
Backyard Bliss: The Ultimate Guide to Outdoor Hot Tubs
Introduction
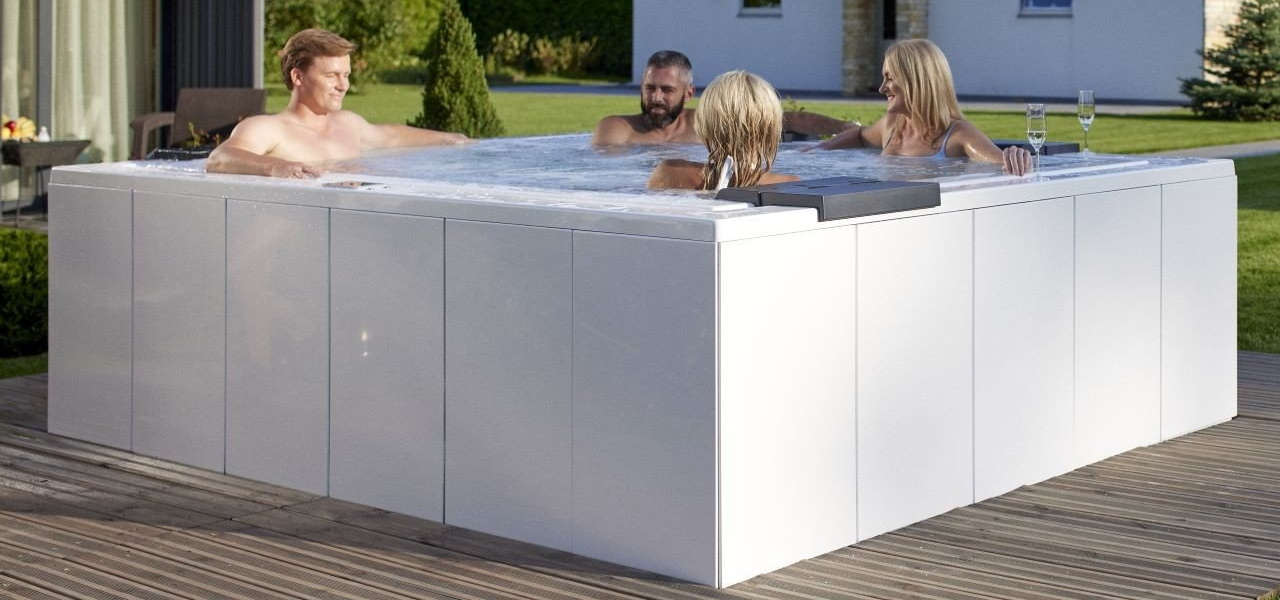
Imagine sinking into a warm, bubbling hot tub surrounded by the tranquility of your backyard. Outdoor hot tubs offer a luxurious and relaxing escape from the stresses of everyday life. Whether you’re looking to soothe sore muscles, unwind after a long day, or simply enjoy the company of friends and family, hot tubs provide a unique and enjoyable experience.
Types of Outdoor Hot Tubs
Outdoor hot tubs come in a variety of styles and sizes to suit different needs and preferences. Here are the main types of hot tubs:
-
- Acrylic Hot Tubs: Acrylic hot tubs are the most popular type of hot tub due to their affordability, durability, and ease of maintenance.
Advantages:
- Affordable
- Durable
- Easy to maintain
- Smooth, non-porous surface
Disadvantages:
-
-
Susceptible to scratches and dents
-
May fade over time
-
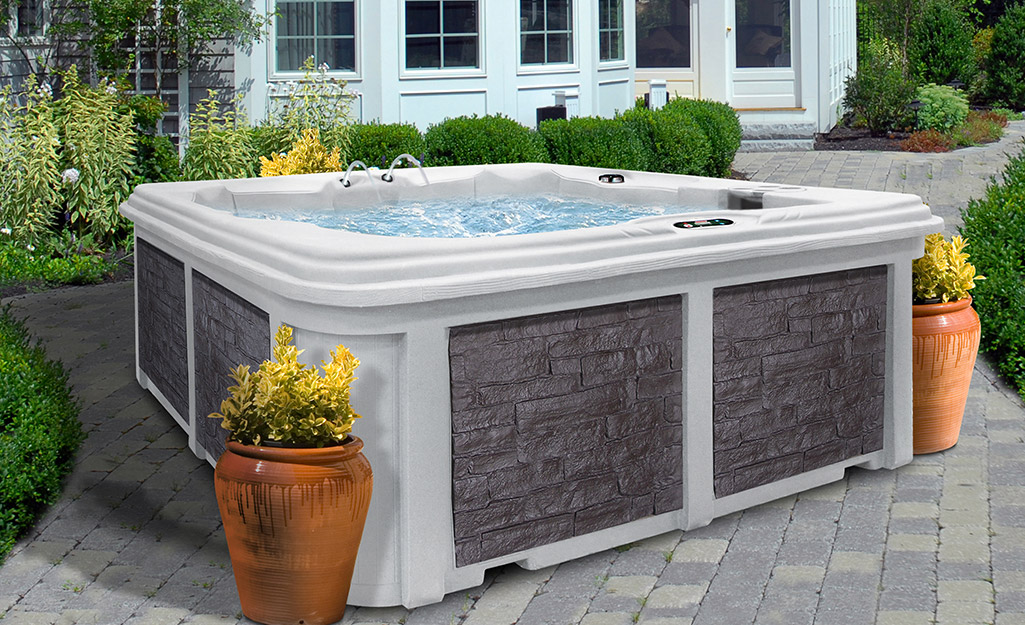
Fiberglass Hot Tubs: Fiberglass hot tubs offer a smooth, non-porous surface that is easy to clean and resistant to stains.
-
Advantages:
- Smooth, non-porous surface
- Easy to clean
- Resistant to stains
- Durable
Disadvantages:
-
-
More expensive than acrylic hot tubs
-
Can crack or chip if damaged
-
Polyethylene Hot Tubs: Polyethylene hot tubs are lightweight and portable, making them a good choice for those who want a hot tub that they can easily move around.
-
Advantages:
- Lightweight
- Portable
- Affordable
- Easy to install
Disadvantages:
-
-
Not as durable as acrylic or fiberglass hot tubs
-
May not be as aesthetically pleasing as other types of hot tubs
-
Wood-Fired Hot Tubs: Wood-fired hot tubs offer a rustic and traditional experience. They are heated by burning wood in an external furnace.
-
Advantages:
- Rustic and traditional experience
- Can be heated without electricity
- Environmentally friendly
Disadvantages:
-
-
Require more maintenance than other types of hot tubs
-
Can be difficult to control the temperature
-
May not be suitable for all climates
-
Intex Hot Tubs: Intex hot tubs are inflatable hot tubs that are easy to set up and take down. They are a good choice for those who want a hot tub that they can use seasonally.
-
Advantages:
- Easy to set up and take down
- Affordable
- Portable
- Can be stored when not in use
Disadvantages:
- Not as durable as other types of hot tubs
- May not be as aesthetically pleasing as other types of hot tubs
- Can be difficult to keep inflated
Choosing the Right Outdoor Hot Tub for You
When selecting an outdoor hot tub, consider the following factors:
-
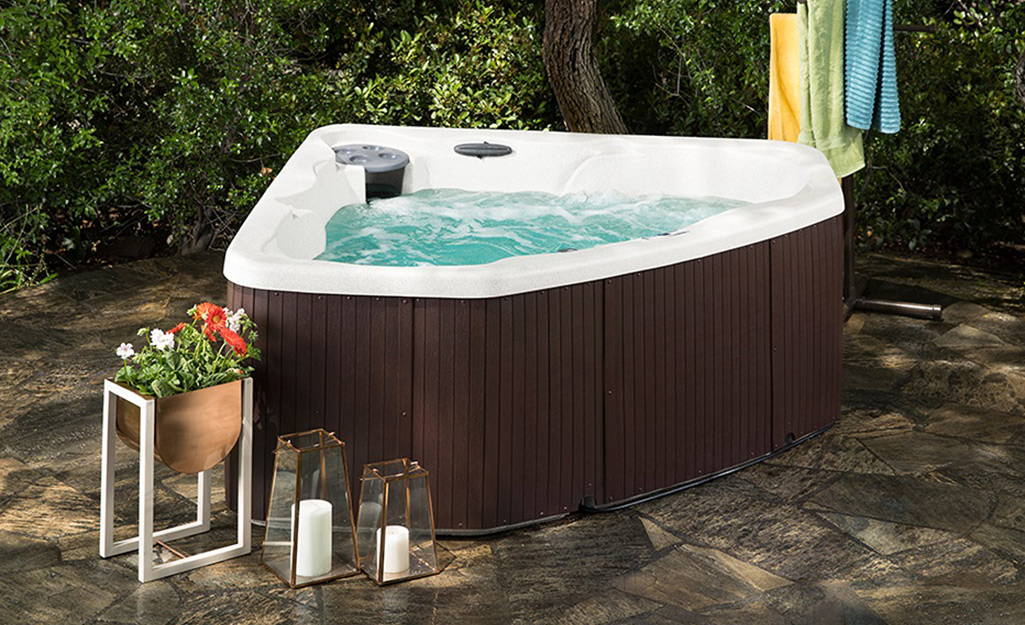
Size: Choose a hot tub that is large enough to accommodate the number of people you typically plan to have in it.
-
Features: Decide which features are important to you, such as jets, lighting, and a sound system.
-
Budget: Set a budget before you start shopping to narrow down your options.
-
Installation: Consider the installation process and whether you will need to hire a professional.
-
Maintenance: Think about how much time and effort you are willing to put into maintaining the hot tub.
Additional Features to Consider
In addition to the basic features mentioned above, some outdoor hot tubs offer additional features that may be appealing to you:
-
- Waterfall: A waterfall can add a soothing and relaxing element to your hot tub experience.
Benefits:
- Creates a soothing and relaxing atmosphere
- Adds visual interest to the hot tub
Drawbacks:
-
-
Can increase the cost of the hot tub
-
May require additional maintenance
-
LED Lighting: LED lights can create a fun and festive atmosphere in your hot tub.
-
Benefits:
- Creates a fun and festive atmosphere
- Allows you to use the hot tub at night
- Can be programmed to change colors
Drawbacks:
-
-
Can increase the cost of the hot tub
-
May require additional maintenance
-
Stereo System: A stereo system allows you to enjoy music while you relax in your hot tub.
-
Benefits:
- Allows you to enjoy music while you relax
- Can create a more immersive experience
Drawbacks:
-
Can increase the cost of the hot tub
-
May require additional maintenance
- Ozone Purifier: An ozone purifier can help to keep your hot tub water clean and sanitized, reducing the amount of chlorine or other chemicals needed.
-
Can increase the cost of the hot tub
-
Requires additional maintenance
-
Child Safety Lock: A child safety lock can help to prevent children from accidentally accessing the hot tub.
Benefits:
- Keeps hot tub water clean and sanitized
- Reduces the amount of chlorine or other chemicals needed
- Can improve the smell of the hot tub water
Drawbacks:
Benefits:
- Prevents children from accidentally accessing the hot tub
- Provides peace of mind for parents
Drawbacks:
-
May not be necessary for all families
Benefits of Owning an Outdoor Hot Tub
There are many benefits to owning an outdoor hot tub, including:
-
Relaxation: Hot tubs can help to relax your muscles, reduce stress, and improve your overall mood. The warm water and massage jets can help to ease tension and promote feelings of well-being.
-
Pain Relief: The heat and massage jets of a hot tub can help to relieve pain from arthritis, muscle aches, and other conditions. The buoyancy of the water can also help to take pressure off of your joints.
-
Improved Sleep: Taking a hot tub before bed can help you to relax and fall asleep more easily. The warm water can help to lower your body temperature, which can signal to your body that it’s time to sleep.
-
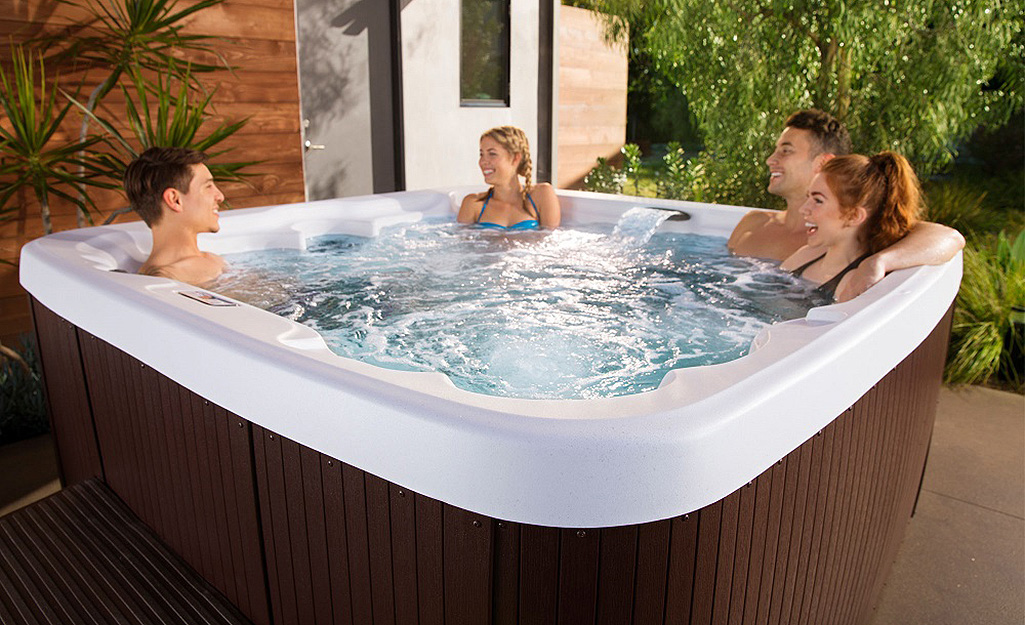
Socialization: Hot tubs are a great place to socialize with friends and family. They provide a relaxed and inviting atmosphere for conversation and bonding.
-
Entertainment: Hot tubs can be a fun and entertaining way to spend time outdoors. They can be a great place to relax and unwind after a long day, or to enjoy a social gathering with friends and family.
Safety Precautions for Using an Outdoor Hot Tub
It is important to take safety precautions when using an outdoor hot tub. Here are some tips:
-
Never leave children unsupervised in a hot tub. Children can drown quickly in even a small amount of water.
-
Do not drink alcohol or use drugs before or while using a hot tub. Alcohol and drugs can impair your judgment and increase your risk of drowning.
-
Stay hydrated by drinking plenty of water before, during, and after using a hot tub. Dehydration can occur even in hot water, so it’s important to stay hydrated.
-
Limit your time in the hot tub to 20-30 minutes at a time. Spending too much time in a hot tub can raise your body temperature to dangerous levels.
-
Consult with your doctor before using a hot tub if you are pregnant, have any health conditions, or are taking medication. Certain health conditions and medications can make it unsafe to use a hot tub.
Maintaining Your Outdoor Hot Tub
Regular maintenance is essential to keep your outdoor hot tub clean, safe, and in good working condition. Here are some basic maintenance tasks:
-
Check the water chemistry regularly and adjust as needed. The water chemistry in your hot tub needs to be balanced to prevent the growth of bacteria and algae. You will need to test the pH and chlorine levels of the water regularly and adjust them as needed.
-
Clean the filters regularly. The filters in your hot tub trap dirt and debris from the water. You will need to clean the filters on a regular basis to ensure that they are working properly.
-
Skim the surface of the water to remove debris. Skimming the surface of the water will help to remove leaves, insects, and other debris from the water.
-
Drain and clean the hot tub periodically. You will need to drain and clean your hot tub periodically to remove any buildup of dirt and debris. The frequency of cleaning will depend on how often you use the hot tub and how many people use it.
By following these tips, you can enjoy the many benefits of owning an outdoor hot tub for years to come. Soaking in a warm, bubbling hot tub can be a great way to relax, relieve pain, improve your sleep, socialize with friends and family, and enjoy the great outdoors.

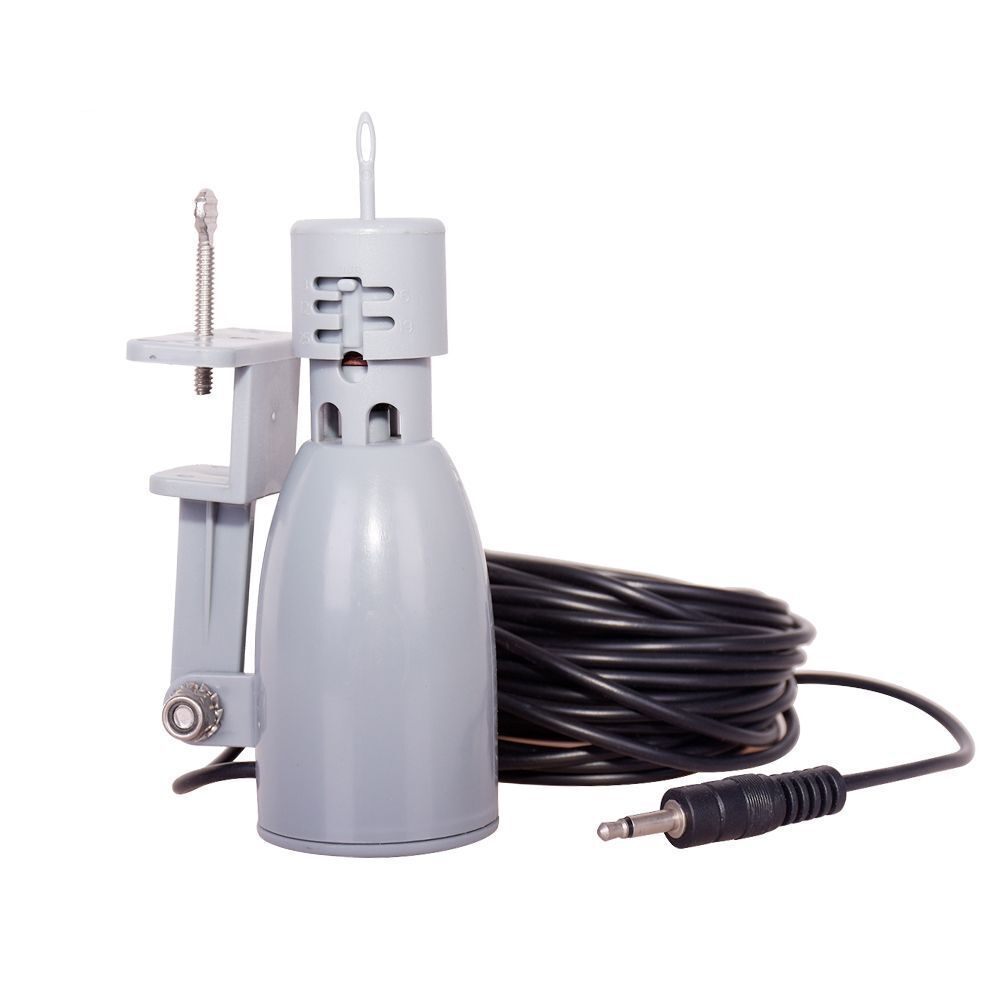
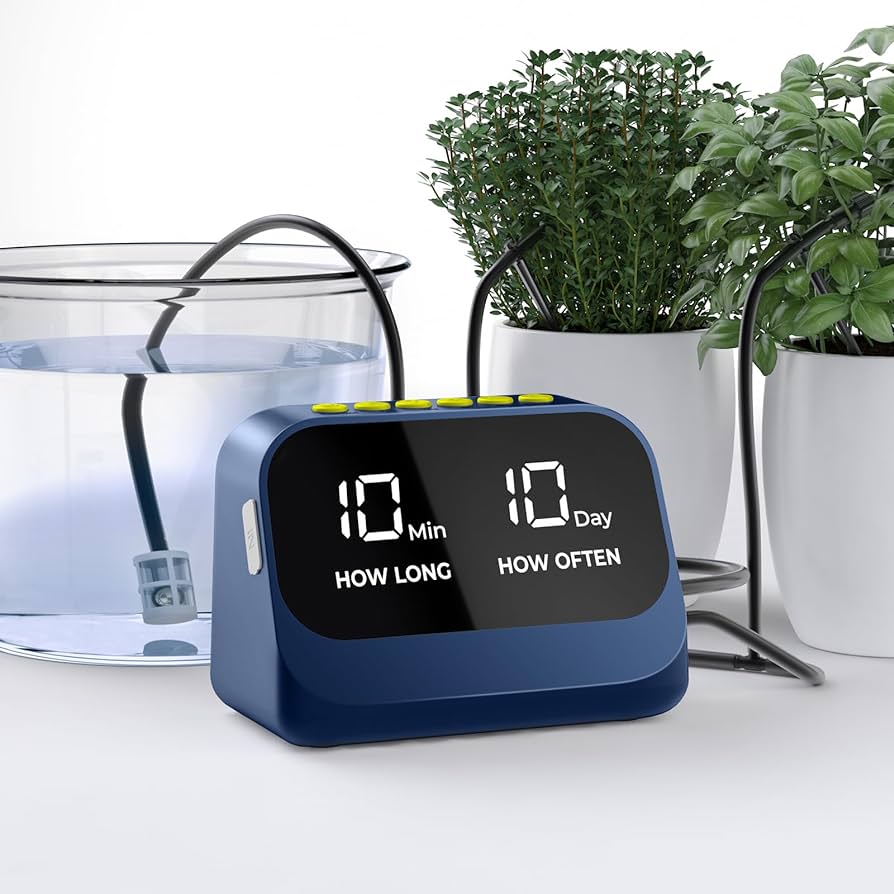
Mini Rain Sensor Automatic Shutoff Watering System

Introduction
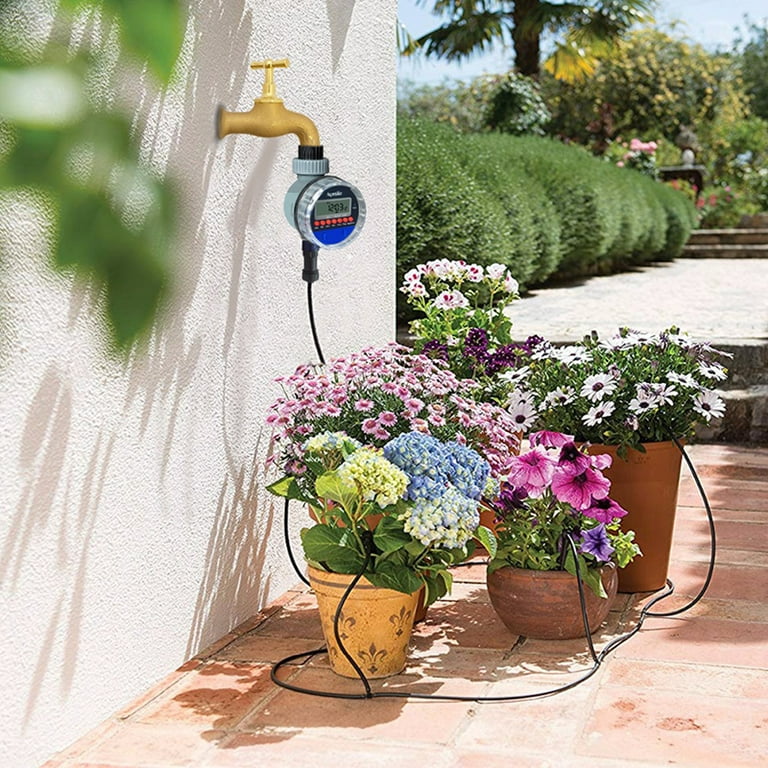
Maintaining a lush and thriving garden requires dedication, consistent care, and the right tools. One crucial aspect of garden care is ensuring that your plants receive the right amount of water at the right time. This is where a rain sensor watering system, like the Mini Rain Sensor Automatic Shutoff Watering System, comes in handy.
Features of the Mini Rain Sensor Automatic Shutoff Watering System
The Mini Rain Sensor Automatic Shutoff Watering System is a versatile and user-friendly tool that simplifies the process of watering your plants. Its array of features makes it an ideal choice for gardeners of all levels.
-
Automatic Rain Detection and Shut-off: This smart watering system automatically detects rainfall and temporarily shuts off the watering schedule to prevent overwatering and water wastage. This feature is particularly beneficial in areas with frequent rainfall.
-
Customizable Watering Schedules: With the Mini Rain Sensor Automatic Shutoff Watering System, you can set customized watering schedules that cater to the specific needs of your plants. This allows you to tailor the watering frequency and duration based on plant type, soil conditions, and weather patterns.
-
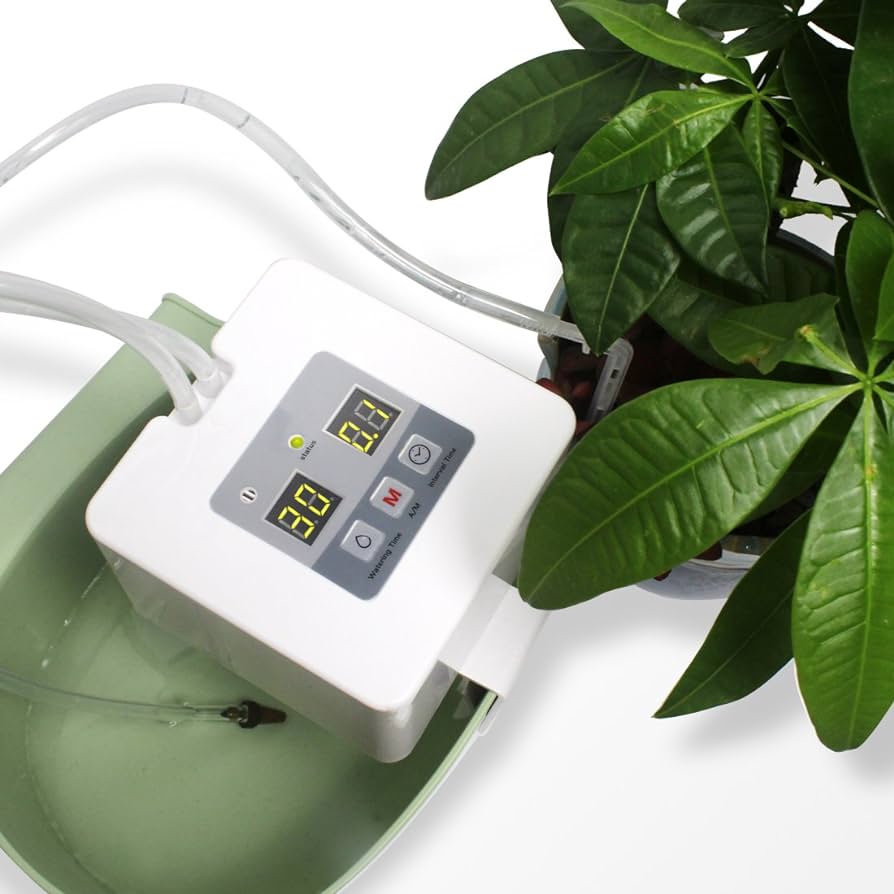
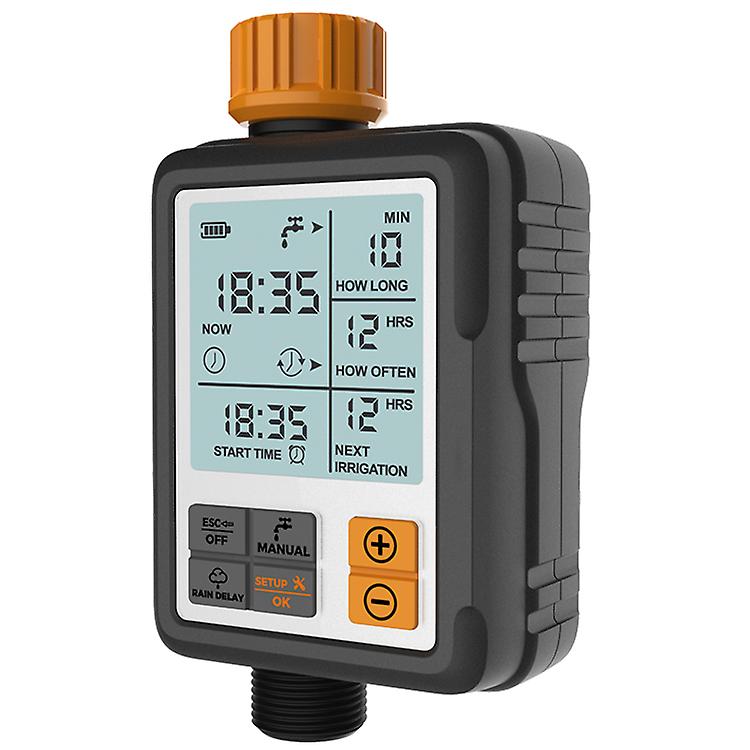
Easy-to-Use Digital Display: The timer features a clear and intuitive digital display that makes programming and monitoring watering schedules a breeze. With just a few simple button presses, you can set up and adjust watering parameters without any hassle.
-
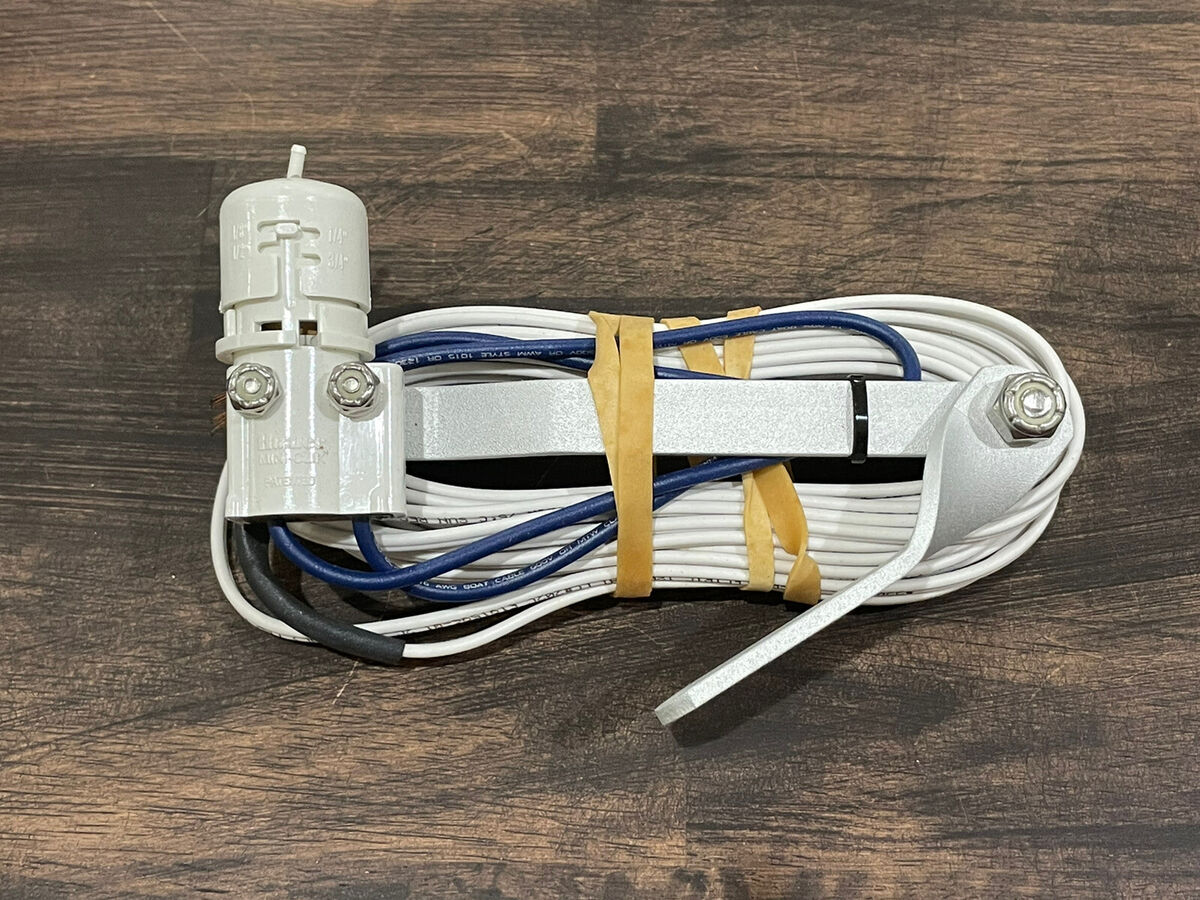
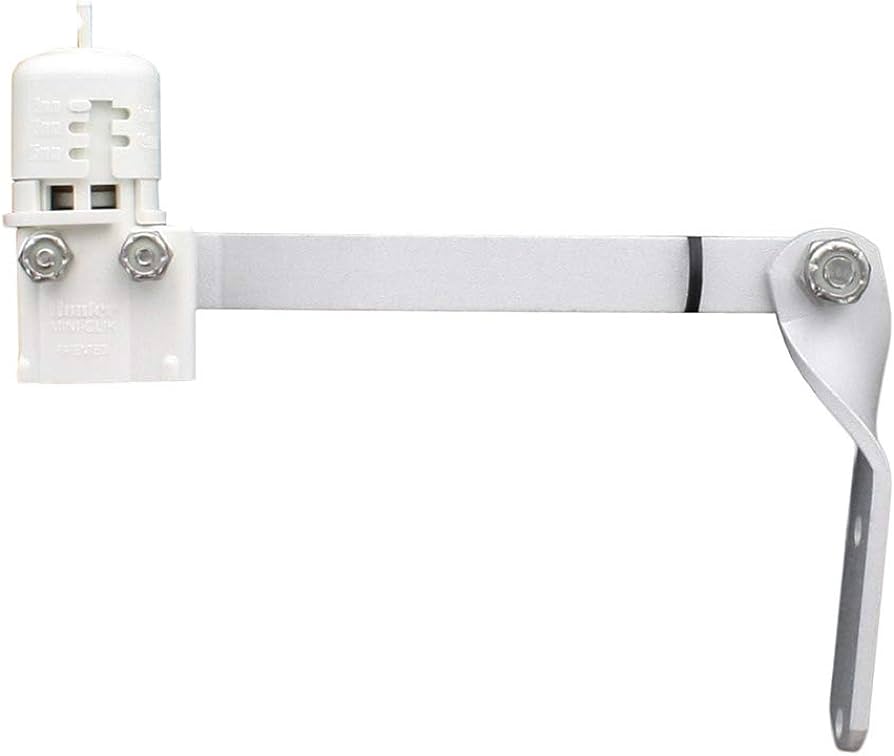
Durable and Weatherproof Construction: The Mini Rain Sensor Automatic Shutoff Watering System is constructed from high-quality materials that can withstand the elements. It is weatherproof and UV-resistant, ensuring that it can perform reliably even in harsh outdoor conditions.
-
Compatibility with Various Water Sources: This versatile timer can be connected to a variety of water sources, including faucets, hose bibs, and even water storage tanks. This flexibility allows you to use it in a wide range of garden setups.
Setting Up and Using the Mini Rain Sensor Automatic Shutoff Watering System
Getting started with the Mini Rain Sensor Automatic Shutoff Watering System is a straightforward process that can be completed in a few simple steps:
-
To begin the installation process, securely mount the water timer onto a wall or fence post in a central location within your garden, ensuring that it is easily accessible for programming and maintenance.
Next, connect the water timer to your garden’s water supply using the provided hose adapter or plumbing connections. Make sure that the connection is tight and free of leaks to prevent water wastage.
Once connected, access the timer’s digital display and set up your desired watering schedule, specifying the watering frequency, duration, and start time for your entire garden or individual watering zones.
Finally, position the rain sensor in an open area within your garden that receives direct rainfall. Avoid placing it under trees or other objects that could obstruct rainfall detection.
-
Testing the System: Once the programming is complete, manually activate the water timer to test the system. Observe the water flow and ensure that the watering zones are functioning correctly.
-
Troubleshooting Common Issues: If you encounter any issues during the setup or operation, refer to the user manual for troubleshooting tips. For more complex problems, contact the manufacturer’s customer support.
Benefits of Using the Mini Rain Sensor Automatic Shutoff Watering System
Incorporating the Mini Rain Sensor Automatic Shutoff Watering System into your gardening routine offers a multitude of benefits that enhance both the health of your plants and your overall gardening experience:
-
Conserves Water: By automatically skipping watering cycles during rainfall, the Mini Rain Sensor Automatic Shutoff Watering System helps prevent overwatering, which can lead to water wastage and potential damage to plants. This contributes to water conservation and environmentally friendly practices.
- Additionally, consistent and precise watering, ensured by the Mini Rain Sensor Automatic Shutoff Watering System, is crucial for optimal plant growth, promoting healthy root development, vibrant foliage, and abundant blooms.
Furthermore, the Mini Rain Sensor Automatic Shutoff Watering System saves time and effort, eliminating the burden of manual watering and allowing you to focus on other gardening tasks or simply enjoy your outdoor space.
-
Provides Peace of Mind: Whether you’re away on vacation or busy with other commitments, the Mini Rain Sensor Automatic Shutoff Watering System ensures that your plants receive the necessary care, providing peace of mind and eliminating the worry of underwatered or overwatered plants.
-
Enhances Curb Appeal: A well-maintained garden with a lush green lawn and thriving plants enhances curb appeal, contributing to a beautiful and inviting outdoor space. This not only adds beauty to your property but also potentially increases its value.
Applications of the Mini Rain Sensor Automatic Shutoff Watering System
The Mini Rain Sensor Automatic Shutoff Watering System’s versatility extends beyond traditional gardens. Here are some additional applications for this resourceful tool:
-
Watering Lawns and Gardens: The Mini Rain Sensor timer is ideal for maintaining healthy lawns and diverse garden beds. By automatically adjusting the watering schedule based on rainfall, it prevents overwatering while ensuring the soil receives sufficient moisture for optimal growth.
-
Watering Potted Plants and Hanging Baskets: For those who adore container gardening, the Mini Rain Sensor timer becomes a game-changer. Program individual watering schedules for your potted plants and hanging baskets, and let the rain sensor take care of adjustments during rainy periods. This eliminates the risk of overwatering delicate container plants.
-
Watering Vegetable Gardens: Vegetable gardens often require consistent moisture but are susceptible to fungal diseases with excessive watering. The Mini Rain Sensor timer provides the perfect solution. It delivers precise watering based on your program, and the rain sensor automatically adjusts to prevent oversaturation, promoting healthy vegetable growth.
-
Watering Greenhouses and Conservatories: In greenhouses and conservatories where humidity control is crucial, the Mini Rain Sensor timer offers a reliable watering solution. Program customized schedules for your exotic plants, and the rain sensor ensures adjustments are made during rainfall to maintain ideal moisture levels and prevent root rot.
-
Watering Vacation Homes and Rental Properties: For those with vacation homes or rental properties, the Mini Rain Sensor timer provides peace of mind. Program the timer before you leave, and the rain sensor takes care of the rest. Your plants receive the necessary water, even during your absence, eliminating the worry of underwatered plants or potential damage from burst pipes due to overwatering.
Tips for Choosing the Right Rain Sensor Watering System for Your Garden
Selecting the perfect rain sensor watering system for your garden requires considering a few key factors:
-
Consider the Size of Your Garden: A larger garden will likely require a system with more watering zones to manage different areas effectively. The Mini Rain Sensor timer may come in various models with different zone capacities, so choose the one that best suits your garden size.
-
When selecting a watering system such as the Mini Rain Sensor timer, several considerations come into play. Firstly, Determine the Number of Watering Zones You Need by assessing the diverse watering needs of your plants and the layout of your garden. The Mini Rain Sensor timer’s ability to handle multiple zones allows you to create customized watering programs for lawns, flowerbeds, vegetable patches, and other areas.
Furthermore, when choosing a system with the features you need, it’s important to consider aspects such as compatibility with your water source (faucet, hose bib, or water tank) and the ability to set multiple watering schedules. The Mini Rain Sensor timer offers these functionalities, making it a well-rounded choice for diverse garden setups.
Furthermore, it’s crucial to Consider the Price. Rain sensor watering systems range in price depending on features and capabilities. Set a budget and choose a system that offers the functionality you require within your price range. The Mini Rain Sensor timer is known for its affordability and user-friendly design, making it an attractive option for many gardeners.
Lastly, Read Reviews from Other Customers, as they can provide valuable insights into the performance and user experience. Reviews can highlight the timer’s strengths and weaknesses, helping you make an informed decision.
Maintaining the Mini Rain Sensor Automatic Shutoff Watering System
Ensuring the smooth operation of your Mini Rain Sensor Automatic Shutoff Watering System requires minimal maintenance:
-
Cleaning the Filter: Periodically clean the filter screen located at the water inlet to prevent clogging and ensure optimal water flow.
-
Checking the Batteries: If your Mini Rain Sensor timer uses batteries, regularly check their power level and replace them when necessary to avoid disruptions in the watering schedule.
-
Inspecting the Connections: Occasionally inspect the hose connections and the rain sensor itself for leaks or signs of wear and tear. Tighten any loose connections and replace damaged hoses to prevent water wastage.
-
Cleaning the Rain Sensor: Periodically clean the rain sensor with a soft brush to remove any debris or dirt accumulation that could hinder its ability to detect rainfall accurately.
-
Winterizing the Timer: In colder climates, it’s crucial to winterize the timer by following the manufacturer’s instructions. This may involve draining the water from the unit and storing it indoors to prevent damage from freezing temperatures.
Troubleshooting Common Problems with the Mini Rain Sensor Automatic Shutoff Watering System
While the Mini Rain Sensor timer is a reliable tool, occasional minor issues might arise. Here’s how to address some common problems:
-
The Timer is Not Turning On: Double-check the battery power (if applicable) and ensure the timer is properly plugged into a power source or that the on/off switch is turned on. Consult the user manual for troubleshooting steps specific to your model.
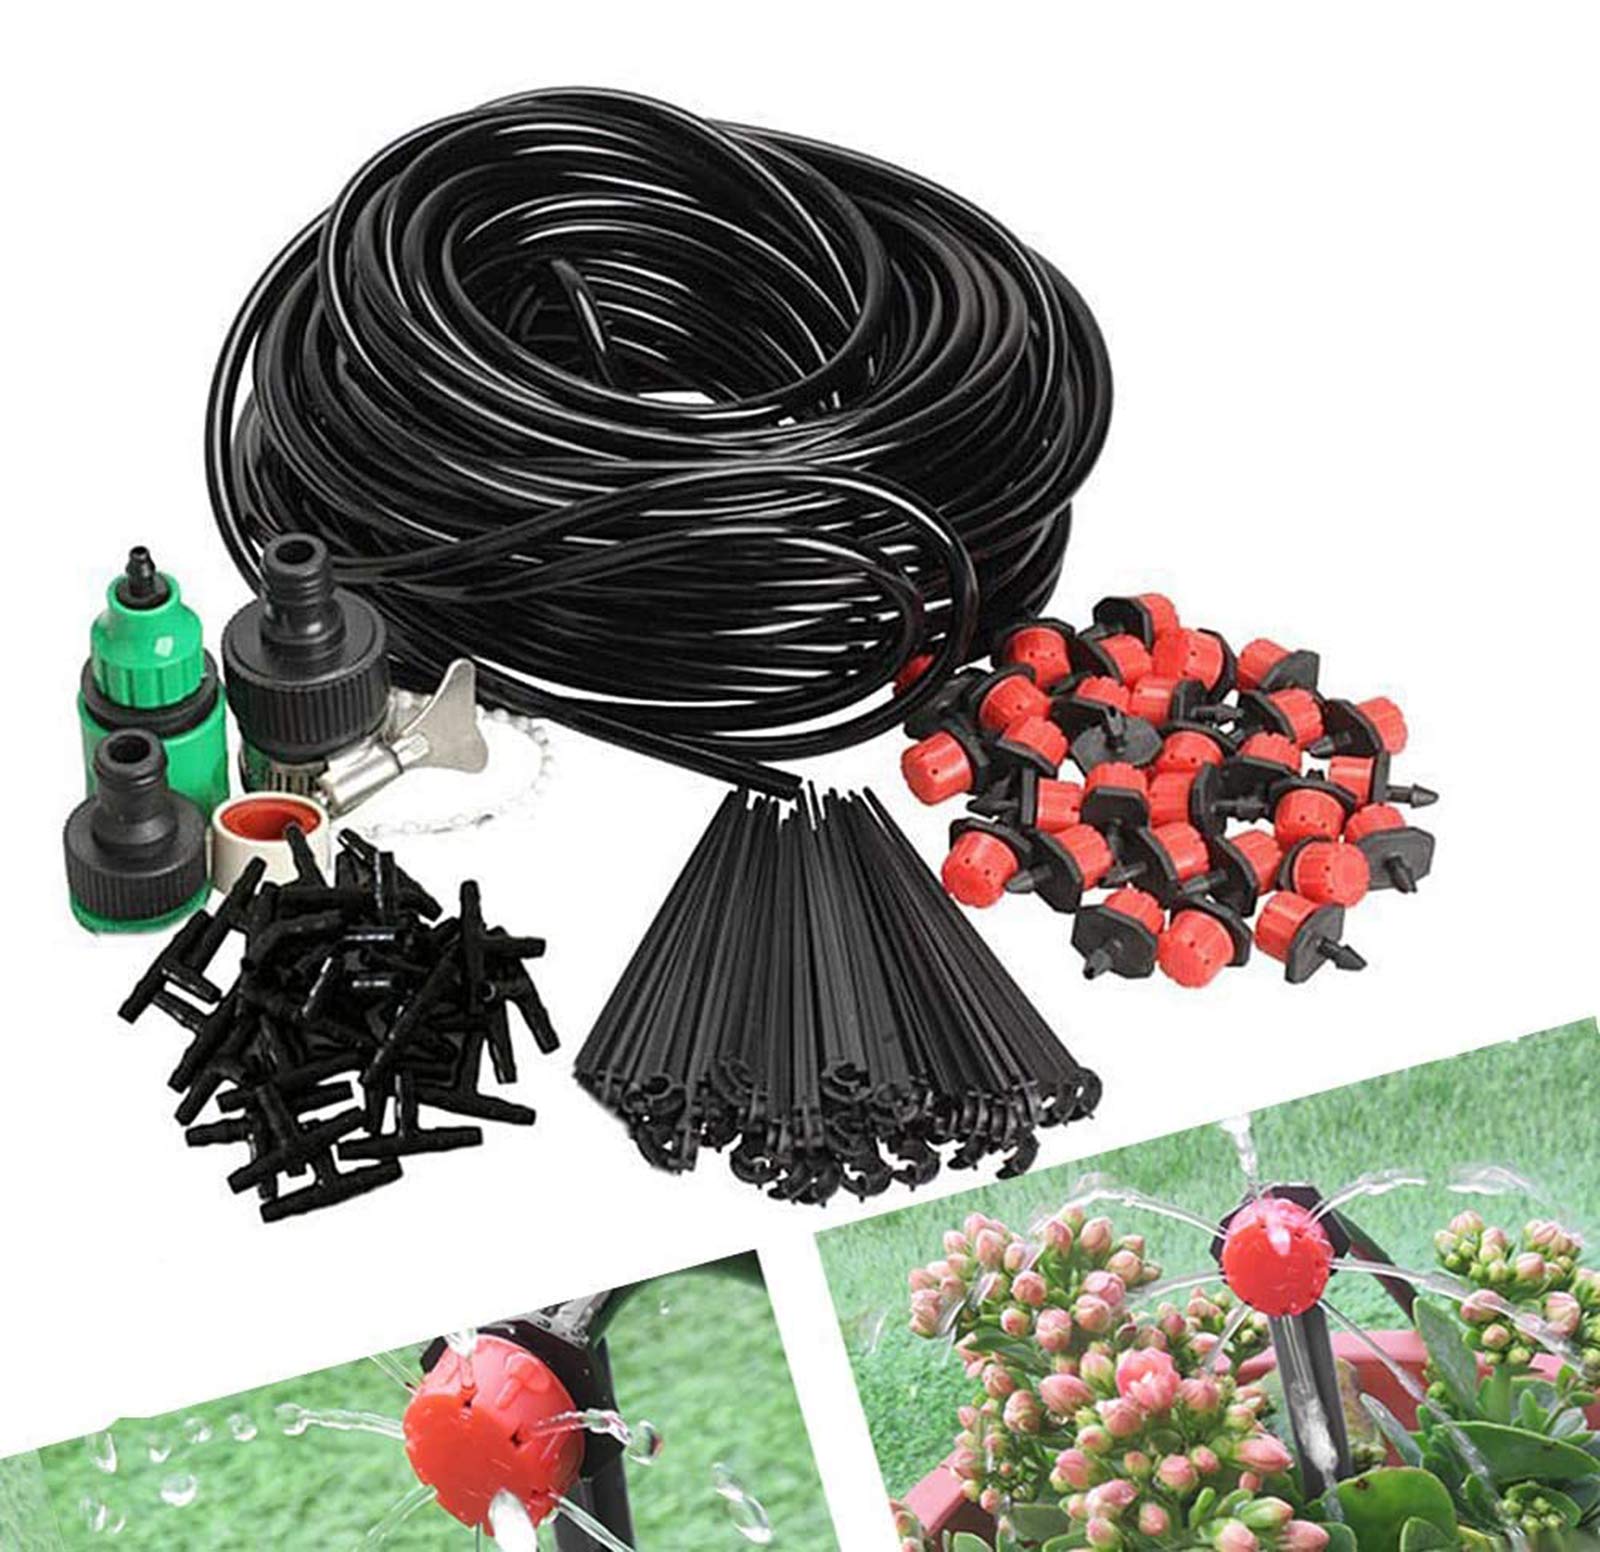
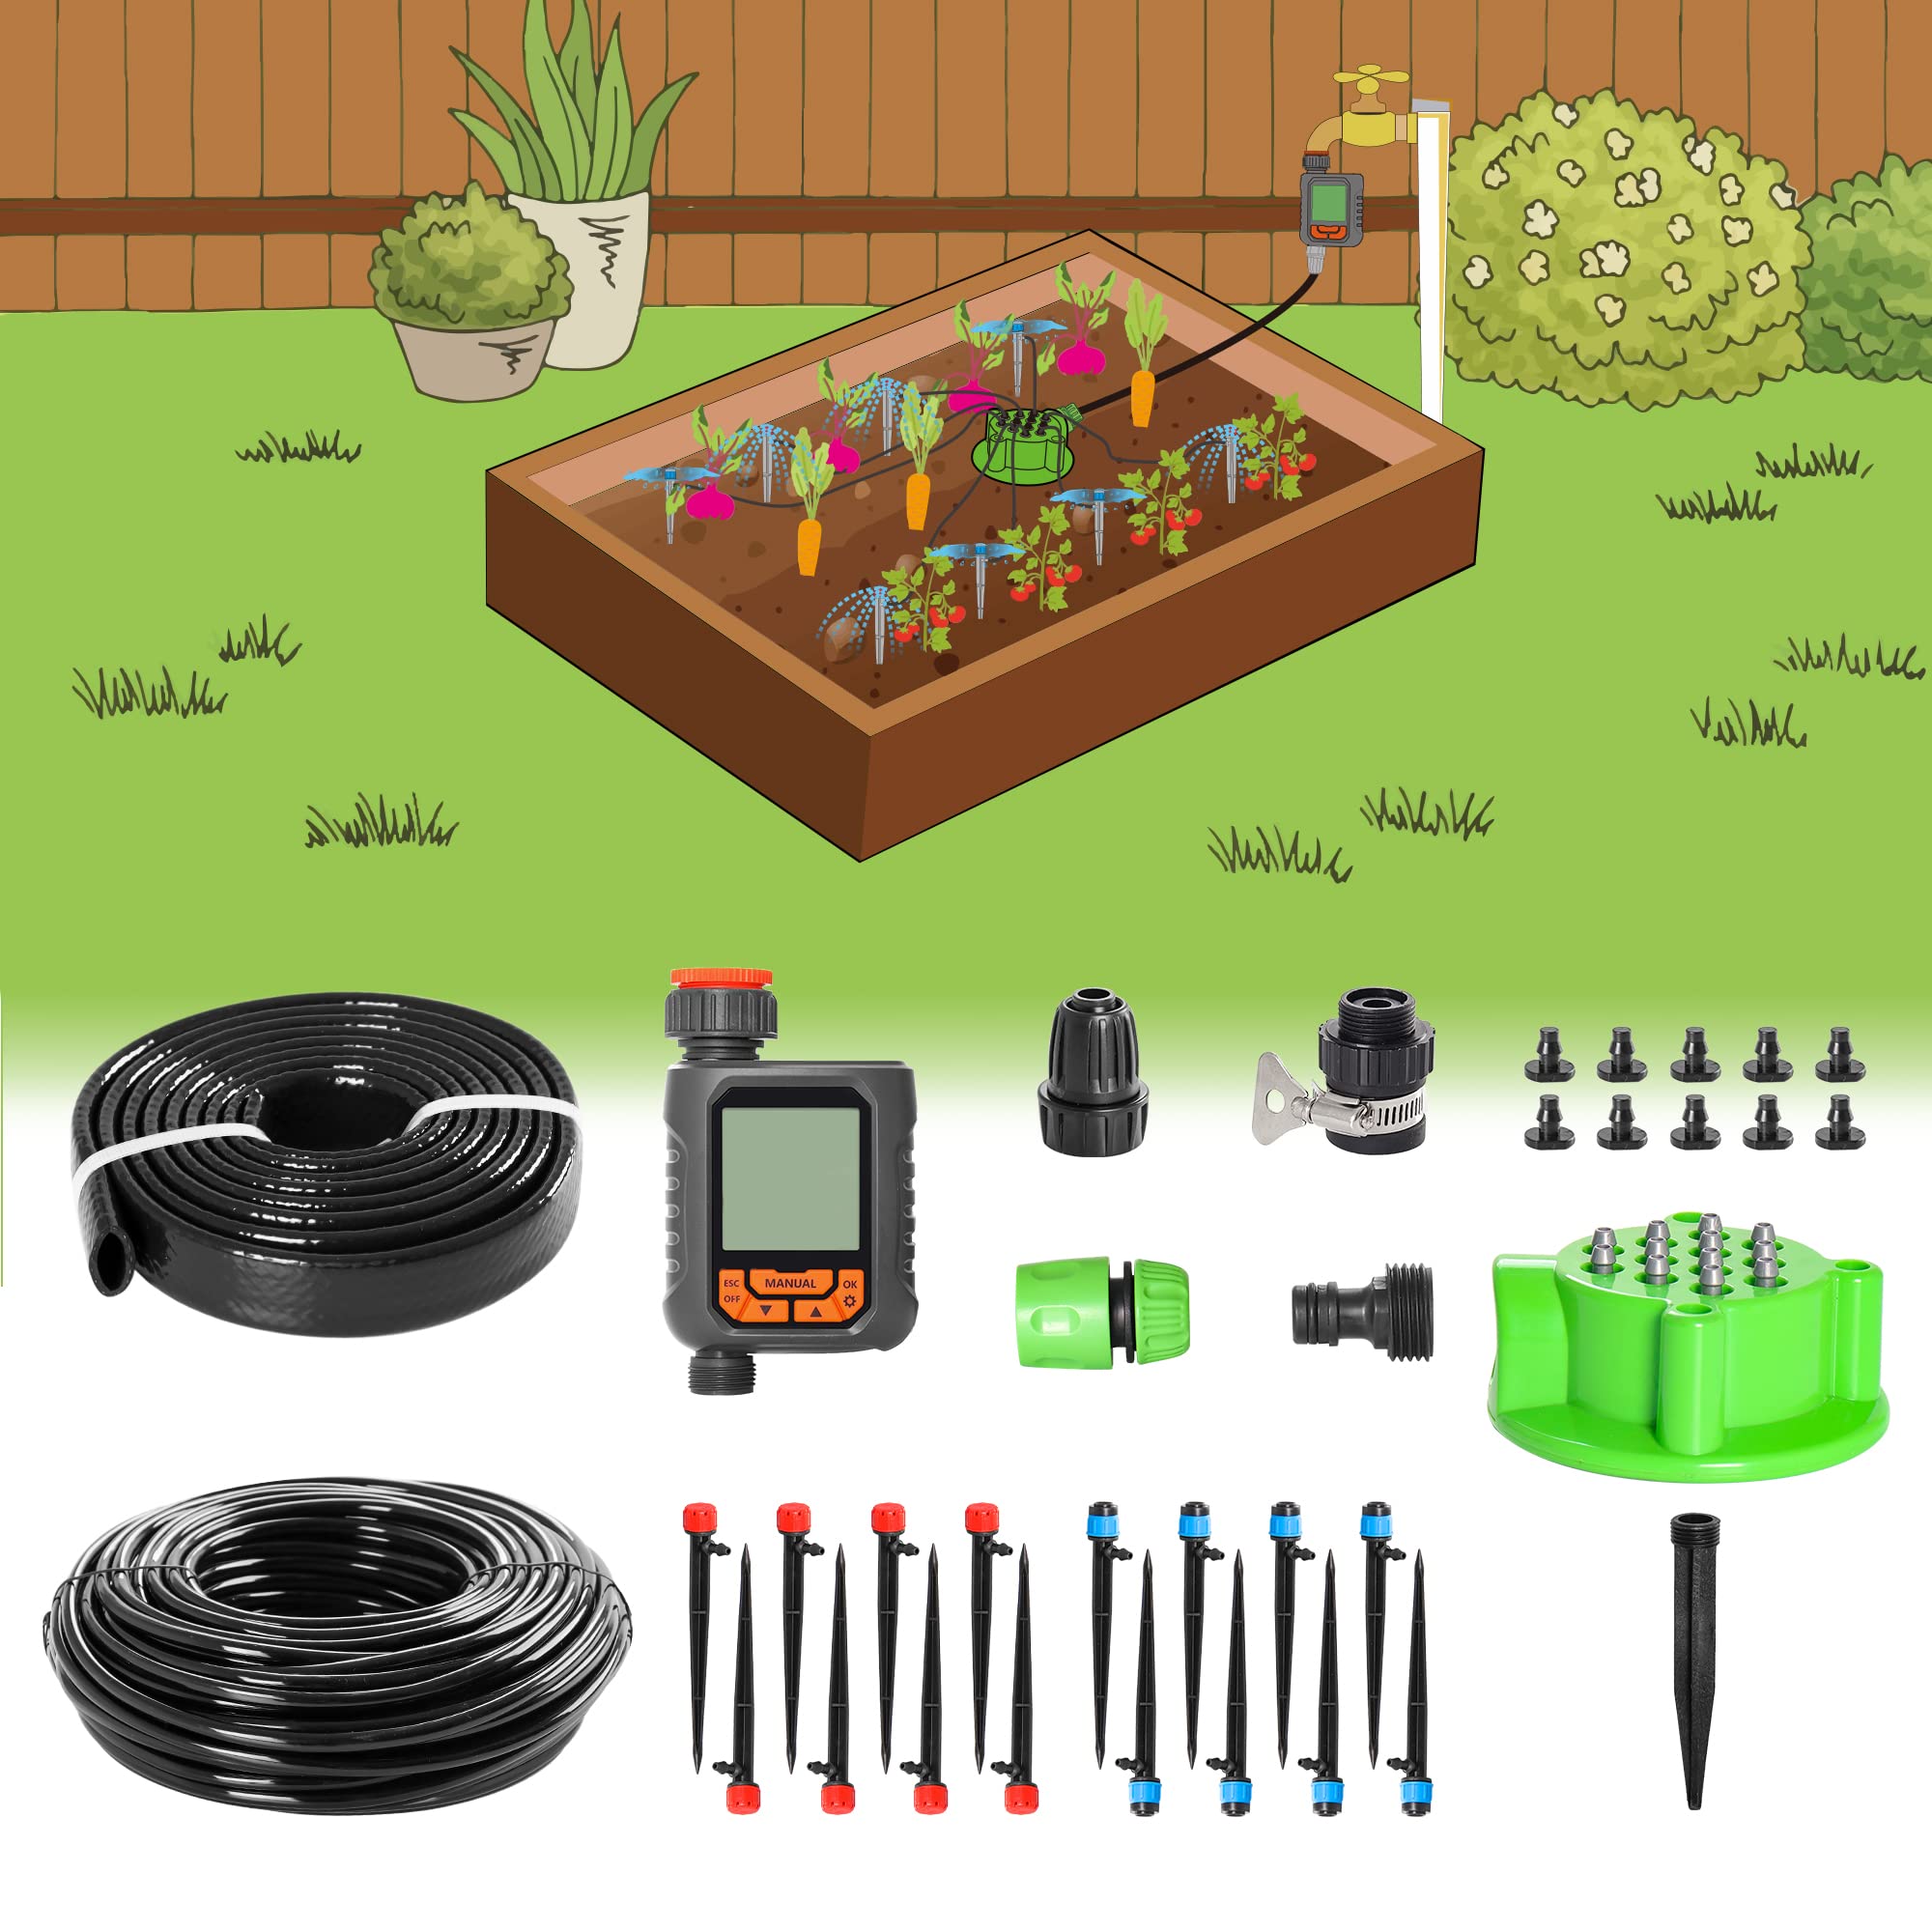
DIY Drip Irrigation System Automatic Watering Kit
Introduction
Maintaining a lush and thriving garden requires dedication, consistent care, and the right tools. One crucial aspect of garden care is ensuring that your plants receive the right amount of water at the right time. This is where a DIY drip irrigation system, like the DIY Drip Irrigation System Automatic Watering Kit, comes in handy.
Components of a DIY Drip Irrigation System
A DIY drip irrigation system is a versatile and user-friendly tool that simplifies the process of watering your plants. It consists of several key components that work together to deliver water directly to the roots of your plants, minimizing waste and promoting healthy growth.
-
Water Source: The water source is the starting point for your drip irrigation system. It can be a connected faucet, a water tank, or even a rainwater collection system.
-
Water Timer: A water timer is an essential component for automating the watering process. It allows you to set customized schedules based on your plants’ needs and weather conditions.
-
Drip Irrigation Tubing: Drip irrigation tubing is the network of pipes that transport water from the source to the individual plants. It is typically made of durable PVC or polyethylene material.
-
Drip Emitters: Drip emitters are small devices that release water at a controlled rate directly to the plant roots. They come in various flow rates to suit different plant needs.
-
Filters: Filters are crucial for preventing clogging and ensuring that clean water reaches the drip emitters. They are typically installed at the water source or near the water timer.
-
Stakes and Connectors: Stakes and connectors are used to secure the drip irrigation tubing in place and connect different components of the system.
Planning and Designing Your DIY Drip Irrigation System
Before you start assembling your DIY drip irrigation system, it’s essential to carefully plan and design your layout. This will ensure that your system is efficient, effective, and tailored to your specific garden needs.
-
Determine Your Water Source: Identify the most suitable water source for your system, considering factors like distance and water pressure.
-
Measure Your Garden Area: Measure the dimensions of your garden to determine the length of drip irrigation tubing and the number of components required.
-
Create a Layout: Sketch a layout of your garden and mark the locations of your plants. Plan the placement of drip emitters and tubing based on plant spacing and watering requirements.
-
Select Drip Emitters: Choose the appropriate drip emitters based on the water flow rate needed for each plant type. Consider factors like plant size, soil type, and sun exposure.
-
Calculate Water Flow Requirements: Determine the total water flow required for your system by calculating the individual flow rates for each drip emitter.

Assembling Your DIY Drip Irrigation System
Once you have your plan in place, you can start assembling your DIY drip irrigation system. Follow these steps to ensure a proper setup:
-
Connect Water Source to Timer: Connect the water source to the water timer using a hose or pipe adapter. Ensure a secure connection to prevent leaks.
-
Install Drip Irrigation Tubing: Lay out the drip irrigation tubing according to your plan. Use stakes and connectors to secure the tubing in place.
-
Attach Drip Emitters: Insert the drip emitters into the drip irrigation tubing at the designated locations. Secure them tightly to prevent leaks.
-
Secure Tubing: Use additional stakes and connectors to secure the drip irrigation tubing throughout the garden, ensuring it is stable and free from tangles.
Programming Your Water Timer
The water timer plays a crucial role in automating the watering process. Program your timer according to your plants’ needs and weather conditions.
-
Set Watering Schedule: Determine the frequency and duration of watering cycles based on plant requirements. Consider factors like plant type, soil type, and climate.
-
Adjust Watering Duration: Adjust the watering duration for each cycle based on the specific needs of different plant groups.
-
Monitor System Performance: Observe the system’s performance and make adjustments to the watering schedule as needed.
Benefits of Using a DIY Drip Irrigation System
Incorporating a DIY drip irrigation system into your gardening routine offers a multitude of benefits that enhance both the health of your plants and your overall gardening experience:
-
Conserves Water: Drip irrigation delivers water directly to the plant roots, minimizing evaporation and reducing water waste. This is particularly beneficial in areas with water scarcity.
-
Promotes Healthy Plant Growth: Consistent and precise watering promotes healthy root development, vibrant foliage, and abundant blooms.
-
-
Saves Time and Effort: Manually watering your garden can be time-consuming and labor-intensive. A DIY drip irrigation system automates the process, freeing up your time for other gardening tasks or simply enjoying your outdoor space.
-
Reduces Weeds and Pests: Drip irrigation minimizes water reaching the surface of the soil, discouraging weed growth. Additionally, by targeting the root zone, it reduces the habitat for moisture-loving pests.
-
Enhances Curb Appeal: A well-maintained garden with healthy and thriving plants contributes to a beautiful and inviting outdoor space. This not only enhances curb appeal but also potentially increases your property value.
Applications of DIY Drip Irrigation Systems
The versatility of DIY drip irrigation systems extends beyond traditional gardens. Here are some additional applications for this resourceful tool:
-
Watering Lawns and Gardens: Drip irrigation is ideal for maintaining healthy lawns and diverse garden beds. By delivering water directly to the roots, it promotes even growth and minimizes water waste in areas with exposed soil.
-
Watering Potted Plants and Hanging Baskets: For container gardeners, a DIY drip irrigation system is a game-changer. Individual watering schedules can be programmed for each pot or basket, ensuring consistent moisture for even the most delicate plants.
-
Watering Vegetable Gardens: Drip irrigation is particularly beneficial for vegetable gardens. It delivers precise amounts of water directly to the root zone, promoting optimal vegetable growth and preventing waterborne diseases that can spread through overhead watering.
-
Watering Greenhouses and Conservatories: In greenhouses and conservatories, where humidity and temperature control are crucial, drip irrigation provides a targeted and efficient watering solution. This helps maintain ideal moisture levels for a wide variety of exotic plants.
-
Watering Vacation Homes and Rental Properties: For those with vacation homes or rental properties, a DIY drip irrigation system offers peace of mind. Program the timer before you leave, ensuring your plants are automatically watered while you’re away. This eliminates the worry of underwatered or overwatered plants and potential damage.
Tips for Maintaining Your DIY Drip Irrigation System
Maintaining your DIY drip irrigation system is crucial for ensuring its smooth operation and optimal performance. Here are some simple tips:
-
Inspect Drip Emitters: Regularly check drip emitters for clogs. You can clean them with a mild solution or replace them if necessary.
-
Clean Filters: Periodically clean the filters to prevent clogging and ensure proper water flow. Follow the manufacturer’s instructions for cleaning or replacing the filters.
-
Flush the System: Flushing the system periodically helps remove any accumulated sediment or debris within the tubing. This maintains optimal water flow and prevents clogging.
-
Winterizing the System: If you live in a climate with freezing temperatures, winterize your system to prevent damage. Drain the water from the tubing and timer, and store them in a frost-free location.
Troubleshooting Common Problems with DIY Drip Irrigation Systems
Even with proper maintenance, occasional minor issues might arise with your DIY drip irrigation system. Here’s how to address some common problems:
-
Low Water Pressure: Low water pressure can lead to uneven watering. Check the source of the pressure and ensure there are no kinks or leaks in the tubing.
-
Clogged Drip Emitters: Clogged emitters can prevent water from reaching the plants. Clean or replace the clogged emitters as needed.
-
Leaking Connections: Leaking connections can waste water and reduce system efficiency. Tighten loose connections or replace damaged tubing segments.
-
Uneven Watering: Uneven watering can indicate issues like clogged emitters, incorrect pressure, or improper system layout. Address the root cause to ensure consistent water distribution.
Where to Buy DIY Drip Irrigation System Components
DIY drip irrigation system components are readily available at various retailers to suit your needs and budget. Here are some options:
-
Online Retailers: Online retailers offer a wide selection of DIY drip irrigation system components at competitive prices. You can compare features, specifications, and user reviews before making your purchase.
-
Home Improvement Stores: Many home improvement stores carry a variety of drip irrigation system components, allowing you to purchase everything you need in one location.
-
Garden Centers: Garden centers often cater to specific gardening needs and may offer specialized drip irrigation system components or pre-assembled kits tailored for various garden sizes.
Safety Precautions When Using a DIY Drip Irrigation System
While DIY drip irrigation systems are generally safe to use, it’s essential to follow appropriate safety precautions:
-
Read Instruction Manuals: Carefully read the manufacturer’s instructions for each component of your system to ensure proper installation and operation.
-
Use Correct Tools and Materials: Use the recommended tools and materials for assembling and maintaining your system to avoid damage or leaks.
-
Avoid Electrical Hazards: If your system incorporates an electrical timer, ensure all connections are secure and avoid using the system in wet conditions.
-
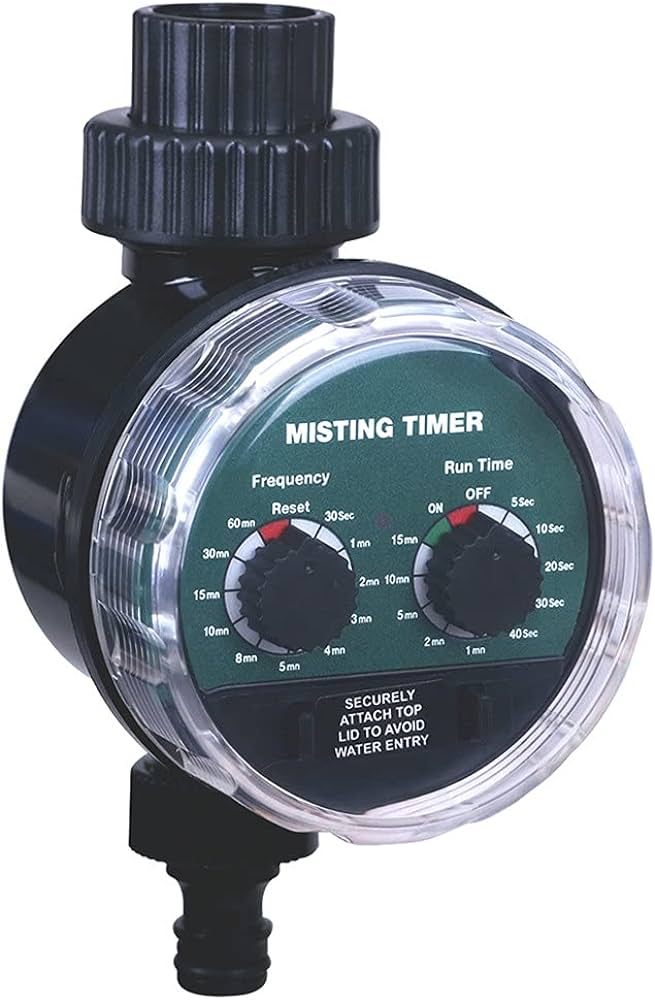
Garden Ball Valve Automatic Electronic Watering Timer
Introduction
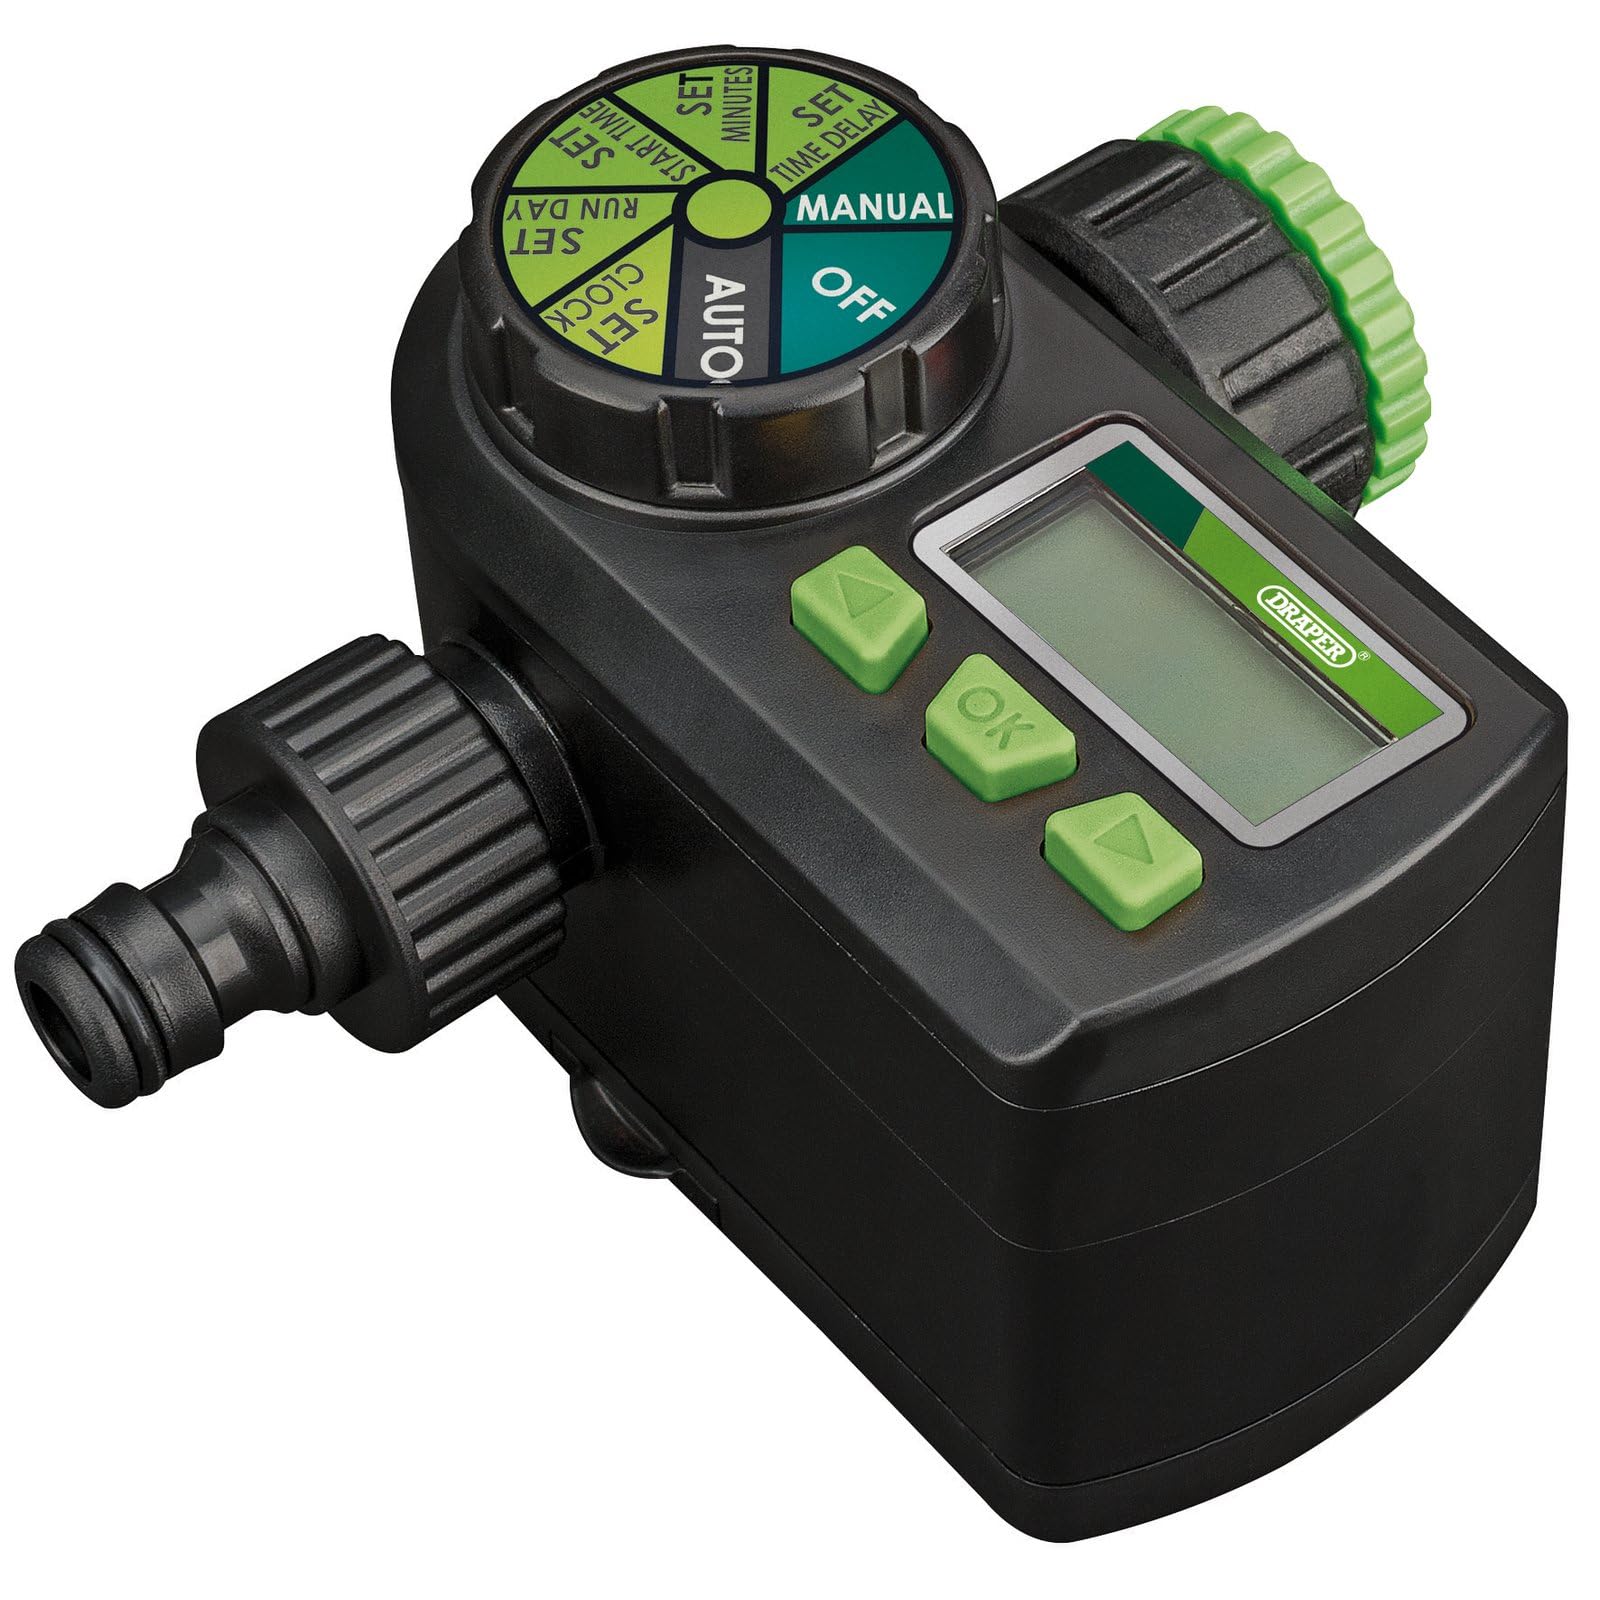
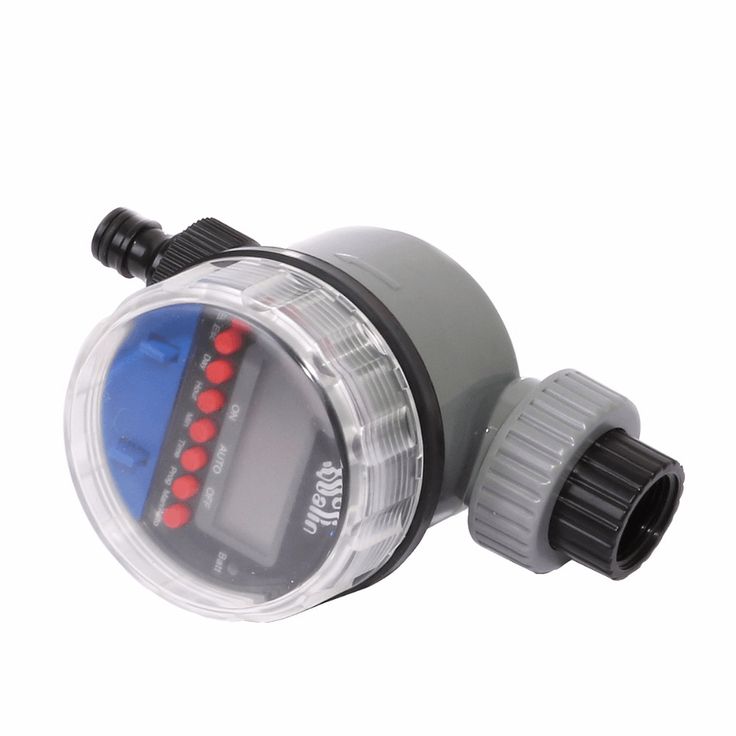
Maintaining a lush and thriving garden requires dedication, consistent care, and the right tools. One crucial aspect of garden care is ensuring that your plants receive the right amount of water at the right time. This is where an automatic water timer, like the Garden Ball Valve Automatic Electronic Watering Timer, comes in handy.
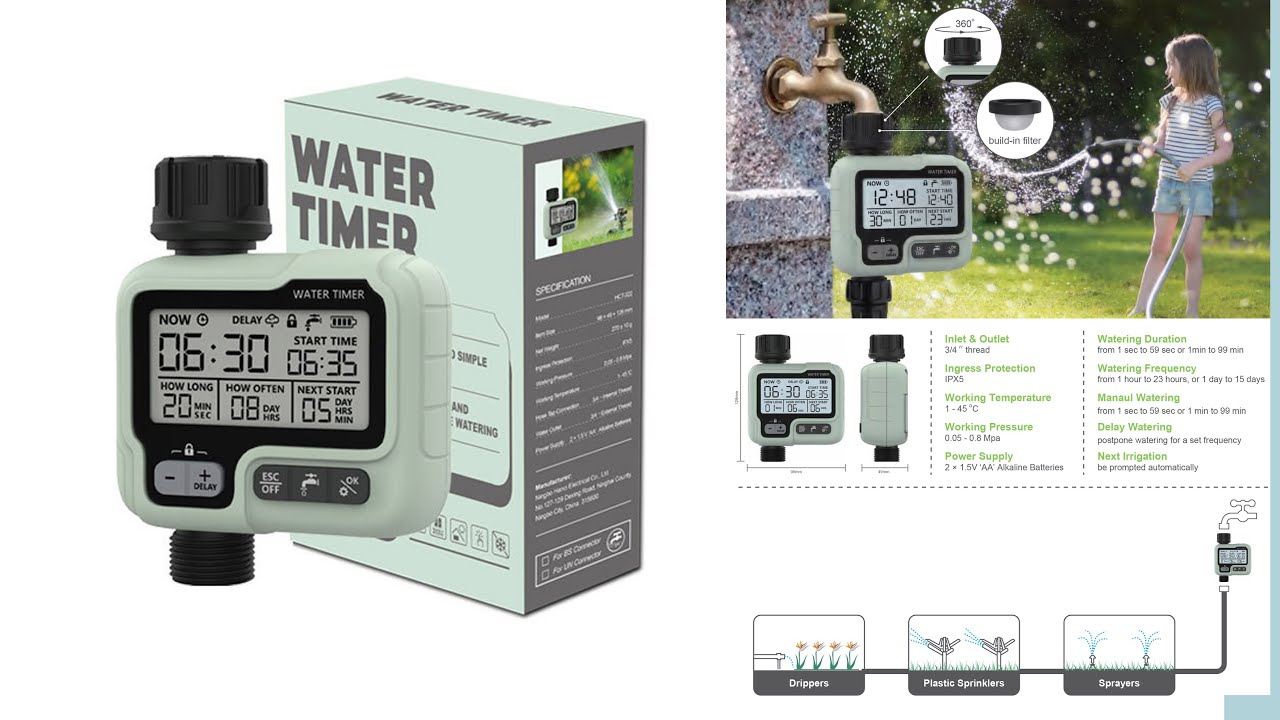
Features of the Garden Ball Valve Automatic Electronic Watering Timer
The Garden Ball Valve Automatic Electronic Watering Timer is a versatile and user-friendly tool that simplifies the process of watering your plants. Its array of features makes it an ideal choice for gardeners of all levels.
-
Programmable Watering Schedules: With the Garden Ball Valve Automatic Electronic Watering Timer, you can set customized watering schedules that cater to the specific needs of your plants. This allows you to tailor the watering frequency and duration based on plant type, soil conditions, and weather patterns.
-
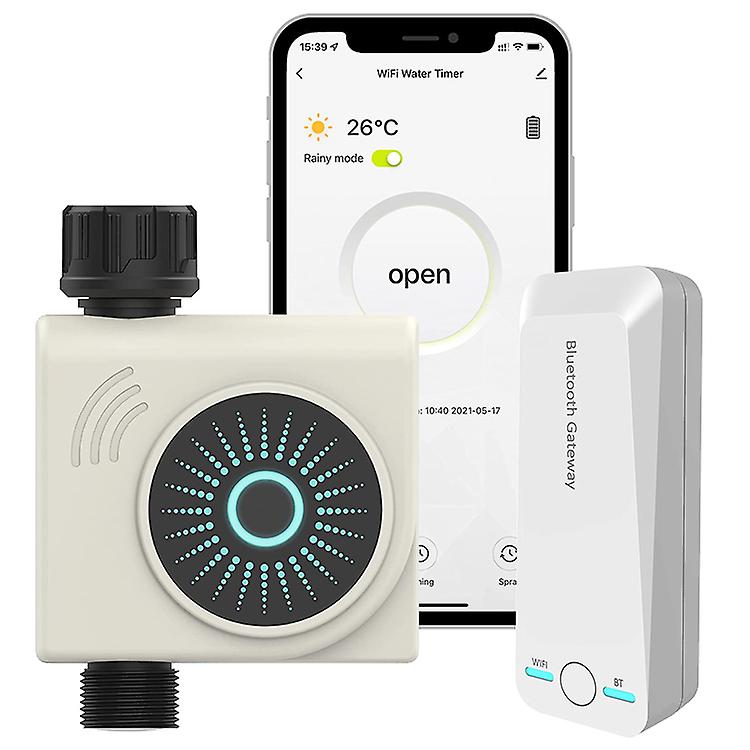
Rain Sensor Compatibility: This smart water timer features a built-in rain sensor that automatically skips watering cycles when rainfall is detected. This helps prevent overwatering and water wastage, ensuring that your plants receive just the right amount of moisture, even during rainy periods.
-
Easy-to-Use Digital Display: The timer features a clear and intuitive digital display that makes programming and monitoring watering schedules a breeze. With just a few simple button presses, you can set up and adjust watering parameters without any hassle.
-
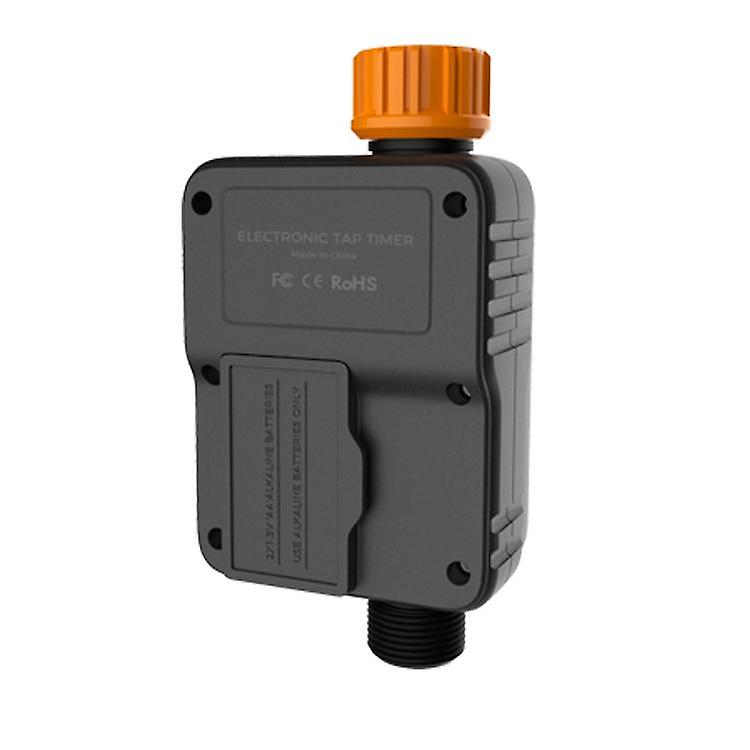
Durable and Weatherproof Construction: The Garden Ball Valve Automatic Electronic Watering Timer is constructed from high-quality materials that can withstand the elements. It is weatherproof and UV-resistant, ensuring that it can perform reliably even in harsh outdoor conditions.
-
Compatibility with Various Water Sources: This versatile timer can be connected to a variety of water sources, including faucets, hose bibs, and even water storage tanks. This flexibility allows you to use it in a wide range of garden setups.
Setting Up and Using the Garden Ball Valve Automatic Electronic Watering Timer
Getting started with the Garden Ball Valve Automatic Electronic Watering Timer is a straightforward process that can be completed in a few simple steps:
-
Installing the Water Timer: Begin by securely mounting the water timer onto a wall or fence post in a central location within your garden. Ensure that it is easily accessible for programming and maintenance.
-
Connecting the Water Source: Connect the water timer to your garden’s water supply using the provided hose adapter or plumbing connections. Make sure that the connection is tight and free of leaks to prevent water wastage.
-
Programming the Watering Schedule: Access the timer’s digital display and set up your desired watering schedule. Specify the watering frequency, duration, and start time for your entire garden or individual watering zones.
-
Testing the System: Once the programming is complete, manually activate the water timer to test the system. Observe the water flow and ensure that the watering zones are functioning correctly.
-
Troubleshooting Common Issues: If you encounter any issues during the setup or operation, refer to the user manual for troubleshooting tips. For more complex problems, contact the manufacturer’s customer support.
Benefits of Using the Garden Ball Valve Automatic Electronic Watering Timer
Incorporating the Garden Ball Valve Automatic Electronic Watering Timer into your gardening routine offers a multitude of benefits that enhance both the health of your plants and your overall gardening experience:
- Additionally, the Garden Ball Valve Automatic Electronic Watering Timer contributes to water conservation and environmentally friendly practices by eliminating the risk of overwatering, which can lead to water wastage and potential damage to plants.
Moreover, consistent and precise watering, ensured by the Garden Ball Valve Automatic Electronic Watering Timer, is crucial for optimal plant growth, promoting healthy root development, vibrant foliage, and abundant blooms.
Furthermore, the Garden Ball Valve Automatic Electronic Watering Timer saves time and effort, eliminating the burden of manual watering and allowing you to focus on other gardening tasks or simply enjoy your outdoor space.
-
Provides Peace of Mind: Whether you’re away on vacation or busy with other commitments, the Garden Ball Valve Automatic Electronic Watering Timer ensures that your plants receive the necessary care, providing peace of mind and eliminating the worry of underwatered or overwatered plants.
-
Enhances Curb Appeal: A well-maintained garden with a lush green lawn and thriving plants enhances curb appeal, contributing to a beautiful and inviting outdoor space. This not only adds beauty to your property but also potentially increases its value.
-
Watering Lawns and Gardens:
-
-
The Garden Ball Valve timer is perfect for maintaining healthy lawns and diverse garden beds. By incorporating the ball valve design, it ensures a complete shut-off of water flow when the timer is not in operation, preventing unnecessary water usage.
-
Watering Potted Plants and Hanging Baskets: For those who adore container gardening, the Garden Ball Valve timer becomes a game-changer. Program individual watering schedules for your potted plants and hanging baskets, ensuring their continued growth and vibrant displays, especially during hot summer months.
-
Watering Drip Irrigation Systems: If you utilize a drip irrigation system in your garden, the Garden Ball Valve timer seamlessly integrates for automated watering. The ball valve design ensures a tight shut-off when the timer is not active, preventing water from leaking out of the mainline before reaching the drip emitters.
-
Watering Greenhouses and Conservatories: The Garden Ball Valve timer can be a valuable tool for managing the specific watering needs of your greenhouse or conservatory plants. By creating customized schedules, you can maintain the ideal moisture levels for your delicate and often exotic flora.
-
Watering Vacation Homes and Rental Properties: For those with vacation homes or rental properties, the Garden Ball Valve timer provides peace of mind. Program the timer before you leave, ensuring your plants are automatically watered while you’re away. The ball valve design adds an extra layer of security by completely stopping water flow when not in use, minimizing the risk of leaks or flooding in your absence.
Tips for Choosing the Right Automatic Water Timer for Your Garden
Selecting the perfect automatic water timer for your garden requires considering a few key factors:
-
Consider the Size of Your Garden: A larger garden will likely require a timer with more watering zones to manage different areas effectively. The Garden Ball Valve timer may come in various models with different zone capacities, so choose the one that best suits your garden size.
- When selecting an automatic water timer such as the Garden Ball Valve timer, several considerations come into play.
Firstly, Determine the Number of Watering Zones You Need by assessing the diverse watering needs of your plants and the layout of your garden. The Garden Ball Valve timer’s ability to handle multiple zones allows you to create customized watering programs for lawns, flowerbeds, vegetable patches, and other areas.
Furthermore, when choosing a timer, it’s essential to consider features like rain sensor compatibility, program memory for multiple schedules, and compatibility with your water source (faucet, hose bib, or water tank) to ensure the timer meets your specific needs. The Garden Ball Valve timer offers these functionalities, making it a well-rounded choice for diverse garden setups.
Furthermore, it’s crucial to Consider the Price. Automatic water timers range in price depending on features and capabilities. Set a budget and choose a timer that offers the functionality you require within your price range. The Garden Ball Valve timer offers a balance of features and affordability, making it an attractive option for many gardeners.
Lastly, Read Reviews from Other Customers, as they can provide valuable insights into the performance and user experience. Reviews can highlight the timer’s strengths and weaknesses, helping you make an informed decision.
Maintaining the Garden Ball Valve Automatic Electronic Watering Timer
Ensuring the smooth operation of your Garden Ball Valve Automatic Electronic Watering Timer requires minimal maintenance:
-
Cleaning the Filter: Periodically clean the filter screen located at the water inlet to prevent clogging and ensure optimal water flow. The ball valve design itself is generally low maintenance, but a clean filter maintains efficiency.
-
Checking the Batteries: If your Garden Ball Valve timer uses batteries, regularly check their power level and replace them when necessary to avoid disruptions in the watering schedule.
-
Inspecting the Connections: Occasionally inspect the hose connections and the ball valve itself for leaks or signs of wear and tear. Tighten any loose connections and replace damaged hoses to prevent water wastage.
-
Winterizing the Timer: In colder climates, it’s crucial to winterize the timer by following the manufacturer’s instructions. This may involve draining the water from the unit and storing it indoors to prevent damage from freezing temperatures. The ball valve design can be helpful during winterization as it allows for a complete shut-off of water flow, minimizing the risk of burst pipes due to freezing.
-
HCT-322 Automatic Water Timer Garden
Introduction
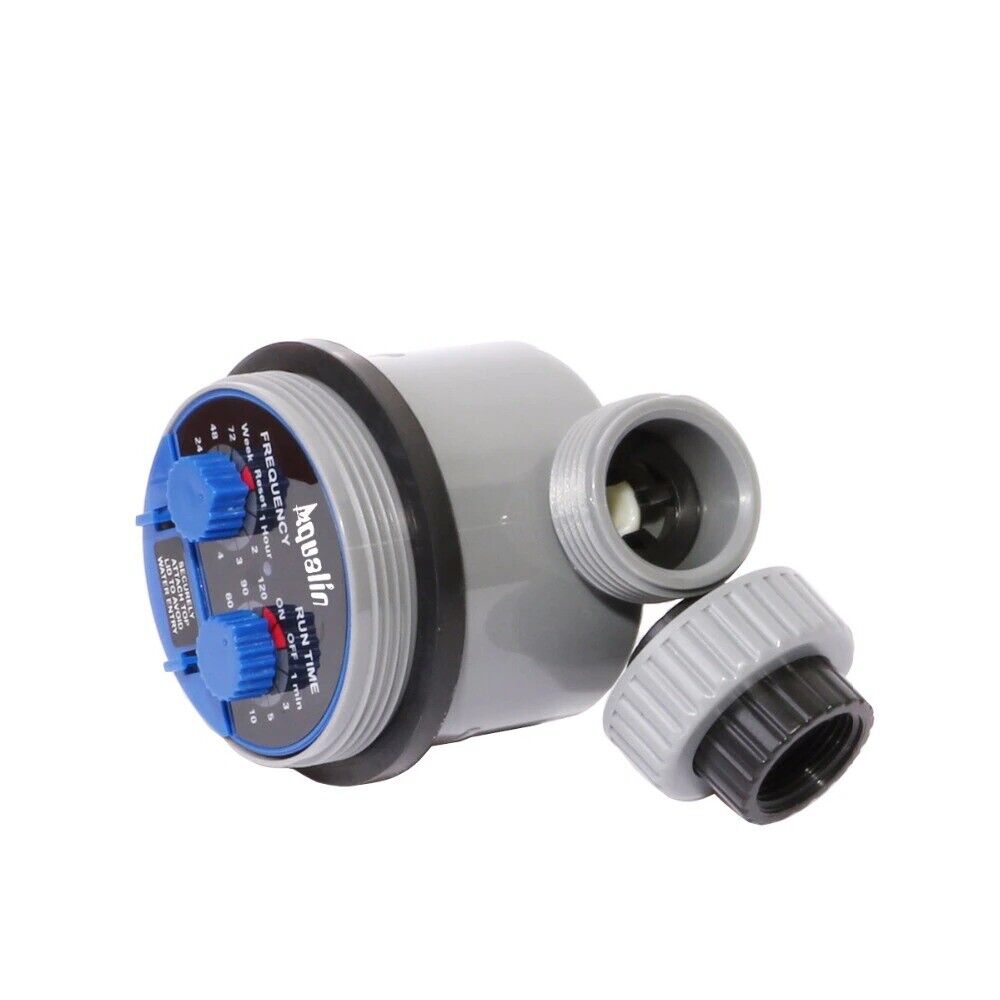
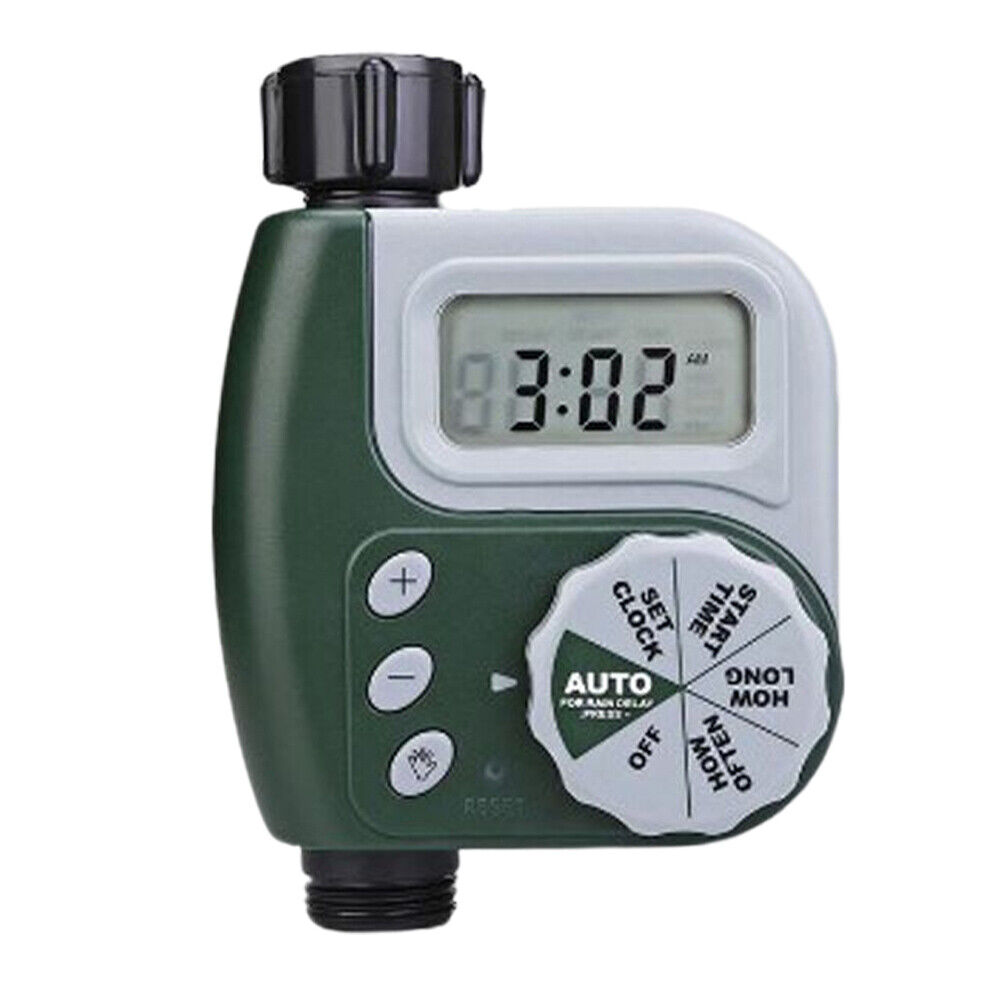
Maintaining a lush and thriving garden can be a rewarding experience, but it also requires dedication and consistent effort. One crucial aspect of garden care is ensuring that your plants receive the right amount of water at the right time. This is where an automatic water timer, like the HCT-322 Automatic Water Timer Garden, comes in handy.
Features of the HCT-322 Automatic Water Timer Garden
The HCT-322 Automatic Water Timer Garden is a versatile and user-friendly tool that simplifies the process of watering your plants. Its array of features makes it an ideal choice for gardeners of all levels.
-
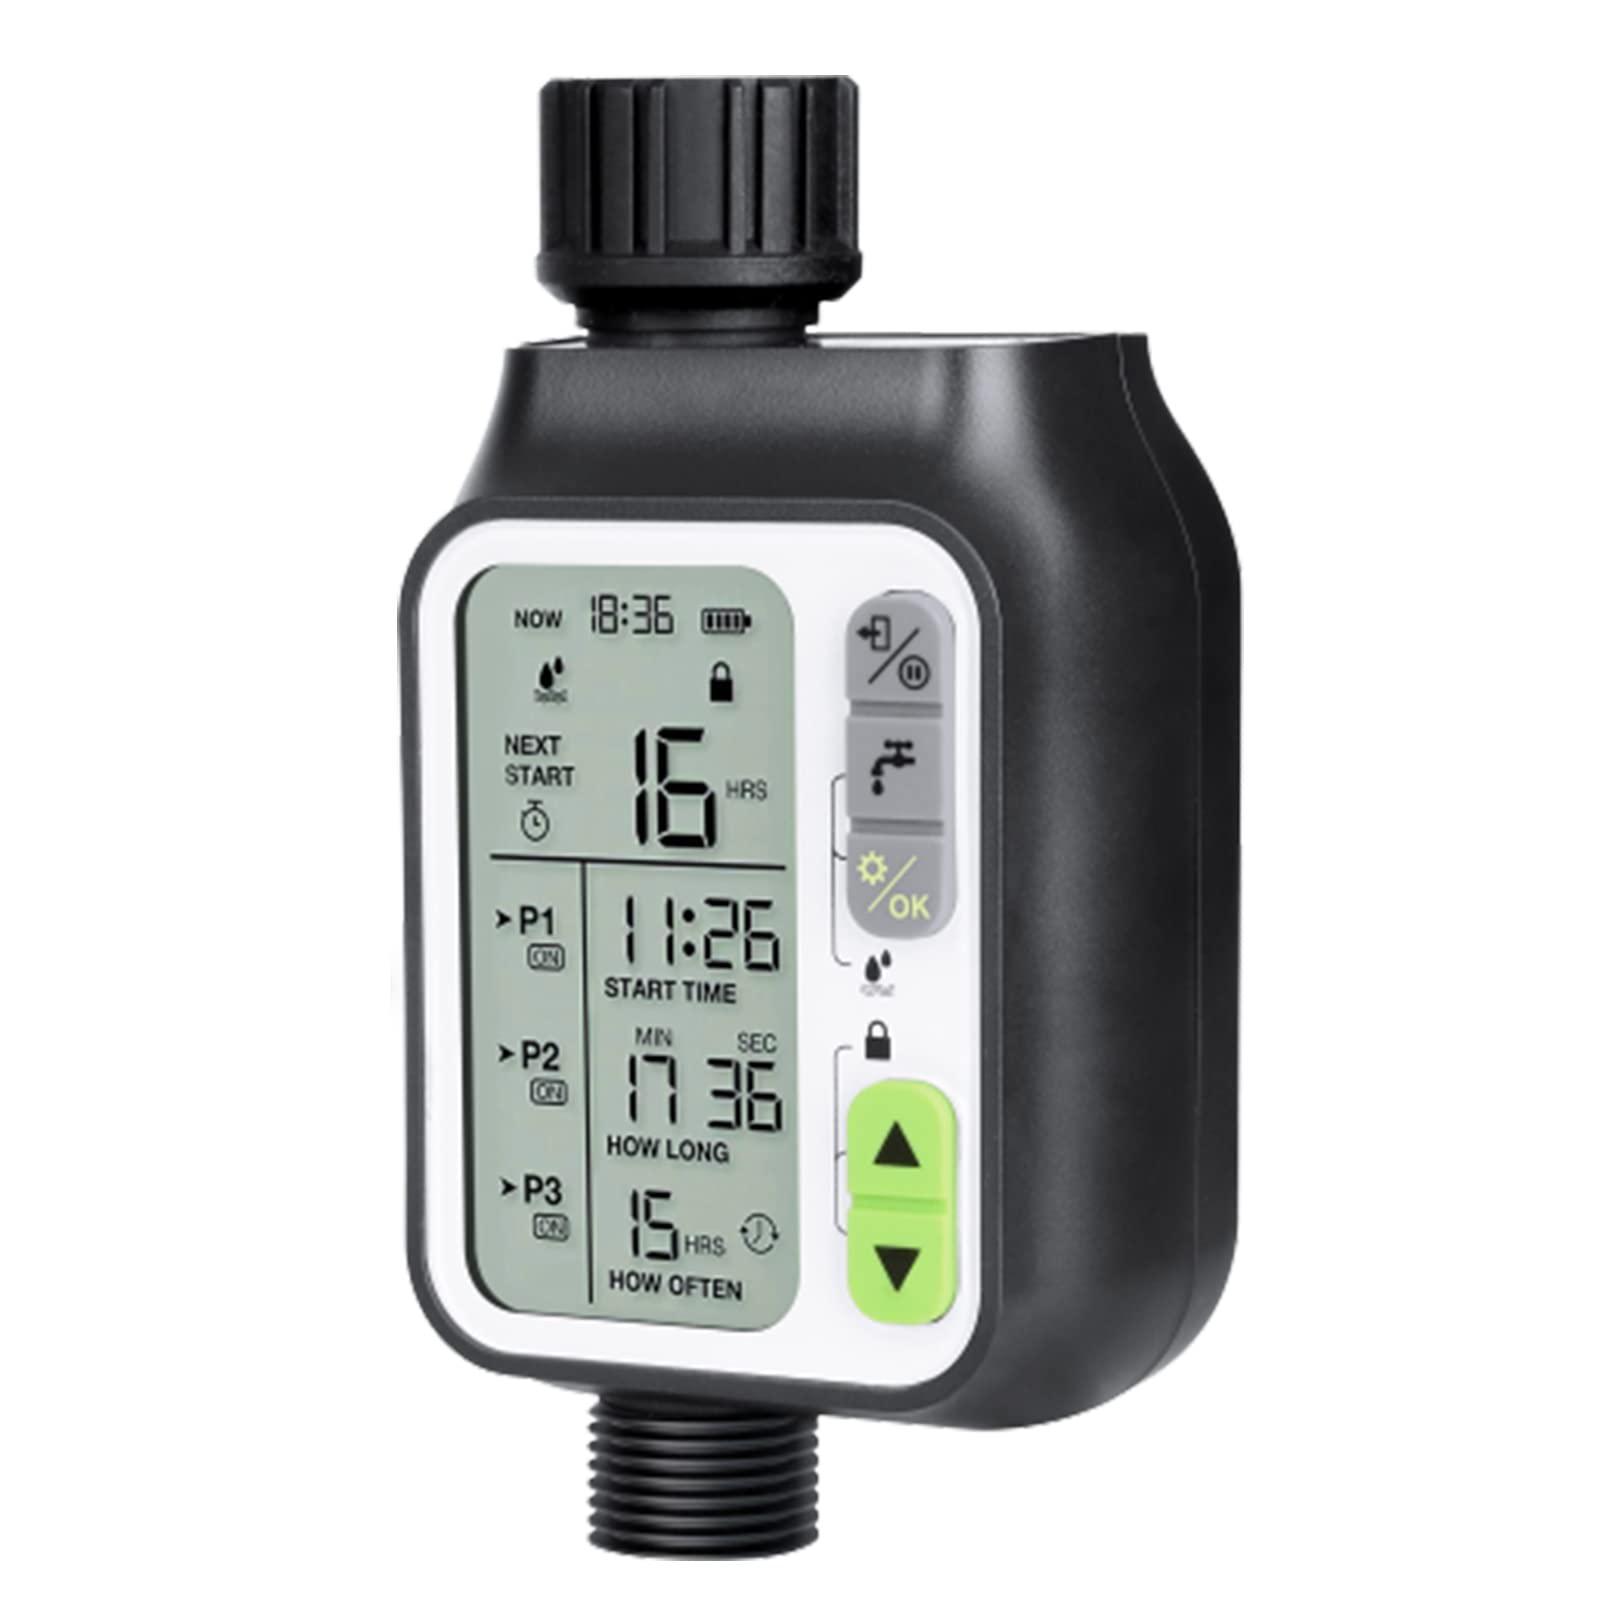
Programmable Watering Schedules: With the HCT-322 Automatic Water Timer Garden, you can set customized watering schedules that cater to the specific needs of your plants. This allows you to tailor the watering frequency and duration based on plant type, soil conditions, and weather patterns.
-
Rain Sensor Compatibility: This smart water timer features a built-in rain sensor that automatically skips watering cycles when rainfall is detected. This helps prevent overwatering and water wastage, ensuring that your plants receive just the right amount of moisture, even during rainy periods.
-
Multiple Watering Zones: The HCT-322 Automatic Water Timer Garden can manage multiple watering zones, allowing you to independently control the watering schedule for different areas of your garden. This is particularly useful for gardens with diverse plant requirements or those with uneven terrain.
-
Easy-to-Use Digital Display: The timer features a clear and intuitive digital display that makes programming and monitoring watering schedules a breeze. With just a few simple button presses, you can set up and adjust watering parameters without any hassle.
-
Durable and Weatherproof Construction: The HCT-322 Automatic Water Timer Garden is constructed from high-quality materials that can withstand the elements. It is weatherproof and UV-resistant, ensuring that it can perform reliably even in harsh outdoor conditions.
Setting Up and Using the HCT-322 Automatic Water Timer Garden
Getting started with the HCT-322 Automatic Water Timer Garden is a straightforward process that can be completed in a few simple steps:
-
Installing the Water Timer: Begin by securely mounting the water timer onto a wall or fence post in a central location within your garden. Ensure that it is easily accessible for programming and maintenance.
-
Connecting the Water Source: Connect the water timer to your garden’s water supply using the provided hose adapter. Make sure that the connection is tight and free of leaks to prevent water wastage.
-
Programming the Watering Schedule: Access the timer’s digital display and set up your desired watering schedule. Specify the watering frequency, duration, and start time for each watering zone.
-
Testing the System: Once the programming is complete, manually activate the water timer to test the system. Observe the water flow and ensure that the watering zones are functioning correctly.
-
Troubleshooting Common Issues: If you encounter any issues during the setup or operation, refer to the user manual for troubleshooting tips. For more complex problems, contact the manufacturer’s customer support.
Benefits of Using the HCT-322 Automatic Water Timer Garden
Incorporating the HCT-322 Automatic Water Timer Garden into your gardening routine offers a multitude of benefits that enhance both the health of your plants and your overall gardening experience:
-
Conserves Water: By automating the watering process, the HCT-322 Automatic Water Timer Garden eliminates the risk of overwatering, which can lead to water wastage and potential damage to plants. This contributes to water conservation and environmentally friendly practices.
-
Promotes Healthy Plant Growth: Consistent and precise watering is crucial for optimal plant growth. The HCT-322 Automatic Water Timer Garden ensures that your plants receive the right amount of water at the right time, promoting healthy root development, vibrant foliage, and abundant blooms.
-
Saves Time and Effort: Manually watering your garden can be time-consuming and labor-intensive. The HCT-322 Automatic Water Timer Garden eliminates this burden, allowing you to focus on other gardening tasks or simply enjoy your outdoor space.
-
Provides Peace of Mind: Whether you’re away on vacation or busy with other commitments, the HCT-322 Automatic Water Timer Garden ensures that your plants receive the necessary care, providing peace of mind and eliminating the worry of underwatered or overwatered plants.
-
Enhances Curb Appeal: A well-maintained garden enhances curb appeal, contributing to a lush and aesthetically pleasing outdoor space. This not only adds beauty to your property but also potentially increases its value.
-
-
Applications of the HCT-322 Automatic Water Timer Garden
The HCT-322 Automatic Water Timer Garden’s versatility extends beyond traditional gardens. Here are some additional applications for this resourceful tool:
-
Watering Lawns and Gardens: The HCT-322 is perfect for maintaining healthy lawns and diverse garden beds. By creating separate watering zones, you can cater to the specific needs of your lawn (often requiring deeper watering) and your flowerbeds (with varying water requirements depending on plant types).
-
Watering Potted Plants and Hanging Baskets: For those who adore container gardening, the HCT-322 becomes a game-changer. Program individual watering schedules for your potted plants and hanging baskets, ensuring their continued growth and vibrant displays, especially during hot summer months.
-
Watering Drip Irrigation Systems: If you utilize a drip irrigation system in your garden, the HCT-322 seamlessly integrates for automated watering. This allows for efficient water delivery directly to the plant roots, minimizing evaporation and maximizing water usage.
-
Watering Greenhouses and Conservatories: The HCT-322 can be a valuable tool for managing the specific watering needs of your greenhouse or conservatory plants. By creating customized schedules, you can maintain the ideal moisture levels for your delicate and often exotic flora.
-
Watering Vacation Homes and Rental Properties: For those with vacation homes or rental properties, the HCT-322 provides peace of mind. Program the timer before you leave, ensuring your plants are automatically watered while you’re away. This eliminates the need to rely on others for watering duties and prevents your plants from suffering during your absence.
Tips for Choosing the Right Automatic Water Timer for Your Garden
Selecting the perfect automatic water timer for your garden requires considering a few key factors:
- When selecting an automatic water timer such as the HCT-322, it’s important to consider various factors. Firstly, consider the Size of Your Garden: a larger garden will likely require a timer with more watering zones to manage different areas effectively.
Next, Determine the Number of Watering Zones You Need by assessing the diverse watering needs of your plants and the layout of your garden to determine the optimal number of watering zones required.
In addition, Choose a Timer with the Features You Need, considering features like rain sensor compatibility, program memory for multiple schedules, and compatibility with drip irrigation systems to ensure the timer meets your specific needs.
Furthermore, it’s vital to Consider the Price. Automatic water timers range in price depending on features and capabilities. Set a budget and choose a timer that offers the functionality you require within your price range.
Lastly, Read Reviews from Other Customers, as reading online reviews from other gardeners who have used the HCT-322 or similar timers can provide valuable insights into its performance and user experience.
Maintaining the HCT-322 Automatic Water Timer Garden
Ensuring the smooth operation of your HCT-322 Automatic Water Timer Garden requires minimal maintenance:
-
Cleaning the Filter: Periodically clean the filter screen located at the water inlet to prevent clogging and ensure optimal water flow.
-
Checking the Batteries: If your HCT-322 uses batteries, regularly check their power level and replace them when necessary to avoid disruptions in the watering schedule.
-
Inspecting the Connections: Occasionally inspect the hose connections for leaks or signs of wear and tear. Tighten any loose connections and replace damaged hoses to prevent water wastage.
-
Winterizing the Timer: In colder climates, it’s crucial to winterize the timer by following the manufacturer’s instructions. This may involve draining the water from the unit and storing it indoors to prevent damage from freezing temperatures.
Troubleshooting Common Problems with the HCT-322 Automatic Water Timer Garden
While the HCT-322 is a reliable tool, occasional minor issues might arise. Here’s how to address some common problems:
-
If the Timer is Not Turning On, double-check the battery power (if applicable) and ensure the timer is properly plugged into a power source. Additionally, consult the user manual for troubleshooting steps specific to your model.
If the Timer is Not Watering the Plants, it’s essential to verify that the watering schedule is programmed correctly and the valves are open. Moreover, ensure there are no blockages in the hoses or connections.
In case the Timer is Watering the Plants Too Much or Too Little, review the watering schedule settings and adjust the watering duration or frequency as needed based on your plant needs and weather conditions.
-
The Timer is Leaking: Inspect the hose connections and tighten any loose fittings. If the leak persists, consult the user manual or contact the manufacturer for further assistance.
-

Top-rated hydroponic boxes for small spaces
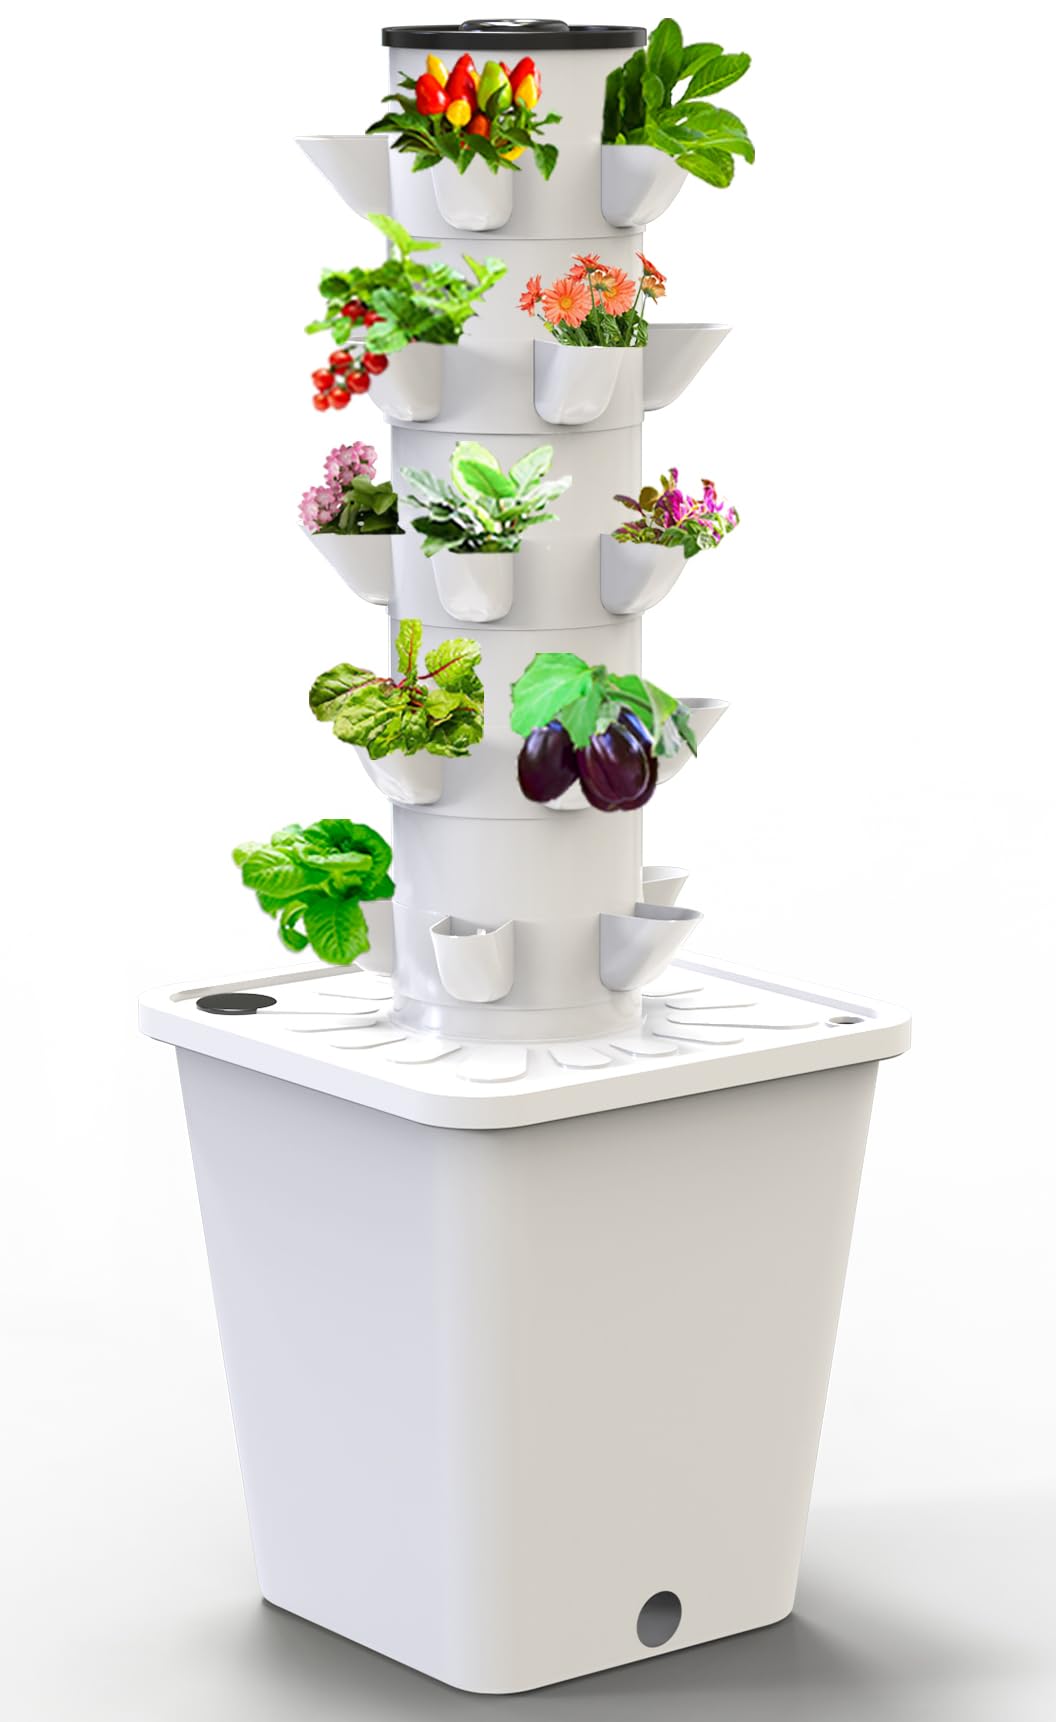
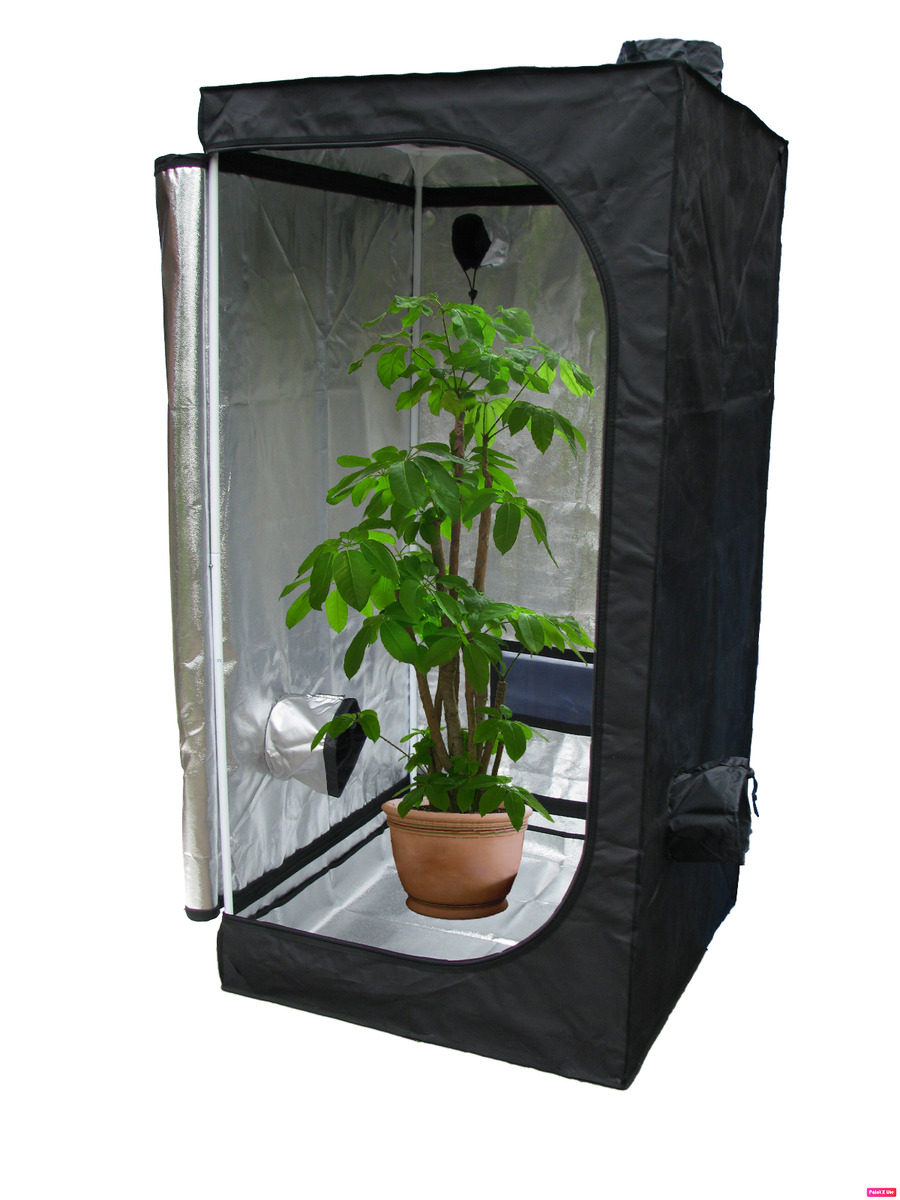
In the realm of home gardening, hydroponics has emerged as a revolutionary technique, offering a soilless approach to cultivating plants that has captivated the hearts of both novice and experienced gardeners alike. Hydroponic systems eliminate the need for traditional soil, instead suspending plant roots in nutrient-rich solutions, allowing for optimal growth and enhanced yields. For those who enjoy the thrill of DIY projects and the satisfaction of nurturing their own indoor gardens, DIY hydroponic boxes present an exciting and rewarding endeavor.
However, space constraints can often pose a challenge for aspiring hydroponic enthusiasts, particularly those residing in apartments, condos, or homes with limited square footage. Fear not, for the world of hydroponics caters to all, offering a plethora of compact and efficient hydroponic box systems specifically designed to thrive in small spaces. These ingenious creations not only minimize the footprint required for your indoor garden but also provide a convenient and accessible way to cultivate fresh herbs, vegetables, and even flowers right in the comfort of your own home.
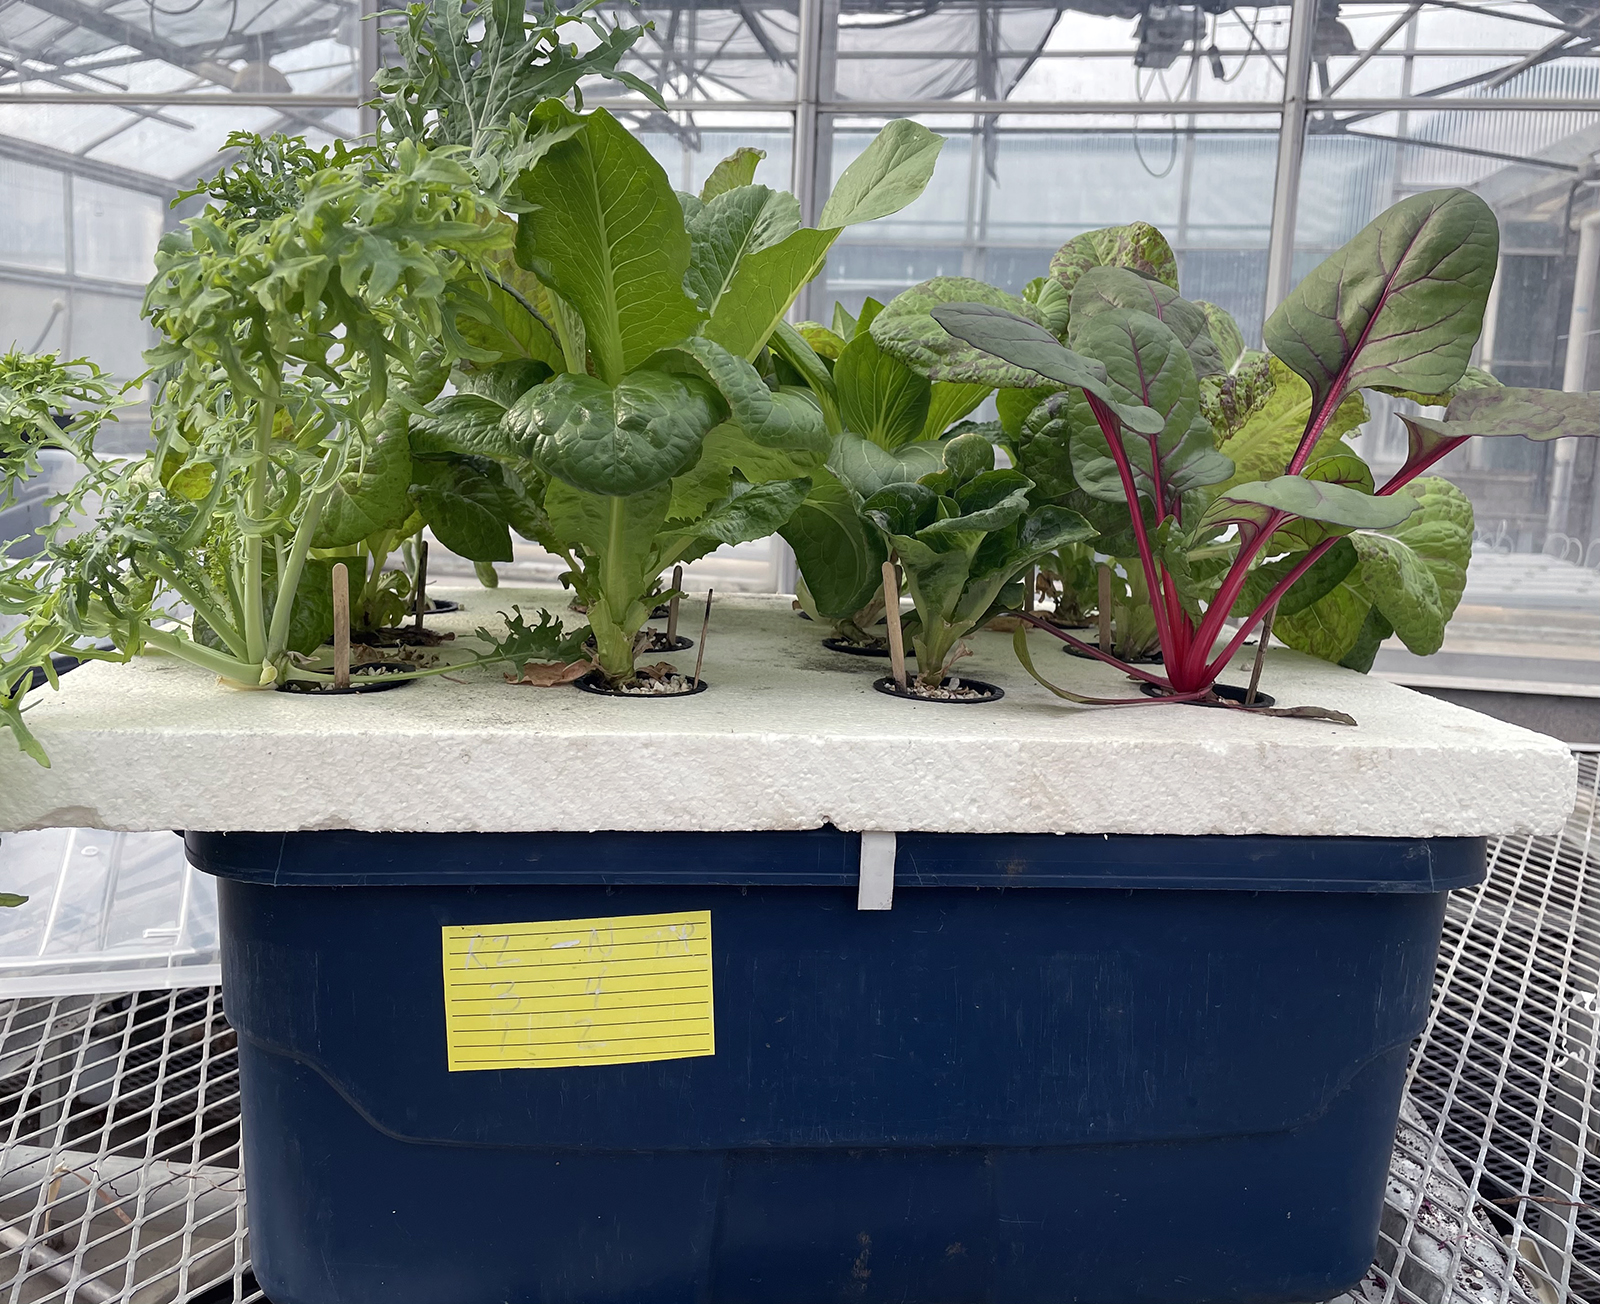
I. Unveiling the Wonders of Hydroponic Boxes
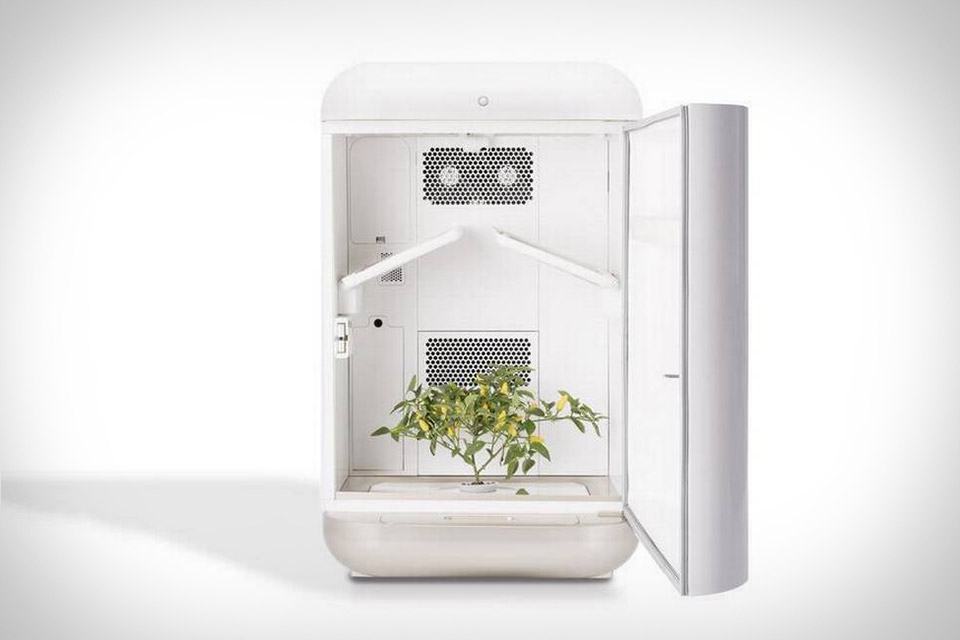
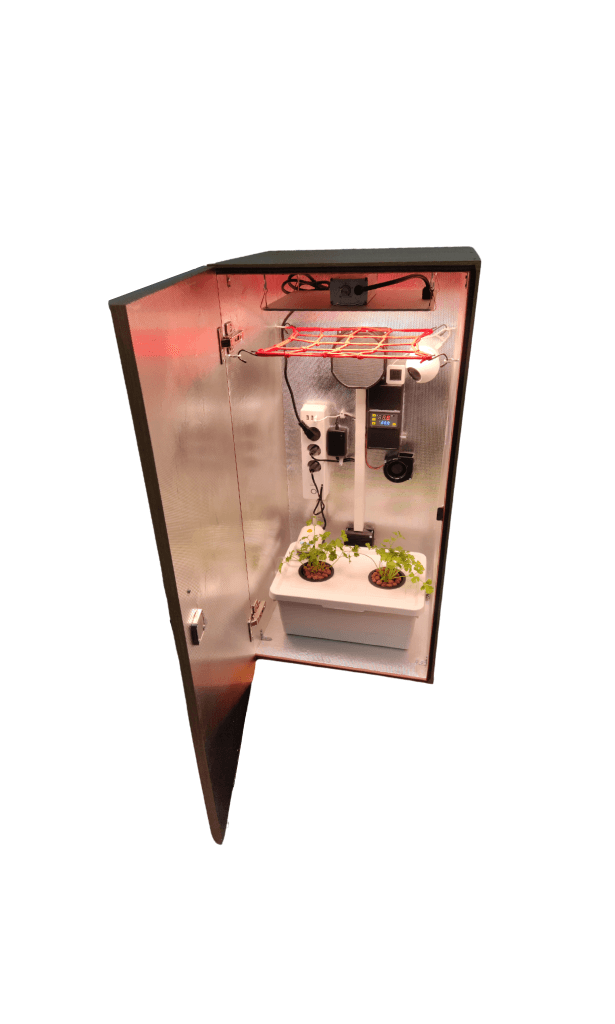
Hydroponic boxes, also known as self-contained hydroponic gardens, are essentially miniature hydroponic systems packaged within a compact and user-friendly structure. These ingenious contraptions typically encompass all the essential components for hydroponic cultivation, including a reservoir for nutrient solution, a planting area for housing plant roots, a nutrient delivery system to distribute the nutrient solution, and a lighting system to provide the necessary illumination for plant growth.
The allure of hydroponic boxes lies in their simplicity and convenience. Unlike traditional hydroponic setups that often involve intricate plumbing and DIY expertise, hydroponic boxes streamline the process, making them accessible to even the most novice gardeners. With minimal assembly and straightforward operation, these compact gardens allow anyone to embark on the rewarding journey of cultivating fresh produce, regardless of their gardening experience or spatial limitations.
II. Embarking on a Hydroponic Adventure: Choosing the Right Box
Venturing into the world of hydroponic boxes requires careful consideration of your specific needs and preferences. Factors such as the size of your available space, the types of plants you intend to grow, and your desired level of automation play a crucial role in selecting the most suitable hydroponic box for your indoor garden.
1. Size Matters:
Hydroponic boxes come in a variety of sizes, ranging from petite countertop models to slightly larger systems that can be placed on tables or shelves. Assess the available space in your home and choose a box that fits comfortably without compromising your living area.
2. System Type:
Hydroponic systems employ different techniques to deliver nutrient solution to plant roots. Popular options include Deep Water Culture (DWC), Nutrient Film Technique (NFT), and Aeroponics. Each system has its own advantages and considerations.
-
Deep Water Culture (DWC): DWC systems are simple and effective, immersing plant roots directly in the nutrient solution.
-
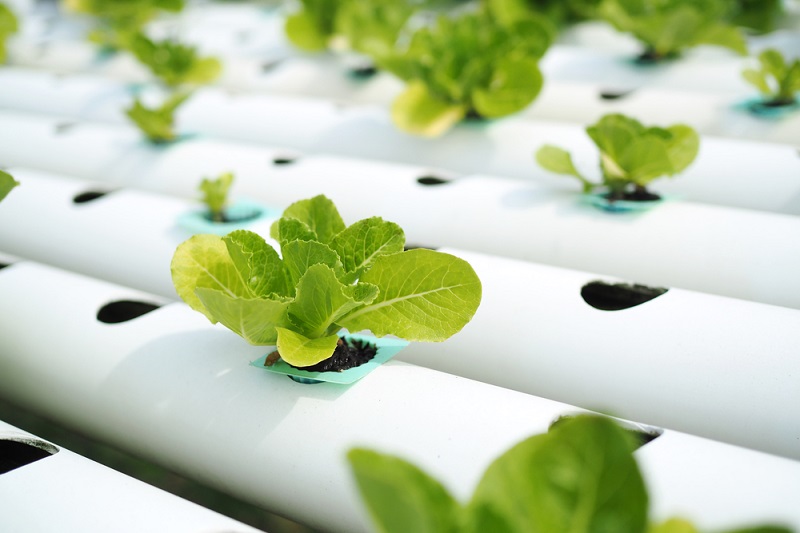
Nutrient Film Technique (NFT): NFT systems continuously flow a thin film of nutrient solution over plant roots, promoting rapid growth and efficient nutrient uptake.
-
Aeroponics: Aeroponic systems suspend plant roots in air and mist them with nutrient solution, providing excellent aeration and preventing root rot.
3. Grow Media:
Grow media serves as the support system for plant roots in hydroponic setups. Common choices include clay pebbles, perlite, and rockwool. Select a grow media that provides adequate drainage and aeration for your chosen plants.
4. Nutrient Solution:
Nutrient solution provides essential nutrients for plant growth. Choose a pre-mixed nutrient solution or prepare your own using a hydroponic nutrient formula.
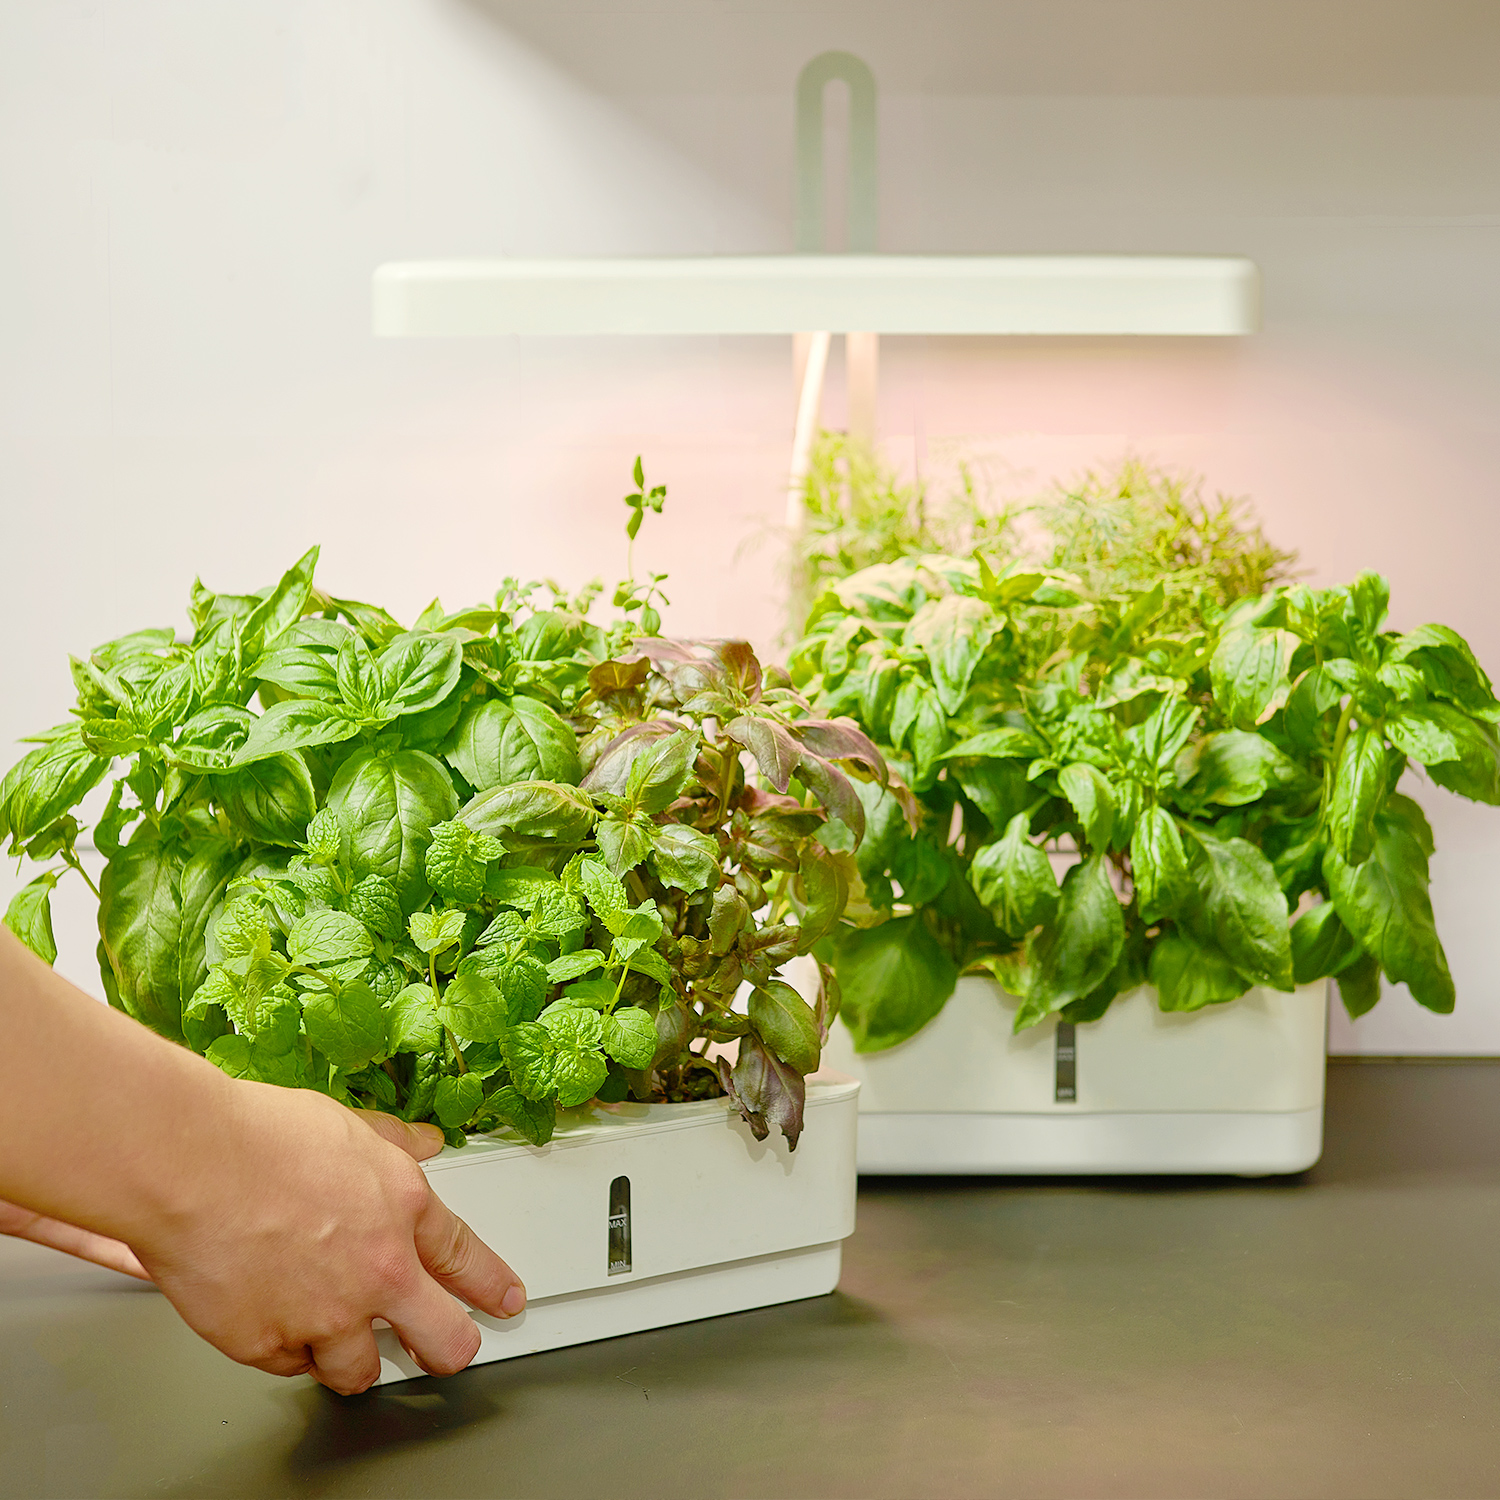
5. Lighting:
Plants require adequate light for photosynthesis. LED grow lights are a popular choice for hydroponic gardens due to their energy efficiency and ability to provide a full spectrum of light that promotes healthy plant growth.
III. Top Contenders: Unveiling the Best Hydroponic Boxes for Small Spaces
Navigating the vast array of hydroponic boxes available can be overwhelming. To assist you in your quest for the perfect compact hydroponic garden, let’s delve into some of the top-rated hydroponic boxes for small spaces:
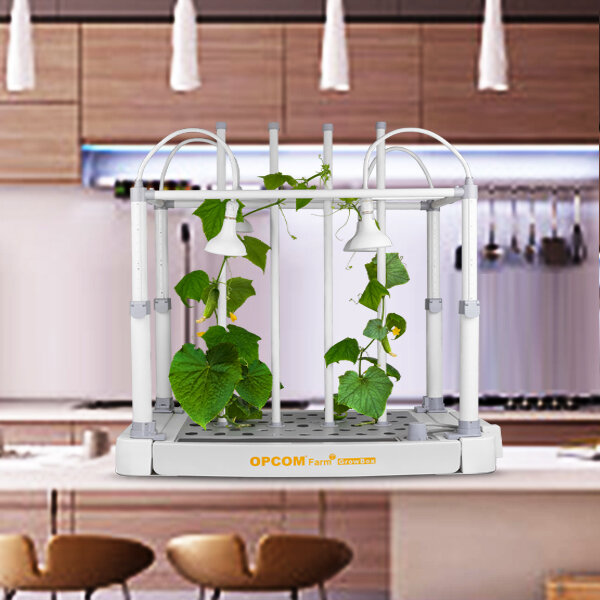
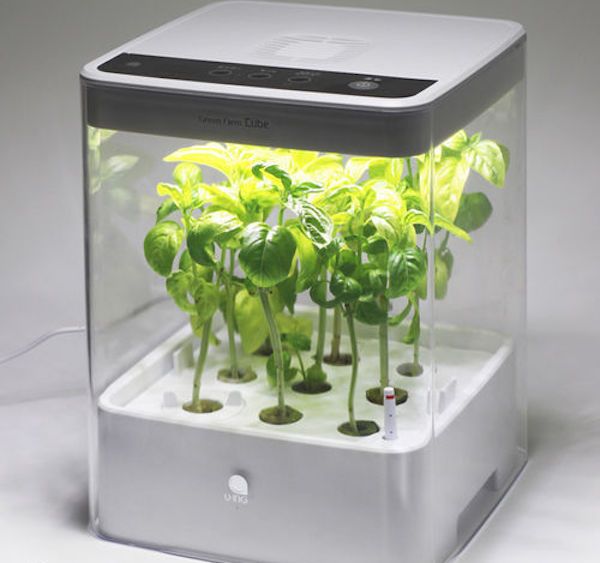
1. AeroGarden Harvest:
The AeroGarden Harvest is a user-friendly and self-watering hydroponic box that comes with everything you need to get started, including seed pods, nutrient solution, and LED grow lights. It is a great choice for beginners who want a hassle-free hydroponic experience.
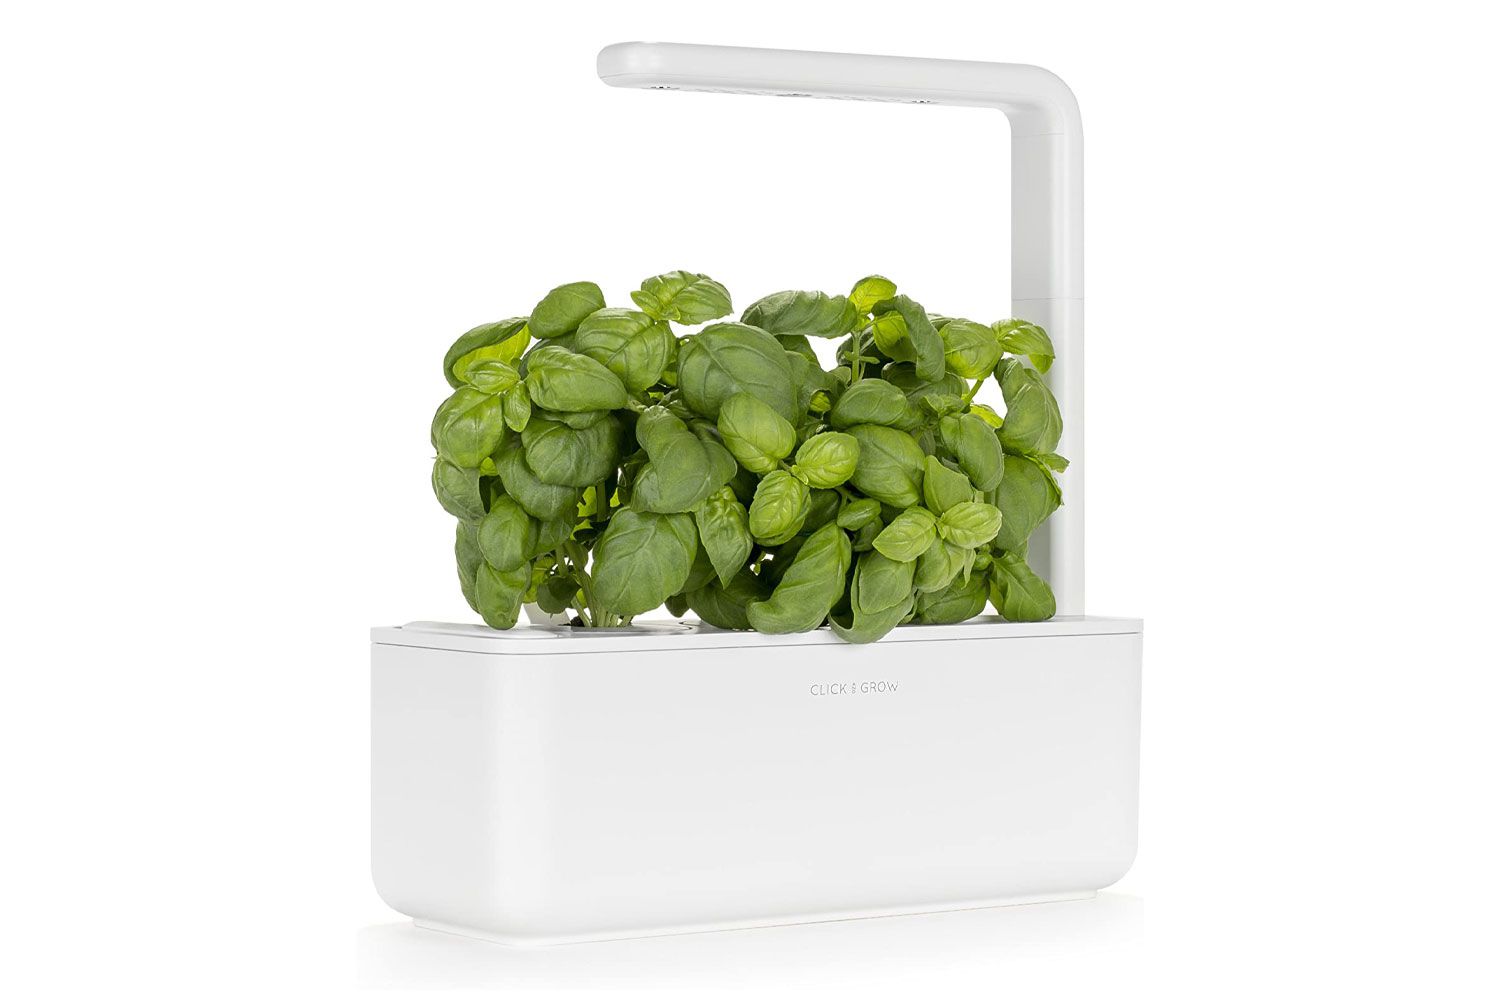
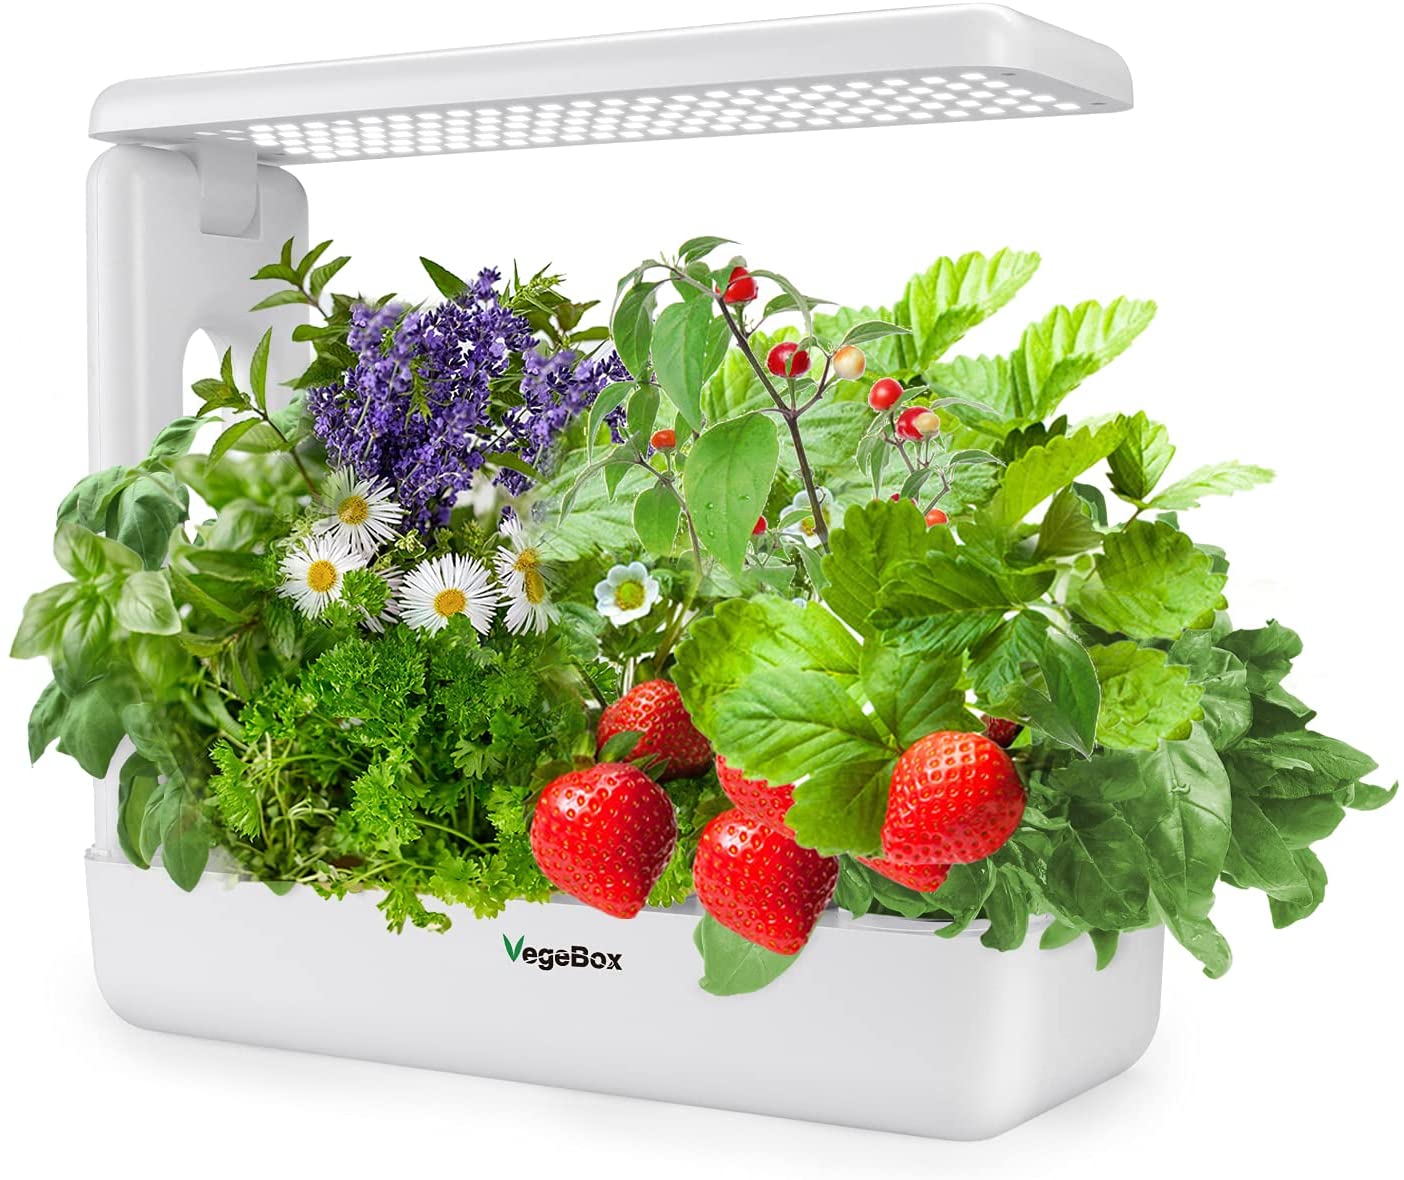
2. Click and Grow Garden:
The Click and Grow Garden is a compact and stylish hydroponic box that is perfect for kitchens or small spaces. It is easy to use and can grow a variety of herbs, vegetables, and flowers.
3. Lettuce Grow The Complete Garden:
The Lettuce Grow The Complete Garden is a fast-growing and high-yielding hydroponic box that uses a patented aeroponic system. It is a great option for those who want to grow a lot of food in a small space. However, it is on the pricier side and requires a subscription for the pre-seeded pods.
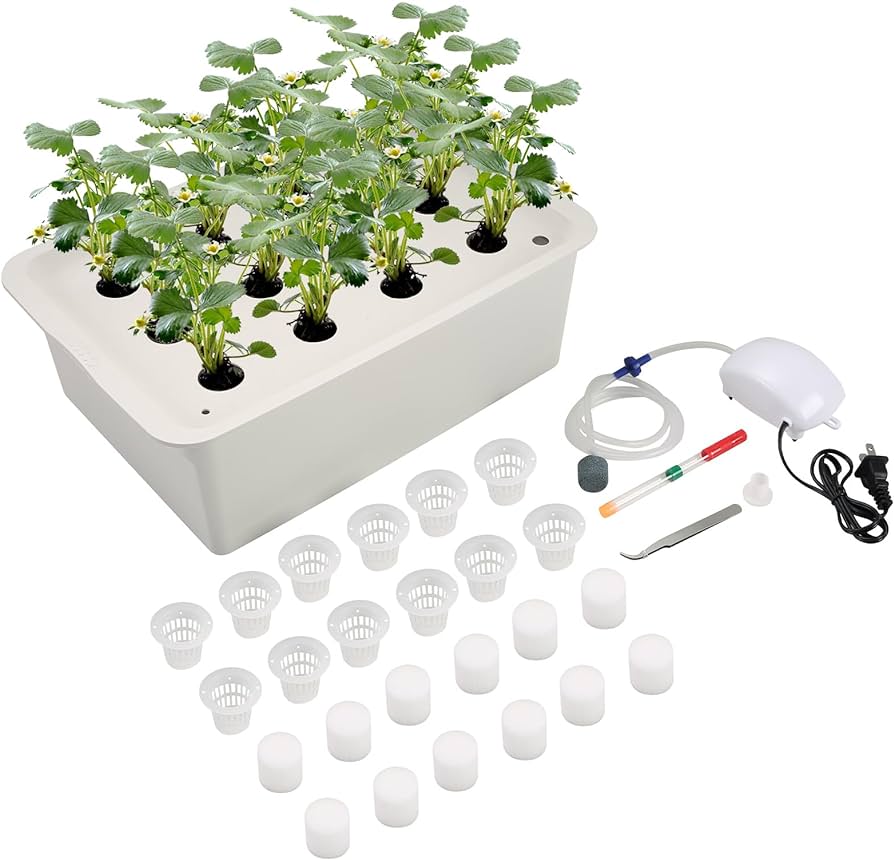
4. MiGardener Hydroponic Grow Box:
The MiGardener Hydroponic Grow Box is an affordable and customizable hydroponic box that allows you to grow a variety of plants. It is a good option for those who want a more DIY experience. However, it requires some assembly and may not be as user-friendly as some other systems.
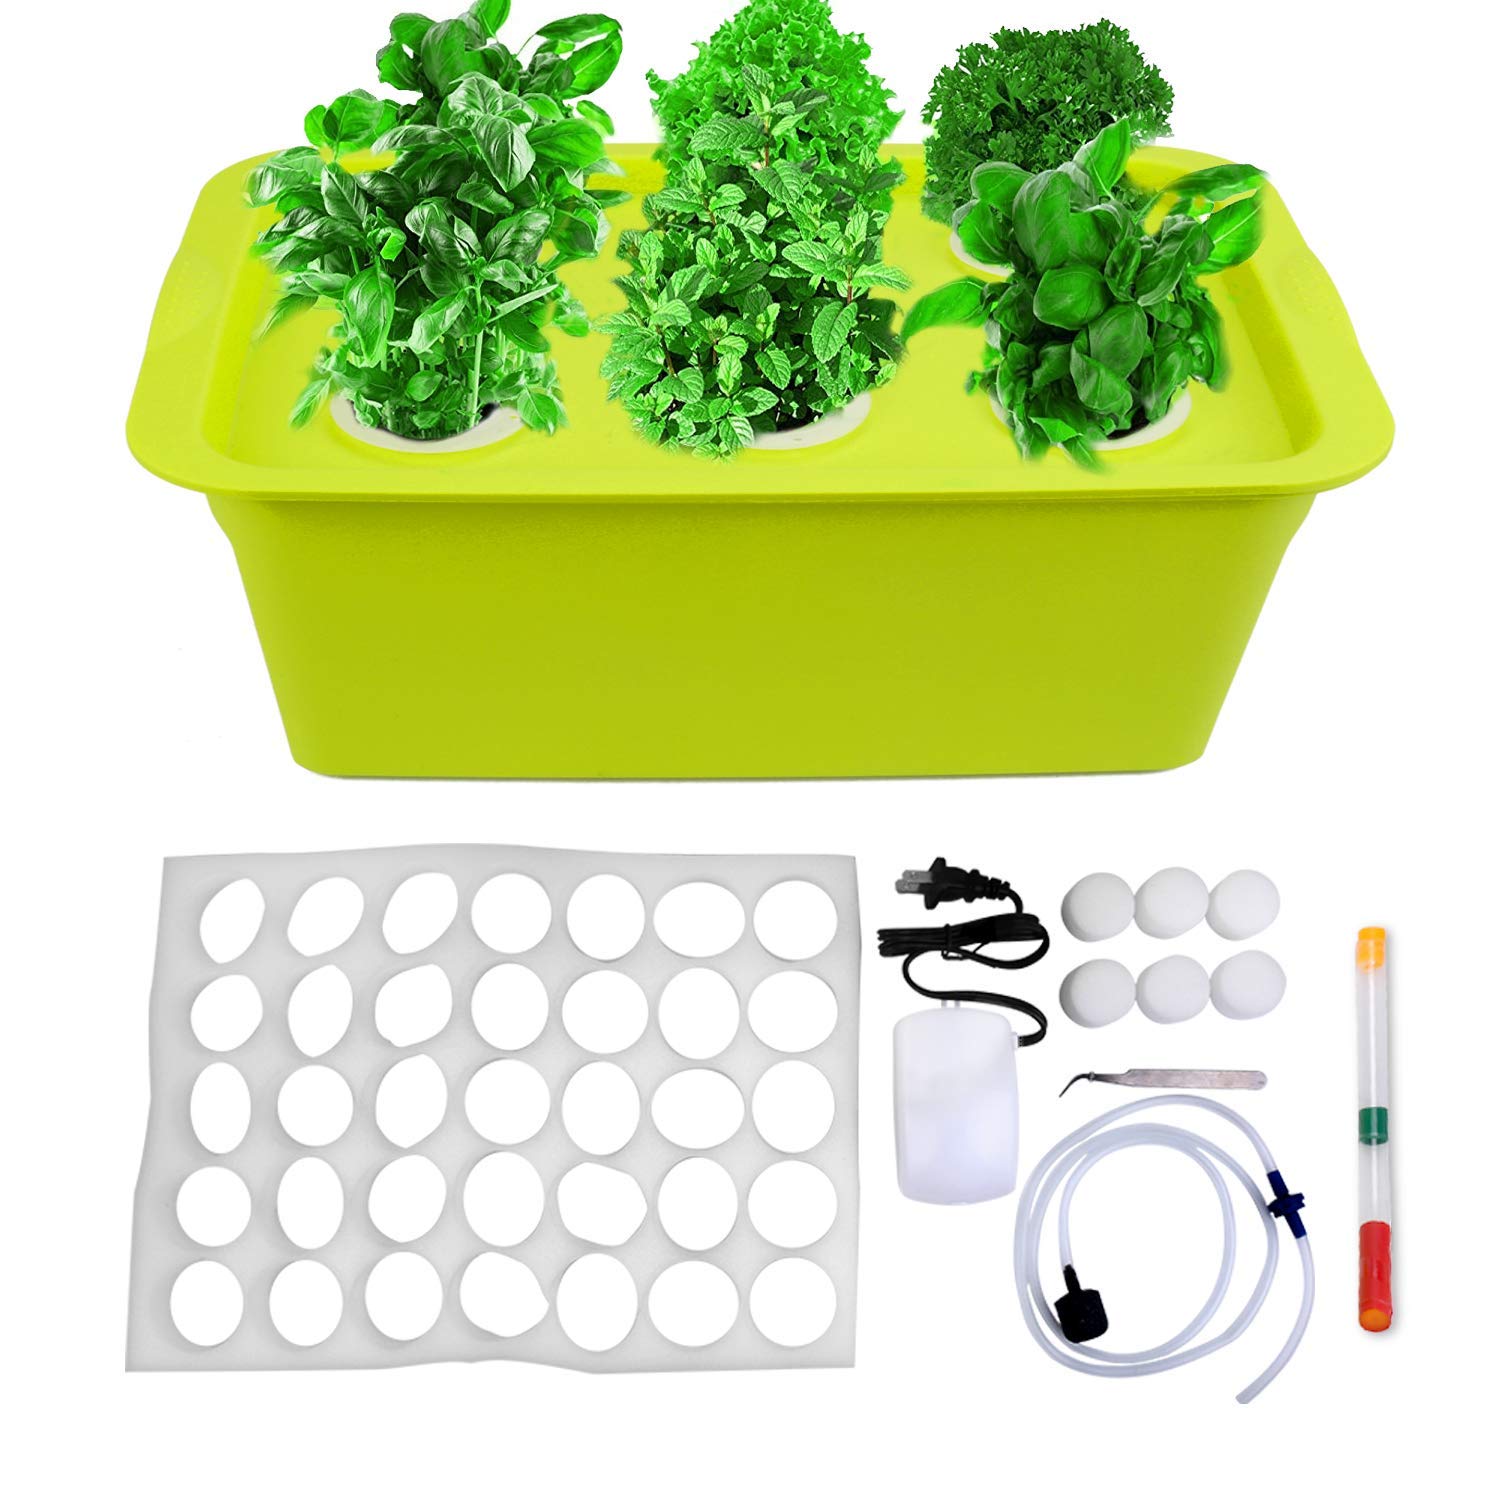
5. Ilovegrowing 9-Pod Herb Garden:
The Ilovegrowing 9-Pod Herb Garden is a compact and affordable hydroponic box that is perfect for growing herbs. It is easy to use and does not require a lot of maintenance. However, it has fewer plant options than some other systems and is not as customizable.
IV. Cultivating Success: Essential Tips for Using Your Hydroponic Box
Once you’ve chosen your ideal hydroponic box, it’s time to embark on your hydroponic adventure! Here are some essential tips to ensure your indoor garden thrives:
1. Location, Location, Location:
Select a suitable location for your hydroponic box. It should receive sufficient natural light or be positioned near a reliable source of artificial light from your grow lights. Ideally, the location should also be temperature-controlled and out of direct drafts.
2. Setting the Stage:
Follow the manufacturer’s instructions to properly set up your hydroponic box. This may involve filling the reservoir with nutrient solution, adding the chosen grow media, and installing the lighting system.
3. Planting Power:
Plant your chosen seeds or seedlings according to the instructions. Ensure the roots are gently nestled within the grow media and avoid overwatering during the initial stages.
4. Monitoring Marvels:
Regularly monitor your hydroponic box, checking the nutrient solution level, pH levels, and overall plant health. Adjust nutrient solution and pH as needed to maintain optimal growing conditions.
5. Harvesting Happiness:
Once your plants have reached maturity, it’s time to harvest your fresh, homegrown produce! Enjoy the fruits (or vegetables, or herbs) of your labor and savor the satisfaction of cultivating your own food.
V. Navigating Challenges: Troubleshooting Common Hydroponic Issues
Even the most meticulous hydroponic gardener may encounter occasional challenges. Here are some common hydroponic problems and solutions to help you navigate any hurdles that may arise:
1. Nutrient Problems:
Nutrient deficiencies or imbalances can hinder plant growth. Monitor nutrient levels and adjust the nutrient solution accordingly.
2. pH Problems:
Maintaining the proper pH level of the nutrient solution is crucial for nutrient uptake. Invest in a pH meter to monitor and adjust pH levels as needed.
3. Pests and Diseases:
While less common in hydroponics compared to soil-based gardening, pests and diseases can still occur. Regularly inspect your plants and take appropriate action using organic methods or approved hydroponic pesticides if necessary.
4. Root Rot:
Overwatering or poor aeration can lead to root rot. Ensure proper drainage and maintain optimal oxygen levels around the roots.
VI. Conclusion: Cultivating Freshness Within Your Reach
Hydroponic boxes offer a revolutionary and space-saving approach to cultivating fresh produce indoors. With a multitude of options available and a focus on user-friendliness, these compact gardens empower anyone to embark on a rewarding journey of hydroponic gardening, regardless of their experience level or spatial constraints. So, embrace the thrill of nurturing your own indoor oasis and savor the satisfaction of harvesting fresh, homegrown goodness within the comfort of your own small space.
Hydroponic box systems
I. Introduction
In the realm of home gardening, hydroponics has emerged as a revolutionary technique, offering a soilless approach to cultivating plants that has captivated the hearts of both novice and experienced gardeners alike. Hydroponic systems eliminate the need for traditional soil, instead suspending plant roots in nutrient-rich solutions, allowing for optimal growth and enhanced yields. For those who enjoy the thrill of DIY projects and the satisfaction of nurturing their own indoor gardens, DIY hydroponic boxes present an exciting and rewarding endeavor.
II. Understanding Hydroponics
Before embarking on your DIY hydroponic box adventure, it’s crucial to grasp the fundamental principles of hydroponics, the soil-free method of cultivating plants. In hydroponic systems, plant roots are suspended in a nutrient-rich solution, providing them with direct access to the essential elements they need for growth and development. This revolutionary technique offers several advantages over traditional soil gardening methods:
-
Faster Growth: Hydroponic plants often exhibit accelerated growth rates compared to their soil-grown counterparts due to the direct and consistent availability of nutrients and water.
-
Enhanced Yields: Hydroponic systems can produce significantly higher yields per square foot of growing space compared to traditional soil gardening methods. The efficient delivery of nutrients and the absence of soil-related limitations allow hydroponic plants to reach their full potential.
-
Reduced Water Usage: Hydroponics is an incredibly water-efficient method of gardening. Nutrient solutions are recirculated and reused, minimizing water waste and conserving this precious resource.
-
Pest and Disease Control: The absence of soil in hydroponic systems significantly reduces the risk of soil-borne pests and diseases. This contributes to healthier plants and minimizes the need for pesticides or fungicides.
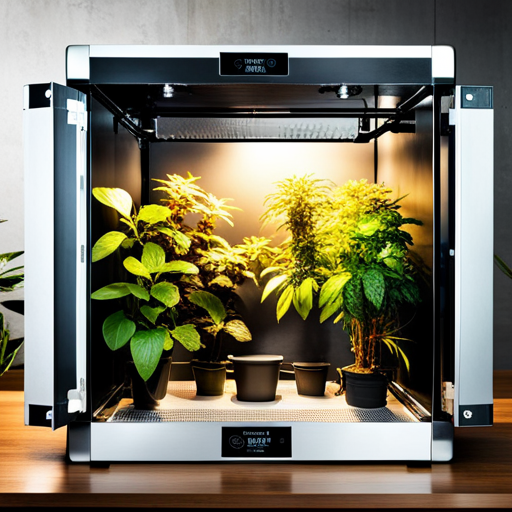
III. Designing Your DIY Hydroponic Box
The design of your DIY hydroponic box plays a pivotal role in the success of your indoor garden. Carefully consider the following factors to ensure your creation meets your needs and preferences:
1. Size and Shape: Determine the appropriate size and shape of your hydroponic box based on the available space in your home and the number of plants you intend to grow. Consider factors like vertical space utilization and ease of access when making your decision.
2. System Type: Choose the hydroponic system type that best suits your needs and preferences. Popular options include Deep Water Culture (DWC), Nutrient Film Technique (NFT), and Aeroponics. Each system has its own unique advantages and considerations.
-
Deep Water Culture (DWC): DWC systems are simple and effective, immersing plant roots directly in the nutrient solution.
-
Nutrient Film Technique (NFT): NFT systems continuously flow a thin film of nutrient solution over plant roots, promoting rapid growth and efficient nutrient uptake.
-
Aeroponics: Aeroponic systems suspend plant roots in air and mist them with nutrient solution, providing excellent aeration and preventing root rot.
3. Materials: Select durable and food-safe materials for constructing your hydroponic box. Common choices include PVC pipes, plastic containers, and food-grade plastic sheets. Ensure the materials are compatible with the nutrient solution you intend to use.
4. Lighting System: Plan for an adequate lighting system to provide the necessary light intensity and duration for your chosen plants. LED grow lights are a popular and energy-efficient option, offering a full spectrum of light that promotes healthy plant growth.
5. Nutrient Delivery System: Design a nutrient delivery system to distribute the nutrient solution evenly to the plant roots. This may involve pumps, tubing, and drippers or sprayers. The choice of system will depend on the hydroponic type you selected.
IV. Gathering the Necessary Materials
Once you’ve finalized your hydroponic box design, assemble the required materials to bring your vision to life. Ensure you have all the necessary tools and equipment to complete the construction process safely and efficiently.
1. Cutting and Drilling Tools: Acquire tools for cutting and drilling the materials you’ve selected, such as saws, drills, and hand tools. Choose tools that are appropriate for the materials you will be working with.
2. Measuring and Marking Tools: Gather measuring and marking tools like rulers, tape measures, and markers to ensure accurate construction. These tools will be essential for cutting materials to the correct dimensions and positioning components precisely.
3. Adhesives and Sealants: Choose appropriate adhesives and sealants to join the components of your hydroponic box securely and prevent leaks. Select adhesives that are compatible with the materials you are using and that are safe for use in hydroponic systems.
4. Hydroponic Components: Procure the necessary hydroponic components, such as net pots, grow media (clay pebbles, perlite, etc.), and nutrient solution. Choose net pots that are suitable for the size of your plants and select a grow media that provides adequate drainage and aeration.
V. Step-by-Step Construction Guide
Now that you have a firm grasp of the design considerations and necessary materials, let’s delve into the exciting process of constructing your DIY hydroponic box! Follow these detailed instructions, taking your time and ensuring each step is completed accurately.
1. Cut and Prepare Materials:
-
Meticulously cut the materials you’ve chosen according to your design specifications. Utilize the measuring and marking tools you gathered earlier to ensure precise dimensions for each component.
-
Debur any rough edges created during the cutting process using sandpaper or a filing tool. This will create a smoother finish and prevent potential injury while handling the components.
2. Assemble the Frame:
- Construct the frame of your hydroponic box using the chosen materials. Secure the frame components firmly using the appropriate adhesives or fasteners, ensuring a strong and stable structure.
3. Install the Reservoir:
- Mount the reservoir, which will hold the nutrient solution that nourishes your plants, at the designated location in the base of the hydroponic box. Ensure the reservoir is properly sealed and level to prevent leaks and maintain consistent nutrient distribution throughout the system.
4. Create the Planting Area:
- Establish the planting area above the reservoir, where your plants will reside. This may involve installing a net pot grid within the frame, creating a platform for placing individual pots, or implementing a design specific to your chosen hydroponic system (e.g., a channel for NFT or misting nozzles for Aeroponics).
5. Integrate the Nutrient Delivery System:
- Install the nutrient delivery system, meticulously connecting it to the reservoir. Utilize tubing or pipes to distribute the nutrient solution throughout the planting area. Consider using drippers or sprayers at the end of the tubing to deliver the solution directly to the plant roots. Ensure the chosen delivery method aligns with your hydroponic system type (e.g., pumps for NFT or a pressurized misting system for Aeroponics).
6. Attach the Lighting System:
- Mount the grow lights in the optimal position above the planting area. Ensure they are properly secured and provide adequate light coverage for your chosen plants. Research the specific light requirements of your plants to determine the appropriate lighting intensity and duration. LED grow lights are a popular choice due to their energy efficiency and ability to provide a full spectrum of light that promotes healthy plant growth.
VI. Testing and Preparation for Planting
Before introducing your precious plants to their new hydroponic home, it’s crucial to conduct thorough testing to ensure the system is functioning flawlessly.
1. Nutrient Solution Preparation:
- Prepare the nutrient solution according to the instructions provided by the nutrient manufacturer. Ensure you dilute the concentrated solution to the appropriate ratio for your plants and adjust the pH level to fall within the recommended range, typically between 5.5 and 6.5. A pH meter will be helpful for this step, as it allows for precise measurement and adjustment.
2. System Check:
- Run the nutrient delivery system to check for leaks and ensure even distribution of the nutrient solution throughout the planting area. Address any leaks promptly to prevent damage and wasted nutrients. Test the lighting system to confirm proper operation and adjust the positioning if necessary to provide optimal coverage for your plants.
3. Cleaning and Sanitization:
- Clean and sanitize all components of the hydroponic box to eliminate any potential contaminants that could harm your plants. Use a mild bleach solution or a hydroponic system cleaner, following the manufacturer’s instructions for dilution and application. Rinse all components thoroughly with clean water after sanitization to remove any cleaning solution residue.
4. Planting Preparation:
- Choose suitable seedlings or seeds for your hydroponic system. Pre-soak seeds according to the seed packet instructions if necessary. Prepare your chosen grow media, such as clay pebbles or perlite, by rinsing them thoroughly to remove any dust or debris that could hinder plant growth.
VII. Planting and Initial Care
With your DIY hydroponic box meticulously constructed, tested, and prepared, it’s time to introduce your plant life! Here’s how to establish your thriving indoor garden:
1. Planting:
- Carefully place your chosen seedlings or germinated seeds into the net pots, ensuring the roots are gently nestled within the grow media. If using seeds, plant them at the recommended depth according to the seed packet instructions.
2. Initial Watering:
- Provide your newly planted seedlings or seeds with a gentle watering using clean, preferably pH-balanced water. Avoid overwatering, as this can damage delicate roots. Aim to keep the grow media moist but not soggy.
3. Lighting Adjustment:
- Adjust the lighting system to provide the appropriate light intensity and duration for your chosen plants. Many LED grow lights offer adjustable settings to cater to different plant needs. Refer to plant-specific growing guides or consult online resources for optimal lighting recommendations.
Hydroponic grow boxes
I. Introduction
In the realm of home gardening, hydroponics has emerged as a revolutionary technique, offering a soilless approach to cultivating plants that has captivated the hearts of both novice and experienced gardeners alike. Hydroponic systems eliminate the need for traditional soil, instead suspending plant roots in nutrient-rich solutions, allowing for optimal growth and enhanced yields. For those who enjoy the thrill of DIY projects and the satisfaction of nurturing their own indoor gardens, DIY hydroponic boxes present an exciting and rewarding endeavor.
II. Understanding Hydroponics
Before embarking on your DIY hydroponic box adventure, it’s crucial to grasp the fundamental principles of hydroponics, the soil-free method of cultivating plants. In hydroponic systems, plant roots are suspended in a nutrient-rich solution, providing them with direct access to the essential elements they need for growth and development. This revolutionary technique offers several advantages over traditional soil gardening methods:
-
Faster Growth: Hydroponic plants often exhibit accelerated growth rates compared to their soil-grown counterparts. The direct and consistent availability of nutrients and water in the nutrient solution contributes to this enhanced growth.
-
Enhanced Yields: Hydroponic systems can produce significantly higher yields per square foot of growing space compared to traditional soil gardening methods. The efficient delivery of nutrients and the absence of soil-related limitations allow hydroponic plants to reach their full potential.
-
Reduced Water Usage: Hydroponics is an incredibly water-efficient method of gardening. Nutrient solutions are recirculated and reused, minimizing water waste and conserving this precious resource.
-
Pest and Disease Control: The absence of soil in hydroponic systems significantly reduces the risk of soil-borne pests and diseases. This contributes to healthier plants and minimizes the need for pesticides or fungicides.
III. Designing Your DIY Hydroponic Box
The design of your DIY hydroponic box plays a pivotal role in the success of your indoor garden. Carefully consider the following factors to ensure your creation meets your needs and preferences:
1. Size and Shape: Determine the appropriate size and shape of your hydroponic box based on the available space in your home and the number of plants you intend to grow. Consider factors like vertical space utilization and ease of access when making your decision.
2. System Type: Choose the hydroponic system type that best suits your needs and preferences. Popular options include Deep Water Culture (DWC), Nutrient Film Technique (NFT), and Aeroponics. Each system has its own unique advantages and considerations.
-
Deep Water Culture (DWC): DWC systems are simple and effective, immersing plant roots directly in the nutrient solution.
-
Nutrient Film Technique (NFT): NFT systems continuously flow a thin film of nutrient solution over plant roots, promoting rapid growth and efficient nutrient uptake.
-
Aeroponics: Aeroponic systems suspend plant roots in air and mist them with nutrient solution, providing excellent aeration and preventing root rot.
3. Materials: Select durable and food-safe materials for constructing your hydroponic box. Common choices include PVC pipes, plastic containers, and food-grade plastic sheets. Ensure the materials are compatible with the nutrient solution you intend to use.
4. Lighting System: Plan for an adequate lighting system to provide the necessary light intensity and duration for your chosen plants. LED grow lights are a popular and energy-efficient option, offering a full spectrum of light that promotes healthy plant growth.
5. Nutrient Delivery System: Design a nutrient delivery system to distribute the nutrient solution evenly to the plant roots. This may involve pumps, tubing, and drippers or sprayers. The choice of system will depend on the hydroponic type you selected.

IV. Gathering the Necessary Materials
Once you’ve finalized your hydroponic box design, assemble the required materials to bring your vision to life. Ensure you have all the necessary tools and equipment to complete the construction process safely and efficiently.
-
Cutting and Drilling Tools: Acquire tools for cutting and drilling the materials you’ve selected, such as saws, drills, and hand tools. Choose tools that are appropriate for the materials you will be working with.
-
Measuring and Marking Tools: Gather measuring and marking tools like rulers, tape measures, and markers to ensure accurate construction. These tools will be essential for cutting materials to the correct dimensions and positioning components precisely.
-
Adhesives and Sealants: Choose appropriate adhesives and sealants to join the components of your hydroponic box securely and prevent leaks. Select adhesives that are compatible with the materials you are using and that are safe for use in hydroponic systems.
-
Hydroponic Components: Procure the necessary hydroponic components, such as net pots, grow media (clay pebbles, perlite, etc.), and nutrient solution. Choose net pots that are suitable for the size of your plants and select a grow media that provides adequate drainage and aeration.
-
V. Step-by-Step Construction Guide
Now that you have a firm grasp of the design considerations and necessary materials, let’s delve into the exciting process of constructing your DIY hydroponic box! Follow these detailed instructions, taking your time and ensuring each step is completed accurately.
1. Cut and Prepare Materials:
-
Meticulously cut the materials you’ve chosen according to your design specifications. Utilize the measuring and marking tools to ensure precise dimensions.
-
Debur any rough edges created during the cutting process using sandpaper or a filing tool. This will create a smoother finish and prevent potential injury while handling the components.
2. Assemble the Frame:
- Construct the frame of your hydroponic box using the chosen materials. Secure the frame components firmly using the appropriate adhesives or fasteners, ensuring a strong and stable structure.
3. Install the Reservoir:
- Mount the reservoir, which will hold the nutrient solution that nourishes your plants, at the designated location in the base of the hydroponic box. Ensure the reservoir is properly sealed and level to prevent leaks and maintain consistent nutrient distribution.
4. Create the Planting Area:
- Establish the planting area above the reservoir, where your plants will reside. This may involve installing a net pot grid within the frame, creating a platform for placing individual pots, or implementing a design specific to your chosen hydroponic system.
5. Integrate the Nutrient Delivery System:
- Install the nutrient delivery system, meticulously connecting it to the reservoir. Utilize tubing or pipes to distribute the nutrient solution throughout the planting area. Consider using drippers or sprayers at the end of the tubing to deliver the solution directly to the plant roots.
6. Attach the Lighting System:
- Mount the grow lights in the optimal position above the planting area. Ensure they are properly secured and provide adequate light coverage for your chosen plants. Research the specific light requirements of your plants to determine the appropriate lighting intensity and duration.
VI. Testing and Preparation for Planting
Before introducing your precious plants to their new hydroponic home, it’s crucial to conduct thorough testing to ensure the system is functioning flawlessly.
1. Nutrient Solution Preparation:
- Prepare the nutrient solution according to the instructions provided by the nutrient manufacturer. Ensure you dilute the concentrated solution to the appropriate ratio for your plants and adjust the pH level to fall within the recommended range, typically between 5.5 and 6.5. A pH meter will be helpful for this step.
2. System Check:
- Run the nutrient delivery system to check for leaks and ensure even distribution of the nutrient solution throughout the planting area. Address any leaks promptly to prevent damage and wasted nutrients. Test the lighting system to confirm proper operation and adjust the positioning if necessary.
3. Cleaning and Sanitization:
- Clean and sanitize all components of the hydroponic box to eliminate any potential contaminants that could harm your plants. Use a mild bleach solution or a hydroponic system cleaner, following the manufacturer’s instructions for dilution and application. Rinse all components thoroughly with clean water after sanitization.
4. Planting Preparation:
- Choose suitable seedlings or seeds for your hydroponic system. Pre-soak seeds according to the seed packet instructions if necessary. Prepare your chosen grow media, such as clay pebbles or perlite, by rinsing them thoroughly to remove any dust or debris.
VII. Planting and Initial Care
With your DIY hydroponic box meticulously constructed, tested, and prepared, it’s time to introduce your plant life! Here’s how to establish your thriving indoor garden:
1. Planting:
- Carefully place your chosen seedlings or germinated seeds into the net pots, ensuring the roots are gently nestled within the grow media. If using seeds, plant them at the recommended depth according to the seed packet instructions.
2. Initial Watering:
- Provide your newly planted seedlings or seeds with a gentle watering using clean, preferably pH-balanced water. Avoid overwatering, as this can damage delicate roots. Aim to keep the grow media moist but not soggy.
3. Lighting Adjustment:
- Adjust the lighting system to provide the appropriate light intensity and duration for your chosen plants. Many LED grow lights offer adjustable settings to cater to different plant needs. Refer to plant-specific growing guides or consult online resources for optimal lighting recommendations.
VIII. Ongoing Maintenance and Monitoring
The journey doesn’t stop after planting! Consistent care and monitoring are essential for the continued success of your hydroponic garden.
1. Nutrient Management:
- Regularly monitor the nutrient solution level in the reservoir and top it up with fresh solution as needed. Periodically test and adjust the pH level of the solution to ensure it remains within the optimal range.
2. Plant Monitoring:
- Closely observe your plants for signs of growth and adjust lighting or nutrient levels as necessary. Prune any diseased or overgrown foliage to maintain healthy plant development.
-

DIY hydroponic boxes
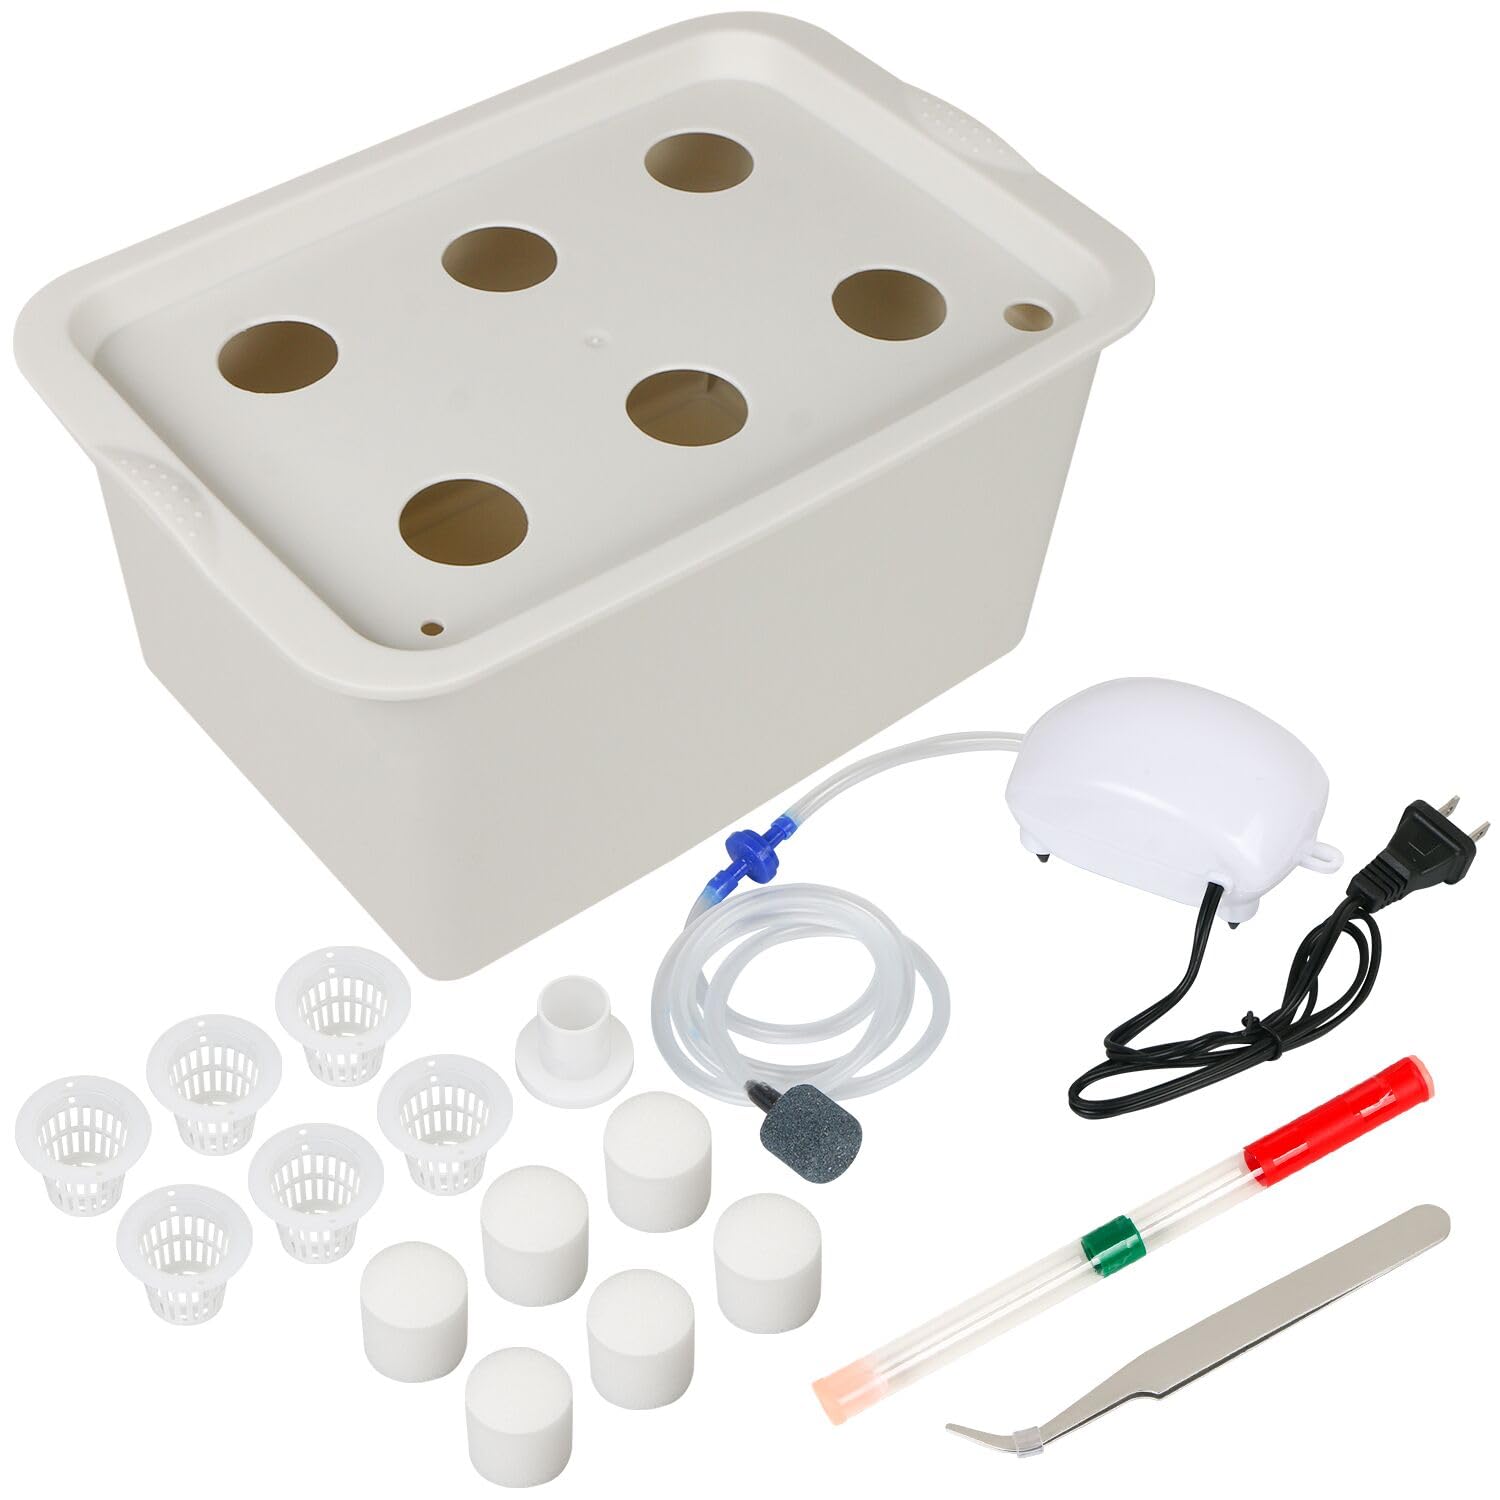
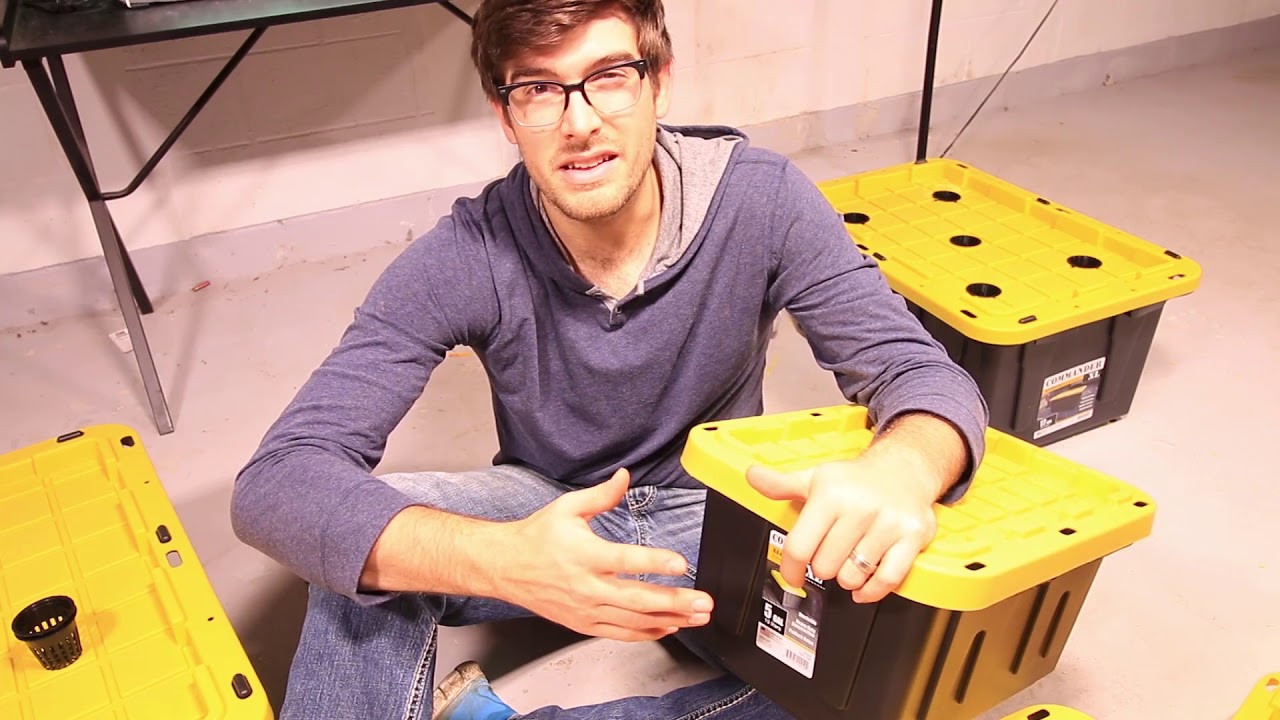
I. Introduction
In the realm of home gardening, hydroponics has emerged as a revolutionary technique, offering a soilless approach to cultivating plants that has captivated the hearts of both novice and experienced gardeners alike. Hydroponic systems eliminate the need for traditional soil, instead suspending plant roots in nutrient-rich solutions, allowing for optimal growth and enhanced yields. For those who enjoy the thrill of DIY projects and the satisfaction of nurturing their own indoor gardens, DIY hydroponic boxes present an exciting and rewarding endeavor.
II. Understanding Hydroponics
Before embarking on your DIY hydroponic box adventure, it’s crucial to grasp the fundamental principles of hydroponics, the soil-free method of cultivating plants. In hydroponic systems, plant roots are suspended in a nutrient-rich solution, providing them with direct access to the essential elements they need for growth and development. This revolutionary technique offers several advantages over traditional soil gardening methods:
-
Faster Growth: Hydroponic plants often exhibit accelerated growth rates compared to their soil-grown counterparts. The direct and consistent availability of nutrients and water in the nutrient solution contributes to this enhanced growth.
-
Enhanced Yields: Hydroponic systems can produce significantly higher yields per square foot of growing space compared to traditional soil gardening methods. The efficient delivery of nutrients and the absence of soil-related limitations allow hydroponic plants to reach their full potential.
-
Reduced Water Usage: Hydroponics is an incredibly water-efficient method of gardening. Nutrient solutions are recirculated and reused, minimizing water waste and conserving this precious resource.
-
Pest and Disease Control: The absence of soil in hydroponic systems significantly reduces the risk of soil-borne pests and diseases. This contributes to healthier plants and minimizes the need for pesticides or fungicides.
III. Designing Your DIY Hydroponic Box
The design of your DIY hydroponic box plays a pivotal role in the success of your indoor garden. Carefully consider the following factors to ensure your creation meets your needs and preferences:
1. Size and Shape: Determine the appropriate size and shape of your hydroponic box based on the available space in your home and the number of plants you intend to grow. Consider factors like vertical space utilization and ease of access when making your decision.
2. System Type: Choose the hydroponic system type that best suits your needs and preferences. Popular options include Deep Water Culture (DWC), Nutrient Film Technique (NFT), and Aeroponics. Each system has its own unique advantages and considerations.
-
Deep Water Culture (DWC): DWC systems are simple and effective, immersing plant roots directly in the nutrient solution.
-
Nutrient Film Technique (NFT): NFT systems continuously flow a thin film of nutrient solution over plant roots, promoting rapid growth and efficient nutrient uptake.
-
Aeroponics: Aeroponic systems suspend plant roots in air and mist them with nutrient solution, providing excellent aeration and preventing root rot.
3. Materials: Select durable and food-safe materials for constructing your hydroponic box. Common choices include PVC pipes, plastic containers, and food-grade plastic sheets. Ensure the materials are compatible with the nutrient solution you intend to use.
4. Lighting System: Plan for an adequate lighting system to provide the necessary light intensity and duration for your chosen plants. LED grow lights are a popular and energy-efficient option, offering a full spectrum of light that promotes healthy plant growth.
5. Nutrient Delivery System: Design a nutrient delivery system to distribute the nutrient solution evenly to the plant roots. This may involve pumps, tubing, and drippers or sprayers. The choice of system will depend on the hydroponic type you selected.
IV. Gathering the Necessary Materials
Once you’ve finalized your hydroponic box design, assemble the required materials to bring your vision to life. Ensure you have all the necessary tools and equipment to complete the construction process safely and efficiently.
-
Cutting and Drilling Tools: Acquire tools for cutting and drilling the materials you’ve selected, such as saws, drills, and hand tools. Choose tools that are appropriate for the materials you will be working with.
-
Measuring and Marking Tools: Gather measuring and marking tools like rulers, tape measures, and markers to ensure accurate construction. These tools will be essential for cutting materials to the correct dimensions and positioning components precisely.
-
Adhesives and Sealants: Choose appropriate adhesives and sealants to join the components of your hydroponic box securely and prevent leaks. Select adhesives that are compatible with the materials you are using and that are safe for use in hydroponic systems.
-
Hydroponic Components: Procure the necessary hydroponic components, such as net pots, grow media (clay pebbles, perlite, etc.), and nutrient solution. Choose net pots that are suitable for the size of your plants and select a grow media that provides adequate drainage and aeration.
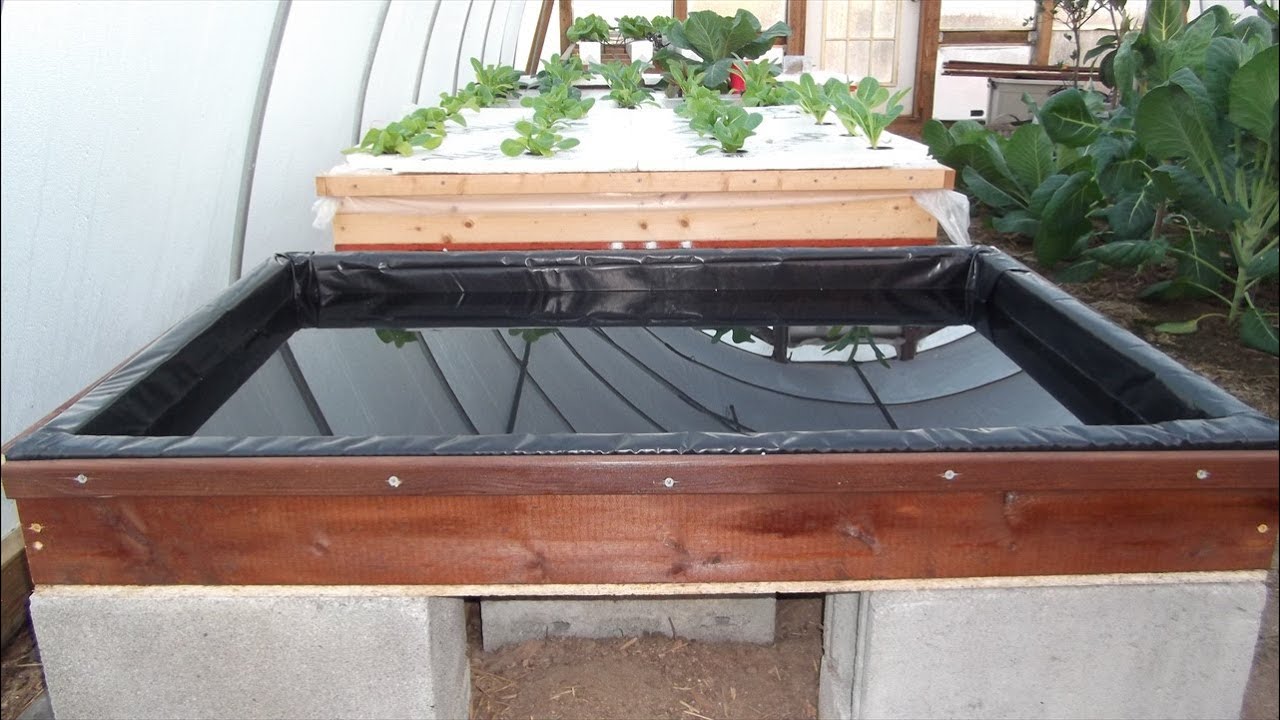
-
V. Step-by-Step Construction Guide
Now that you have a firm grasp of the design considerations and necessary materials, let’s delve into the exciting process of constructing your DIY hydroponic box! Follow these detailed instructions, taking your time and ensuring each step is completed accurately.
1. Cut and Prepare Materials:
-
Meticulously cut the materials you’ve chosen according to your design specifications. Utilize the measuring and marking tools to ensure precise dimensions.
-
Debur any rough edges created during the cutting process using sandpaper or a filing tool. This will create a smoother finish and prevent potential injury while handling the components.
2. Assemble the Frame:
- Construct the frame of your hydroponic box using the chosen materials. Secure the frame components firmly using the appropriate adhesives or fasteners, ensuring a strong and stable structure.
3. Install the Reservoir:
- Mount the reservoir, which will hold the nutrient solution that nourishes your plants, at the designated location in the base of the hydroponic box. Ensure the reservoir is properly sealed and level to prevent leaks and maintain consistent nutrient distribution.
4. Create the Planting Area:
- Establish the planting area above the reservoir, where your plants will reside. This may involve installing a net pot grid within the frame, creating a platform for placing individual pots, or implementing a design specific to your chosen hydroponic system.
5. Integrate the Nutrient Delivery System:
- Install the nutrient delivery system, meticulously connecting it to the reservoir. Utilize tubing or pipes to distribute the nutrient solution throughout the planting area. Consider using drippers or sprayers at the end of the tubing to deliver the solution directly to the plant roots.
6. Attach the Lighting System:
- Mount the grow lights in the optimal position above the planting area. Ensure they are properly secured and provide adequate light coverage for your chosen plants. Research the specific light requirements of your plants to determine the appropriate lighting intensity and duration.
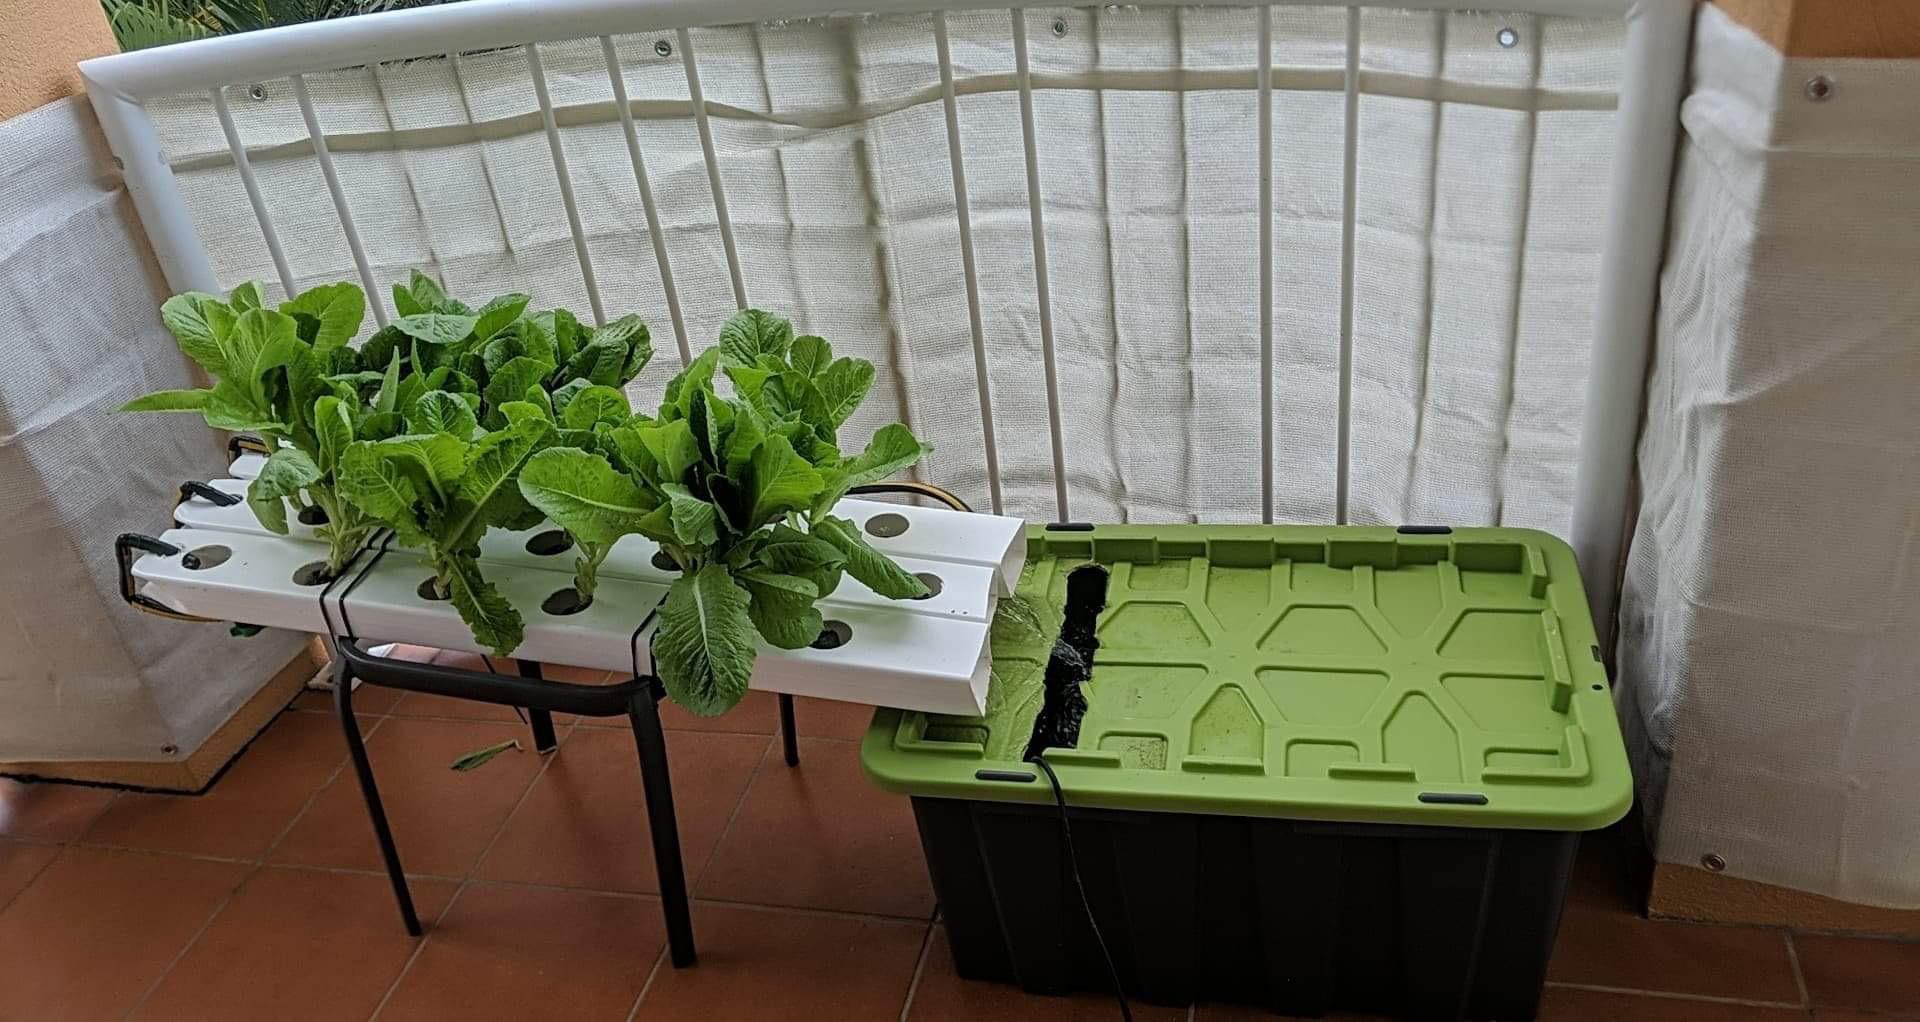
VI. Testing and Preparation for Planting
Before introducing your precious plants to their new hydroponic home, it’s crucial to conduct thorough testing to ensure the system is functioning flawlessly.
1. Nutrient Solution Preparation:
- Prepare the nutrient solution according to the instructions provided by the nutrient manufacturer. Ensure you dilute the concentrated solution to the appropriate ratio for your plants and adjust the pH level to fall within the recommended range, typically between 5.5 and 6.5. A pH meter will be helpful for this step.
2. System Check:
- Run the nutrient delivery system to check for leaks and ensure even distribution of the nutrient solution throughout the planting area. Address any leaks promptly to prevent damage and wasted nutrients. Test the lighting system to confirm proper operation and adjust the positioning if necessary.
3. Cleaning and Sanitization:
- Clean and sanitize all components of the hydroponic box to eliminate any potential contaminants that could harm your plants. Use a mild bleach solution or a hydroponic system cleaner, following the manufacturer’s instructions for dilution and application. Rinse all components thoroughly with clean water after sanitization.
4. Planting Preparation:
- Choose suitable seedlings or seeds for your hydroponic system. Pre-soak seeds according to the seed packet instructions if necessary. Prepare your chosen grow media, such as clay pebbles or perlite, by rinsing them thoroughly to remove any dust or debris.
VII. Planting and Initial Care
With your DIY hydroponic box meticulously constructed, tested, and prepared, it’s time to introduce your plant life! Here’s how to establish your thriving indoor garden:
1. Planting:
- Carefully place your chosen seedlings or germinated seeds into the net pots, ensuring the roots are gently nestled within the grow media. If using seeds, plant them at the recommended depth according to the seed packet instructions.
2. Initial Watering:
- Provide your newly planted seedlings or seeds with a gentle watering using clean, preferably pH-balanced water. Avoid overwatering, as this can damage delicate roots. Aim to keep the grow media moist but not soggy.
3. Lighting Adjustment:
- Adjust the lighting system to provide the appropriate light intensity and duration for your chosen plants. Many LED grow lights offer adjustable settings to cater to different plant needs. Refer to plant-specific growing guides or consult online resources for optimal lighting recommendations.
VIII. Ongoing Maintenance and Monitoring
The journey doesn’t stop after planting! Consistent care and monitoring are essential for the continued success of your hydroponic garden.
-
Nutrient Management: Regularly monitor the nutrient solution level in the reservoir and top it up with fresh solution as needed. Periodically test and adjust the pH level of the solution to ensure it remains within the optimal range.
-
Plant Monitoring: Closely observe your plants for signs of growth and adjust lighting or nutrient levels as necessary. Prune any diseased or overgrown foliage to maintain healthy plant development.
-
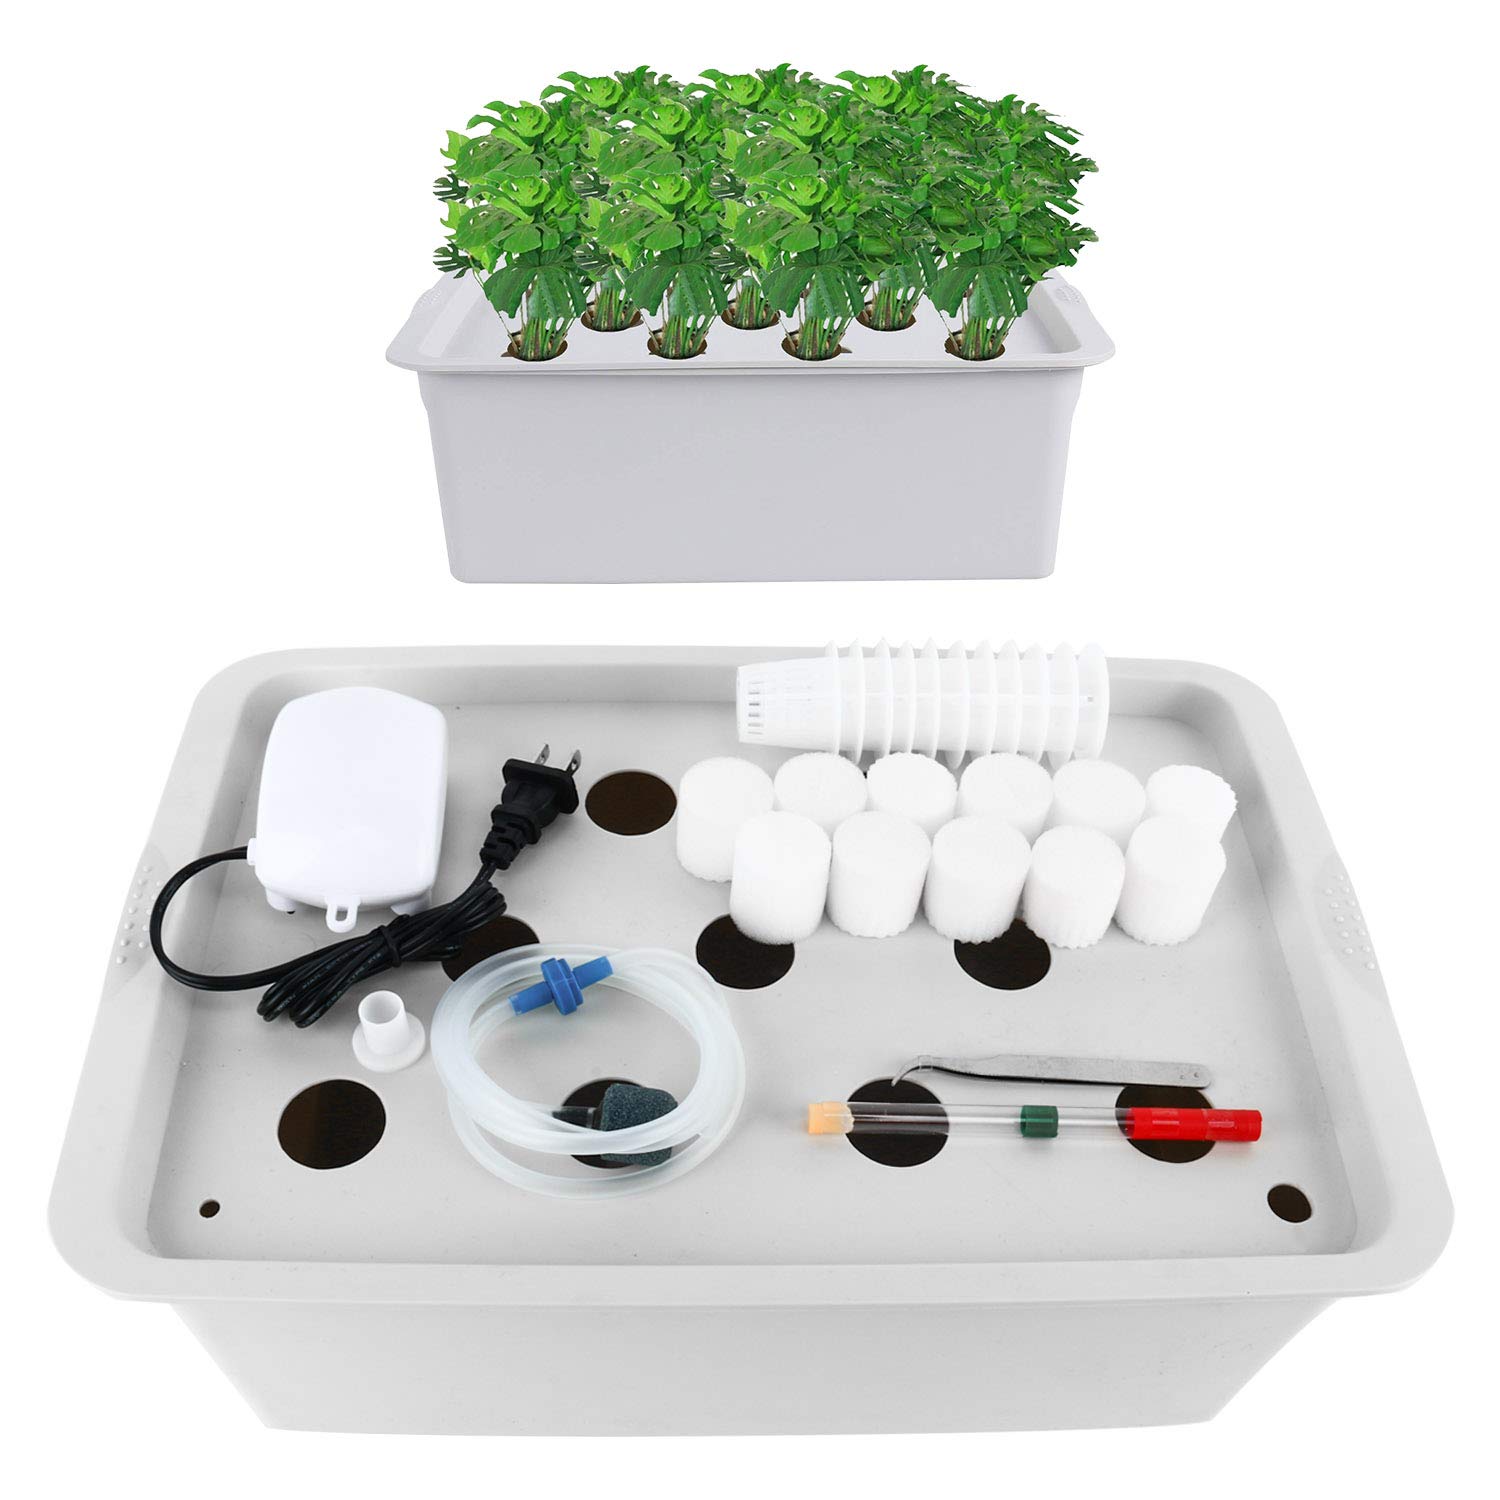
Best hydroponic boxes for beginners
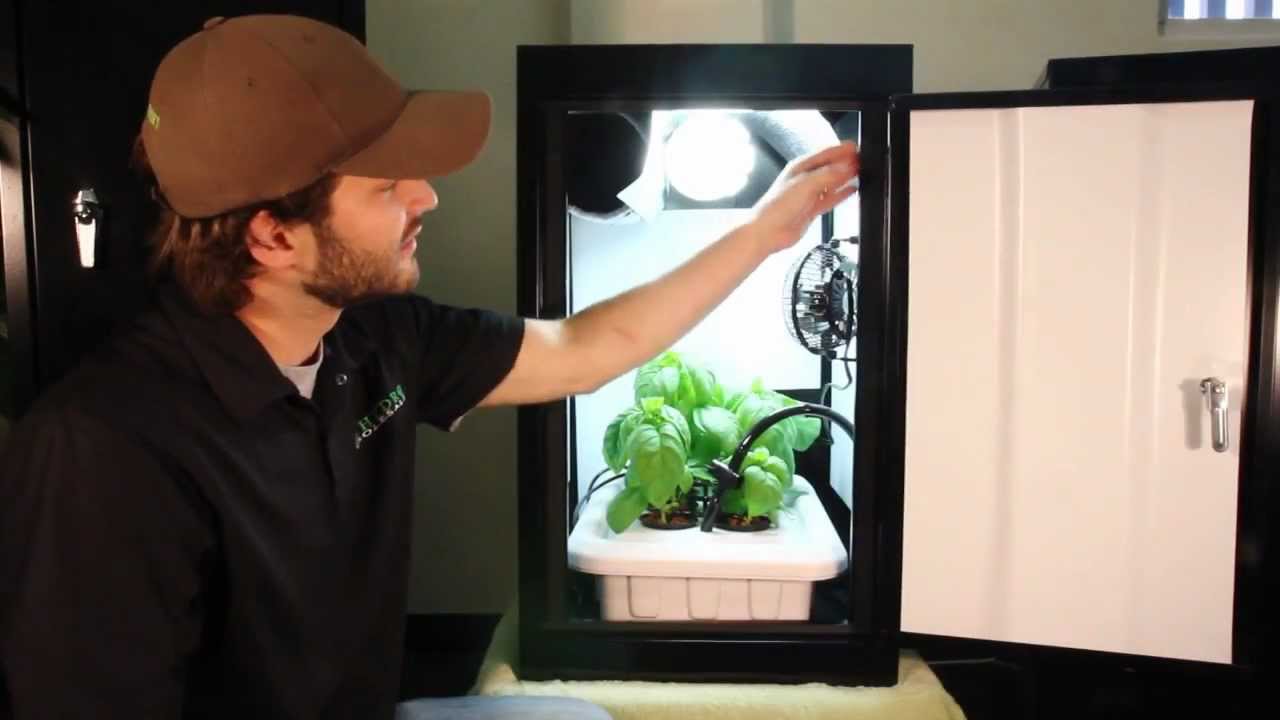

I. Introduction
In the realm of gardening, hydroponics has emerged as a revolutionary technique, offering a soilless approach to cultivating plants that has captivated the hearts of both novice and experienced gardeners alike. Hydroponic systems eliminate the need for traditional soil, instead suspending plant roots in nutrient-rich solutions, allowing for optimal growth and enhanced yields. For beginners venturing into the world of hydroponics, hydroponic boxes serve as an ideal gateway, providing a convenient and user-friendly platform to embark on this exciting indoor gardening journey.
II. Choosing the Right Hydroponic Box
As you embark on your hydroponic adventure, selecting the right hydroponic box is crucial for a successful and enjoyable experience. Several factors merit consideration to ensure you choose a box that aligns with your needs and preferences.
1. Size: The size of your hydroponic box should be carefully chosen based on the available space in your home and the number of plants you intend to grow. Compact systems are ideal for limited spaces, while larger boxes can accommodate a wider variety of plants.
2. System Type: Hydroponic systems come in various configurations, each with its unique advantages and considerations. Deep Water Culture (DWC) systems immerse plant roots directly in nutrient solution, offering simplicity and effectiveness. Nutrient Film Technique (NFT) systems continuously flow a thin film of nutrient solution over plant roots, promoting rapid growth. Aeroponic systems suspend plant roots in air and mist them with nutrient solution, providing excellent aeration and preventing root rot.
3. Features: Essential features to look for in a hydroponic box include:
-
Lighting Systems: Adequate lighting is crucial for photosynthesis and plant growth. Choose a box with integrated grow lights or the ability to connect external lighting systems.
-
Water Pumps: Water pumps circulate nutrient solution throughout the system, ensuring proper nutrient delivery to plant roots. Select a pump with sufficient capacity for the size of your hydroponic box.
-
Nutrient Dosing Systems: Automated nutrient dosing systems simplify the process of maintaining the optimal nutrient concentration in the solution, reducing the risk of over- or under-fertilization.
4. Price: Hydroponic boxes range in price depending on their size, features, and brand. Set a realistic budget and consider the value proposition of different options, ensuring you get the most out of your investment.

III. Top Picks for Beginner Hydroponic Kits
To help you navigate the diverse array of hydroponic boxes available, here’s a selection of top picks for beginner hydroponic enthusiasts:
1. AeroGarden Harvest 6-Pod Indoor Hydroponic Garden: This user-friendly kit provides everything you need to get started, including a self-watering system, integrated grow lights, and pre-seeded pods with herbs and vegetables.
2. Click and Grow Garden 3.0 Hydroponic Growing System: This sleek and compact system features a modular design, allowing you to expand your garden as your needs grow. It also offers smart features like automated nutrient dosing and a control panel for monitoring plant progress.
3. LettuceGrow The Complete Hydroponic Garden Kit: This all-inclusive kit takes the guesswork out of hydroponic gardening, providing pre-seeded pods, a self-regulating water system, and LED grow lights for optimal plant growth.
4. iDOO Hydroponics Growing System 9 Pods Indoor Herb Garden Kit: This space-saving system is perfect for small kitchens or apartments. It features a self-watering system, adjustable LED grow lights, and a touchscreen control panel for easy operation.
5. HerbLife Hydroponics Growing System 12 Plant Sites Indoor Herb Garden Kit: This versatile system accommodates a variety of herbs and vegetables, making it ideal for those who want to grow a larger selection of plants. It features a self-watering system, adjustable LED grow lights, and a large water reservoir for extended nutrient supply.
IV. Setting Up Your Hydroponic Box
Once you’ve chosen your ideal hydroponic box, it’s time to embark on the exciting journey of setting it up and preparing it for your plants.
1. Unpacking and Assembly: Carefully unpack your hydroponic box and follow the assembly instructions provided by the manufacturer. Ensure all components are securely fastened and properly connected.
2. Planting Seeds or Seedlings: Choose seeds or seedlings suitable for hydroponic cultivation. If using seeds, follow the germination instructions provided by the seed packet. If using seedlings, gently place them in the designated planting holes or net pots.
3. Adding Nutrients: Prepare the nutrient solution according to the instructions provided by the manufacturer. Fill the system’s reservoir with the prepared nutrient solution, ensuring the level is sufficient to reach the plant roots.
4. Lighting Adjustments: Adjust the lighting system to provide the appropriate light intensity and duration for your chosen plants. Most hydroponic boxes offer adjustable lighting settings to cater to different plant needs. Refer to the plant-specific growing guide or consult the hydroponic box’s manual for recommended lighting schedules.
5. Monitoring and Maintenance: Regularly monitor your plants for signs of growth and adjust the nutrient solution level or lighting settings as needed. Top up the reservoir with water or fresh nutrient solution to maintain proper levels. Observe for any signs of pests or diseases and take appropriate action to address them promptly.
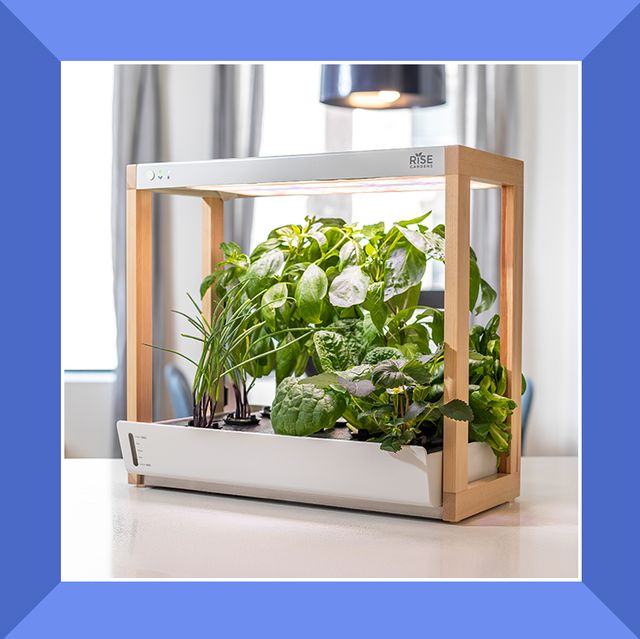
V. Growing and Harvesting Your Hydroponic Crops
With proper care and maintenance, your hydroponic box will soon be teeming with flourishing plants. Here’s how to nurture them to harvest and enjoy the fruits (or vegetables!) of your labor.
1. Plant Care: Provide ongoing care for your hydroponic plants. Regularly monitor water levels and nutrient solution concentration. Adjust the nutrient solution as needed to ensure your plants receive the optimal balance of essential elements. Prune any diseased or overgrown foliage to maintain healthy plant growth.
2. Harvesting Techniques: Once your plants reach maturity, it’s time to harvest! The harvesting techniques will vary depending on the type of plant you’re growing. For leafy greens, carefully harvest individual leaves as needed. For herbs, harvest stems just above a node to encourage further growth.
3. Tips for Success: Here are some additional tips to maximize your success with hydroponic gardening:
- Start with easy-to-grow plants: Herbs like basil, mint, and parsley are excellent choices for beginners due to their relatively simple requirements.
- Maintain consistent water temperature: Cooler water temperatures can slow down plant growth. Aim for a water temperature range between 68°F and 78°F (20°C and 26°C).
- Provide good air circulation: Proper air circulation helps prevent fungal diseases and promotes healthy root development. Some hydroponic boxes feature built-in fans, while others may require additional circulation methods like oscillating fans.
VI. Troubleshooting Common Hydroponic Issues
Even with careful planning, occasional challenges can arise in hydroponic gardening. Here’s how to address some common hydroponic issues:
1. Nutrient Deficiencies: Signs of nutrient deficiencies can include stunted growth, yellowing leaves, or discoloration. Identify the specific nutrient deficiency by researching the symptoms and adjust your nutrient solution accordingly.
2. pH Imbalances: The pH level of your nutrient solution plays a crucial role in nutrient availability. Regularly monitor the pH using a pH meter and adjust it with pH up or down solutions to maintain an optimal range between 5.5 and 6.5.
3. Pest and Disease Control: While hydroponic systems minimize the risk of pests and diseases compared to traditional soil gardening, they can still occur. Regularly inspect your plants for signs of infestation or disease. Use organic or biological pest control methods whenever possible to maintain a healthy growing environment.
4. Root Rot: Root rot is a fungal disease that can devastate hydroponic plants. Ensure proper aeration around the roots and avoid overwatering to prevent root rot. Regularly clean and sterilize your hydroponic system to minimize the risk of fungal growth.
5. Lighting Problems: Ensure your grow lights are positioned correctly and provide the appropriate light intensity and duration for your plants. Monitor the light spectrum and adjust if necessary to cater to the specific needs of your chosen crops.
VII. Advanced Hydroponic Techniques
As you gain experience and confidence with hydroponic gardening, you can explore more advanced techniques to further optimize your plant growth and yields.
1. Cloning and Propagation: Hydroponic systems provide an ideal environment for cloning and propagating plants. Research techniques for taking cuttings and propagating new plants from your existing stock.
2. Reservoir Management: Advanced reservoir management techniques involve monitoring and adjusting various parameters like dissolved oxygen levels and electrical conductivity (EC) to optimize nutrient uptake by plants.
3. Automated Systems: Consider incorporating automated systems into your hydroponic setup. These systems can automate nutrient dosing, lighting control, and even environmental monitoring, simplifying maintenance and ensuring optimal growing conditions.
4. Aeroponics and Aquaponics: Once you’ve mastered the basics of hydroponics, you can delve into more advanced techniques like aeroponics and aquaponics. Aeroponics suspends plant roots in a mist environment, providing excellent oxygenation and rapid growth. Aquaponics combines hydroponics with aquaculture, utilizing fish waste as a natural nutrient source for plants.