Introduction
Maintaining a lush and thriving garden requires dedication, consistent care, and the right tools. One crucial aspect of garden care is ensuring that your plants receive the right amount of water at the right time. This is where a DIY drip irrigation system, like the DIY Drip Irrigation System Automatic Watering Kit, comes in handy.
Components of a DIY Drip Irrigation System
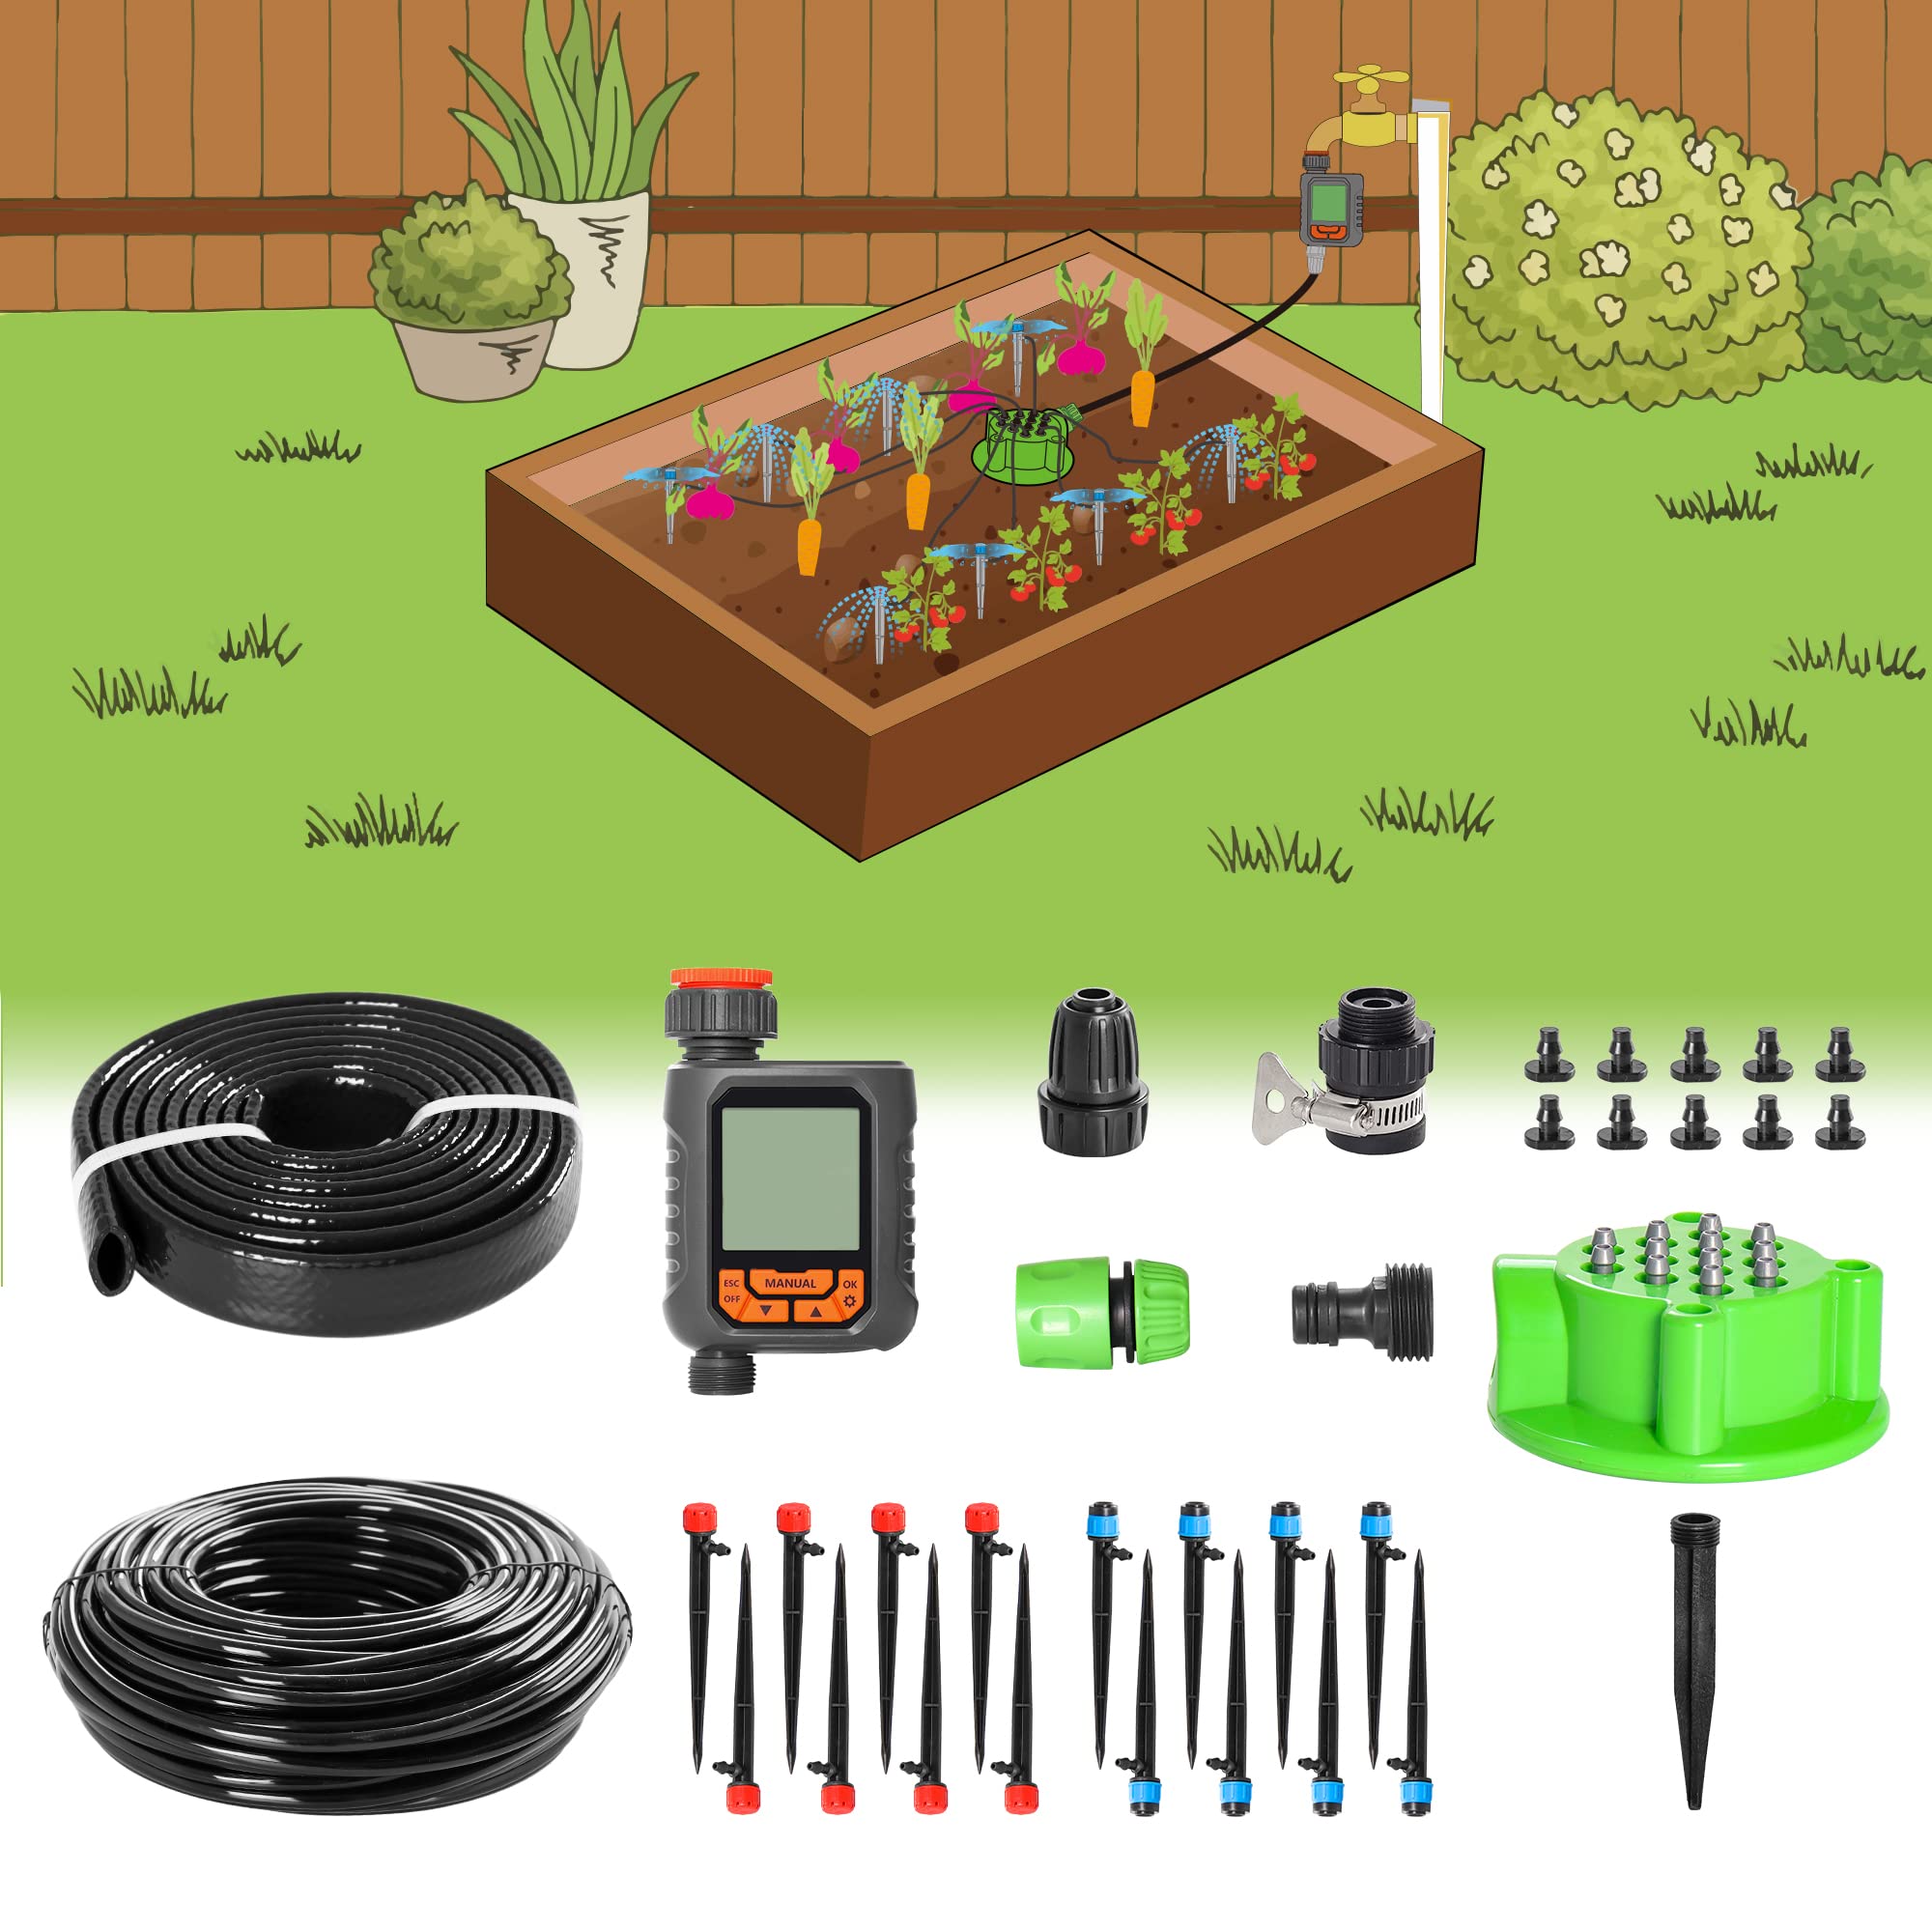
A DIY drip irrigation system is a versatile and user-friendly tool that simplifies the process of watering your plants. It consists of several key components that work together to deliver water directly to the roots of your plants, minimizing waste and promoting healthy growth.
-
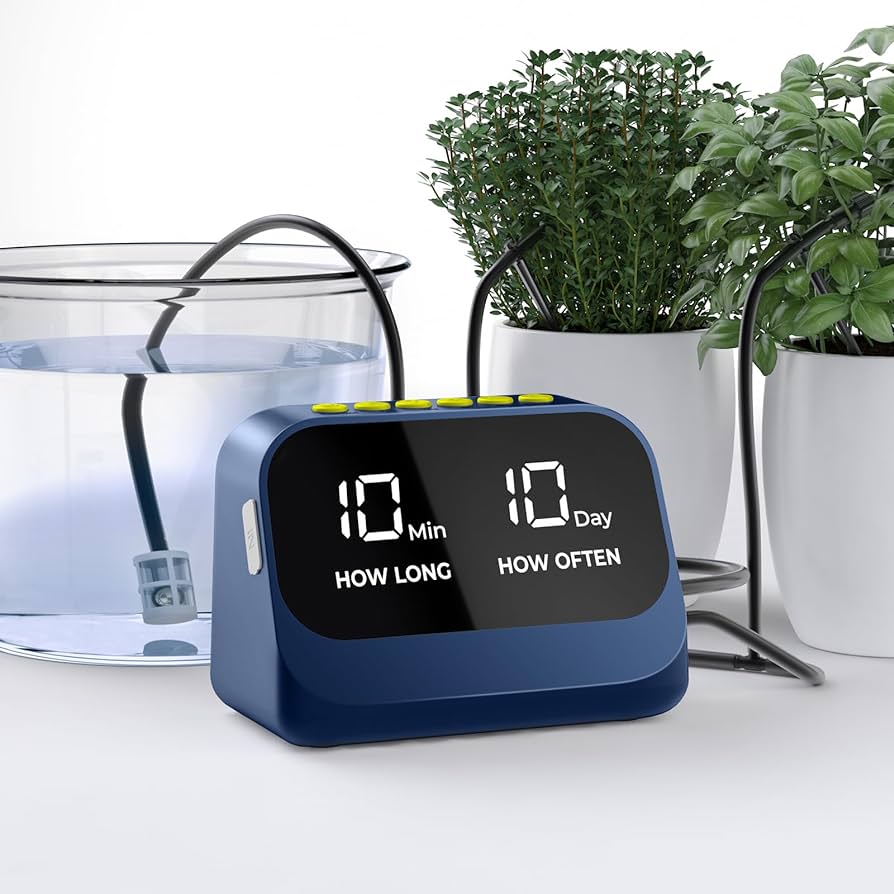
Water Source: The water source is the starting point for your drip irrigation system. It can be a connected faucet, a water tank, or even a rainwater collection system.
-
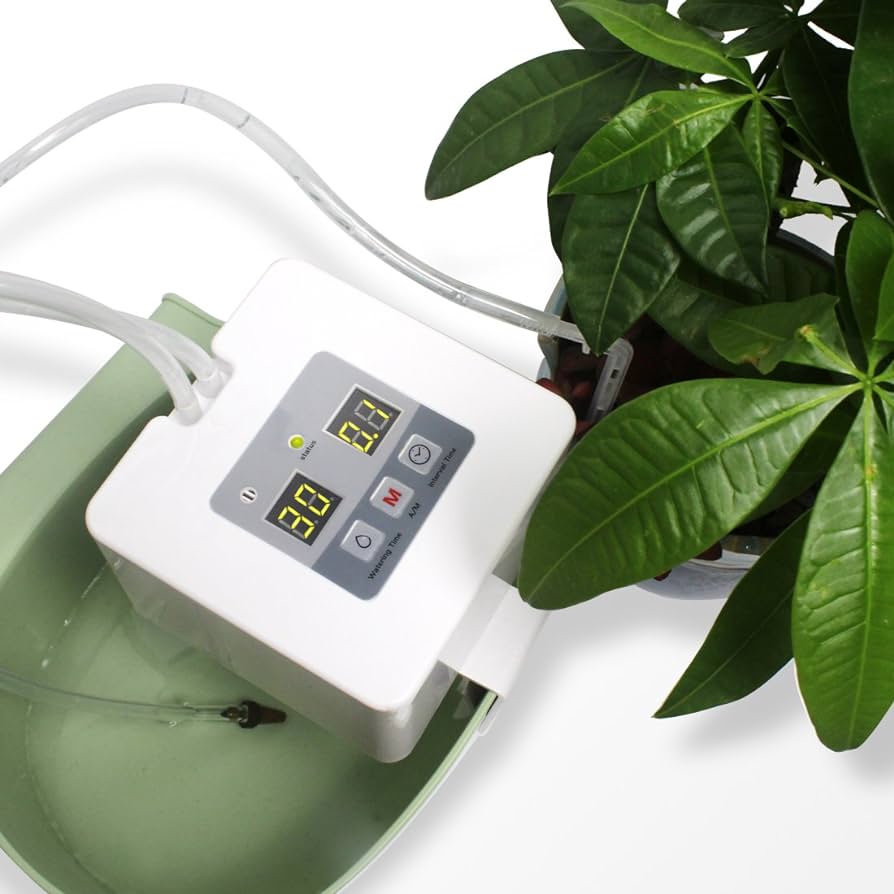
Water Timer: A water timer is an essential component for automating the watering process. It allows you to set customized schedules based on your plants’ needs and weather conditions.
-
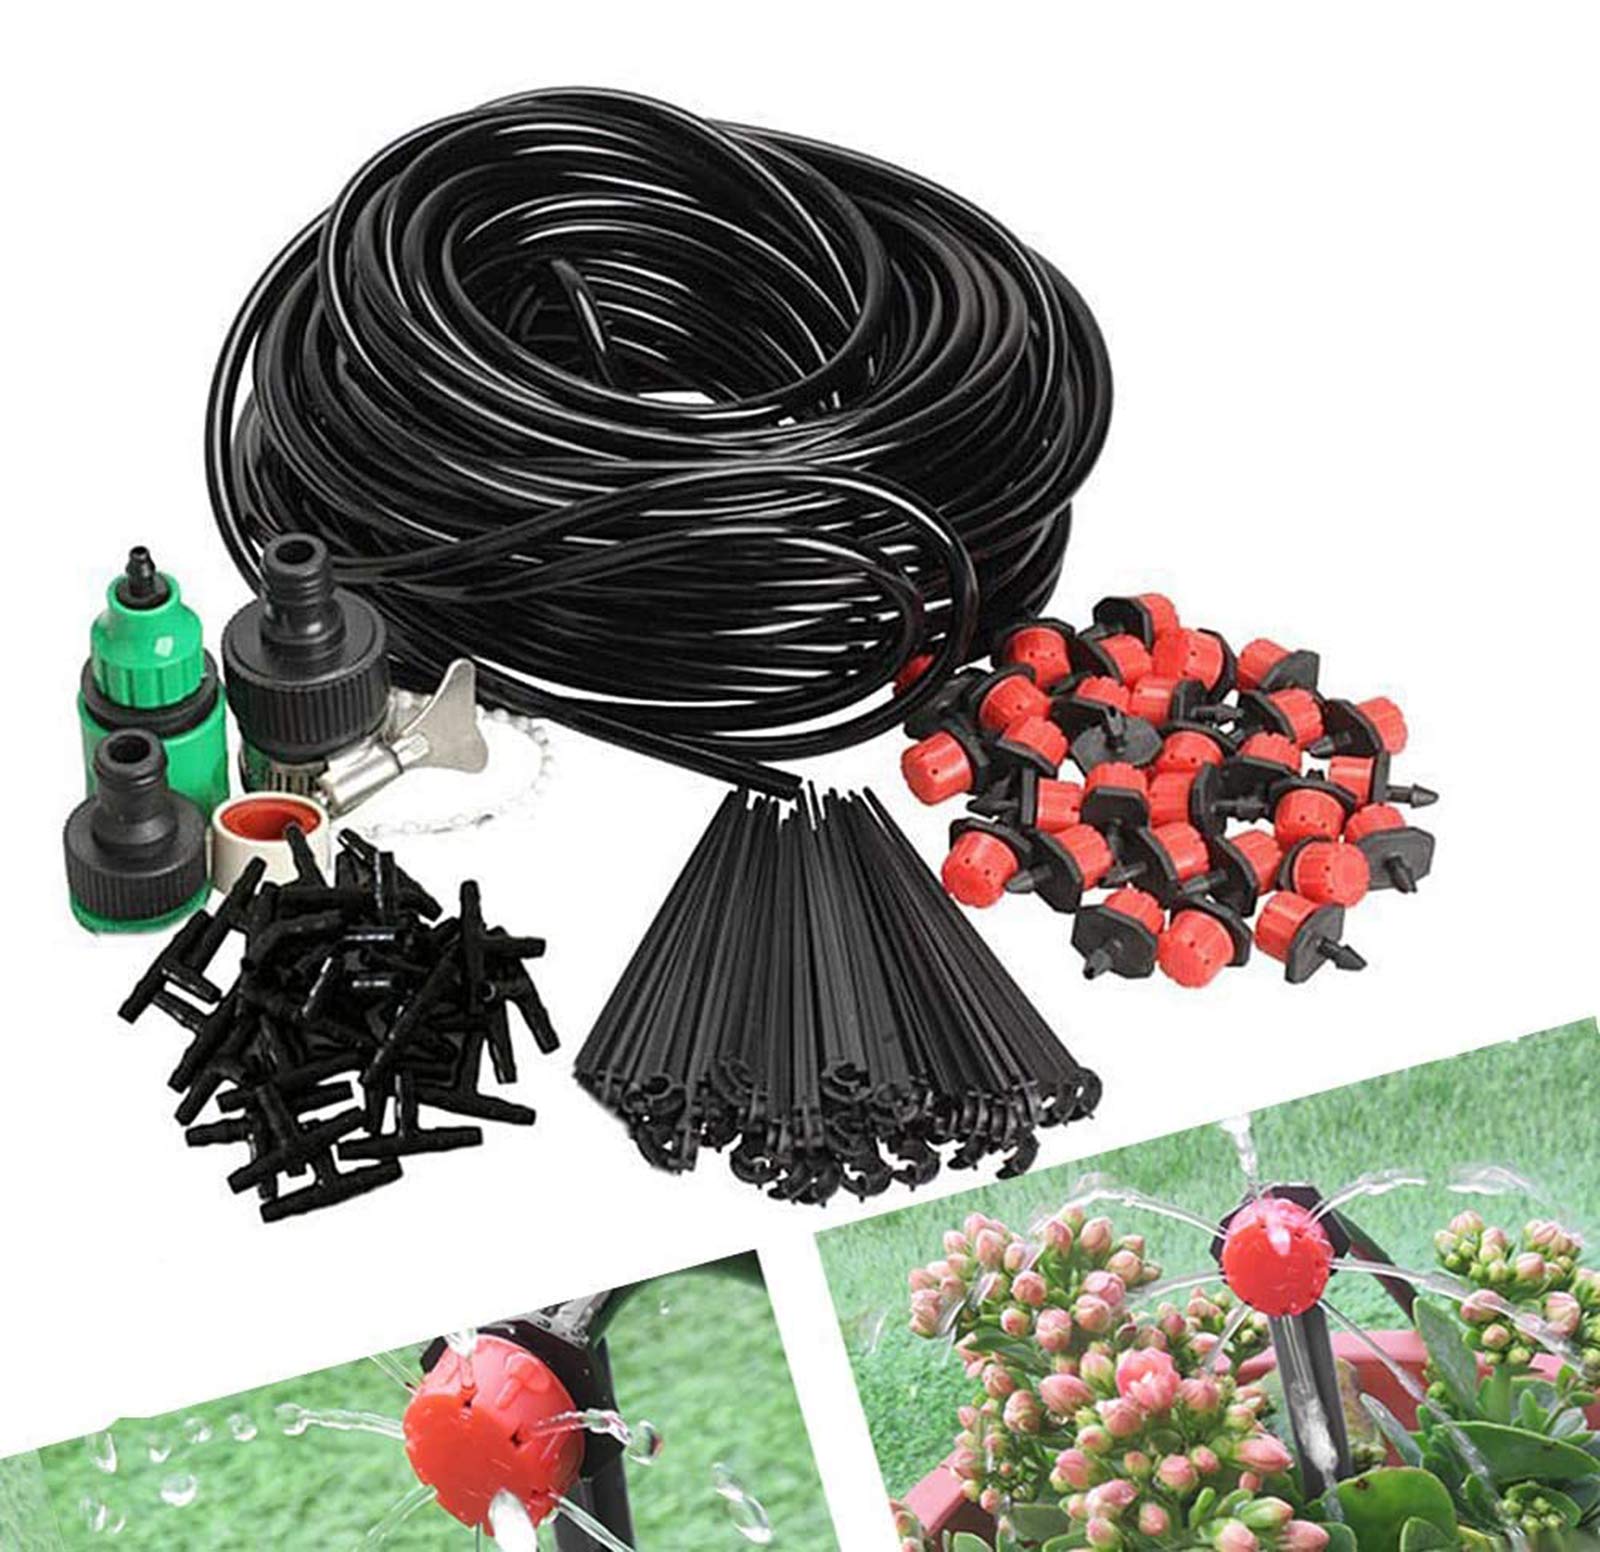
Drip Irrigation Tubing: Drip irrigation tubing is the network of pipes that transport water from the source to the individual plants. It is typically made of durable PVC or polyethylene material.
-
Drip Emitters: Drip emitters are small devices that release water at a controlled rate directly to the plant roots. They come in various flow rates to suit different plant needs.
-
Filters: Filters are crucial for preventing clogging and ensuring that clean water reaches the drip emitters. They are typically installed at the water source or near the water timer.
-
Stakes and Connectors: Stakes and connectors are used to secure the drip irrigation tubing in place and connect different components of the system.
Planning and Designing Your DIY Drip Irrigation System
Before you start assembling your DIY drip irrigation system, it’s essential to carefully plan and design your layout. This will ensure that your system is efficient, effective, and tailored to your specific garden needs.
-
Determine Your Water Source: Identify the most suitable water source for your system, considering factors like distance and water pressure.
-
Measure Your Garden Area: Measure the dimensions of your garden to determine the length of drip irrigation tubing and the number of components required.
-
Create a Layout: Sketch a layout of your garden and mark the locations of your plants. Plan the placement of drip emitters and tubing based on plant spacing and watering requirements.
-
Select Drip Emitters: Choose the appropriate drip emitters based on the water flow rate needed for each plant type. Consider factors like plant size, soil type, and sun exposure.
-
Calculate Water Flow Requirements: Determine the total water flow required for your system by calculating the individual flow rates for each drip emitter.

Assembling Your DIY Drip Irrigation System
Once you have your plan in place, you can start assembling your DIY drip irrigation system. Follow these steps to ensure a proper setup:
-
Connect Water Source to Timer: Connect the water source to the water timer using a hose or pipe adapter. Ensure a secure connection to prevent leaks.
-
Install Drip Irrigation Tubing: Lay out the drip irrigation tubing according to your plan. Use stakes and connectors to secure the tubing in place.
-
Attach Drip Emitters: Insert the drip emitters into the drip irrigation tubing at the designated locations. Secure them tightly to prevent leaks.
-
Secure Tubing: Use additional stakes and connectors to secure the drip irrigation tubing throughout the garden, ensuring it is stable and free from tangles.
Programming Your Water Timer
The water timer plays a crucial role in automating the watering process. Program your timer according to your plants’ needs and weather conditions.
-
Set Watering Schedule: Determine the frequency and duration of watering cycles based on plant requirements. Consider factors like plant type, soil type, and climate.
-
Adjust Watering Duration: Adjust the watering duration for each cycle based on the specific needs of different plant groups.
-
Monitor System Performance: Observe the system’s performance and make adjustments to the watering schedule as needed.
Benefits of Using a DIY Drip Irrigation System
Incorporating a DIY drip irrigation system into your gardening routine offers a multitude of benefits that enhance both the health of your plants and your overall gardening experience:
-
Conserves Water: Drip irrigation delivers water directly to the plant roots, minimizing evaporation and reducing water waste. This is particularly beneficial in areas with water scarcity.
-
Promotes Healthy Plant Growth: Consistent and precise watering promotes healthy root development, vibrant foliage, and abundant blooms.
-
-
Saves Time and Effort: Manually watering your garden can be time-consuming and labor-intensive. A DIY drip irrigation system automates the process, freeing up your time for other gardening tasks or simply enjoying your outdoor space.
-
Reduces Weeds and Pests: Drip irrigation minimizes water reaching the surface of the soil, discouraging weed growth. Additionally, by targeting the root zone, it reduces the habitat for moisture-loving pests.
-
Enhances Curb Appeal: A well-maintained garden with healthy and thriving plants contributes to a beautiful and inviting outdoor space. This not only enhances curb appeal but also potentially increases your property value.
Applications of DIY Drip Irrigation Systems
The versatility of DIY drip irrigation systems extends beyond traditional gardens. Here are some additional applications for this resourceful tool:
-
Watering Lawns and Gardens: Drip irrigation is ideal for maintaining healthy lawns and diverse garden beds. By delivering water directly to the roots, it promotes even growth and minimizes water waste in areas with exposed soil.
-
Watering Potted Plants and Hanging Baskets: For container gardeners, a DIY drip irrigation system is a game-changer. Individual watering schedules can be programmed for each pot or basket, ensuring consistent moisture for even the most delicate plants.
-
Watering Vegetable Gardens: Drip irrigation is particularly beneficial for vegetable gardens. It delivers precise amounts of water directly to the root zone, promoting optimal vegetable growth and preventing waterborne diseases that can spread through overhead watering.
-
Watering Greenhouses and Conservatories: In greenhouses and conservatories, where humidity and temperature control are crucial, drip irrigation provides a targeted and efficient watering solution. This helps maintain ideal moisture levels for a wide variety of exotic plants.
-
Watering Vacation Homes and Rental Properties: For those with vacation homes or rental properties, a DIY drip irrigation system offers peace of mind. Program the timer before you leave, ensuring your plants are automatically watered while you’re away. This eliminates the worry of underwatered or overwatered plants and potential damage.
Tips for Maintaining Your DIY Drip Irrigation System
Maintaining your DIY drip irrigation system is crucial for ensuring its smooth operation and optimal performance. Here are some simple tips:
-
Inspect Drip Emitters: Regularly check drip emitters for clogs. You can clean them with a mild solution or replace them if necessary.
-
Clean Filters: Periodically clean the filters to prevent clogging and ensure proper water flow. Follow the manufacturer’s instructions for cleaning or replacing the filters.
-
Flush the System: Flushing the system periodically helps remove any accumulated sediment or debris within the tubing. This maintains optimal water flow and prevents clogging.
-
Winterizing the System: If you live in a climate with freezing temperatures, winterize your system to prevent damage. Drain the water from the tubing and timer, and store them in a frost-free location.
Troubleshooting Common Problems with DIY Drip Irrigation Systems
Even with proper maintenance, occasional minor issues might arise with your DIY drip irrigation system. Here’s how to address some common problems:
-
Low Water Pressure: Low water pressure can lead to uneven watering. Check the source of the pressure and ensure there are no kinks or leaks in the tubing.
-
Clogged Drip Emitters: Clogged emitters can prevent water from reaching the plants. Clean or replace the clogged emitters as needed.
-
Leaking Connections: Leaking connections can waste water and reduce system efficiency. Tighten loose connections or replace damaged tubing segments.
-
Uneven Watering: Uneven watering can indicate issues like clogged emitters, incorrect pressure, or improper system layout. Address the root cause to ensure consistent water distribution.
Where to Buy DIY Drip Irrigation System Components
DIY drip irrigation system components are readily available at various retailers to suit your needs and budget. Here are some options:
-
Online Retailers: Online retailers offer a wide selection of DIY drip irrigation system components at competitive prices. You can compare features, specifications, and user reviews before making your purchase.
-
Home Improvement Stores: Many home improvement stores carry a variety of drip irrigation system components, allowing you to purchase everything you need in one location.
-
Garden Centers: Garden centers often cater to specific gardening needs and may offer specialized drip irrigation system components or pre-assembled kits tailored for various garden sizes.
Safety Precautions When Using a DIY Drip Irrigation System
While DIY drip irrigation systems are generally safe to use, it’s essential to follow appropriate safety precautions:
-
Read Instruction Manuals: Carefully read the manufacturer’s instructions for each component of your system to ensure proper installation and operation.
-
Use Correct Tools and Materials: Use the recommended tools and materials for assembling and maintaining your system to avoid damage or leaks.
-
Avoid Electrical Hazards: If your system incorporates an electrical timer, ensure all connections are secure and avoid using the system in wet conditions.
-