Step-by-Step Guide for How to Drain Oil from Lawn Mower
Preparing for Oil Change
How to drain oil from lawn mower? Before you begin the oil change process, it’s important to be prepared.
Safety Precautions and Necessary Tools
Safety comes first. Ensure the lawn mower is off and cool before starting. Gather gloves, safety glasses, an oil pan, a funnel, and old rags. You’ll also need a socket wrench set for the drain plug and the correct type of replacement oil.
Warming Up the Engine
A warm engine lets oil flow easier. Run the mower for a few minutes. Then, let it cool briefly before proceeding to prevent burns.
Cleaning the Oil Fill Area
Dirt around the oil cap can contaminate the oil. Use compressed air or a clean cloth to clean around the oil fill area before opening it.

Draining the Old Oil
Locating the Drain Plug
First, find the drain plug underneath the lawn mower. It’s usually at the base of the engine.
Proper Method to Tilt the Lawn Mower
Tilt the mower carefully on its side. Make sure the air filter is facing up to avoid contamination.
Capturing Old Oil
Place an oil pan under the mower. Unscrew the plug and let the old oil flow out completely.
Addressing the Oil Filter (If Applicable)
Not all lawn mowers have an oil filter, but if yours does, it’s integral to change it.
Identifying If Your Mower Has an Oil Filter
Look in your owner’s manual or inspect the engine to see if there’s an oil filter.
Steps to Remove the Old Oil Filter
After draining the oil, locate the filter. With a catch pan ready, unscrew and remove the old filter.
Preparing the New Oil Filter for Installation
Before installing the new filter, apply a bit of oil to its seal. This helps with sealing and ease of future removal.
Refilling with New Oil
Selecting the Right Type of Oil
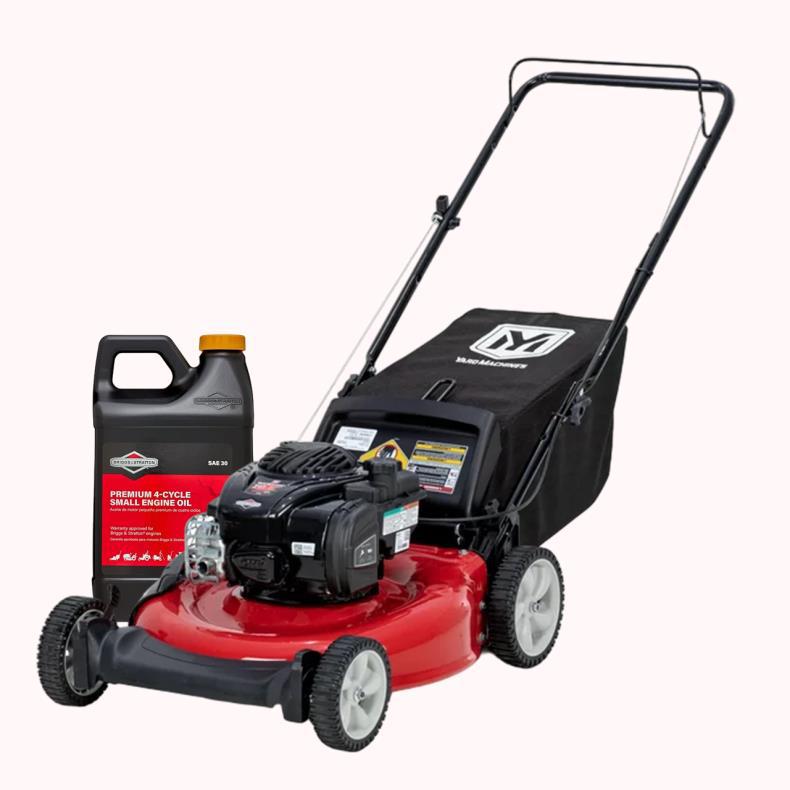
Before you can refill your lawn mower, it’s critical to choose the right type of oil. Check your mower’s manual. It will list the ideal grade and viscosity for your specific engine. Typically, engines prefer 10W-30 or SAE 30 for warmer climates. Using the correct oil ensures proper engine function and longevity.
Checking Oil Levels with Dipstick
After adding some new oil, use the dipstick to check the level. Clean the dipstick first, then insert it into the oil reservoir. Remove it to see where the oil mark hits. It should be between the high and low marks. This step is crucial to avoid overfilling or underfilling the engine.
Steps to Add New Oil Correctly
To add new oil, follow these simple steps:
- Place a funnel in the fill port to prevent spills.
- Pour oil slowly into the engine, pausing to check the dipstick.
- Aim to get the oil level just right – not above the full mark.
- Once at the right level, remove the funnel and wipe any spills.
- Screw the oil cap back on securely.
Perform these steps carefully to ensure your mower works smoothly for the coming seasons.
Finalizing the Oil Change
After successfully draining the old oil and adding new, you’ll need to finalize the process.
Reinstalling the Oil Cap
Place the oil cap back onto the engine securely. Turn it until snug to prevent leaks.
Cleaning Up and Disposal of Old Oil
Wipe any spilled oil from the mower with rags. Pour old oil into a container. Seal it.
Take used oil to a recycling facility or auto part store for proper disposal. Avoid illegal dumping.
Seasonal Maintenance Tips
Proper maintenance ensures your lawn mower runs smoothly throughout the year.
Frequency of Oil Changes
Changing your lawn mower’s oil regularly is key to engine health. Most manufacturers recommend changing oil every 20-50 hours of operation. Always check your mower’s manual for specific intervals. At a minimum, change oil once a year as part of seasonal maintenance.
Additional Seasonal Tune-up Maintenance
Beyond oil, consider these tune-up tasks each season:
- Replace or clean air filters.
- Inspect and sharpen the mower blade.
- Check spark plugs and replace if worn.
- Clean the mower deck to prevent rust.
- Lubricate moving parts to reduce wear.
These steps can extend your mower’s lifespan and improve performance.
Troubleshooting Common Issues
When carrying out an oil change on your lawn mower, you may encounter a couple of issues. Addressing these promptly ensures your mower remains in good working condition.
Overfilling and Underfilling Concerns
Overfilling or underfilling your mower’s engine with oil can lead to problems. Too much oil might cause leaks or smoke. Not enough oil can cause the engine to overheat or seize. If you overfill, drain the excess until you reach the correct level. For underfilling, simply add more oil, check regularly with the dipstick, and stop at the right mark.
How to Drain Oil from Lawn Mower
Tools and Materials Needed:
- Oil drain pan or container
- New oil (appropriate type for your mower)
- Funnel (optional, for adding new oil)
- Rag or paper towels
- Wrench or socket set (if needed for oil plug)
Steps to Drain Oil from Your Lawn Mower:
Prepare the Lawn Mower
Turn off the mower and allow it to cool down if it has been recently used.
Disconnect the spark plug wire to prevent accidental starting.
Position the mower on a flat surface.
Locate the Oil Fill Port and Drain Plug
Refer to your mower’s manual to find the location of the oil fill port and drain plug. These are typically located on the engine block.
Position the Oil Drain Pan
Place an oil drain pan or container under the drain plug to catch the old oil.
Remove the Oil Fill Cap
Remove the oil fill cap to allow air to flow through the system as you drain the oil. This helps the oil flow out more smoothly.
Drain the Oil
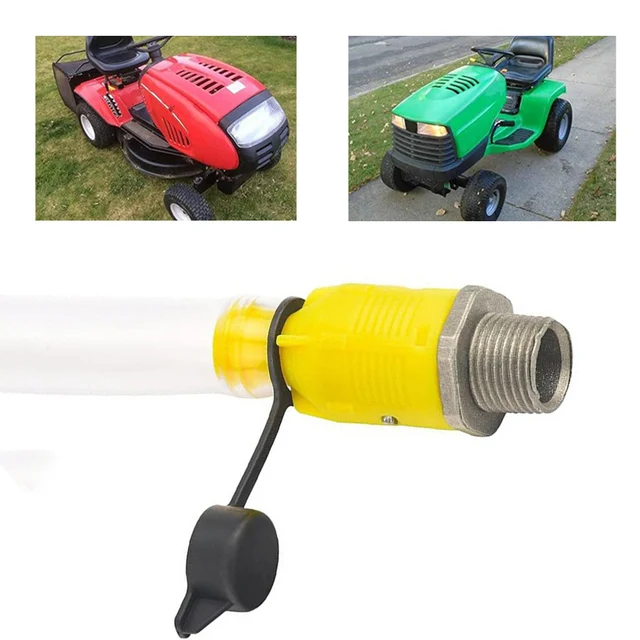
For mowers with a drain plug: Use a wrench or socket to loosen and remove the drain plug. Let the oil drain completely into the pan. Once done, replace the drain plug and tighten it securely.
For mowers without a drain plug: Tilt the mower carefully on its side (with the air filter facing up to avoid oil spillage into the carburetor). Allow the oil to drain into the pan. Be cautious when tilting the mower to avoid damaging any components.
Dispose of Old Oil Properly
Take the used oil to a recycling center or auto parts store that accepts used motor oil. Do not dispose of it in drains or garbage.
Add Fresh Oil
Check your mower’s manual for the recommended type and amount of oil.
Use a funnel to pour the fresh oil into the fill port. Avoid overfilling; check the dipstick frequently to ensure you add the correct amount.
Replace the oil fill cap once you’ve added the new oil.
Clean Up
Wipe down any spilled oil with a rag or paper towel.
Reconnect the spark plug wire.
Check for Leaks
Start the mower and let it run for a few minutes to ensure there are no leaks around the drain plug or fill port.
Tips
- Always use the type of oil specified by the manufacturer.
- Change the oil at least once a year or according to the manufacturer’s recommendations.
- Keep a record of when you change the oil to stay on schedule.

Conclusion
Sometimes, a lawn mower may refuse to start after an oil change. First, check if you’ve properly reinstalled the oil cap and if the spark plug is connected. Next, ensure the air filter isn’t soaked with oil. If it’s dirty or oily, clean or replace it. If the mower still won’t start, the carburetor may be flooded; wait a moment before trying again. Always refer to the manual or seek professional help if the problem persists.
Draining the oil from your lawn mower is an important part of its maintenance to ensure it runs efficiently and safely. By following these steps, you can effectively drain and replace the oil in your lawn mower, helping to extend its life and maintain its performance.
How to Clean a Lawn Mower Carburetor Without Removing It?
Introduction to Carburetor Cleaning
How to clean a lawn mower carburetor without removing it? A carburetor is key to your lawn mower’s performance. It mixes air and fuel, creating the right combustion balance. However, over time, it can get dirty. This can lead to clogs and poor engine function. So, knowing how to clean a lawn mower carburetor without removing it is a valuable skill. It saves you time and keeps your mower running smoothly.
To start, you’ll need the right tools and cleaners. A good carburetor cleaner spray is essential. You’ll also need safety gear like gloves and goggles. This will protect you from chemicals and debris.
This guide will walk you through each step. From identifying signs of a dirty carburetor to the finishing touches. We aim for a process that’s effective and safe for both you and your lawn mower. With a little time and the right approach, you can clean your carburetor with ease. Let’s dive in to ensure your lawn mower’s optimal performance.

Signs Your Lawn Mower Carburetor Needs Cleaning
Identifying when your lawn mower carburetor needs cleaning is crucial for timely maintenance. Look out for these signs:
- Starting Issues: If your mower struggles to start or doesn’t start at all, a dirty carburetor might be the culprit. This happens because grime and debris can block the fuel and air flow.
- Irregular Idling: Noticeable changes in engine idling, such as rough or uneven idling, can indicate a dirty carburetor. This is often a result of uneven fuel mixture due to blockages.
- Reduced Performance: A decrease in the mower’s efficiency or power during operation often means the carburetor is clogged.
- Fuel Smell: If you smell fuel more than usual, it could mean that the carburetor is flooding due to residue restricting the flow.
- Visible Dirt: Sometimes, you can see build-up or a dirty appearance around the carburetor area. This is a clear sign that it needs cleaning.
Recognizing these signs early can help you maintain your lawn mower in top condition without needing complex repairs. Cleaning the carburetor as soon as these signs appear enhances your mower’s lifespan and performance.
Preparing Your Lawn Mower for Cleaning
Before diving into the cleaning process, it’s important to prep your lawn mower properly. Taking these preliminary steps ensures a safe and effective cleaning session. Here’s how to get started:
- Safety First: Always disconnect the spark plug before you begin. This prevents the engine from accidentally starting.
- Clean Exterior: Wipe down the mower’s exterior to avoid pushing any surface debris into the carburetor.
- Access Carburetor: Locate the carburetor’s position. Often, it’s near the air filter. Remove the air filter to reach the carburetor more easily.
- Inspect the Area: Take a quick look for any visible clogs or dirt around the carburetor. This can help you target your cleaning efforts.
By following these steps, you’ll set up a safe and clear workspace. You’ll also avoid additional problems. With your lawn mower ready, you’re all set to begin the cleaning process.
Step-by-Step Guide to Cleaning the Carburetor
Cleaning a lawn mower carburetor without removing it involves a few key steps. Follow this guide to clear any blockages and improve your mower’s performance.
- Access the Carburetor: Following your prep work, you should now have easy access to the carburetor. Make sure the mower is cool and well-ventilated.
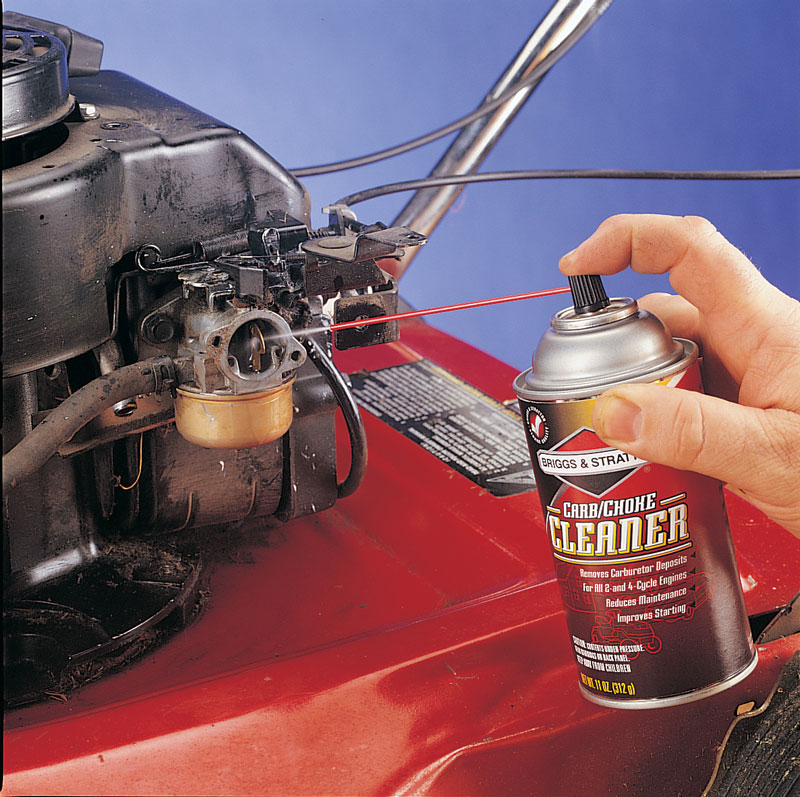
- Apply Cleaner: Spray carburetor cleaner directly into the carburetor. Target all visible dirt and grime.
- Let it Sit: Allow the cleaner to dissolve the buildup. This usually takes a few minutes.
- Scrub Away Debris: Use a small brush to gently remove loosened deposits. Be thorough but careful.
- Reapply Cleaner: If necessary, spray again to tackle any stubborn areas. Let the cleaner work its magic.
- Dry Everything: Once you’re satisfied, let the carburetor air dry. This ensures no cleaner residue remains.
- Replace Air Filter: If the air filter is dirty, clean or replace it before reassembly.
- Reconnect Spark Plug: Once everything is dry and back in place, reconnect the spark plug.
Remember to use the carburetor cleaner in a well-ventilated area and avoid direct contact with engine parts that are hot. Always follow the instructions on the cleaner can for the best results. By performing these steps carefully, you’ll help ensure how to clean a lawn mower carburetor without removing it is effective and your mower runs smoothly for your next lawn care session.
Tips for Effective Carburetor Cleaning
Here are some pro tips to help make your carburetor cleaning efforts more efficient and effective:
- Use Quality Cleaner: Choose a high-quality carburetor cleaner. It should be powerful against grime.
- Consistent Spraying: Apply an even spray. Make sure to cover all areas within the carburetor.
- Safety Gear: Always wear gloves and goggles. This provides protection against chemicals and debris.
- Small Brushes: Utilize small brushes or old toothbrushes for hard-to-reach spots.
- Patience Is Key: Let the cleaner soak in. It helps to break down tough deposits.
- Regular Maintenance: Clean regularly to prevent build-up. This keeps your lawn mower in top shape.
- Follow Instructions: Adhere to the directions on the cleaner. Proper use ensures the best outcome.
- Visual Inspection: After cleaning, examine the carburetor. Make sure no debris is left behind.
- Avoid Excess Force: When scrubbing, be gentle. Harsh scrubbing can damage the carburetor.
By following these tips, you enhance the effectiveness of how to clean a lawn mower carburetor without removing it. Your lawn mower will thank you with improved performance and reliability.

Reassembling and Testing Your Lawn Mower
After you clean the carburetor, it’s time to put things back together. Here’s how to do it right:
- Check Work Area: Before reassembling, make sure the cleaning area is free of tools and debris.
- Replace the Air Filter: If you removed the air filter, now is the time to clean or replace it.
- Reassemble Parts: Carefully put back any parts you removed. This may include the air filter cover and any screws.
- Reconnect Spark Plug: This is an important step. It makes your lawn mower ready to start.
- Fuel Check: Ensure there is fresh fuel in the tank to avoid starting issues.
Once you complete these steps, it’s crucial to test your lawn mower:
- Start the Engine: Turn the key or pull the starter cord. The engine should start more easily now.
- Listen for Smooth Idling: The engine should run smoothly. If it doesn’t, there may be a remaining issue.
- Monitor Performance: As you mow, notice if the power and efficiency improved.
- Check for Leaks: Look around the carburetor for any signs of leaks. This could indicate you need to recheck your work.
If you follow these steps carefully on how to clean a lawn mower carburetor without removing it, and your lawn mower should run like it’s new. It’s essential for easy lawn care and the longevity of your mower.
Maintaining Your Lawn Mower Carburetor
Maintaining your lawn mower carburetor is key to prolonging its life and ensuring optimal performance. Regular upkeep not only prevents major malfunctions but also keeps the mower running smoothly. Here are some guidelines to help you maintain your lawn mower carburetor effectively:
- Regular Cleaning: Commit to a regular cleaning schedule based on usage. More frequent use requires more frequent cleaning.
- Check for Wear and Tear: Regularly inspect the carburetor for signs of wear or damage. Replace parts as necessary.
- Use Fresh Fuel: Always use fresh fuel and empty old fuel from the tank to avoid clogs and corrosion.
- Proper Storage: When not in use, store your lawn mower in a clean, dry area to prevent dust and dirt buildup.
- Regular Check-Ups: Schedule annual check-ups with a professional to ensure all parts are functioning correctly.
By following these simple steps, you can ensure your lawn mower stays in good condition and continues to perform well. Regular maintenance will save time and money by avoiding complex repairs.

Troubleshooting Common Lawn Mower Carburetor Issues
Encountering issues after cleaning your carburetor can be frustrating. Here, we discuss common problems and their solutions to keep your mower running smoothly.
Engine Starts Then Dies
If your lawn mower starts but stops shortly after, consider these steps:
- Check the Fuel: Old or contaminated fuel can cause this issue. Replace it with fresh fuel.
- Inspect the Carburetor: Ensure no cleaner residue is left. Residue can block the jets and affect performance.
- Look at Air Flow: Blocked air filters can also lead to this problem. Clean or replace the filter.
Engine Doesn’t Start at All
Failure to start can be alarming. Here’s what you might check:
- Spark Plug Connection: Make sure the spark plug is properly connected and in good condition.
- Carburetor Blockage: Despite cleaning, blockages can remain. Recheck and clean as necessary.
- Fuel Flow: Ensure the fuel valve is open and fuel is reaching the carburetor.
Unstable Engine Idling
An engine that idles erratically can be a symptom of carburetor issues. To fix:
- Adjust the Carburetor: Sometimes, the carburetor might need slight adjustments. Refer to your mower’s manual.
- Check for Leaks: Air leaks around the carburetor can cause unstable idling. Seal any gaps.
- Re-examine the Cleaner: Make sure all cleaner is cleared out. Excess cleaner can impact performance.
By understanding how to troubleshoot common lawn mower carburetor problems, you can quickly rectify issues and maintain optimal mower performance.