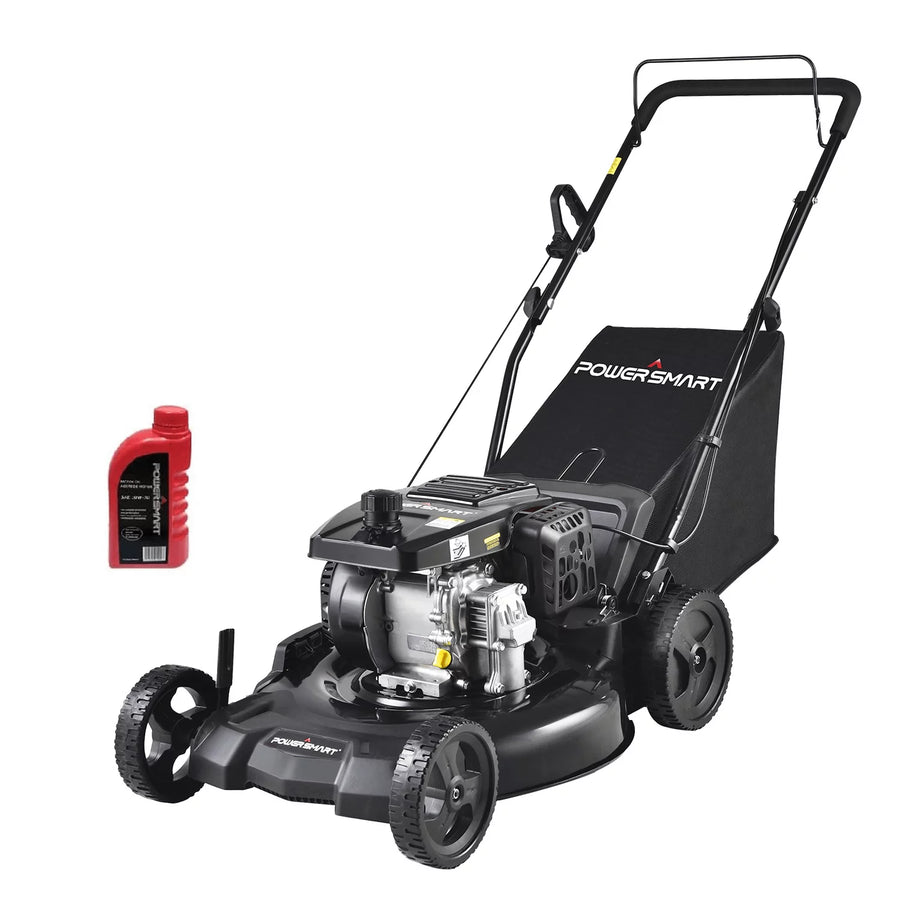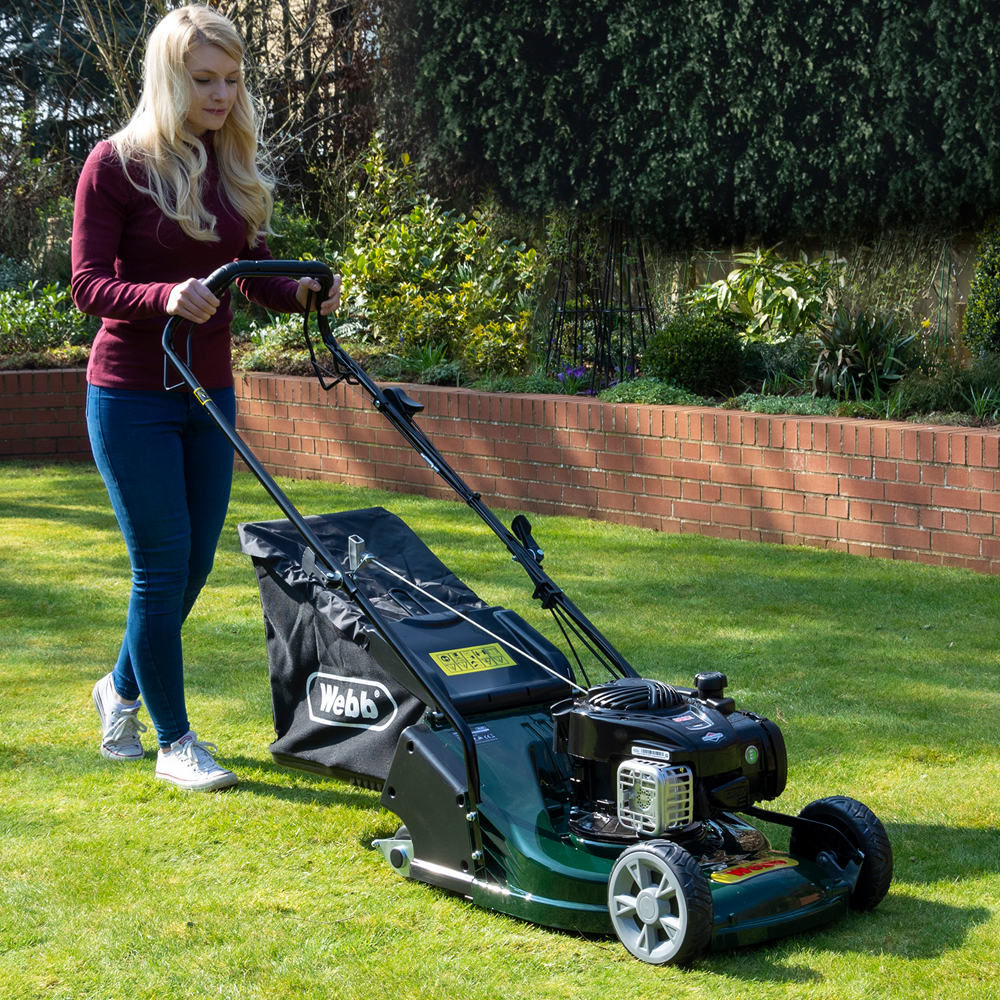
A Guide of How to Use A Lawn Mower: Efficient Techniques
Choosing The Right Lawn Mower
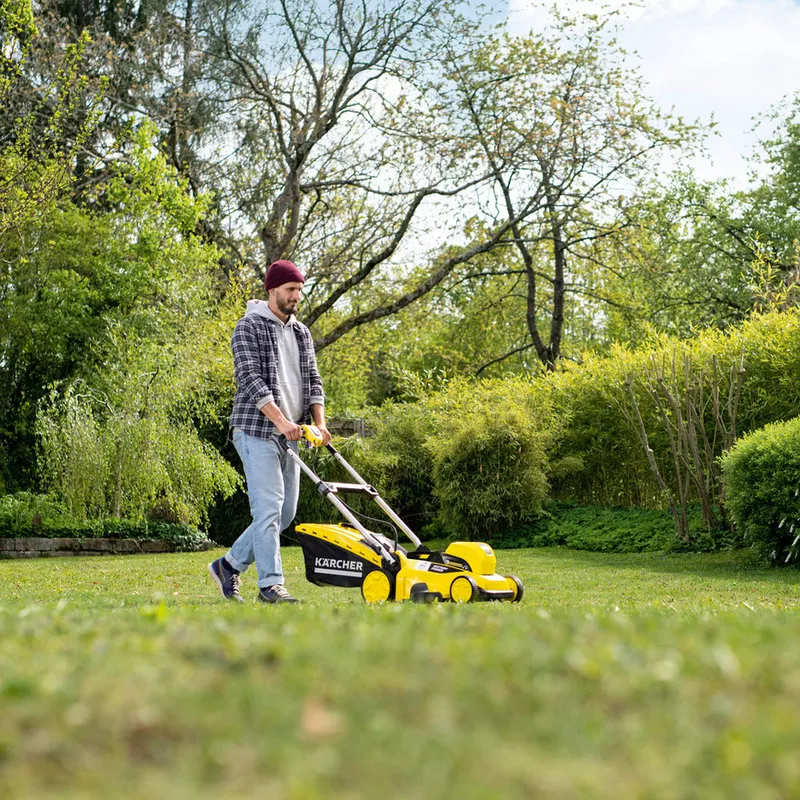
How to use a lawn mower? Selecting a suitable lawn mower is vital for efficient lawn care. The correct mower can make the task easier, faster, and more effective.
Types of Lawn Mowers and Their Advantages
There are several types of lawn mowers, each offering unique benefits:
- Manual Reel Mowers: They are quiet and ideal for small lawns. They cut grass cleanly and are environmentally friendly.
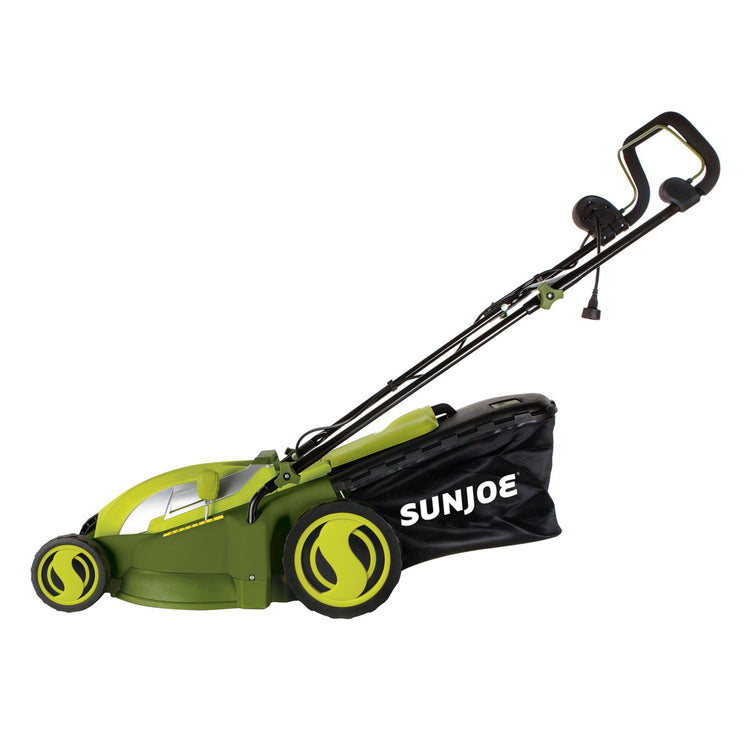
- Electric Mowers: These are easy to start and maintain. They work best for medium-sized lawns and are less noisy than gas mowers.
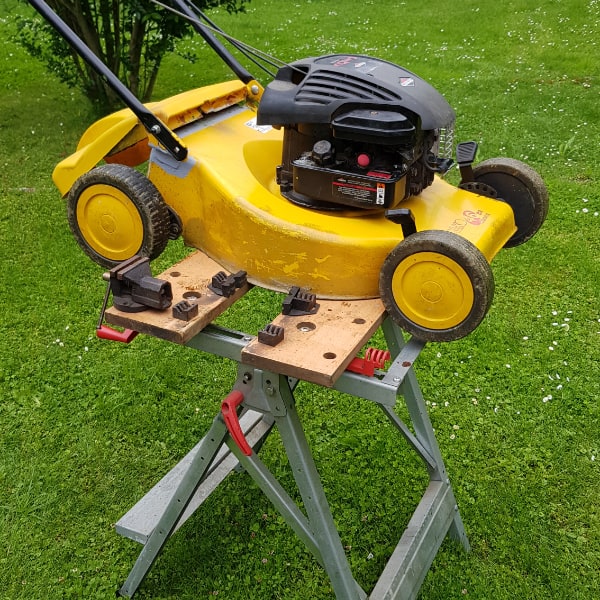
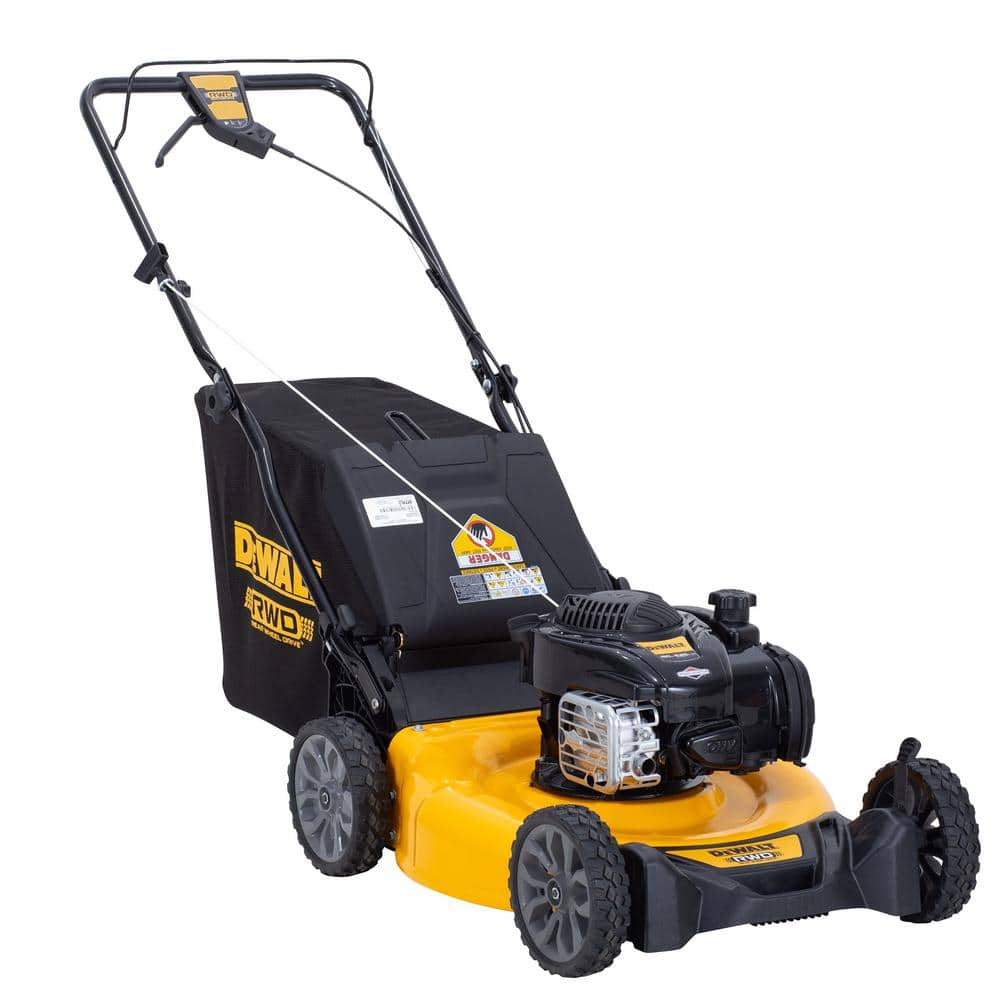
- Gas-Powered Mowers: Perfect for larger lawns or uneven terrain. They offer power and mobility without the restriction of a cord.
- Robotic Mowers: They work automatically and are great for maintaining a consistent lawn height with minimal effort.
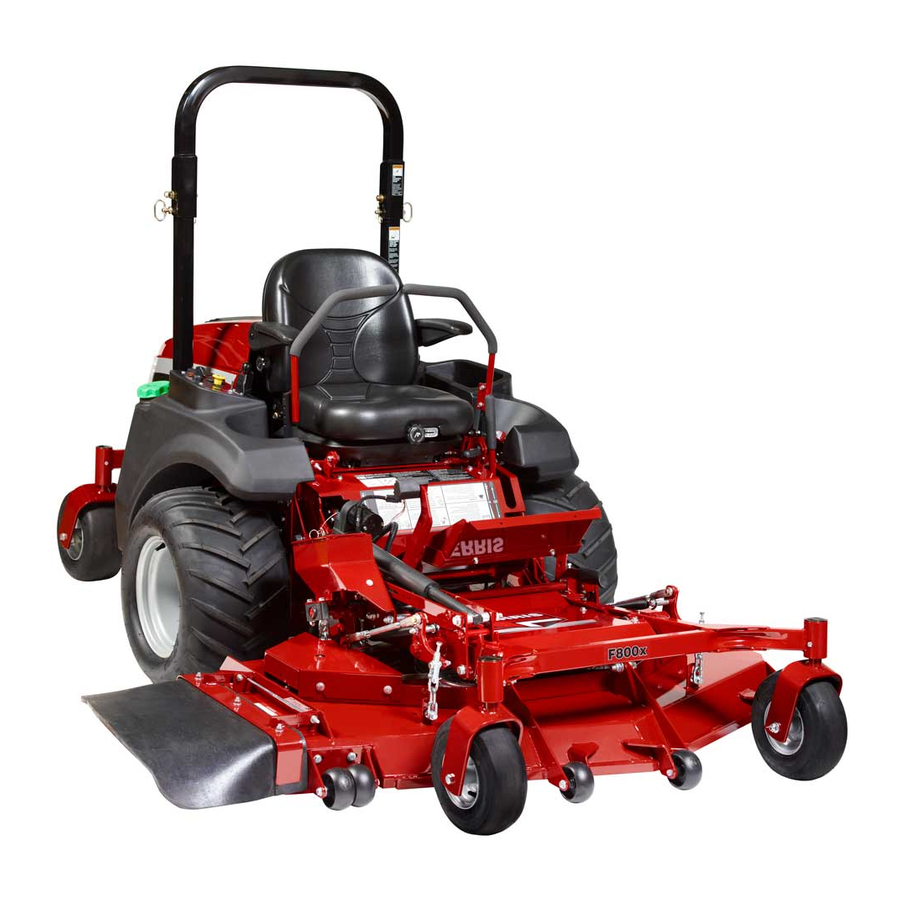
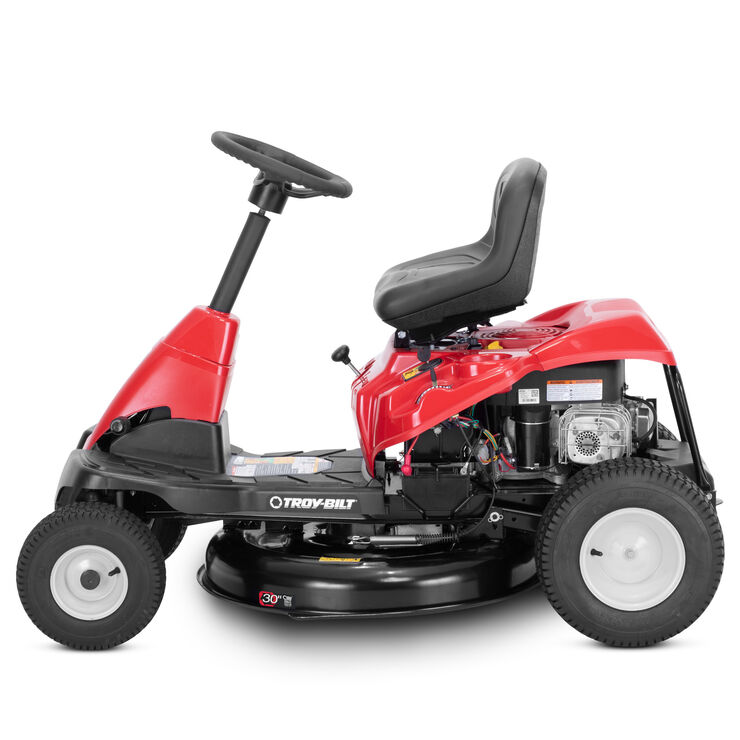
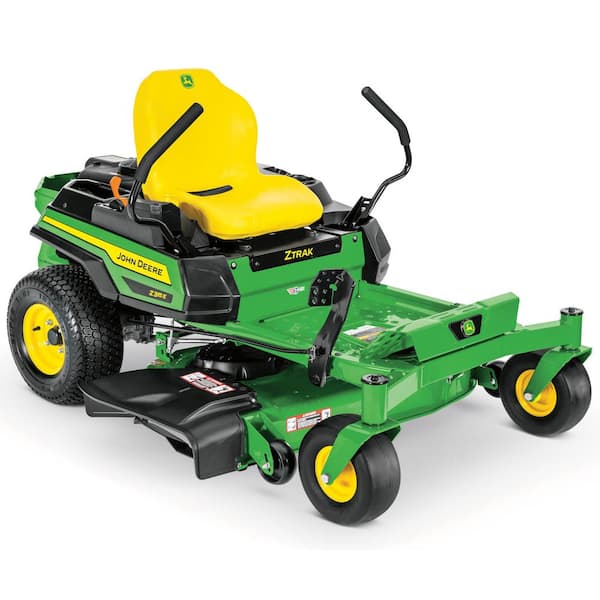
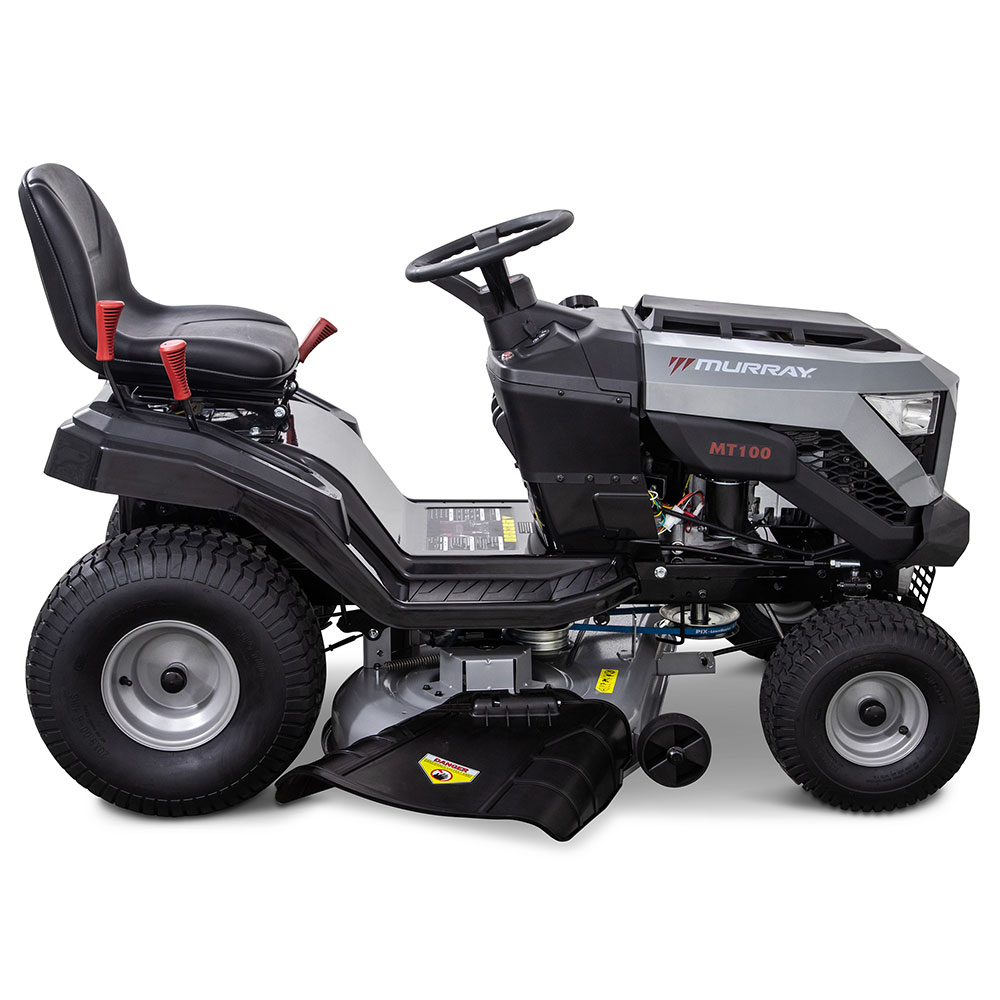
- Ride-on Mowers: Best for very large areas. They save time and reduce physical effort significantly.
Each mower type caters to different lawn sizes and personal preferences. Choose one that fits your lawn’s needs and your comfort with machinery.
Essential Features for Effective Mowing
When figuring out how to use a lawn mower, consider these features:
- Adjustable Height Settings: This allows for changing the blade height to suit the grass’s growth stage and season.
- Sharp Blades: Sharp blades ensure a clean cut, which is healthier for the grass and gives a neater appearance.
- Wide Cutting Path: A larger cutting path can reduce the time spent mowing.
- Grass Collection Options: Some mowers mulch the clippings, while others collect them in a bag for disposal or use as garden compost.
Knowing your lawn’s characteristics and the available mower features will help you choose the right tool for maintaining a healthy and beautiful lawn.
Optimal Cutting Height for Healthy Grass
Achieving a healthy, vibrant lawn starts with the correct cutting height. Utilizing the optimal cutting height for your grass can prevent pests and diseases, and promote a lush, green appearance. Mowing at the recommended height also helps your lawn withstand weather stresses like drought or excessive rain. Whether you have a cool-season grass or a warm-season variety, understanding the best practices for setting your mower’s blade height is crucial for lawn care success.
Guidelines for Setting Cutting Height
Setting the cutting height on your lawn mower is not a one-size-fits-all approach. There are a few general guidelines to help ensure you’re cutting your grass at the healthiest height:
- Start with a sharp blade for a clean cut.
- Use the mower’s adjustable settings to customize the height.
- Stick to the 1/3 rule: never cut more than one-third of the grass blade length at a time.
- Allow for higher settings in summer to prevent drying out.
- Consult your lawn mower manual to understand the settings.
By following these guidelines, you encourage your grass to develop deeper roots and become more resistant to weeds.
Adapting Cutting Height to Season and Grass Type
Different seasons and grass types require varying cutting heights to maintain optimum health:
- Cool-season grasses: Cut taller in summer and shorter in spring and fall.
- Warm-season grasses: Lowest during active growth in summer; higher in the cooler months.
- Summer: Longer grass blades can shade the soil and reduce water evaporation.
- Spring and Fall: Slightly lower cutting heights promote denser growth and help prevent thatch.
- Winter maintenance: Avoid mowing unless necessary, and then cut at a moderate height to prevent damage.
Adapting the cutting height is not just about seasons; it involves observation. Watch how your grass responds to mowing and adjust accordingly. By understanding and applying the right cutting height, you’ll foster a healthier, more resilient lawn year-round.
The Art of Mowing: Patterns and Techniques
Mowing your lawn isn’t just about keeping it short; it’s about doing it right. Proper mowing techniques can significantly enhance the health and appearance of your lawn.
Best Practices for Mowing Straight Lines
To achieve a professional-grade lawn look, mowing straight lines is essential. Here are some tips:
- Use landmarks: Aim your mower towards a fixed point at the other end of the lawn.
- Walk steadily: Maintain a consistent speed and pressure for even cuts.
- Check wheel tracks: After each pass, ensure the wheels are aligned with the previous stripe.
With these practices, your lawn will display clean, straight lines, giving it a well-manicured appearance.
How Overlapping Cuts Ensure Even Growth
Overlapping each mowing pass slightly guarantees no patches are missed and encourages even grass growth:
- Overlap by a third: Each pass should overlap the last by about a third of the mower’s width.
- Consistent pattern: Maintain the same mowing pattern each session for uniformity.
This approach not only keeps your lawn looking tidy but also supports healthier, denser grass growth.
Mowing Frequency and Grass Health
Maintaining optimal grass health involves more than just watering and fertilizing – it often comes down to how often you mow. Regular mowing not only enhances the aesthetic appeal of your lawn but also plays a crucial role in its overall health and resilience against pests and diseases.
When to Mow: Understanding Grass Growth Cycles
Grass grows based on temperature, sunlight, and water availability. Recognizing these cycles can help determine the best mowing frequency:
- Spring Growth: As temperatures rise, grass grows rapidly. Frequent mowing ensures thickness and reduces weeds.
- Summer Slowing: Heat and drought can slow growth. Adjust mowing frequency according to grass growth rate and health.
- Autumn Prep: Growth slows; however, regular mowing prepares grass for winter by removing old, potentially diseased blades.
- Winter: Mostly dormant, mow occasionally if growth continues due to mild weather.
By tuning into these cycles, you align mowing frequency with natural growth patterns, promoting a healthier lawn.
Balancing Mowing Frequency with Lawn Quality
Achieving a balance requires consideration of lawn usage, grass type, and seasonal changes:
- Usage: High traffic areas need more frequent mowing to recover and remain robust.
- Grass Type: Some grass types thrive with more frequent cuts, while others benefit from growing longer.
- Seasonal Health: During stressful seasons like summer, allow your grass to grow slightly longer to retain moisture and protect roots.
Combine these factors to create a mowing schedule that maintains both the health and appearance of your lawn throughout the year.
Lawn Care in Different Seasons
Proper lawn care varies by season, with unique activities each period demands for optimal lawn health.
Summer Mowing: Protecting Your Lawn from Heat
During summer, the heat can stress your lawn. To protect it:
- Raise the cutting height to shade the soil and conserve water.
- Mow in the morning or evening to avoid the intense midday sun.
- Water your lawn after mowing to help it recover from the stress.
- Follow a weekly mowing schedule, but be ready to adjust based on rainfall and temperatures.
These steps help maintain green, healthy-grass even in high summer temps.
Preparing Your Lawn for Winter with Autumn Mowing
Autumn mowing preps your lawn for winter:
- Continue to mow regularly as long as grass grows.
- Gradually lower the mower’s blade for the last few cuts before winter.
- Collect and remove leaves to let in light and prevent rot.
- A final trim before the first frost can reduce fungi and disease risk.
Following these autumn mowing tips readies your lawn for a strong spring comeback.
Dealing with Weeds and Lawn Pests
Keeping a lawn free from weeds and pests is key to its health.
Methods for Preventing Weed Growth
To prevent weeds, take these steps:
- Mow at the right height; not too short.
- Fertilize properly to boost grass health.
- Use mulch clippings to suppress new weeds.
- Water deeply but not too often.
- Overseed to keep grass dense and competitive.
Doing these will create conditions that discourage weed invasion and promote robust grass growth.
Identifying and Addressing Common Lawn Pests
For lawn pests, early identification is crucial. Look for these signs:
- Brown spots or wilting can indicate bugs.
- Chewed blades suggest insect presence.
- Bare patches may signal grubs or rodents.
Once pests are identified, act fast with these steps:
- Use targeted pesticides as a last resort.
- Encourage natural predators like birds.
- Aerate to improve soil health and deter grubs.
- Biological controls, like nematodes, can be effective against certain pests.
With vigilance and timely action, your lawn can stay healthy and pest-free.
Mulching as a Natural Fertilizing Technique
Mulching involves using grass clippings as a natural fertilizer for your lawn. This eco-friendly practice not only nourishes the soil but also maintains moisture and suppresses weeds. By leaving finely chopped grass clippings on the lawn after mowing, you provide essential nutrients back into the soil. This process is efficient and reduces the need for chemical fertilizers.
Benefits of Mulching Your Clippings
Mulching your lawn offers multiple advantages:
- Nutrient Recycling: Clippings decompose and release nitrogen, potassium, and phosphorus.
- Moisture Retention: Helps the soil retain water, reducing the need for frequent watering.
- Weed Suppression: Thick mulch limits light to the soil, hindering weed germination.
- Temperature Control: Acts as an insulating layer, keeping the soil cooler in summer and warmer in winter.
Embracing this technique leads to a lush, healthy lawn while being environmentally responsible.
How to Mulch Properly for Lawn Nutrition
For effective mulching, follow these steps:
- Use a mulching mower: These mowers cut grass into fine pieces that decompose quickly.
- Mow regularly: Shorter grass clippings decompose faster and do not smother the lawn.
- Avoid wet grass: Wet clippings clump and may not distribute evenly.
By mulching correctly, you enhance soil health and boost your lawn’s appearance and durability.
Noise Regulations and Respectful Mowing Practices
Maintaining a beautiful lawn involves not only care for the grass but also for neighbors. Noise from mowing can be disruptive. It’s important to follow legal noise regulations and practice respectful mowing.
Understanding Legal Mowing Times
Each area has laws on when you can mow. Usually, these times avoid early mornings and late evenings. Check local regulations before you start. Weekdays often have wider mowing windows than weekends. By knowing and respecting these times, you reduce noise complaints.
Alternatives for Quiet Lawn Maintenance
For a quieter solution, consider hand or electric mowers. They are much quieter than gas-powered ones. Mowing manually also avoids noise altogether, allowing for flexible mowing times. This way, you can maintain your lawn any day without disturbing peace.

Manscaped the Lawn Mower 4.0 Reviews: Worth Your Money?
Introduction to Manscaped Lawn Mower 4.0
The Manscaped Lawn Mower 4.0 enters the male grooming game with buzz. It promises a nick-free and snug grooming experience with its high-tech design. Grooming below the belt or taming unruly body hair, this gadget aims to be your go-to. But the question remains, is the Manscaped Lawn Mower 4.0 worth your hard-earned cash? With its sleek look and boasted features, it has caught the attention of many men seeking the perfect trim. Let’s delve into what sets this trimmer apart and whether it stands up to its claims. Sleek and teeming with features, it’s designed to handle the delicate task of below-the-belt grooming with precision and care. Manscaped the lawn mower 4.0 reviews – it’s time to examine its features, performance, and overall value. This introduction will help to navigate the world of modern grooming tools and decide if the Lawn Mower 4.0 is the right choice for you.
Key Features of the Lawn Mower 4.0
Waterproof Design and Shower Compatibility
The Lawn Mower 4.0 boasts a fully waterproof design. This means you can use it in the shower with ease, adding convenience to your grooming routine. Not worrying about water damage simplifies the cleaning process too. Just rinse it under running water post-trim.
Replaceable Blade Assembly with SkinSafe Technology
Innovative SkinSafe Technology contributes to the Lawn Mower 4.0’s appeal. The replaceable blade assembly helps maintain hygiene and performance over time. Blades can be easily switched out, minimizing the risk of nicks and cuts during use.
Wireless Charging System and Battery Life
Say goodbye to pesky cords with the Lawn Mower 4.0’s wireless charging system. Just place it on the dock, and it powers up effortlessly. On a single charge, enjoy up to 90 minutes of continuous use, providing ample time for a full grooming session.
Compact Size and Ergonomic Handling
The trimmer’s compact size and ergonomic design promise a comfortable grip and easy handling. Precision is improved, even in hard-to-reach areas. Its small form factor is a big win for maneuvering through sensitive regions with confidence.
Performance Evaluation
Evaluating the performance of Manscaped Lawn Mower 4.0 is crucial. How does it handle the delicate task of grooming? Let’s dive in.
Below-the-Belt Grooming Efficiency
When it comes to below-the-belt grooming, the Lawn Mower 4.0 shines with its ergonomic design. The trimmer’s SkinSafe Technology ensures a nick-free experience. Compact size aids in navigating sensitive places flawlessly. Users find the LED spotlight particularly useful for precision.
Back and Body Hair Trimming Experience
Moving beyond the belt, this trimmer handles back and body hair with ease. Although designed for below-the-belt, its performance extends to other body parts. A lengthier session may be needed due to its small head size, but it trims effectively.
Comparison with Beard Trimming
Is the Lawn Mower 4.0 good for beards? Not quite. Its blades are less fine-tuned for facial hair, possibly leaving harsh stubble. It’s not ideal for creating clean beard lines. For hygiene, using it exclusively for body grooming is recommended.
Practical Usage Tips
Navigating the intimate grooming landscape can be daunting. Below are helpful tips for using the Lawn Mower 4.0 safely and effectively. You’ll learn the best approach to trimming sensitive areas, as well as how to keep the device in top condition through proper maintenance and cleaning.
Trimming Technique for Sensitive Areas
Trimming sensitive areas requires the right technique to ensure safety and comfort. Here are a few pointers:
- Start with a longer guard to reduce the risk of nicks.
- Use gentle, steady strokes to trim hair without pressing too hard.
- Hold skin taut to create a flat surface for even trimming.
- Trim in the direction of hair growth to minimize skin irritation.
- Utilize the LED spotlight for better visibility in hard-to-see places.
- Consider using a mirror to monitor progress and ensure even trimming.
Maintenance and Cleaning Guidelines
Taking care of the Manscaped Lawn Mower 4.0 will extend its life and maintain hygienic grooming. Here’s how to keep it clean:
- Rinse the trimmer under running water after each use, thanks to its waterproof design.
- Regularly remove hair buildup by detaching the blade and brushing out trapped hair.
- For a deeper clean, use the cleaning brush provided to sweep away any remaining debris.
- After cleaning, dry the trimmer thoroughly before storing it.
- Charge the device after several uses to keep it ready for the next grooming session.
By following these trimming techniques and maintenance guidelines, your Manscaped Lawn Mower 4.0 should serve you well for many grooming sessions to come.
Cost Analysis
Evaluating the cost of the Manscaped Lawn Mower 4.0 is crucial for buyers. Understanding the value it provides against the expense is key to making an informed decision. This section will break down the upfront costs, ongoing expenses, and overall value proposition of this grooming device.
Upfront Price and Value for Money
The Manscaped Lawn Mower 4.0 has a retail price typically around $89.99. This price places it in the mid to high range of the market. Assess its value by considering the features like waterproof design, wireless charging, and comfortable handling. It is costly, but these features may justify the expense for many users seeking quality. Keep in mind that occasional discounts and promo codes can offer savings.
Subscription Plans and Blade Lifespan
Manscaped offers subscription plans for replacing blades. These plans can provide savings over time. A single replacement blade costs $19.99, but with a subscription, you can get a new blade plus other grooming products at a lower rate. Blade lifespan varies, depending on use frequency and the amount of hair trimmed. For regular users, a blade might last a few months before needing replacement. A subscription can ensure you always have a sharp blade ready.
Overall, the cost analysis involves weighing the upfront purchase against the long-term maintenance expenses. The Lawn Mower 4.0’s durability and feature set may offer good value for those prioritizing a high-quality grooming experience.
Pros and Cons Recap
After reviewing the features and performance of the Manscaped Lawn Mower 4.0, let’s summarize the upsides and downsides.
Advantages of Using the Lawn Mower 4.0
- Waterproof Convenience: Groom in the shower without worry. Quick, easy clean-up.
- SkinSafe Technology: Swap blades fast for hygiene. Fewer risks of cuts and nicks.
- Extended Battery Life: Charge once, use for 90 minutes straight.
- Compact and Ergonomic: Fits well in hand. Precision in tight spots made easy.
- LED Spotlight: See clearly in low-light areas. Helps avoid missed hairs.
- Wireless Charging: Say goodbye to messy cords; charging is now hassle-free.
These features make the Manscaped Lawn Mower 4.0 a solid choice for anyone looking for a reliable man grooming tool.
Limitations and Considerations
- Price Point: Higher cost compared to some competitors. Assess if the features justify it for you.
- Small Trimmer Head: Takes longer to cover large areas like the back and chest.
- Beard Trim: Not ideal for facial hair. Blades not fine enough for sharp beard lines.
- Clean-Up: Need to regularly remove hair buildup to maintain performance.
- Subscription for Blades: Additional expense for keeping blades sharp; weigh this in the long-term cost.
These limitations are essential to consider before deciding if the Manscaped Lawn Mower 4.0 is the right investment for your grooming needs.
Overall, the Manscaped Lawn Mower 4.0 offers robust features, making grooming a smoother experience, but it’s important to weigh its advantages against your personal needs and the associated costs.
Concluding Remarks
Manscaped the lawn mower 4.0 reviews: Concluding our review, the Manscaped Lawn Mower 4.0 stands out in male grooming. This trimmer offers a blend of functional features tailored for delicate areas. Its waterproof design and wireless charging make it user-friendly. The compact size and replaceable blades ensure hygiene and effective trimming.
However, considering the price point, it’s not for every budget. Evaluate the features against the cost to make an informed choice. Overall, it excels but comes with a higher initial expense. For those who value top-tier grooming tools, it’s worth considering.
Simple Guide: How to Bypass All Safety Switches on Lawn Mower
Introduction to Safety Switches on Mowers
How to bypass all safety switches on lawn mower? Safety switches on mowers serve crucial roles in preventing accidents and ensuring safe operation. These switches are designed to halt engine operation or disable critical functions if they detect unsafe conditions, such as an operator leaving the seat or attempting to mow in reverse without proper engagement.
Purpose and Function of Safety Switches
The primary purpose of safety switches is to protect the operator from potential harm. For instance, if an operator falls off the seat, the seat switch will shut down the mower’s engine to prevent it from running uncontrolled. These safeguards help prevent injury and enhance the overall safety of mowing operations.
Locations of Common Safety Switches
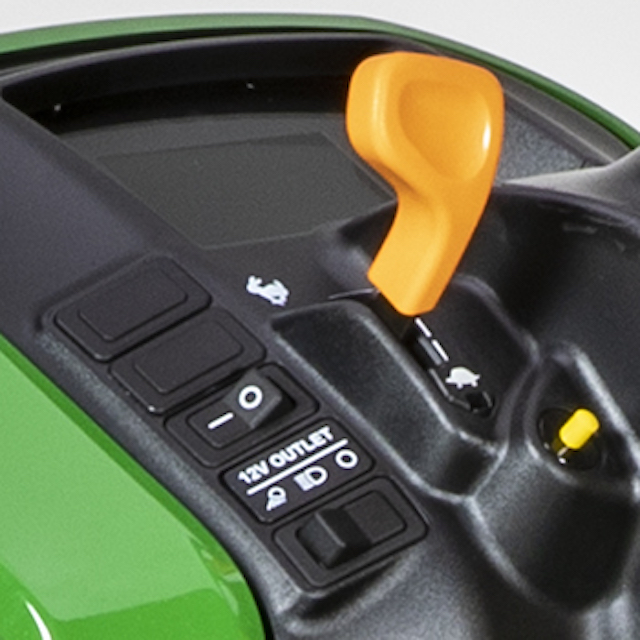
Commonly found safety switches on mowers include the seat safety switch, brake safety switch, and the reverse implement option (RIO) switch. The seat safety switch is often located beneath the mower’s seat, activating when pressure is not detected. Brake safety switches are typically found near the brake pedal, ensuring the mower is stationary when started. The RIO switch, usually found near the steering area, ensures that the mower blades are disengaged when reversing.
Identifying Your Mower’s Safety Switches
Before attempting to bypass safety switches, you first need to identify them. Safety switches may vary between models.
Types of Safety Switches
Mowers typically have seat, brake, and RIO safety switches. Each switch has a unique role.
Tracing Wires and Connections
Follow wires from switch to connector. Use your mower’s manual to help identify them. A multimeter can track continuity and assist in finding switches.
The Brake Safety Switch Bypass
To safely start your lawn mower without pressing the brake, bypass the brake safety switch.
Understanding the Brake Safety Mechanism
The brake safety switch ensures the mower starts only when the brake is engaged. This switch is typically located near the brake pedal and features a pin mechanism. When the brake pedal is fully pressed, the pin depresses, closing the circuit between wires and allowing the engine to start.
Step-by-Step Guide to Bypassing the Brake Safety Switch
- Locate the brake safety switch under the mower’s hood, near the brake pedal.
- Disconnect the plug from the brake safety switch.
- Identify the two wires leading into the brake switch connector. These are usually the purpose-specific wires you need to modify.
- Use a screwdriver to carefully release these wires from the connector.
- Once removed, strip a small portion of the insulation from the ends of these wires.
- Twist the bare wire ends together or use a small insulated screw connector to connect them.
- Secure the connection with electrical tape to ensure safety and prevent any possible shorts.
- Test the connection by starting the mower without pressing the brake pedal.
How to bypass all safety switches on lawn mower? By following these steps, you can bypass the brake safety switch and simplify the start process. However, always consider the safety implications of modifying safety features.
The Seat Safety Switch Bypass
Safety switches on mowers like the seat switch are crucial for operator safety.
Role of the Seat Safety Switch
The seat safety switch stops the engine if the operator leaves the seat. This prevents accidents.
Methods to Disable the Seat Safety Switch
- Locate the switch under the seat of the mower.
- Unplug the connector from the seat safety switch.
- Identify the wires connected to the switch. Refer to the mower’s manual for guidance.
- Use a small screwdriver to carefully release the wires from the connector.
- Once free, strip the wire ends slightly.
- Twist the stripped ends together or connect them with an insulated screw connector.
- Secure the connection with electrical tape to avoid any shorts.
- Test the mower to ensure it operates without needing someone on the seat.
By following these steps, you can disable the seat safety switch effectively. However, be aware that bypassing safety features can increase risk. Always evaluate the necessity and potential risks involved.
The RIO (Reverse Implement Option) Switch
Essential for safe mower operation, the RIO Switch plays a critical role. For the John Deere D125, its absence prevents blade engagement while reversing. This complication can frustrate users requiring non-traditional operation patterns.
Explanation of the RIO Switch
The Reverse Implement Option Switch, commonly known as the RIO switch, ensures mower safety. It prevents blade operation when the mower moves in reverse. This safeguard protects the operator and bystanders from potential harm due to flying debris.
Simple Steps to Bypass the RIO Switch
To bypass the RIO switch and allow for uninterrupted mowing, follow these steps:
- Locate the RIO switch, near the steering dashboard.
- Identify the two wires connected to the switch. Your manual may help with this.
- Disconnect the wires from the RIO switch carefully.
- Connect the wires together using an insulated connector.
- Secure the connection well to ensure it won’t come apart.
- Test the mower to confirm that the blades operate in reverse.
How to bypass all safety switches on lawn mower? By performing these actions, the RIO switch gets bypassed successfully. Mowers maintain functionality when reversing, without the switch’s restriction.
Tips for Safe Bypassing
While safety switches are there for a reason, there might be situations where bypassing them is necessary for mower maintenance or a particular use case. Before you proceed, ensure you understand the risks.
Precautions to Take While Bypassing
- Read the mower’s manual for any specific warnings or instructions.
- Wear protective gloves to prevent electrical shocks.
- Disconnect the mower’s battery before working on electrical components.
- Understand the function of the switch you’re bypassing.
- Never bypass a switch if you’re unsure of the process. Seek professional help.
- Keep a fire extinguisher nearby in case of any accidental sparks or flames.
Remember, these steps are not endorsed by mower manufacturers and can void warranties or go against safety regulations.
Ensuring Safe Operation After Bypassing
- Always check all connections are secure after bypassing.
- Regularly inspect the bypassed switches for signs of wear or damage.
- Test the mower in a safe, open area to ensure it operates as expected.
- If you face any troubles, revert the changes and consult a professional.
- Inform anyone else using the mower about the bypassed switches and associated risks.
By taking these tips into account, you can minimize risks when bypassing safety switches on your lawn mower. Always prioritize safety and consider the implications of modifying your mower’s safety features.
Troubleshooting Common Issues
Experiencing issues after attempting to bypass safety switches is not uncommon. Understanding what to look out for and how to address problems can save you time and frustration.
What to Check if the Mower Still Won’t Start
If your mower refuses to start after a bypass, do not panic. Check the following:
- Battery connections: Ensure they are tight and free from corrosion.
- Fuse conditions: Look for blown fuses and replace if necessary.
- Wire connections: Double-check that all bypassed wires are secure and properly connected.
- Safety switch bypass: Confirm that you followed the bypass instructions correctly.
- Ignition switch: Ensure it’s properly installed and functional.
- Starter solenoid: Verify that it is receiving power and functioning as it should.
Address these areas one by one to diagnose the starting issue.
Diagnosing Problems After Bypassing
After bypassing, issues might not be apparent straight away. If problems arise, consider these steps:
- Undo the bypass: Return to the original wiring setup to see if the problem persists.
- Visual inspection: Look for signs of damaged wires or loose connections.
- Multimeter use: Employ a multimeter to check for continuity and voltage at various points.
- Systematic approach: Test each safety switch circuit one at a time to isolate the fault.
- Consult a professional: If you’re stuck, a certified technician can offer expertise.
Troubleshooting effectively often involves reverting to basics and ruling out simple faults. Remain patient and methodical for the best results.
Conclusion and Summary
After exploring various techniques to bypass the safety switches on lawn mowers, we have comprehensively covered the methods to circumvent the seat, brake, and RIO switches. The step-by-step guides provided intentional steps to help simplify the process while maintaining a focus on mower safety and operation.
Recap of Methods and Steps
In our journey, we began by identifying and understanding different mower safety switches. We proceeded to provide detailed instructions on how to bypass each type of switch:
- Brake Safety Switch: Disconnection and direct wiring of key terminal wires.
- Seat Safety Switch: Disabling by connecting switch wires together.
- RIO Switch: Wires bypassed to allow blade function in reverse.
Each bypass method was designed to help improve machine handling under specific conditions or preferences, equipped with clear steps to ensure safety and functional integrity.
Final Safety Advice and Recommendations
It’s vital to stress the importance of exercising caution when modifying any safety features of a lawn mower. While these bypass methods can enhance usability,
- Always wear protective gear during modifications.
- Disconnect power before making electrical adjustments.
- After any modification, test the mower in a controlled environment to ensure it operates safely.
- Regularly check the condition of modified components.
Consider the long-term implications of bypassing safety features. In cases of uncertainty, seeking guidance from a professional or referring to your mower’s manual is advisable to maintain safety standards. How to bypass all safety switches on lawn mower? By following these practices, you can ensure that mower modifications do not compromise on safety or efficiency. Stay informed and careful, and always prioritize operational safety over convenience.
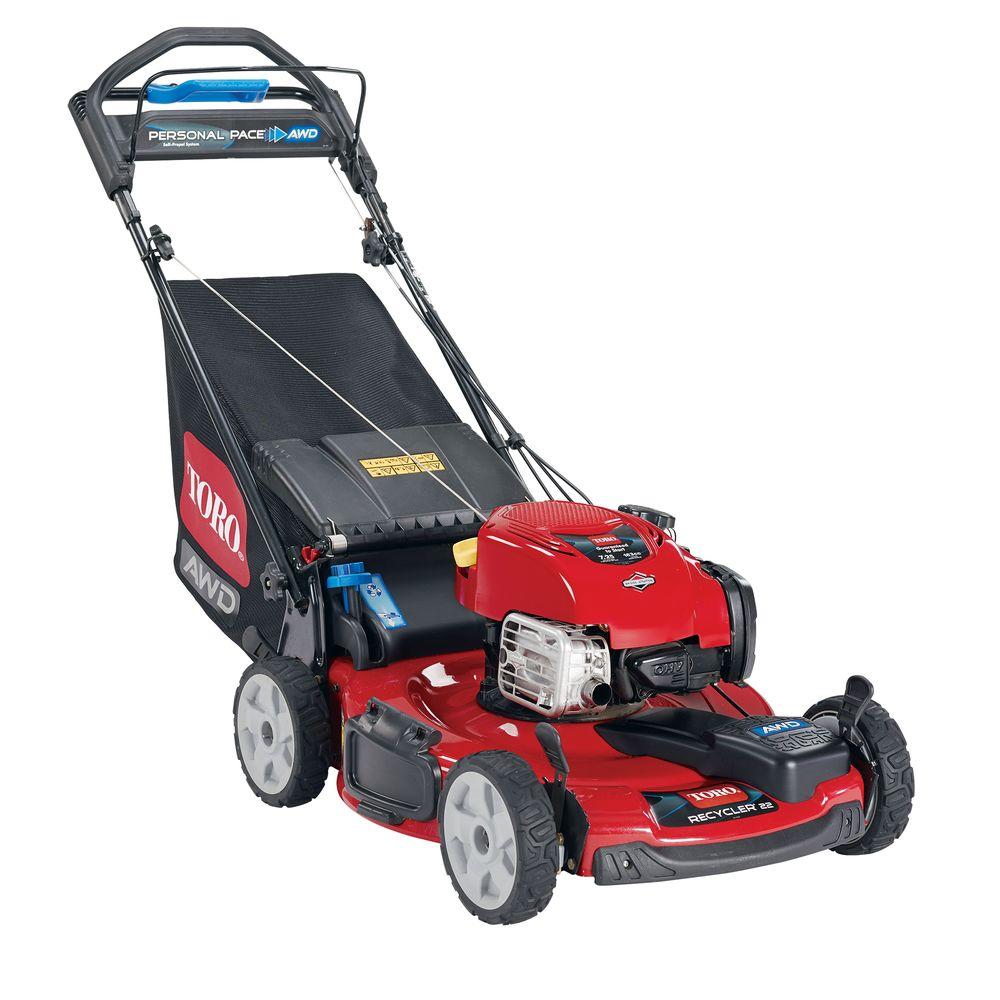
How to Change Oil in Lawn Mower: Lawn Mower Oil Change
Preparing Your Lawn Mower for Oil Change
How to change oil in lawn mower? Before you start the oil change process, preparation is key. Make sure you have the right tools and materials. This will make the task easier and quicker.
Gathering Necessary Tools and Materials
Begin by collecting all the tools you’ll need for changing the oil in your lawn mower. You’ll require:
- A wrench or socket set for removing the oil drain plug.
- An oil pan or container to catch the old oil.
- Gloves to protect your hands.
- Rags or paper towels for cleaning spills.
- New oil that suits your mower’s specifications.
- A funnel to pour new oil without spilling.
- A replacement oil filter if your mower has one.
Gather these items before you start to ensure a smooth oil change process. Use the right type of oil to keep your mower in good shape. It must meet the manufacturer’s recommendations.
Safety Precautions Before Starting
Safety comes first. Here are some precautions:
- Turn off the mower and let it cool down. This prevents burns and other injuries.
- Disconnect the spark plug wire. This stops the mower from starting accidentally.
- Wear safety glasses to shield your eyes from oil splashes.
- Work in a well-ventilated area to avoid inhaling fumes.
- Place the lawn mower on a flat, stable surface to prevent it from tipping over.
Taking these steps will help prevent accidents and make the oil change process safe.
Steps to Drain Old Oil
Identifying the Oil Drain Location
When changing oil in a lawn mower, locating the oil drain is key. Most mowers will have the oil drain plug beneath the mower deck or the engine’s base. It might be at the bottom or on the side of the engine. You need to tilt the mower carefully to access it. Ensure the tilt is away from the air filter to prevent contamination. Also, ensure the oil fill cap is on the top side when tilting.
Proper Techniques for Draining Oil
Draining oil correctly helps to maintain a clean process. Follow these steps:
- Warm up the engine for a few minutes as it helps to drain the oil smoothly.
- Turn off the engine and let it cool slightly.
- Place an oil pan or container under the oil drain plug.
- Carefully remove the oil cap and the drain plug using a wrench.
- Tilt the mower correctly, oil side down, if there is no drain plug at the bottom.
- Allow all the old oil to flow into the pan completely.
- Once drained, replace the drain plug tightly to avoid leaks.
Remember, take care not to overtilt the mower and always tilt in the direction specified by the mower’s manufacturer. Keep a rag at hand to clean any spills during the draining process.
Cleaning During Oil Change
Importance of Cleaning the Oil Cap Area
During an oil change for your lawn mower, a clean work area is crucial. Start by cleaning around the oil cap. This prevents dirt and debris from entering the crankcase. Use a rag or brush to gently remove any debris around the cap. A clean cap area ensures that new oil stays uncontaminated. This minor step greatly protects the engine’s health.
Checking for Any Oil Residues
After draining the old oil, check for residual oil in and around the mower. Any remaining old oil can mix with the new oil and reduce its effectiveness. Use clean rags or paper towels to wipe away oil residues. Pay special attention to the oil drain area. Clean thoroughly to ensure a fresh start for the new oil. This helps maintain optimal engine performance and extends mower life.
Refilling New Oil
Properly refilling your lawn mower’s oil is essential for its performance and longevity. After you’ve drained the old oil and cleaned the relevant parts, it’s time to pour in the fresh oil. But it’s not just about pouring in any oil you find; you must select the right type suitable for your mower’s engine. Moreover, you also have to be cautious about the amount of oil you refill to maintain the engine’s optimal function.
Choosing the Right Type of Oil
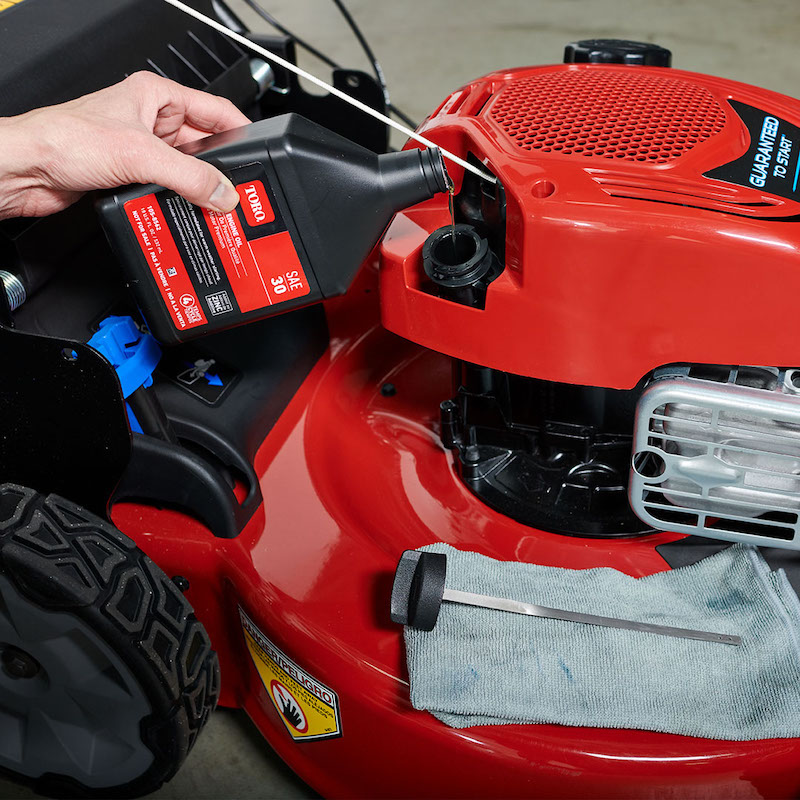
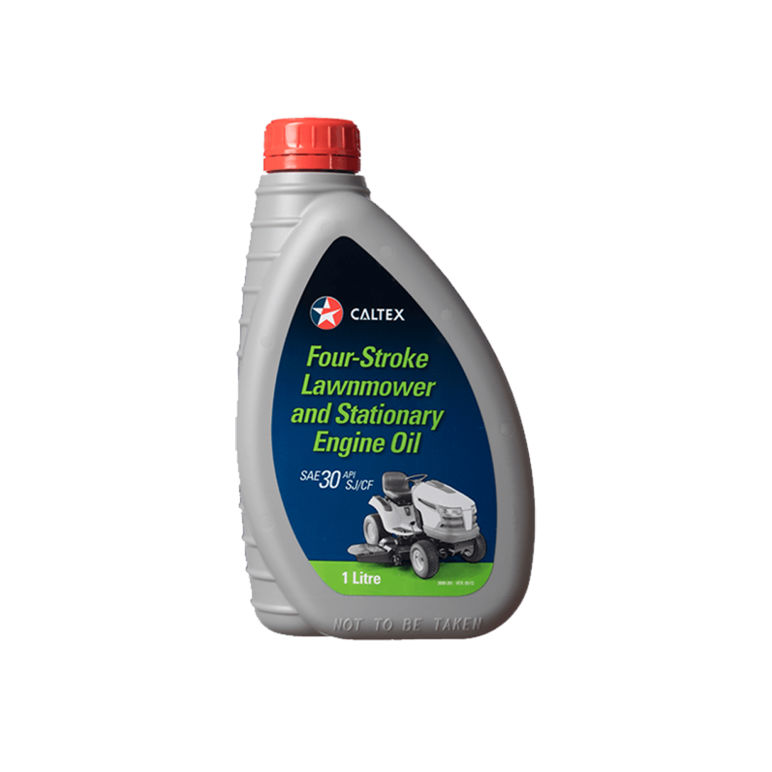
Select the appropriate oil type based on your mower’s engine. Refer to the manufacturer’s manual to know the right oil specification. Commonly, small engines use SAE 30 for warmer temperatures, while SAE 10W-30 is preferred for varying temperature ranges. A synthetic 5W-30 offers the best protection at all temperatures, along with improved starting and oil consumption. Only use oil that meets or exceeds the maker’s requirements to help your lawn mower run smoothly and efficiently.
Process of Refilling Oil to the Correct Level
To refill, follow these simple steps:
- Place a funnel in the oil fill port to ensure no spills.
- Pour the new oil slowly, checking the level frequently.
- Stop adding oil when it reaches the FULL mark on the dipstick.
- Do not overfill, as too much oil can harm the engine.
- Replace the oil cap securely after refilling.
- Run the mower for a few minutes, then check the level again to ensure it’s right.
By using the right type of oil and filling it to the correct level, you’re ensuring that your lawn mower will continue to function effectively, providing a clean cut to your lawn for seasons to come.
Post Oil Change Tips
Disposal of Used Oil
After changing the oil in your lawn mower, don’t just throw the old oil away. It can harm the environment. Take the used oil to a recycling center or auto shop that accepts it. They will dispose of it safely. Keep the old oil in a sealed container to avoid spills. Remember to label it clearly.
Checking for Leaks After the Change
Once you fill new oil, look for leaks. Start the mower and let it run for a few minutes. Then turn it off and check underneath for any signs of oil. If you find a leak, it could mean the drain plug or oil cap is not tight. Check these parts and tighten if necessary. Keep an eye on leaks for a few days to be sure.
Maintenance Tips for Lawn Mower
Maintaining your lawn mower is vital for its durability and performance. Keep it running smoothly with regular check-ups and maintenance routines. Following these tips can save you time and money in the long run while ensuring your mower is always ready to keep your lawn in great shape.
Regular Oil Check-Ups
To maintain your mower’s efficiency, check the oil level before each use. A low oil level can cause engine damage. Use the dipstick to check the oil level. If it’s near the LOW mark, add oil until it reaches FULL. Check for oil color; dark or dirty oil needs a change. This simple routine will help you catch issues before they worsen.
Importance of Oil Change for Mower Longevity
Changing oil in your lawn mower is crucial for engine health. Regular oil changes prevent engine wear and keep it running smoothly. Most manufacturers suggest an oil change after 50 hours of mower use or once each season. Fresh oil reduces friction, overheating and wear in the engine parts. This prolongs the life of your lawn mower, making it a reliable tool for years. Follow the steps to change oil in lawn mower, and your machine will thank you with consistent performance.
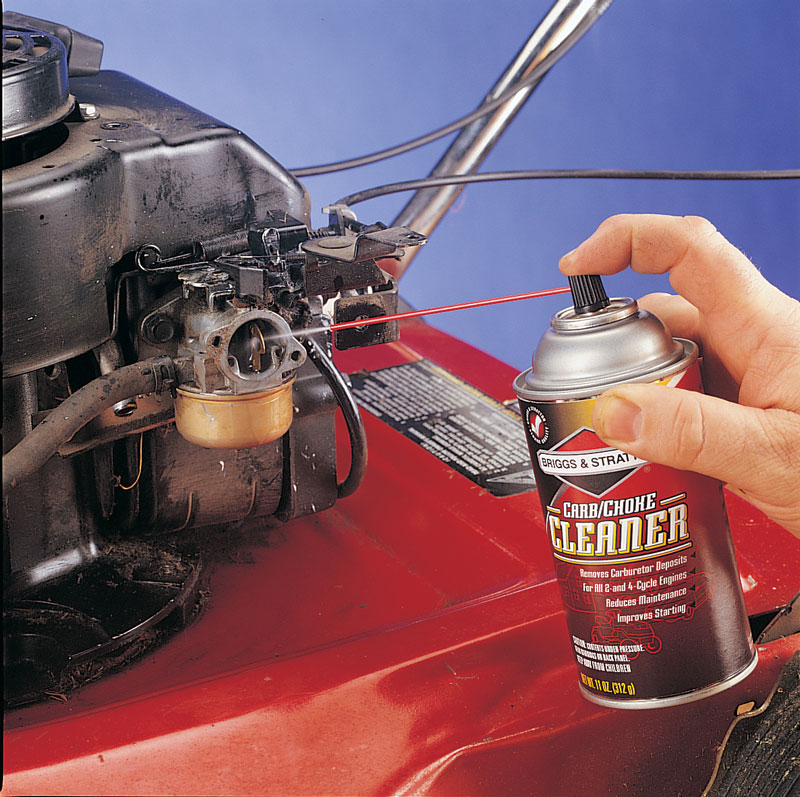
How to Clean a Lawn Mower Carburetor Without Removing It?
Introduction to Carburetor Cleaning
How to clean a lawn mower carburetor without removing it? A carburetor is key to your lawn mower’s performance. It mixes air and fuel, creating the right combustion balance. However, over time, it can get dirty. This can lead to clogs and poor engine function. So, knowing how to clean a lawn mower carburetor without removing it is a valuable skill. It saves you time and keeps your mower running smoothly.
To start, you’ll need the right tools and cleaners. A good carburetor cleaner spray is essential. You’ll also need safety gear like gloves and goggles. This will protect you from chemicals and debris.
This guide will walk you through each step. From identifying signs of a dirty carburetor to the finishing touches. We aim for a process that’s effective and safe for both you and your lawn mower. With a little time and the right approach, you can clean your carburetor with ease. Let’s dive in to ensure your lawn mower’s optimal performance.
Signs Your Lawn Mower Carburetor Needs Cleaning
Identifying when your lawn mower carburetor needs cleaning is crucial for timely maintenance. Look out for these signs:
- Starting Issues: If your mower struggles to start or doesn’t start at all, a dirty carburetor might be the culprit. This happens because grime and debris can block the fuel and air flow.
- Irregular Idling: Noticeable changes in engine idling, such as rough or uneven idling, can indicate a dirty carburetor. This is often a result of uneven fuel mixture due to blockages.
- Reduced Performance: A decrease in the mower’s efficiency or power during operation often means the carburetor is clogged.
- Fuel Smell: If you smell fuel more than usual, it could mean that the carburetor is flooding due to residue restricting the flow.
- Visible Dirt: Sometimes, you can see build-up or a dirty appearance around the carburetor area. This is a clear sign that it needs cleaning.
Recognizing these signs early can help you maintain your lawn mower in top condition without needing complex repairs. Cleaning the carburetor as soon as these signs appear enhances your mower’s lifespan and performance.
Preparing Your Lawn Mower for Cleaning
Before diving into the cleaning process, it’s important to prep your lawn mower properly. Taking these preliminary steps ensures a safe and effective cleaning session. Here’s how to get started:
- Safety First: Always disconnect the spark plug before you begin. This prevents the engine from accidentally starting.
- Clean Exterior: Wipe down the mower’s exterior to avoid pushing any surface debris into the carburetor.
- Access Carburetor: Locate the carburetor’s position. Often, it’s near the air filter. Remove the air filter to reach the carburetor more easily.
- Inspect the Area: Take a quick look for any visible clogs or dirt around the carburetor. This can help you target your cleaning efforts.
By following these steps, you’ll set up a safe and clear workspace. You’ll also avoid additional problems. With your lawn mower ready, you’re all set to begin the cleaning process.
Step-by-Step Guide to Cleaning the Carburetor
Cleaning a lawn mower carburetor without removing it involves a few key steps. Follow this guide to clear any blockages and improve your mower’s performance.
- Access the Carburetor: Following your prep work, you should now have easy access to the carburetor. Make sure the mower is cool and well-ventilated.
- Apply Cleaner: Spray carburetor cleaner directly into the carburetor. Target all visible dirt and grime.
- Let it Sit: Allow the cleaner to dissolve the buildup. This usually takes a few minutes.
- Scrub Away Debris: Use a small brush to gently remove loosened deposits. Be thorough but careful.
- Reapply Cleaner: If necessary, spray again to tackle any stubborn areas. Let the cleaner work its magic.
- Dry Everything: Once you’re satisfied, let the carburetor air dry. This ensures no cleaner residue remains.
- Replace Air Filter: If the air filter is dirty, clean or replace it before reassembly.
- Reconnect Spark Plug: Once everything is dry and back in place, reconnect the spark plug.
Remember to use the carburetor cleaner in a well-ventilated area and avoid direct contact with engine parts that are hot. Always follow the instructions on the cleaner can for the best results. By performing these steps carefully, you’ll help ensure how to clean a lawn mower carburetor without removing it is effective and your mower runs smoothly for your next lawn care session.
Tips for Effective Carburetor Cleaning
Here are some pro tips to help make your carburetor cleaning efforts more efficient and effective:
- Use Quality Cleaner: Choose a high-quality carburetor cleaner. It should be powerful against grime.
- Consistent Spraying: Apply an even spray. Make sure to cover all areas within the carburetor.
- Safety Gear: Always wear gloves and goggles. This provides protection against chemicals and debris.
- Small Brushes: Utilize small brushes or old toothbrushes for hard-to-reach spots.
- Patience Is Key: Let the cleaner soak in. It helps to break down tough deposits.
- Regular Maintenance: Clean regularly to prevent build-up. This keeps your lawn mower in top shape.
- Follow Instructions: Adhere to the directions on the cleaner. Proper use ensures the best outcome.
- Visual Inspection: After cleaning, examine the carburetor. Make sure no debris is left behind.
- Avoid Excess Force: When scrubbing, be gentle. Harsh scrubbing can damage the carburetor.
By following these tips, you enhance the effectiveness of how to clean a lawn mower carburetor without removing it. Your lawn mower will thank you with improved performance and reliability.
Reassembling and Testing Your Lawn Mower
After you clean the carburetor, it’s time to put things back together. Here’s how to do it right:
- Check Work Area: Before reassembling, make sure the cleaning area is free of tools and debris.
- Replace the Air Filter: If you removed the air filter, now is the time to clean or replace it.
- Reassemble Parts: Carefully put back any parts you removed. This may include the air filter cover and any screws.
- Reconnect Spark Plug: This is an important step. It makes your lawn mower ready to start.
- Fuel Check: Ensure there is fresh fuel in the tank to avoid starting issues.
Once you complete these steps, it’s crucial to test your lawn mower:
- Start the Engine: Turn the key or pull the starter cord. The engine should start more easily now.
- Listen for Smooth Idling: The engine should run smoothly. If it doesn’t, there may be a remaining issue.
- Monitor Performance: As you mow, notice if the power and efficiency improved.
- Check for Leaks: Look around the carburetor for any signs of leaks. This could indicate you need to recheck your work.
If you follow these steps carefully on how to clean a lawn mower carburetor without removing it, and your lawn mower should run like it’s new. It’s essential for easy lawn care and the longevity of your mower.
Maintaining Your Lawn Mower Carburetor
Maintaining your lawn mower carburetor is key to prolonging its life and ensuring optimal performance. Regular upkeep not only prevents major malfunctions but also keeps the mower running smoothly. Here are some guidelines to help you maintain your lawn mower carburetor effectively:
- Regular Cleaning: Commit to a regular cleaning schedule based on usage. More frequent use requires more frequent cleaning.
- Check for Wear and Tear: Regularly inspect the carburetor for signs of wear or damage. Replace parts as necessary.
- Use Fresh Fuel: Always use fresh fuel and empty old fuel from the tank to avoid clogs and corrosion.
- Proper Storage: When not in use, store your lawn mower in a clean, dry area to prevent dust and dirt buildup.
- Regular Check-Ups: Schedule annual check-ups with a professional to ensure all parts are functioning correctly.
By following these simple steps, you can ensure your lawn mower stays in good condition and continues to perform well. Regular maintenance will save time and money by avoiding complex repairs.
Troubleshooting Common Lawn Mower Carburetor Issues
Encountering issues after cleaning your carburetor can be frustrating. Here, we discuss common problems and their solutions to keep your mower running smoothly.
Engine Starts Then Dies
If your lawn mower starts but stops shortly after, consider these steps:
- Check the Fuel: Old or contaminated fuel can cause this issue. Replace it with fresh fuel.
- Inspect the Carburetor: Ensure no cleaner residue is left. Residue can block the jets and affect performance.
- Look at Air Flow: Blocked air filters can also lead to this problem. Clean or replace the filter.
Engine Doesn’t Start at All
Failure to start can be alarming. Here’s what you might check:
- Spark Plug Connection: Make sure the spark plug is properly connected and in good condition.
- Carburetor Blockage: Despite cleaning, blockages can remain. Recheck and clean as necessary.
- Fuel Flow: Ensure the fuel valve is open and fuel is reaching the carburetor.
Unstable Engine Idling
An engine that idles erratically can be a symptom of carburetor issues. To fix:
- Adjust the Carburetor: Sometimes, the carburetor might need slight adjustments. Refer to your mower’s manual.
- Check for Leaks: Air leaks around the carburetor can cause unstable idling. Seal any gaps.
- Re-examine the Cleaner: Make sure all cleaner is cleared out. Excess cleaner can impact performance.
By understanding how to troubleshoot common lawn mower carburetor problems, you can quickly rectify issues and maintain optimal mower performance.

Mastering the Perfect Paint Edging Tool: A Comprehensive Guide
Introduction
Paint edging is a critical aspect of any painting project, ensuring that your walls, ceilings, and trim lines are sharp and professional-looking. Achieving clean, precise edges can make or break the overall appearance of your space. While many painters rely on traditional methods like masking tape and brushes, using a paint edging tool can significantly enhance efficiency and quality. This article delves into the world of paint edging tools, exploring their benefits, types, usage techniques, maintenance, and how they compare to conventional methods. Whether you’re a DIY enthusiast or a professional painter, this guide will equip you with the knowledge to choose and use the best paint edging tool for your projects.
1. Understanding the Importance of Clean Edges in Painting
Clean, well-defined edges are essential for creating a polished and professional look in any painting project. The importance of clean edges cannot be overstated, as they serve multiple purposes beyond just aesthetics:
Visual Appeal
Sharp edges create a crisp, clean line that enhances the visual appeal of your painted surfaces. They give your room a finished, put-together appearance that can elevate the overall ambiance of the space. Clean edges also help in highlighting architectural features such as crown molding, baseboards, and window frames, making them stand out beautifully.
Professionalism
For professional painters, delivering high-quality work with clean edges is crucial. Clients expect flawless results, and poorly executed edges can lead to dissatisfaction and damage to your reputation. Using a paint edging tool ensures consistent and reliable outcomes, helping you meet and exceed client expectations.
Time-Saving
Achieving clean edges without specialized tools can be time-consuming. Traditional methods often involve meticulous masking and careful brushwork, which can extend project timelines. Paint edging tools streamline the process, allowing you to complete edges more quickly and efficiently, thereby saving valuable time.
Precision
Manual painting methods can sometimes result in uneven or smudged edges due to human error. Paint edging tools offer greater precision by providing a controlled and steady application, reducing the likelihood of mistakes and rework.
2. Types of Paint Edging Tools Available in the Market
When it comes to achieving clean, precise edges in your painting projects, having the right tool can make all the difference. The market offers a variety of paint edging tools, each designed to cater to different needs and preferences. Here’s an overview of the most common types available:
1. Paint Edgers (Edge Rollers)
Description: Paint edgers, also known as edge rollers, are handheld tools that feature a small roller attached to a handle. These tools come in various sizes, typically ranging from 2 to 4 inches wide, making them versatile for both large and small edges.
Advantages:
- Speed and Efficiency: Edge rollers cover larger areas quickly, reducing the time spent on tedious brushwork.
- Consistency: They provide uniform coverage, resulting in smooth and even edges.
- Ease of Use: Their ergonomic design makes them comfortable to hold and maneuver around corners and tight spaces.
Best For: Walls, ceilings, and large trim sections where speed and consistency are key.
2. Angle Brushes
Description: Angle brushes have bristles cut at an angle, allowing for better control and precision when applying paint along edges. They come in different widths, usually between 1 and 2 inches, suitable for detailed work.
Advantages:
- Precision Control: The angled bristles enable you to reach into corners and crevices with ease.
- Versatility: Ideal for intricate details like window sills, door frames, and decorative moldings.
- Customization: Available in synthetic and natural bristle options, catering to different paint types and finishes.
Best For: Detailed and intricate edge work requiring fine control and accuracy.
3. Paint Tape Systems
Description: Paint tape systems combine masking tape with a specially designed applicator that creates a barrier between the painted surface and adjacent areas. Some advanced systems include built-in cutting blades for precise removal after painting.
Advantages:
- Perfect Lines: Ensures razor-sharp edges by preventing paint bleed.
- Time-Saving: Eliminates the need for extensive prep work and touch-ups.
- Minimal Cleanup: Reduces mess and cleanup efforts post-painting.
Best For: Projects requiring ultra-clean lines and minimal paint bleed, especially around trim and fixtures.
4. Airless Paint Sprayers with Edging Attachments
Description: Airless paint sprayers equipped with edging attachments allow for quick and efficient application of paint while maintaining clean edges. These attachments often include shields or guards to protect adjacent surfaces.
Advantages:
- High Speed: Covers large areas rapidly, ideal for commercial or residential projects.
- Professional Finish: Delivers a smooth, even finish with minimal overspray.
- Flexibility: Suitable for both interior and exterior applications.
Best For: Large-scale projects where speed and coverage are paramount, but maintaining clean edges is still important.
5. Magnetic Paint Guides
Description: Magnetic paint guides are metal strips that attach to metal surfaces using magnets. They act as a physical barrier to ensure straight, clean edges when painting.
Advantages:
- Stability: Provides a stable and secure edge guide, reducing the risk of slippage.
- Adjustability: Can be easily adjusted for different widths and angles.
- Reusability: Durable and reusable, offering long-term value for frequent users.
Best For: Metal surfaces such as radiators, pipes, and metal trims where stability and adjustability are beneficial.
Conclusion:
Choosing the right paint edging tool depends on the specific requirements of your project. Each type has its unique advantages, catering to different levels of detail, speed, and precision. By understanding the capabilities and limitations of each tool, you can select the one that best fits your needs and enhances your painting experience.
3. How to Choose the Right Paint Edging Tool for Your Project
Selecting the appropriate paint edging tool is crucial for achieving the desired results in your painting project. With so many options available, it can be overwhelming to decide which tool is best suited for your needs. Here’s a comprehensive guide to help you make an informed decision:
Consider the Type of Surface You Are Painting
Different surfaces require different approaches and tools. For instance, painting smooth walls versus textured ceilings or intricate trim work will demand varying levels of precision and adaptability.
- Smooth Surfaces: If you’re working on smooth walls or ceilings, a paint edger or angle brush would be ideal. These tools provide the necessary control and speed for covering large, flat areas while maintaining clean edges.
- Textured Surfaces: For textured walls or ceilings, consider using an airless paint sprayer with edging attachments. The spray system can evenly coat textured surfaces without missing spots, ensuring a consistent finish.
- Trim and Molding: When dealing with trim, molding, or other detailed elements, an angle brush or paint tape system would be more appropriate. These tools offer the precision needed for intricate detailing and tight corners.
Assess the Size of Your Project
The scale of your project plays a significant role in determining the right tool. Larger projects benefit from tools that can cover more ground quickly, while smaller, detailed work requires finer instruments.
- Large Projects: For expansive areas like entire rooms or outdoor structures, an airless paint sprayer with edging attachments or a paint edger can save considerable time. These tools can handle large volumes of paint efficiently, ensuring faster completion.
- Small Projects: For smaller jobs, such as touch-ups or minor renovations, an angle brush or paint tape system might be more practical. They provide the necessary precision without the bulkiness of larger tools, making them easier to manage in confined spaces.
Evaluate Your Skill Level
Your expertise and comfort level with painting tools should also factor into your decision. Beginners may find certain tools more user-friendly, while experienced painters can leverage advanced tools for optimal performance.
- Beginners: If you’re new to painting, start with simpler tools like angle brushes or paint edgers. These tools are relatively easy to use and can help build confidence as you learn proper techniques.
- Intermediate Users: As you gain experience, you can explore more sophisticated tools like paint tape systems or magnetic paint guides. These tools offer enhanced precision and can improve the quality of your work.
- Advanced Users: Experienced painters can take advantage of airless paint sprayers with edging attachments for large-scale projects. These tools require a higher skill level but offer unparalleled efficiency and quality.
Budget Constraints
Your budget will also influence your choice of paint edging tool. High-end tools offer superior performance but come at a higher cost. Conversely, more affordable options may suffice for occasional use or smaller projects.
- Budget-Friendly Options: For those on a tighter budget, angle brushes and paint edgers provide excellent value for money. They are relatively inexpensive yet deliver satisfactory results for most home improvement tasks.
- Mid-Range Options: Paint tape systems and magnetic paint guides fall into the mid-range category. They offer a balance between cost and functionality, suitable for users who want a step up in quality without breaking the bank.
- Premium Options: Airless paint sprayers with edging attachments represent the premium end of the spectrum. These tools are more expensive but justify their cost through increased productivity and professional-grade finishes.
Longevity and Maintenance Requirements
Consider the durability and maintenance needs of the tool. Some tools require regular cleaning and care to maintain their effectiveness, while others are more durable and low-maintenance.
- Durable Tools: Paint edgers and angle brushes are generally durable and require minimal maintenance. Regular cleaning with water or solvent can keep them in good condition for extended use.
- Maintenance-Intensive Tools: Paint tape systems and airless paint sprayers may require more upkeep. Ensuring proper storage, cleaning, and occasional replacement of parts can prolong their lifespan.
- Low-Maintenance Tools: Magnetic paint guides are inherently low-maintenance, as they do not come into direct contact with paint. Occasional wiping down is usually sufficient to keep them functional.
Compatibility with Paint Types
Different paints have varying viscosities and properties, which can affect how well a tool performs. Ensure the chosen tool is compatible with the type of paint you plan to use.
- Water-Based Paints: Most paint edging tools are suitable for water-based paints, as they are easier to clean and less likely to cause damage to the tool.
- Oil-Based Paints: For oil-based paints, opt for tools made from materials that resist corrosion and wear. Synthetic brushes and airless sprayers designed for oil-based paints are recommended.
- Specialty Finishes: If you’re working with specialty finishes like metallic or textured paints, choose tools that can accommodate these unique characteristics without compromising quality.
4. Step-by-Step Guide to Using a Paint Edging Tool Effectively
Using a paint edging tool effectively can significantly enhance the quality and efficiency of your painting projects. Follow this step-by-step guide to master the art of clean, precise edges:
Preparation
Before diving into the painting process, thorough preparation is essential to ensure optimal results. Here’s what you need to do:
- Surface Cleaning: Begin by cleaning the surfaces you intend to paint. Remove any dirt, dust, or debris using a damp cloth or vacuum cleaner. A clean surface promotes better paint adhesion and reduces the risk of imperfections.
- Protect Surrounding Areas: Cover floors, furniture, and any other surfaces that you don’t want to paint with drop cloths or plastic sheets. Secure them with painter’s tape to prevent accidental spills or splatters.
- Choose the Right Paint: Select a high-quality paint suitable for the surface you are working on. Water-based latex paints are generally easier to clean and work well with most edging tools. Oil-based paints may require special brushes or sprayers designed for heavier viscosity.
- Load the Tool: Depending on the type of edging tool you are using, load it with paint. For paint edgers and edge rollers, dip the roller into the paint tray and roll it back and forth to ensure even distribution. For angle brushes, load the bristles by dipping them halfway into the paint and tapping off excess.
Technique
Proper technique is crucial for achieving clean, professional-looking edges. Here’s how to apply paint effectively using your chosen edging tool:
- Start at the Edge: Position the edging tool close to the edge of the surface you want to paint. For paint edgers, place the roller against the wall or ceiling, ensuring it is aligned with the edge. For angle brushes, position the angled bristles near the edge for better control.
- Apply Gentle Pressure: Apply gentle pressure to the tool as you move it along the edge. Avoid pressing too hard, as this can cause paint to seep under the tool or create uneven lines. Maintain a steady hand for consistent results.
- Move in Small Sections: Work in small sections to maintain control and avoid overloading the tool with paint. For larger areas, overlap each stroke slightly to ensure full coverage without gaps.
- Maintain Consistent Speed: Keep a steady pace as you move the tool along the edge. Too fast can result in missed spots, while too slow can lead to drips or smudges. Practice finding a balance that works best for you.
- Use Multiple Strokes if Necessary: If you notice any missed spots or uneven areas, go over them with additional strokes. Be cautious not to overload the tool, as this can compromise the integrity of the edge.
- Check for Bleed-Through: If you’re using paint tape, check for any bleed-through by gently pressing down on the tape as you paint. Ensure the tape adheres properly to prevent paint from seeping underneath.
- Allow Adequate Drying Time: After applying paint, allow it to dry according to the manufacturer’s instructions. Avoid touching or disturbing the freshly painted edges until they are fully dry to prevent smudging or damage.
Tips for Advanced Techniques
Once you’ve mastered the basics, try these advanced techniques to take your edge work to the next level:
- Double-Layer Taping: For ultra-sharp lines, apply two layers of painter’s tape, offsetting them slightly. This creates a double barrier against paint bleed and ensures crisp edges.
- Feathering Edges: Use a small, dry brush to feather the edges of the paint. This technique helps blend the paint smoothly into adjacent areas, creating a seamless transition.
- Cut-In Technique: For tight corners and detailed areas, practice the cut-in technique. Load a small brush with paint and carefully apply it along the edge in short, controlled strokes. This method allows for precise control and clean lines.
- Practice on Scrap Materials: Before starting your main project, practice on scrap materials to get a feel for the tool and refine your technique. This helps build confidence and ensures smoother execution during the actual job.
By following these steps and tips, you can effectively use a paint edging tool to achieve professional-grade results. With practice and attention to detail, you’ll soon be able to create clean, precise edges that enhance the overall appearance of your painted surfaces.

Conclusion
Mastering the art of paint edging is essential for achieving a polished, professional finish in any painting project. The right paint edging tool can make all the difference, offering precision, efficiency, and reliability. From understanding the importance of clean edges to choosing the appropriate tool, and from mastering effective usage techniques to maintaining and caring for your equipment, this guide has provided a comprehensive overview of everything you need to know.
By investing in a quality paint edging tool and following best practices, you can transform your painting projects, whether you’re a DIY enthusiast or a professional painter. Clean, well-defined edges not only enhance the visual appeal of your space but also contribute to the overall quality and longevity of your work. Embrace the power of paint edging tools and take your painting skills to the next level. Happy painting!
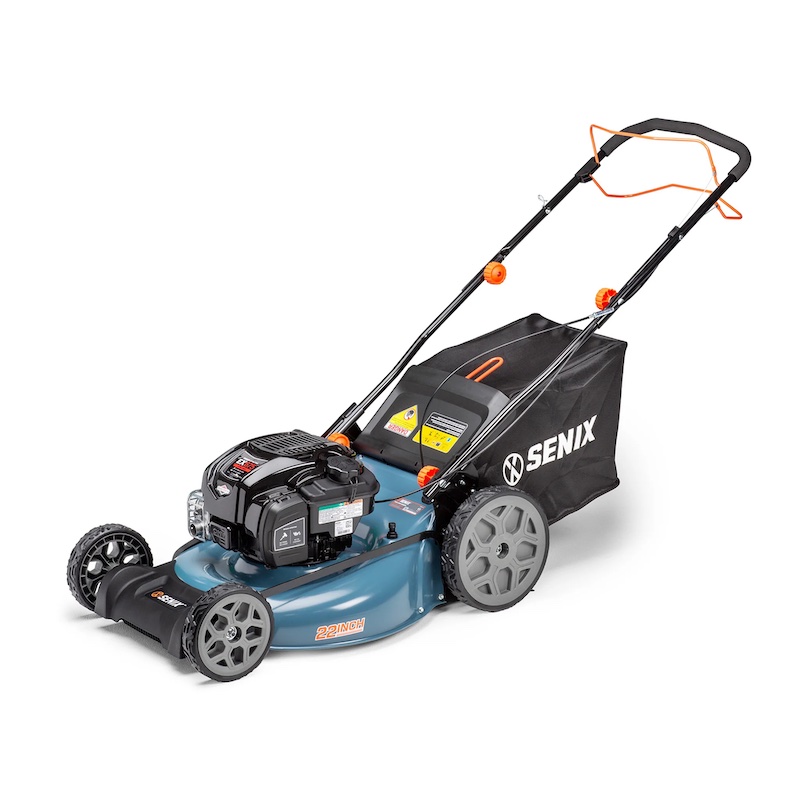
What Kind of Gas for Lawn Mower? Choosing the Right Gas
The Importance of Selecting the Correct Fuel Type
What kind of gas for lawn mower? Selecting the right fuel for your lawn mower is critical. A suitable fuel type enhances mower performance and extends its lifespan. Wrong choices can lead to costly repairs or decreased efficiency.
Recommended Octane Ratings for Lawn Mowers
For most lawn mowers, gasoline with an octane rating of 87 or higher is recommended. This level ensures efficient burning without damaging the engine. It’s advisable to always check your mower’s manual for specific recommendations.
The Effects of Using Low-Quality Gasoline
Using low-quality gasoline can seriously harm your lawn mower. Gasoline with an octane rating below 87 could lead to engine knocking and reduced efficiency. Furthermore, poor quality gas might void your mower’s warranty, leading to out-of-pocket expenses for repairs.
Understanding Ethanol Content in Gasoline
Ethanol content plays a crucial role in gasoline used for lawn mowers. Modern fuels often incorporate ethanol, a form of alcohol produced by fermenting and distilling starch crops like corn. While ethanol can help reduce emissions, its levels must be carefully managed in fuel for lawn mowers.
Risks of Higher Ethanol Levels in Lawn Mowers
High ethanol levels in gasoline can be detrimental to lawn mowers. Gasoline with more than 10% ethanol can cause several issues:
- Increased Wear and Tear: Ethanol can corrode metal parts and degrade rubber and plastic components in the mower.
- Moisture Accumulation: Ethanol tends to attract and absorb water from the air. This moisture can enter the fuel system, leading to rust and clogging.
- Engine Performance: High ethanol levels can make the engine run hotter, potentially overheating the mower and reducing its lifespan.
Using gasoline with high ethanol content in lawn mowers might also void the warranty, as it is considered improper use.
The Safe Ethanol Level and Octane Combination for Lawn Mowers
To ensure the safety and efficiency of your lawn mower, it is key to choose the correct ethanol and octane levels.
- Ethanol: The safest ethanol level for most lawn mowers is 10% or less (E10). Higher levels like E15 are not recommended and may harm the engine.
- Octane: An octane rating of 87 or higher is best for lawn mowers. This rating supports efficient fuel burning and minimizes the risk of engine damage.
Always consult your lawn mower’s manual to verify the recommended fuel specifications. Choosing the right combination will enhance performance and extend your mower’s life.
Seasonal Considerations for Lawn Mower Fuel
Proper fuel management aligns with seasonal use of your lawn mower. Recognizing seasonal fuel needs prevents common mishaps and prolongs your mower’s functionality.
Risks of Letting Gas Sit in the Mower
Leaving fuel in your mower over winter can cause significant issues. Hydrocarbons in the gasoline evaporate, leaving a harmful residue inside the engine. This residue can develop into varnish, which clogs the carburetor and fuel lines. Such blockages hinder the mower’s engine from operating effectively. Problems may appear when you start the mower after storage – difficulty starting or performing inadequately are common signs.
Precautions for Storing Gas in Lawn Mowers During Off-Season
To avoid the complications of stale gas, empty the mower’s tank at the end of mowing season or use a fuel stabilizer. Adding a stabilizer to the fuel can prevent the formation of varnish and keep the fuel fresh for about six months. Always store your mower in a cool, dry place to protect it from extreme temperatures and moisture. By adhering to these guidelines, you ensure a smoother start-up in spring and safeguard the mower’s longevity.
Practical Tips for Fuel Usage in Lawn Mowers
Proper fuel management in lawn mowers ensures optimal performance and longevity. Keeping track of the fuel you use and understanding how it affects your mower is essential. These practical tips will help you maintain the efficiency of your lawn mower.
Checking Compatibility with Manufacturer Recommendations
Always consult your lawn mower’s manual before choosing gas. It will list the best type of fuel and octane rating for your specific model. Using the recommended fuel type prevents potential damage and maintains the machine’s efficiency.
Regular Fuel Checks and Maintenance Tips
Regularly check the fuel quality in your lawn mower. Replace old or contaminated gas with fresh fuel to improve performance. Regular maintenance, like cleaning the fuel tank and replacing filters, also helps. This keeps your lawn mower running smoothly, avoiding unnecessary wear or damage.
Long-Term Impacts of Using Wrong Gas on Mowers
Choosing the wrong type of gas can seriously affect a lawn mower’s lifespan and performance. Using gas with incorrect octane levels or too much ethanol can have severe consequences.
Potential Damage to Engine Components
Using gas with low octane ratings or high ethanol content can lead to:
- Corrosion in the fuel system from ethanol which attracts moisture.
- Deposits on engine parts, resulting from the use of lower quality fuel.
- Wear in the carburetor, fuel lines, and engine from impure gas.
These issues may not appear immediately but can gradually develop, leading to costly engine repairs or the need for a new mower.
Implications for Mower Performance and Durability
The wrong gas affects a mower’s performance and durability in several ways:
- Engine Knocking and Misfires: Wrong octane may result in combustion problems.
- Loss of Power: This occurs when the engine cannot burn fuel efficiently due to impurities.
- Shortened Lifespan: Continuous use of unsuitable fuel can significantly reduce a lawn mower’s operational life.
To prevent these problems, always use the right type of gas as recommended by your lawn mower’s manufacturer. Regular maintenance and fuel checks can also ensure better mower performance and longevity.
Legal and Warranty Considerations
Navigating legal and warranty issues is key when choosing gas for your lawn mower.
Warranty Concerns with Wrong Fuel Usage
Using the wrong kind of gas can lead to big problems. It risks voiding your mower’s warranty. This means repairs or damage from the wrong gas come out of your pocket. Always follow your mower’s manual. It guides what kind of gas maintains the warranty. Pay close attention to approved fuel types and octane ratings.
Regulations on Gasoline Types by the U.S. Department of Energy
The U.S. Department of Energy sets rules on gas types. They do not approve fuels like E15 for small engines or old cars. These rules protect engines and ensure safe usage. For lawn mowers, use gasoline as per their regulations. This keeps your machine safe and compliant with legal standards. It is best to use E10 gasoline, which meets these guidelines and is safe for your mower.
Some Key Points for Your Lawn Mower
Type of Fuel: Most gasoline-powered lawn mowers require regular unleaded gasoline (87 octane). Always check your mower’s manual for specific recommendations.
- Freshness: Gasoline can go bad over time, especially if it contains ethanol. Old gas can cause engine problems. Try to use fresh fuel and avoid letting gas sit in the mower for more than a few months.
- Ethanol Content: Many gas stations sell fuel with up to 10% ethanol (E10), which is generally safe for most modern mowers. However, higher ethanol blends like E15 or E85 can damage small engines, so avoid these.
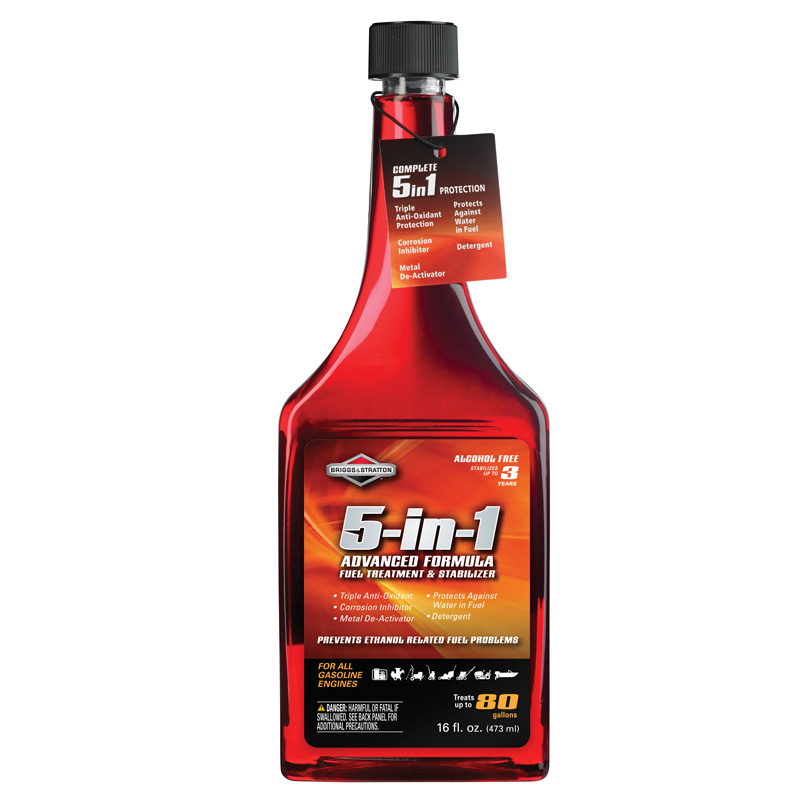
- Stabilizers: If you plan to store fuel for an extended period, consider adding a fuel stabilizer. This helps prevent the gasoline from breaking down and causing issues when you’re ready to use the mower again.
- Proper Storage: Store gasoline in an approved, well-ventilated container away from heat sources and out of reach of children and pets.
- Mixing Oil (for Two-Stroke Engines): If your mower has a two-stroke engine, you’ll need to mix oil with the gasoline. Follow the manufacturer’s instructions for the correct oil-to-gas ratio, typically around 50:1 or 40:1.
- Check the Tank: Before refueling, make sure the mower is turned off and the engine has cooled down. Avoid overfilling the tank, as this can lead to spills or fuel entering the air filter.
- Draining Fuel (Seasonal Maintenance): At the end of the mowing season, it’s a good idea to either run the mower until it’s out of fuel or drain the gas tank to prevent buildup and clogs.
By following these guidelines, you can help ensure your lawn mower runs smoothly and efficiently.
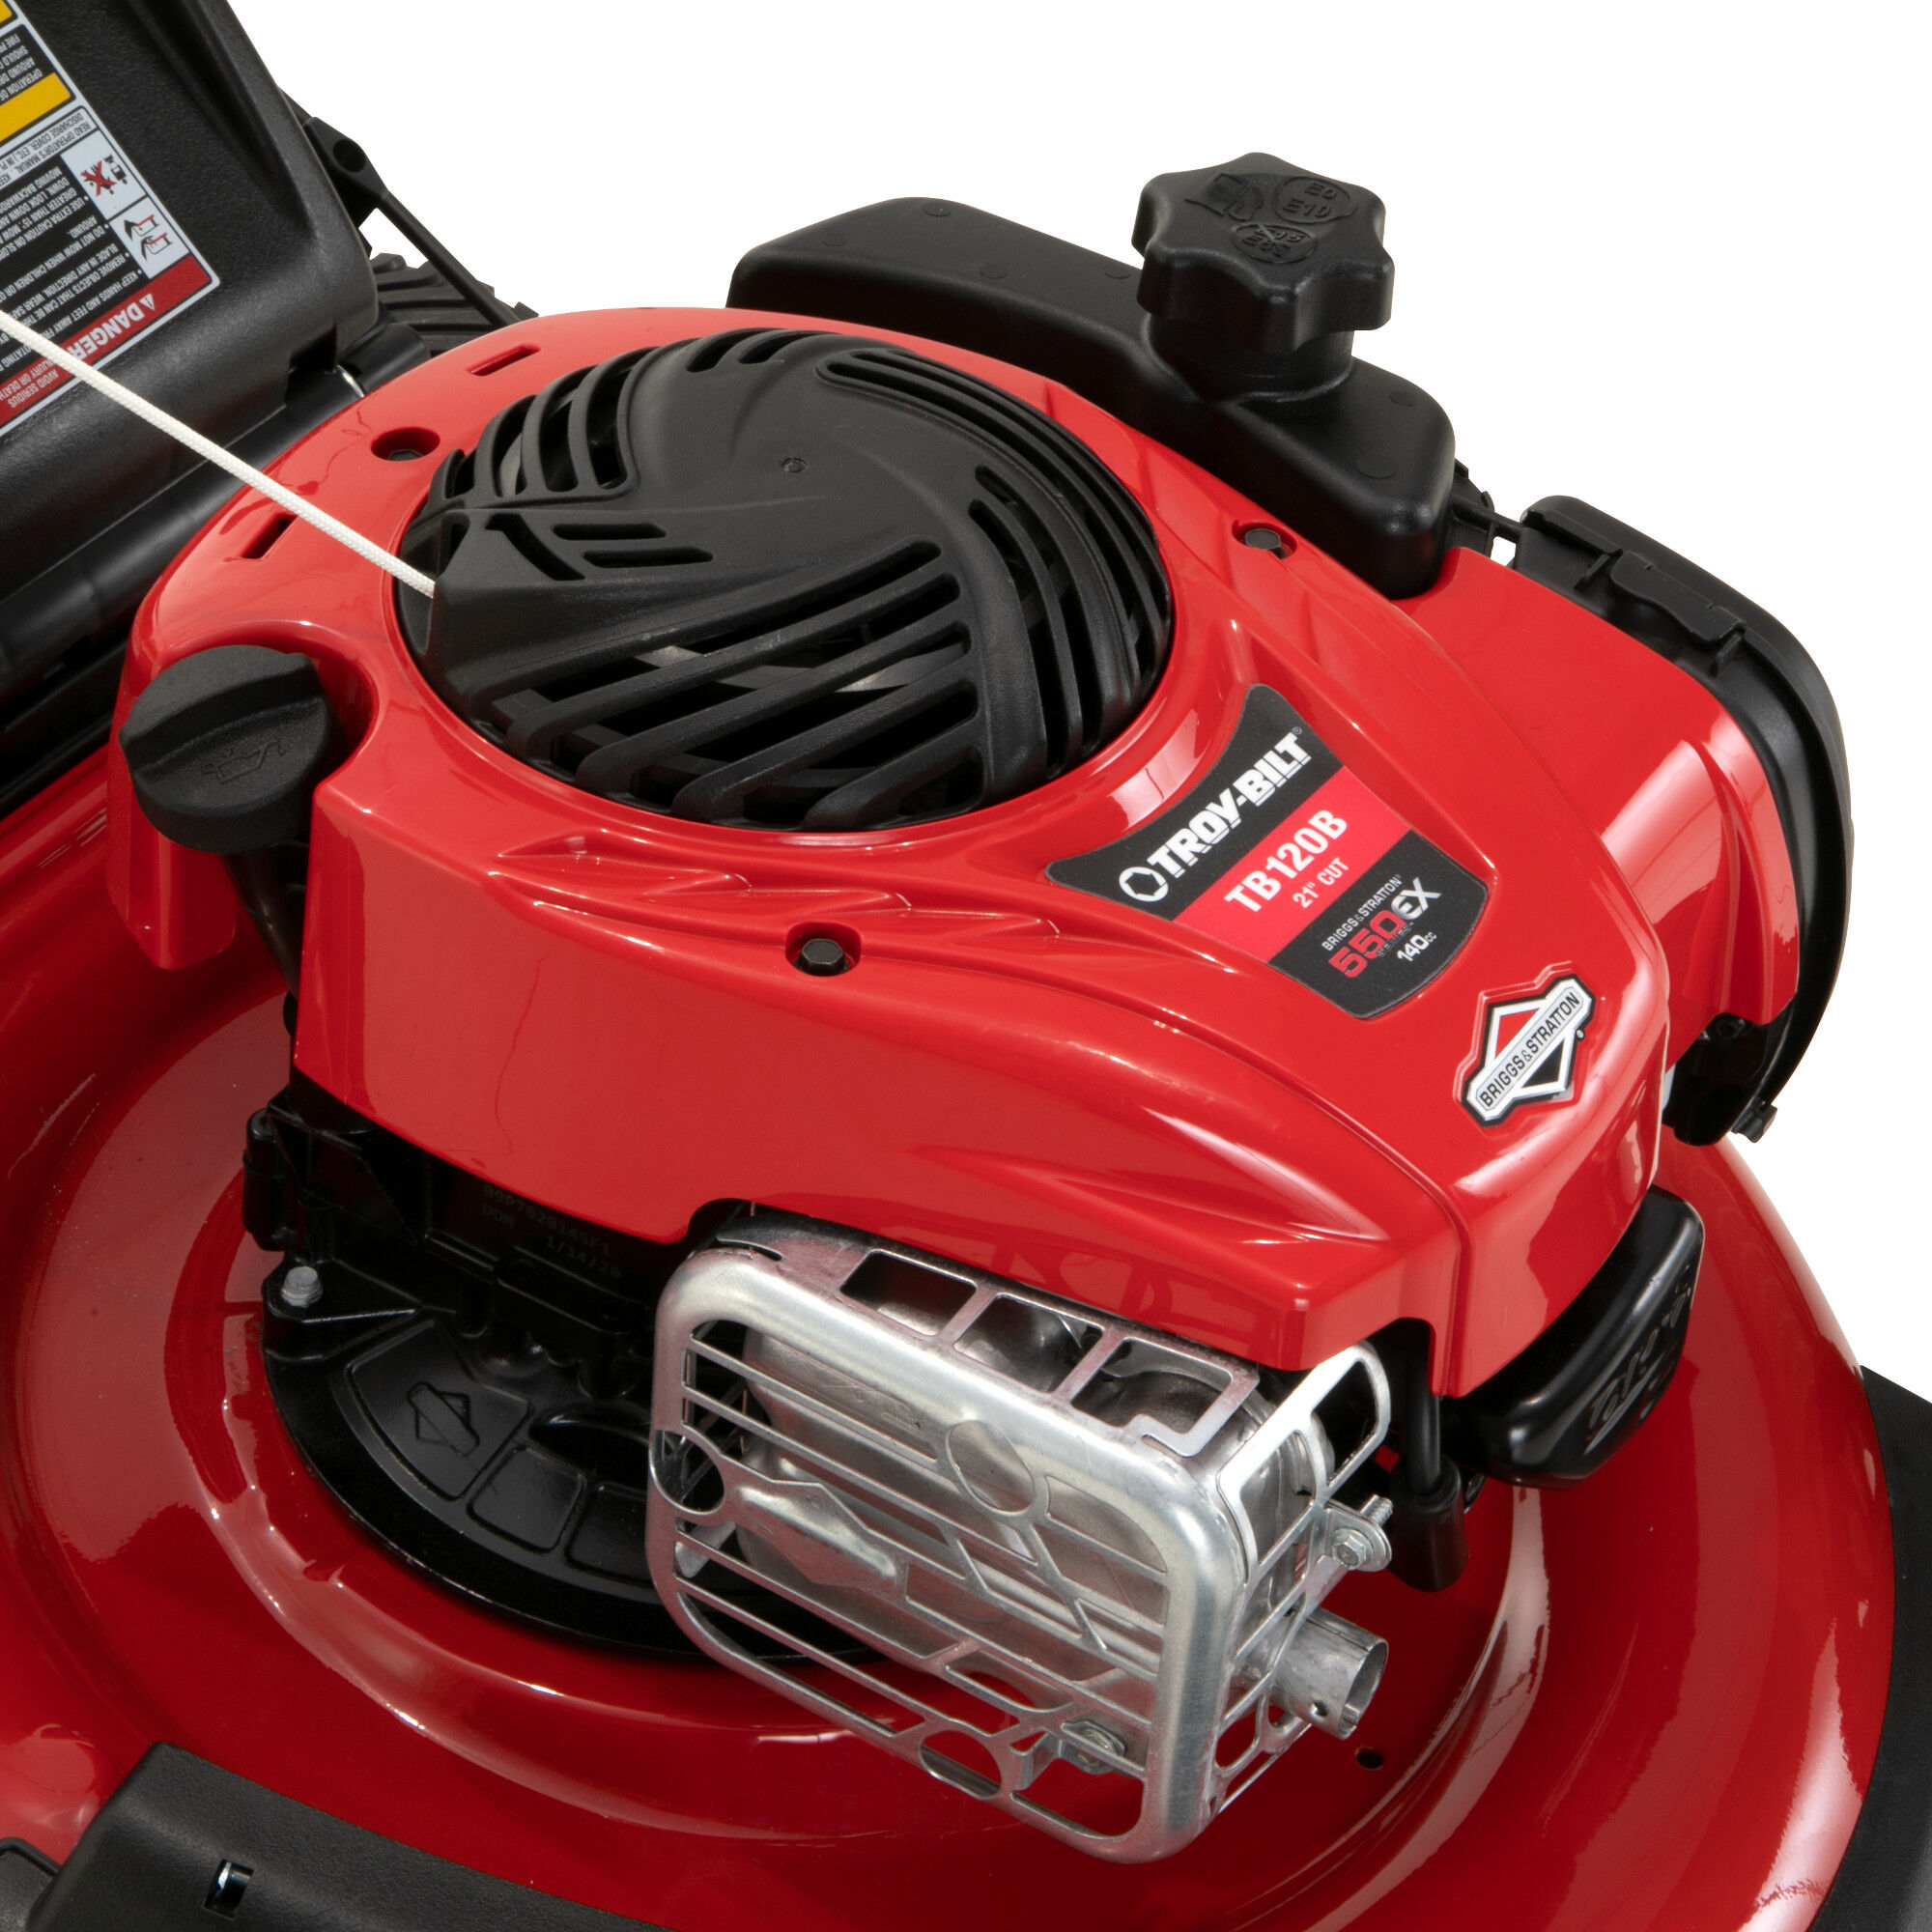
Why Your Riding Lawn Mower Won’t Start No Click, No Problem?
Identifying the Issue: Understanding Scenarios When Your Mower Won’t Start
Riding lawn mower won’t start no clicking? When you face a non-starting riding lawn mower, it usually falls into one of several scenarios, each indicating a specific underlying issue. Identifying which scenario you’re dealing with is the first step towards troubleshooting.
- The Engine Cranks but Doesn’t Start: This suggests that the engine is turning over but lacks spark, fuel, or proper compression.
- Nothing Happens When the Key is Turned: Indicates potential issues with your mower’s battery or electrical system.
- Starter Solenoid Clicks but No Crank: If you hear a click without engine movement, it could point to a malfunctioning starter solenoid or a deeper engine problem.
- No Click, No Start: When there’s no sound at all upon turning the key, you might be dealing with a dead battery or a failed connection or switch.
By understanding these scenarios, you can effectively begin to pinpoint the cause of the start failure. Careful observation of the symptoms will dictate the specific troubleshooting path to follow. Remember, accurate diagnosis is key in restoring your riding lawn mower to working condition.
Quick Troubleshooting for Engine Cranks But Doesn’t Start
When facing a scenario where your riding lawn mower’s engine cranks but refuses to start, it’s time for quick troubleshooting. This situation usually points to one of three critical requirements not being met: fuel, compression, or spark. Let’s walk through a few steps to diagnose and address the issue.
Check for Fuel Issues
Begin with the most accessible problem, the fuel supply. There could be various reasons why fuel isn’t reaching the engine:
- Check the Fuel Tank: Make certain there is enough fresh gas in the tank. Stale or contaminated fuel can prevent starting.
- Inspect the Fuel Lines: Look for clogs or damages that might block fuel flow.
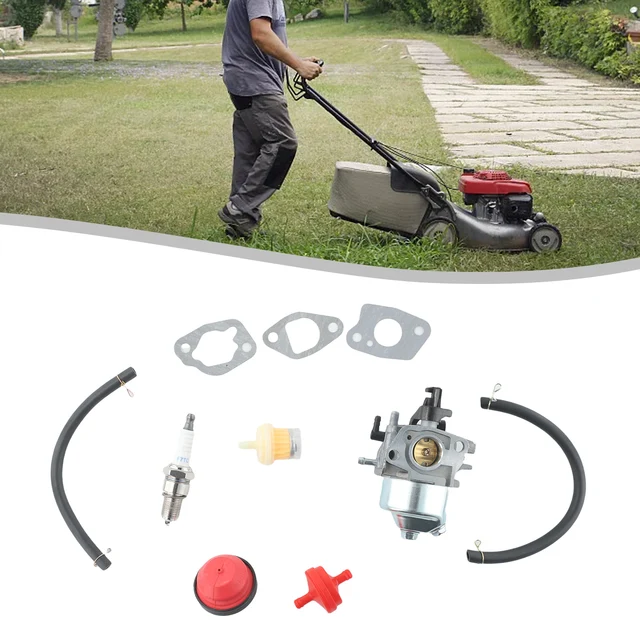
- Examine the Carburetor: Issues with the carburetor, such as dirt or clogs, can stop the fuel supply.
Assess the Compression
An engine lacking proper compression won’t start. Perform a compression test using a gauge or seek professional help if you’re unfamiliar with this step.
Verify Spark Plug Function
A faulty spark plug can prevent the engine from starting. Remove the spark plug and:
- Check its Condition: Look for fouling or damage.
- Test for Spark: Refer to your mower’s manual to safely check for spark.
Check Other Possible Issues
If you’ve confirmed fuel, compression, and spark and still face issues, consider checking these:
- Air Filter: A dirty air filter can choke the engine.
- Safety Switches: Ensure all safety switches, such as the seat switch, are engaged properly.
Your riding lawn mower relies on these systems working in harmony. Go through these steps methodically to cover all bases. Remember, refer to your mower’s manual for specific procedures or consider professional maintenance to avoid potential damage. Keep these troubleshooting tips in mind, and you’ll be on your way to a smooth start and a perfectly mowed lawn.
Resolving Fuel Supply Problems to Start Your Mower
If your mower’s engine cranks but won’t start, check the fuel supply first. A common cause could be fuel issues blocking the mower from starting properly. Here’s what you can do to resolve fuel-related problems:
Ensure Adequate Fuel Level
- Check the fuel tank for enough gas. It may sound simple, but it’s a frequent oversight.
Use Fresh Fuel
- Refresh old or contaminated gas. If it’s been sitting for over a month, drain it out and refill the tank.
Clean the Fuel Cap Vent
- Clear any blockage from the fuel cap vent to prevent vacuum in the tank.
Inspect the Fuel Lines
- Look for any kinks or clogs that could stop fuel flow to the engine.
Check the Carburetor
- A dirty or clogged carburetor can cause fuel delivery problems. It might need cleaning or replacing.
Consider Adding Fuel Stabilizer
- Use a fuel stabilizer to keep the gas fresh, especially when storing your mower.
By addressing these simple yet crucial fuel supply issues, your mower is more likely to start smoothly. Keeping your mower’s fuel system clean and using fresh gas are key to prevent starting problems. Run these checks regularly to keep your riding lawn mower in peak condition.
What to Do When Nothing Happens as You Turn the Key
When you turn the key and nothing happens, it’s crucial to check a few key areas. First, make sure the mower’s battery is charged. A low or dead battery can’t start the engine. Use a multimeter to test the battery voltage. If it reads below 12 volts, charge or replace the battery. Next, examine the cables for loose connections or corrosion. Clean any corrosion and tighten connections as needed. Ensure the safety switches, like the brake and blade controls, are in the correct positions. The mower won’t start if these switches aren’t properly set. Check the fuse next. A blown fuse can lead to power issues. If the fuse looks burnt or broken, replace it. Lastly, consider the ignition switch. If it’s faulty, it may need replacement. Follow these steps methodically for a systematic diagnosis, especially if your riding lawn mower won’t start with no clicking sound.
Battery and Electrical System Checks for Start Failure
When your riding lawn mower won’t start with no clicking sound, it might be an electrical issue. Starting failures often relate to the battery or mower’s electrical system. Here are some steps to guide you through important checks:
Test the Battery
A weak battery often causes starting problems. Use a multimeter to check the battery. If it’s under 12 volts, it needs charging or replacement.
Clean Battery Terminals
Corrosion on the terminals can block power. Clean them with a wire brush to ensure a good connection.
Inspect and Tighten Cable Connections
Loose cables can prevent starting. Check for loose connections and tighten them as needed.
Evaluate the Safety Switches
Your mower’s safety switches must be set correctly. The mower will not start if they are not.
Check the Fuse
A blown fuse can stop the mower from starting. Look for a burned-out fuse and replace it.
Test the Charging System
The alternator or charging system could be failing. If the battery keeps dying, test the charging system.
By following these steps, you can often identify and resolve start failures caused by the battery or electrical system. Routine checks of these components are essential for reliable mower operation.
Diagnosing and Fixing Starter Solenoid Issues
When your riding lawn mower emits a clicking sound but won’t crank, the starter solenoid may be at fault. Here’s how to diagnose and fix issues with the starter solenoid:
Test the Starter Solenoid
To check if the solenoid is working, turn the key and listen for a clear clicking sound. No click can mean a dead solenoid.
Check for a Dead Battery
A dead battery can mimic solenoid problems. Test the battery voltage with a multimeter. Replace the battery if needed.
Examine Cable Connections
Inspect cables to the solenoid for looseness or corrosion. Tighten connections and clean corrosion with a wire brush.
Test Solenoid Functionality
Use a multimeter to test for power at the solenoid’s terminals. If there’s power but no click, the solenoid might need replacing.
Replace the Starter Solenoid
If tests confirm the solenoid is faulty, replace it. Consult the mower’s manual for the correct part number.
By following these steps, you can address issues with the starter solenoid and move closer to solving your mower’s starting problems. Make sure to perform these checks regularly to keep your mower in top shape.
How to Address a Clicking Sound Without Engine Crank
When your riding lawn mower makes a clicking noise but fails to crank, the issue often lies with the starter solenoid or battery. Follow these troubleshooting steps to address the problem effectively.
Check the Battery First
- Test the Battery: Use a multimeter to check the battery’s voltage. If it’s below 12 volts, the battery might be the problem.
- Examine Battery Terminals: Look for corrosion on the terminals. Clean them well to ensure a strong connection.
- Evaluate Cable Connections: Make sure all connections to the battery are tight and secure.
Assess the Starter Solenoid
- Listen for the Click: When you turn the key, listen for a distinct click from the solenoid. No sound can point to a solenoid failure.
- Test Solenoid Power: Use a multimeter to check if power reaches the solenoid when the key turns. Lack of power suggests issues upstream in the electrical system.
- Replace the Solenoid if Necessary: If power reaches the solenoid and it still fails to function, replacing it might solve your problem.
Check Related Electrical Components
- Fuse Inspection: Locate and inspect the fuse connected to the starting system. Replace it if you find it blown.
- Test Other Safety Switches: Validate that all safety switches are engaged. These include the seat and brake switches. They prevent the engine from starting if not correctly set.
By systematically checking each of these areas, you can usually pinpoint why your riding mower is making a clicking sound but not cranking. Regular maintenance can prevent these issues from arising in the first place.
Expert Maintenance Tips to Prevent Starting Problems
Regular maintenance can keep your riding lawn mower running smoothly and reduce starting issues. Here are expert tips to help prevent these problems before they occur:
Schedule Regular Inspections
- Have a professional inspect your mower yearly. They can spot and fix issues early on.
Change the Oil Regularly
- Follow the manufacturer’s guidelines on oil change intervals.
Keep the Battery Charged
- Regularly check your mower’s battery charge. Recharge it if needed, especially after long storage periods.
Clean or Replace Air Filters
- Clean or replace air filters as recommended to ensure good air flow into the engine.
Check Spark Plugs and Replace if Necessary
- Inspect spark plugs periodically; replace them if you find deposits or wear.
Adjust or Replace Belts
- Check belts for wear and proper tension regularly. Replace worn or loose belts.
Keep the Fuel System Clean
- Use fresh fuel and add a fuel stabilizer if the mower will sit idle.
- Check and clean the fuel cap vent and replace the fuel filter as needed.
Riding lawn mower won’t start no clicking? By following these maintenance tips regularly, you can greatly improve the chances that your riding lawn mower will start when needed and perform at its best throughout the mowing season.
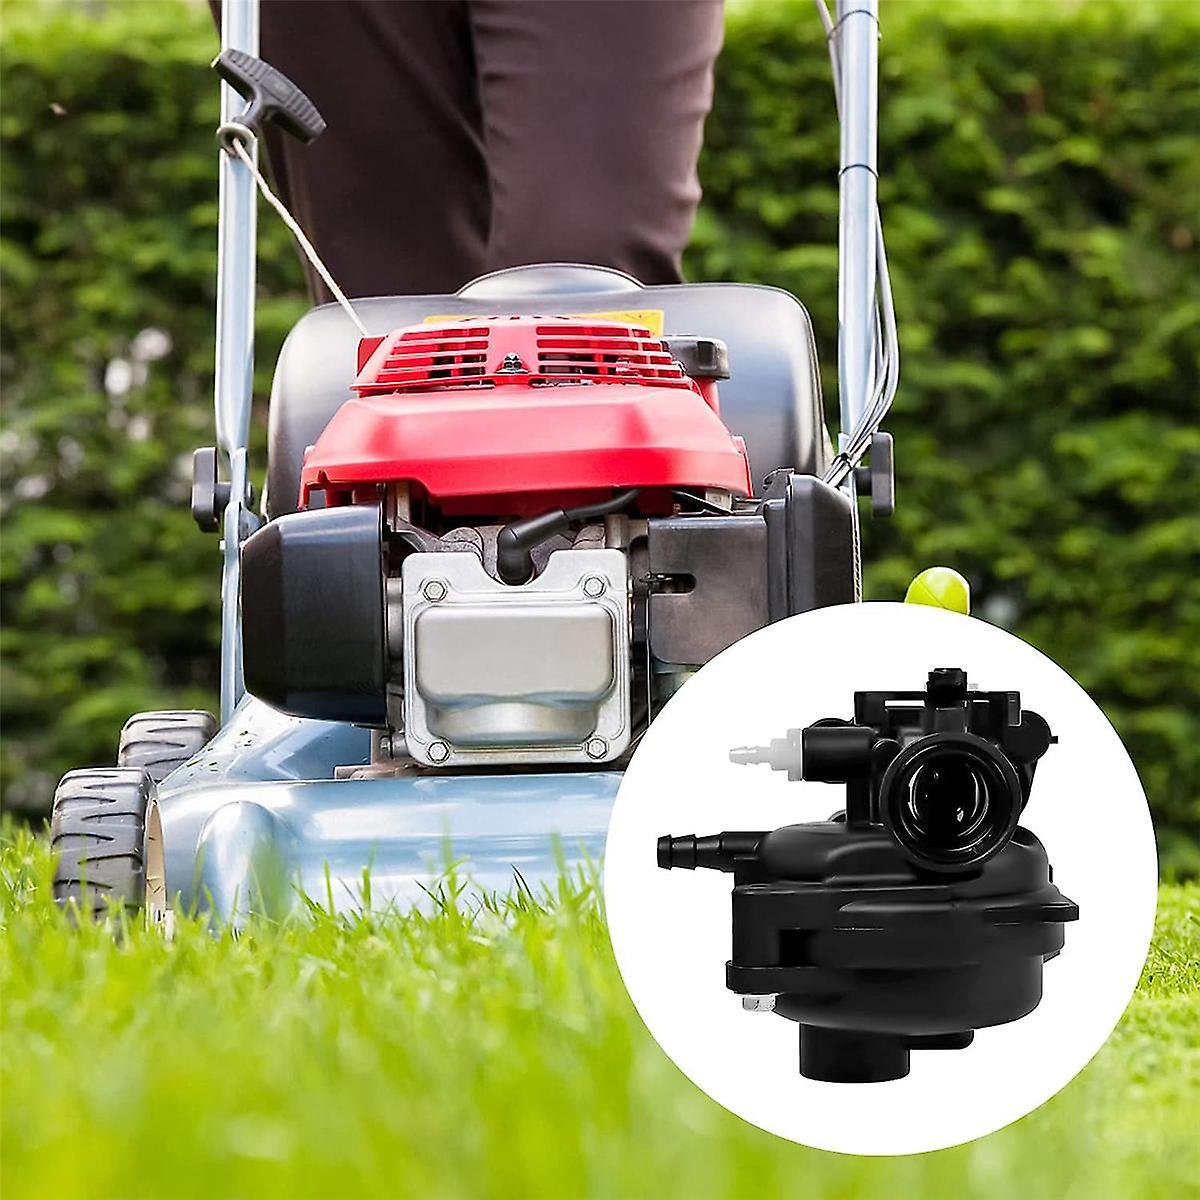
Where Is the Carburetor on A Lawn Mower: Locating the Carburetor
Introduction to Lawn Mower Carburetors
Where is the carburetor on a lawn mower? Understanding where the carburetor on a lawn mower is located is crucial for maintenance and troubleshooting. A carburetor’s main role is to mix air with gasoline in the right proportion. This mixture is what fuels the lawn mower’s engine to run smoothly. The exact locatoin of the carburetor can vary, usually at the top or side of the engine. It’s connected to both the air intake and the gas tank.
Start by turning off your lawn mower and placing it in a stable position. Then look for a round or square filter housing. This is commonly located on the engine’s top or side and connected to the carburetor. If you can’t find it easily, follow the fuel line from the gas tank. This line usually ends at the carburetor. Always refer to your mower’s manual for guidance on specific models.
Tools and Safety Precautions
Before attempting to locate the carburetor on your lawn mower, it’s important to gather the right tools and take safety precautions. Here’s what you need to know.
Gather Necessary Tools
To safely and effectively locate the carburetor, you’ll need a few basic tools:
- A pair of gloves to protect your hands.
- A screwdriver to open the filter housing or remove any covers.
- A flashlight to help you see in dark or shadowed areas around the engine.
Make sure you have these tools on hand before starting. They will make the process smoother and help prevent any unnecessary damage to your lawn mower.
Safety Precautions
Safety should always come first when working on any machinery, including lawn mowers. Follow these safety tips:
- Turn off the lawn mower completely and ensure the ignition is off.
- Remove the spark plug wire to prevent accidental starting of the engine.
- Wear sturdy shoes to protect your feet.
- If the engine was running, wait for it to cool down before touching it to avoid burns.
By preparing the right tools and adhering to safety measures, you’re set to begin locating the carburetor on your lawn mower.
Step 1: Preparing the Lawn Mower
Before delving into the carburetor’s location, it’s vital to prep your lawn mower. Start by turning off the lawn mower’s ignition. This prevents the engine from turning on during your inspection. Engage the parking brake and put the mower in gear. This safety measure stops the mower from moving unexpectedly.
Ensure the mower is on a flat, stable surface to circumvent tipping or rolling. If you’re working in a shed or garage, open doors for ventilation. Avoid working in closed spaces where gas fumes could accumulate.
Double-check that the mower’s ignition is off. It’s a good habit that reinforces safety. Lastly, wait for the engine to cool if the mower was recently in use. This prevents burns and other injuries. With these steps, you’re ready to move on to accessing the engine.
Step 2: Accessing the Engine
To access the engine, where the carburetor is mounted, you must first release any covers protecting it. Start by identifying the hood or engine cover of your lawn mower. Release the hood latches or other fasteners that hold the cover in place. You may need to unscrew bolts or turn knobs, depending on your lawn mower’s design.
Once you’ve unfastened the covering, lift it carefully to expose the engine beneath. Some models may have a secondary cover or a shroud over the engine; remove these if necessary. Keep all screws and bolts in a safe place so you do not lose them.
With the engine now in view, you’re a step closer to locating the carburetor. Ensure you have ample light to see all parts clearly. A flashlight can be helpful if the natural lighting is insufficient. Take a moment to visually inspect the engine layout. Your carburetor is usually attached to the engine near the air intake and filter assembly, which you will identify in the next step. This visibility is crucial for both maintenance tasks and diagnosing any potential issues with the carburetor or surrounding components.
Step 3: Identifying the Air Intake and Filter Housing
After opening the engine cover, the next step is to identify the air intake and filter housing. This component is crucial as it is directly connected to the carburetor, facilitating the air intake necessary for fuel mixing. Here’s how to identify them:
- Look for the Filter Housing: This is typically round or square-shaped and located on the top or side of the engine. It features a structure with holes or slits designed to allow air passage while blocking debris.
- Check for Attachments: The filter housing is usually attached to the carburetor with screws or latches. Recognizing these attachments can help confirm that you’re looking at the right component.
- Inspect the Filter Type: Inside the housing, you will find either a paper or foam filter. This filter plays a critical role in cleaning the air before it enters the carburetor.
Identifying these parts accurately is essential for proper lawn mower maintenance and troubleshooting. Ensure you have sufficient lighting, like a flashlight, to get a clear view of the air intake and filter housing.
Step 4: Tracing the Fuel Line to the Carburetor
Once you have identified the air intake and filter housing, you’ll need to trace the fuel line to locate the carburetor. The fuel line is a key component that transports gasoline from the tank to the carburetor, and it’s usually made of rubber or plastic. Here’s what to do:
- Find the Gas Tank: Usually, this is a black container located in an accessible spot for easy refueling.
- Locate the Fuel Line: Look for a rubber or plastic tube coming out near the bottom of the gas tank.
- Follow the Line: Carefully follow the fuel line as it runs from the tank towards the engine.
- Spot the Carburetor Connection: The line will lead you to a junction point where it connects with the carburetor. This area typically has a clamp or a fixture securing the line in place.
It’s important to be gentle when handling the fuel line to avoid damage. If the line appears cracked or damaged, it may need replacement. Remember, locating the carburetor may vary slightly depending on the lawn mower model, so if you run into trouble, consult the owner’s manual for your specific mower.
Step 5: Checking the Carburetor’s Physical Attributes
After you have traced the fuel line to the carburetor, the next step is to examine its physical attributes. Here’s how you can effectively check the carburetor’s condition and features:
- Visibility: The carburetor should now be visible near the junction point of the fuel line. It may be mounted on the side or top of the engine.
- Condition: Look closely at the carburetor for any signs of wear or damage. Check for cracks, leaks, or dirt accumulation which could impair its function.
- Connections and Mountings: Ensure that all connections to the carburetor are secure. This includes checking clamps, screws, and other mounting elements that hold the carburetor in place.
- Operation Mechanisms: Some carburetors will have visible levers or adjustments for varying the air and fuel mixture. Familiarize yourself with these if your mower model includes them.
- Cleanliness: Given the carburetor’s role in mixing air with gasoline, cleanliness is crucial. Make sure there’s no blockage in the air or fuel passages.
If you notice any issues during this inspection, it may signal the need for cleaning or maintenance. Before attempting any repairs, consult your lawn mower’s manual or seek professional help. This step ensures that your mower’s carburetor is ready for efficient operation.
Additional Tips for Carburetor Location on Different Models
When locating the carburetor on various lawn mower models, keep these tips in mind:
- Consult the Owner’s Manual: Each lawn mower model can have a unique engine layout. For specific guidance, always refer to the mower’s manual.
- Check Manufacturer’s Website: Many manufacturers provide online resources, including diagrams and instructional videos. These can be particularly helpful.
- Look for Model-Specific Labels: Some mowers have labels or stickers indicating major components, including the carburetor.
- Engine Configurations Vary: Remember that engine designs differ; some engines have their carburetors hidden beneath covers or between other components.
- Observe Other Lawn Mowers: If available, observing how other models are assembled can offer insight.
By following these additional tips, you’ll have a better chance of quickly and accurately locating the carburetor on any lawn mower model. Stay patient and remember that variations in engine design are common, so take your time to identify the carburetor correctly.
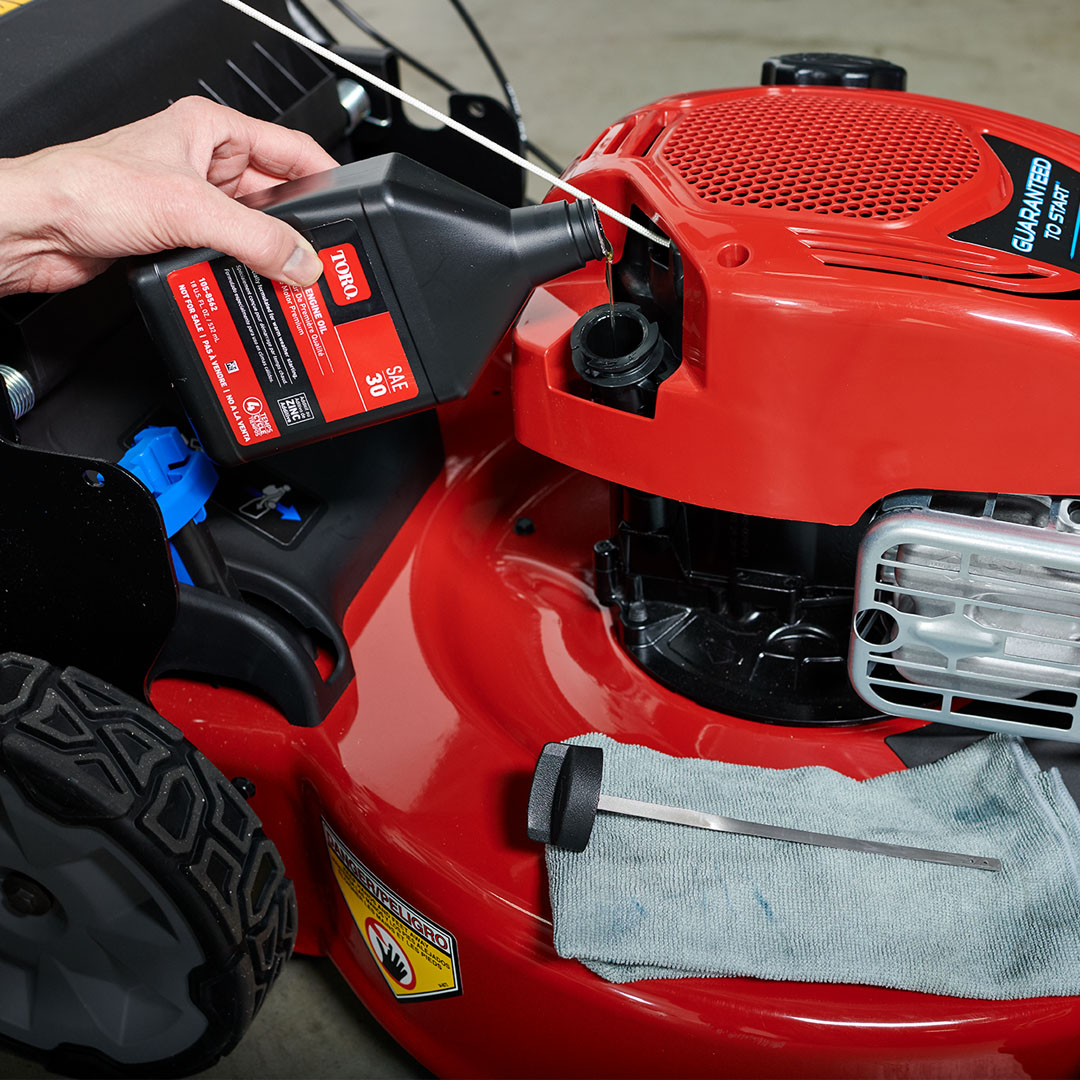
How Much Oil Does A Lawn Mower Take: Oil Requirements
Understanding Lawn Mower Oil Types
Proper maintenance includes knowing which oil to use. How much oil does a lawn mower take? Lawn mowers typically require motor oil to run smoothly. Knowing the difference between oil types is crucial for the health and longevity of your mower’s engine.
Conventional Motor Oils
Conventional motor oils, also known as mineral oils, are the traditional choice for many lawn mower owners. They are derived from refined crude oil. The performance of these oils is generally reliable for standard lawn mower engines. Here’s what to consider:
- Cost-effective: They are less expensive than synthetic oils, making them a good choice for those on a budget.
- Suitable for mild conditions: If you use your lawn mower in average temperatures without extreme conditions, conventional oils will often do the job well.
- Regular changes needed: To maintain engine health, it’s vital to change conventional oil as recommended, usually after 25-50 hours of mower operation.
Synthetic Motor Oils
Synthetic motor oils are engineered to provide superior performance. They handle extreme temperatures better than conventional oils. Benefits include:
- Long-lasting protection: Synthetic oils typically last longer than conventional oils, meaning less frequent changes.
- Better at temperature extremes: Whether in very hot or cold conditions, synthetic oils maintain their viscosity and protect your engine.
- Increased efficiency: They can help the engine run smoother, potentially improving fuel economy and power.
Overall, knowing how much oil does a lawn mower take and the type of oil suited for your mower’s engine, will keep your lawn mower running efficiently. Whether you choose conventional or synthetic oil, always adhere to the manufacturer’s guidelines.
How to Determine the Correct Oil Amount for Your Lawn Mower
Knowing how much oil does a lawn mower take is key to proper engine maintenance. The right amount of oil ensures smooth operation and prevents damage. Here is how to determine the oil necessary for your lawn mower:
Checking the User Manual
The first step should always be to check the user manual. Each lawn mower has specific oil requirements based on its design and engine. The manual will provide details on the type and amount of oil needed. It will also offer the frequency of oil changes recommended.
- Look for the section on maintenance in the manual.
- Follow the manufacturer’s guidelines on oil types and amounts.
- Note any special instructions for oil changes.
Engine Size and Oil Capacity
Generally, engine size dictates oil capacity. Larger engines will likely need more oil than smaller ones. Knowing your engine’s size helps you to figure out the oil capacity.
- Check engine specifications for capacity information.
- Measure the amount of oil recommended for your engine.
- Refill with the exact quantity to avoid issues.
Getting the right oil amount is essential. Too much or too little can cause problems. Use these tips to ensure you add just what your lawn mower needs.
Step-by-Step Guide to Changing Lawn Mower Oil
Changing the oil in your lawn mower is a straightforward task that can significantly extend engine life and improve performance. Here is a simple guide to help you through each step of the process. Remember to consult your user manual for any specific instructions related to your particular model.
Preparing Your Lawn Mower
Before you begin, gather all necessary tools and supplies like gloves, a pan for oil collection, and the correct type of oil. Ensure the mower is on a flat surface and disconnect the spark plug wire for safety. Check the engine is cool to avoid burns.
Draining the Old Oil
Carefully remove the oil cap and tilt the mower to drain the old oil into the pan. Some models may have a drain plug that can be opened with a wrench. Let the oil fully drain to remove any impurities and worn-out oil.
Adding the New Oil
Once drained, place the mower back upright. Use a funnel to pour new oil into the engine, checking to avoid overfilling. Refer to your manual for knowing how much oil does a lawn mower take. Replace the cap securely and wipe away any spills.
Following this guide ensures that you change your lawn mower’s oil accurately and safely. Regular oil changes prevent engine problems and keep your mower running smoothly.
The Importance of Regular Oil Changes
Regular oil changes are critical to your lawn mower’s health. They keep the engine running smoothly and efficiently. Your mower’s engine life can extend with proper oil maintenance. Here are two key benefits of sticking to a regular oil change schedule:
Engine Longevity and Performance
Regular oil changes help ensure that your mower’s engine doesn’t wear out prematurely. Over time, oil breaks down and loses its ability to lubricate effectively. Fresher oil reduces friction, thus preventing excessive wear. This results in:
- A longer-lasting engine: Fresh oil keeps internal parts well-lubricated.
- Better engine performance: Smooth operation is achieved with consistent oil changes.
- Improved fuel efficiency: A well-oiled engine uses fuel more efficiently.
Preventing Common Engine Problems
Changing oil as recommended helps avoid common issues. Old, dirty oil can cause engine problems.
- Reduces the chance of engine failure: Clean oil prevents the build-up of harmful particles.
- Decreases maintenance costs: Regular oil changes can reduce the need for repairs.
- Prevents overheating: Proper lubrication helps maintain an optimal engine temperature.
By realizing how much oil does a lawn mower take and changing it regularly, you avoid costly and inconvenient engine troubles. Always refer to your manual for the right schedule. Remember, investing time in regular oil changes pays off by keeping your lawn mower in top condition.
Troubleshooting Tips for Lawn Mower Oil Issues
Maintaining the right oil level in your lawn mower is essential. However, sometimes issues like overfilling and underfilling may arise. Knowing how to address these can save you from engine damage or inefficient operation.
Overfilling and Underfilling
Overfilling your lawn mower with oil can cause various problems. It might lead to oil leaking into other parts of the engine or cause smoke and hard starting. If you notice these issues:
- Stop the mower and let it cool off.
- Drain excess oil until it reaches the right level.
- Restart the engine and check for any persistent issues.
Underfilling is equally harmful. It can cause poor lubrication and overheating. If your mower runs with too little oil:
- Stop the engine and let it sit.
- Add the right amount of oil as described in your user manual.
- Check the oil level with the dipstick to ensure it’s correct.
Identifying and Addressing Leaks
Oil leaks can be a sign of a problem in your lawn mower. Leaks may occur due to damaged seals or loose components. Stay attentive to any oil spots on the ground where you park your mower. If you find a leak:
- Clean the mower to find the source of the leak.
- Tighten any loose bolts or replace worn seals and gaskets.
- Refill with oil and monitor to ensure the leak is fixed.
Troubleshooting these oil issues in your lawn mower ensures better performance and longevity. If problems persist after your attempts to fix them, contact a professional for help. Remember, knowing how much oil does a lawn mower take is critical for these fixes.
Lawn Mower Maintenance Best Practices
Proper maintenance ensures your lawn mower operates efficiently and lasts longer. Here are some best practices to maintain the oil levels and overall performance of your lawn mower.
Checking Oil Levels Regularly
Regular oil level checks are crucial for the smooth operation of your lawn mower. Always use a dipstick to measure the oil levels before each use to ensure they are within the recommended range. If the oil is below the minimum mark, top it up to meet the specified level. Remember, maintaining proper oil levels prevents engine damage and ensures optimal performance.
Seasonal Maintenance Tips
Seasonal changes can affect lawn mower performance. Here are some tips to keep it in top condition:
- Spring: Ensure you change the oil at the start of the mowing season. Check all fluid levels and the condition of the mower blades.
- Summer: Regularly clean the air filter and check the oil level, as hot weather can increase oil consumption.
- Fall: Prepare your mower for storage by changing the oil and cleaning the engine. Drain fuel or add a stabilizer.
- Winter: If you’re in a cold climate, make sure to store your lawn mower in a dry, frost-free place to avoid oil thickening and battery discharge.
By following these maintenance best practices and adjusting them seasonally, your lawn mower will remain reliable and ready to use whenever needed.
Frequently Asked Questions About Lawn Mower Oil
Navigating lawn mower oil can often prompt several questions. Let’s address some of the most common queries.
Types of Oil for Different Climate Conditions
Choosing the right oil type depending on climate conditions is crucial. Here’s a quick guide:
- Cold climates: Synthetic oils are best. They flow better at low temperatures, safeguarding the engine.
- Warm climates: Conventional oils could be fine. They function well under typical warm conditions.
- Variable climates: Consider a multi-grade oil. It adjusts well to temperature changes, providing stable performance.
How Often Should You Change Lawn Mower Oil?
The frequency of changing your lawn mower oil can affect its performance and longevity. Here are some guidelines:
- Regular use: Change oil every 25-50 hours of operation, as suggested by most manufacturers.
- Light use: If used sparingly, change the oil at least once a season or annually.
- Harsh conditions: In dusty or very hot environments, consider more frequent changes.
Following the specific guidelines for oil type and change frequency ensures your lawn mower operates efficiently and lasts longer.

