Transform Your Garden: The Creative Watering Can Planter Ideas
Choosing the Right Watering Can for Your Planter
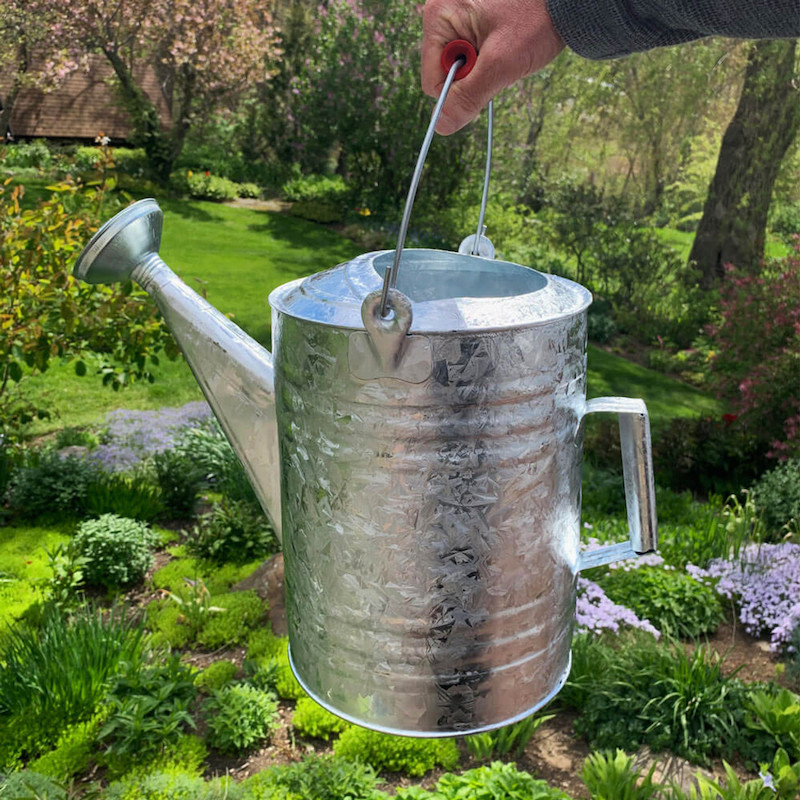
Selecting the perfect watering can planter is crucial for both aesthetics and functionality. Start with size; a can that’s too large may overwhelm your plants, while one too small won’t provide ample space for root growth. Material matters as well. Metal cans offer durability and a classic look, while plastic ones are lightweight and come in various colors. Think about the design; a vintage-style can adds charm, whereas a modern design suits contemporary gardens. Check for a nozzle with a fine rose attachment for gentle watering. Ensure the can has a comfortable handle for easy lifting and pouring. Keep these tips in mind to pick an ideal watering can planter for your garden.
Creative Watering Can Planter Designs
After selecting the right watering can for your garden, let your creativity bloom with unique planter designs. Here are some inspirational ideas to get you started:
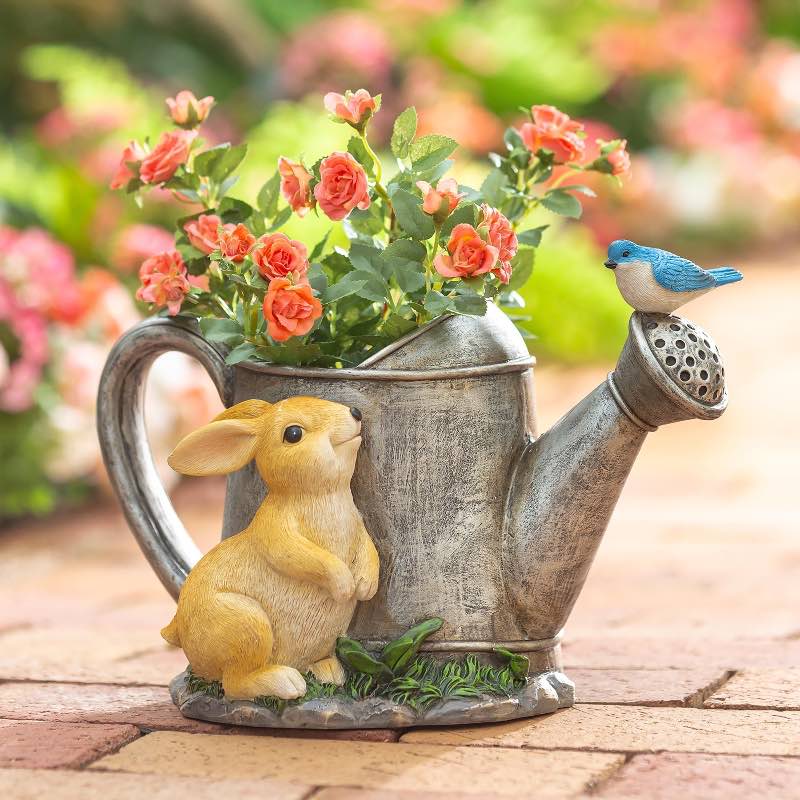
- Vintage Charm: Take an old metal can and distress it further for an antique look. It can complement a rustic garden theme.
- Fairy Garden Fantasy: Create a miniature fairy garden. Use small plants and figurines to bring the fantasy to life within the can.
- Painted Perfection: Brighten a plain can with weather-resistant paint. Choose colors that stand out or match your outdoor decor.
- Mosaic Magic: Adorn your watering can with glass or ceramic tiles for a shimmering mosaic effect. This can add a touch of art to your garden.
- Herb Haven: Transform your watering can into a portable herb garden. Fresh herbs are at hand whenever you cook outdoors.
Each of these designs allows the watering can planter to serve as both a functional item and a decorative piece. Keep the use of the keyword ‘watering can planter’ within the prescribed limit to maintain readability. By incorporating these designs, not only do you make efficient use of old watering cans, but you also add unique touches that enhance the beauty of your outdoor space.
Tips for Planting in a Watering Can
When planting in a watering can, consider these helpful tips to ensure success:
- Choose Suitable Soil: Select a high-quality potting mix that provides proper drainage and nutrient support for your plants.
- Mind the Drainage: Drill holes in the bottom of the can if they’re not already present to prevent waterlogging.
- Layer the Base: Place a layer of pebbles or gravel at the bottom to enhance drainage and prevent root rot.
- Go for Small Plants: Opt for smaller plants or seedlings, as they fit well in the confines of a watering can planter.
- Monitor Water Levels: Water sparingly to avoid overwatering, as the space inside a watering can is limited.
- Consider the Weight: Remember that the can will be heavier once filled with soil and plants; ensure it’s manageable.
- Fertilize with Care: Use a diluted liquid fertilizer to gently provide nutrients without overwhelming your plants.
With these tips in mind, your watering can planter can thrive and add a unique touch to your garden.
Best Plants for Watering Can Planters
Choosing the best plants for your watering can planter can be quite fun. Look for plants that thrive in small spaces and need moderate watering. Here are some excellent picks:
- Succulents and Cacti: These are ideal because they grow slowly and need little water.
- Annual Flowers: Think pansies or petunias for a splash of color.
- Herbs: Basil, chives, and parsley can grow well in watering can planters.
- Ferns: The compact Boston fern is a good choice.
- Alpine Plants: These are used to harsh conditions and grow well in confined spaces.
Remember, the key is to select plants that match the watering can’s environment. Make sure they get the right amount of sun and shade. This will help your plants flourish in their unique watering can planter.
How to Properly Drain Your Watering Can Planter
Ensuring your watering can planter has proper drainage is vital for plant health. Here’s how to achieve it:
- Drill Drainage Holes: If your can lacks holes, drill 3-4 at the bottom. Use a drill bit suitable for the material.
- Cover Holes with Mesh: This keeps soil from escaping. Cut a fine mesh to fit inside the can, over the holes.
- Use the Right Soil: Choose potting soil that drains well. This prevents water buildup that can harm roots.
- Elevate the Can: Place the can on bricks or feet. It lets water flow freely out of the drainage holes.
- Regularly Clean Holes: Check and clear the holes to stop them from clogging. Use a wire or toothpick to remove debris.
By following these steps, your watering can planter will drain effectively, preventing overwatering and promoting healthy plant growth.
Incorporating Watering Can Planters into Your Garden Layout
Incorporating watering can planters into your garden adds charm and character. Here’s how to blend them seamlessly into your outdoor space:
- Strategic Placement: Put your watering can planter in a spot where it’s visible and adds to the overall garden design. Choose locations near pathways or sitting areas for the best visual impact.
- Grouping: Cluster various watering can planters for an eye-catching display. Mix sizes and colors to create depth and interest.
- Height Variation: Place watering can planters at different heights using stands or garden features. This creates a dynamic and layered look.
- Combine with Other Planters: Integrate watering can planters with traditional pots and containers. This adds variety and texture to your garden layout.
- Seasonal Changes: Swap out plants according to the season. This keeps your garden looking fresh and ensures plants are season-appropriate.
- Theme Continuity: If your garden has a certain style, like a cottage or tropical theme, choose watering can planters that complement it.
- Mobile Advantage: Use the portability of watering can planters to change your garden layout easily. This also helps in repositioning plants for optimal sun exposure.
By carefully planning their placement, watering can planters can become integral parts of your garden’s design, offering both function and beauty.
DIY Watering Can Planter Projects
Getting hands-on with DIY projects can bring your garden to life and personalize your space. These DIY watering can planter projects will inspire you to turn simple watering cans into stunning garden features. Remember to sprinkle the keyword ‘watering can planter’ adequately throughout the text to optimize for SEO, without overdoing it.
- Hanging Charm: Convert your watering can into a hanging planter. Drill holes in the sides, attach strong wires, and hang it with your favorite blooms spilling out.
- Stencil Art: Use stencils to paint floral or abstract designs on your can. Fill it with soil and plants after the paint dries.
- Illuminate with Lights: String lights inside a watering can and let them cascade out of the spout. It creates a magical evening glow in your garden.
- Chalkboard Labels: Paint a section with chalkboard paint for easy labeling. Great for herbs, you can write and rewrite names as needed.
- Laced Look: Wrap lace or burlap around a can for a textured look. Plant something simple inside to let the design stand out.
Attempting these DIY watering can planter projects not only upcycles old items but also adds a creative touch to your outdoor space. They are a great weekend activity that can involve the whole family, from painting to planting. Plus, these planters can make thoughtful, homemade gifts for friends and garden enthusiasts. Have fun personalizing your garden with these unique planters.
Maintaining Your Watering Can Planter Through the Seasons
Maintaining a watering can planter requires seasonal care for its best performance. Here are tips to keep it in top shape throughout the year:
- Spring Prep: Clean out any leftover debris from winter. Check for rust or damage and repair as needed. This is a great time to refresh the soil and replant if necessary.
- Summer Checks: Inspect your watering can planter frequently as plants grow. Ensure it has enough water but isn’t waterlogged. Add mulch to help retain moisture during hot months.
- Autumn Adjustments: As temperatures drop, consider moving sensitive plants indoors. If your can stays outside, empty it to prevent damage from freezing.
- Winter Storage: If not in use, store your watering can planter inside to avoid cold damage. Place in a dry area to inhibit rust formation.
- Regular Cleaning: Throughout all seasons, keep your watering can planter clean. Gently scrub the exterior to prevent dirt buildup and potential plant diseases.
- Monitor Plant Health: No matter the season, watch for signs of stress in your plants. Adjust watering and exposure to sun as needed to keep them thriving.
By following these simple maintenance steps, your watering can planter will provide beauty and purpose all year round.
Transform Garden with Imagination: Watering Can Planter Ideas
The Charm of Watering Can Planters
The watering can planter is a blend of practicality and pastoral beauty. It can turn any garden space into a scene from a charming countryside tale. These planters provoke a feeling of nostalgia, taking us back to the simplicity of rural life. They are perfect for those who value both the aesthetic of bygone days and the functionality of modern gardening.
Watering can planters capture the imagination and invite creativity. They offer a unique way to display flowers and greenery. Unlike traditional pots, these quirky containers come with their own character. Often, they feature vintage designs and rustic finishes that fit well in any garden setting. The watering can’s spout and handle add a whimsical touch, which makes it stand out as a decorative feature.
Not only do watering can planters create a visual appeal, but they also spark conversations. They reflect the gardener’s personal style and the effort put into making the garden a cozy retreat. Whether hanging from a tree, resting on a table, or nestled among other plants, they make a statement. Turning a simple tool into a delightful planter is an art form in itself, celebrating ingenuity and love for gardening.
In short, watering can planters carry a unique and enchanting spirit that can enhance any garden they grace. By incorporating them into your garden, you’re inviting a touch of whimsy and history. Let your creativity flourish, and you’ll see how they transform your outdoor sanctuary.

Choosing the Right Watering Can for Planting
Selecting the ideal watering can for planting is essential. Here are some tips to guide you:
- Size Matters: A can that’s too large may be hard to handle when filled with soil and plants. Look for one that fits comfortably in your hand and is easy to lift.
- Material Is Key: Watering cans come in metal, plastic, and ceramic. Metal cans add a vintage vibe but ensure they are rust-free. Plastic varieties are lightweight and often more affordable. Ceramic cans bring elegance but can be fragile.
- Check for Drainage: Your planter will need drainage holes to prevent water buildup. If your can doesn’t have them, drill a few holes in the bottom.
- Consider the Design: The shape of the can will affect how your plants grow. Choose a design that allows your plants to spill out gracefully.
- The Spout: A removable spout is a bonus. It makes planting easier and gives more space for plants to thrive.
- Color and Finish: Select a color that complements your garden’s palette. A rustic finish adds charm, while a bright hue makes a statement.
Get the right watering can planter and witness your garden’s transformation. Remember, the key is to balance practicality with your personal taste.
Step-by-Step Guide to Creating a Watering Can Planter
Transform an ordinary watering can into a stunning garden feature with these easy steps:
- Select Your Can: Choose a watering can that reflects your style. Ensure it is the right size and material for handling and that it has or can have drainage holes.
- Prepare the Can: Clean the can thoroughly. Remove any rust from metal cans. Drill drainage holes if needed.
- Add a Layer of Rocks: Place a layer of small rocks or gravel at the bottom. This aids in water drainage.
- Fill With Soil: Use high-quality potting soil. Fill the can until it is about two-thirds full.
- Plant Your Flowers: Choose plants that fit well with the size of the can. Plant them gently, with space to grow.
- Water Your Plants: Gently water the plants, being cautious not to flood the soil.
- Find the Perfect Spot: Place your watering can planter in a spot where it complements your garden’s design.
Creating a watering can planter is simple. With these steps, you’ll add a unique touch to your garden that’s both practical and stylish. Remember to pick plants that suit the size of your can and your garden’s conditions. Enjoy the blend of functionality and charm these planters bring to your outdoor space.

Best Plants for Watering Can Planters
When choosing plants for your watering can planter, think about size, growth habit, and care needs. Here’s a list to get you started:
- Succulents: Their modest size and drought resistance make them perfect for small planters.
- Herbs: Basil, mint, and thyme thrive in compact spaces and add fresh aroma.
- Annual Flowers: Petunias, marigolds, and pansies bring vibrant colors and are easy to replace.
- Perennials: Choose dwarf varieties like lavender or saxifrage for longevity.
- Ferns: Small ferns add a lush green look and love the shade a can might provide.
Select plants that match your gardening style and the watering can’s size. Avoid large shrubs that will outgrow the space. Make sure the plants you pick enjoy the same sunlight conditions.
Watering Can Planter Care and Maintenance
Caring for a watering can planter is both simple and rewarding. Here’s how to keep your planters thriving:
- Regular Watering: Like any container plant, consistent moisture is key. Make sure the soil stays damp, but not waterlogged. Check the dampness with your finger to know when it’s time to water again.
- Sunlight Exposure: Pay attention to how much sun your plants need. Place the planter in a spot that gets the right amount of light daily.
- Pruning and Deadheading: Trim any dead or overgrown parts. This helps your plants look neat and encourages more blooms.
- Rotate the Planter: Turn the watering can planter occasionally. This ensures all sides of the plants get equal sunlight, promoting even growth.
- Fertilize: Apply a balanced fertilizer once a month. This helps plants get the nutrients they need to grow strong.
- Winter Care: If you live in a cold area, bring your planter indoors or protect it from frost. Some plants can’t survive freezing temperatures.
- Bug and Disease Watch: Look out for pests or signs of disease. Take action early if you see any issues to prevent them from spreading.
With these care tips in mind, your watering can planter will continue to add beauty and charm to your garden for seasons to come. Remember to balance care with the unique needs of the plants you have chosen to ensure a lush and vibrant display.
Creative Placement Ideas for Watering Can Planters
Finding the perfect spot for your watering can planter can elevate your garden’s charm significantly. Here are some innovative placement ideas to inspire you:
- In the Midst of a Flower Bed: Nestle your can among your flowers. It blends seamlessly and adds depth to your flower bed.
- On a Garden Wall: Attach the can to a wall for a splash of greenery at eye level. This is great for small gardens.
- Atop a Garden Table or Bench: Place the can in your seating area. It’s both decorative and a delightful conversation piece.
- Under a Window: Set it below a window for a pop of color that can be enjoyed from inside and out.
- Hanging from Tree Branches: Suspend the can from a sturdy branch. It’ll sway gently and catch the light.
- Beside a Garden Path: Let it greet you as you walk through your garden. It’s welcoming and guides visitors along the path.
- Grouped with Other Planters: Show off a collection. Different watering cans together create an eclectic display.
Creative placements will show off your watering can planter’s unique beauty. They make your garden a more engaging and personal space. Play with these ideas and let your creativity lead the way!
Seasonal Decorating with Watering Can Planters
Seasonal decorating with watering can planters adds a festive touch to any garden. As the seasons change, so can the look of your planter. Here’s how to make the most of each season:
- Spring: Welcome the season of renewal with pastel-hued flowers. Try tulips and daffodils for a pop of color.
- Summer: Go for bright blooms like zinnias and sunflowers. They thrive in the sun and bring cheer.
- Fall: Embrace the autumn vibes with chrysanthemums. Choose oranges and yellows to match the foliage.
- Winter: Fill your can with evergreens or holly. These stay vibrant even on snowy days.
Decorate your watering can planters to reflect the seasonal joy. Swap out plants and add ornaments like ribbons or pine cones. Keep it simple and fun. This way, your garden will always be in tune with the season’s spirit.

Upcycling Old Watering Cans into Beautiful Planters
Transform old watering cans into unique planters with these upcycling tips. Here’s how you can do it:
- Find Your Can: Hunt for an old watering can at yard sales or in your own shed. Look for one with character, even if it’s worn out.
- Clean and Repair: Wash it well and fix any large holes. Small holes are fine for drainage.
- Paint It Up: Give it new life with a coat of paint. Choose a color that pops or goes with your garden theme.
- Add Drainage: If there are not enough holes, drill some at the bottom. This helps prevent water from staying in the soil.
- Decorate: Get creative with decorations. Stick on stencils, patterns, or even hand-painting designs.
- Sealant Is Key: Use a clear sealant for metal cans. This will help to keep rust at bay.
- Fill with Plants: Select plants that fit the look. Small perennials, herbs, or succulents work well.
Upcycling old watering cans is fun and eco-friendly. Give your garden a personal touch with these repurposed gems. It’s a simple project that reduces waste and brings a sense of history to your outdoor space.