Maximizing Performance and Longevity with a Battery Tester
Introduction
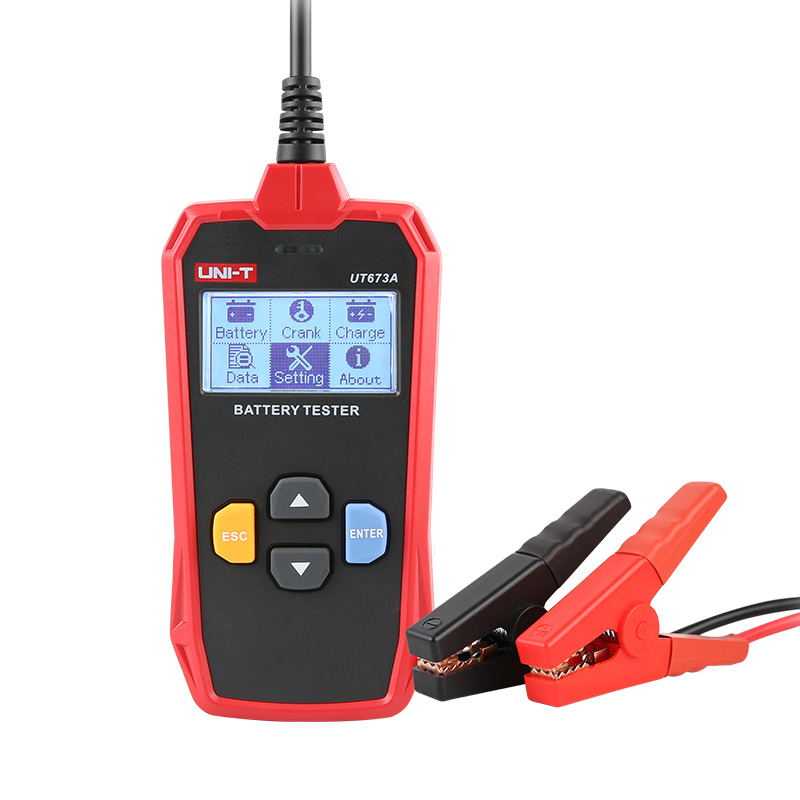
A battery tester is a device used to measure the voltage and overall health of a battery. It is commonly used in automotive, industrial, and household applications to determine if a battery is in good working condition or if it needs to be replaced. There are different types of battery testers available, ranging from simple handheld devices to more advanced digital testers.
When it comes to keeping your electronic devices up and running, the quality and life of the battery are crucial factors. From smartphones and laptops to cars and power tools, batteries play a crucial role in powering the technology that makes our modern lives possible. However, as with any component, batteries degrade over time and regular testing is essential to ensure optimal performance and prevent unexpected failures.
Part 1: Understanding Battery Testers
Battery testers typically work by connecting the positive and negative terminals of the battery to the tester’s leads or clamps. Once connected, the tester will display the voltage of the battery, allowing the user to determine if it is within the recommended range for proper functioning. In addition to voltage readings, some battery testers also provide information on the battery’s overall health and charge level, allowing for a more comprehensive assessment of its condition.
Level 1: What is a Battery Tester?
A battery tester is a device used to measure the voltage and, in some cases, the internal resistance of a battery. By doing so, it can determine the state of charge and health of the battery.
Level 2: Types of Battery Testers
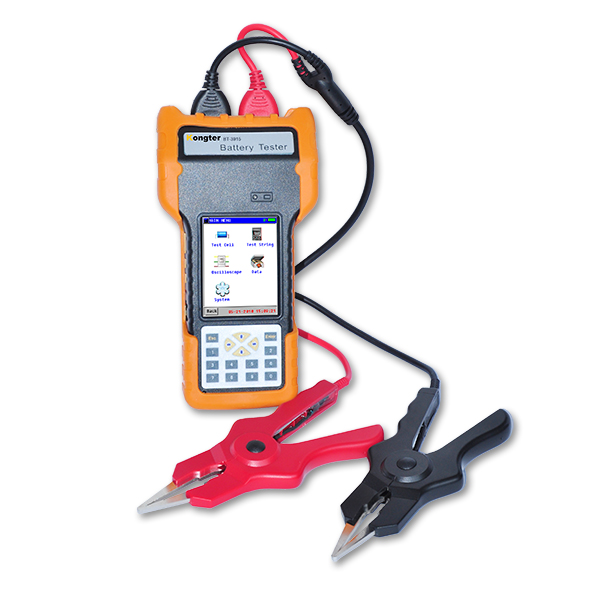
There are various types of battery testers available, ranging from simple handheld devices to more advanced models with digital displays and built-in diagnostics. Some testers are designed specifically for certain battery types, such as lead-acid, lithium-ion, or alkaline batteries.
Part 2: Importance of Battery Testing
One of the key benefits of using a battery tester is that it helps to prevent unexpected battery failures. By regularly testing the voltage and health of batteries, users can identify batteries that are no longer performing optimally and replace them before they fail. This is particularly important in automotive applications, where a failed battery can leave a vehicle stranded and in need of a jump start or tow.
Level 1: Why Test Batteries?
Regular battery testing is essential for several reasons. Firstly, it allows you to assess the remaining capacity of a battery and determine whether it needs to be charged or replaced. Additionally, testing can help to identify weak or failing batteries before they cause unexpected downtime or damage to equipment.
Level 2: Benefits of Battery Testing
By identifying and replacing weak or failing batteries, you can improve the overall reliability and performance of your devices. This can lead to cost savings by reducing the need for premature replacements and minimizing the risk of unexpected failures.
Part 3: Using a Battery Tester
Level 1: How to Test a Battery
Testing a battery with a battery tester typically involves connecting the positive and negative leads of the tester to the corresponding terminals on the battery. The tester will then display the voltage and, if applicable, the internal resistance of the battery.
Level 2: Interpreting Test Results
The test results provided by a battery tester can indicate the state of charge and health of the battery. Understanding how to interpret these results is essential for making informed decisions about the maintenance and replacement of batteries.
Part 4: Battery Maintenance and Longevity
Level 1: Maximizing Battery Life
Regular testing, proper charging, and avoiding deep discharges can all help to maximize the lifespan of a battery. By identifying and addressing issues early on, you can extend the overall longevity of your batteries.
Level 2: The Role of Battery Testers in Maintenance
Battery testers play a crucial role in ongoing maintenance efforts by providing valuable insights into the condition of batteries. By incorporating regular testing into your maintenance routine, you can proactively address any issues and ensure optimal performance.

Part 5: Choosing the Right Battery Tester
Level 1: Considerations for Choosing a Battery Tester
When selecting a battery tester, it’s important to consider factors such as the types of batteries you’ll be testing, the level of accuracy and precision required, and any additional features or capabilities that may be beneficial for your specific needs.
Level 2: Recommended Battery Testers
There are numerous battery testers available on the market, ranging from budget-friendly options to high-end professional-grade devices. Researching and comparing different models is essential for finding a tester that aligns with your requirements.
Benefits of Battery Testers and Environmental Impact
Level 1: Benefits of Battery Testers
A battery tester helps to prolong the life of batteries by identifying when they need to be recharged or replaced. This can save you money by preventing the premature disposal of batteries that still have some life left in them. Additionally, battery testers can help prevent equipment malfunctions or failures caused by weak or dead batteries, which can be especially important in critical applications such as medical devices or emergency equipment.
Level 2: Environmental Impact
By enabling users to get the most use out of their batteries, battery testers can contribute to reducing the environmental impact of battery disposal. This is because properly functioning batteries are less likely to end up in landfills, where they can leak toxic chemicals into the soil and water. This can help to reduce pollution and the consumption of natural resources required to produce new batteries.
Testing Methods
Level 1: Types of Battery Testers
There are several types of battery testers available, including simple handheld devices, multi-purpose automotive testers, and advanced diagnostic testers for industrial applications. Handheld testers are typically compact and easy to use, making them ideal for consumers and small businesses. Automotive testers are more specialized and often include additional features for testing alternators, starters, and voltage levels. Industrial testers are capable of providing detailed analysis and diagnostics for larger battery systems, such as those used in data centers, telecommunications, and renewable energy installations.
Level 2: Testing Methods
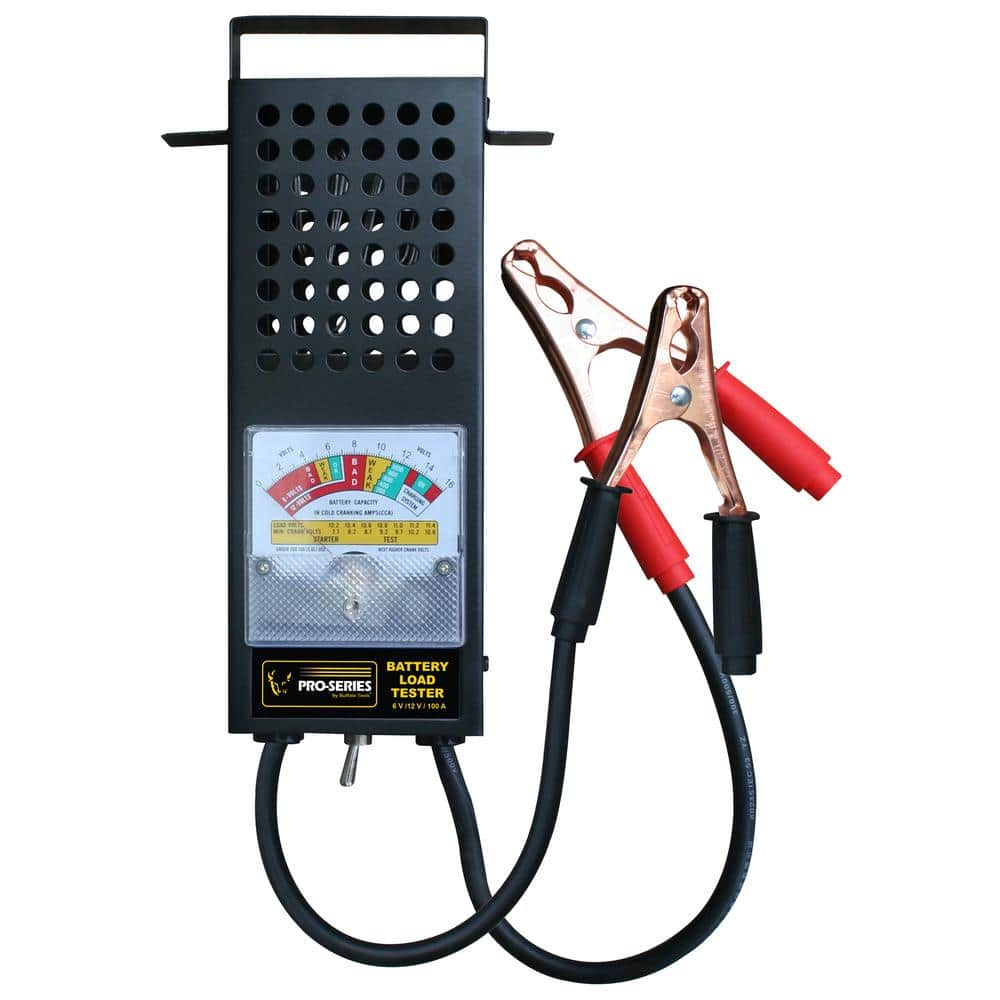
Battery testers use different methods to evaluate battery performance, including conductance testing, impedance testing, load testing, and voltage testing. Conductance testing measures the ability of the battery to conduct electrical current, while impedance testing assesses the internal resistance of the battery. Load testing involves applying a simulated load to the battery to measure its performance under real-world conditions, and voltage testing simply measures the voltage output of the battery. Different testing methods may be more suitable for different types of batteries and applications.

Maintenance and Care and Integration with Other Equipment
Level 1: Maintenance and Care
Regularly testing your batteries can help you identify and address issues before they become more serious or costly. Additionally, proper care and maintenance of your battery tester itself can ensure accurate results and a longer lifespan for the device. This may include calibrating the tester as recommended by the manufacturer, cleaning the contacts and terminals, and storing the tester in a cool, dry place when not in use. Following the manufacturer’s guidelines for maintenance can help you get the most out of your battery tester.
Level 2: Integration with Other Equipment
Some battery testers are designed to integrate with other equipment, such as diagnostic tools, chargers, or battery management systems. This can streamline the testing process and provide more comprehensive data for analysis and decision-making. Integration may involve wireless connectivity, data sharing capabilities, or compatibility with specific software platforms. When selecting a battery tester, consider whether integration with other equipment is important for your applications and workflows.
Types of Battery Testers
- Conductance Testers: These testers measure the ability of a battery to produce current by sending a signal through the battery and measuring the response. They are commonly used for lead-acid batteries.
- Load Testers: These testers apply a load to the battery and measure its performance under load. They are particularly useful for identifying weak or failing batteries.
Features to Consider When Choosing a Battery Tester
- Compatibility: Consider the types of batteries the tester can accommodate, such as lead-acid, AGM, gel, or deep cycle batteries.
- Display: Look for a battery tester with a clear and easy-to-read display that provides accurate and detailed information about the battery’s health and performance.

Conclusion
Overall, a battery tester is an essential tool for anyone who relies on batteries for power. By using a battery tester regularly, users can ensure that their batteries are in good working condition, preventing unexpected failures and saving time and money in the long run. Whether used in automotive, industrial, or household settings, a battery tester is a valuable tool for maintaining the reliability and performance of battery-powered devices.
In conclusion, the use of a battery tester is a crucial aspect of maintaining the performance and longevity of batteries in a wide range of applications. By understanding the importance of regular testing, how to use a battery tester effectively, and the role it plays in maximizing battery life, you can ensure that your devices continue to operate reliably and efficiently. Remember to select a battery tester that aligns with your specific needs and to incorporate regular testing into your maintenance routine for optimal results.

The Ultimate Guide to Socket Tool: Everything You Need to Know
Introduction
A socket tool, also known as a socket wrench, is a versatile hand tool used for tightening or loosening bolts and nuts. It consists of a handle and a socket, which is a hollow cylinder with a six-sided opening on one end that fits onto the head of a bolt or nut. The handle and socket are connected by a ratcheting mechanism that allows the socket to turn in one direction while the handle remains stationary, making it easier to apply torque to the fastener.
Socket tools are essential for any DIY enthusiast or professional mechanic. These versatile tools come in a variety of sizes and types, making them an indispensable part of any toolkit. Whether you’re working on your car, assembling furniture, or tackling home improvement projects, socket tools are a must-have. In this comprehensive guide, we’ll cover everything you need to know about socket tools, including their different types, uses, and maintenance tips.
Part 1: Types of Socket Tools
Level 1: Standard Sockets
Standard sockets are the most common type of socket tool and come in both metric and SAE (Society of Automotive Engineers) sizes. They are typically hexagonal in shape and are designed to fit on a ratcheting handle for turning bolts and nuts.
Level 2: Impact Sockets
Impact sockets are specifically designed to withstand the high torque and force generated by impact wrenches. They are made from toughened steel and have a thicker wall to handle the extra stress. Impact sockets are essential for automotive or industrial applications.
Part 2: Socket Drive Sizes
Level 1: 1/4-inch Drive
The 1/4-inch drive socket is the smallest and is ideal for working on small electronics, bicycles, and motorcycles. These sockets are perfect for delicate and precise work.
Level 2: 3/4-inch Drive
The 3/4-inch drive socket is the largest and is used for heavy-duty and industrial applications. These sockets are capable of handling large bolts and nuts, making them essential for construction and machinery maintenance.

Part 3: Uses of Socket Tools
Level 1: Automotive Repairs
Socket tools are a crucial part of any automotive toolkit, used for tasks such as changing oil, replacing spark plugs, and removing engine components. They are essential for both DIY car maintenance and professional automotive repairs.
Level 2: Home Improvement Projects
From assembling furniture to tightening loose bolts, socket tools are indispensable for various home improvement projects. They are ideal for tasks such as installing shelves, hanging light fixtures, and repairing appliances.
Part 4: Maintenance and Care
Level 1: Cleaning
Regular cleaning of socket tools is crucial for ensuring their longevity and performance. Use a solvent to remove grease and dirt from the sockets, and ensure they are thoroughly dried before use.
Level 2: Storage
Proper storage is essential for preventing rust and damage to socket tools. Organize them in a toolbox or chest, and consider using socket rail organizers to keep them neatly arranged and easily accessible.
Part 5: Tips for Choosing the Right Socket Tools
Level 1: Quality
Invest in high-quality socket tools made from durable materials such as chrome vanadium steel. Quality tools will last longer and provide better performance.
Level 2: Compatibility
Consider the types of projects you’ll be working on and choose socket tools that are compatible with your existing ratchets and wrenches. Ensure they are the correct size for the nuts and bolts you’ll be working with.

Part 6: Types of Socket Tools
Level 1: Types of Socket Tools
There are various types of socket tools available, designed for specific tasks and applications. Some of the most common types include:
- Impact sockets: These are designed to withstand high levels of torque and are commonly used with impact wrenches or air tools. They are usually made of chrome molybdenum steel for durability.
- Spark plug sockets: These are specifically designed for removing and installing spark plugs. They often feature a rubber insert to securely hold the spark plug in place during installation.
Level 2: Specialized Socket Tool Sets
Many socket tool sets are designed for specialized purposes, such as:
- Motorcycle tool sets: These sets typically include a range of socket sizes and other tools specifically designed for working on motorcycles, such as narrow profile sockets for tight spaces and specialized bits for motorcycle maintenance.
- Emergency roadside kits: These sets often include a compact selection of socket tools, along with other essential tools and items, to help with common vehicle repairs and emergencies while on the road.
Part 7: Specialty Socket Tools
Level 1: Specialty Socket Tools
In addition to standard socket sets, there are also specialty socket tools available for specific tasks. Some examples include:
- Torque limiting sockets: These sockets are designed to limit the amount of torque applied to a fastener, preventing over-tightening and potential damage. They are often used in critical applications where precise torque control is necessary.
- Swivel sockets: These sockets have a swiveling head that allows for greater flexibility and access to fasteners in tight or awkward spaces, making them ideal for automotive and machinery repairs.
Level 2: Socket Tool Accessories
There are also a variety of accessories available for socket tools, such as:
- Socket rails or trays: These are convenient storage solutions for organizing and transporting sockets in a workshop or garage. They typically feature clips or posts to securely hold individual sockets in place.
- Universal joints: These attachments allow for increased flexibility and angle adaptability when using socket tools, enabling access to fasteners that are not in a straight line with the tool’s handle.
Part 8: Advancements in Socket Tool Technology
Level 1: Advancements in Socket Tool Technology
In recent years, advancements in materials and design have led to improvements in socket tool performance and durability. Some of the latest advancements include:
- High-performance alloy steels: Manufacturers are developing new alloy steels with enhanced strength and wear resistance, resulting in sockets that can withstand higher torque levels and last longer under heavy use.
- Anti-corrosion coatings: Some socket tools now feature specialized coatings that provide protection against rust and corrosion, extending their lifespan in harsh working environments.
Level 2: Ergonomic Socket Tool Design
Modern socket tools with ergonomic features to improve user comfort and reduce fatigue. These design elements may include:
- Cushioned handles: Many socket wrenches now incorporate ergonomic handles with cushioned grips to provide more comfortable and secure handling during use, reducing hand fatigue and improving control.
- Quick-release mechanisms: Some socket wrench designs feature quick-release mechanisms that allow for easy and rapid socket changes, reducing the need for manual socket removal and speeding up workflow.

Conclusion
Extension bars can extend the reach of the ratchet wrench. And allowing it to access bolts or nuts located in tight or hard-to-reach spaces. Universal joints provide flexibility in the angle, making it easier to reach fasteners at odd angles. Spark plug sockets are specifically for removing and installing spark plugs, and impact sockets.
Overall, socket tools are essential for any mechanic, handyman, or DIY enthusiast. They provide a reliable and efficient way to tackle a wide range of fastening tasks. Making them an indispensable part of any tool collection. Socket tools are an essential part of any toolkit, offering versatility and functionality for a wide range of tasks. By understanding the different types, sizes, and uses of socket tools, as well as how to properly maintain and choose the right tools, you can ensure you have the right equipment for any job. Whether you’re a professional tradesperson or a DIY enthusiast, socket tools are a must-have for any workshop or garage.
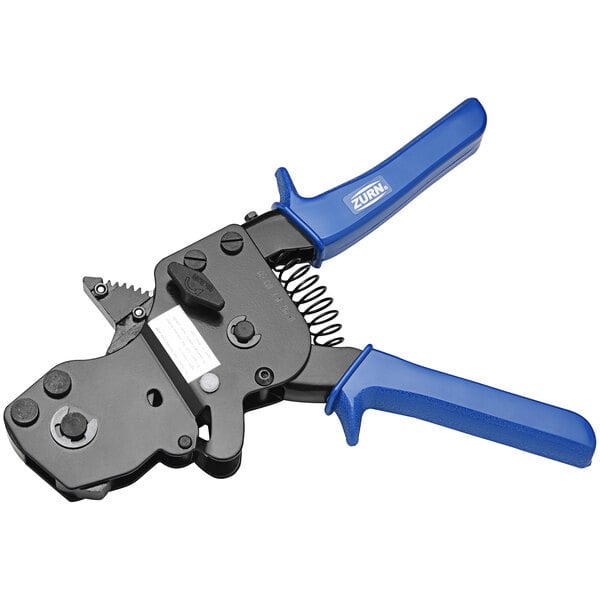
The Guide to PEX Clamp Tool: Everything You Need to Know
Introduction
PEX (cross-linked polyethylene) tubing has become a popular choice for plumbing systems due to its flexibility, durability, and ease of installation. To secure PEX tubing to fittings, a PEX clamp tool is essential. In this comprehensive guide, we will delve into the world of PEX clamp tools, exploring their uses, benefits, and how to choose the right one for your needs.
Part 1: Understanding PEX Clamp Tools
This tool is commonly used in PEX plumbing systems for both hot and cold water distribution. It is also used in radiant heating systems, snowmelt systems, and other hydronic applications. The PEX clamp tool is designed to ensure a secure and reliable connection, preventing leaks and minimizing the risk of water damage. The PEX clamp tool is available in different sizes to accommodate various PEX tubing diameters, ranging from 3/8 inch to 1 inch. It is crucial to select the correct-sized tool for the specific PEX tubing being used to ensure a proper and secure connection.
Level 1: What are PEX clamp tools?
PEX clamp tools are used to secure PEX tubing to barbed fittings with stainless steel PEX clamps. They come in various designs, including manual and battery-powered options, and are essential for creating reliable and leak-free connections in PEX plumbing systems.
Level 2: Types of PEX clamp tools
There are two main types of PEX clamp tools: manual and battery-powered. Manual PEX clamp tools require physical force to crimp the clamps, while battery-powered tools use a motorized mechanism for effortless crimping. Each type has its advantages and is suited to different applications.
Part 2: Benefits of Using PEX Clamp Tools
Level 1: Reliability and durability
PEX clamp tools create strong, secure connections between PEX tubing and fittings, minimizing the risk of leaks and ensuring long-term durability. This is essential for maintaining the integrity of a plumbing system and preventing costly water damage.
Level 2: Ease of installation
PEX clamp tools are relatively easy to use, even for DIY enthusiasts. With the right tool and proper technique, anyone can create professional-quality crimps, saving time and money on installation costs.

Part 3: Choosing the Right PEX Clamp Tool
There are two main types of PEX clamp tools: manual and battery-powered. The manual PEX clamp tool requires the user to manually squeeze the handles to compress the clamp around the PEX tubing and fitting. This type of tool is lightweight, portable, and suitable for small-scale projects. On the other hand, battery-powered PEX clamp tools are designed to automate the clamping process, making it faster and less labor-intensive. These tools are ideal for large-scale installations and professional use.
Level 1: Factors to consider
When choosing a PEX clamp tool, it’s important to consider factors such as the size of the clamps it can accommodate, the type of PEX tubing you will be working with (PEX-A, PEX-B, or PEX-C), and the frequency of use. Additionally, consider the tool’s ergonomics, weight, and overall build quality.
Level 2: Popular brands and models
Some well-known manufacturers of PEX clamp tools include Milwaukee, Uponor, Apollo, and IWISS. Each brand offers a range of models with various features and capabilities to suit different needs and budgets.
Part 4: How to Use a PEX Clamp Tool
Level 1: Preparing the tubing and fittings
Before using a PEX clamp tool, ensure that the ends of the PEX tubing are cut squarely and cleanly. Verify that the fittings are compatible with the tubing and are free of any debris or damage.
Level 2: Crimping the clamps
Position the clamp over the barbed fitting and the PEX tubing, ensuring that it is properly aligned. Use the PEX clamp tool to apply the necessary force to crimp the clamp securely around the tubing and fitting. Check for any signs of deformation or incomplete crimps.
Part 5: Maintenance and Safety Tips
Level 1: Tool maintenance
Regularly inspect and clean your PEX clamp tool to ensure that it is in good working condition. Lubricate moving parts as recommended by the manufacturer and store the tool in a dry, secure location when not in use.
Level 2: Safety precautions
Always wear appropriate eye protection and gloves when using a PEX clamp tool. Avoid overexerting force on the tool, and never use it for purposes other than crimping PEX clamps. Follow the manufacturer’s guidelines and recommendations for safe operation.
Part 6: Benefits of Using a PEX Clamp Tool
Level 1: Increased Efficiency
Using a PEX clamp tool increases the efficiency of the installation process. The tool allows for quick and easy crimping of the clamps, reducing the time and effort required for the task. This is especially beneficial for larger projects where time is of the essence.
Level 2: Enhanced Reliability
PEX clamp tools ensure a reliable connection between the PEX tubing and the fittings. The properly crimped clamps provide a secure and leak-free joint, minimizing the risk of potential problems down the line. This enhanced reliability gives users peace of mind that their plumbing system is built to last.
Part 7: Types of PEX Clamp Tools
Level 1: Manual PEX Clamp Tool
Manual PEX clamp tools require physical force to compress the rings onto the PEX tubing and fittings. These tools are often lightweight, portable, and affordable, making them a popular choice for smaller residential projects or occasional use.
Level 2: Battery-Powered PEX Clamp Tool
Battery-powered PEX clamp tools are designed to provide a more effortless crimping process. These tools are suitable for frequent use and larger-scale projects, as they can quickly and consistently crimp the clamps with minimal physical effort from the user. While they may be more expensive than manual tools, the time and labor savings they offer can make them a worthwhile investment for professionals.
Part 8: Maintenance and Care of PEX Clamp Tools
Level 1: Regular Cleaning
It’s important to keep PEX clamp tools clean to ensure their proper function and longevity. After each use, wipe down the tool to remove any debris or dirt that may have accumulated. Regular cleaning can prevent corrosion and extend the lifespan of the tool.
Level 2: Storage
Proper storage is essential for PEX clamp tools. When not in use, store the tool in a dry, clean environment to prevent rust or damage. Some tools may come with a protective case or pouch for safekeeping. Additionally, it’s important to store the tool in a secure location to prevent unauthorized use or damage. Regular maintenance and care will help maximize the performance and lifespan of the PEX clamp tool.

Conclusion
When using a PEX clamp tool, it is essential to follow the manufacturer’s instructions and safety guidelines. This includes properly aligning the clamp with the PEX tubing and fitting, positioning the tool correctly, and applying the appropriate amount of pressure to ensure a tight seal. It is also important to regularly inspect the tool for signs of wear and tear and perform any necessary maintenance to keep it in good working condition.
In conclusion, the PEX clamp tool is an indispensable tool for anyone working with PEX tubing in plumbing and heating applications. It provides a quick, efficient, and reliable method for creating secure connections, ensuring the integrity and performance of the PEX system. PEX clamp tool is indispensable for anyone working with PEX plumbing systems. By understanding their uses, benefits, and how to choose and use them properly, you can ensure the reliability and longevity of your PEX installations. Whether you’re a professional plumber or a DIY enthusiast, investing in a quality PEX clamp tool is a wise decision for any plumbing project.
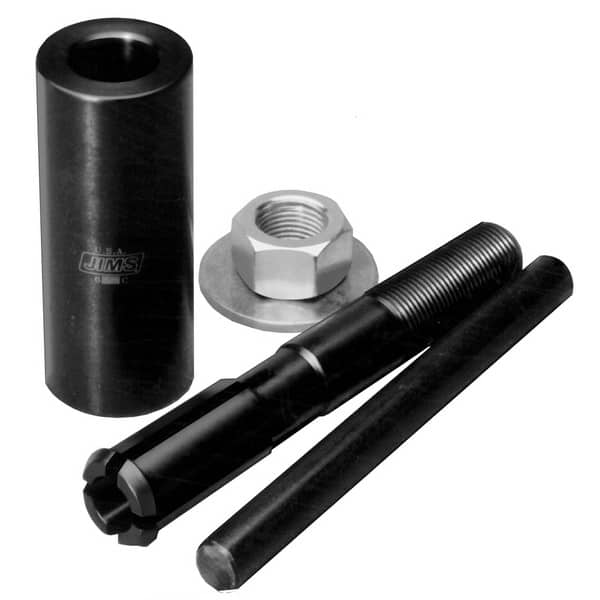
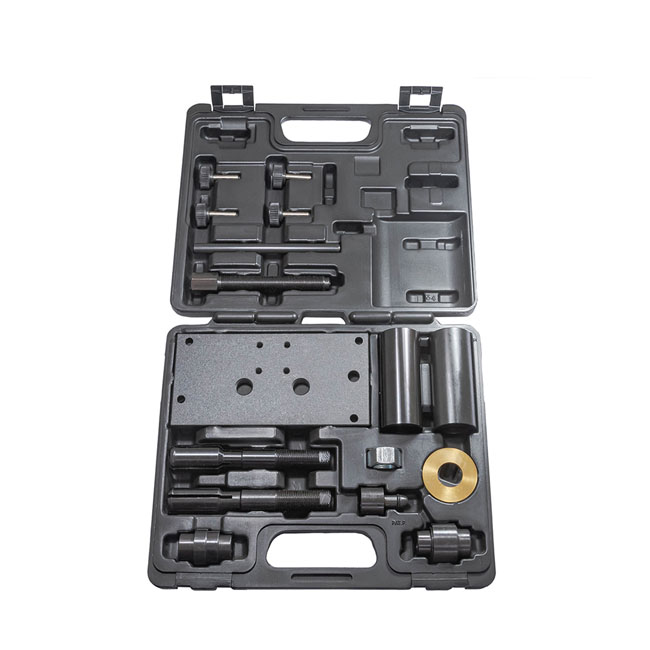
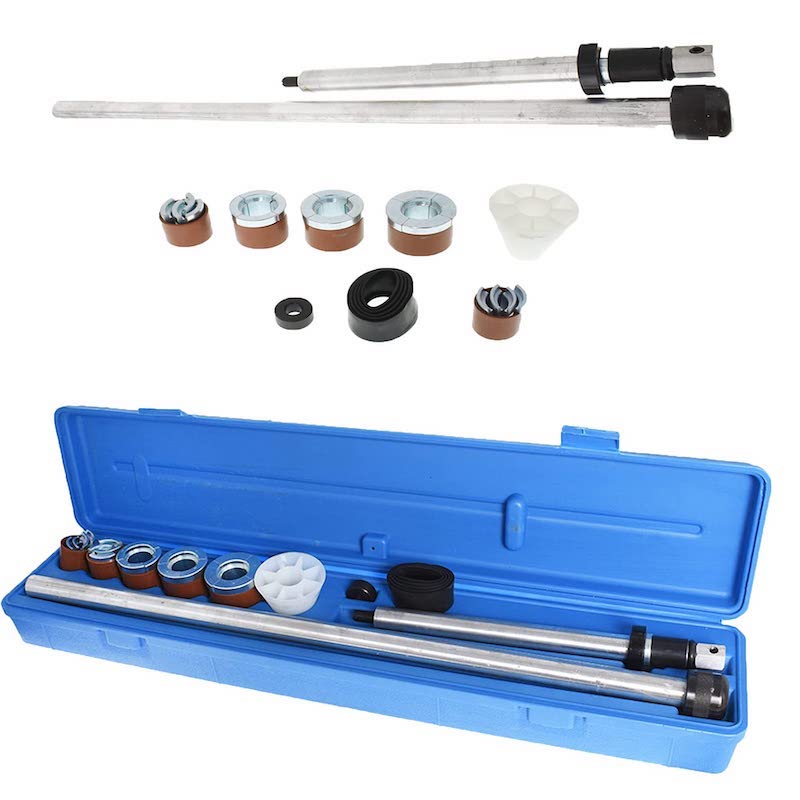
Cam Bearing Tool: How to Choose the Right Tool for Your Needs
Introduction
Cam bearing tools are an essential piece of equipment for anyone working on an engine. Whether you’re a professional mechanic or a DIY enthusiast, having the right cam bearing tool can make the difference between a smooth and successful engine repair and a frustrating and time-consuming experience. In this guide, we’ll explore the different types of cam bearing tools available, how to choose the right tool for your specific needs, and tips for using cam bearing tools effectively.
Part 1: Understanding Cam Bearings
The cam bearing tool is made up of a few components, including an expansion sleeve, a driver, and an installation or removal tool. The expansion sleeve can fit inside the bearing, and when the driver is inserted into the expansion sleeve and tightened. It expands the sleeve to the proper diameter. And allowing it to install the bearing into the engine block. The installation tool is used to drive the bearing into the engine block, while the removal tool is used to extract the bearings from the block.
Level 1: What are cam bearings?
Cam bearings are a crucial component of any engine, as they provide support and reduce friction for the camshaft. They are typically made of durable materials like bronze or steel, and they are designed to withstand the high speeds and extreme temperatures of the engine.
Level 2: Importance of cam bearings
Cam bearings play a vital role in the overall performance and longevity of an engine. Without properly functioning cam bearings, the camshaft can become damaged, leading to costly repairs and potential engine failure.
Part 2: Types of Cam Bearing Tools
There are different types of cam bearing tools available, including manual and hydraulic versions. The manual version requires hand-operated force to expand the sleeve and drive the bearing into the block, while the hydraulic version uses hydraulic pressure to accomplish the same task. The hydraulic version is often preferred due to its ability to apply more even and controlled force, resulting in more precise bearing installation.
Level 1: Manual cam bearing tools
Manual cam bearing tools are hand-operated and are typically used for smaller engines or occasional use. These tools are simple to use and are a cost-effective option for DIY enthusiasts.
Level 2: Hydraulic cam bearing tools
Hydraulic cam bearing tools use hydraulic pressure to remove and install cam bearings. These tools are ideal for professional mechanics or anyone working on larger engines, as they provide efficient and consistent results.
Part 3: Choosing the Right Cam Bearing Tool
A cam bearing tool is a specialized tool in the automotive industry to install or remove cam bearings in an engine block. These bearings support the camshaft and allow it to rotate smoothly, so it is crucial to have the right tool for the job. The tool typically consists of a series of adapters and a handle to apply pressure and guide the bearing into place. It is designed to fit specific engine models and makes the installation process easier and more precise. Using a cam bearing tool ensures that the bearings are properly seated and aligned, which is essential for the proper functioning of the engine.
Level 1: Consider the size and type of engine
When choosing a cam bearing tool, it’s essential to consider the size and type of engine you’ll be working on. Smaller engines may only require a manual tool, while larger engines will benefit from a hydraulic option.
Level 2: Quality and durability
Investing in a high-quality cam bearing tool is crucial for achieving reliable and precise results. Look for tools made from durable materials and with a reputation for longevity and performance.
Part 4: Tips for Using Cam Bearing Tools Effectively
Level 1: Proper installation techniques
Properly installing cam bearings is essential for the overall performance of the engine. Always follow the manufacturer’s instructions and use the appropriate tools for the job.
Level 2: Regular maintenance and cleaning
Keeping your cam bearing tools clean and well-maintained will ensure they continue to perform at their best. Regularly inspect the tools for any signs of wear or damage and replace any worn components as needed.
Part 5: Slide Hammer Cam Bearing Tool
Level 1: Cam Bearing Tool Types
There are several types of cam bearing tools available on the market, each designed for specific applications and engine types.
Level 2: Roller Style Cam Bearing Tool
One popular type of cam bearing tool is the roller style, which features rolling elements that allow for easier insertion and removal of cam bearings. This type of tool in high-performance engine builds where precision and ease of use are essential.
Level 3: Slide Hammer Cam Bearing Tool
Another type of cam bearing tool is the slide hammer style, which utilizes a hammering action to remove stubborn cam bearings. This tool is ideal for situations.
Part 6: Identifying Cam Bearing Sizes
Level 1: Understanding Cam Bearing Tool Sizes
It’s important to select the correct size cam bearing tool for your specific engine application in order to ensure proper fit and function.
Level 2: Identifying Cam Bearing Sizes
Before purchasing a cam bearing tool, it’s crucial to identify the size of the cam bearings in your engine. This can usually be done by referencing the engine’s specifications or by measuring the dimensions of the existing cam bearings.
Level 3: Selecting the Right Tool Size
Once you have determined the size of the cam bearings in your engine, you can select the appropriate cam bearing tool size for insertion and removal. Using the correct size tool will ensure a proper fit, preventing damage to the bearings or the engine block.
Part 8: Maintenance and Care for Cam Bearing Tools
Level 1: Maintenance and Care for Cam Bearing Tools
Proper maintenance and care of cam bearing tools is essential for optimal performance and longevity.
Level 2: Cleaning and Lubrication
After each use, cam bearing tools should be thoroughly cleaned to remove any debris or contaminants. Additionally, applying a light coating of lubricant to the tool’s surface can prevent rust and corrosion, ensuring smooth operation for future use.
Level 3: Storage
When not in use, cam bearing tools can prevent damage and maintain their precision. Proper storage can also prevent wear and extend the lifespan of the tool.

Conclusion
Using a cam bearing tool is important for a few reasons. This is crucial for maintaining the integrity of the engine and ensuring that it performs optimally. Additionally, using the tool allows for more precise bearing installation, which is essential for reducing friction, prolonging the life of the bearings, and maximizing engine performance.
Overall, the cam bearing tool is an essential piece of equipment for anyone involved in engine rebuilding or maintenance. Especially for those working on high-performance engines. Engine builders and mechanics can ensure that camshaft bearings are installed or removed with precision and care. And leading to better engine performance and longevity.
Cam bearing tool is an essential piece of equipment for anyone working on an engine, and choosing the right tool for your needs is crucial for achieving the best results. By understanding the different types of cam bearing tools available. Considering the size and type of engine you’ll be working on. Following proper installation techniques and maintenance tips. You can ensure that your engine repairs are smooth and successful. With the right cam bearing tool in hand, you can tackle any engine repair with confidence and precision.