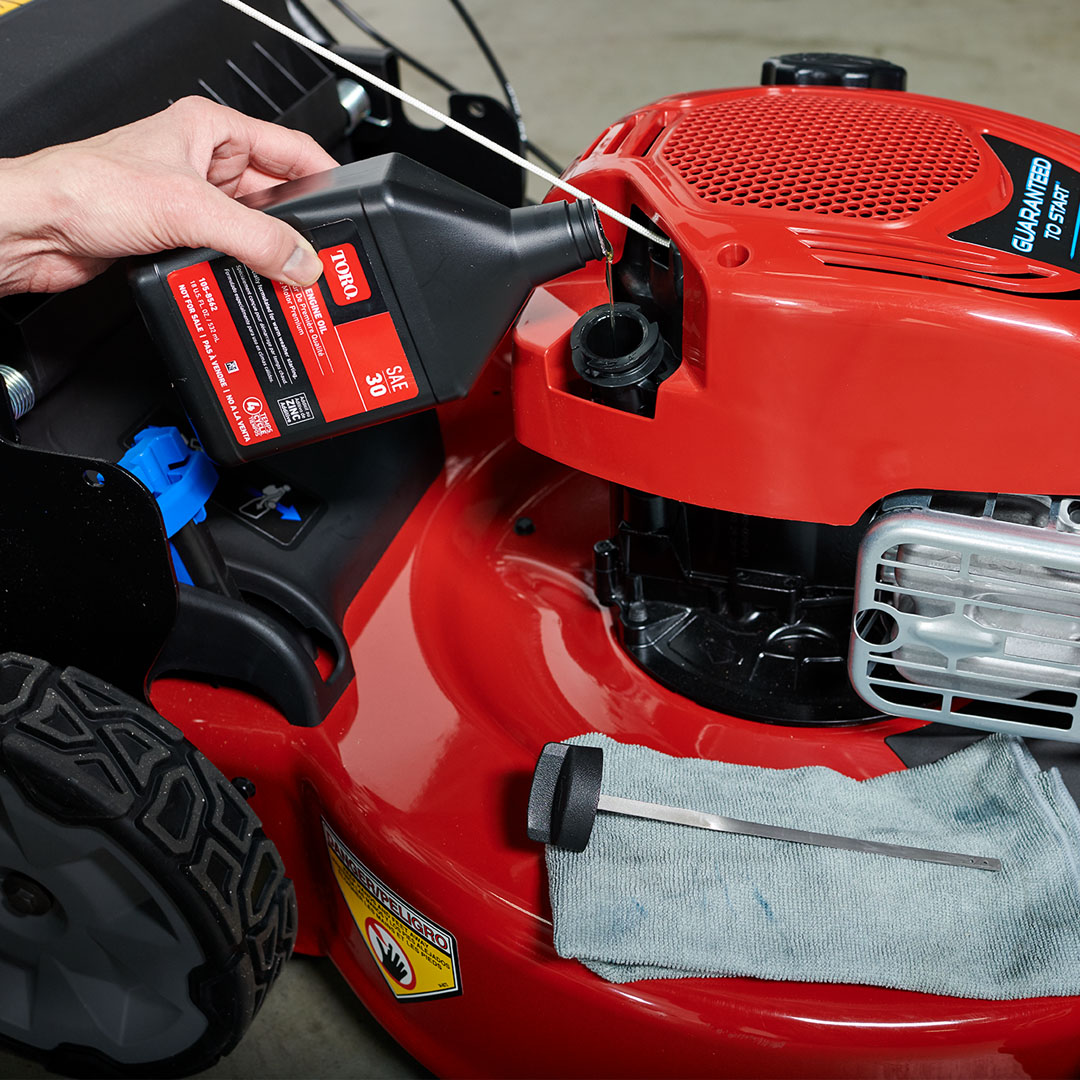
Lawn Mower Maintenance: Lawn Mower Oil Change the Right Way
Preparing for the Oil Change
Before you start the lawn mower oil change, good preparation is key. It ensures a smooth and clean process.
Warming Up the Engine
Start by warming up the engine. This helps the oil flow freely, making it easier to drain. Run the mower for a few minutes.
Cleaning the Oil Fill Area
Next, clean around the oil fill cap. Use a rag or a brush to remove any dirt, ensuring no debris gets into the engine.
Setting Up the Oil Catch Pan
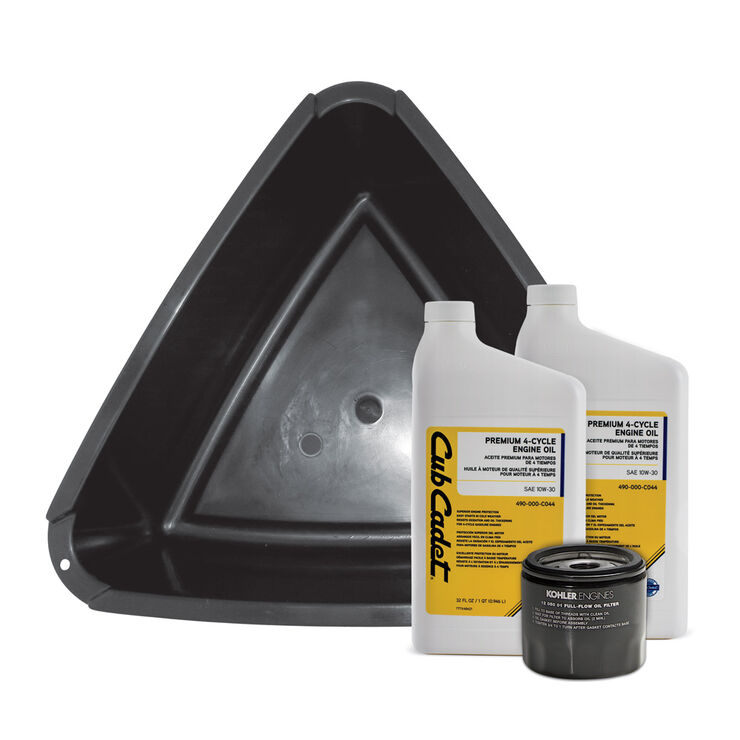
Finally, place an oil catch pan next to the mower. Position it where you plan to tip the mower so it catches all the oil.
Draining the Old Oil
After preparing your lawn mower for the oil change, it’s now time to drain the old oil. This is a crucial step in ensuring your mower runs efficiently.
Removing the Oil Cap
Start by taking off the oil cap. Make sure your hands and tools are clean to prevent dirt from entering the engine.
Tipping the Mower and Draining
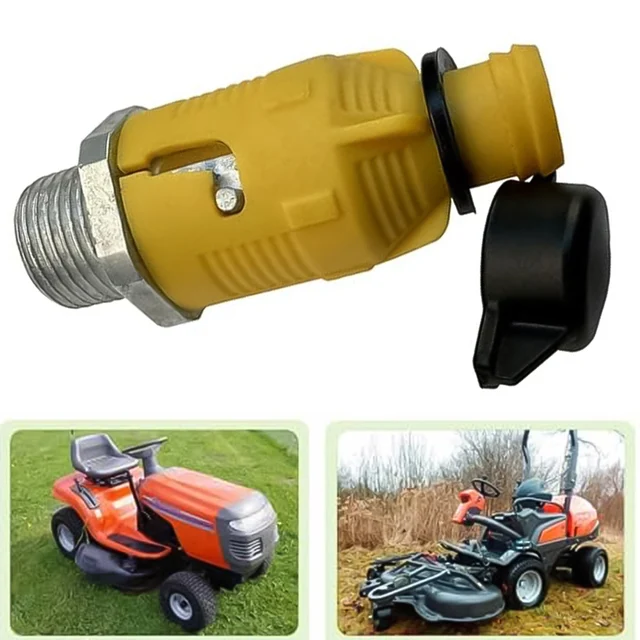
Gently tip the lawn mower to its side, with the oil side down. Position it so the air filter faces upward, avoiding contamination. Drain the oil into your catch pan. If there’s a drain plug underneath, use it to empty the oil more conveniently. Wait until the oil stops flowing, then set the mower back on its feet.
Replacing the Oil Filter (If Applicable)
Not all mowers have an oil filter, but if yours does, it’s vital to change it too. This keeps your mower running well.
Preparing Oil Catch for the Filter
First, put an oil catch container under the oil filter. Make sure it’s right below to catch any spills.
Unscrewing the Old Oil Filter
With the catch in place, gently unscrew the old filter. Let it drain out into your catch container.
Installing the New Oil Filter
Before screwing in the new filter, dab some oil on its seal. This helps it fit snugly. Screw it on firmly, not too tight, just until it’s securely in place.
Refilling with New Oil
Once the old oil has been fully drained from your lawn mower, it’s time to refill it with fresh, high-quality engine oil. This is an essential step to revitalize your mower’s performance and efficiency.
Gradually Adding Engine Oil
Begin by identifying the correct type of oil recommended by the manufacturer for your specific lawn mower model. Slowly pour the new oil into the engine, taking care not to overfill it. It’s better to add a little at a time, allowing the oil to settle.
The amount of oil needed can vary between models, but most require between 2/3 and 3/4 of a quart. Avoid rushing this step; adding oil gradually ensures accuracy and prevents the risk of overfilling, which can harm the engine.
Checking Oil Level with Dipstick
After adding a small amount of oil, pause to check the level with the dipstick. Wipe it clean and insert it into the oil compartment, then remove it again to see where the oil mark is. The correct level typically falls right at the ‘full’ mark, but not over it.
Repeat the process of adding oil and checking with the dipstick until the oil reaches the ideal level. Be patient and precise—accuracy here can save you from engine troubles down the line.
Once you’ve reached the desired oil level, replace the dipstick and secure the oil cap. Your lawn mower is now ready with new oil, ensuring smoother operation and longer engine life. Remember, regular lawn mower oil changes are crucial and should be performed as a part of your mower’s seasonal maintenance routine to keep it running reliably.
Final Steps
Once you have refilled your lawn mower with the new oil, there are just a couple more actions to wrap up the process.
Replacing the Oil Cap
After confirming the oil level is correct, it’s time to reseal the oil compartment. Replace the oil cap carefully and ensure it’s tight. This prevents oil from leaking and keeps contaminants out of the engine.
Disposal of Old Oil
Proper disposal of the old oil is critical for environmental protection. Transfer the used oil from the catch pan into a sealable container. Most auto parts stores accept used oil at no charge. Do not pour it down the drain or on the ground.
Follow these final steps to complete your lawn mower oil change properly. This ensures your mower operates smoothly and remains in good condition.
Seasonal Maintenance Tips
As an all-season gardener or homeowner, it’s crucial to ensure your lawn mower receives regular maintenance. This doesn’t stop at an occasional lawn mower oil change. Following a structured seasonal maintenance schedule can vastly improve your mower’s longevity and performance.
Regular Oil Change Intervals
Just like any well-oiled machine, your lawn mower requires timely oil changes. Most manufacturer manuals suggest an oil change every 20-50 operational hours. However, at a minimum, perform an oil change annually, aligning it with the onset of the mowing season.
For optimal performance of your mower, keep track of the usage hours. Set reminders for oil changes. Staying consistent helps maintain engine health and prevent malfunctions.
Additional Seasonal Tune-Up Tasks
Alongside regular lawn mower oil changes, other tune-up tasks can make a difference. These include:
- Replace or clean the air filter.
- Check spark plugs and replace if necessary.
- Inspect and sharpen the mower blades.
- Lubricate the mower’s moving parts.
- Check tire pressure and adjust as needed.
- Clean the undercarriage to prevent rust and wear.
Executing these additional tasks at the start of each season can enhance your mower’s performance. They also help avoid costly repairs. Remember that a little care goes a long way in keeping your lawn mower running smoothly.
Conclusion
Performing a lawn mower oil change is not just another task on your to-do list. It is a crucial aspect of maintaining the efficiency and longevity of your lawn mower’s engine. By neglecting this vital maintenance step, you risk facing engine problems that can lead to costly repairs or even the need for a complete replacement.
Importance of Regular Oil Changes
Regular oil changes are the heartbeat of lawn mower maintenance. Fresh oil ensures your engine runs smoothly, stays cool, and has a reduced risk of corrosion. It flushes out particles and sludge, which if left unattended, can impair your mower’s performance. Changing oil at the right intervals prevents wear and tear, ensuring that your mower is always ready when you are.
Conducting an oil change as recommended—typically between 20 to 50 hours of operation, or at least annually—can save you from greater expenses down the road. It’s a simple practice that serves as an investment in your lawn mower’s health.
Extending the Life of Your Lawn Mower
A lawn mower oil change does more than keep the engine purring; it helps extend the overall life of your lawn mower. With new oil, the engine is less prone to overheating and more capable of handling the demands of lawn care. Let’s not forget that the engine is the heart of the lawn mower; its care is paramount.
In addition to regular oil changes, other maintenance such as cleaning or replacing air filters, checking spark plugs, sharpening blades, and ensuring all parts are properly lubricated, works collectively to extend the life span of your mower. By diligently following these maintenance practices, you can help your lawn mower operate at its best for many seasons to come.
Regular maintenance is the key to reliability and longevity. It ensures that every time you pull the starter cord, you can trust your lawn mower to perform efficiently and effectively. Remember, a well-maintained lawn mower makes for a beautiful, healthy lawn and a happy homeowner.
Effortless Lawn Mower Blade Removal Guide
Safety Precautions for Blade Removal
How to remove lawn mower blade? Before removing a lawn mower blade, prioritize safety to prevent injuries. Always disconnect the power source first. For gas mowers, detach the spark plug cable; for electric mowers, unplug the cord or remove the battery. This step ensures the mower can’t start accidentally.
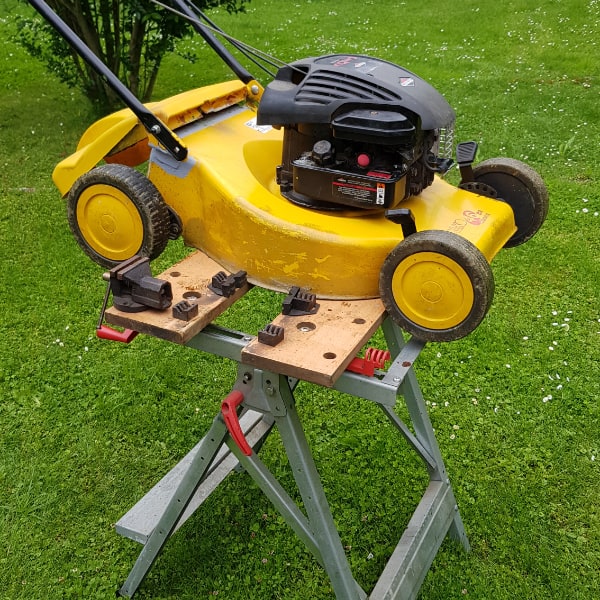
Securing the lawn mower is also crucial. Make sure it’s on a flat, stable surface. Use a block of wood to wedge the blade in place. This prevents it from turning when you’re working on the bolts. Double-check that all tools are in good condition and suited for this task. Wear protective gloves and goggles to shield yourself from sharp edges and debris. Safety can never be overstated when handling sharp, heavy mower blades.
Identifying Mower Types and Blade Varieties
Understanding the type of your lawn mower and the blade it uses is essential. Different mowers have various blade types, each designed for specific tasks. Here’s what you need to know:
- Walk-behind mowers: Common for small to medium-sized lawns. They often have straight, horizontal blades.
- Riding mowers: Ideal for large lawns. Blades can be wider and may have multiple edges for efficient cutting.
- Reel mowers: They use a reel-and-bedknife cutting mechanism, not a single blade.
Blade types can also vary:
- Standard blades: Also known as 2-in-1 blades, suitable for discharging or bagging clippings.
- Mulching blades: These 3-in-1 blades can bag, discharge, and mulch clippings. They have a curved design and more cutting surfaces.
- High-lift blades: Best for bagging, their design creates higher suction to lift grass for a clean cut.
Knowing your lawn mower type and the blade it uses helps in safe removal and proper maintenance. Check your mower’s manual if unsure. In the next steps, we’ll discuss how to safely position your mower for blade access.
Positioning the Mower for Blade Access
To safely remove the lawn mower blade, first position the mower correctly. Begin by finding a flat, stable surface, such as your driveway or garage floor. This prevents the mower from wobbling or tipping over during the process.
For gas-powered mowers, ensure the carburetor is facing upwards when tilted. Check which side that is; it’s usually on the opposite side of the discharge chute. This orientation stops oil from spilling into the carburetor, which could cause issues.
Next, secure the blade to prevent it from moving while you’re working. Place a block of wood between the blade and the mower deck to immobilize the blade. This allows you to loosen the bolts without the blade spinning.
Remember, never tip your mower until you’ve ensured it’s safe to do so according to your model’s guidelines. Some mowers might require different positioning or additional steps. When in doubt, consult the owner’s manual for specific instructions.
Keep the tank as empty as possible or wait for the gas to run low to avoid fuel leaks. If you’re dealing with an electric mower, position it in a way that you can easily access the blade without straining.
Always double-check that the mower’s power source is disconnected before you start any work. This step is crucial for your safety and should never be skipped. Now, with the mower safely positioned, you are ready to proceed to remove the blade.
The Step-by-Step Process of Removing the Blade
To remove your lawn mower blade, follow these straightforward steps:
- Secure the Blade – Place a block of wood against the blade and mower deck. This prevents the blade from turning.
- Loosen the Bolt – Use a wrench to turn the bolt counter-clockwise. Remember “lefty loosey” to unscrew it.
- Detach the Blade – Once the bolt is loose, carefully remove the blade. Keep the bolt and washer safe.
- Inspect the Blade – Check for damage such as bends or deep nicks. If it’s damaged, consider replacing it.
- Clean the Blade – Wipe off grass and debris. This prepares it for sharpening or storage.
After removal, you can either sharpen the blade or replace it if necessary. Always handle the blade with care to avoid injury. With the blade off, you’re ready for the next step – getting a sharp edge back on that blade.
Sharpening Your Lawn Mower Blade
Sharpening the blade restores its cutting ability for a well-kept lawn. A dull blade makes mowing harder and less efficient. Sharpening also extends the mower’s life. Here’s how to do it:
- Safety Check: Confirm the mower is powered off. Wear gloves and eye protection.
- Clamp the Blade: Secure the blade in a vise or with clamps to a stable surface.
- Mark the Edge: Use a marker on the blade edge. This shows where you’ve sharpened.
- Sharpening Tool: Choose a file or an angle grinder. A grinder works faster.
Maintain the blade’s original angle, usually about 45 degrees. Sharpen in one direction, from the center outwards. Check your progress with the marker. Swap sides often to ensure even sharpening. Keep your movements steady and avoid overheating the metal.
After sharpening, the blade should be free of nicks and have a consistent, smooth edge. If you’re unsure, consult a professional or the mower’s manual. With a sharper blade, mowing becomes easier and your lawn, neater.
Deburring the Blade for a Pristine Edge
Once you sharpen the lawn mower blade, a burr may form on the edge. Go over the back side of the blade lightly with a flat file. This removes the burr, leaving a fine edge. Heart’s rule during deburring: work from the end of the blade towards the center. Take care to maintain the blade’s shape and sharpness.
Deburring is like fine-tuning your work; it ensures a clean cut when mowing your lawn. A properly deburred blade prevents ragged cuts, which can harm grass health.
Check the blade after deburring. Hold it up to the light. The edge should be clean and smooth, without any rough spots. If all looks good, you’re ready to move to the next step: ensuring the blade’s balance.
Ensuring Blade Balance for Optimum Performance
After sharpening your lawn mower blade, it’s critical to ensure it’s well-balanced. An unbalanced blade can cause mower vibrations, accelerate wear on the mower’s parts, and result in an uneven cut. Here is how to guarantee that your sharpened blade will perform optimally.
- Check Balance with a Cone: Use a blade balancing cone to check your blade’s balance. Place the blade on the cone; if it tilts, it’s unbalanced.
- Adjust as Necessary: If one side dips, grind it a bit more until both ends stay level on the cone.
- Alternative Methods: If a balancing cone is unavailable, hang the blade on a nail through the center hole. Balanced blades will remain horizontal.
- Consistent Material Removal: Ensure equivalent amounts of material are removed from both cutting edges during sharpening to maintain balance.
- Test and Confirm: After adjustments, always retest to ensure the blade is balanced. Proper balance will extend the life of your mower.
Balanced blades reduce strain on the lawn mower engine and result in a cleaner cut. A few minutes spent balancing can save hours of frustration and extend your mower’s functionality. Remember, for the smoothest lawn finish and mower care, balance is key.
Reinstalling the Lawn Mower Blade
Once your lawn mower blade is sharp and balanced, it’s time to put it back. Here’s a simple guide to reinstall the blade safely and correctly.
- Position the Blade Properly: The blade should face the right way. The sharpened edges must point upwards, away from the ground.
- Secure the Blade: Place the blade onto the mower’s spindle. Align it with the mounting holes.
- Install the Bolt and Washer: Reattach the washer and bolt you set aside. Tighten them securely with a wrench, going ‘righty-tighty’.
- Torque to Specification: If your mower has torque specifications for the bolt, follow them to avoid over-tightening or under-tightening.
- Remove the Wood Block: Take out the block of wood used to immobilize the blade during removal.
- Reconnect Power Source: For gas mowers, reattach the spark plug cable. For electric mowers, reconnect the battery or power cord.
- Do a Final Check: Make sure everything is secure and in place before starting your mower.
- Test It Out: Start your mower and listen for unusual sounds. An odd noise might mean the blade needs more tightening.
How to remove lawn mower blade? With these steps, you’ve successfully reinstalled your lawn mower blade. Now, your mower is ready for action, and you can enjoy a cleanly cut lawn once again. Remember, keeping the blade sharp and in good condition ensures efficient mowing and a healthy lawn.
