Watering Can with Long Spout: Ideal for Precision Plant Hydration
The Benefits of a Long Spout in Watering Cans
Using a watering can with a long spout offers multiple advantages for gardeners and plant enthusiasts. First and foremost, it allows precise water delivery. The long spout reaches easily into tight spots, ensuring that water goes directly to the plant’s base, without splashing or spilling on the leaves. This is crucial for plants susceptible to leaf diseases when wet.
Additionally, a long spout helps control the water flow, offering a gentle shower that doesn’t disturb the soil or damage delicate plants. This feature is especially beneficial for young seedlings or fragile flowers that require a soft touch.
Another key benefit is reduced strain on the gardener’s body. With a long spout, there’s no need to stretch or bend awkwardly to water plants in hard-to-reach areas. This ergonomic advantage means you can maintain a comfortable posture while watering, which is notably helpful for those with mobility issues.
Investing in a watering can with a long spout also promotes water conservation. By directing water exactly where it’s needed, waste is minimized. Every drop counts, especially in regions with water scarcity or for eco-conscious gardeners aiming to reduce their environmental footprint.
In summary, a long spout watering can offers precision, control, ergonomic comfort, and promotes conservation, making it an ideal tool for any gardening task.
Key Features to Look for in a Long Spout Watering Can
When shopping for a watering can with long spout, there are several key features to consider. These features not only add to the convenience of watering your plants but also ensure longevity and efficiency of the tool. Here’s what to look out for:
- Spout Length and Shape: Opt for a watering can with a spout that’s long enough to reach your plants comfortably. A curved or angled spout can help in targeting water right at the roots. Some spouts come with a detachable rose, which is great for gentle watering.
- Material Durability: Watering cans are made from various materials like plastic, galvanized steel, or copper. Each has its pros and cons. Metal cans are often more durable than plastic but may be heavier.
- Comfortable Handle Design: A good grip makes watering less of a chore. Look for a handle that’s easy to hold and balances the can when it’s full. An ergonomic design can reduce hand fatigue.
- Capacity: Choose the size based on your garden’s needs. A larger capacity means fewer trips to refill, but also a heavier can to carry.
- Water Control: A watering can with a precision spout and adjustable flow is crucial for controlling water output. This is especially important for delicate plants or seedlings.
- Aesthetic Appeal: While function is key, the design of the can may be important to you. Many gardeners prefer a watering can that looks good in their garden space.
Keep in mind these features to find a watering can with long spout that is not only a functional tool for your gardening needs but also a pleasure to use.
Top Rated Long Spout Watering Cans on the Market
When it comes to finding the best watering can with a long spout, there are several top-rated options to consider. These products stand out for their quality, functionality, and customer satisfaction. Here’s a rundown of some standout watering cans that have garnered positive reviews:
- The Classic Gardener’s Choice: This high-quality watering can combines durability with a sleek design. The long, slender spout provides excellent reach, ideal for watering hanging baskets or back-of-border plants. It often features a sturdy metal construction and a comfortable wooden handle.
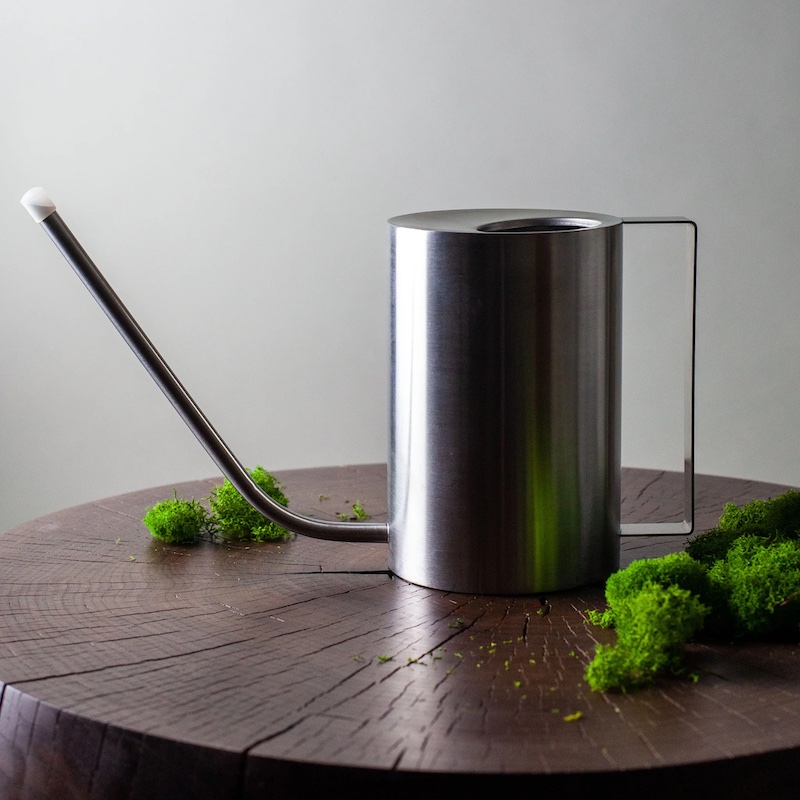
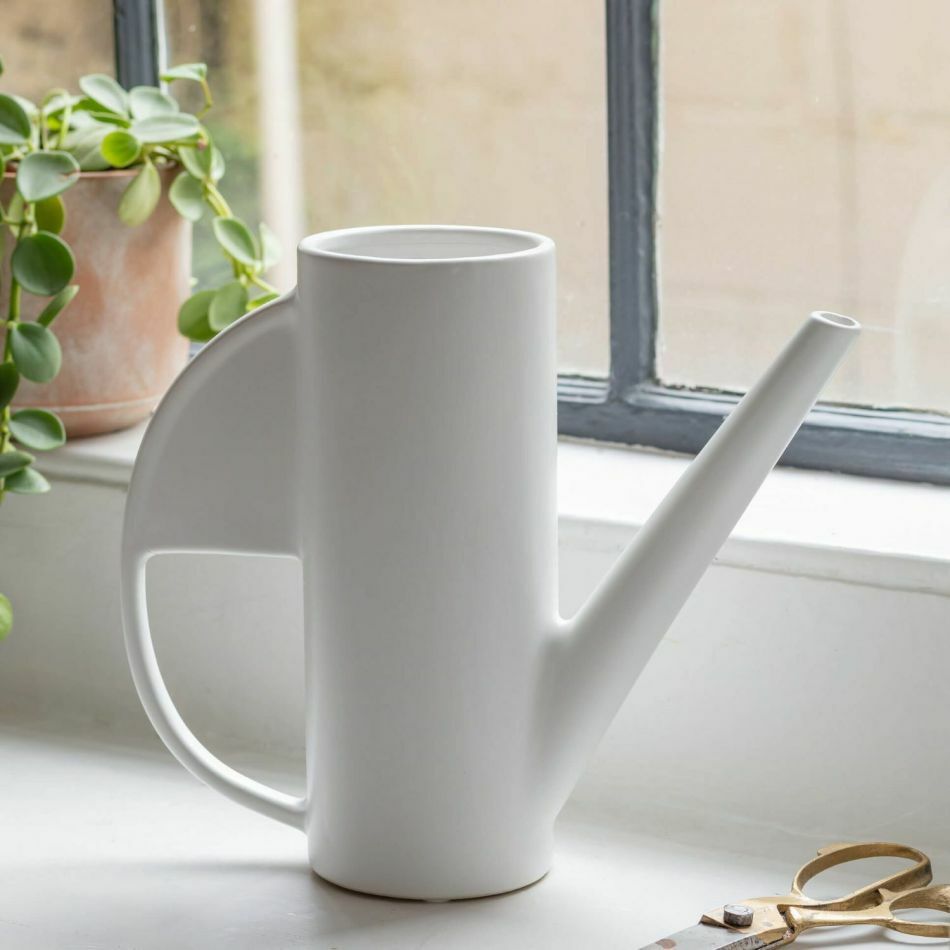
- The Modern Minimalist: If you prefer a more contemporary look, this watering can might be for you. It’s made of lightweight materials and has a long, clean-lined spout. Its elegant design is perfect for minimalists who also want functionality.
- The Eco-Friendly Option: For those who are environmentally conscious, an eco-friendly model could be the best pick. Often crafted from recycled materials, these watering cans with long spouts are designed with sustainability in mind.
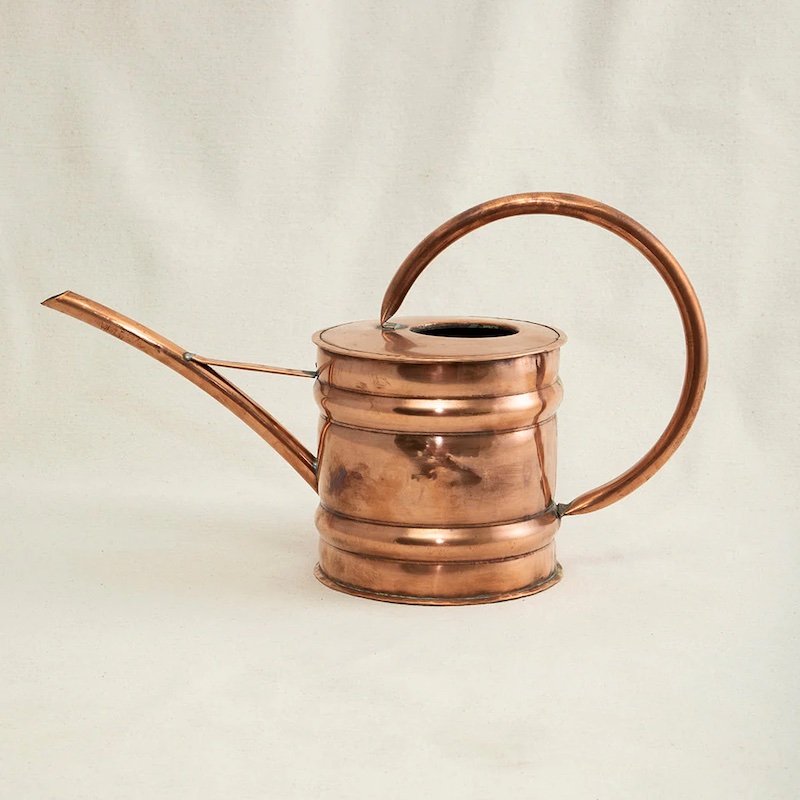
- The Heirloom Quality Can: Some gardeners invest in a watering can that will last for generations. Heirloom-quality cans are typically made from durable metals like copper and are known for their long, gracefully curved spouts.
- The Budget-Friendly Find: You don’t have to spend a lot to get a high-performing long spout watering can. There are budget-friendly models that offer a good balance between cost and quality. They might be less robust but can still offer a good reach and comfortable handling.
Before making a purchase, consider the specific needs of your garden and balance them with the reviews of avid gardeners. Look for capacity, ease of filling, balance, and the quality of the material. With the right watering can with a long spout, you can make gardening easier and more enjoyable.
Caring for Indoor Plants with a Long Spout Watering Can
Indoor plants add beauty and life to our homes, but they require careful watering to thrive. A watering can with a long spout is an excellent tool for maintaining the health of your indoor greenery. Here are reasons why it should be part of your plant care routine:
- Direct Water to the Root Zone: The long spout lets you water the soil directly, avoiding the leaves and stem. This helps prevent leaf rot and disease.
- Avoid Overwatering: Using a long spout watering can gives you better control over the amount of water. This means less risk of overwatering, which can harm or even kill plants.
- Reach Hanging and Tall Plants: The extended reach of a long spout makes it easy to water hanging baskets or tall plants without a step stool.
- Keep Leaves Dry: Many indoor plants, like African violets, dislike wet leaves. The precise pour of a long spout can keeps leaves dry and happy.
- Minimize Disturbance to Soil: A gentle water flow maintains soil structure. This is crucial for delicate roots and helps prevent erosion in the pot.
- Watering with Precision: Especially for plants in narrow or crowded spaces, precision is key. The long spout allows you to deliver water exactly where it’s needed.
When caring for indoor plants, always check the soil moisture before watering. Use your long spout watering can to give a thorough drink when the top inch of soil is dry. This tool, combined with the right watering technique, ensures that your indoor plants grow vibrant and strong.
The Importance of Watering Techniques for Different Plants
The right watering techniques are vital for plant health. Different plants need different amounts of water and methods of delivery. Using a watering can with long spout helps apply these techniques effectively. Let’s look at some key tips:
- Understand Your Plant’s Needs: Every plant species has unique watering requirements. Some need moist soil at all times, while others thrive with dry periods.
- Check Soil Moisture: Before watering, always check the soil. Use your finger or a moisture meter.
- Water Deeply but Infrequently: This encourages roots to grow deep and strong. It’s often better than frequent shallow watering.
- Use Room Temperature Water: Cold water can shock roots, while warm water can harm them. Room temperature is best.
- Time Your Watering: Morning is usually the best time to water plants. It gives them time to absorb it before the heat of the day.
- Adjust for Seasons and Weather: Plants need less water in winter and more in dry, hot weather. Watch for these changes and adjust how you water.
- Focus on the Root Zone: With a long spout, you can deliver water straight to the roots. This is where plants absorb water and nutrients.
Using these techniques with a watering can with long spout will help your plants flourish. Always remember, overwatering can be as harmful as under-watering. Be observant and responsive to your plants’ signals for the best results.
Long Spout vs. Short Spout: Pros and Cons
When you’re choosing between a watering can with a long spout and one with a short spout, it’s crucial to weigh the pros and cons of each. Here’s a quick rundown to help you decide which type suits your gardening needs best.
Pros of Long Spout Watering Cans:
- Reach: They extend your reach, making it easier to water plants that are far away or hard to access.
- Precision: The design allows for targeted watering, reducing waste and ensuring water gets directly to the plant’s roots.
- Safety for Leaves: They help keep leaves dry, preventing leaf diseases that can arise from moisture.
- Ergonomics: They prevent strain by eliminating the need to stretch or bend over your plants.
Cons of Long Spout Watering Cans:
- Weight: When filled with water, the can may become heavier and harder to manage, especially with a very long spout.
- Storage: They require more space to store due to their size.
- Price: Sometimes they can be more expensive than short spout alternatives.
Pros of Short Spout Watering Cans:
- Control: They can offer greater control and balance when watering, useful for small or tight spaces.
- Portability: Easier to carry and handle, making them ideal for quick watering jobs or for people with less strength.
- Cost: They tend to be more affordable and are a good basic option for simple watering tasks.
Cons of Short Spout Watering Cans:
- Limited Reach: It’s harder to water plants that are not easily accessible.
- Risk of Overwatering: Focused, heavy flow may lead to overwatering or soil disturbance.
- Less Precision: Without a long spout, it’s more challenging to avoid getting water on plant leaves or missing the root zone.
In conclusion, a long spout watering can offers greater precision and reach but may be more cumbersome and expensive. On the other hand, a short spout is more manageable and afforable but lacks the precision and extension of a long spout. Your choice should depend on your garden layout, the types of plants you have, and your personal comfort and ability to manage the can.
Enhancing Your Gardening Experience with the Right Watering Can
Choosing the perfect watering can with long spout can greatly enhance your gardening experience. Here’s how to ensure you get the most out of this essential tool:
- Match the Can to Your Needs: Consider the size and type of your garden. Pick a can that holds enough water for your plants while still being easy to carry.
- Look for Comfort: A can with an ergonomic handle can make watering less tiring. This is important if you spend a lot of time gardening.
- Check for a Removable Rose: Some long spout cans come with a detachable watering rose. This is useful for switching between a gentle shower and a more direct stream.
- Consider Balance: When full, the can should be balanced. A well-designed can won’t tip over easily and helps prevent water wastage.
- Ease of Use: Make sure the can is simple to fill, carry, and pour. Avoid cans that are awkward to handle or pour from.
- Opt for Durability: A durable watering can with long spout is a good investment. It will last for many seasons, saving you money in the long run.
By paying attention to these factors, you can make watering your garden a more enjoyable and effective task. The right can help you care for your plants precisely and with ease.
Innovative Designs in Long Spout Watering Cans
Watering can designers are always looking for ways to improve function and style. Innovative designs in watering cans with long spouts bring new levels of convenience and efficiency to gardening. Here are some trends in design to look out for:
- Collapsible Spouts: Some watering cans now feature spouts that can be collapsed or telescoped. This makes storage easier without sacrificing reach.
- Weight Distribution: Newer models focus on an even weight distribution. They make the can feel lighter and easier to carry, even when full.
- Ergonomic Triggers and Grips: Watering cans are getting more ergonomic. Triggers and contoured grips help control water flow and reduce hand fatigue.
- Integrated Measuring Scales: For precise plant care, some cans have scales to measure water volume. This helps you give each plant the right amount of water.
- Dual Handles: A top handle paired with a side handle offers better control. This design helps when tipping the can to pour.
- Fashion-forward Colors and Patterns: Today’s cans come in a range of colors and patterns. They can blend with your garden’s aesthetic or stand out as a statement piece.
- Self-Watering Systems: Some long spout cans have a self-watering feature. They drip-feed plants a consistent water supply, perfect for when you’re away.
These innovative designs in watering cans with long spouts combine practicality with visual appeal. They make gardening tasks not just easier, but also more enjoyable. Look for these features next time you’re in the market for a new watering can.

Tips for Maintaining Your Long Spout Watering Can
To keep your long spout watering can in top shape, follow these easy maintenance tips:
- Rinse After Use: Always rinse out your watering can after use. It prevents buildup and clogs.
- Store Properly: Keep your can in a dry place to avoid rust and damage.
- Check for Leaks: Inspect your can regularly for any holes or cracks. Patch them up quickly.
- Handle with Care: Be gentle with your can. Rough handling can lead to dents and damage.
- Clean the Spout: Ensure the spout is free from debris. Use a brush to clear blockages.
- Dry Thoroughly: After cleaning, dry your can well to prevent rust, especially if it’s metal.
- Use Mild Detergents: If deep cleaning is needed, use mild soaps to protect the finish.
Proper care will extend your watering can’s life and keep it functioning for years. These tips use common household items and take little time, making them easy to follow. Plus, they ensure your watering can continues to assist you in nurturing your garden with precision.
Sustainable Gardening: Make Your Own DIY Watering Can
Introduction to DIY Watering Cans
In the world of gardening, a reliable watering can is a must-have. Yet, not all watering cans are equal. DIY watering cans are rising in popularity, and for good reason. They reflect a desire to be sustainable while giving a personal touch to gardening tools. In this blog, we discuss the why’s and how’s of making your own watering can. This not only supports eco-friendly practices but also saves money. Whether you’re an avid gardener or just starting out, you’ll find that creating a diy watering can is a rewarding project. It’s simple, efficient, and a great step towards sustainable living.

The Benefits of a Homemade Watering Can
Creating a diy watering can brings several advantages to gardening enthusiasts. The first benefit is cost-effectiveness. Buying a brand-new watering can may be costly, but making one at home can significantly reduce expenses. You often use materials already at hand, avoiding an extra trip to the store. Another advantage is customization. You can tailor the size, shape, and flow of your homemade can to suit the specific needs of your garden. This personalization ensures that plants receive the right amount of water without waste.
Moreover, making a diy watering can fosters creativity. It allows you to repurpose common household items, turning them into functional garden tools. This process can be a fun, creative project for the whole family, combining craft time with learning about sustainability. Additionally, homemade cans often prove to be more durable than their store-bought counterparts. When you select materials and construct the can yourself, you control the quality and craft it to last.
Lastly, there’s the sustainability factor. By choosing to craft your own watering can, you contribute to reducing plastic waste and promoting a more eco-friendly gardening approach. You give a second life to objects that might otherwise end up in a landfill, thus leaving a lighter ecological footprint. In summary, the advantages of building a homemade watering can are clear: it’s cost-saving, customizable, creative, durable, and sustainable—a true win-win for gardeners and the environment alike.
Materials Needed for Your DIY Watering Can
When embarking on your adventure to create a diy watering can, you’ll need some basic materials. The beauty of this project is its flexibility—you can often use items that are readily available in your home. Below is a list of common materials you might consider:
- Empty container: Look for plastic bottles, milk jugs, or detergent containers. Make sure they are clean.
- Nails or screws: You will need these to poke holes and create the spout.
- Hammer or drill: These tools will help you punch holes accurately.
- Sharp knife or scissors: Use these to cut the container if needed.
- Permanent marker: This is helpful to mark where you will create openings.
- Sandpaper: Smooth out any rough edges after cutting your container.
- Decorative materials: Feel free to get creative with paints, tapes, or stickers.
- Glue or waterproof sealant: These might be necessary if you need to attach parts.
Remember, the aim is to customize your diy watering can to meet your garden’s needs, so feel free to adapt this list. By gathering these simple materials, you are not only preparing to water your plants but also taking a step towards sustainable living.
Step-by-Step Guide to Making a Simple Watering Can
Crafting a diy watering can is straightforward and rewarding. Here are the steps you can follow to make a simple, effective watering tool for your garden:
- Choose Your Container: Select an empty bottle or jug that will serve as the body of your watering can. Ensure it’s clean and holds enough water for your needs.
- Create the Spout Holes: Use a marker to indicate where you want your water spout holes to be. With a hammer and nail or drill, make several holes in the lid of the container.
- Cut an Opening: If your container needs a larger opening for filling, use a sharp knife or scissors. Cut carefully and always keep safety in mind.
- Smooth Edges: After any cutting, there might be rough edges. Gently sand these down to prevent any accidental cuts during use.
- Decorate (Optional): Bring out your creative side. Decorate your diy watering can with paint, tape, or stickers. This gives it a personal touch.
- Seal Any Joints: If you attach new parts, like a handle, use glue or a waterproof sealant. This ensures no leaks when watering.
- Test Your Watering Can: Fill it with water and test to see how it pours. Make sure the flow is gentle and suitable for your plants.
- Adjust if Necessary: After testing, you might need to widen holes or fix leaks. Make adjustments as needed for the perfect watering can.
Remember, the goal is to have a functional, efficient diy watering can that serves your garden’s watering needs while being mindful of the environment.
Creative Ideas for Upcycling Items into Watering Cans
Transforming everyday objects into diy watering cans doesn’t just save money, it sparks creativity. Let’s explore some inventive ideas for upcycling items you might find around the house into functional garden tools:
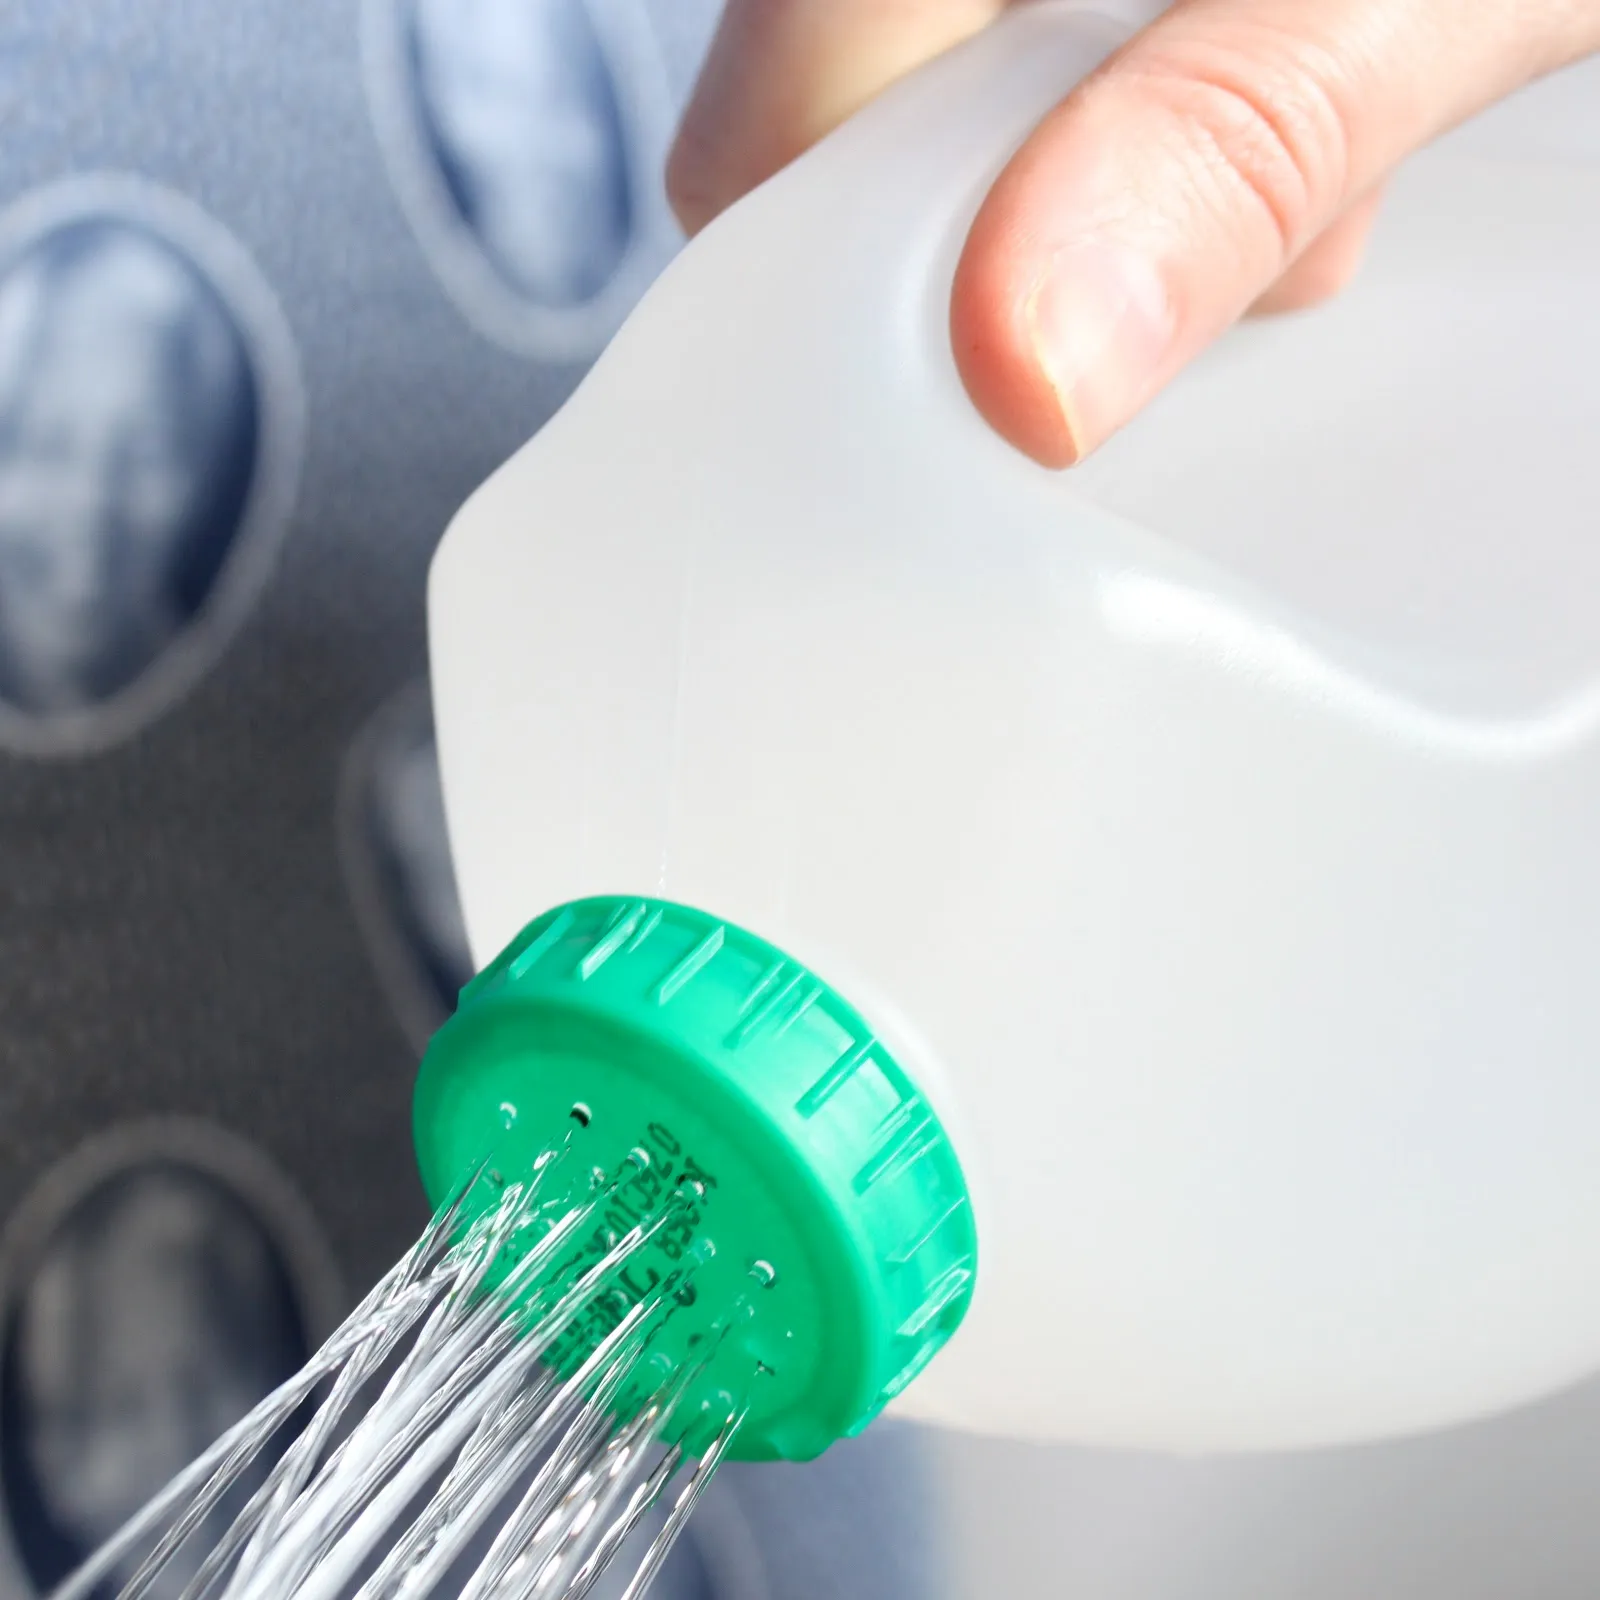
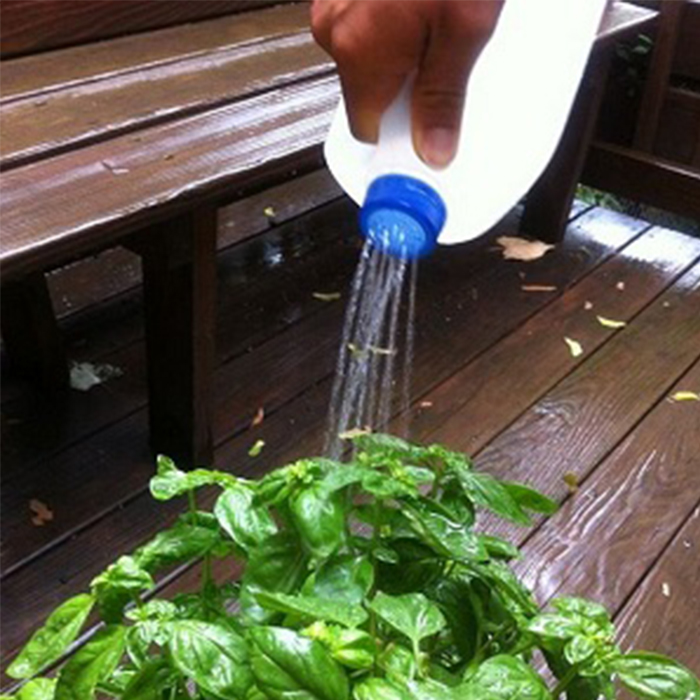
- Milk Jugs: A gallon-sized milk jug makes an ideal watering can. Simply poke holes in the lid for a makeshift spout.
- Detergent Bottles: Their sturdy handles and durable material are perfect. Cut the bottom off for an instant can.
- Soda Bottles: Smaller plants appreciate a gentle shower from a pierced soda bottle.
- Oil Containers: Cleaned out, these can become watering cans with a long, narrow spout.
- Large Yogurt Containers: Add a handle and you’ve got a lightweight watering tool.
- Old Teapots: For a whimsical look, drill holes in the spout of a retired teapot.
As you select an item to upcycle, consider the size and type of plants you’re watering. Customize the number and size of holes in the spout for a gentle or heavy flow. Use what you have and have fun with your diy project. Your plants and the planet will thank you for it.
Tips for Maintaining Your DIY Watering Can
Once you have crafted your own diy watering can, keeping it in good condition is key. Here are some straightforward tips to ensure your watering can lasts longer:
- Regular Cleaning: Rinse your can after each use. This prevents dirt build-up and keeps the water flow clear.
- Check for Leaks: Examine your can regularly for any leaks. Patch them up quickly with waterproof sealant to prevent water loss.
- Store Properly: Keep your diy watering can in a cool, dry place when not in use. Avoid leaving it in direct sunlight as some materials may degrade.
- Handle with Care: Treat your can gently. Avoid dropping it or rough handling that could cause damage.
- Periodic Upgrades: Over time, the holes in your can may enlarge or change shape. Fix them with a small piece of wire mesh or a few layers of clear tape as needed.
- Decoration Maintenance: If you’ve decorated your can, check for any peeling or fading. Touch up the paint or stickers to keep it looking fresh.
By following these tips, your homemade watering can will remain functional and visually appealing for many seasons. It will also stay true to your sustainable gardening goals by extending the lifespan of repurposed items.

Environmental Impact of Using Recycled Materials for Garden Tools
Using recycled materials for garden tools like a diy watering can has a significant positive impact on the environment. Here are some key environmental benefits:
- Reduces Waste: Upcycling items into garden tools prevents them from ending up in landfills. This helps lower the amount of waste impacting our planet.
- Conserves Resources: Crafting tools from existing materials means fewer new resources are used. This reduces the demand for manufacturing and raw materials.
- Lowers Pollution: Less manufacturing of new garden tools translates to less pollution. This includes emissions from factories and the fuel used to transport goods.
- Promotes Biodiversity: By choosing eco-friendly practices, you support a healthier ecosystem. Recycled tools do not release harmful chemicals into the soil, protecting local flora and fauna.
- Educates on Sustainability: Using recycled materials sets an example. It shows others the value of resourcefulness and environmental stewardship.
- Encourages Innovation: Turning trash into tools sparks creativity and innovation. It encourages finding new ways to solve old problems.
In summary, making garden tools from recycled materials like a diy watering can, contributes to a healthier planet. It minimizes waste, saves resources, decreases pollution, and enhances biodiversity. Moreover, it teaches valuable lessons on sustainable living and fosters innovative thinking.
Conclusion: Embracing Sustainability in Gardening Practices
Creating a diy watering can is more than a gardening task. It is a step towards living sustainably. By making your own watering can, you show care for the environment. You save money, reduce waste, and get creative in the process. Using everyday items for your garden keeps plastics out of landfills. It also cuts down on the need to produce new plastic goods.
The process is simple and adaptable. Whether you’re using a milk jug or a soda bottle, you can make a diy watering can that meets your gardening needs. Moreover, it encourages resourcefulness and teaches future generations the importance of sustainability. Everyone can play a part in making gardening a greener activity.
Keeping your homemade watering can in top shape is straightforward. Regular cleaning and proper storage extend its life. Timely repairs and touch-ups on decorations keep it functional and attractive. Through these small actions, you contribute to a larger cause. You help preserve the planet for future generations.
In conclusion, the journey to create a diy watering can is rewarding. It promotes a sustainable mindset that goes beyond the garden. It shows that we can all make a difference with small, thoughtful actions. Embrace the ethos of sustainability in your gardening practices. Together we can create a greener, more vibrant world.