The Smart Watering: Choosing the Right Watering Can for Plants
The Importance of Proper Watering for Plant Health
Proper watering is crucial for plant health. It ensures that plants get the right amount of moisture they need to grow. Too much water can lead to root rot, a common issue that can harm or kill your plants. On the other hand, too little water can dry out the roots, causing stress and stunted growth. A good watering can for plants helps gardeners provide consistent water. Consistency is key to avoiding the swings of over or under-watering. It also helps in distributing water evenly to all parts of the soil. This even distribution allows roots to absorb moisture and nutrients well. Choose a watering can that suits the needs of your plants and your gardening style. This choice can make a big difference in the health and beauty of your garden. Remember, healthy plants resist pests and diseases better, and they flourish, providing you with a lush, vibrant garden. Every drop counts, so it’s important to water wisely and effectively.

Types of Watering Cans and How to Choose
Choosing the right watering can for plants is a fundamental gardening decision. Different cans offer various benefits and limitations. When picking a can, consider your garden size, plant types, and how often you need to water. Let’s explore the common types of watering cans to help you make an informed choice.
Metal vs. Plastic Watering Cans
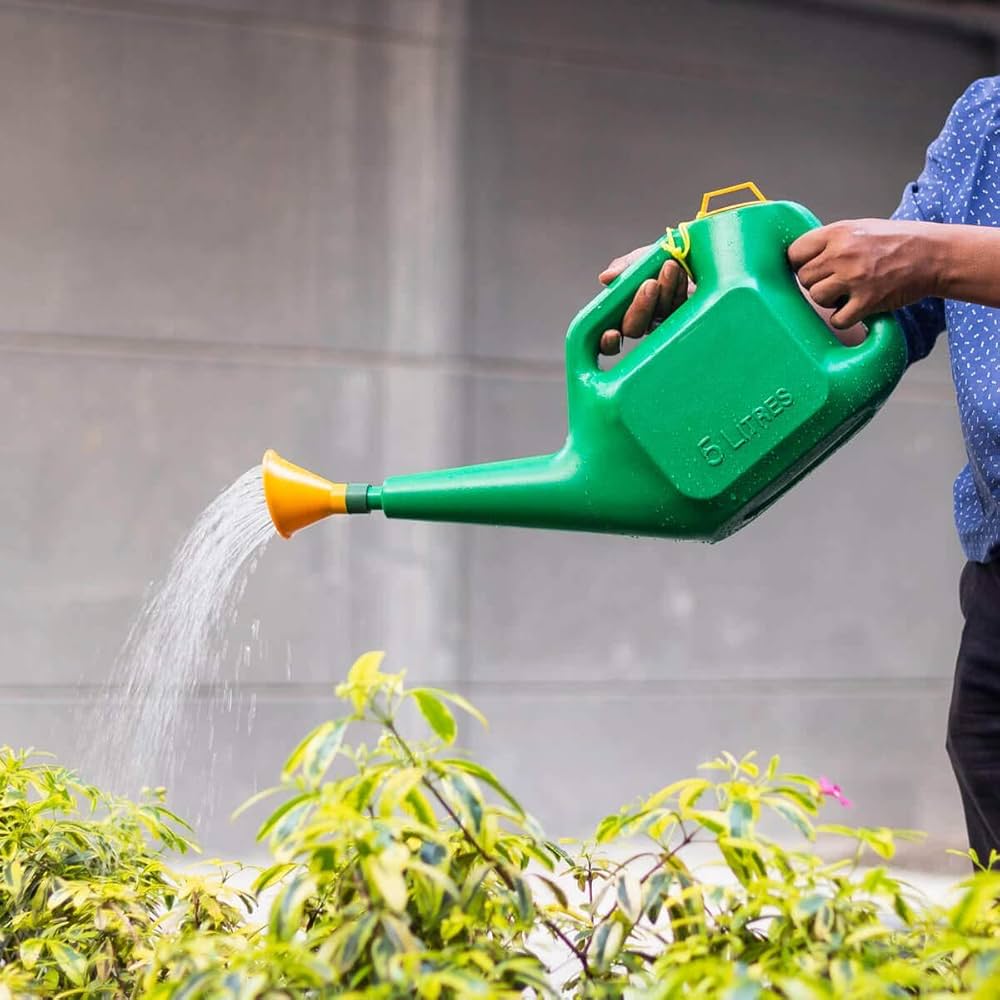
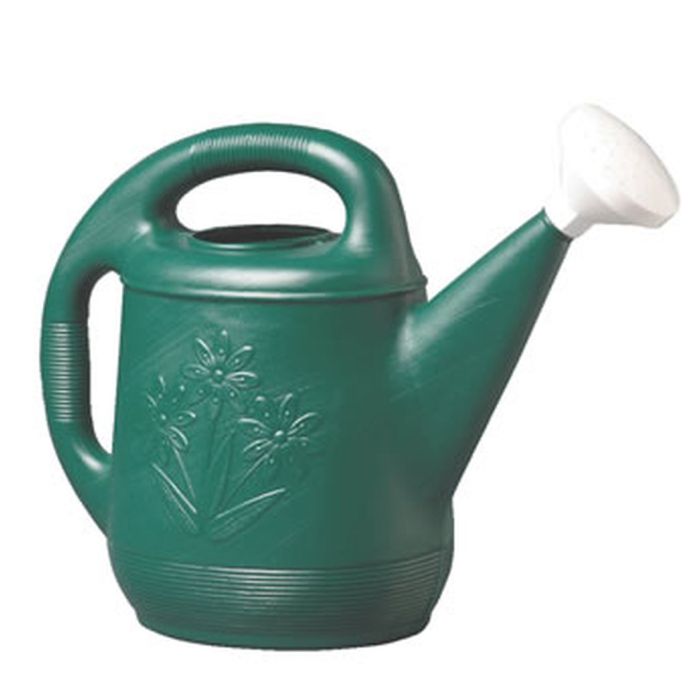
Metal watering cans are durable and often have a classic look. They withstand wear and resist damage from falls or harsh weather. However, they can be heavier and may rust over time, which is a factor to consider. Plastic cans are lightweight and usually more affordable. They won’t rust, which makes them a good choice for outdoor use. But, they may not last as long as metal cans if left out in the sun, as UV rays can weaken the plastic.
Specialty Watering Cans for Different Plants
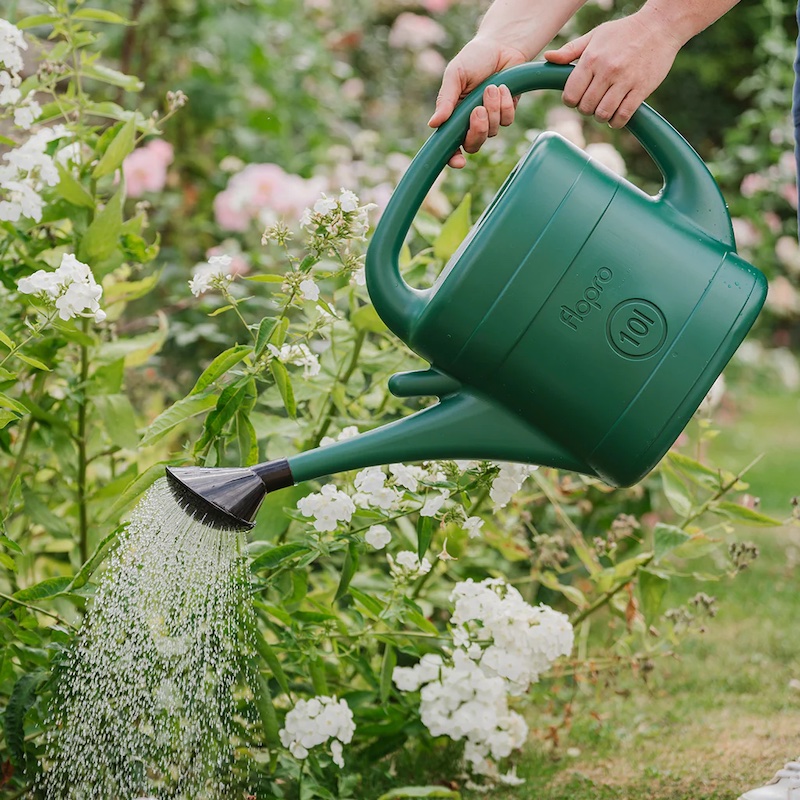
Some plants require special care and hence, special watering cans. For delicate or small plants, consider cans with a narrow spout for precise watering. For hanging or tall plants, a can with a long spout can reach without much effort. There are also cans designed for seedlings with a gentle shower head to avoid disturbing the soil. Always match the can’s features with the needs of your plants for the best results.
Features to Look For in a Watering Can
When shopping for the perfect watering can for plants, certain features stand out as especially important. Let’s dive into the specific aspects you should consider to find a can that does not only meet your plants’ needs but also enhances your gardening experience.
Spout Length and Shape
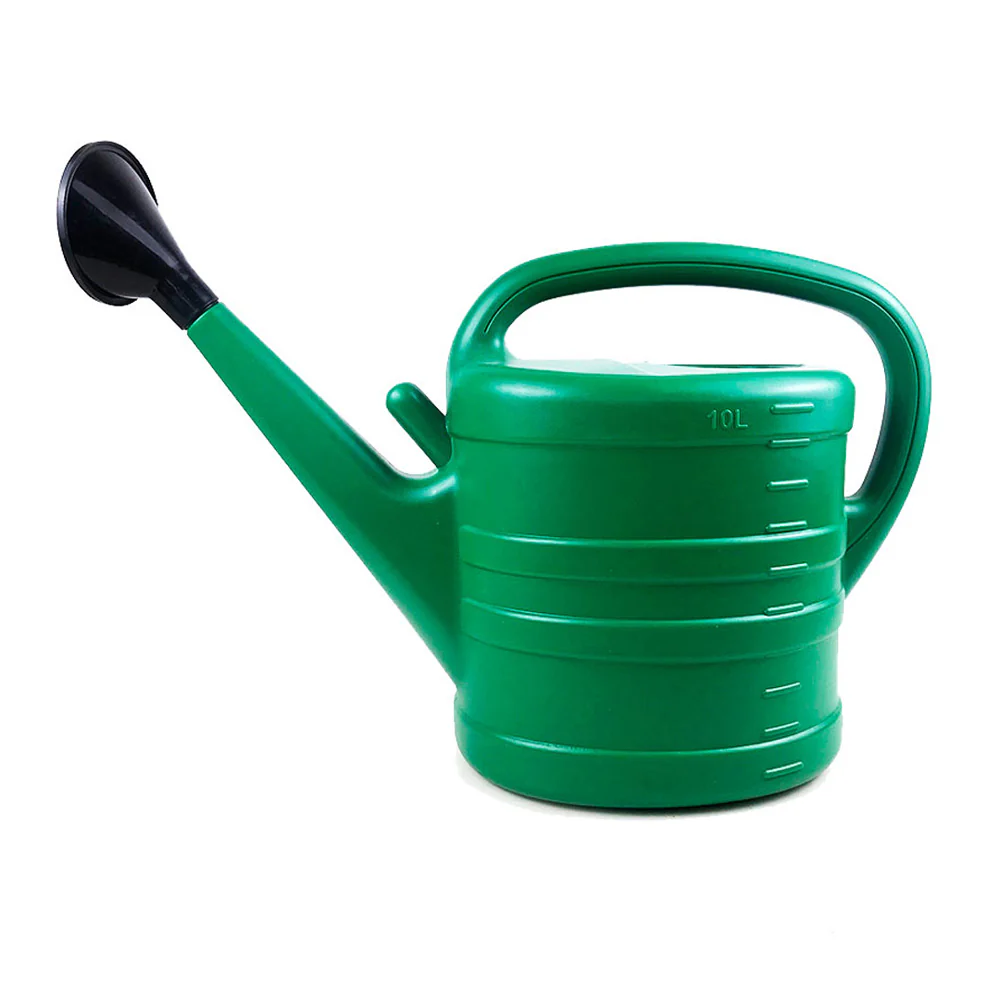
The spout of a watering can plays a crucial role in how water is delivered to your plants. A longer spout ensures you can reach plants in the back of the bed or hanging baskets without straining. Look for spouts with a gentle curve for precision watering without splashing. Shape matters too; narrower spouts suit seedlings and delicate plants, directing water right to the roots without displacing soil.
Capacity and Weight Considerations
How much a watering can holds impacts how often you’ll need to refill it. Larger capacities are perfect for extensive gardens, reducing the number of trips to the tap. Yet, keep in mind the weight when full. A watering can should be easy to carry and manage. Opt for a balance between capacity and weight that you can comfortably handle when full.
Durability and Material Quality
The material of a watering can affects its longevity. Metal cans are strong and may last longer, but they can be heavier and prone to rust. High-quality plastic is lighter and rust-proof but might degrade in constant sun. Assess your use, whether indoors or outdoors, and choose a material that will endure your gardening conditions while maintaining its form and function.
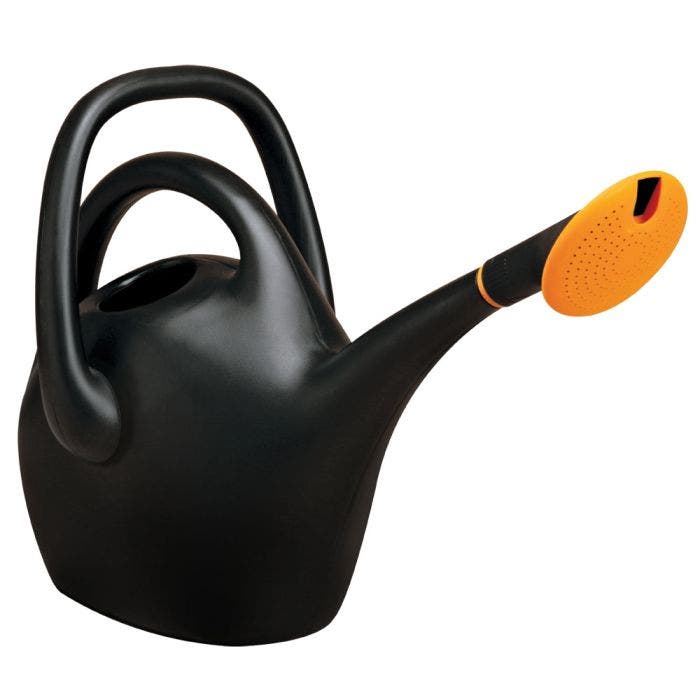
Ergonomic Designs for Comfortable Use
Ergonomic designs in watering cans can greatly increase comfort during use. These designs focus on reducing the strain on your hands, wrists, and back while watering. Look for watering cans with curved handles that fit well in your hand. This provides a natural grip, reducing the risk of cramping or fatigue. A well-balanced can makes it easier to carry when filled with water. It should not feel too heavy on one side. Some cans also have a second handle at the rear. This allows you to use both hands for better control and less strain when pouring. A can with an ergonomic design may also feature a tilt in the body. This helps to direct water flow without the need to bend too much. Remember that a watering can for plants should always feel comfortable to use. If you find one that suits your body and your garden’s layout, watering becomes a less tiresome task. A gardener who is at ease is more likely to care for their plants regularly and with joy. When shopping, it’s worth trying out different cans to find the best ergonomic fit for you.
Innovative Watering Can Features
When choosing the optimal watering can for plants, innovative features can enhance the watering process. Modern watering cans come with added functionalities that cater to different gardening needs. From built-in measuring tools to adjustable spray nozzles, these features can simplify plant care and ensure your plants thrive.
Built-in Measuring Tools
One smart feature of some modern watering cans is the inclusion of built-in measuring tools. These allow gardeners to provide the precise amount of water their plants need. Measuring marks on the side or inside of the can show how much water you’re using. This is very helpful for following the specific watering requirements of various plant species. It prevents over-watering and under-watering, promoting healthy plant growth.
Adjustable Spray Nozzles
Adjustable spray nozzles are another feature that can make a big difference. They allow you to customize the water flow to suit the needs of each plant. You can choose a gentle mist for delicate plants or a stronger stream for robust, deep-rooted plants. This adjustability helps target the watering, avoids displacing soil around the base of the plants, and offers versatility to the gardener. It’s crucial to have a watering can that adapts to your diverse garden.
Eco-Friendly Watering Can Options
In the age of sustainability, opting for eco-friendly watering can options becomes a priority for gardeners. Not only do these options reduce environmental impact, they also ensure that you can care for your plants responsibly. Here are some eco-friendly choices to consider:
- Recycled Materials: Choose watering cans made from recycled materials. These cans give a second life to plastic and reduce waste in landfills. Look for labels that confirm the recycled content.
- Biodegradable Cans: Some watering cans are now available in biodegradable materials. These will decompose over time and won’t clutter the planet for centuries.
- Solar-powered Watering Systems: Modern systems use solar power to water plants. This means less manual work for you and no electricity use, which is great for the environment.
- Rainwater Harvesting: Collect rainwater in barrels and use it with a simple watering can. You’ll save tap water and provide your plants with natural water. Make sure your barrel has a secure lid to keep out mosquitoes.
- Long-lasting Designs: Durable, long-lasting watering cans may not seem eco-friendly at first. However, investing in one reduces the need to replace it often, which is good for the planet.
- Local Sourcing: Buy watering cans made locally. This cuts down on transportation emissions and supports local economies.
When choosing an eco-friendly watering can for plants, remember that every small action counts. Whether it’s using recycled products or harnessing the power of the sun, the right choices can help preserve our planet while keeping your garden green and healthy. Check for capacity, durability, and ergonomic features in these eco-friendly options as well. Balance function, sustainability, and your gardening needs for the best pick.
Tips for Efficient Watering Techniques
Efficient watering techniques conserve water and support plant health. Here are practical tips to use a watering can for plants efficiently:
- Water Early or Late: Water plants during the cooler parts of the day. This reduces evaporation and ensures that plants have time to absorb moisture.
- Target the Root Zone: Aim the water at the base of the plants. Wetting the foliage is less effective and can promote disease.
- Mulch Around Plants: Mulch conserves moisture and reduces water runoff. It also helps prevent weeds that compete with plants for water.
- Use a Watering Schedule: Set a routine based on your plants’ needs. Some plants require weekly watering, while others may need more frequent care.
- Observe Your Plants: Look for signs of over or under-watering. Adjust your technique and schedule as needed for the well-being of your plants.
- Implement Drip Irrigation: For larger areas, consider a drip irrigation system. This delivers water directly to the roots and can be time-saving.
By following these efficient watering practices with your watering can for plants, you’ll ensure your garden is lush and healthy while also conserving valuable resources.
Watering Your Plants: Efficient Stainless Steel Watering Can
Benefits of Stainless Steel Watering Cans
Opting for a stainless steel watering can comes with a variety of advantages that will not only ease your gardening but also provide long-term value. Let’s delve into the key benefits of using stainless steel cans for watering your plants.
- Durability and Strength: Stainless steel is a strong material resistant to dents, drops, and everyday wear and tear. This means your watering can is more likely to withstand frequent use and last longer compared to other materials.
- Rust Resistance: Unlike other metals, stainless steel does not rust. This is crucial for any gardening tool that is frequently in contact with water. Your stainless steel watering can will maintain its appearance and functionality over time.
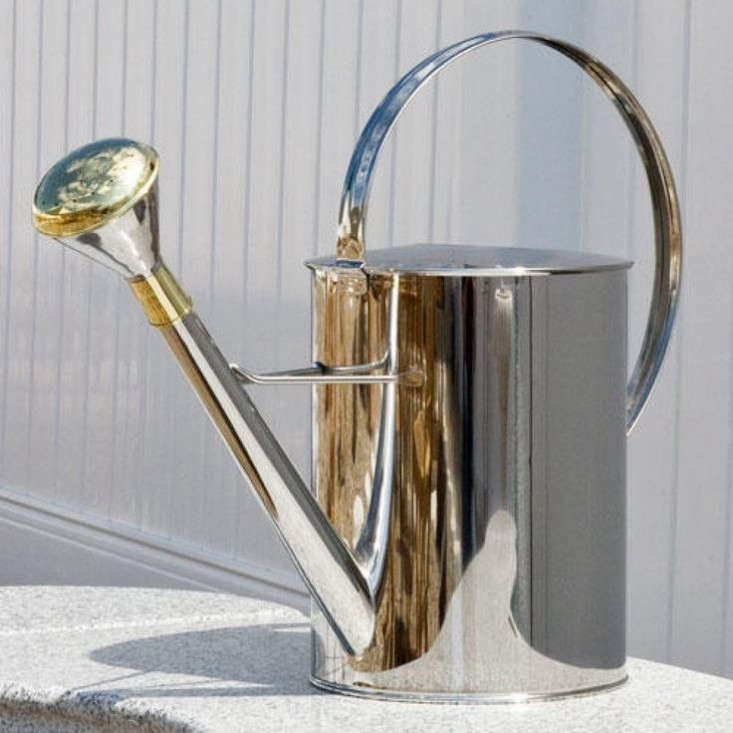
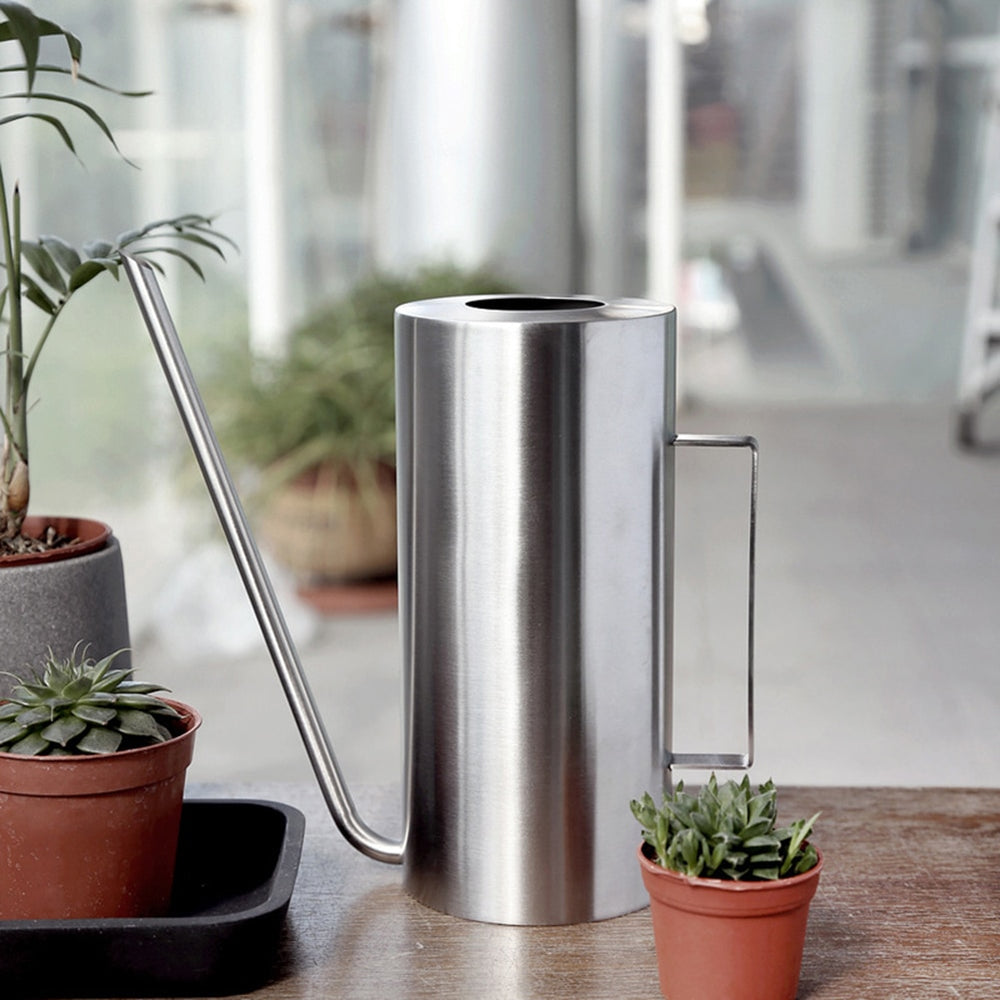
- Aesthetic Appeal: Stainless steel has a sleek, modern look that stands out in the garden. It blends well with other gardening tools and adds a touch of elegance to your gardening routine.
- Health and Safety: Stainless steel is a non-toxic material. It does not leach chemicals into the water or soil, making it a safer choice for watering edible plants like vegetables and herbs.
- Easy to Clean: The smooth surface of stainless steel is easy to clean and doesn’t harbor bacteria. A quick rinse is often all that’s needed to keep your watering can in good condition.
- Recyclable Material: Stainless steel is 100% recyclable, which adds an eco-friendly aspect to your gardening practices. Using a recyclable watering can helps in reducing your carbon footprint.
In weaving these benefits into your decision-making process, you will see how a stainless steel watering can is more than just a tool; it’s an investment in your garden’s health and your own peace of mind. With these advantages, you’ll find watering your plants becomes a simple, gratifying task.
Types of Stainless Steel Watering Cans
When shopping for a stainless steel watering can, you’ll come across various types that cater to different gardening needs. Here are the most common ones you’ll find:
- Traditional Can: This classic design has a simple, sturdy build with a handle and spout. It works well for general gardening tasks.
- Long Spout Can: Ideal for reaching hard-to-get areas, this type has an extended spout. It helps in delivering water directly to the roots without disturbing the soil.
- Professional Grade Can: Built for durability, these cans often have reinforced handles and spouts. They suit frequent gardening and commercial use.
- Decorative Can: These cans focus on aesthetics as well as functionality. They often feature unique designs and finishes.
- Mini Can: Perfect for indoor plants, mini cans offer precision watering in smaller volumes.
- Watering Can with Rose: The ‘rose’ is a detachable sprinkler at the spout’s end. It spreads water gently and evenly, mimicking rainfall.
Each type of stainless steel watering can serves a purpose. Consider your specific gardening tasks to determine which one matches your needs. Whether you need precision for delicate seedlings or efficiency for a large garden, there is a stainless steel watering can to fit the bill. Remember, the aim is efficient watering with the benefits of a long-lasting, safe material.
Choosing the Right Size and Capacity
When you’re in the market for a stainless steel watering can, size and capacity are crucial. Here’s how to pick the best one for your needs:
- Consider Garden Size: Think about the size of your garden. A larger garden may need a can with more capacity to avoid frequent refills.
- Plant Types: Different plants need varying amounts of water. Succulents require less, while vegetable gardens might need more.
- Storage Space: Account for the space you have. A compact watering can is ideal if you have limited room.
- Weight When Full: Remember, water is heavy. Ensure you can comfortably carry and use the can when it’s full.
- Frequency of Watering: If you water often, a larger can means fewer trips to the tap.
Selecting the right stainless steel watering can involves balancing these factors. Match your watering can to your garden’s needs for the best watering experience.
Design Features for Enhanced Usability
When selecting a stainless steel watering can, the design can greatly influence its usability. Here are some design features to look for:
- Ergonomic Handle: A well-designed handle provides comfort and better control when watering. It reduces strain on your hands and wrists.
- Balanced Weight Distribution: A can that has even weight distribution feels lighter and is easier to carry. Look for a design that feels stable and balanced when full.
- Detachable Spout: Some cans come with a removable spout for easier cleaning and storage. This can be a handy feature if you have limited space.
- Water Level Indicator: Having a visible gauge or indicator helps prevent overfills and allows you to track how much water you’re using.
- Non-Slip Base: A can with a non-slip base won’t slide around. This is useful when you’re filling it up or setting it down on wet surfaces.
- Precision Spout: A narrow spout gives you better control for watering small pots and delicate plants. It helps to direct the flow of water exactly where it’s needed.
These design features enhance the practical use of a stainless steel watering can. When you choose a can with these functionalities, you ensure a smoother and more efficient watering routine for all your gardening tasks.

Maintenance and Care for Longevity
Taking care of your stainless steel watering can is key to its longevity. Here’s what you can do to ensure your watering can lasts for many seasons:
- Regular Cleaning: After use, rinse the can with water to remove any soil or debris. This prevents build-up and keeps it looking new.
- Dry After Use: Wipe your can dry with a cloth. This helps avoid water spots and maintains its sleek appearance.
- Check for Damage: Inspect your can for dents or damage regularly. Catching issues early can prevent them from getting worse.
- Storage: Store your watering can in a dry place. If possible, keep it indoors to protect it from the elements.
- Avoid Chemicals: Don’t use harsh chemicals for cleaning. They can damage the stainless steel’s surface.
- Use Soft Cleaning Tools: To clean, use a soft sponge or cloth. Abrasive tools can scratch the stainless steel finish.
By following these simple steps, you can maintain your stainless steel watering can and enjoy its benefits for years. Always handle with care to protect its construction and look.
Innovative Stainless Steel Watering Can Accessories
When you want to make the most of your gardening, innovative accessories for your stainless steel watering can can help. These add-ons enhance functionality and make gardening tasks more enjoyable. Here are some accessory ideas that could change the way you water your plants:
- Watering Can Extensions: These attach to the spout. They let you adjust the length and reach those tough spots with ease.
- Interchangeable Roses: Swap out the ‘rose’ on your can to change the water flow. This lets you provide a gentle sprinkle or a stronger stream as needed.
- Fine Mist Spray Attachment: Perfect for seedlings. It provides a delicate mist that’s kinder to tiny plants.
- Watering Can Lids: A lid prevents spills when you’re moving from plant to plant. It also keeps out unwanted debris.
- Spout Filters: Filters catch sediment and limit clogging. Your water flow stays clean and consistent.
- Can Holders: Secure your watering can in a holder mounted to the wall. It saves space and keeps your can at the ready.
- Water Level Windows: Some cans can be fitted with a clear strip. This allows you to see the water level at a glance.
These accessories can make watering precise, efficient, and gentle on plants. They support the sustainability and durability of your stainless steel watering can. With these simple add-ons, you can upgrade your gardening game and ensure your plants get the care they need.
Environmental Impact and Sustainability
Choosing a stainless steel watering can is not only beneficial for your garden but also for the environment. This type of can champions sustainability in a number of ways. Here are the key environmental benefits of using a stainless steel watering can:
- Reduced Plastic Waste: By opting for stainless steel, you help cut down on plastic waste. Unlike plastic, stainless steel doesn’t break down into harmful microplastics that pollute our soil and waterways.
- Longevity and Reusability: Stainless steel is incredibly durable. This means you won’t have to replace your watering can often, which reduces the demand for manufacturing new products and the resources they require.
- Recyclability: Stainless steel is 100% recyclable. At the end of its long life, your can can be melted down and repurposed without any loss in quality.
- Energy Efficiency in Production: The production of stainless steel is increasingly becoming more energy-efficient, contributing less to carbon emissions compared to many other materials.
- Safe for Wildlife: Stainless steel is a safer option for wildlife. It doesn’t leach chemicals into the environment, protecting the delicate ecosystem of your garden.
By selecting a stainless steel watering can, you’re making a choice that benefits your plants and protects the earth. It’s a practical step towards a greener lifestyle and a more sustainable future. Combine the use of your stainless steel watering can with other eco-friendly gardening practices, and you’ll have a garden that is thriving and eco-conscious. Remember, every small action can make a huge difference in preserving our planet for future generations.
Top Brands and Where to Buy Them
When looking for a stainless steel watering can, choosing a reputable brand is essential. Here are some top brands renowned for their quality and design:
- Haws: Known for their traditional and long-spout designs, Haws offers cans that are both functional and stylish. Their products are durable and well-balanced.
- Bosmere: Bosmere cans are recognized for their ergonomic designs and ample capacity, ideal for gardeners who value comfort and efficiency.
- OXO: OXO’s watering cans are popular for indoor and precision watering. They provide innovative features like a spout that can twist and tuck away.
- IKEA: IKEA offers budget-friendly, sleek watering cans. They cater to those who want functionality without spending too much.
- Gardman: Gardman specializes in decorative stainless steel watering cans that add a touch of elegance to your gardening tools.
You can find these brands at various stores:
- Local Garden Centers: They often stock a range of brands and can offer advice on the best can for you.
- Home Improvement Stores: Stores like Home Depot and Lowe’s usually have a selection of watering cans.
- Online Retailers: Websites like Amazon and eBay provide convenience and a wide variety.
- Brand Websites: Buying directly from the brand’s website can sometimes offer the best deals and exclusive products.
When shopping, remember to consider the size, design, and accessories that will suit your gardening needs. Combining quality brands with the right features ensures you get a stainless steel watering can that serves you well.

Maximizing Efficiency with a 3 Gallon Watering Can
Choosing the Right 3 Gallon Watering Can
When shopping for a 3 gallon watering can, consider its design and material. Look for ergonomic features that make it comfortable to carry and pour. Metal cans are durable but may be heavier, while plastic ones are lightweight but might not last as long. Ensure the can has a well-designed spout for accurate pouring, and check if it comes with a detachable rose for gentle watering. Choose a can with a sturdy handle that won’t strain your hand. Remember that balance is key: a full 3 gallon can gets quite heavy, so it should feel stable when lifted. Steer clear of cans with seams or weak joints that might leak. Lastly, consider the aesthetic appeal if you plan to display it in your garden. Pick a can that suits your style and meets your gardening needs.
Benefits of Using a 3 Gallon Watering Can
Using a 3 gallon watering can offers key benefits for gardeners and plant enthusiasts. The size provides ample water for multiple plants, reducing the need for frequent refills. With a larger capacity, you can water your garden more efficiently, saving you time and effort. This can is ideal for deep watering, encouraging strong root growth by allowing moisture to penetrate deeper into the soil.
The extra volume also helps maintain a consistent watering routine, which is essential for plant health. Consistency in watering promotes steady growth and can prevent stress from under or over-watering. Additionally, with a 3 gallon can, you have the flexibility to add liquid fertilizers or plant food, mixing it directly with the water for an even distribution. This can lead to better nutrient absorption and healthier plants.
A 3 gallon watering can might seem bulky, but the benefits of fewer trips back to the faucet are clear. It’s a practical choice for those with larger gardens or the desire to minimize labor during their gardening tasks. Choose a 3 gallon can to enjoy these advantages and keep your green space flourishing. Remember to look for cans with features that cater to comfort and ease of use.
Optimal Watering Techniques with a 3 Gallon Can
To water effectively with a 3 gallon watering can, start by planning your route. Begin with plants farthest from your water source and work your way back. This prevents unnecessary trips and saves time. Fill your can to a level that’s manageable. For some, a full can may be too heavy, so adjust the water volume to suit your strength.
Water plants at their base rather than from above. Directing the water flow at the root zone reduces evaporation and leaf wetness, which can lead to fungi. Use a slow and steady pour to avoid soil erosion or disturbing the plant roots. If your can has a rose attachment, use it for delicate plants that require gentler watering.
Early morning or late afternoon are the best times to water. These hours allow the water to soak in before the high heat of day increases evaporation. Moreover, watering in cooler temperatures helps prevent shock to the plants.
Finally, establish a regular watering schedule. Consistent watering helps plants grow strong and avoid the stress of drying out or being overwatered. With your 3 gallon watering can, this routine becomes less burdensome as you’ll be making fewer trips to refill.
Caring for Your 3 Gallon Watering Can
To make sure your 3 gallon watering can lasts, proper care is essential. Keep it clean by regularly rinsing it out with water, especially if you use it for mixing fertilizers or plant food solutions. This prevents any residue build-up that could clog the spout or rose attachment.
Store your watering can in a dry place to prevent rusting or damage, especially important for metal cans. For plastic watering cans, keep them out of direct sunlight when not in use to avoid UV damage.
Check for leaks or wear regularly. If you find a small hole in a metal can, you may be able to patch it as a temporary fix. For plastic cans, a strong adhesive might work, but consider replacing the can if the damage is significant.
Treat any moving parts, like hinges on the handle or the rose attachment, with care. Lubricate them as needed to keep them functioning smoothly. Be sure to empty the watering can completely before storing it to avoid unnecessary stress on the can from the weight of the water.
By maintaining your 3 gallon watering can properly, you’ll ensure its longevity and performance in keeping your garden green and healthy.
Accessories to Enhance Your Watering Can Experience
To maximize your gardening with a 3 gallon watering can, consider adding useful accessories. These can make your watering more efficient and enjoyable. Start with a watering can rose attachment. This tool spreads water evenly, perfect for delicate plants and seedlings. It also minimizes soil disruption. Next, pick up a watering can holder. This device saves space and keeps your can accessible and organized. A long-reach nozzle is another smart addition. It extends your reach and allows you to water hard-to-access areas. If you prefer precise watering, a spout with a flow control valve is handy. It helps manage water volume and reduces waste. For anyone mixing nutrients or plant food in their can, measuring tools are essential. Use a measuring cup or scoop for accurate portions. Some gardeners add a carrying strap to their can. It eases the load on your arms and back, especially when the can is full. Lastly, decorative covers are available. They protect your can from the elements and add a touch of style to your garden tools. These accessories can enhance your gardening and help your 3 gallon watering can serve you better.

Common Mistakes to Avoid When Using a 3 Gallon Can
Using a 3 gallon watering can is straightforward, but there are still errors to dodge. Avoid the most common missteps to maintain a healthy garden and a functional tool.
First, don’t overfill the can. It may be tempting to use its full capacity. Remember, water is heavy. Carrying too much can strain your back and make pouring less controlled. It’s better to fill the can to a weight you can manage comfortably.
Second, avoid watering in the heat of the day. This often leads to evaporation before the water reaches the plant roots. Aim for early morning or late afternoon for the best results.
Third, don’t ignore the pour technique. Watering plants from above can encourage disease. Instead, direct water close to the soil, near the plant base. This method targets the roots and preserves plant health.
Additionally, don’t neglect regular maintenance of your can. Clean it after use, especially if you mix in fertilizers. This prevents clogs and preserves the condition of the can.
Lastly, resist the urge to use a powerful jet. This can disturb the soil and harm plant roots. A gentle watering approach is more effective. If it has an attachment, use the rose to distribute water evenly.
By avoiding these common mistakes, you ensure your 3 gallon watering can is an asset to your gardening routine.
Creative Uses for a 3 Gallon Watering Can Beyond Plants
A 3 gallon watering can is not just for plants. It can serve multiple uses around your home and garden. Here are some creative ways to utilize your watering can beyond watering plants:
- Water Transport: Carry water to areas without a hose or faucet. This is handy for filling birdbaths or topping up a pet’s water bowl.
- Mixing Solutions: Use the can to mix and dispense homemade cleaning solutions for outdoor furniture and decks.
- Garden Tool Cleaner: After gardening, fill the can with water and use it to rinse soil off tools.
- Kid’s Play: Children can use it for outdoor water play, teaching them about pouring and measuring.
- Cool Down: Sprinkle water to cool down hot surfaces like patios or decks in the summer.
- Compost Tea Distributor: If you make compost tea for your garden, the can is perfect for applying it to your soil.
- Water Weight: Fill the can and use it as a weight for fitness exercises or to hold down objects on windy days.
- Decorative Piece: When not in use, it can be an aesthetic element in the garden or patio.
These inventive applications show the 3 gallon watering can’s versatility. From practical uses to creative solutions, this garden staple can do much more than keep your plants hydrated.
Sustainable Gardening: Choosing the Right Plastic Watering Can
Introduction to Sustainable Gardening and Watering Cans
Gardening in a way that respects the environment is key in today’s eco-conscious world. Sustainable gardening involves using resources thoughtfully. This includes conserving water and choosing garden tools, like a plastic watering can, that have less impact on our planet. A watering can is essential for any gardener. It helps control the amount of water you give to plants. It ensures you water them at the roots where they need it most. But not every plastic watering can supports sustainable practices. It’s important to select one that is durable, made from recyclable materials, and designed for a long life. In this blog, we’ll explore how to choose the right plastic watering can for your sustainable garden. We’ll consider factors such as material choice, design, and eco-friendliness. Our goal is to arm you with the information needed to make a greener choice. A choice that aligns with your values and the well-being of your garden.

The Importance of Material Choice in Watering Cans
The material of a plastic watering can matters for sustainability. It determines the can’s life span, recyclability, and eco-friendliness. When choosing a watering can, look for high-quality, recyclable plastics. These materials often come from post-consumer waste. This means fewer new resources go into making your gardening tool. Think about the can’s durability too. A long-lasting can reduces the need for frequent replacements. This saves resources and cuts down on waste. UV-resistant plastic is a good pick. It stands up well to sun exposure and will not degrade as quickly as other plastics. Some cans may also have eco-certifications. These labels can guide you to materials that meet strict environmental standards. In short, the best material for a plastic watering can is durable, recyclable, and eco-conscious.
Features to Look for in a Plastic Watering Can
When selecting a plastic watering can for your garden, several features are essential for sustainability and ease of use. Here’s what to keep in mind:
Capacity and Size: Opt for a can that matches your garden’s size. A larger garden may need a can with more capacity to avoid frequent refills. However, remember that a full, large can be heavy.
Spout Design: Look for a can with a spout that fits your watering needs. Long spouts target water directly to the roots, while shorter ones might be better for pots.
Weight and Balance: Even when full, the can should be easy to carry and tilt. A well-balanced design helps prevent water from spilling and makes it easier to handle.
Durability: A can made from durable plastic will last many seasons. This means less waste and fewer replacements. Make sure the can is resistant to cracks and fading.
Eco-Friendly Features: Search for cans made from eco-friendly plastics. Such plastics could be biodegradable or made from recycled materials.
Detachable Heads: Some cans come with detachable heads for different watering patterns. This feature can help conserve water by applying it precisely where needed.
Incorporating these features in your plastic watering can selection process will not only benefit your garden but also align with sustainable gardening practices.
Eco-Friendly Alternatives to Traditional Plastic
When looking for a plastic watering can, consider eco-friendly alternatives to traditional plastics. These options can help reduce your environmental footprint while still providing the functionality you need for sustainable gardening. Here are a few options:
- Bioplastics: These are made from natural materials such as corn starch. They break down faster than traditional plastics.
- Recycled Plastics: Cans made from recycled plastics use less energy and resources than new plastics.
- Sustainable Production: Seek out brands that use renewable energy in their production processes.
- Long Life Cycle Products: Choose cans designed to last longer to avoid frequent replacements.
Remember that it’s not just the material but also the production method and life cycle that matter. Eco-friendly alternatives often come with certifications. Look for those as a sign of a greener product. By choosing these alternatives, you take an extra step toward sustainable gardening practices.
How to Recycle and Reuse Plastic Watering Cans
Recycling and reusing plastic watering cans are key to sustainable gardening. When your can reaches the end of its life, don’t just throw it away. Check local recycling programs for guidelines on recycling plastics. Look for symbols on the can to identify its plastic type. This helps ensure it goes into the correct recycling stream.
For reusing, think creatively. A can with a broken spout can still hold tools or compost. You can even turn it into a planter, giving it a new life in your garden. Drill holes in the bottom for drainage, and you’re set. If the can is intact, use it for non-gardening tasks. It can carry cleaning supplies or hold ice for outdoor parties.
Remember, reusing often is better than recycling. It cuts down on the energy used to break down and remake products. Try to fix your can if it’s damaged. Use waterproof glue for small cracks. Replace the head or spout if they’re the only broken parts. Reusing extends the life of the can and reduces waste. By doing so, you support both your garden and the environment.
The Role of Design and Ergonomics
When choosing a plastic watering can, design and ergonomics play a crucial role. Look for features that enhance comfort and efficiency.
Handle Comfort: Select a watering can with a comfortable handle. It should fit well in your hand and not cause strain during use.
Balance: A well-designed can should feel balanced, whether it’s full or empty. Proper balance reduces the effort needed to carry and pour.
Accessibility: The can should allow for easy filling from a tap or rain barrel. A wide opening helps avoid spills and makes cleaning simpler.
Ease of Pouring: A watering can with an ergonomically designed spout is key. It should pour smoothly without requiring awkward movements or positions.
Overall Shape: Look for a can with a shape that is both functional and attractive. It should be easy to store and should not tip over easily.
Good design and ergonomics in a plastic watering can lead to a better gardening experience. They also promote sustainable practices by making the tool easier to use repeatedly. This helps avoid the need for frequent replacement due to discomfort or poor performance.

Popular Types and Brands of Plastic Watering Cans
When shopping for a plastic watering can, you’ll find various types suited for different gardening needs. Here are popular ones to consider:
- Traditional Cans: These usually have a classic design with a large handle and a long spout.
- Mini Cans: Perfect for indoor plants or small balcony gardens, they are lightweight and easy to store.
- Professional Cans: Designed for heavy use, they can handle larger volumes and often come with sturdier handles.
- Collapsible Cans: Great for space-saving, these cans can be folded or collapsed when not in use.
As for brands, there are several reputable ones known for their quality and commitment to sustainability. Customers often trust these brands:
- Haws: A long-standing brand known for high-quality cans that come in various styles and sizes.
- Fiskars: Offers innovative and durable garden tools, including eco-friendly watering cans.
- Scheurich: A German brand that produces aesthetically pleasing cans often made from recycled plastics.
- Oxo: Known for ergonomic designs, their watering cans are user-friendly and often feature a rotating spout.
Each brand has its strengths, ranging from ergonomic design to sustainability. It pays to research and choose a brand that aligns with your sustainable gardening values. Look for cans that are built to last, made from recyclable materials, and comfortable to use. This will ensure you invest in a tool that serves your garden well and supports the environment.

Tips for Maintaining and Caring for Your Watering Can
Proper care for your plastic watering can extends its life and supports sustainability. Here are some maintenance tips:
Regular Cleaning: Empty the can after use and rinse it well. This prevents algae growth and blockages.
Safe Storage: Keep your can out of direct sunlight when not in use. UV rays can weaken the plastic over time.
Inspect for Damage: Check regularly for cracks or leaks. Early detection means easier repairs and less chance of needing a full replacement.
Gentle Use: Avoid dragging your can on rough surfaces. This can lead to scratches and punctures.
Handle with Care: Lift and carry your can using both hands when full. This prevents handle stress and breakage.
Sustainable Repairs: Use eco-friendly glues or tape for minor fixes. This keeps the can recyclable at its end of life.
By following these tips, your plastic watering can will remain a valuable tool in your sustainable gardening toolkit for years.
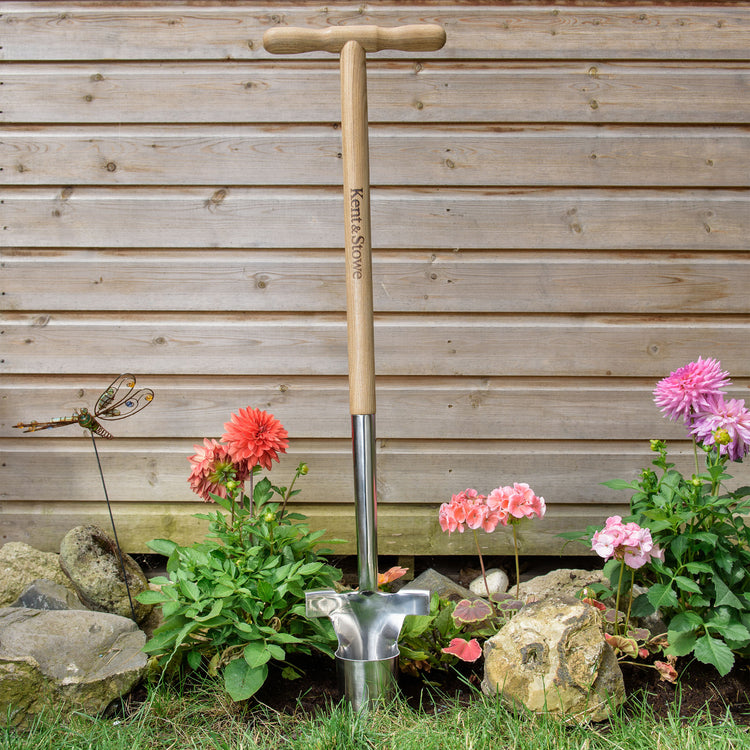
The Guide to Bulb Planter Tool: A Comprehensive Overview
Introduction:
Bulb planter tools are an essential device for gardeners looking to plant bulbs efficiently and accurately. Whether you’re a novice or experienced gardener, having the right bulb planter can make the task much more manageable. In this comprehensive guide, we’ll explore everything you need to know about bulb planter tool, from their different types and features to proper usage and maintenance.
Part 1: Understanding Bulb Planter Tools
Level 1: Types of Bulb Planter Tools
When it comes to bulb planter tools, there are several types to choose from, each catering to different gardening needs. The most common types include handheld bulb planters, long-handled bulb planters, and drill bulb planters.
Level 2: Features of Bulb Planter Tools
Bulb planter tools come with various features to enhance their functionality. Some key features to look out for include ergonomic handles, depth markers, and durable construction materials such as stainless steel or carbon steel.
Part 2: Choosing the Right Bulb Planter Tool
Level 1: Considerations for Selecting a Bulb Planter Tool
When choosing bulb planter tools, it’s important to consider factors such as the type of soil in your garden, the size and depth of the bulbs you’ll be planting, and your own physical capabilities.
Level 2: Comparing Different Brands and Models
There are numerous brands and models of bulb planter tools available on the market, each with its own unique features and design. Researching and comparing different options can help you find the best bulb planter tool for your specific gardening needs.
Part 3: Proper Usage of Bulb Planter Tools
Level 1: Preparing the Soil for Planting
Before using bulb planter tools, it’s essential to prepare the soil by removing any debris, weeds, or rocks and ensuring it is well-drained and aerated.
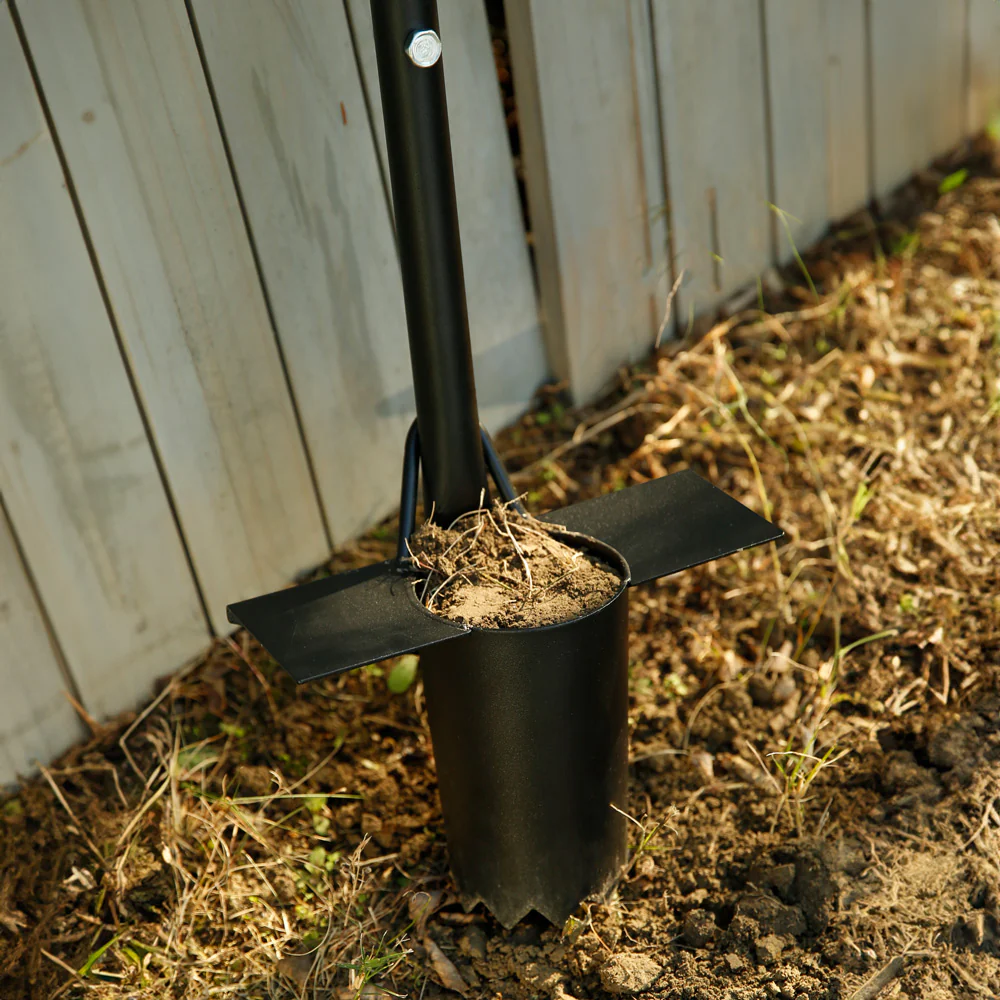
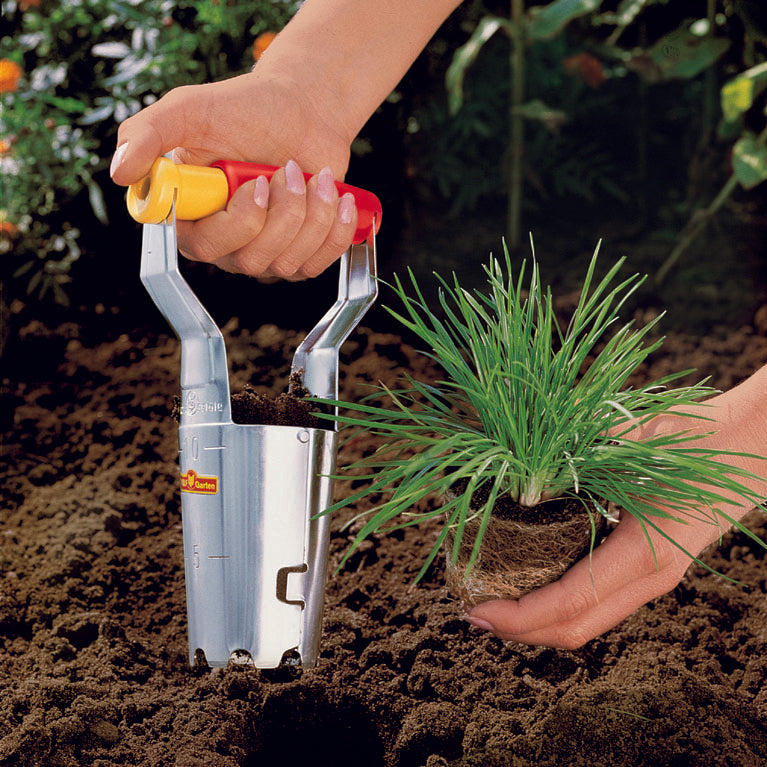
Level 2: Using the Bulb Planter Tool Effectively
To use bulb planter tools effectively, place the tool at the desired planting location, press it into the soil, and then release the soil plug by pressing down on the handle. Repeat this process for each bulb, ensuring proper spacing and depth.
Part 4: Maintenance and Care of Bulb Planter Tools
Level 1: Cleaning and Storage
After each use, it’s important to clean the bulb planter tool to remove any soil or debris and prevent rust or corrosion. Additionally, storing the tool in a dry and sheltered location can help prolong its lifespan.
Level 2: Sharpening and Lubrication
Over time, the cutting edge of a bulb planter tool may become dull, impacting its effectiveness. Regular sharpening and lubrication can help maintain the tool’s cutting ability and overall performance.
Part 5: Tips for Successful Bulb Planting
Level 1: Planting Depth and Spacing
Different types of bulbs require specific planting depths and spacing for optimal growth. It’s essential to follow the planting instructions provided by the bulb supplier to ensure successful results.
Level 2: Timing and Seasonal Considerations
Timing is crucial when planting bulbs, with the ideal time varying depending on the specific type of bulb. Understanding the seasonal considerations for different bulbs can help you plan and execute successful plantings.

Part 6: How to Use a Bulb Planter Tool
Using bulb planter tools is a simple and efficient way to plant bulbs in your garden. Here’s a step-by-step guide on how to use one:
- First, choose the location where you want to plant your bulbs. Dig a small hole in the soil with a trowel to prepare the area for planting.
- Insert the bulb planter tool into the soil, using a twisting motion to create a hole. The depth of the hole should be determined by the size of the bulb you are planting.
- Once the hole is made, remove the bulb planter tool from the ground and place the bulb in the hole, making sure the root end is facing downward.
- Gently cover the bulb with soil, and press down to secure it in place.
- Continue this process until all of your bulbs are planted, spacing them according to the recommended planting distance for each type of bulb.
- Water the newly planted bulbs thoroughly to help them establish their roots.
Using a bulb planter tool makes the process of planting bulbs quick and easy, allowing you to create beautiful flower displays in your garden with minimal effort.
Part 7: Maintenance and Care for Your Bulb Planter Tool
Proper maintenance and care for your bulb planter tool will ensure that it continues to function effectively for years to come. Here are some tips for keeping your bulb planter tool in top condition:
- After each use, clean bulb planter tools thoroughly to remove any dirt or debris. A brush or cloth can be used to wipe down the tool and remove any soil build-up.
- Inspect the cutting edge of bulb planter tools regularly to ensure that it remains sharp. Dull edges can make it difficult to create holes in the soil and may damage the bulbs during planting.
- Apply a light coat of oil to the metal parts of the bulb planter tool to prevent rust and corrosion. This will help prolong the life of the tool and keep it functioning smoothly.
By following these maintenance tips, you can ensure that your bulb planter tools remains in excellent condition, ready for use whenever you need it.
Part 8: Choosing the Right Bulb Planter Tool
When it comes to choosing a bulb planter tool, there are a few key factors to consider to ensure you select the right one for your needs.
- Size: Bulb planter tools come in various sizes to accommodate different types of bulbs. Consider the size of the bulbs you will be planting and choose a bulb planter tool that is appropriate for them.
- Material: Look for a bulb planter tool made from durable and rust-resistant materials such as stainless steel or coated metal. This will ensure that the tool remains in good condition and is able to withstand regular use.
- Handle: Consider the design of the handle and choose a bulb planter tool that feels comfortable to hold and use. Look for ergonomic handles that provide a secure grip and reduce strain on your hands and wrists.
- Additional features: Some bulb planter tools come with extra features, such as depth markings or a release mechanism for easy bulb removal. Consider whether these additional features would be beneficial for your planting needs.
By taking these factors into consideration, you can choose a bulb planter tool that is well-suited to your gardening requirements, making the process of planting bulbs a breeze.
Part 9: Benefits of Using a Bulb Planter Tool
Using bulb planter tools offers a number of benefits for gardeners and home landscapers. One of the main benefits is the efficiency and ease it provides for planting bulbs. With a bulb planter tool, gardeners can quickly and easily create evenly-spaced holes for planting bulbs, saving time and effort compared to traditional hand digging.
Another benefit of using bulb planter tools is the reduction of strain on the body. Bending down and using a hand trowel to dig individual holes for bulbs can be physically taxing, especially for those with back or knee issues. The long handle of bulb planter tools allows for more ergonomic and comfortable planting, reducing strain on the body and making the process more enjoyable.
Furthermore, bulb planter tools help ensure proper planting depth. Many bulbs need to be planted at specific depths to thrive, and bulb planter tools can ensure that each bulb is planted at the correct depth consistently. This can lead to healthier and more successful growth for the bulbs, resulting in more vibrant and abundant blooms in the future.
Additionally, using bulb planter tools can help protect the bulbs from damage. Traditional hand digging methods can sometimes result in accidentally slicing or damaging the bulbs, which can hinder their ability to grow. Bulb planter tools, with its gentle and precise digging action, can help minimize the risk of damaging the bulbs during planting.
Overall, the benefits of using bulb planter tools include efficiency, ergonomic planting, proper planting depth, and reduced risk of bulb damage. These factors make bulb planter tools an invaluable asset for anyone looking to plant bulbs in their garden or landscape.
Conclusion:
Bulb planter tools are invaluable for simplifying the process of planting bulbs in your garden. By understanding the various types and features of bulb planter tools, choosing the right tool for your needs, and employing proper usage and maintenance practices, you can ensure successful and efficient bulb plantings. With the tips and guidance provided in this comprehensive guide, you’ll be well-equipped to take on your next bulb planting project with confidence.