Fixing a Lawn Mower That Won’t Start Post-Winter
Common Reasons for Post-Winter Starting Issues
If your lawn mower won’t start after winter, a few common issues might be the cause. Stale fuel is a typical culprit for mowers that have sat unused for several months. Over the winter, fuel can degrade and lose its combustibility, making it difficult for the engine to start. Another common problem is the battery. Lawn mower batteries may lose their charge when not in use for extended periods. Moisture accumulation and corrosion of the battery contacts can also prevent the engine from starting. Spark plugs are another potential issue; they can become dirty or corroded during the off-season. Lastly, oil viscosity changes with temperature. Thickened, old oil may not lubricate the engine parts as needed for a smooth start. To avoid such problems, it’s crucial to perform proper maintenance before storing your mower for winter.
Signs of Stale Fuel in Your Lawn Mower
Knowing the signs of stale fuel can save you time and frustration. Watch for these indicators:
- Fuel Color Change: Fresh fuel is typically clear or has a light yellow hue. If it turns brown, it’s stale.
- Strange Odor: Stale fuel often has a sour or unpleasant smell, unlike fresh gasoline’s typical odor.
- Engine Trouble: If the mower is hard to start or doesn’t start at all, stale fuel may be the cause.
- Visible Gumming: Look for sticky residues, which are products of fuel degradation, around the fuel tank or carburetor.
If you notice any of these signs, it is likely that your lawn mower won’t start after winter due to stale fuel. It’s essential to address this problem promptly to prevent further issues.
Steps to Drain and Replace Stale Fuel
If your lawn mower won’t start after winter, stale fuel could be the problem. To fix this, follow these steps:
- Safety First: Always work in a well-ventilated area away from any flames or sparks. Shut off the mower completely.
- Drain Old Fuel: Locate the fuel tank and carefully drain the stale fuel into an approved container.
- Dispose Properly: Take the old fuel to a recycling center or hazardous waste disposal facility.
- Clean the Tank: Wipe the inside of the tank with a clean cloth to remove any residue.
- Refill with Fresh Fuel: Use new, fresh fuel from a reliable source. Don’t use leftover fuel from the previous season.
- Check the Fuel Line: Ensure the fuel line is clean and free of blockages.
- Replace Fuel Filter: If your lawn mower has a fuel filter, now is a good time to replace it.
With fresh fuel in your lawn mower, it stands a better chance of starting smoothly after winter. This step is crucial in eliminating starting issues related to stale fuel.
Importance of Fresh Fuel for Lawn Mowers
Using fresh fuel for your lawn mower is crucial. It ensures a reliable start and optimal engine performance. During winter, your mower’s fuel can degrade and cause starting problems. Fresh fuel means better combustion, which is key for engine health. Here’s why fresh fuel matters:
- Prevents Engine Wear: Stale fuel can cause engine wear and tear. Fresh fuel keeps the engine clean.
- Enhances Performance: Fresh fuel helps your lawn mower run smoothly and efficiently.
- Reduces Maintenance: Using fresh fuel can cut down on maintenance needs and costs.
Make sure to fill up with new, high-quality fuel for the coming mowing season. Remember to avoid using last year’s fuel. It might have gone stale in the can. For the best care of your lawn mower, consider getting fuel from a garden machinery supplier. They usually stock the freshest options. If the mower doesn’t start after a fuel change, stale fuel might be left in the carburetor. You may need this part cleaned by a professional to solve the issue.
What to Do If Your Mower Still Won’t Start
If your lawn mower won’t start after winter even with fresh fuel, consider these tips:
- Check the Carburetor: Stale fuel can leave residue in the carburetor. It may need cleaning.
- Inspect Spark Plugs: Dirty or damaged spark plugs can prevent starting. Replace if necessary.
- Evaluate the Battery: Ensure the battery is charged. Clean any corrosion from contacts.
- Look at the Oil: Change old or thickened oil that can hinder engine movement.
- Clear Air Filters: A blocked air filter can stifle the engine. Clean or replace it.
- Review the Fuel Line: The line could be clogged. Also, check for cracks or damage.
- Safety Switches: Mowers have safety features. Make sure all safety devices are engaged.
- Consult the Manual: Your mower’s manual may have troubleshooting tips specific to the model.
If these steps don’t solve the issue, it may be time to seek help from a professional. They can pinpoint and fix complex issues. Remember, dealing with lawn mower repairs safely is crucial. If you’re unsure of any steps, professional assistance is the best choice.
Maintenance Tips to Prevent Future Winter Starting Problems
Preventive maintenance is key to ensuring your lawn mower starts smoothly after winter. Follow these simple tips to avoid common issues like stale fuel and battery problems.
- Stabilize the Fuel: Before winter storage, add a fuel stabilizer to the tank. This prevents the fuel from degrading.
- Run the Engine Dry: After adding stabilizer, run the mower until it stops. This ensures no fuel remains in the engine.
- Disconnect the Battery: Remove the battery and store it in a cool, dry place. Charge it periodically over winter.
- Change the Oil: Replace old oil with new, which helps protect the engine’s internal parts.
- Clean or Replace Spark Plugs: Dirty spark plugs can cause starting issues. Clean or replace them as needed.
- Lubricate Moving Parts: Apply lubricant to all moving parts to prevent rust and corrosion.
- Cover the Mower: Use a breathable cover to protect your mower from dust and moisture.
By implementing these maintenance tips, your lawn mower will be well-prepared for the next cutting season.
When to Seek Professional Help for Your Lawn Mower
Sometimes, despite your best efforts to troubleshoot, your lawn mower might still face issues that are too complex to handle on your own. In such cases, seeking professional help becomes necessary. Here are some scenarios when it’s advisable to call in the experts:
- Persistent Starting Issues: If your lawn mower won’t start after winter even after trying all the troubleshooting steps, it may have an underlying issue that requires professional attention.
- Complex Mechanical Failures: Problems like internal engine damage or failures in the transmission system are best handled by professionals.
- Electrical Issues: If there are signs of electrical faults such as non-responsive start switches or erratic behavior of the mower, these could indicate deeper electrical issues that need expert handling.
- Severe Fuel System Problems: If problems persist even after cleaning the carburetor and replenishing with fresh fuel, the fuel system might need a more thorough examination or repair which should be done by a technician.
- Safety Concerns: If at any point you feel that continuing to troubleshoot could be unsafe, or if the mower shows signs of potential safety hazards, it is best to consult with a professional.
Professionals have the tools, training, and parts to diagnose and fix issues more comprehensively. While it might cost more upfront, professional repair can save time and extend the life of your lawn mower, potentially preventing further issues during the cutting season.
Preparing Your Lawn Mower for the Cutting Season
Proper preparation can make your lawn mower start smoothly after winter. Here’s how you can prepare your mower for the upcoming cutting season:
- Check All Parts: Inspect your mower for any loose, damaged, or missing parts. Fix them before starting.
- Clean the Mower: Remove dirt, grass clippings, and debris from the mower’s undercarriage and blades.
- Sharpen Blades: Dull blades make cutting tough. Sharpen them for a clean cut.
- Lubricate Where Needed: Apply oil to moving parts to ensure they work smoothly.
- Check Tire Pressure: If your mower has tires, ensure they are properly inflated.
- Test the Controls: Make sure all levers and controls function correctly.
- Connect the Battery: If you disconnected it for winter, reconnect the battery.
If you’ve followed these steps but your lawn mower won’t start after winter, review the earlier troubleshooting tips again. These include checking for stale fuel, spark plug issues, and battery problems. Remember that regular maintenance is key to a hassle-free start. Each spring, make it a routine to prepare your mower, so you’re ready to go when the grass starts growing.
Step-by-Step Guide: Cleaning Your Lawn Mower Carburetor
Introduction
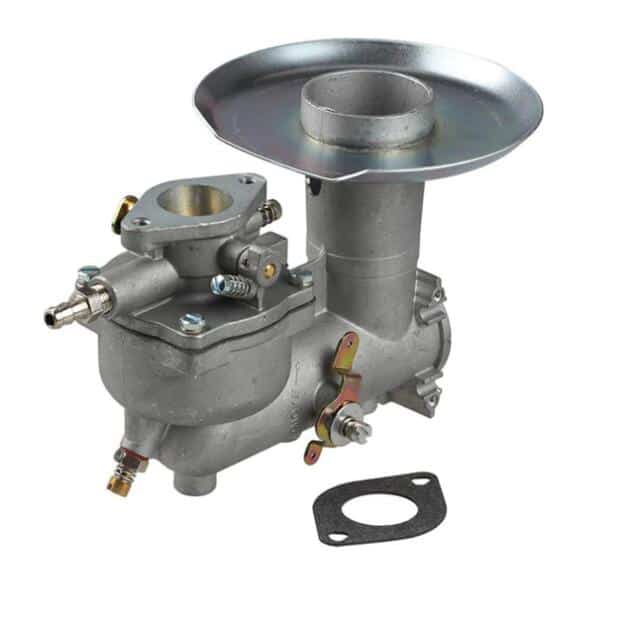
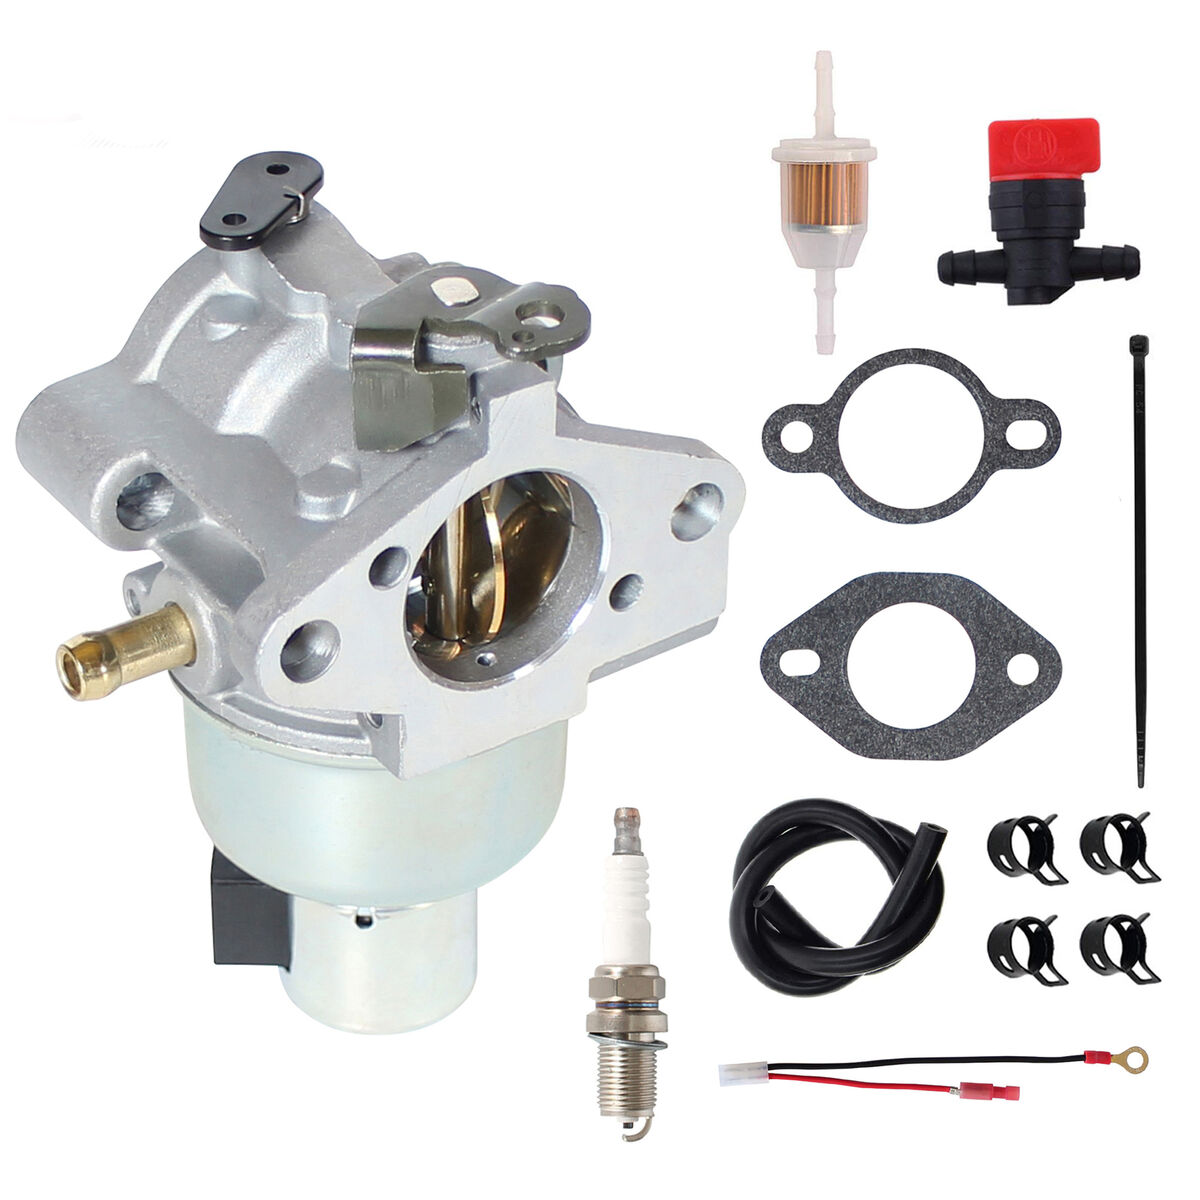
A well-maintained lawn mower is crucial for keeping your garden in top shape. The carburetor, being a vital component, determines how effectively your mower runs. It manages the engine’s air and gasoline mixture, enabling your mower to start smoothly and continue running efficiently. Understanding how to clean a lawn mower carburetor is important not only for optimal performance but also to extend the life of your machine. How to clean a lawn mower carburetor? This guide will walk you through the clear signs that your carburetor needs cleaning, the tools you will require, and a step-by-step process for cleaning. Simplify your maintenance routine and ensure your lawn mower functions effectively with our comprehensive guide.
Signs Your Lawn Mower Carburetor Needs Cleaning
Recognizing the signs that your lawn mower carburetor requires cleaning is crucial for its maintenance and efficiency. One clear sign is difficulty in starting the mower. If the mower does not start or takes multiple attempts, this might be due to a clogged carburetor. Another symptom is an irregular running engine; if the engine starts but stutters or runs unevenly, the carburetor might be dirty. Additionally, a noticeable increase in fuel consumption can indicate that the carburetor is not mixing the fuel and air properly due to being unclean.
Excessive smoke from the mower is also a sign that the carburetor could be clogged. This occurs because the improper fuel mixture leads to incomplete burning of fuel. Lastly, if the mower performs poorly even after you’ve checked other components, the carburetor should be inspected. Regular checks will help you identify these signs early, making it easier to maintain your mower’s performance and extend its lifespan.
Tools and Materials Needed for Cleaning
Before you begin the process of cleaning your lawn mower carburetor, gathering the right tools and materials is essential. Here is a comprehensive list to ensure you have everything you need:
- Screwdrivers: Needed to remove screws from the carburetor.
- Wrench set: Useful for detaching the carburetor and other connections.
- Carburetor cleaner: Specifically designed to dissolve dirt and buildup without damaging the carburetor parts.
- Compressed air: Helps in blowing out dust and debris from tight spaces within the carburetor.
- Soft brushes or an old toothbrush: For gently scrubbing the carburetor components without scratching them.
- Pliers: Might be needed to remove clamps or other tight components.
- Rags or towels: Useful for wiping off excess cleaner and dirt.
- Container: To keep small parts like screws and clamps, so they don’t get lost.
- New gaskets and O-rings (optional, but recommended): To replace old, worn-out parts to ensure a good seal during reassembly.
Having these tools and materials ready not only simplifies the cleaning process but also helps in accomplishing it more efficiently. This preparation step is crucial for learning how to clean a lawn mower carburetor effectively.
Preparing Your Lawn Mower for Cleaning
Before you start the task of cleaning your lawn mower carburetor, proper preparation is essential to ensure safety and efficiency. Here are the steps you need to follow to prepare your lawn mower for a thorough carburetor cleaning:
- Turn Off the Mower: Make sure the lawn mower is completely turned off and that the ignition key is removed. This prevents the engine from accidentally starting while you’re working on it.
- Disconnect the Spark Plug: To enhance safety, disconnect the spark plug. This step is a crucial safety measure that stops the engine from igniting during the cleaning process.
- Drain the Fuel: Empty the fuel tank to prevent any fuel spillage or accidental ignition. You can use a siphon pump or carefully tip the mower to pour out the fuel into a container.
- Clean the Exterior: Wipe down the mower’s exterior with a rag to remove any dirt, grass clippings, or debris. This helps in preventing any external dirt from getting into the carburetor during the cleaning.
- Arrange Your Workspace: Set up a clean, well-lit workspace with ample room to place your tools and the parts you’ll remove. A clear table or a flat surface in a well-ventilated area is ideal.
- Gather Your Tools: Have all the tools and materials listed in the previous section at hand. This includes screwdrivers, wrenches, carburetor cleaner, compressed air, and soft brushes.
By following these preparatory steps, you’ll create a safe and efficient environment for learning how to clean a lawn mower carburetor. These initial steps are just as important as the actual cleaning process.
Step 1: Accessing the Carburetor
The first step in learning how to clean a lawn mower carburetor is gaining access to it. Follow these clear, simple steps to reach the carburetor of your lawn mower:
- Locate the Air Filter: The carburetor is usually situated behind the air filter. Find the air filter housing and remove its cover. Usually, this involves unscrewing or unclipping the cover.
- Remove the Air Filter: Carefully take out the air filter. If it’s dirty or damaged, consider replacing it after cleaning the carburetor.
- Expose the Carburetor: With the air filter removed, you will see the carburetor attached to the fuel line and throttle. It’s typically held in place by a couple of bolts or screws.
- Detach the Fuel Line: Before you can remove the carburetor, you must detach the fuel line. Be ready with a rag or small container to catch any fuel that may drip out.
- Unscrew the Bolts: Use your screwdrivers or wrench set to loosen the bolts or screws that are securing the carburetor to the mower.
- Carefully Remove the Carburetor: Once the bolts are removed, gently take the carburetor out of its position. Make sure you keep track of any small parts or connections.
Now that you have accessed the carburetor, you can move on to disassembling and cleaning its parts. Proper access is crucial for a thorough cleaning, so take your time with this step to ensure everything is done right.
Step 2: Disassembling the Carburetor
After accessing the carburetor, the next phase is disassembling it for cleaning. Here’s how to carefully dismantle the carburetor to prepare it for a thorough cleaning:
- Document the Process: Before disassembling, take pictures of the carburetor. This will help you remember how to reassemble it correctly.
- Remove the Bowl: At the bottom of the carburetor, you’ll find a bowl attached by a nut or a screw. Remove this to access the inside components.
- Take Out the Float: The float controls the flow of fuel into the carburetor. Carefully remove the pin that holds the float to take it out.
- Remove the Jet Screws: Jets are tiny screws inside the carburetor that control the fuel and air mix. Use a screwdriver to carefully remove them.
- Pull Out the Needle Valve: Alongside the float, you’ll find the needle valve. This needs to be gently removed.
- Keep All Parts Organized: As you remove each part, place them neatly on a clean towel or container. This keeps them safe and organized.
By disassembling the carburetor carefully and methodically, you ensure that every component gets the cleaning attention it requires. This also helps avoid any damage to the parts. The next steps will involve cleaning these components before reassembling them.
Step 3: Cleaning the Carburetor Components
Now that you have disassembled the carburetor, it’s time to clean each component thoroughly. Here’s a step-by-step guide to ensure every part is cleaned properly:
- Use Carburetor Cleaner: Spray carburetor cleaner generously on each part. Make sure to cover all surfaces.
- Scrub with Brushes: Use soft brushes or an old toothbrush to scrub the parts gently. Pay attention to crevices and hidden areas where dirt accumulates.
- Rinse with Water: After scrubbing, rinse the parts with water to remove any remaining cleaner and loose dirt.
- Dry Completely: Shake off excess water and use compressed air to blow away moisture from small parts. Let all parts air dry on a clean towel.
- Inspect for Damage: While the parts are drying, inspect each for any signs of wear or damage. Replace parts as needed.
By following these cleaning steps, you ensure that each component of the carburetor is free from dirt and grime. This process helps in maintaining the efficiency of your lawn mower.
Step 4: Reassembling and Reattaching the Carburetor
After thoroughly cleaning each component of the carburetor, the next crucial step is to reassemble and reattach it to your lawn mower. Here’s how to methodically proceed to get your carburetor functioning smoothly again:
- Check all parts: Ensure all cleaned parts are dry and free from damage. Replace any that are worn out.
- Reassemble the carburetor: Start by placing the needle valve back in position, followed by the float and securing it with the pin. Next, carefully screw back the jets.
- Attach the bowl: Realign the bowl to the bottom of the carburetor and secure it with the original nut or screw.
- Reconnect the carburetor: Position the carburetor back to its original place. Fasten it using bolts or screws as required.
- Reattach the fuel line and air filter: Connect the fuel line and ensure there are no leaks. Place a new or cleaned air filter back in its housing.
- Double-check connections: Make sure all connections are tight and secure to prevent any operational issues.
- Test the mower: Before using the mower in your lawn, start it to ensure it runs smoothly. Listen for any irregularities in the engine’s performance.
Correctly reassembling and reattaching the carburetor not only ensures your lawn mower runs efficiently but also extends the life of the engine. Taking the time to do this right will save you from potential issues and additional maintenance down the line.
Tips for Maintaining Your Carburetor
Maintaining your lawn mower carburetor is essential for ensuring long-term performance. Here are practical tips to keep it in top condition:
- Regular Cleaning: Consistently clean your carburetor every few months or as recommended in your mower’s manual. This prevents buildup and ensures smooth operation.
- Check for Wear: Regularly inspect the carburetor for signs of wear or damage. Replace worn parts promptly to avoid more serious issues.
- Use Fresh Fuel: Always use fresh, clean fuel in your mower. Old or contaminated fuel can clog the carburetor.
- Store Properly: When not in use, particularly during off-season, store your mower in a clean, dry place. This prevents rust and dirt accumulation in the carburetor.
- Avoid Moisture: Try to keep the carburetor dry as moisture can cause corrosion and other issues.
- Regular Tune-ups: Schedule regular tune-ups from a professional. They can spot issues that might not be obvious and ensure your mower remains in excellent condition.
By following these tips, you can extend the life of your lawn mower carburetor and improve the overall performance of your mower.
Conclusion
In wrapping up our step-by-step guide on how to clean a lawn mower carburetor, remember it’s a valuable skill. With the right tools and a bit of patience, you can keep your mower running efficiently. Start by identifying signs that suggest a need for cleaning, such as difficulty starting or irregular engine performance. Gather your tools and prepare the workspace properly before starting. Systematically proceed through each step, ensuring careful disassembly, thorough cleaning, and cautious reassembly.
Regular maintenance, including carburetor cleaning, not only improves mower performance but also extends its lifespan. Make use of fresh fuel, store your mower correctly, and conduct frequent checks for wear and tear. Remember to schedule professional tune-ups to catch issues you might miss. This guide aims to make lawn mower carburetor cleaning approachable for anyone, regardless of their mechanical expertise.
By maintaining a clean carburetor, you’re investing in the longevity of your lawn mower and the health of your lawn. Embrace the knowledge shared in this guide and take pride in mastering an essential aspect of lawn mower maintenance.
