Mastering the Brake Spring Tool – An Efficient Automotive Repairs
Part 1: Introduction to Brake Spring Tools – The Unsung Heroes of Brake Maintenance
Level 1: What Is a Brake Spring Tool?
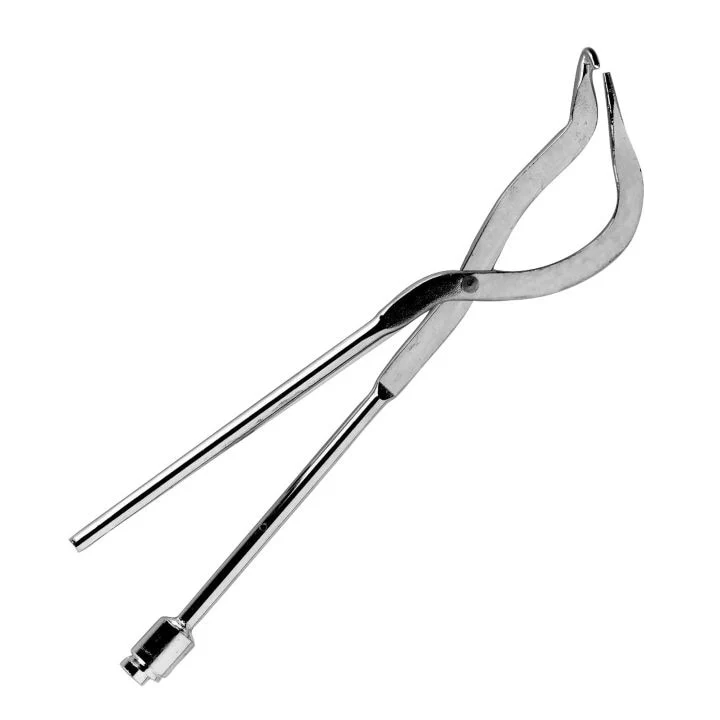
A brake spring tool is a specialized automotive device designed to simplify the installation and removal of brake springs, which are critical components in drum brake systems. These tools help mechanics and DIY enthusiasts safely manipulate tensioned springs without causing damage to the braking system or risking injury. By providing leverage and precision, brake spring tools ensure that tasks like replacing brake shoes or adjusting mechanisms are performed efficiently and effectively.
- The Role of Brake Springs in Vehicle Safety:
Brake springs play a vital role in maintaining proper tension within drum brake assemblies. They keep brake shoes aligned with the drum, ensuring consistent friction and stopping power. Over time, these springs can weaken or break, necessitating replacement. Without the right tool, working on them can be challenging due to their high tension and small size. - Why Use a Dedicated Brake Spring Tool?
Attempting to remove or install brake springs manually or with improvised tools can lead to frustration, damaged parts, or even personal injury. A dedicated brake spring tool reduces these risks by offering a controlled method for handling tight, coiled springs. This makes it an essential addition to any toolkit for those who work on vehicles regularly.
Level 2: Key Features of Brake Spring Tools
Understanding what sets brake spring tools apart highlights their value in automotive maintenance.
- Design Variations and Functionality:
Brake spring tools come in various designs, including plier-style, hook-style, and scissor-action models. Each type caters to specific applications, such as removing heavy-duty return springs or delicate hold-down springs. Some tools feature interchangeable heads or adjustable settings to accommodate different vehicle models. - Durability and Ergonomics:
High-quality brake spring tools are typically constructed from hardened steel or durable alloys to withstand repeated use under demanding conditions. Ergonomic handles with non-slip grips enhance user comfort, while corrosion-resistant coatings extend the tool’s lifespan.

Part 2: Types of Brake Spring Tools – Exploring Options for Every Need
Level 1: Common Categories of Brake Spring Tools
There are several types of brake spring tools available on the market, each tailored to specific applications and preferences. Below are some of the most popular categories:
- Plier-Style Tools:
Plier-style brake spring tools resemble standard locking pliers but are specifically engineered to grip and release brake springs. Their self-locking mechanism allows users to apply steady pressure while minimizing hand strain. These tools are ideal for beginners and professionals alike due to their versatility and ease of use. - Hook-Style Tools:
Hook-style tools consist of a curved end designed to catch and pull brake springs into position. They are particularly useful for accessing hard-to-reach areas within drum brake assemblies. Lightweight and portable, hook-style tools are often included in basic automotive repair kits.
Level 2: Specialty Tools for Unique Challenges
Beyond mainstream options, specialty brake spring tools address niche requirements or complex scenarios.
- Scissor-Action Tools:
Scissor-action brake spring tools utilize a dual-lever design to amplify force, making it easier to stretch or compress highly tensioned springs. These tools are commonly used in commercial garages where efficiency and reliability are paramount. - Multi-Function Kits:
Some manufacturers offer multi-function kits that include multiple brake spring tools along with other accessories, such as screwdrivers, wrenches, and retaining clips. These comprehensive sets cater to individuals who perform a wide range of brake-related repairs.
Part 3: How Brake Spring Tools Enhance Your Maintenance Routine – Beyond Convenience
Level 1: Encouraging Safety and Efficiency
Brake spring tools play a vital role in streamlining automotive maintenance tasks while prioritizing safety and accuracy.
- Preventing Damage During Repairs:
Using a proper tool ensures that delicate components like brake shoes, drums, and hardware remain unharmed during spring adjustments. This not only saves money on potential repairs but also extends the lifespan of your vehicle’s braking system. - Simplifying Complex Procedures:
Replacing brake springs often involves navigating cramped spaces or dealing with rusted parts. A dedicated brake spring tool provides the leverage needed to overcome resistance without straining yourself or damaging surrounding areas.
Level 2: Supporting Professionalism and Confidence
Beyond practical benefits, brake spring tools contribute to fostering confidence and professionalism among users.
- Empowering DIY Enthusiasts:
With the right tool, even novice car owners can tackle brake spring replacements independently. This sense of accomplishment encourages further exploration into automotive maintenance and fosters self-reliance. - Enhancing Workshop Productivity:
For professional mechanics, having reliable brake spring tools improves workflow efficiency. Tasks that once required significant effort and time can now be completed swiftly, allowing technicians to focus on more complex repairs.

Part 4: Practical Considerations – Choosing and Using Brake Spring Tools
Level 1: Tips for Selecting the Right Tool
With so many variations available, choosing the perfect brake spring tool requires thoughtful consideration of several factors.
- Vehicle Compatibility:
Before purchasing a tool, verify its compatibility with your vehicle’s make and model. Consult your owner’s manual or online resources to determine the type of brake springs used in your car. - Material Quality and Build:
Opt for tools made from high-grade materials that resist wear and tear. Look for features like heat-treated steel, anti-corrosion coatings, and ergonomic designs that enhance usability and durability.
Level 2: Techniques for Safe and Effective Use
Mastering the correct usage of a brake spring tool ensures optimal results and prevents accidents.
- Proper Positioning and Alignment:
Always position the tool securely before applying force. Misalignment can cause uneven pressure, leading to damage or incomplete removal. Double-check that all components are firmly seated before proceeding. - Avoiding Common Mistakes:
Over-tightening screws or applying excessive force can result in stripped threads or bent springs. Work slowly and steadily, using only the amount of pressure necessary to disengage the part.
Part 5: Behind the Scenes – The Making of Brake Spring Tools
Level 1: The Development Process
Creating brake spring tools involves meticulous planning and execution to ensure safety, performance, and aesthetic appeal.
- Concept Development:
Engineers collaborate with designers, mechanics, and end-users to develop concepts that balance visual design with functional performance. Inspiration comes from observing common challenges faced during brake spring manipulation and identifying market gaps. - Testing and Refinement:
Once a prototype is developed, rigorous testing ensures consistency in strength, ergonomics, and ease of use. Feedback loops refine the product until it meets the brand’s exacting standards.
Level 2: Manufacturing Techniques
Advanced manufacturing techniques enable brands to produce high-quality brake spring tools at scale while maintaining precision and consistency.
- Material Selection and Treatment:
Premium materials like stainless steel, aluminum alloys, and reinforced polymers undergo stringent quality checks. Special treatments protect against corrosion, fatigue, or breakage, ensuring longevity. - Quality Assurance:
Final inspections include stress tests, finish evaluations, and dimensional checks to guarantee compliance with industry standards. Only products that pass all quality checks are approved for distribution, ensuring customer satisfaction.
Accessories That Enhance Your Brake Spring Tool Experience
Level 1: Essential Accessories for Everyday Use
Certain accessories can significantly improve the functionality and enjoyment of your brake spring tool.
- Protective Covers and Guards:
Use protective covers or guards to shield surrounding components during spring adjustments. Always check compatibility before purchasing additional components. - Lubricants and Cleaning Solutions:
Rust inhibitors or penetrating oils help loosen stuck bolts or corroded parts. These solutions ensure smooth operation and prevent future sticking.
Level 2: Creative Enhancements
Take your brake spring tool experience to the next level with these creative additions.
- Customizable Handles and Grips:
Add custom handles, grips, or tassels to personalize your tool further. This customization fosters ownership and pride among users. - Interactive Storytelling Tools:
Augmented reality apps or QR codes linked to multimedia content can enrich the tool’s narrative, providing insights into its creation, history, and cultural significance.
By understanding what makes brake spring tools exceptional, exploring diverse designs, leveraging expert tips, and embracing future innovations, you can fully unlock their potential. Whether you’re seeking affordability, craftsmanship, or symbolism, these tools offer endless possibilities—one step closer to hassle-free maintenance!
The Ultimate Guide to the Jack Tool: Everything You Need to Know
Introduction
Jack Tool is a renowned figure in the construction and home improvement industry, known for his expertise in power tools, hand tools, and DIY projects. With over 20 years of experience, Jack has gained a deep understanding of the tools and techniques required for various construction and repair tasks.
Having started his career as a construction worker, Jack quickly developed a passion for tools and equipment. He realized the importance of having high-quality tools that are durable, efficient, and safe to use. This passion led him to further his knowledge in the field and eventually establish himself as a trusted source of information and advice for both professionals and DIY enthusiasts.
Jack tools are a must-have in any toolkit, whether you are a professional mechanic or an everyday car owner. These versatile and powerful tools are designed to lift heavy objects, making them essential for vehicle maintenance, construction projects, and more. In this comprehensive guide, we will explore the different types of jack tools, their uses, maintenance tips, and safety precautions.
Part 1: Understanding the Different Types of Jack Tools
Jack is known for his hands-on approach and practical advice. His experience in using a wide range of tools allows him to provide valuable insights into their performance, durability, and value for money. He is also well-versed in the latest advancements in tool technology and always stays updated on new products entering the market.
Level 1: Hydraulic Jacks
Hydraulic jacks are perhaps the most commonly used type of jack tool. They work by using a hydraulic liquid to create pressure and lift heavy objects. These jacks come in various designs, including bottle jacks, floor jacks, and toe jacks, each with its own unique features and weight capacities.
Level 2: Mechanical Jacks
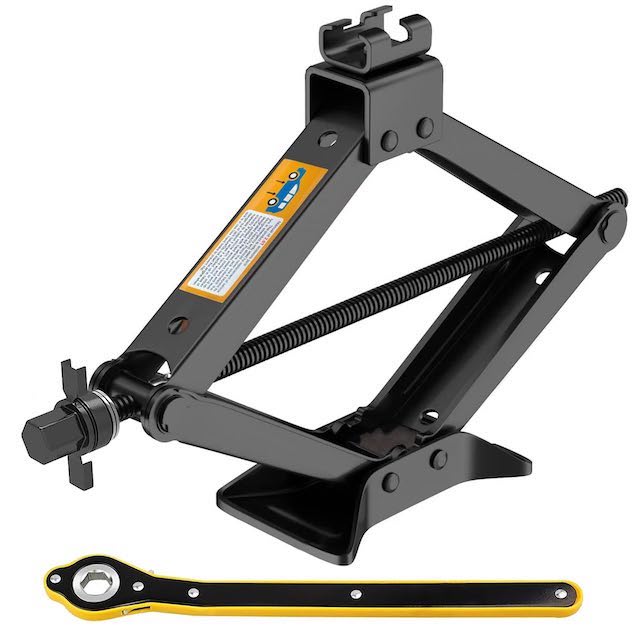
Mechanical jacks rely on brute force to lift heavy objects, using a simple mechanism such as a screw thread or a lever. These jacks are often used in emergency situations, such as changing a tire on the side of the road.
Part 2: Common Uses of Jack Tools
Jack Tool is a renowned figure in the construction and home improvement industry, known for his expertise in power tools, hand tools, and DIY projects. With over 20 years of experience, Jack has gained a deep understanding of the tools and techniques required for various construction and repair tasks.
Having started his career as a construction worker, Jack quickly developed a passion for tools and equipment. He realized the importance of having high-quality tools that are durable, efficient, and safe to use. This passion led him to further his knowledge in the field and eventually establish himself as a trusted source of information and advice for both professionals and DIY enthusiasts.
Level 1: Vehicle Maintenance
One of the most common uses of jack tools is for vehicle maintenance, such as lifting cars or trucks to change tires, check brakes, or access the underside of the vehicle for repairs.
Level 2: Construction and Industrial Applications
In the construction and industrial sectors, jack tools can lift and support heavy loads, such as heavy machinery, structural components, and more. These tools play a crucial role in ensuring safety and efficiency on construction sites.

Part 3: Maintenance Tips for Jack Tools
Level 1: Regular Inspections
It is essential to regularly inspect your jack tools for any signs of wear and tear, such as leaks, cracks, or damaged parts. This will help ensure that your jack tools remain in good working condition and prevent accidents.
Level 2: Lubrication
Proper lubrication of the moving parts of your jack tools is essential for smooth operation and longevity. Be sure to use the recommended lubricants and follow the manufacturer’s guidelines for maintenance.
Part 4: Safety Precautions When Using Jack Tools
Level 1: Weight Capacity
Always make sure to use a jack tool that is rated for the weight of the object you are lifting. Exceeding the weight capacity of the jack can lead to failure and potential injury.
Level 2: Stability
Ensure that the surface on which you place the jack tool is stable and level. Use additional support, such as jack stands, when working under a lifted object to prevent it from falling.
Part 5: Choosing the Right Jack Tool for Your Needs
Level 1: Consider Your Requirements
When selecting a jack tool, consider the weight of the objects you will be lifting, the available space for storage, and the frequency of use. These factors will help you determine the most suitable type and size of jack tool for your needs.
Level 2: Quality and Reliability
Invest in high-quality jack tools from reputable manufacturers to ensure safety and durability. Consider factors such as the materials used, weight capacity, and customer reviews when making your purchase.

Part 6: Jack Tool’s reputation for quality and durability
Jack Tool in the industry for providing high-quality, durable tools that stand the test of time. For their reliability and performance, their products are making them a top choice for professionals and DIY enthusiasts alike.
Part 7: Jack Tool’s commitment to innovation and design
Jack Tool is staying ahead of the curve when it comes to innovation and design. They continually invest in research and development to ensure that their products incorporate the latest technology and advancements in tool design. This dedication to innovation sets them apart in the industry and keeps them at the forefront of tool manufacturing.
Part 8: Jack Tool’s customer service and support
Not only does Jack Tool offer a wide range of high-quality hand tools, but they also provide a guarantee of satisfaction with every purchase. This level of commitment to their customers’ satisfaction sets them apart from other tool manufacturers and has helped them build a strong and loyal customer base.
Overall, Jack Tool is a company that can provide professional-grade tools. It can meet the highest standards of quality and durability. With a commitment to innovation, customer satisfaction, and strict manufacturing standards, they have established themselves as a leading name in the industry.
Jack Tool prides itself on providing exceptional customer service and support. They have a team of knowledgeable and friendly staff who are always ready to assist customers with any questions or concerns they may have. Whether it’s helping customers find the right tool for their needs or providing technical support, Jack Tool goes above and beyond to ensure customer satisfaction.

Conclusion
In addition to his expertise in tools, Jack is also skilled at various DIY projects. Jack has a wealth of knowledge in carrying out a wide range of tasks. His ability to explain complex procedures in a simple and understandable manner has made him a popular figure among DIY enthusiasts looking for guidance.
Jack also has a strong online presence, with a popular blog and social media channels where he shares his knowledge, reviews, and tips with his audience. His practical approach and honest opinions have earned him a loyal following of readers and viewers who trust his recommendations and advice.
Overall, Jack Tool is a respected figure in the construction and home improvement industry. Known for his extensive knowledge of tools and equipment and his practical expertise in various DIY projects. He continues to inspire and educate others with his passion for quality tools and craftsmanship.
Jack tools are indispensable for a wide range of lifting and support applications, from vehicle maintenance to construction projects. By understanding the different types of jack tools, their uses, maintenance tips, and safety precautions. You can confidently choose the right jack tool for your needs and use it safely and effectively. Remember to prioritize safety at all times and perform regular maintenance to keep your jack tools in top condition.
The Ultimate Guide to Using a Planer for Woodworking
Introduction
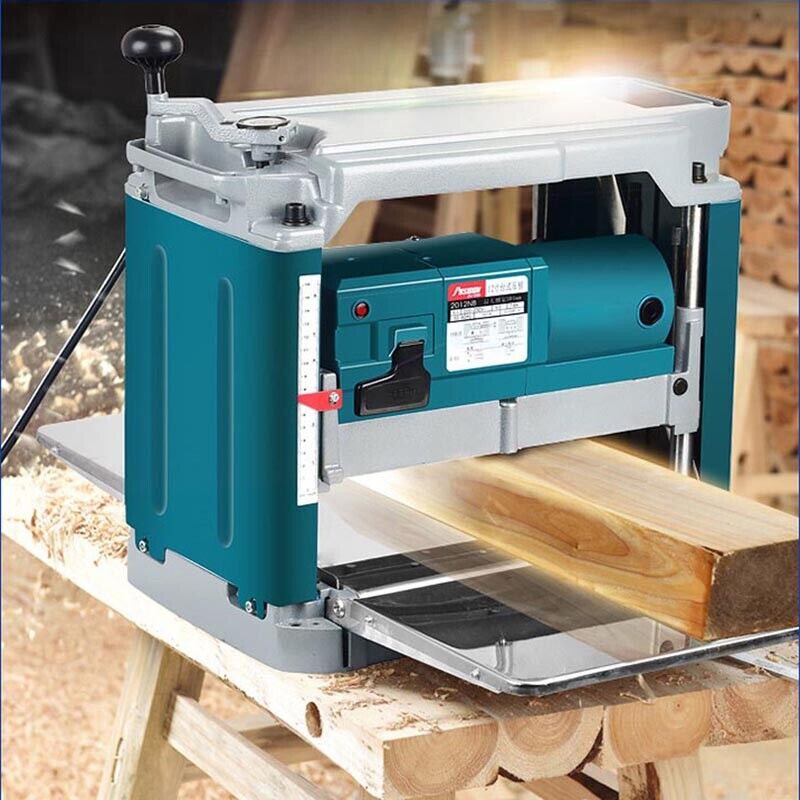
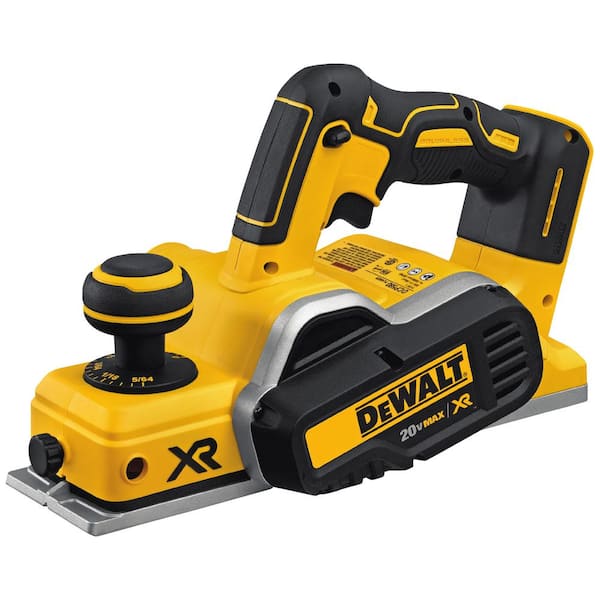
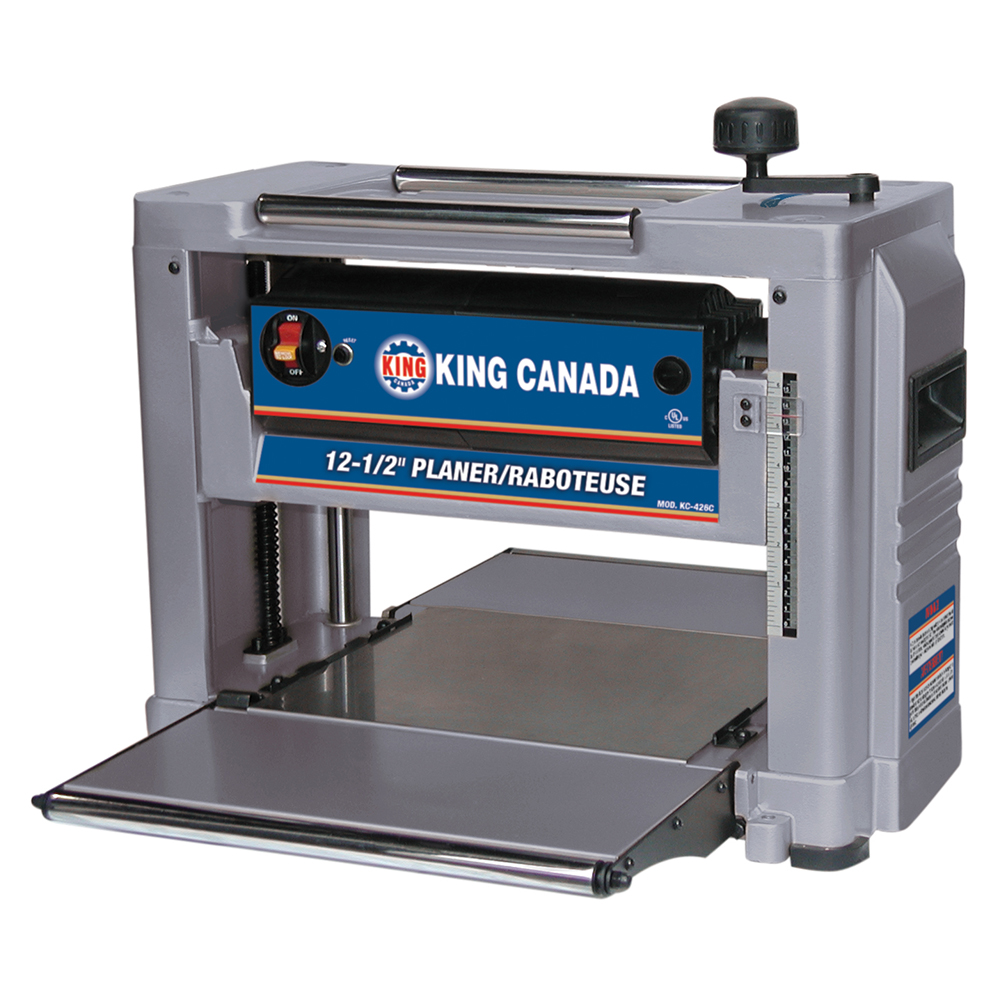
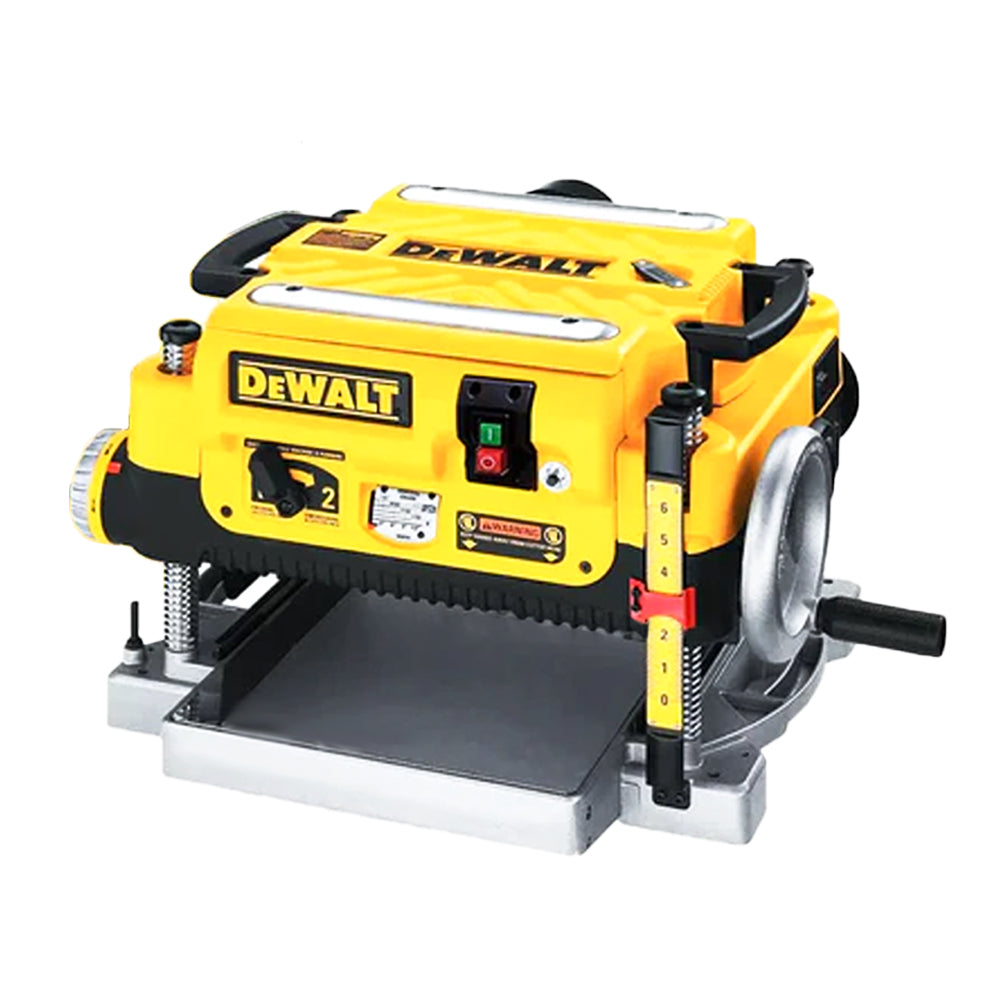
Hand-held planers are small, portable tools that are easy to maneuver and control. For small-scale projects or for trimming and shaping edges, stationary benchtop planer, on the other hand, are larger and sturdier machines that are designed for heavier-duty work. We can typically use the planer in woodworking shops. And we can handle larger and thicker pieces of wood. A planer is an essential tool in the woodworking industry, used to achieve a smooth and uniform thickness on a piece of wood. This versatile tool is perfect for both professional woodworkers and DIY enthusiasts, and it can help with a variety of woodworking projects. In this comprehensive guide, we will explore the different types of planers, how to operate them safely and effectively, and the many benefits of using a planer in your woodworking projects.
Part 1: Understanding the Different Types of Planers
A planer is a woodworking tool used to create a flat and smooth surface on a piece of wood. It is an essential tool in the woodworking industry and is commonly used by carpenters, furniture makers, and woodworkers.
There are two main types of planers: hand planers and electric planers. Hand planers are operated manually, with the user pushing the tool across the surface of the wood to remove material and create a smooth surface. They are often used for smaller woodworking projects and are popular among hobbyists and DIY enthusiasts. Electric planers, on the other hand, are powered by electricity and are typically used for larger woodworking projects. They are more efficient and can quickly remove material to create a smooth and flat surface.
Level 1: Electric Planers
Electric planers are the most common type of planer used in woodworking. They are suitable for both small-scale and large-scale woodworking projects. Electric planers come in a variety of sizes and can be handheld or mounted on a stand.
Level 2: Thickness Planers vs. Jointer Planers
There are two main types of electric planers: thickness planers and jointer planers. Thickness planers are used to achieve a consistent thickness across the entire surface of a piece of wood. Jointer planers, on the other hand, are designed to flatten one face of a board and square up one edge before using a thickness planer to achieve a consistent thickness.
Part 2: Safety Precautions When Using a Planer
Planers are available in different sizes, with larger planers being used for heavy-duty applications and smaller planers for more precise and detailed work. Some planers also come with adjustable depth settings, allowing users to control the amount of material being removed from the wood.
One of the key features of a planer is the cutter head, which is equipped with sharp blades that cut and remove material from the wood as it passes through the machine. The blades are adjustable and can be sharpened or replaced as needed to maintain their cutting efficiency.
Level 1: Proper Personal Protective Equipment (PPE)
When using a planer, it is essential to wear the proper personal protective equipment, including safety glasses, hearing protection, and a dust mask. This will help protect you from flying wood chips and loud noise, as well as any airborne dust particles.
Level 2: Maintaining a Clean and Organized Workspace
It is important to keep your workspace clean and organized when using a planer. This includes removing any obstacles from the area, ensuring the work area clear of any sawdust or debris that can pose a slipping hazard.
Part 3: Setting Up and Operating a Planer
Level 1: Choosing the Right Blade and Adjusting the Depth
Before operating a planer, it is crucial to choose the right blade for your project and adjust the depth of the planer to achieve the desired thickness.
Level 2: Feeding the Wood through the Planer
When feeding wood through a planer, it is important to do so slowly and evenly to achieve a smooth and uniform thickness. Avoid forcing the wood through the planer, as this can result in uneven cuts and potential damage to the wood or the planer.

Part 4: Benefits of Using a Planer in Woodworking Projects
Level 1: Achieving Consistent Thickness
One of the main benefits of using a planer is the ability to achieve a consistent thickness across a piece of wood. This is essential for projects such as furniture making or cabinetry, where uniformity is key to achieving a professional finish.
Level 2: Smoothing Rough Surfaces
In addition to achieving a consistent thickness, a planer can also be used to smooth rough surfaces on a piece of wood. This can save time and effort during the sanding phase of a project and result in a more polished and professional-looking final product.
Part 5: Maintenance and Care for Your Planer
Level 1: Regular Cleaning and Lubrication
To ensure your planer operates smoothly and efficiently, it is important to regularly clean and lubricate the moving parts. This will help prevent any buildup of sawdust and debris, as well as reduce wear and tear on the motor and other components.
Level 2: Sharpening and Replacing Blades
The blades on a planer will eventually wear down over time, so it is important to regularly inspect them and sharpen or replace them as needed. This will help maintain the performance and accuracy of your planer, as well as prevent any damage to the wood being planed.
Part 6: Safety Features
Level 1: Importance of Safety Features
Planers are powerful and potentially dangerous tools, so it is crucial that they have proper safety features to prevent accidents and injuries.
Level 2: Common Safety Features
Some common safety features found on planers include blade guards, emergency stop buttons, automatic shut-off mechanisms, and anti-kickback devices. These features help to protect the user from accidental contact with the blades and prevent kickback during operation.

Part 7: Maintenance and Care
Level 1: Importance of Maintenance
Proper maintenance and care are essential for keeping a planer in good working condition and ensuring its longevity. Neglecting maintenance can lead to decreased performance, increased wear and tear, and potential safety hazards.
Level 2: Routine Maintenance Tasks
Routine maintenance tasks for planers may include regular blade sharpening or replacement. And cleaning debris and dust buildup, lubricating moving parts, and checking for any signs of wear or damage. Following a maintenance schedule will help to keep the planer running smoothly and prevent premature breakdowns.
Part 8: Best Practices for Safe Operation
Level 1: Safe Operating Practices
To prevent accidents and injuries, it is important for planer users to follow safe operating practices. This includes reading the user manual, using the appropriate safety gear, and avoiding distractions while the planer is in use.
Level 2: Proper Material Handling
Proper material handling is crucial for safe planer operation. Users should ensure that the workpiece can feed it into the planer at a steady, even pace to prevent kickback or binding. Additionally, it is important to never force the material through the planer. This can cause damage to the machine and increase the risk of accidents.
Conclusion
A planer is a woodworking tool used to smooth and level the surface of a piece of wood. It consists of a cutter head that removes material from the wood and a flat surface called the bed. It supports the wood as it is fed through the machine. Planers come in various sizes and styles, with the most common types being hand-held planers and stationary benchtop planers.
In addition to their primary function of leveling and smoothing wood, planers can also create decorative and unique finishes on wooden surfaces. By adjusting the cutting depth and feed rate, woodworkers can create different textures and patterns. And adding visual interest to their projects. Planers can chamfer edges, create bevels, and shape wood for joinery. Making them a versatile tool in any woodworking shop. It is important to use caution when operating a planer, as the high-speed rotating blades can be dangerous if not handled properly. With the right precautions and proper technique, a planer can be a valuable tool for any woodworker.
In conclusion, a planer is an invaluable tool for any woodworker, whether professional or hobbyist. By understanding the different types of planers, following proper safety precautions, and mastering the setup and operation of a planer. You can achieve consistent thickness and smooth surfaces on your woodworking projects. With regular maintenance and care, your planer will continue to serve you well for years to come. Whether you are building furniture, constructing cabinets, or simply working on a DIY project. A planer is an essential tool for achieving professional results.
The Guide to Wire Stripper: Everything You Need to Know
Introduction
When using wire stripper, it’s important to take certain safety precautions to prevent accidents and injuries. Always wear safety goggles to protect your eyes from flying debris or sharp wire ends. Inspect the wire stripper for any damage or dull blades before use, and never use a damaged tool. When stripping wires, make sure to follow the manufacturer’s guidelines for the proper gauges and types of wires the tool can handle. Avoid using excessive force when stripping insulation, as this can damage the wire or the tool itself. Additionally, always cut the power source before working with live electrical wires, and use insulated tools to minimize the risk of electric shock.
Wire strippers are essential tools for anyone working with electrical wiring or cables. Whether you are a professional electrician or a DIY enthusiast, having the right wire stripper can make a world of difference in your work. In this comprehensive guide, we will explore everything you need to know about wire strippers, including their types, uses, and how to choose the best one for your needs.
Part 1: Understanding Wire Strippers
Level 1: What are Wire Strippers?
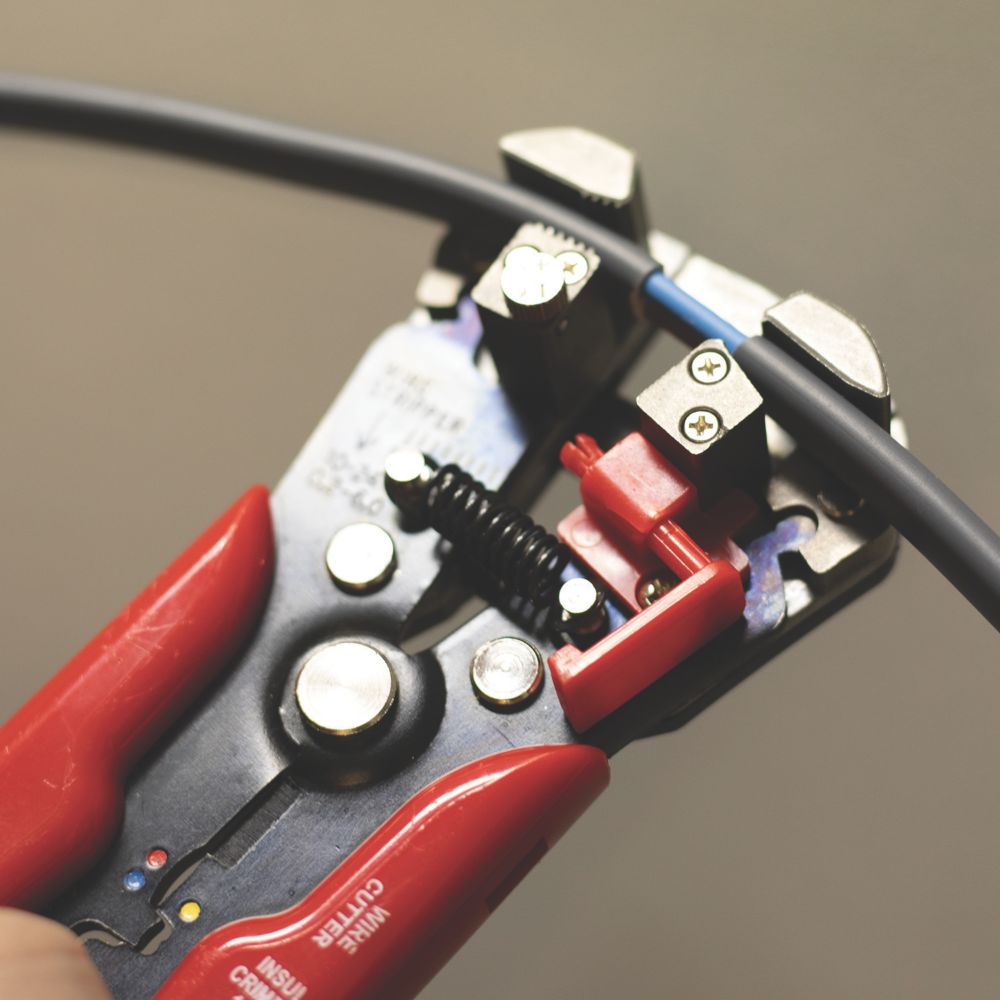
Wire strippers are hand-held tools used to remove the insulation from electrical wires to expose the metal conductor inside. This allows for proper connections to be made, whether it’s for splicing, attaching connectors, or terminating wires.
Level 2: Types of Wire Strippers
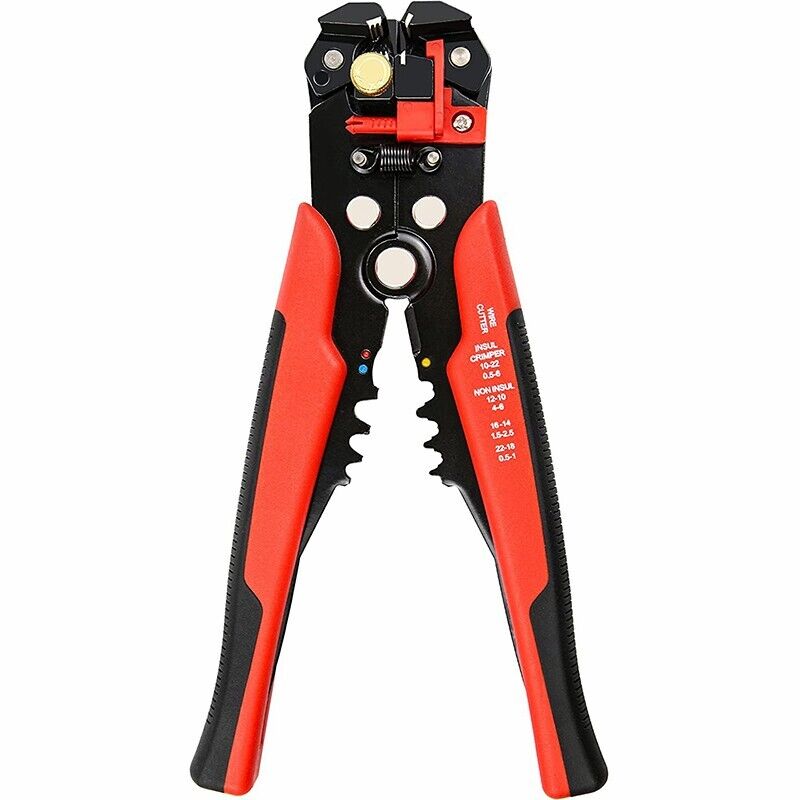
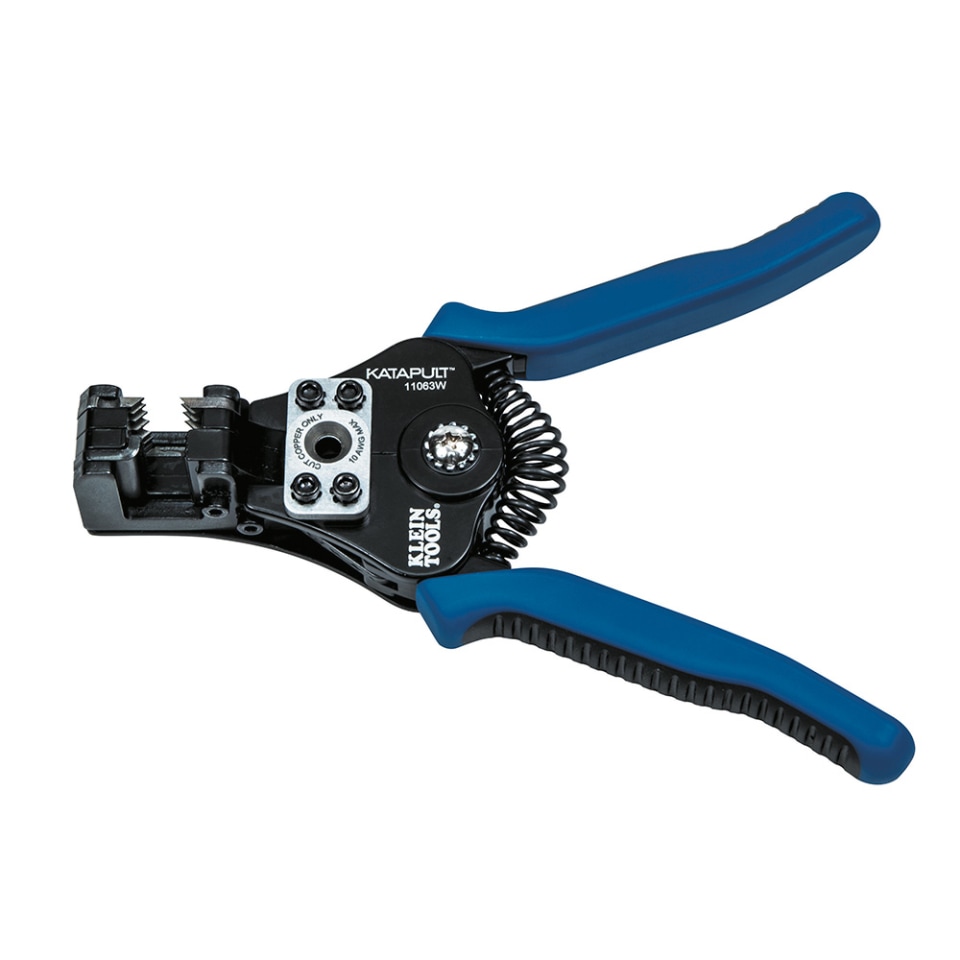
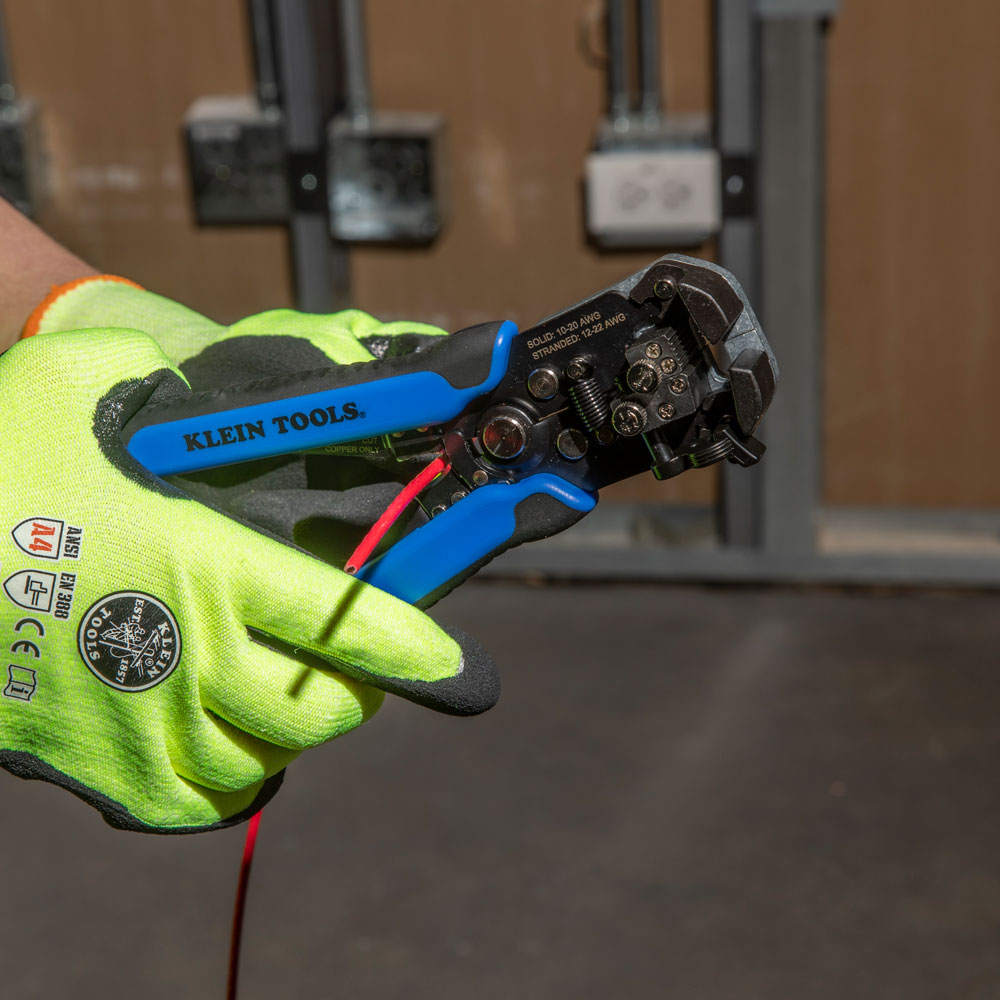
There are several types of wire strippers available, each designed for a specific purpose. Some common types include manual wire strippers, automatic wire strippers, and multipurpose wire strippers. Manual wire strippers require the user to manually adjust the blade to the desired wire size and then pull the wire through the tool to strip the insulation. Automatic wire strippers, on the other hand, feature a mechanism that automatically adjusts to the wire size and strips the insulation with a single squeeze of the handles. Multipurpose wire strippers are designed to strip insulation, cut wires, and crimp connectors, making them a versatile tool for various electrical tasks.
Part 2: Uses of Wire Strippers
Level 1: Electrical Work
One of the most common uses for wire strippers is in electrical work, such as installing light fixtures, outlets, and switches. Wire strippers are essential for preparing the wires to be connected and ensuring a secure and reliable electrical connection.
Level 2: DIY Projects
Wire strippers are also useful for DIY projects, such as building circuit boards, repairing appliances, or creating electronic devices. They allow for precise and clean wire stripping, which is crucial for the success of any project.
Part 3: How to Choose the Right Wire Stripper
Level 1: Consider the Wire Gauge
When choosing a wire stripper, it’s essential to consider the wire gauge or thickness you will be working with. Different wire strippers are designed for specific wire gauges, so selecting the right one will ensure efficient and accurate wire stripping.
Level 2: Ergonomics and Comfort
Since wire stripping can be a repetitive task, it’s important to consider the ergonomics and comfort of the wire stripper. Look for models with comfortable handles and easy-to-use mechanisms to reduce hand fatigue and improve overall efficiency.
Part 4: Tips for Using Wire Strippers
-
Use the appropriate wire strippers for the job. There are different types and sizes of wire strippers for different gauges of wire, so be sure to use the right one for the job.
- Carefully measure and mark the length of insulation to be removed before using the wire strippers. This will help ensure accuracy and prevent damage to the wire.
- Adjust the wire strippers to the proper gauge of wire by loosening the adjustment screw and sliding the cutting blades to the correct position.
- Hold the wire firmly in one hand while using the wire strippers with the other hand to avoid slipping and causing injury.
- Gently squeeze the handles of the wire strippers to cut through the insulation without damaging the wire underneath.
- After making the initial cut, carefully pull the insulation off the wire using the wire strippers, making sure not to pull too hard to avoid damaging the conductor.
- Check the stripped end of the wire for any nicks or damage to the conductor. If there are any, trim them with the wire strippers to ensure a clean, proper connection.
- Always wear safety goggles when using wire strippers to protect your eyes from any flying debris.
- Store wire strippers in a dry place to prevent rust and keep them sharp and in good working condition.
- Practice using wire strippers on scrap wire before attempting to strip wires in an actual project to ensure proper technique and avoid mistakes.

Part 5: Top Wire Stripper Brands and Models
Store wire strippers in a dry, clean environment to prevent rust and corrosion. Finally, periodically inspect the tool for any signs of wear or malfunction, and address any issues promptly to prevent further damage or safety hazards. With proper maintenance, wire strippers can provide years of reliable service for your electrical projects.
Level 1: Klein Tools
Klein Tools is a well-known brand in the electrical industry, offering a wide range of high-quality wire strippers for professionals and DIY enthusiasts. Their wire strippers are known for their durability, precision, and ergonomic design.
Level 2: IRWIN Tools
IRWIN Tools is another reputable brand that manufactures reliable and efficient wire strippers. Their products are designed to meet the needs of professionals and hobbyists alike, with a focus on performance and user comfort.
Part 5: Maintenance and Care of Wire Strippers
Proper maintenance of wire strippers is essential to ensure their longevity and effectiveness. After each use, clean the tool to remove any debris or residue that may have accumulated. Inspect the blades for any nicks or damage, and sharpen or replace them as needed. Lubricate any moving parts according to the manufacturer’s instructions to keep the tool operating smoothly.
-
Keep the cutting edges sharp and clean by regularly cleaning and inspecting the blades for any debris or build-up. This can be done with a soft cloth and a small amount of oil.
- Ensure that the wire stripper is kept dry and free from rust by storing it in a clean. Dry place when not in use.
- Use the wire stripper only for its intended purpose and do not use it on materials.
- Inspect the handles and grips for any signs of wear and tear, and replace them if necessary to maintain a secure and comfortable grip.
- Regularly check the adjustment screws and moving parts for any signs of looseness or damage. And tighten or replace them as needed to ensure smooth operation.
- Clean the wire stripper after each use, especially if it has been used on dirty or oily materials, to prevent build-up and damage to the cutting edges.
- If the wire stripper becomes damaged or dull, have it professionally sharpened or replaced to ensure safe and efficient operation.
- Always follow the manufacturer’s instructions and guidelines for proper maintenance and care of your specific wire stripper model.

Part 6: Safety Precautions When Using Wire Strippers
- Always wear safety glasses to protect your eyes from any flying debris while using wire strippers.
- Keep your fingers and hands away from the cutting edges of the wire strippers to avoid injury.
- Make sure to use the appropriate size and type of wire strippers for the specific job and wire gauge.
- Inspect the wire strippers for any damage or wear before using them to ensure they are in proper working condition.
- Use a stable and flat surface to work on while using wire strippers to prevent accidents or slips.
- Always cut away from your body and be mindful of the direction of the cutting action to avoid accidental cuts.
- Keep the wire strippers clean and free from dirt and debris to maintain their effectiveness and prevent accidents.
- Store wire strippers in a safe and secure location to prevent damage and keep them out of the reach of children.
- Do not use wire strippers near flammable materials or in wet conditions to avoid the risk of fire or electric shock.
- Read and follow the manufacturer’s instructions and guidelines for the specific type of wire strippers being used.
Conclusion
Wire strippers are indispensable tools for anyone working with electrical wiring or cables. By understanding the different types of wire strippers, their uses, and how to choose the right one, you can ensure efficient and precise wire stripping for all your projects. With the tips for using and maintaining wire strippers, as well as the top brands and models to consider, you can confidently select the best wire stripper for your needs and achieve professional results in all your electrical work.
Wire stripper is a type of hand tool used to remove the insulation from electrical wires. They have a pair of sharp blades that cut through the insulation without damaging the wire underneath. This allows the user to easily strip off the insulation and expose the bare wire for connection to electrical devices. Wire strippers come in various sizes and styles to accommodate different wire gauges and insulation types. They are commonly used by electricians, technicians, and DIY enthusiasts for electrical wiring and repair tasks.
The Ultimate Guide to Bushing Removal Tools
Introduction
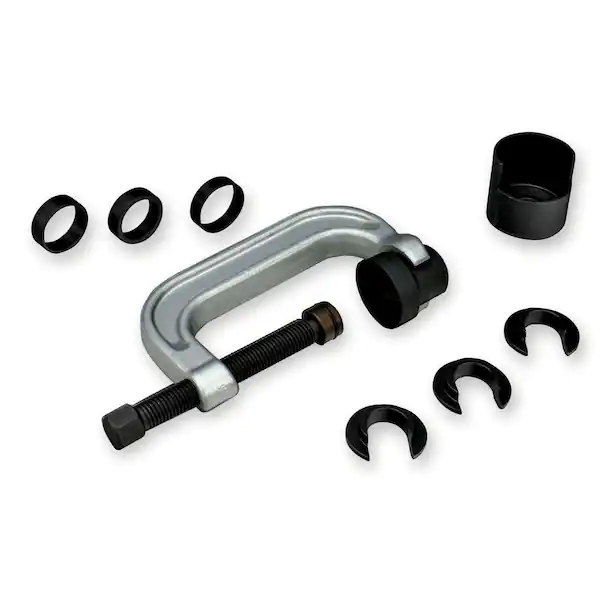
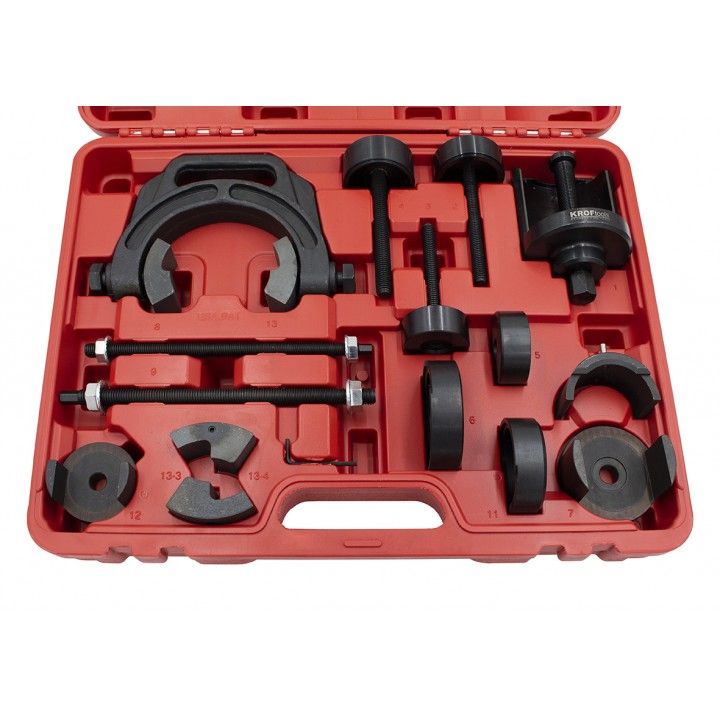
Bushing removal tools are essential for safely and efficiently removing bushings from various automotive and industrial components. These tools are specifically designed to prevent damage to the surrounding parts and to make the removal process as smooth as possible. Some common types of bushing removal tools include hydraulic press kits, bearing pullers, and slide hammer tools. Hydraulic press kits are ideal for large bushings that are pressed into place, while bearing pullers are perfect for removing smaller bushings. Slide hammer tools are versatile and can be used for a wide range of bushing sizes. Overall, bushing removal tools are essential for any mechanic or technician working on vehicles or machinery.
Bushing removal tools are essential for any DIY mechanic or professional technician working on suspension and steering components. These specialized tools make the removal of bushings from control arms, leaf springs, and other components much easier and more efficient. In this comprehensive guide, we will discuss the importance of bushing removal tools and provide an in-depth look at the different types available on the market.
Part 1: The Importance of Bushing Removal Tools
Hydraulic bushing removal tool use hydraulic pressure to exert force on the bushing, making removal much easier and more efficient. These tools are ideal for removing stubborn bushings, such as press-and-pull kits, use mechanical force to remove bushings from their housings. These tools are often more affordable and easier to use for smaller, less stubborn bushings.
Level 1: Why Bushing Removal Tools Are Necessary
Bushing removal tool is essential for safely and effectively removing worn-out or damaged bushings from various automotive components. Without the proper tools, removing bushings can be a time-consuming and frustrating process, often resulting in damage to the surrounding components.
Level 2: Benefits of Using Bushing Removal Tools
Using a bushing removal tool not only saves time and effort but also reduces the risk of damaging the surrounding components. These tools are designed to exert precise force on the bushing, making removal much easier and safer. Additionally, using a bushing removal tool ensures that the new bushing will be properly seated in its housing, leading to improved performance and longevity.
Part 2: Selecting the Right Bushing Removal Tool
Level 1: Consider the Type and Size of Bushing
Before selecting a bushing removal tool, it’s important to consider the type and size of the bushing you will be removing. Some tools certain types of bushings, so it’s important to choose the right tool for the job.
Level 2: Assessing the Workload
If you frequently work on suspension and steering components, investing in a high-quality hydraulic bushing removal tool may be a wise decision. However, if you only occasionally remove bushings, a manual tool may suffice.
Part 3: Using a Bushing Removal Tool
Level 1: Preparation
Before using a bushing removal tool, it’s important to ensure that the surrounding components are properly supported and that the area is clear of any obstructions. Additionally, lubricating the bushing and surrounding surfaces can make removal easier.
Level 2: Proper Technique
Using a bushing removal tool requires patience and precision. Applying steady force and making sure that the tool is properly aligned with the bushing are essential for successful removal. Additionally, taking the time to properly clean and inspect the surrounding components before installing the new bushing is crucial for optimal performance.
Part 4: Maintenance and Care of Bushing Removal Tools
Here are some general tips for the maintenance and care of bushing removal tools:
- Keep tools clean: After every use, make sure to clean the bushing removal tools thoroughly to remove any dirt, grease, or debris. Use a solvent or degreaser and a brush to clean the tools and wipe them dry with a clean cloth.
- Inspect regularly: Regularly check the condition of the bushing removal tools for any signs of wear, damage, or corrosion. This will help identify any issues early on and prevent further damage to the tools.
- Store properly: Store the bushing removal tools in a dry and clean place to protect them from moisture and corrosion. It’s also a good idea to keep the tools in a toolbox or case to prevent them.
- Lubricate moving parts: If the bushing removal tools have moving parts, such as handles or mechanisms, it’s important to lubricate them regularly to keep them functioning smoothly. Use a lightweight lubricant or oil to maintain the moving parts.
- Replace worn or damaged parts: It’s important to replace them as soon as possible. Using tools with worn or damaged parts can lead to safety hazards and ineffective performance.
- Follow manufacturer’s instructions: Always follow the manufacturer’s instructions for the care and maintenance of the specific bushing removal tools you are using. This will ensure that you are taking the proper steps to keep the tools in good condition.
- Use protective equipment: When using bushing removal tools, make sure to wear appropriate protective equipment, such as gloves and safety glasses, to prevent injuries and keep the tools clean.
By following these tips, you can help prolong the lifespan of your bushing removal tools and ensure they continue to perform effectively.
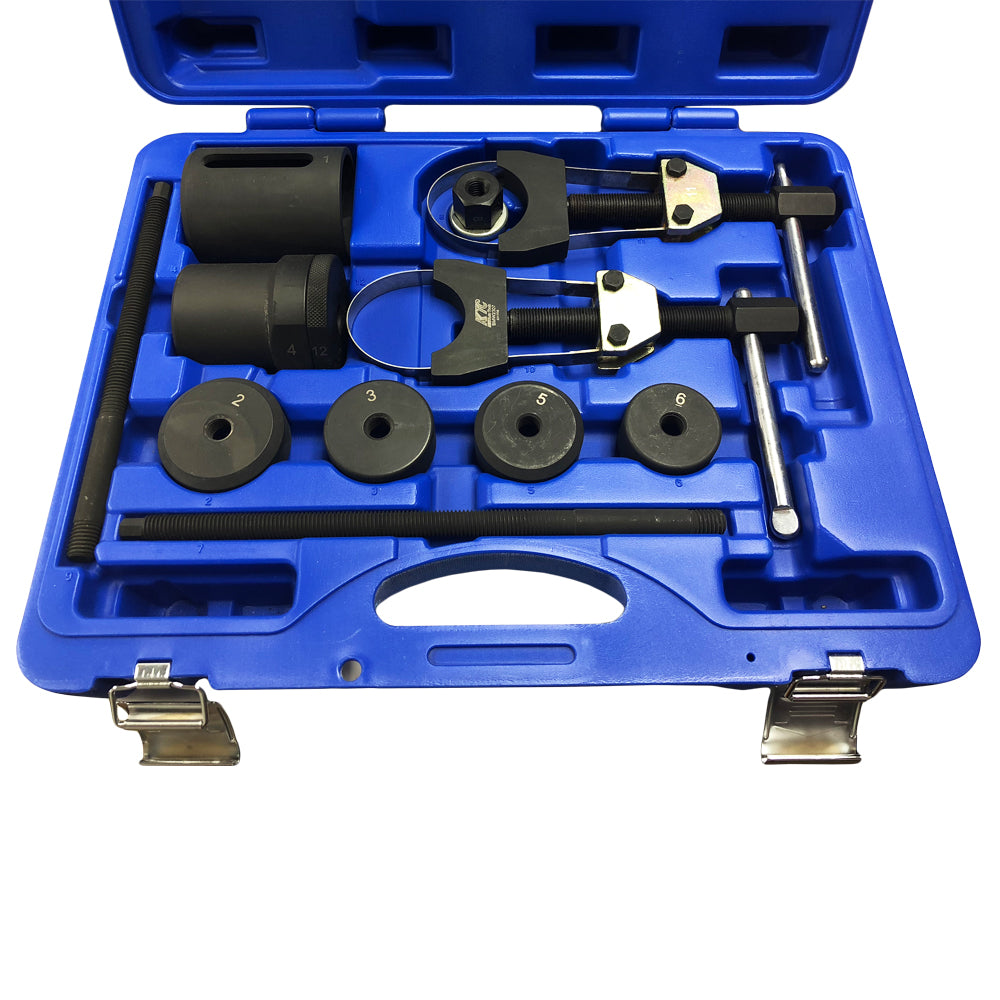
Part 5: Types of Bushing Removal Tools
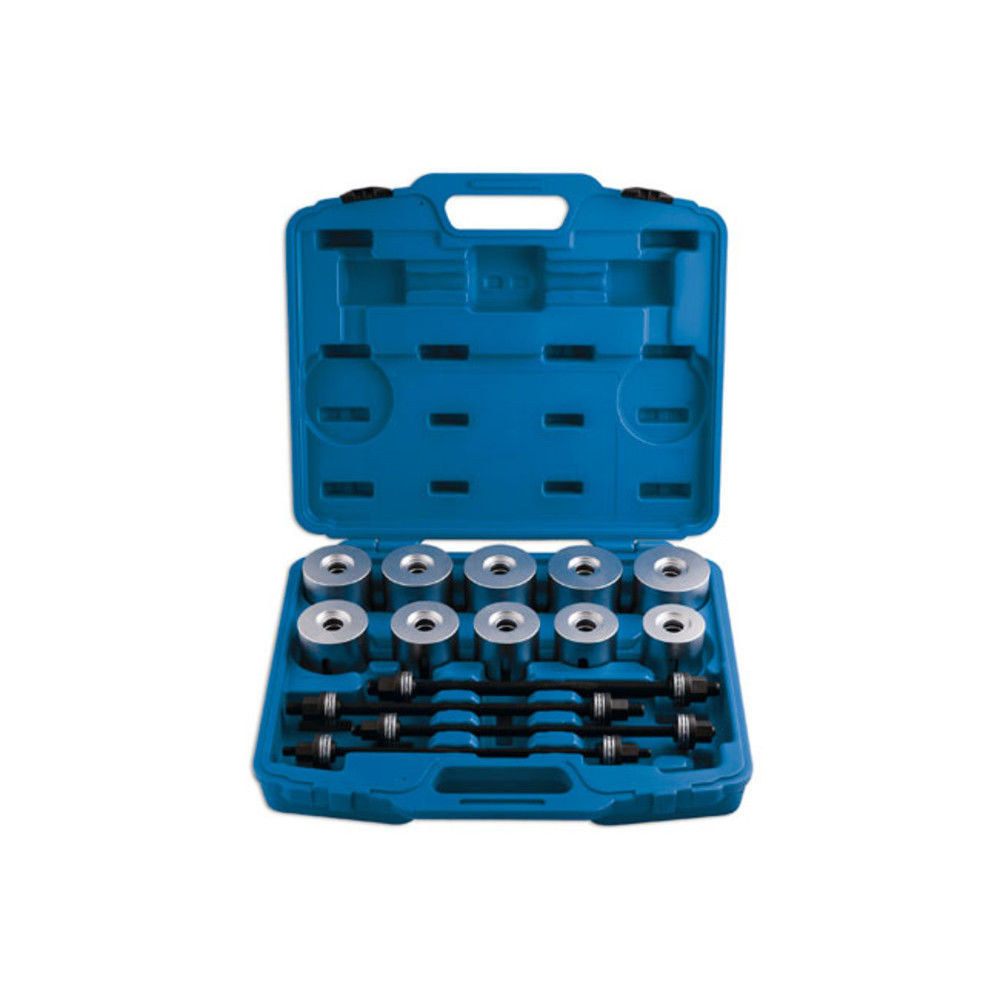
- Bushing removal tool set: This set usually includes various sized bushing removal tools can fit different kinds of bushings. These can include press-in, screw-in, and other types of bushings.
- Slide hammer puller: This tool uses a slide hammer mechanism to forcefully pull out stubborn bushings from their housing, saving time and effort.
- Hydraulic press: A hydraulic press with specific adapters can push out bushings with significant force, especially for larger or more difficult to remove bushings.
- Bushing puller kit: A bushing puller kit typically includes a selection of interchangeable adapters and a slide hammer for removing a wide range of bushings.
- Bearing splitter set: While not specifically designed for bushings, a bearing splitter set can remove bushings by gripping the outside of the bushing and then using a hydraulic press or other force application tool to push it out.
- Universal bushing tool kit: This kit may include various tools such as pin punch sets, screw extractors, and other specialized tools for removing different kinds of bushings.
- Pneumatic bushing removal tool: A pneumatic tool that uses air pressure to forcefully remove bushings, particularly useful for quick and efficient bushing removal in an auto shop or similar setting.
These tools can be essential for mechanics, automotive professionals, and DIY enthusiasts to safely and effectively remove bushings from various applications such as suspension components, engines, and other mechanical systems.
Conclusion
After each use, it’s important to clean and lubricate the bushing removal tool to prevent rust and corrosion. This will ensure that the tool remains in optimal working condition for future use. Proper storage is essential for maintaining the longevity of your bushing removal tool. Keeping it in a cool, dry place and protecting it from moisture and excessive heat will prevent damage and ensure that it’s ready for use when needed.
Bushing removal tool is indispensable for anyone working on suspension and steering components. Whether you’re a professional mechanic or a DIY enthusiast, having the right tools for the job can make all the difference. By understanding the different types of bushing removal tool available, selecting the right tool for your needs, and using proper techniques, you can ensure that removal and replacement of bushings is a smooth and efficient process. Additionally, proper maintenance and care of your bushing removal tool will ensure that it remains in optimal working condition for years to come.
The Ultimate Guide to the Crescent Tool Set
Introduction
When it comes to DIY projects, having the right tools on hand is essential. One brand that has been trusted by professionals and hobbyists alike for decades is Crescent. With a wide range of high-quality hand tools, power tools, and tool sets, Crescent has become a go-to choice for those who demand durability, reliability, and precision. In this comprehensive guide, we will take a closer look at the Crescent tool set, exploring its history, the range of products available, and the benefits of investing in this trusted brand.
Part 1: History of Crescent Tools
Level 1: Origins of the Crescent brand
Crescent, a brand known for its innovative and reliable tools, has a rich history dating back to the late 19th century. The Crescent brand originated in the United States and quickly gained a reputation for producing high-quality hand tools, wrenches, and pliers. The company’s commitment to quality and innovation has made it a staple in the tool industry for over a century.
Level 2: Evolution of product offerings
Over the years, Crescent has expanded its product offerings to include a wide range of tools, from hand tools and wrenches to power tools and tool sets. The brand’s dedication to meeting the needs of professionals and DIY enthusiasts alike has allowed it to remain a leading choice for those seeking reliable and durable tools for a variety of projects.
Part 2: The Range of Crescent Tool Sets
Level 1: Hand tool sets
Crescent offers a diverse range of hand tool sets designed to meet the needs of professionals and DIYers. These sets often include a combination of wrenches, pliers, screwdrivers, and other essential hand tools, providing a convenient and cost-effective solution for those who need a complete set of tools for various projects.
Level 2: Power tool sets
In addition to hand tools, Crescent also offers a selection of power tool sets, including drills, saws, and impact drivers. These sets are designed to provide users with everything they need to tackle a wide range of tasks, from woodworking to metalworking and beyond. With a focus on durability, performance, and user-friendly design, Crescent power tool sets are a popular choice among professionals and hobbyists alike.
Part 3: Benefits of Investing in Crescent Tool Sets
Level 1: Durability and reliability
One of the key benefits of investing in Crescent tool sets is the brand’s commitment to durability and reliability. With a focus on using high-quality materials and precision engineering, Crescent tools are built to last. And providing users with confidence and peace of mind when taking on challenging projects.
Level 2: Precision and performance
Another advantage of Crescent tool sets is their precision and performance. Crescent products are designed to deliver exceptional performance. Allowing users to work with accuracy and efficiency. This focus on precision and performance sets Crescent tools apart from the competition. And making them an ideal choice for those who demand the best from their tools.
Part 4: Popular Crescent Tool Set Options
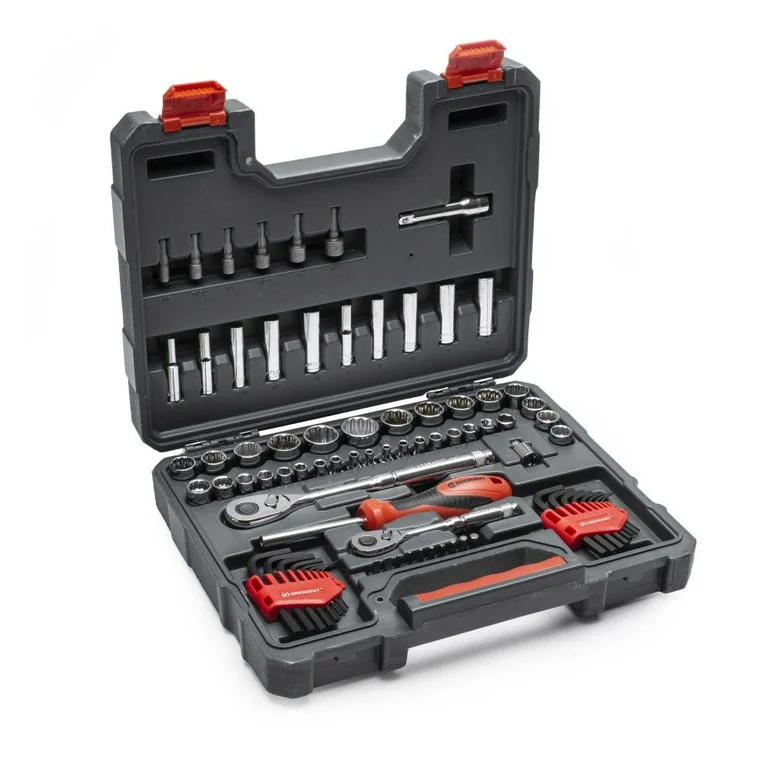
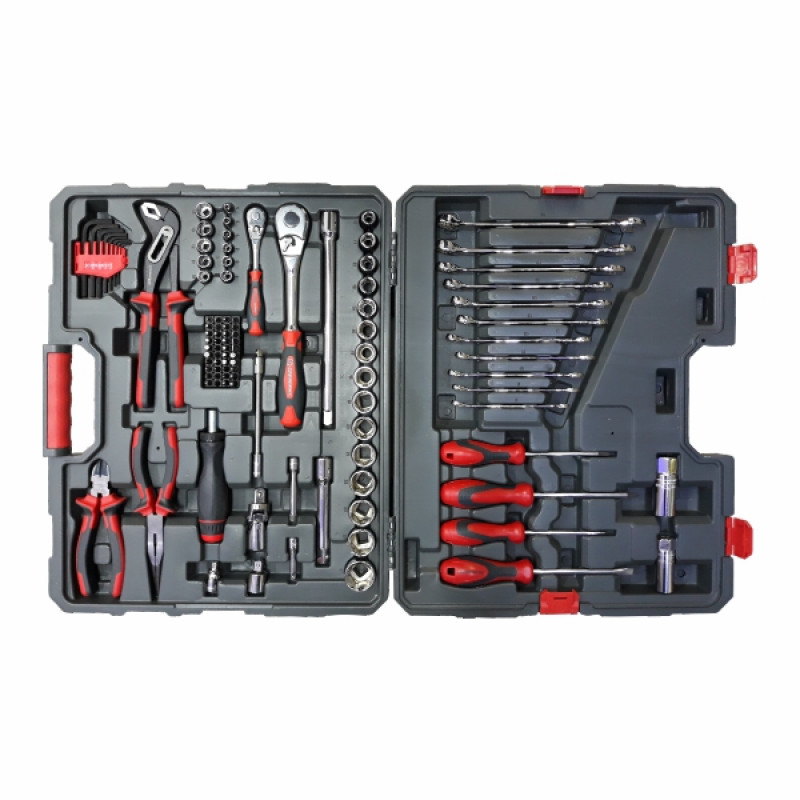
Level 1: Crescent 170-piece General Purpose Tool Set
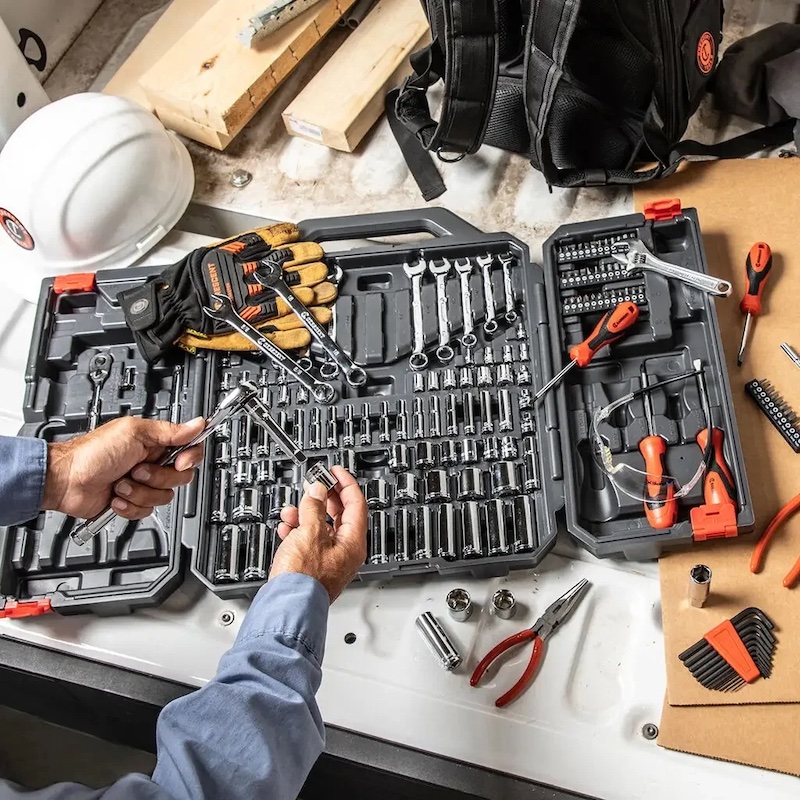
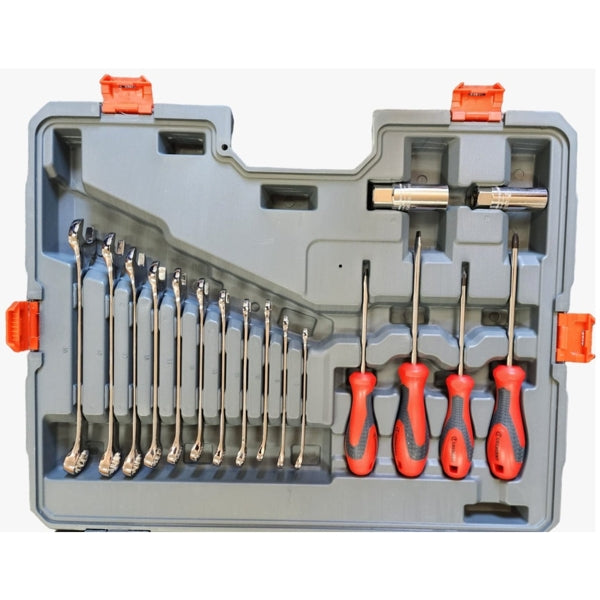
The Crescent 170-piece General Purpose Tool Set is a comprehensive set that includes a wide variety of hand tools, including wrenches, pliers, screwdrivers, and more. This set is ideal for those who need a versatile and reliable collection of tools for tackling a range of tasks around the home or job site.
Level 2: Crescent CTK170CMP2 Mechanics Tool Set
For those in need of a high-quality and comprehensive mechanics tool set, the Crescent CTK170CMP2 is an ideal choice. This set includes a wide array of sockets, ratchets, wrenches, and other essential tools, making it the perfect solution for automotive work, equipment maintenance, and other mechanical tasks.
Part 5: Tips for Maximizing the Value of Crescent Tool Sets
Level 1: Proper maintenance and storage
To get the most out of a Crescent tool set, it’s essential to properly maintain and store the tools. This includes regular cleaning, lubrication, and storage in a dry, climate-controlled environment. By taking proper care of Crescent tools, users can ensure they remain in top condition for years to come.
Level 2: Using the right tool for the job
Another way to maximize the value of Crescent tool sets is by using the right tool for the job. Each tool in a Crescent set is designed for a specific purpose, and using the wrong tool can lead to inefficiency, damage to the tool or workpiece, or even injury. By taking the time to select the appropriate tool for each task, users can make the most of their Crescent tool sets while ensuring safety and precision.
Part 6: Innovation and Technology in Crescent Tool Sets
Level 1: Incorporation of advanced materials
Crescent has continually embraced innovation and technology in the development of their tool sets. This includes the incorporation of advanced materials such as high-strength steel, chrome vanadium, and ergonomic handle designs. These materials improve the durability, strength, and user comfort of the tools, enhancing their overall performance and reliability.
Level 2: Integration of power tool technology
In addition to their traditional hand tool offerings, Crescent has also expanded into power tools, integrating cutting-edge technology into their products. This includes features such as brushless motors, lithium-ion batteries, and electronic torque control, which enhance the power, efficiency, and precision of their power tool sets. By staying at the forefront of technological advancements, Crescent ensures that their tool sets remain competitive and effective in meeting the evolving needs of users.
Part 7: Customization and Specialized Tool Sets
Level 1: Customization options for specific trades
Crescent recognizes that different trades and professions may have unique tool requirements. To address this, they offer customization options and specialized tool sets tailored to specific industries such as automotive, construction, plumbing, and electrical work. These specialized sets include a curated selection of tools designed to meet the distinct demands and challenges of each trade, providing professionals with the right tools for their specific applications.
Level 2: Modular tool sets and expandable storage systems
Another way Crescent caters to the customization needs of users is through modular tool sets and expandable storage systems. These sets allow users to build and customize their tool collections based on their preferences and tasks. Additionally, the expandable storage systems provide flexibility for expanding and organizing the tool sets as users’ needs evolve, creating a tailored and efficient toolkit for any user.
Part 8: Eco-Friendly Initiatives and Sustainability
Level 1: Sustainable manufacturing processes
Crescent tools prioritize sustainable sourcing of raw materials, efficient production processes, and waste reduction initiatives. By implementing environmentally friendly practices, Crescent reduces its ecological footprint and contributes to the overall sustainability of its operations.
Level 2: Recyclable packaging and product longevity
To further support sustainability, Crescent utilizes recyclable packaging materials for its tool sets and products. Additionally, by producing durable, long-lasting tools, Crescent promotes extended product lifespans, reducing the frequency of tool replacements and minimizing overall waste. This commitment to sustainability aligns with the growing environmental consciousness of consumers and demonstrates Crescent’s dedication to responsible business practices.
Conclusion
In conclusion, the Crescent tool set is a versatile and reliable option for professionals and DIY enthusiasts alike. With a rich history, a diverse range of products, and a focus on durability, precision, and performance, Crescent tools are a valuable addition to any workshop or toolbox. By investing in a Crescent tool set, users can take on a wide range of projects with confidence. Knowing they have the right tools for the job.
Whether it’s the integration of advanced materials and technology, the customization of specialized tool sets, or the dedication to sustainability, Crescent continues to meet the evolving needs of professionals and DIY enthusiasts. By choosing a Crescent tool set, users not only acquire reliable and high-performance tools but also support a brand. It values innovation, sustainability, and customer satisfaction.

Unveiling Versatility: Exploring the Ridgid Multi Tool
Introduction
The Ridgid multi tool is a versatile and innovative power tool that has revolutionized the way professionals and DIY enthusiasts approach a wide range of tasks. With its adaptability and multifunctional capabilities, the tool has become a go-to solution for precision cutting, sanding, scraping, and more. In this comprehensive guide, we will delve into the world of the Ridgid multi tool, examining its features, applications, and the myriad benefits it offers to users across various industries and skill levels.
The Ridgid multi tool represents a versatile and indispensable solution for precision cutting, sanding, scraping, and a myriad of other applications. With its ergonomic design, multifunctional capabilities, and advanced features, the multi tool exemplifies excellence in performance and efficiency. By understanding the diverse applications, features, safety considerations, and accessories associated with the Ridgid multi tool, users can harness its adaptability and versatility to elevate their productivity and achieve exceptional results across various projects and industries. As an innovative and essential tool in the trade, the Ridgid multi tool continues to empower professionals and DIY enthusiasts alike to pursue excellence in craftsmanship and efficiency.
Part 1: Understanding the Ridgid Multi Tool
Level 1: Definition and Functionality
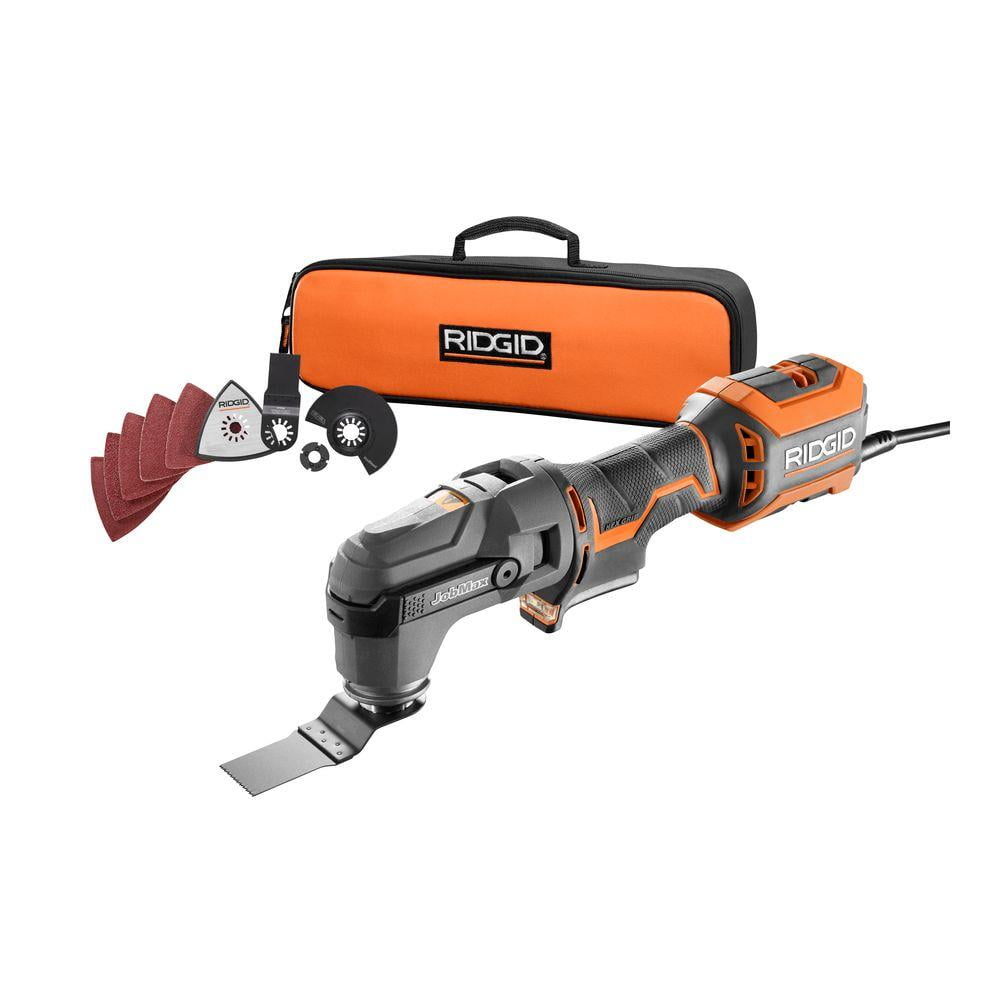
The Ridgid multi tool is a compact and ergonomic power tool designed for precise, detail-oriented tasks such as cutting, sanding, grinding, and scraping. Its modular design typically includes a quick-change accessory system that allows for seamless transitioning between different attachments and applications. The multi tool is characterized by its oscillating motion, which enables it to perform a diverse array of tasks with exceptional precision and control.
Level 2: Applications and Versatility
The versatility of the Ridgid multi tool makes it suitable for a wide range of applications, including woodworking, remodeling, flooring, plumbing, and overall general construction. The ability to use various attachments, such as cutting blades, sanding pads, and scraping accessories, enables users to tackle intricate projects and address different materials, including wood, metal, plastic, and drywall. The multi tool’s adaptability and precision make it an indispensable asset for professionals and hobbyists alike.

Part 2: Features and Technology of the Ridgid Multi Tool
Level 1: Motor Power and Speed Control
The performance of the Ridgid multi tool is driven by a powerful motor that provides robust oscillating action and efficient operation. Additionally, advanced models feature variable speed control, allowing users to adjust the oscillation rate to suit the specific application or material being worked on. This feature enhances precision and versatility, ensuring optimal results across different tasks and projects.
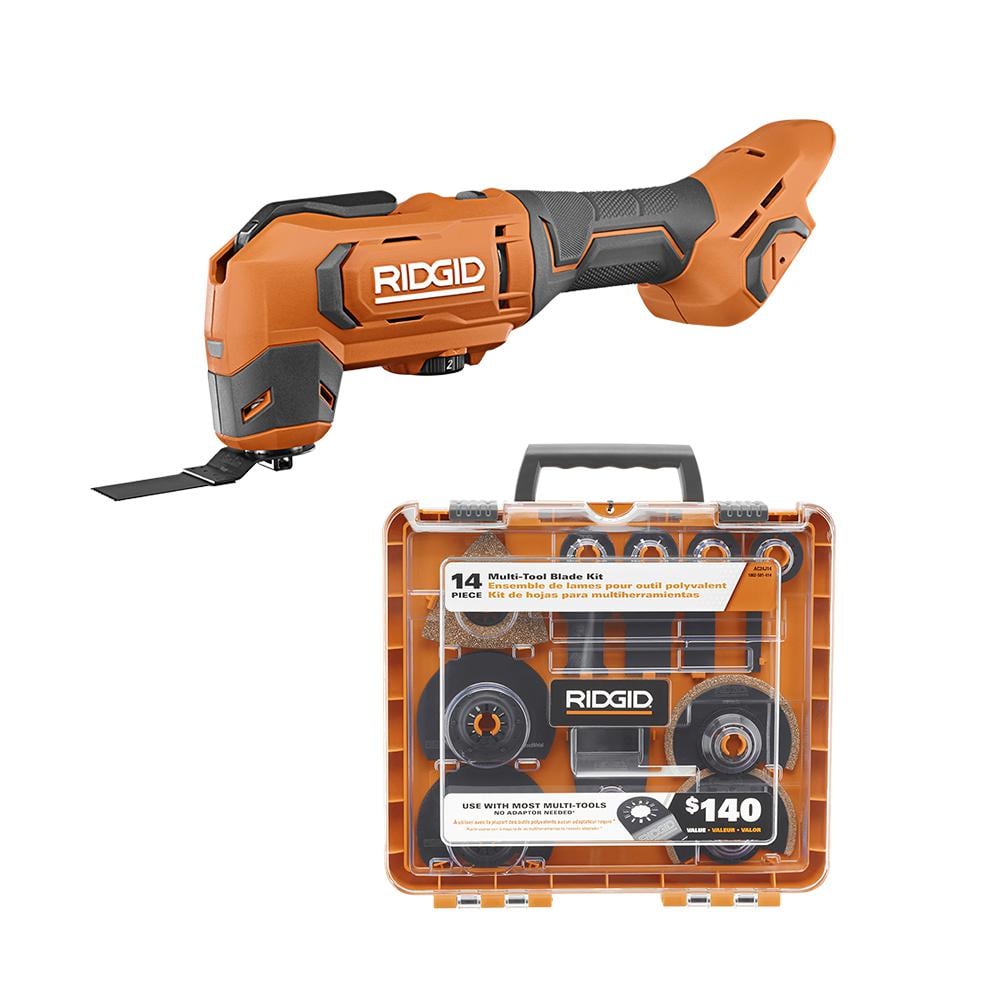
Level 2: Quick-Change Accessory System
A hallmark of the Ridgid multi tool is its quick-change accessory system, which enables users to swiftly swap out attachments without the need for additional tools. This design streamlines workflow, minimizing downtime and enhancing productivity. The seamless transition between cutting, sanding, and scraping accessories empowers users to address diverse project requirements without interruption.
Part 3: Benefits of the Ridgid Multi Tool
Level 1: Precision and Control
The oscillating motion of the Ridgid multi tool provides exceptional precision and control, allowing users to navigate intricate cuts, detailed sanding, and delicate material removal with ease. The ability to maneuver the tool in tight spaces and confined areas makes it well-suited for tasks that demand finesse and accuracy, such as trim work, fitting, and intricate detail finishing.
Level 2: Reduced Vibration and Noise
The ergonomic design of the Ridgid multi tool, coupled with its advanced engineering, minimizes vibration and noise during operation. This not only enhances user comfort and reduces fatigue but also contributes to a quieter and more controlled working environment. The reduced vibration also helps to maintain stability and accuracy while working with delicate materials.
Part 4: Selecting the Right Ridgid Multi Tool for Your Needs
Level 1: Consideration of Power Source
Ridgid multi tools are available in corded and cordless models, and the choice between the two depends on individual preferences and project requirements. Corded models offer consistent power output for prolonged usage, while cordless models provide portability and freedom of movement, making them ideal for on-the-go applications and remote job sites.
Level 2: Attachment Compatibility and Versatility
When selecting Ridgid multi tools, it’s essential to consider the availability of compatible attachments and accessories to meet specific project needs. The range of accessories, including cutting blades, sanding pads, and scraping attachments, enables users to effectively address diverse materials and tasks. Compatibility with universal and industry-standard accessories also ensures flexibility and accessibility.
Part 5: Maintenance and Care for the Ridgid Multi Tool
Level 1: Regular Inspection and Cleaning
To maintain the optimal performance and longevity of the tool, routine inspection and cleaning are essential. Periodically checking for debris, dust, or worn components ensures that the tool operates efficiently and safely. Cleaning the tool’s housing, airflow vents, and attachment connection points helps prevent obstructions and ensures seamless functionality.
Level 2: Lubrication and Blade Maintenance
Applying a suitable lubricant to the oscillating mechanism and components can help reduce friction and wear, prolonging the lifespan of the tool and ensuring smooth operation. Additionally, regularly inspecting and replacing worn or damaged cutting blades, sanding pads, and scraping accessories is crucial for maintaining the tool’s effectiveness and safety.
Part 6: Safety Considerations for Operating the Ridgid Multi Tool
Level 1: Personal Protective Equipment
When utilizing the Ridgid multi tool, it is crucial to wear appropriate personal protective equipment (PPE) such as safety glasses, ear protection, and dust masks to safeguard against potential hazards. These precautions help shield the eyes, ears, and respiratory system from airborne particulates, debris, and noise generated during operation, ensuring a safe and healthy work environment.
Level 2: Secure Workpiece and Stability
To prevent accidental slips, kickbacks, or loss of control while using the multi tool, it’s vital to secure the workpiece firmly in place using clamps or vices. Ensuring the stability of the material being worked on helps maintain precision and control during cutting, sanding, or scraping operations. Additionally, maintaining a secure footing and balance while operating the tool contributes to overall safety and effectiveness.
Part 7: Accessories and Add-Ons for the Ridgid Multi Tool
Level 1: Specialized Attachments for Unique Applications
In addition to standard cutting and sanding accessories, the Ridgid multi tool offers a variety of specialized attachments tailored for unique applications. These may include grout removal blades for tile work, flush-cutting blades for precision trimming, and carbide rasp attachments for aggressive material removal. The availability of specialized accessories extends the versatility and functionality of the multi tool, enabling users to address a wider array of tasks.
Level 2: Workstation and Dust Collection Attachments
Workstation accessories such as precision guides and depth stops can enhance the accuracy and repeatability of cutting and sanding operations, especially for detailed or repetitive tasks. Furthermore, incorporating dust collection attachments or vacuum adapters helps maintain a clean work environment by capturing debris and airborne particles, leading to better visibility and reduced cleanup efforts.
Part 8: Innovative Features in Ridgid Multi Tool Models
Level 1: Brushless Motor Technology
Some advanced Ridgid multi tools models feature brushless motor technology, delivering increased efficiency, extended runtime, and reduced maintenance requirements. Brushless motors offer enhanced power and performance, which contributes to prolonged tool longevity and optimal operation across a variety of applications.
Level 2: Intelligent Speed Control and Feedback Systems
Certain Ridgid multi tool variants integrate intelligent speed control and feedback systems that automatically adjust the oscillation speed based on the load and material density. This technology optimizes cutting and sanding performance while minimizing user effort, ensuring consistent results and preventing damage to workpieces.
Conclusion
The Ridgid multi tool has emerged as a versatile and indispensable tool for professionals and DIY enthusiasts, offering precision, adaptability, and efficiency across a wide range of applications. With its multifunctional capabilities, advanced features, and ergonomic design, the tool has redefined the approach to detail-oriented tasks, empowering users to achieve exceptional results with control and accuracy. By understanding the features, applications, and maintenance considerations associated with the multi tool, users can harness its diverse capabilities and elevate their productivity and craftsmanship across various projects and industries. As a valuable asset in the tool arsenal, the Ridgid multi tool continues to inspire innovation and creativity while setting new standards for precision and efficiency.