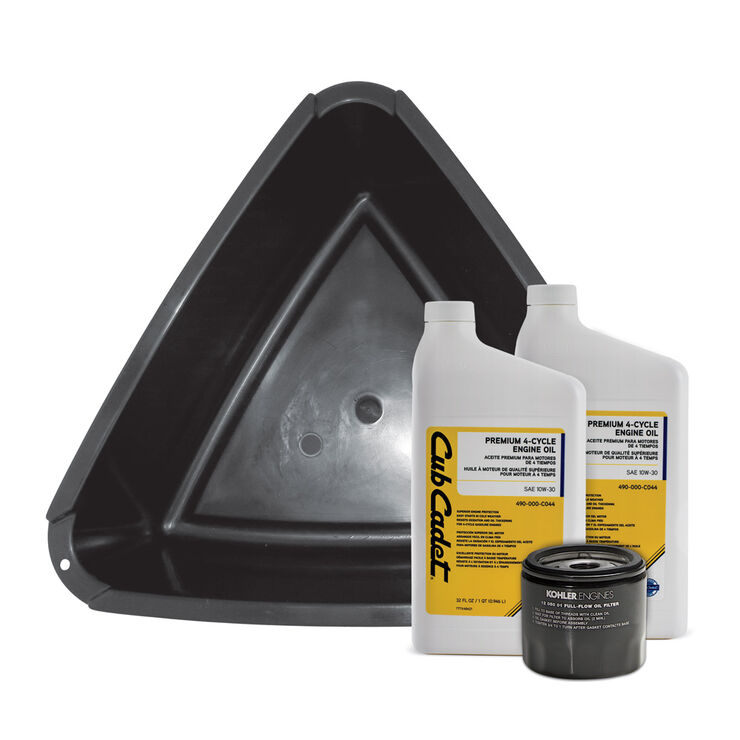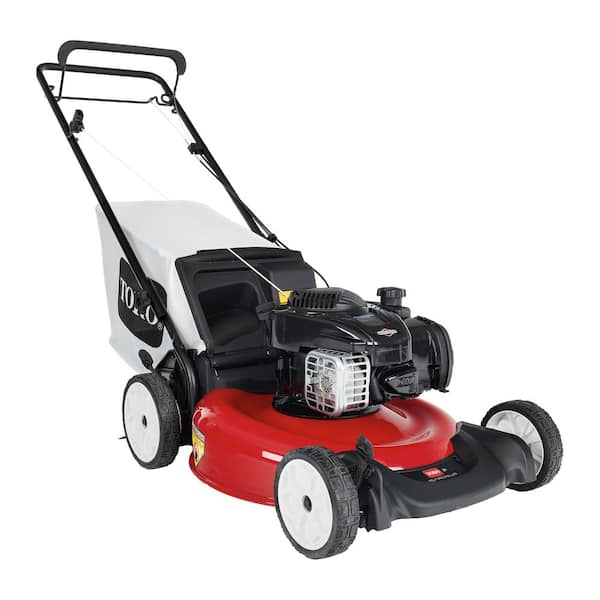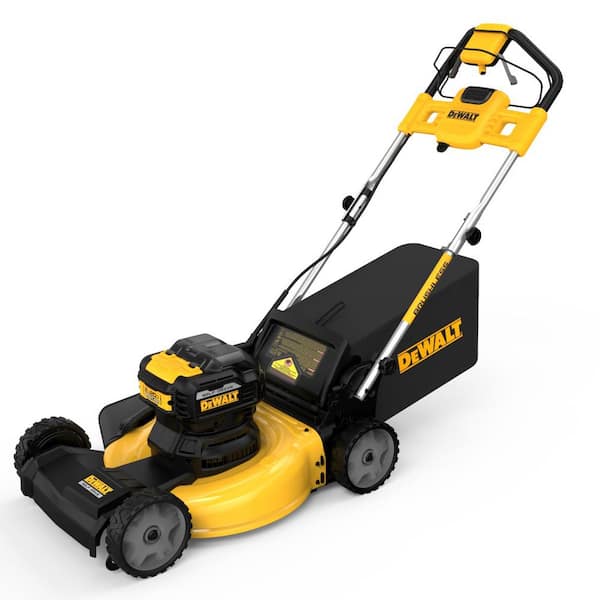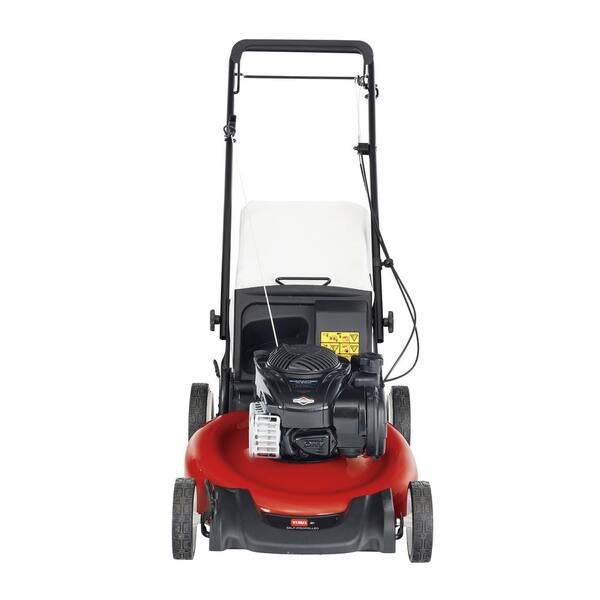
My Lawn Mower Won’t Stay Running? Fixing a Lawn Mower
Identifying Common Lawn Mower Issues
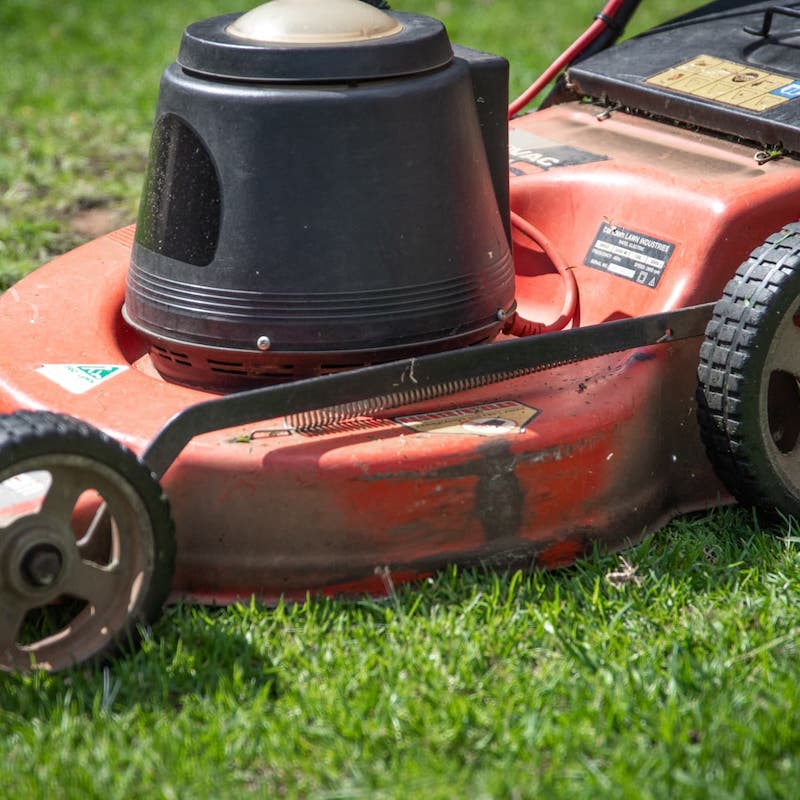
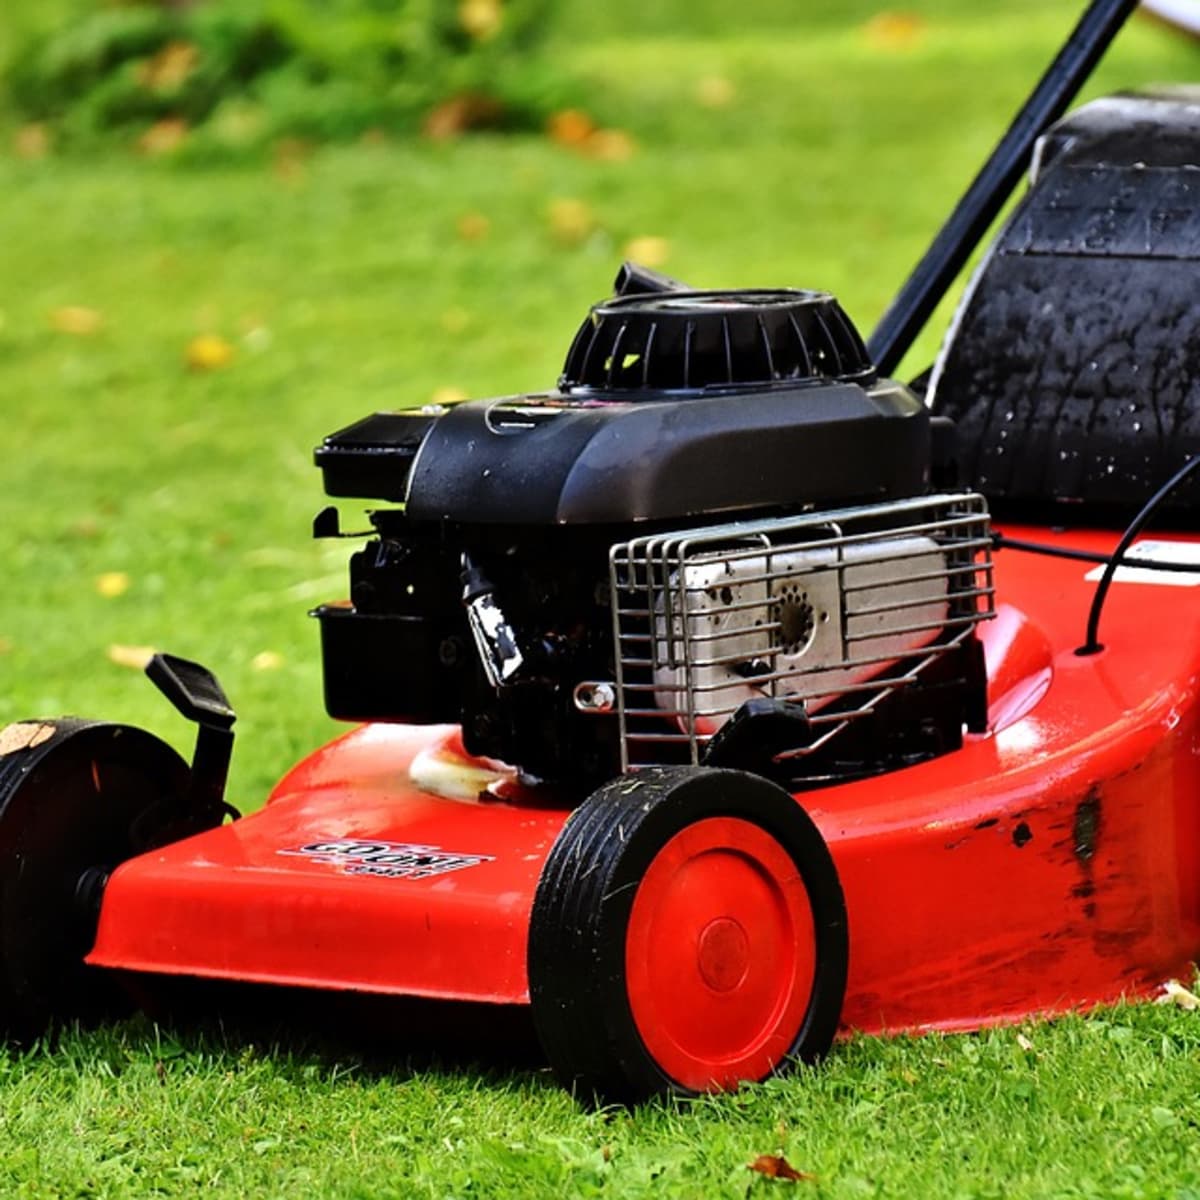
Why my lawn mower won’t stay running? When your lawn mower won’t stay running, several issues could be at fault. Here’s how to pinpoint the problem and get back to grooming your lawn with ease.
Inspecting Fuel Quality and Replacement Needs
Start by examining the fuel. Old or contaminated fuel is often to blame for a lawn mower that doesn’t stay running. Drain old fuel and refill with fresh gas to solve this common issue.
Checking the Air Filter for Contamination
A dirty air filter can choke the engine, preventing it from running smoothly. Inspecting and replacing a contaminated air filter can quickly fix this problem.
Troubleshooting the Carburetor for Clogs and Dirt
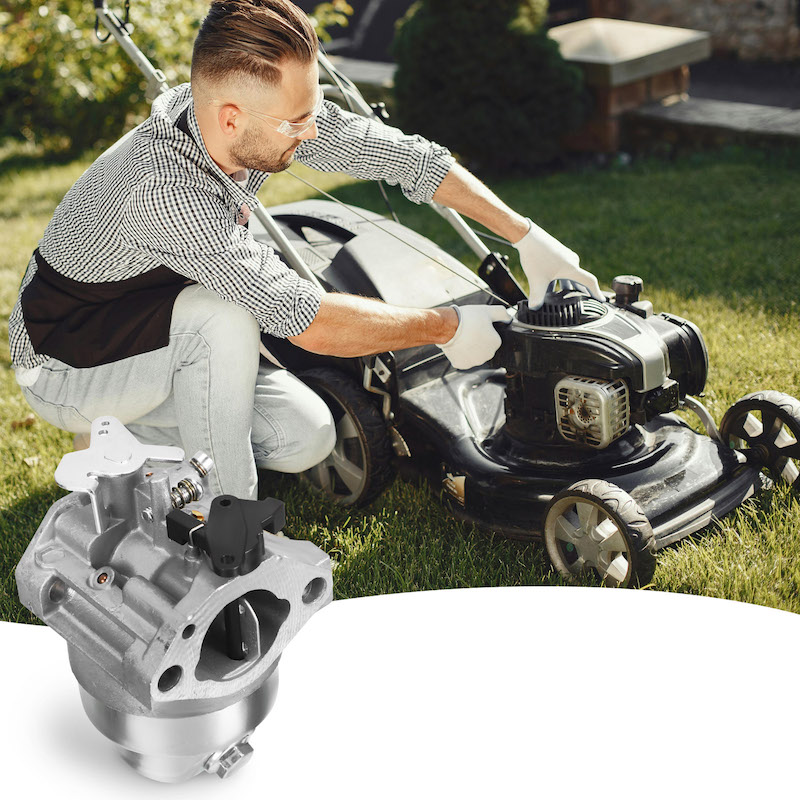
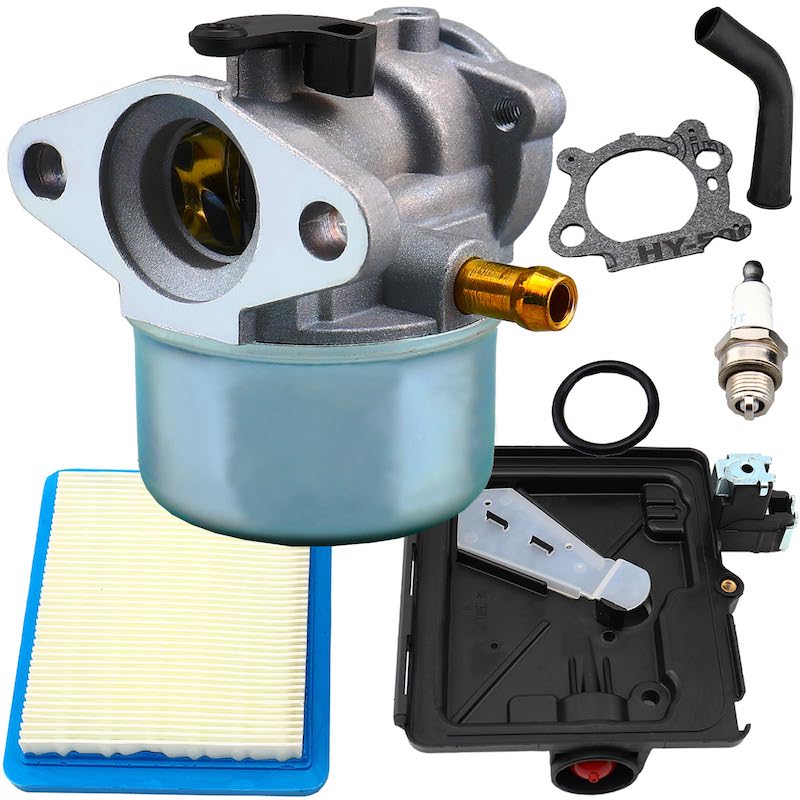
A clogged carburetor is a surefire way to trouble. If you’re up for it, clean the carburetor’s ports and replace the fuel filter to enhance performance.
Understanding the Role of the Choke in Fuel Mixture
If the choke is incorrectly set, it can flood the engine with fuel, causing it to stall. Check the choke setting and adjust it to ensure the right fuel mixture.
Assessing the Spark Plug for Faults and Misfires
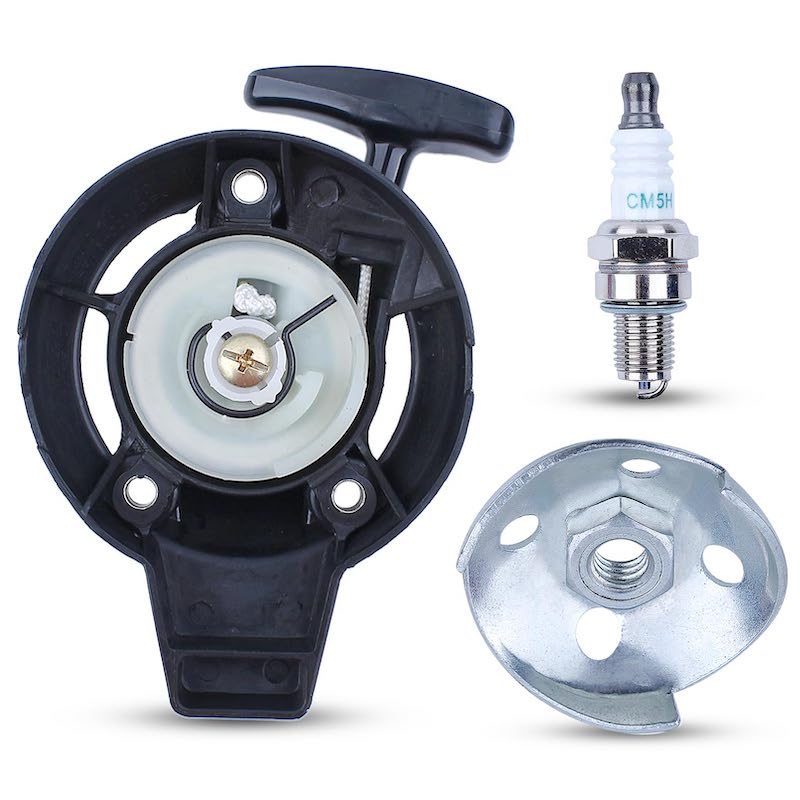
A faulty spark plug may misfire, leading to engine cuts. Inspect the spark plug and clean or replace it if necessary to keep your lawn mower running correctly.
Step-by-Step Lawn Mower Troubleshooting
When your lawn mower won’t stay running, there’s a process to pinpoint and fix the issue.
How to Safely Clean or Replace the Air Filter
Start with the air filter. Turn off the mower and disconnect the spark plug. Locate the air filter and remove it. Check for dirt or oil and decide if cleaning — for foam filters — or replacing is needed. If dirty, replace immediately. Remember, after 25 hours of use, replacement is best.
Carburetor Maintenance and Cleaning Tips
Next, inspect the carburetor. Ensure the engine is off before you begin. Remove the carburetor bowl and clean any debris. Use a carburetor-specific cleaner — not water — to spray the ports and bowl. Reconnect all parts securely after cleaning. If issues persist, consider replacing the fuel filter or consulting a specialist.
Handling Fuel Mixture Problems with the Choke
Check the choke if the engine floods. Make sure the mower is cold, then set the choke lever to the ‘Open’ position. If your lawn mower has a manual choke, adjust it to prevent a too-rich fuel mixture. If the choke is faulty, clean with spray or replace if cleaning doesn’t solve the problem.
Replacing and Servicing the Spark Plug
Finally, examine the spark plug. Remove the plug using a wrench and clean off debris with a brush. If you find a dark residue, it’s time for a new spark plug. Install the new plug, reconnect the cable, and test your lawn mower. Regularly servicing your spark plug can prevent many start-up issues.
When to Seek Professional Lawn Mower Repair
Dealing with a problematic lawn mower can be frustrating. While many issues can be handled with DIY steps, there are signs that suggest when it’s time to call a specialist. If you’ve taken all the troubleshooting steps – from checking the fuel to cleaning the spark plug – and your lawn mower still won’t stay running, a professional’s help may be necessary. Other signs include strange noises, smoke, or if the mower vibrates excessively during use. Frequent engine stalling despite proper maintenance is another indication that a technician should take a look. A professional can diagnose issues that aren’t easily visible and can get your equipment back to peak condition efficiently.
Signs That Indicate a Need for a Specialist
If you witness the following signs, consider hiring a repair specialist:
- The engine starts, then dies repeatedly even with fresh fuel.
- The lawn mower produces smoke or makes unusual sounds.
- The mower vibrates more than usual, indicating possible internal issues.
- You’ve replaced parts like the spark plug or air filter, but the problem persists.
- The troubleshooting tips you’ve tried haven’t had any effect.
Comparing Quotes from Repair Pros
Once you’ve decided to seek professional help, it’s wise to compare quotes from different repair pros. Look for specialists with good reviews and reasonable rates. Ask for detailed quotes that include labor and parts costs. Ensure they have experience with your mower’s brand and model. This can save you money and ensure that you receive quality service.
The Cost-Effectiveness of Repair Versus Replacement
Weigh the cost of repair against buying a new lawn mower. Consider age, model, and overall condition. If the repairs are half the cost of a new mower, it may be more cost-effective to replace it. However, if it’s a minor issue, or if your mower is high-end and just out of warranty, repairing it might be the best option. A specialist can provide you with a cost estimate that can help in making the final decision.
Preventative Maintenance for Lawn Mowers
Preventative maintenance is key to ensuring your lawn mower functions year after year. Regular attention can avoid many common issues.
Routine Checks and Cleaning for Optimal Performance
To keep your lawn mower running smoothly, perform routine checks and clean it often. Make sure to inspect the oil level and replace it if it looks dirty. Check the air filter and clean or change it as needed. Keep the blades sharp and balanced for a consistent cut.
Understanding Your Lawn Mower’s Maintenance Schedule
Each lawn mower comes with a manufacturer’s guidance on maintenance. Follow the schedule for tasks like oil changes, blade sharpening, and filter replacements. This will keep your lawn mower in top condition. Stick to these guidelines for the best results.
Tips for Storing Your Lawn Mower Off-Season
Proper off-season storage protects your lawn mower. Clean the mower thoroughly before storing. Drain the fuel or add a stabilizer to prevent damage. Store the mower in a dry, covered area to protect it from weather and rust.
DIY Fixes Versus Professional Services
When dealing with lawn mower issues, it’s critical to know when you can fix them yourself or when to call an expert. Understanding the problem is the first step. If it’s simple, a DIY approach might save you time and money. But, remember, complex repairs need a professional’s touch.
Evaluating When to DIY and When to Call an Expert
Start by assessing the situation. Can you identify the problem accurately? Are you comfortable with the tools required? If yes, you might handle a DIY repair. Yet, if the issue remains after your attempts, it’s likely time to seek an expert.
The Risks and Rewards of Self-Repair
DIY repairs can be gratifying and less expensive. But, they come with risks. Mistakes can lead to more damage or require costly fixes later. Weigh the potential savings against these risks before diving in.
Finding Quality Lawn Mower Repair Services Near You
If you opt for a professional, finding a reliable service is key. Search online for highly-rated lawn mower repair services in your area. Look for providers with strong customer reviews and clear pricing. This way, you get quality service and value for money.
Additional Resources for Lawn Mower Owners
Owning a lawn mower comes with responsibilities. Knowing where to turn for help can make maintenance easier. Below are resources that lawn mower owners can use to tackle common problems and conduct proper upkeep.
Forums and Online Communities for Troubleshooting
Online forums and communities are great places to seek advice. On these platforms, you can find other lawn mower owners and experts who share their experiences. They can offer practical tips for fixing issues.
- Lawn Mower Forum: A hub for mower owners seeking repair tips.
- Reddit’s r/lawnmowers: A subreddit for discussions and advice.
- GardenWeb’s Lawn Care forum: Provides insights into lawn mower care.
These sites allow you to ask questions and find solutions that others have tested and approved.
Recommended Tools and Products for Maintenance
The right tools turn tough jobs into easy fixes. Here are some essentials for lawn mower maintenance:
- Carburetor cleaner: Keeps the carburetor free from gunk.
- Spark plug wrench: Essential for changing spark plugs.
- Air filter: Get extras to switch out dirty ones as needed.
- Fuel stabilizer: Helps maintain fuel quality during storage.
Stocking up on these will help you maintain your mower’s health.
Learning from Manuals and Manufacturer Guides
Manuals and guides are the first places to check for help. They include:
- Model-specific instructions: Provide tailored advice for your mower.
- Troubleshooting sections: Help diagnose and fix common problems.
- Maintenance schedules: Tell you when to service each part of your mower.
Always refer to the manufacturer’s guide for the most accurate information for your specific lawn mower model.
By using these resources and keeping your tools handy, you’ll be equipped to handle lawn mower challenges with confidence. Remember, for those persistent issues, don’t hesitate to seek professional help.

Too Much Oil in Lawn Mower: Fixing an Oil Compartment
Identifying the Overfill Issue in Lawn Mower Oil Compartments
Identifying that you’ve put too much oil in lawn mower is the first critical step. There are several signs to watch for that suggest an overfilled oil compartment. Look for oil leaks on the ground where your mower is stored. Inspect the oil compartment. If the oil reaches above the maximum fill line, you have too much. Another sign is excessive smoke when starting the engine or uneven engine running.
To confirm, you’ll want to check the oil level using the dipstick. First, make sure your lawn mower is on a flat surface. Remove the dipstick and wipe it clean with a cloth. Then, insert it back into the tube, pull it out again, and check the level. The oil should be within the marks or cross-hatched area on the dipstick.
If the oil is above the maximum mark, it’s time to take action. Too much oil can cause significant damage to your lawn mower’s engine. It may lead to a build-up of pressure, oil leaks, or even engine failure. Taking swift action to drain the excess oil can save you from costly repairs.
Always adhere to the manufacturer’s guidelines for oil capacity. Review your lawn mower’s user manual if you are uncertain about the correct oil amount. This manual is your best resource for proper maintenance practices, including oil management.
In the following sections, you will learn how to safely prepare for oil removal, the step-by-step draining process, and post-drain maintenance for air filters and spark plugs. Keep these tips in mind to maintain a healthy lawn mower and prevent overfill issues in the future.
Safety First: Preparing to Address Lawn Mower Oil Overfill
When dealing with too much oil in a lawn mower, safety is your top priority. Follow these steps to protect yourself and your equipment:
- Turn Off the Mower: Make sure your lawn mower’s engine is off. Let it cool down if it was running recently.
- Disconnect the Spark Plug: Locate the spark plug before you begin. Pull the wire to disconnect it. This step prevents the lawn mower from starting accidentally.
- Wear Protective Gear: Put on gloves to keep your hands clean and protect them from oil. Use eye protection to avoid oil splashes.
- Prepare Your Work Area: Select an open and well-ventilated space. Have rags or paper towels handy for spills.
- Gather Necessary Tools: Make sure to have the correct tools on hand. You need a pan to catch the oil and a wrench for the spark plug.
- Stabilize Your Lawn Mower: Ensure the lawn mower is on a flat, stable surface to check oil levels accurately.
By taking these precautions, you maintain a safe environment. This reduces risk while correcting the oil overfill problem.
Step-By-Step Process to Drain Excess Oil
Once you’ve identified too much oil in your lawn mower, the next action is to drain the excess. Doing so protects the engine and optimizes performance. Follow these simple, step-by-step instructions to safely drain the extra oil.
- Position Your Mower: Begin by putting your lawn mower on a flat, stable surface. Ensure the area is well-ventilated to avoid inhaling fumes.
- Remove Oil Cap: Find the oil cap and take it off. You’ll need access to the oil compartment to proceed.
- Tip the Mower: Carefully tip the mower to the side. Use a pan to catch the oil. Let the oil slowly drain until it reaches the proper level. Always tip the mower sideways or backwards but never to the front.
- Refit the Cap: After draining, place the mower back in its upright position. Double-check the oil level using the dipstick and refit the cap securely.
Remember to perform this process slowly. Let the oil flow out at a steady, manageable pace to avoid any spillage or mess. If you rush, you might miss the right oil level or create a spill. With patience, you can finish this task successfully and with little to no inconvenience.
After draining excess oil, dispose of the old oil properly. Ensure you are following local regulations for oil disposal to maintain environmental safety.
Next, we will move on to checking and replacing the air filter, an important step especially after dealing with too much oil in your lawn mower.
Checking and Replacing the Air Filter Post-Overfill
Correcting too much oil in your lawn mower includes checking the air filter. An overfilled oil compartment might leak oil into the air filter. If this happens, your mower may not start or may run poorly. Inspect the air filter for any signs of oil saturation. A saturated filter needs replacement to maintain engine health.
- Locate the Air Filter: Find the airbox on the side of the engine. This holds the air filter.
- Open the Airbox: Remove the airbox cover. You may need to unclip or unscrew it, based on your mower’s design.
- Examine the Filter: Look at the filter. Is it wet with oil? If yes, then it’s time for a new one.
- Remove the Filter: Carefully take the filter out. If it’s dirty or oily, don’t clean it. Just replace it.
- Clean the Airbox: Before putting in a new filter, wipe the inside of the airbox. Use a dry cloth to remove any remaining oil.
- Install a New Air Filter: Place the new filter in the airbox. Make sure it fits snugly.
- Close the Airbox: Put the cover back on. Secure it with clips or screws, whichever is needed.
A clean airflow is vital for a mower’s performance. Don’t skip this step after you handle too much oil in your lawn mower. Always use a filter recommended by your lawn mower’s manufacturer. This ensures the best fit and function. If you’re not sure about the process, consult the user manual. It can guide you through replacing the air filter step by step.
Assessing and Cleaning the Spark Plug
After you have dealt with too much oil in a lawn mower, it’s crucial to inspect the spark plug. Oil may have fouled the spark plug if the overfill was significant. A soiled spark plug can hinder your lawn mower’s ability to start and run smoothly.
- Locate the Spark Plug: Find the spark plug, usually at the front of the engine.
- Inspect the Spark Plug: Look for signs of oil on the electrode. A dirty spark plug needs attention.
- Remove and Clean the Spark Plug: Use a socket wrench or a spark plug tool to remove the spark plug. Turn it to the left and take it out.
- Clean the Electrode: Wipe off any oil from the spark plug with a clean cloth. Check the electrode gap as well.
- Check the Pull Rope: If the rope doesn’t pull freely, remove the spark plug and try again.
- Reinstall the Spark Plug: Screw the clean spark plug back in place. Tighten it to secure.
It’s a good practice to start the mower and check for smooth operation after cleaning the spark plug. Initially, you may notice more smoke as residual oil burns off, but this should clear up shortly.
If the mower still struggles to start or runs poorly, consider replacing the spark plug with a new one. Fresh spark plugs can sometimes make all the difference in engine performance. Plus, they are an affordable component to replace. Remember to dispose of the old spark plug responsibly.
Addressing the spark plug is an integral part of resolving issues caused by too much oil in your lawn mower. Keep tools handy for routine checks and replacements as part of your lawn mower’s maintenance regime.
Starting Your Lawn Mower After Correcting Oil Levels
After addressing the too much oil in your lawn mower, you’re ready to restart it. Here is a checklist to ensure it’s safe to turn your lawn mower back on:
- Reconnect the Spark Plug: Make sure the spark plug wire is secure. This action is necessary before starting the engine.
- Check the Oil Level Again: Use the dipstick to verify the oil level is correct. It should be within the recommended marks.
- Inspect the Work Area: Clear away tools and the oil drain pan. This keeps the starting area safe.
- Start the Mower: Turn the ignition. The engine might smoke initially as it burns off any remaining oil residue.
- Monitor the Engine: Listen for smooth running. Smoke should decrease as the engine warms up.
- Allow It to Run: Let the mower run for a few minutes. This helps to stabilize it after oil level corrections.
In case there’s trouble starting, check the spark plug and air filter again. They may require a new replacement. If issues persist, consult a professional for further assistance. Remember to always keep safety in mind when dealing with lawn mower repairs.
Preventative Measures for Proper Lawn Mower Oil Maintenance
Proper maintenance is key to preventing too much oil in your lawn mower. Here’s what you should do:
- Read the User Manual: Always start here. It will guide you through your mower’s oil requirements.
- Use the Right Oil: Select the oil type that fits your mower’s specifications. Don’t guess, check the manual.
- Measure the Oil: Pour slowly. Use a funnel and measure the oil before adding. Checking often avoids overfill.
- Check Regularly: Before each use, inspect the oil level. It’s quick and prevents problems.
- Clear Area Before Filling: Make sure there’s nothing that can contaminate the oil. Clean the area well.
- Avoid Overfills: Add little by little. It’s easier to add more than to remove excess oil.
- Use a Dipstick: It’s your best tool for accuracy. Wipe it clean, insert, remove, and check.
- Service Your Mower: Have it serviced regularly. A professional can spot issues before they worsen.
By following these simple steps, you can ensure your lawn mower’s oil level stays optimal, thus protecting your equipment from the risks associated with overfilling.
Troubleshooting Post-Drain Issues: When Your Lawn Mower Won’t Start
After you address too much oil in your lawn mower, you may still face issues. Your lawn mower might refuse to start. Here are steps to troubleshoot and resolve post-drain start-up problems.
- Re-Check the Oil Level: First, verify the oil level is correct using the dipstick. Make sure it’s within the designated marks.
- Examine Spark Plug Connection: Ensure the spark plug wire is firmly connected. A loose wire can stop the mower from starting.
- Look at the Air Filter: If the engine won’t start, the air filter could be saturated with oil. Replace it if needed.
- Test Ignition System: An issue with the ignition system can cause starting problems. Check if everything is in place and functioning.
- Clean Fuel Line: Sometimes, a clogged fuel line can be the culprit. Make sure it’s clean and clear.
- Consult the Manual: Your lawn mower’s manual may have specific troubleshooting tips. Use it as a reference.
- Seek Professional Help: If you have tried the above and still have issues, it’s time to call a professional. Get expert advice to fix the problem.
Always remember, dealing with too much oil in lawn mower is fixable. But if your mower won’t start post-drain, do not ignore it. Taking care of these issues promptly will help you maintain a functional and efficient lawn mower.
Easy Lawn Care: What Is Self Propelled Lawn Mower
Introduction to Self-Propelled Lawn Mowers
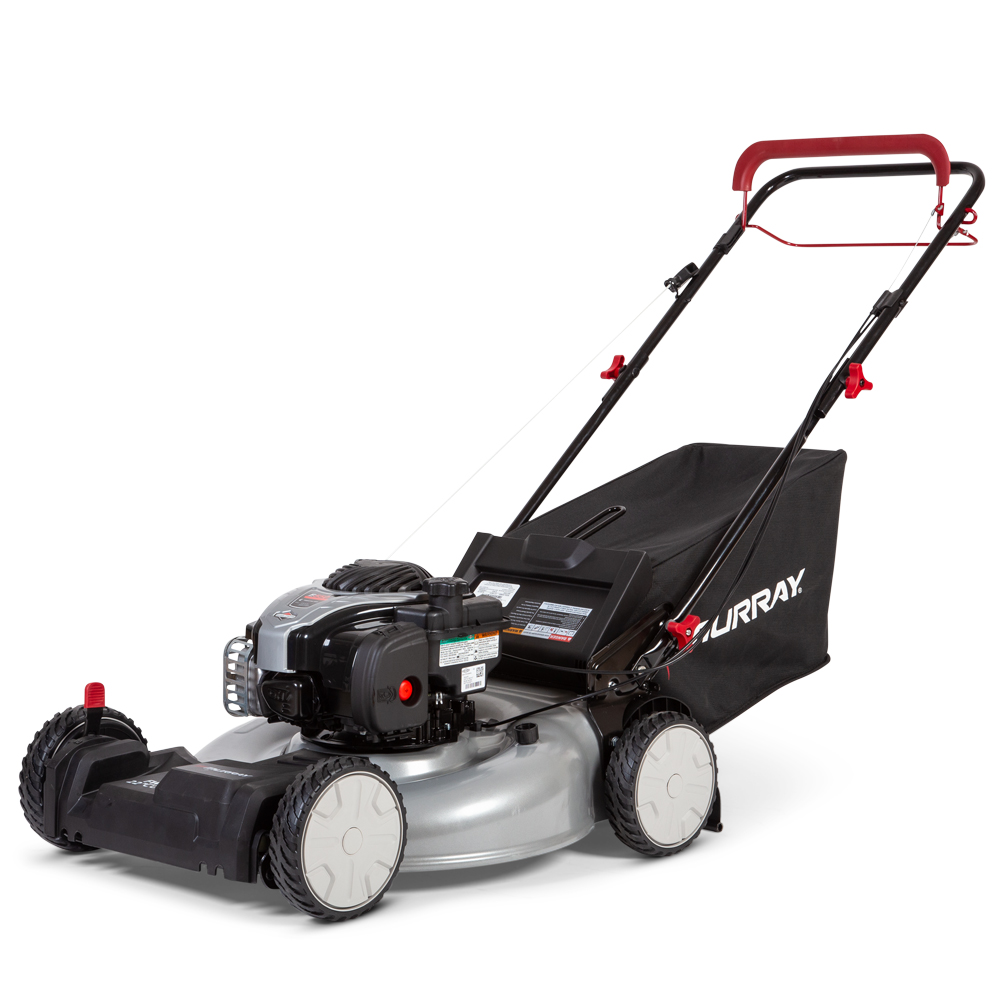
What is self propelled lawn mower? Self-propelled lawn mowers are a game-changer for yard maintenance. They take the hard work out of mowing by powering themselves forward. This type of mower is perfect for anyone who finds pushing a traditional mower strenuous. With an engine or electric motor, these mowers are ideal for handling large lawns or hilly terrains.
With self-propulsion, you simply guide the mower, rather than pushing it. This feature is handy for large areas of grass, long mowing durations, and tackling inclines. It’s also great for those who want to avoid the physical strain that push mowers demand. And if your mower is heavier, you’ll appreciate how self-propulsion makes the job easier.
Different models and makes provide a variety of self-propelled options. From simple single-speed models to variable speed units, there’s a mower for every lawn type. Some operate on petrol, while others are battery-powered or electric. However, electric models can be limited by cord length.
In essence, what is a self-propelled lawn mower? It’s a savvy investment for a more effortless and efficient lawn mowing experience. Now, let’s dive into the advantages and the specifics that make self-propelled mowers a top choice for homeowners and professionals alike.
Advantages of Using Self-Propelled Lawn Mowers
Self-propelled lawn mowers offer multiple benefits over traditional push mowers. Ease of use is the primary advantage; these mowers roll forward automatically, reducing the physical effort you need to exert. Particularly in large lawns or areas with slopes, a self-propelled mower makes the task significantly less tiring.
The self-propelled feature is great for those with physical limitations, as it lessens the strain on the body. Whether it’s due to age, injury, or general fitness levels, users can maintain their lawns without the intense labor associated with push mowers.
Another advantage is speed and efficiency. Self-propelled lawn mowers often complete the job faster than push mowers. This is because their consistent speed and power offer a continual and steady mowing pace, cutting the grass more uniformly.
Self-propelled mowers also excel in handling tough grass and uneven terrain. Their built-in drive system easily powers through thick grass, weeds, and overgrowth. Hills and inclines, which can be challenging with a push mower, become manageable with self-propulsion.
Moreover, self-propelled lawn mowers can lead to better lawn health. They provide a smoother cut with less effort, reducing the chances of damaging the lawn by uneven mowing or scalping due to user fatigue.
In summary, self-propelled lawn mowers are beneficial for their ease of use, user-friendliness, speed, effectiveness on varied terrains, and contribution to lawn health and aesthetics.
Types of Self-Propelled Lawn Mowers
Choosing the right self-propelled lawn mower can be perplexing. There are diverse types to suit different lawns and preferences.
Single Speed vs. Variable Speed Drives
When it comes to self-propelled mowers, the drive speed plays a pivotal role.
Single Speed Drives mean your mower moves at a constant speed. These are less complex and therefore, often more affordable. They work well for open spaces with few obstacles.
Variable Speed Drives offer more control. You can adjust the mower’s speed to suit your walking pace and lawn conditions. They excel in gardens with intricate borders or varied terrains.
Choose single speed if your mowing path is clear and straight. Pick variable speed for a tailored mowing experience.
Front-Wheel vs. Rear-Wheel Drive Systems
The position of the drive wheels affects how a mower performs on different terrains.
Front-Wheel Drive mowers are ideal for level lawns. They are easier to turn around corners and cost less than rear-wheel drives.
Rear-Wheel Drive mowers offer more traction on slopes. They push the mower forward with greater power, making them suitable for hilly terrains.
Select a front-wheel system for flat, simple lawns and rear-wheel for more challenging landscapes.
How Self-Propulsion Eases Lawn Care on Various Terrains
The drive in a self-propelled lawn mower is a key feature on varied terrains. It allows the mower to adjust its force when faced with hills, slopes, and uneven ground. This means less struggle for the user and a more even cut across the lawn.
Self-propulsion is particularly valuable on inclines. Without it, users must push harder, which can lead to uneven cutting. With this feature, the mower maintains a steady rate, ensuring consistent grass height.
On level ground, the benefit lies in simplicity and speed. The mower propels itself, requiring only guidance from the user. This is less taxing, making mowing large, flat areas much quicker and enjoyable.
For those with mixed terrain lawns, self-propulsion offers a clear advantage. It adapts to different conditions, providing ease and efficiency no matter the landscape. Whether the grass is thick or the terrain is rough, the self-propelled mower handles it with ease.
Navigating around obstacles is also simplified. With drive control mechanisms, users can slow down or speed up as needed. This flexibility allows for precision mowing around flower beds, pathways, and other garden features.
Overall, the self-propulsion feature suits various landscapes, from flat and effortless stretches to challenging hills and uneven areas. It turns lawn care into a more manageable, less exhausting process, regardless of terrain diversity.
Key Features to Look for in Self-Propelled Lawn Mowers
When shopping for a self-propelled lawn mower, it’s essential to examine key features. The right amenities can enhance your mowing experience. Look for these aspects to ensure you get a lawn mower that suits your needs.
Drive Control Mechanisms
Drive control mechanisms are vital for handling and comfort. They allow you to adjust the mower’s speed to match your pace. Some mowers have levers while others use paddles. These features let you speed up or slow down with ease. Especially for models with variable speed, control options are very useful.
Cutting Width and Deck Size
The mower’s cutting width and deck size determine how much grass it can cut at once. A wider deck covers more ground in less time. This means fewer passes and can cut your mowing time significantly. But, remember, a larger deck can make the mower harder to maneuver.
Mulching and Discharge Options
Mulching cuts grass clippings finely and redistributes them as nutrients for your lawn. Discharge options let you expel them from the mower. Some mowers even offer bagging to collect the clippings. These options provide versatility in how you handle grass waste. Choosing a mower with multiple options can make your work easier and benefit your lawn.
Maintenance Considerations for Self-Propelled Mowers
Maintaining a self-propelled lawn mower ensures it runs smoothly and lasts longer. Unlike push mowers, self-propelled ones have more complex systems due to their drive mechanisms. Keep in mind these maintenance considerations for peak performance.
Regular Engine Checks
Check the engine often, especially for petrol models. Look for loose parts or leaks. Change the oil and clean or replace the air filter as needed. These simple tasks keep engines in good shape.
Clean the Undercarriage
Grass and debris can clog the mower’s undercarriage. Use a hose to clean it out after each use. This prevents rust and wear, preserving your mower’s condition.
Inspect Drive Belts and Cables
Self-propelled mowers have drive belts and cables. Inspect them for wear or damage regularly. Replace worn parts promptly to avoid breakdowns during mowing.
Blade Sharpening
A dull blade tears grass, resulting in a poor cut. Sharpen mower blades annually for a clean, even trim. Consider having a professional sharpen the blades for best results.
Battery Care for Electric Models
If your mower is battery-powered, ensure the battery is charged and stored properly. Usually, you should charge it after each mow and store it in a cool, dry place.
Check Wheels and Adjustments
Check the wheels for damage and make sure they turn freely. Also, check the height adjustments to ensure they’re working correctly. Proper height settings are crucial for the desired grass length.
By regularly maintaining your self-propelled lawn mower, you minimize the need for costly repairs. With these tips, you can keep your mower running efficiently for years.
Cost-Benefit Analysis of Self-Propelled vs. Push Mowers
When deciding between self-propelled and push lawn mowers, a cost-benefit analysis can be very insightful. Understanding the trade-offs between these two types of mowers can guide you in making an informed purchase and choosing a mower that fits your budget and lawn care needs.
Initial Costs and Long-Term Value
- Self-propelled mowers typically cost more upfront than push mowers. However, they offer greater ease of use and quicker mowing times, which can be valuable for large or hilly lawns.
- Push mowers are generally less expensive to purchase. They are a cost-effective option for smaller, flat lawns and for those who view lawn mowing as an opportunity for exercise.
Physical Effort and Time Savings
- Self-propelled mowers reduce physical strain and potentially save time, making them a practical choice for those with larger lawns or physical limitations.
- Push mowers require more physical effort and often take longer to cover the same area, making them suitable for those who prefer an active involvement.
Maintenance and Repairs
- Self-propelled mowers, with their more complex mechanisms, may incur higher maintenance costs and potentially higher repair costs over their lifespan.
- Push mowers tend to have simpler designs, making them easier and generally cheaper to maintain and repair.
Resale Value
- Self-propelled mowers may retain a higher resale value if well-maintained, given their feature set and appeal to users looking for an easier experience.
- Push mowers, while potentially having a lower resale value, are also less of an investment loss if they need to be replaced.
It is essential to weigh these factors according to your specific lawn size, topography, and personal preference. Carefully considering the cost against the benefits will help ensure that you choose the right mower to meet your lawn care needs effectively and economically.
Best Practices for Operating a Self-Propelled Lawn Mower
Operating a self-propelled lawn mower requires some best practices for optimal use. Firstly, familiarize yourself with the mower’s controls. Know where the speed adjustment is and how to engage the drive. Start on a flat surface to get used to the mower’s pace before tackling varied terrain.
Before you mow, clear the lawn of debris. This prevents damage to the mower’s blade and ensures a smooth cut. Adjust the cutting height to match the grass type and desired lawn length. Taller grass often benefits from a higher setting.
When mowing, let the mower set the pace. Simply guide it without pushing it forward. This reduces strain on your body. Use drive control features to navigate around obstacles with ease. Slow down to turn or when approaching edges.
For hills or slopes, mow across, not up and down. This makes it safer and prevents the mower from getting away from you. Don’t forget to overlap each pass slightly. This avoids missed strips for a uniform look.
Always start with a full battery or tank to avoid interruptions. After mowing, clean the mower to keep it in good shape. Store it in a dry area to prevent corrosion and damage. Regular care and correct use will make your self-propelled lawn mower a valuable tool.
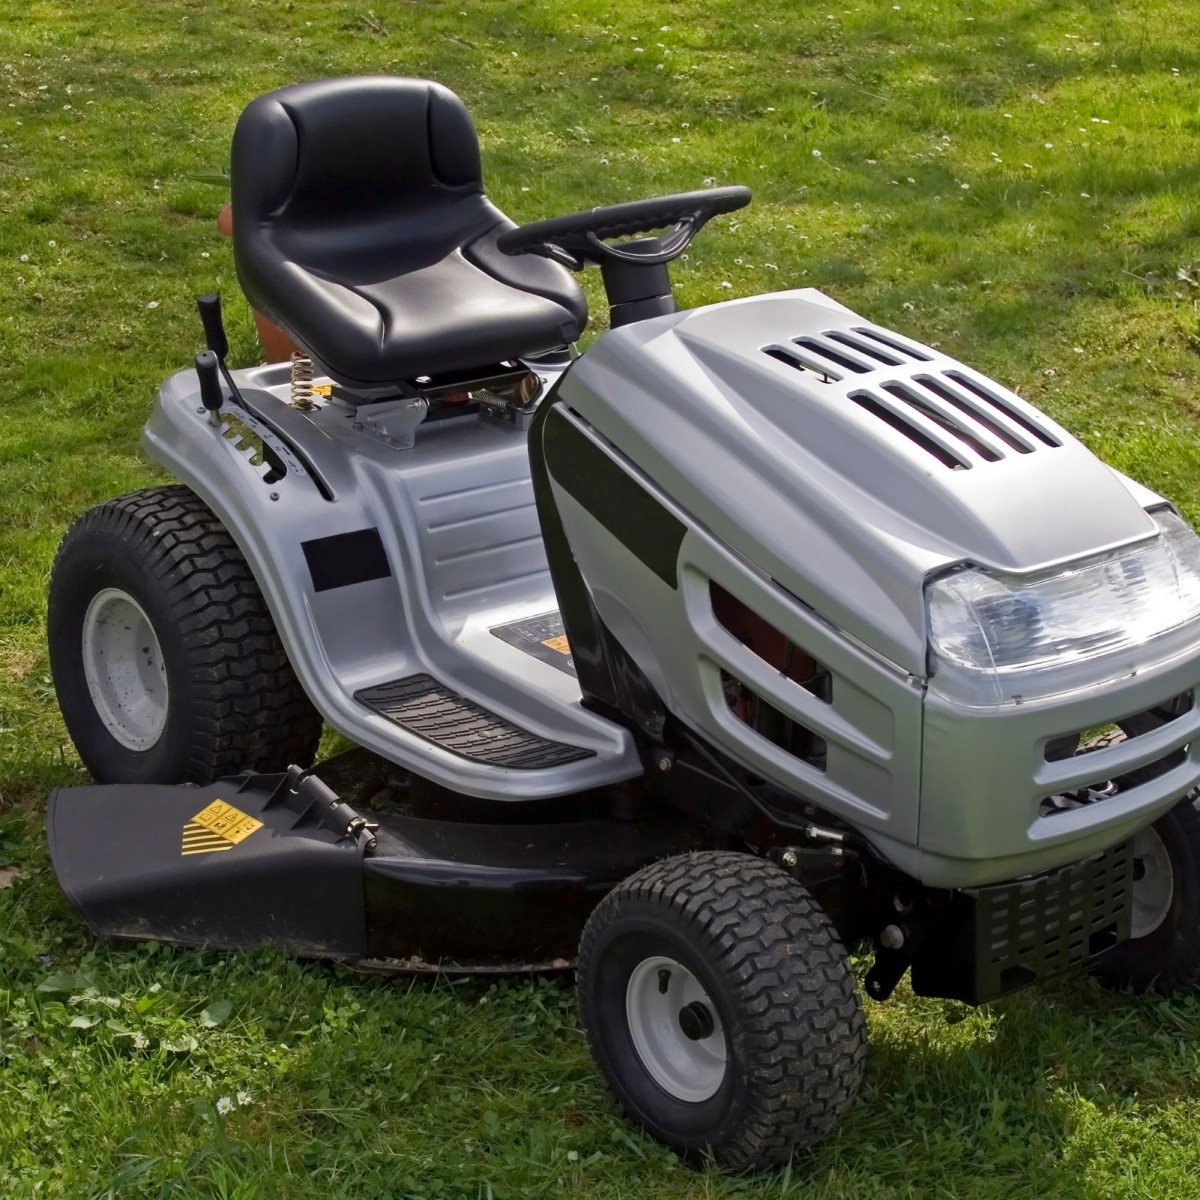
Lawn Mower Starts Then Dies Right Away: For Sudden Stalling
Common Causes of Lawn Mower Stalling
When a lawn mower starts then dies right away, several issues may be at play. A common culprit is a dirty or obstructed carburetor, which can hinder the engine’s performance. Besides the carburetor, stale fuel, a clogged fuel filter, or even a faulty spark plug can lead to stalling. It’s important to identify the root cause to effectively fix the mower.
The Impact of a Dirty Carburetor on Engine Performance
A dirty carburetor can have a serious impact on a lawn mower’s engine. If the carburetor is clogged, it disrupts the air and fuel mix needed for smooth operation. The mower may start, only to die moments later because the engine isn’t getting the proper combustion mixture.
Signs Your Carburetor May Be the Problem
If the engine stalls right after starting or shows inconsistent power, the carburetor could be the issue. Other signs include difficulty starting the engine, poor fuel efficiency, and black smoke from the exhaust. These symptoms suggest the carburetor isn’t managing the air-fuel mixture properly.
Identifying Carburetor Clogging in Lawn Mowers
Carburetor clogging is a prime reason why a lawn mower starts then dies right away. Knowing how to spot this problem saves time and frustration. Look for signs like stalling, surging, and difficulty starting.
The Role of Ethanol in Fuel-Related Issues
Ethanol in fuel can lead to clogging. It may evaporate and leave sticky residues. Over time, these can block carburetor channels and disrupt fuel flow.
Recognizing the Symptoms of Carburetor Obstruction
Watch for engine stalling, surging power, or black exhaust smoke. These signs mean the carburetor may be blocked. Difficulty starting or sudden drops in fuel efficiency are also red flags. Timely cleaning can prevent these issues and keep your mower running smoothly.
Tools Needed for Carburetor Cleaning and Maintenance
Carburetor cleaning is a vital maintenance task for a smoother lawn mower operation. Proper tools make this task easier and effective.
Essential Items for DIY Carburetor Repair
To tackle a dirty carburetor, you need a few basic tools:
- Socket and Ratchet: Match sizes with your mower’s carburetor bolts, as specified in the manual.
- Gas Siphon: Safely remove fuel before starting your cleaning process.
- Carburetor Cleaner Solution: Choose an aerosol type with a straw for precision when applying.
- Fuel Treatment Solution: Using this can prevent future clogs by keeping the gas clean.
Make sure to wear gloves to protect your hands from chemicals and dirt. Organize your tools beforehand to streamline the cleaning process. A clean workspace helps prevent losing small carburetor components during disassembly. With these tools, you’ll be prepared to take on the task of maintaining your lawn mower’s carburetor.
Step-by-Step Guide to Cleaning a Lawnmower Carburetor
Inspecting and Cleaning the Air Filter
First, check the air filter. A clogged filter can cause stalling. Clean off any dirt to improve airflow. If you see black smoke, the filter may need more cleaning. Clean or replace the filter if needed.
Checking and Maintaining Connections
Next, examine the throttle and choke connections. Clean any sticky connections. Tighten loose screws or replace if worn out. Ensure connections are secure for the engine to run smoothly.
Detailed Process for Carburetor Component Cleaning
For a deep clean, remove the carburetor. Unscrew parts carefully. Remove the primer, metering plate, and gasket. Spray cleaner inside ports to clear residue. Wipe down with a soft cloth to finish cleaning.
Reassembling and Testing the Carburetor
After cleaning, put the carburetor back together. Check diaphragms, gaskets, and plates for correct placement. Once reassembled, attach it to the engine. Replace the fuel line, and check the air filter housing. Add gas and start the mower to test. If the mower starts then dies right away, double-check your work. Rechecking connections and assembly can often fix the issue.
Preventative Maintenance to Avoid Future Stalling
Preventing your lawn mower from stalling begins with regular maintenance. Here are a few tips to help avoid future stalling issues:
Tips for Regular Carburetor Upkeep
- Clean Regularly: After every few uses, clean your carburetor to prevent residue build-up.
- Check the Air Filter: Ensure the air filter is clean for optimal performance.
- Use Fresh Fuel: Don’t let fuel sit in the tank too long; use fresh fuel and empty it when storing.
- Fuel Stabilizer: Add a fuel stabilizer to prevent the fuel from evaporating and leaving a residue.
- Inspect Gaskets: Look over the gaskets for wear and tear, replace them as needed to ensure a good seal.
By following these steps, you can extend the life of your lawn mower and reduce the chances of it stalling.
Recommendations for High-Quality Mowers to Reduce Carburetor Issues
Choose a reputable brand for your lawn mower. Companies like Briggs and Stratton provide quality options that are less likely to have carburetor issues. Investing in a mower with well-made components can save money and time on repairs in the long run.
Troubleshooting Persistent Stalling Issues
If your lawn mower starts then dies right away despite thorough cleaning, further troubleshooting is needed. Persistent issues may signal deeper mechanical problems. In such cases, it’s essential to reassess. Missing a small detail during the cleaning process can cause continued stalling.
When to Consider Carburetor Replacement
Sometimes, a carburetor is beyond repair. If cleaning and maintenance don’t resolve the stalling, replacement might be the next step. Signs that suggest the need for a new carburetor include:
- Severe corrosion or damage to the carburetor.
- Repeated clogging despite regular cleaning.
- Worn out gaskets and seals that fail even after replacement.
If these issues are present, it may be more cost-effective to install a new carburetor.
Additional Checks Before Seeking Professional Help
Before opting for professional service, perform these additional checks:
- Fuel Line: Ensure it’s clear of debris and not cracked.
- Spark Plug: Replace it if dirty or damaged.
- Oil Level: Confirm it’s at the appropriate level and not contaminated.
Conclusion
When a lawn mower starts but then dies right away, it can be frustrating. There are several common reasons why this might happen. Ensure the cutting blade is not obstructed or hitting anything. A jammed blade can cause the engine to stall.
If your mower has a primer button, make sure you’re using it correctly. Too many or too few pumps can affect starting and running. Ensure the cutting blade is not obstructed or hitting anything. A jammed blade can cause the engine to stall.
The carburetor might need adjustment or cleaning. Over time, dirt and old fuel can clog the jets and passages. If the engine is flooded (too much fuel), let it sit for a while to dry out or try clearing the flood by pulling the starter rope a few times with the throttle wide open.
A weak or broken throttle return spring can cause the engine to stall because the throttle doesn’t return to idle properly. A clogged muffler can restrict exhaust flow, leading to poor performance and stalling. Inspect and clean if necessary.
If after checking all these components the problem persists, it might be time to consult a professional mechanic. They can provide a more thorough diagnosis and repair. By systematically checking each of these areas, you should be able to identify and resolve the issue causing your lawn mower to start and then die right away. By attending to these areas, you might pinpoint the stalling cause. If the mower still fails to run correctly, it might be time to consult a professional.
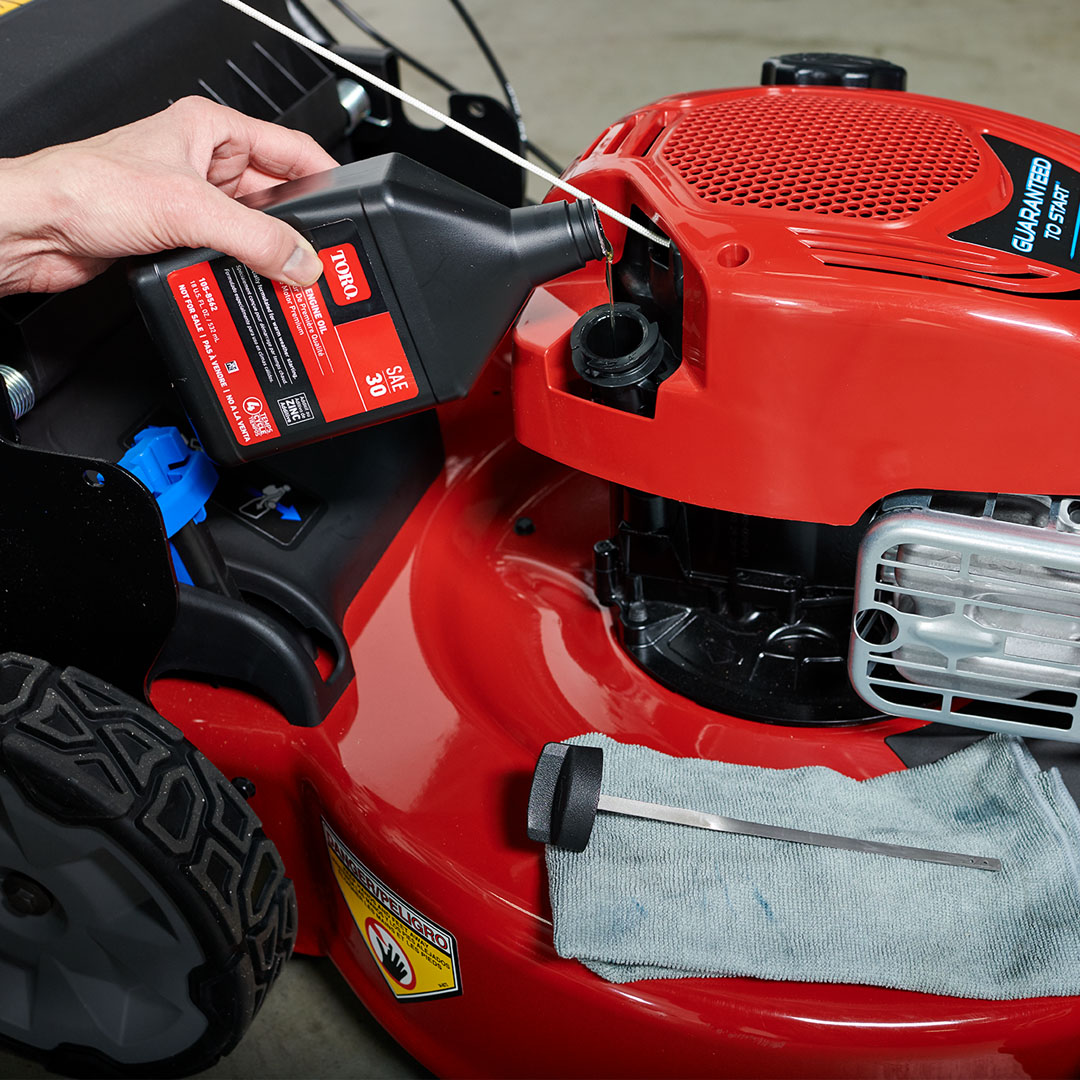
Lawn Mower Maintenance: Lawn Mower Oil Change the Right Way
Preparing for the Oil Change
Before you start the lawn mower oil change, good preparation is key. It ensures a smooth and clean process.
Warming Up the Engine
Start by warming up the engine. This helps the oil flow freely, making it easier to drain. Run the mower for a few minutes.
Cleaning the Oil Fill Area
Next, clean around the oil fill cap. Use a rag or a brush to remove any dirt, ensuring no debris gets into the engine.
Setting Up the Oil Catch Pan
Finally, place an oil catch pan next to the mower. Position it where you plan to tip the mower so it catches all the oil.
Draining the Old Oil
After preparing your lawn mower for the oil change, it’s now time to drain the old oil. This is a crucial step in ensuring your mower runs efficiently.
Removing the Oil Cap
Start by taking off the oil cap. Make sure your hands and tools are clean to prevent dirt from entering the engine.
Tipping the Mower and Draining
Gently tip the lawn mower to its side, with the oil side down. Position it so the air filter faces upward, avoiding contamination. Drain the oil into your catch pan. If there’s a drain plug underneath, use it to empty the oil more conveniently. Wait until the oil stops flowing, then set the mower back on its feet.
Replacing the Oil Filter (If Applicable)
Not all mowers have an oil filter, but if yours does, it’s vital to change it too. This keeps your mower running well.
Preparing Oil Catch for the Filter
First, put an oil catch container under the oil filter. Make sure it’s right below to catch any spills.
Unscrewing the Old Oil Filter
With the catch in place, gently unscrew the old filter. Let it drain out into your catch container.
Installing the New Oil Filter
Before screwing in the new filter, dab some oil on its seal. This helps it fit snugly. Screw it on firmly, not too tight, just until it’s securely in place.
Refilling with New Oil
Once the old oil has been fully drained from your lawn mower, it’s time to refill it with fresh, high-quality engine oil. This is an essential step to revitalize your mower’s performance and efficiency.
Gradually Adding Engine Oil
Begin by identifying the correct type of oil recommended by the manufacturer for your specific lawn mower model. Slowly pour the new oil into the engine, taking care not to overfill it. It’s better to add a little at a time, allowing the oil to settle.
The amount of oil needed can vary between models, but most require between 2/3 and 3/4 of a quart. Avoid rushing this step; adding oil gradually ensures accuracy and prevents the risk of overfilling, which can harm the engine.
Checking Oil Level with Dipstick
After adding a small amount of oil, pause to check the level with the dipstick. Wipe it clean and insert it into the oil compartment, then remove it again to see where the oil mark is. The correct level typically falls right at the ‘full’ mark, but not over it.
Repeat the process of adding oil and checking with the dipstick until the oil reaches the ideal level. Be patient and precise—accuracy here can save you from engine troubles down the line.
Once you’ve reached the desired oil level, replace the dipstick and secure the oil cap. Your lawn mower is now ready with new oil, ensuring smoother operation and longer engine life. Remember, regular lawn mower oil changes are crucial and should be performed as a part of your mower’s seasonal maintenance routine to keep it running reliably.
Final Steps
Once you have refilled your lawn mower with the new oil, there are just a couple more actions to wrap up the process.
Replacing the Oil Cap
After confirming the oil level is correct, it’s time to reseal the oil compartment. Replace the oil cap carefully and ensure it’s tight. This prevents oil from leaking and keeps contaminants out of the engine.
Disposal of Old Oil
Proper disposal of the old oil is critical for environmental protection. Transfer the used oil from the catch pan into a sealable container. Most auto parts stores accept used oil at no charge. Do not pour it down the drain or on the ground.
Follow these final steps to complete your lawn mower oil change properly. This ensures your mower operates smoothly and remains in good condition.
Seasonal Maintenance Tips
As an all-season gardener or homeowner, it’s crucial to ensure your lawn mower receives regular maintenance. This doesn’t stop at an occasional lawn mower oil change. Following a structured seasonal maintenance schedule can vastly improve your mower’s longevity and performance.
Regular Oil Change Intervals
Just like any well-oiled machine, your lawn mower requires timely oil changes. Most manufacturer manuals suggest an oil change every 20-50 operational hours. However, at a minimum, perform an oil change annually, aligning it with the onset of the mowing season.
For optimal performance of your mower, keep track of the usage hours. Set reminders for oil changes. Staying consistent helps maintain engine health and prevent malfunctions.
Additional Seasonal Tune-Up Tasks
Alongside regular lawn mower oil changes, other tune-up tasks can make a difference. These include:
- Replace or clean the air filter.
- Check spark plugs and replace if necessary.
- Inspect and sharpen the mower blades.
- Lubricate the mower’s moving parts.
- Check tire pressure and adjust as needed.
- Clean the undercarriage to prevent rust and wear.
Executing these additional tasks at the start of each season can enhance your mower’s performance. They also help avoid costly repairs. Remember that a little care goes a long way in keeping your lawn mower running smoothly.
Conclusion
Performing a lawn mower oil change is not just another task on your to-do list. It is a crucial aspect of maintaining the efficiency and longevity of your lawn mower’s engine. By neglecting this vital maintenance step, you risk facing engine problems that can lead to costly repairs or even the need for a complete replacement.
Importance of Regular Oil Changes
Regular oil changes are the heartbeat of lawn mower maintenance. Fresh oil ensures your engine runs smoothly, stays cool, and has a reduced risk of corrosion. It flushes out particles and sludge, which if left unattended, can impair your mower’s performance. Changing oil at the right intervals prevents wear and tear, ensuring that your mower is always ready when you are.
Conducting an oil change as recommended—typically between 20 to 50 hours of operation, or at least annually—can save you from greater expenses down the road. It’s a simple practice that serves as an investment in your lawn mower’s health.
Extending the Life of Your Lawn Mower
A lawn mower oil change does more than keep the engine purring; it helps extend the overall life of your lawn mower. With new oil, the engine is less prone to overheating and more capable of handling the demands of lawn care. Let’s not forget that the engine is the heart of the lawn mower; its care is paramount.
In addition to regular oil changes, other maintenance such as cleaning or replacing air filters, checking spark plugs, sharpening blades, and ensuring all parts are properly lubricated, works collectively to extend the life span of your mower. By diligently following these maintenance practices, you can help your lawn mower operate at its best for many seasons to come.
Regular maintenance is the key to reliability and longevity. It ensures that every time you pull the starter cord, you can trust your lawn mower to perform efficiently and effectively. Remember, a well-maintained lawn mower makes for a beautiful, healthy lawn and a happy homeowner.
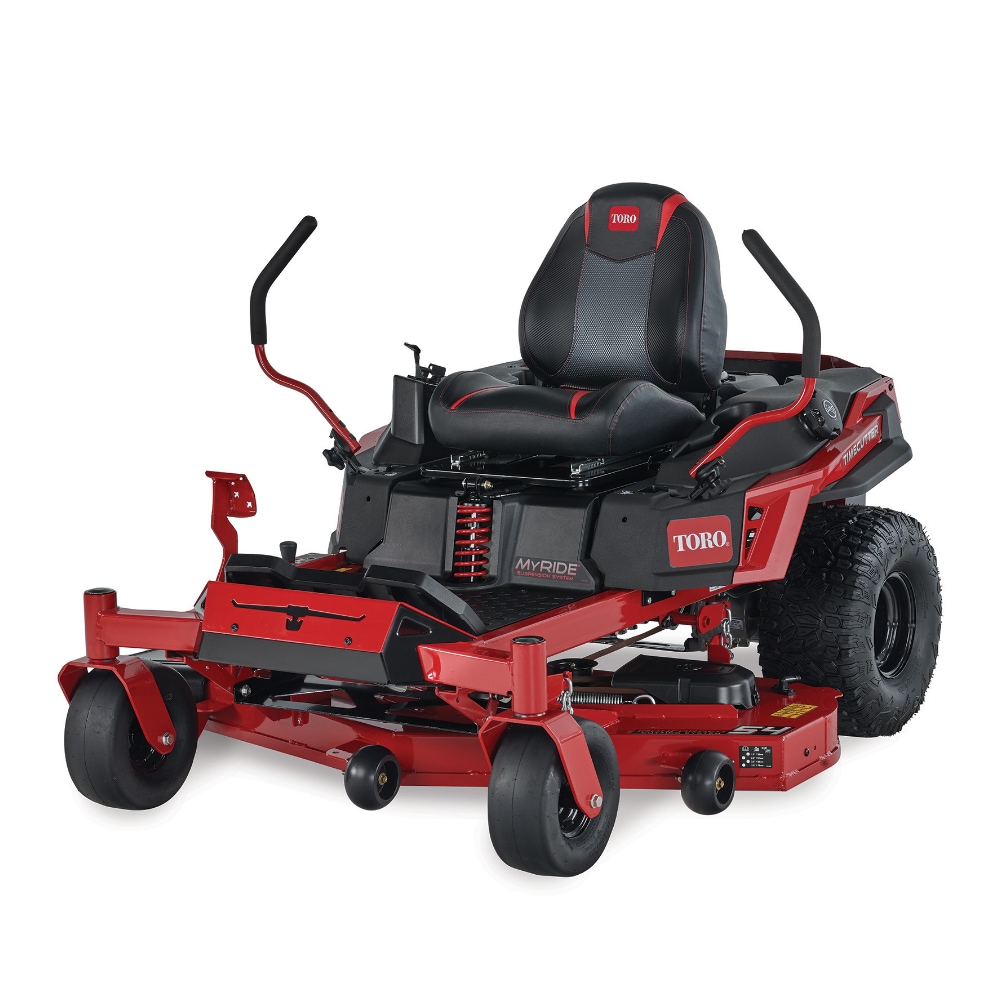
Lawn Mower Recycling Home Depot: Smart Move for Environment
Introduction to Lawn Mower Recycling Program
Recycling your old gas-powered lawn mower is a smart move for the environment. Home Depot’s Lawn Mower Recycling Program offers a simple way for you to do this. Here’s a quick overview of the program. This program helps you switch to electric lawn care equipment. You can earn a voucher to purchase new electric-powered lawn items. It’s important to know that vouchers are available on a first-come, first-served basis. Also, remember that not all stores take part in this program. Check for participating locations near you. By following the program’s steps, you ensure your old mower gets properly recycled. Plus, you receive an incentive to go green with your lawn care. Make sure you select the right type of voucher when you apply. Choose from handheld equipment vouchers or lawn mower vouchers. Some require you to recycle your old gas mower, while others do not. The aim is to encourage the use of more eco-friendly equipment. Get ready to clean up your act and your yard with the Lawn Mower Recycling Program at Home Depot.
Step One: Registering for the Program
To kick-start your switch to eco-friendly lawn care, the first step is clear-cut. Sign up for the Lawn Mower Recycling Program through Home Depot’s official sign-up page. Voucher selection is crucial at this stage, so choose wisely. Remember, these vouchers are your ticket to discount on new electric-powered lawn gear. Keep in mind, a single voucher per household each year is the rule. Whether it’s a $75 voucher for handheld electric tools or a heftier $150 for a shiny electric lawn mower, your choice locks in once you apply. Promptness matters, as your voucher awaits on a first-come, first-served basis. After signing up, you receive an email confirmation. This is not your voucher yet. It’s just the starting line. Your actual voucher is reserved for you for 21 days post sign-up. In this window, ensure to recycle your old gas mower—if that’s the path you pick. So, gear up, register, and step into the greener side of lawn maintenance.
Step Two: Preparing Your Lawn Equipment for Recycling
Before you can claim your voucher from Home Depot, make sure your gas-powered lawn mower is ready for recycling. Here are clear steps to prepare your equipment:
- Drain the Fuel: Empty all gas and oil from your lawn mower. Recycling centers can’t take equipment with these substances.
- Find a Disposal Site: Properly dispose of the drained oil and gas. Check local Household Hazardous Waste facilities or consult with auto-related businesses.
- Remove Gas Cap: Take off your lawn mower’s gas cap. Metal recycling facilities usually accept these caps directly.
Make sure to do this to secure your voucher, especially for those that mandate recycling your old mower. You don’t have to recycle for the $75 electric lawn mower voucher, though. Keep your environment safe and follow these steps to move on to the next phase of the voucher program.
Step Three: Completing the Drop-Off Verification Form
After signing up for the Lawn Mower Recycling Program, the next task is completing the drop-off verification form. Home Depot makes this step straightforward.
- Print the Form: Look for the form attached to the confirmation email you received. Print it out before heading to your recycling center.
- Attach a Receipt: If available, get a receipt from the recycling facility. This will serve as your proof of recycling, which is necessary to obtain the voucher.
- No Receipt, No Problem: In case a receipt is not provided, ask the facility to sign and date your verification form. Their signature verifies the recycling has been done.
- Validity Check: Upload the signed drop-off verification form or receipt to the program’s website. A team member will review it to confirm your recycling proof.
Remember, this step is crucial. Without a verified drop-off form, you cannot receive your voucher. For the $75 electric lawn mower voucher, submit your request without the recycling proof. All other voucher types require this step as part of the process.
Stay organized and complete this step promptly. Ensure you have all necessary documents for a smooth transition to the next stage. The sooner you complete this, the closer you are to getting your voucher.
Step Four: Recycling Your Gas-Powered Lawn Equipment
After completing the drop-off verification form, your next action is the actual recycling of the equipment.
- Head to the Recycler: Take your gas-powered lawn mower to a local recycling facility.
- Get a Receipt: Request a receipt from the recycler as proof of your recycling. This is crucial for voucher eligibility.
- Need a Signature: If a receipt isn’t available, have the recycler sign and date your verification form.
Submitting proof of recycling your gas mower is a must for the $150 voucher. This does not apply to the $75 voucher for an electric lawn mower without recycling. Secure your voucher by ensuring that all aspects of the recycling step are fulfilled.
Once you provide proof of recycling by either a receipt or a signed drop-off form, you move closer to obtaining a voucher for new electric lawn equipment. This step is essential to promote eco-friendly practices and to complete the transition to electric lawn care. Ensure that you follow the recycling guidelines to make your contribution to a cleaner environment.
Step Five: Receiving Your Electric Equipment Voucher
Once you have completed the recycling process, it’s time to get your electric equipment voucher. This step is straightforward and rewarding.
- Check Your Email: After recycling, watch for an email from Home Depot containing your voucher. This may take up to five business days. Ensure you check the email used to register for the program.
- Print or Save Voucher: When you receive it, print out the voucher or keep a digital copy on your phone. You will need this voucher to receive your discount.
- Visit Home Depot: Head to a participating Home Depot store within 14 days. A map of participating stores is available online. It is important to remember that not all stores may participate in the program.
- Present Voucher and ID: At the store, present your voucher along with a valid photo ID. Please show the items in your selected voucher category.
- Redeem and Enjoy: Choose an electric lawn mower or other equipment. Use your voucher to get it at a lower price. Remember, the voucher admits you to any item within your voucher category. It lets you choose any brand or price point at the selected retailer.
By now, you should see how Home Depot’s lawn mower recycling Home Depot program is a win-win. You’re not only helping the environment; you’re also saving money on modern, electric lawn equipment. Just make sure to complete all steps promptly to enjoy your voucher benefits.
Choosing the Right Voucher for Your Needs
Choosing the right voucher is key to making the most out of Home Depot’s Lawn Mower Recycling Program. Here’s how you can pick the voucher that suits your needs best:
- Determine Your Equipment Needs: First, think about what you need. Are you looking for a handheld electric tool or an electric lawn mower?
- Consider the Types of Vouchers: The program offers a $75 voucher for handheld equipment and two types of electric lawn mower vouchers: one for $75 and another for $150. The higher value voucher requires recycling your old gas mower.
- Recycling Requirements: Decide if you are ready to recycle your old gas-powered equipment. Only then opt for the vouchers that necessitate recycling.
- Eco-friendliness Priority: If you want to encourage green practices without immediate recycling, the $75 electric lawn mower voucher is a great choice.
- Assess the Cost: Remember, you will be responsible for any costs above your voucher amount. So, choose a voucher according to your budget.
- One Voucher Per Year: Note that it’s one voucher per household annually. Make your selection count.
- Act Fast: Act quickly, since vouchers are given on a first-come, first-served basis based on funding availability.
When you consider these points, you can select a voucher that aligns with your environmental goals and personal needs. Furthermore, remember to select both the voucher amount and your preferred retailer at the time of sign-up, as these cannot be changed later. By making an informed choice, you’ll not only benefit from the discount but also contribute to eco-friendly lawn care practices.
Additional Tips and Reminders
When embarking on the Lawn Mower Recycling Program with Home Depot, keep these additional tips and reminders in mind:
- Review the Steps: Ensure you understand each step in the process. It’s essential for a hassle-free experience.
- Recycling Deadline: You have 21 days from receiving your confirmation email to complete your equipment recycling and claim your voucher.
- Voucher Usage: Your voucher is valid for a single use at Ace Hardware or Home Depot and cannot be used twice.
- No Recycler Receipt: If you can’t get a receipt from the recycler, make sure they sign the drop-off verification form. This is a must for your voucher claim.
- Check Email Regularly: After recycling, monitor your email for the voucher. Up to five business days might pass before it arrives.
- Participating Locations: Remember, not all stores are part of the program. Check online for a map of participating stores.
- Avoid Delays: Act promptly at each stage. Delays could risk losing your reserved voucher.
- Select Carefully: Once you pick your voucher type and retailer, you cannot change them. Make a wise choice.
- Cover Extra Costs: Be prepared to pay any costs over your voucher value when purchasing your new electric equipment.
- Valid ID: Ensure you have a valid photo ID when going in-store to redeem your voucher.
- First-Come, First-Served: Vouchers are limited and based on fund availability. Apply as early as possible.
- Disposal of Oil and Gas: Remember to properly dispose of the drained oil and gas from your equipment at appropriate facilities.
Following these tips will make your participation in the program smooth and rewarding. By doing so, you contribute to eco-friendly practices while also benefiting from newer, more efficient lawn care technology.
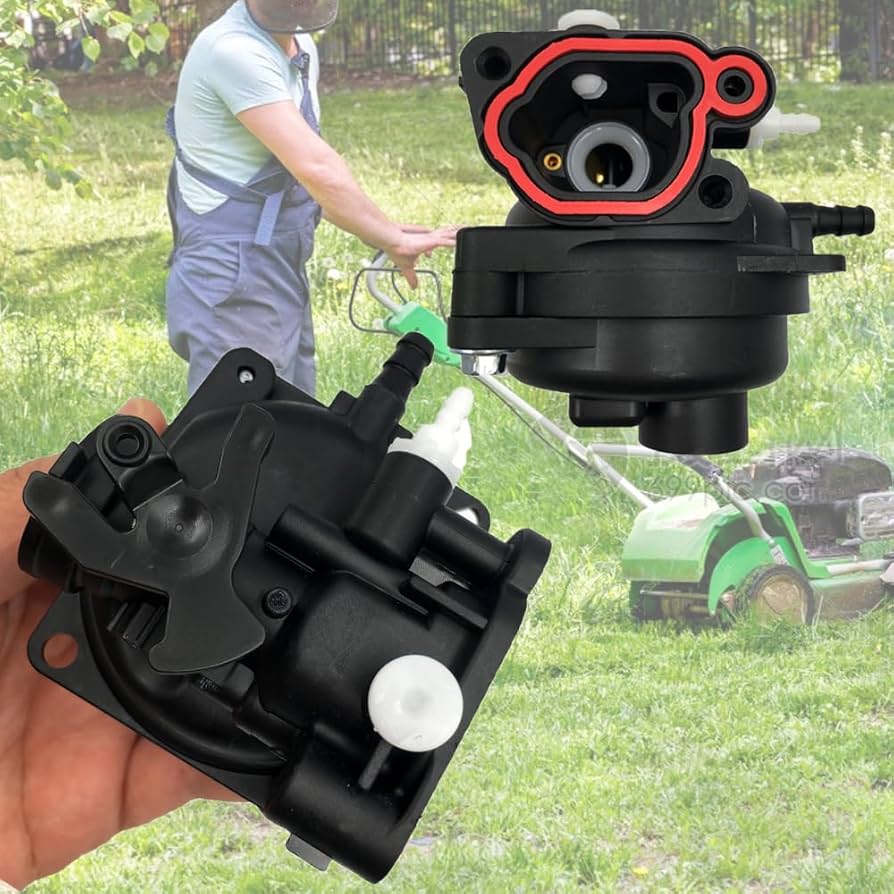
How to Clean A Carburetor on A Lawn Mower? Carburetor Cleaning
Introduction to Lawn Mower Carburetor Issues
How to clean a carburetor on a lawn mower? Understanding carburetor problems is key to smooth lawn mower operation. A clogged or dirty carburetor can lead to starting difficulties. Poor maintenance often turns into performance issues. Fuel not reaching the engine correctly is a common culprit. This issue may show as rough idling, stalling, or even failure to start. Identifying and addressing carburetor issues can restore your mower’s functionality. Regular cleaning prevents these problems and extends mower life. In this post, we’ll explore how to identify and fix carburetor issues, ensuring your mower starts every time.
Identifying the Location of the Lawn Mower Carburetor
Finding the carburetor is the first step in addressing start-up issues. The carburetor is usually near the air filter and engine. It looks like a small metal box or cylinder. To locate it, follow the fuel line from the gas tank to the engine. The carburetor is where the line connects to the engine. If you’re not sure, the owner’s manual should show the exact location for your mower model. Knowing where your carburetor is helps diagnose problems faster.
Locating the carburetor may seem daunting, but it’s fairly straightforward. Once you know where to look, maintenance becomes much simpler. Remember, a properly working carburetor is crucial for a smoothly operating lawn mower. Keep the carburetor clean and your mower should start without a hitch.
The Function of a Lawn Mower Carburetor
The carburetor is an essential part of any lawn mower. Its main function is to mix air and fuel in the correct ratios for combustion. This mixture is then sent into the engine’s cylinders where it ignites and powers the mower. If the air-to-fuel mixture is off, the mower may run poorly or not start at all.
Correctly functioning lawn mower carburetors ensure your mower operates efficiently. They adjust the mixture based on the mower’s needs. This is crucial for the engine’s performance and longevity. When the carburetor is dirty or malfunctioning, common symptoms include difficulty starting, rough running, or excessive fuel consumption. Understanding and maintaining your carburetor can prevent these issues, saving time and money on repairs.
Remember, a clean and well-maintained carburetor contributes to the smooth functioning of the lawn mower, making it vital to regular mower upkeep.
Preparing to Clean the Carburetor
Before tackling the cleaning process, proper preparation ensures safety and efficiency. Begin by turning off the engine and allowing it to cool. Safety is paramount; never work on a hot engine. Cleaning the engine’s exterior is a good first step. It prevents dirt from getting inside the carburetor later on. Next, set up a well-lit and clean workspace. It should have enough room for all parts during the disassembly. Have your tools ready. A screwdriver, nitrile gloves, and carburetor cleaner are essential. Don’t forget to detach the spark plug cable. It’s a simple pull-away action that stops unintended engine starts.
Gather a socket set, needle-nose pliers, and a bucket for parts. Taking a photo before you start may help with reassembly. With your workspace and tools in order, you’re now set to start cleaning the carburetor. This will help restore your mower’s start-up ability. Remember to dispose of any old fuel and replace it if necessary. Old fuel can lead to more carburetor issues. Lastly, refer to your mower’s manual for specific instructions on carburetor access. Some models may differ, but the cleaning principles are the same. Preparing thoroughly is the key to a successful clean of your carburetor.
Step-by-Step Guide to Removing and Cleaning the Carburetor
Cleaning your lawn mower’s carburetor can be simple. Here is a detailed guide to help you do it the right way.
Step 1: Safety First
Turn off the mower and wait for it to cool. Always avoid a hot engine.
Wear your gloves and have your tools ready.
Disconnect the spark plug cable to prevent accidents.
Step 2: Access the Carburetor
Locate the air filter near the engine.
Remove the housing to expose the carburetor.
Step 3: Remove the Carburetor
Use your screwdriver and pliers to detach the carburetor.
Put screws and small parts in a tray to keep track of them.
Carefully pull the carburetor away from the engine.
Step 4: Disassemble the Carburetor
Clean the outer surface first.
Take apart the carburetor gently, keeping track of the order for reassembly.
Step 5: Clean Each Part
Clean with a carburetor cleaner, focusing on jets and passages.
A soft brush helps remove stubborn dirt.
Rinse and dry all the parts thoroughly.
Step 6: Reassemble and Install
Put the carburetor back together using your photos as guides.
Reattach it to the mower, careful with cables and hoses.
Connect the spark plug cable and set the air filter back in place.
Following these steps makes sure your carburetor gets a thorough clean. This could solve starting issues and improve your mower’s performance. If problems persist, consider seeking professional help.
Tips for Reassembling and Installing the Carburetor
After a thorough cleaning, reassembling and installing the carburetor is crucial. Here are some easy-to-follow tips:
- Double-Check Part Placement: Make sure every piece returns to its original spot. Your earlier photos will guide you.
- Inspect for Damage: Check each part for wear. If you find any, replace it before reassembling. A carburetor repair kit might come in handy.
- Use New Gaskets: Old gaskets may not seal well. New ones prevent fuel leaks and ensure proper fitting.
- Handle Parts Gently: When reattaching, be gentle. Forcing parts can cause damage that affects performance.
- Reconnect Cables and Lines: Attach throttle and choke cables exactly as they were. Make sure fuel lines attach snugly to avoid leaks.
- Securely Tighten Screws: Use the screwdriver to tighten bolts for firm attachment. But don’t over-tighten as it can strip threads.
- Check the Air Filter: Reinstall a clean or new air filter. This helps with air flow and keeps the carburetor clean longer.
- Reconnect the Spark Plug Cable: Plug it back in once you’ve reinstalled the carburetor. This is important for starting the mower.
- Test for Functionality: After reassembly, start your lawn mower. Watch for smooth running and no fuel leaks.
Following these straightforward steps should make reassembling and installing your clean carburetor easy. It can restore your mower’s efficiency and readiness for use. If issues persist, consider seeking expert advice. Regular maintenance and cleaning help prevent future problems.
Cleaning the Carburetor Without Removal
Sometimes, your lawn mower may just need a quick carburetor clean without a full disassembly. Some basic maintenance can be done without removing the carburetor. This can save you time while still improving performance.
To clean the carburetor without taking it out, follow these steps:
- Turn Off the Mower: Ensure the engine is off and cool. Safety first.
- Disconnect the Spark Plug: This stops accidental starts during cleaning.
- Remove the Air Filter Housing: Find the housing and open it to reach the carburetor.
- Spray Cleaner: Use carburetor cleaner on the outside and inside the throat. Follow manufacturer’s instructions.
- Clean Jets and Throat: Move throttle and choke to clean all areas well.
- Blow Out Debris: Use compressed air to remove any remaining dirt particles.
- Reattach the Air Filter: Once cleaned, put the air filter back in place.
- Reconnect Spark Plug: Plug it back for the next mower use.
Regular cleaning, even without removal, can prevent bigger engine problems. Doing this two to three times a year keeps your mower in good shape. It helps avoid needing more serious repairs. Remember to handle chemicals carefully and follow all safety instructions.
Scheduling Carburetor Maintenance for Optimal Performance
To keep your lawn mower running smoothly, schedule regular carburetor maintenance. Planning maintenance can prevent starting problems and ensure optimal performance. Here are steps to help you create a schedule:
- Check Twice a Year: Inspect the carburetor at least twice, before and after the mowing season. This helps catch issues early.
- Full Clean Annually: Take the carburetor apart for a deep clean once a year. Best time is before the first mow of the season.
- Spot Cleaning: Between deep cleans, quickly clean the carburetor without removing it, especially if you notice starting troubles.
- Use Fresh Fuel: Always fill the tank with fresh gas when starting a new season. Stale fuel causes more dirt build-up.
- Add Stabilizer: If storing your mower, add fuel stabilizer. This keeps the carburetor clean over periods of non-use.
- Change the Air Filter: Regularly change or clean the air filter. A clean filter prevents dirt from entering the carburetor.
- Monitor Performance: Watch for signs of trouble. If the mower starts running rough or consuming more fuel, check the carburetor.
- Keep a Log: Track maintenance tasks in a logbook. This record helps you stay on schedule and monitor the mower’s health.
By sticking to this maintenance schedule, you can reduce the risk of carburetor-related problems. Consistent care is key to a mower that starts easily and lasts for years. If you struggle after maintenance, consider a professional check-up.
Final Tips for Ensuring Lawn Mower Readiness Post-Cleaning
After cleaning your lawn mower’s carburetor, do a few final checks before starting the engine. Here are some tips:
- Recheck Connections: Ensure all parts, especially the carburetor and air filter, are secure.
- Inspect the Spark Plug: A clean, properly gapped spark plug is essential for ignition.
- Check the Fuel: Use fresh fuel to minimize carburetor gunk.
- Look Over the Fuel Lines: Fuel lines should be free of cracks or damage.
- Test Throttle and Choke: Make sure they move smoothly and without sticking.
- Check for Leaks: Examine the carburetor for any signs of fuel leaks.
- Perform a Safety Check: Verify that all mower guards are in place and secure.
- Start the Mower: Turn on the mower and let it run for a few minutes. Look and listen for any unusual noises or behaviors.
- Observe the Engine: It should run smoothly without surges or stalling.
- Review Your Work: If problems arise, double-check your cleaning and assembly steps.
By following these simple yet crucial steps, you can ensure your lawn mower is prepared for efficient operation after a carburetor cleaning. Regular maintenance, such as this, helps keep your mower running well and extends its lifespan. If you encounter any problems after cleaning that you can’t resolve, don’t hesitate to contact a professional for assistance.
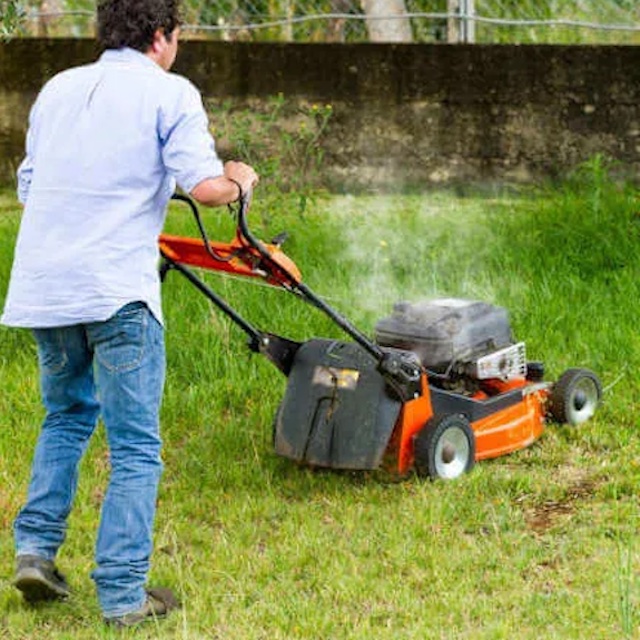
Is Your Lawn Mower Blowing White Smoke? What to Do
Introduction to Lawn Mower Smoke Issues
Is your lawn mower blowing white smoke? Experiencing smoke from your lawn mower can be alarming, but understanding the issue is key. The smoke can vary in color and each signifies different problems — some simple, others more complex. Recognizing the smoke color helps in diagnosing the problem accurately and efficiently. Knowing how to handle these situations can save you time and prevent potential damage to your mower. Armed with the right knowledge about what causes a lawn mower to emit smoke, you can identify issues quickly and decide whether it’s something you can fix yourself or if professional help is needed. Stay informed and your lawn mower will thank you through years of reliable service.
Identifying the Cause by Smoke Color
When your lawn mower emits smoke, the first step is deciphering the smoke color. Different smoke colors indicate various issues, ranging from minor problems to ones that might require professional intervention. Understanding the distinctions between white, blue, and black smoke can guide you in troubleshooting and possibly fixing the issue yourself before it escalates.
White or Blue Smoke Causes
White or blue smoke typically points to oil-related issues within your mower. If you notice this type of smoke, it could be due to an oil spill on the engine or an overfilled oil reservoir. When changing oil or tipping your mower on its side, oil might accidentally spill onto the engine, causing it to smoke once the mower is restarted. To resolve this, let the mower run for a few minutes; the heat will often burn off the excess oil, eliminating the smoke. Always ensure you’re handling the mower according to the guidelines mentioned in the owner’s manual, especially when performing maintenance like oil changes.
Another reason for white or blue smoke could be using the wrong oil grade. Check your owner’s manual for the manufacturer-recommended oil and ensure you’re filling the mower with the correct type. Incorrect oil can lead to inadequate lubrication and cause the engine to overheat and smoke.
Black Smoke and Its Implications
Black smoke, on the other hand, generally signals that the mower is burning too much gasoline. This issue often ties back to the lawn mower’s carburetor. If the carburetor mix is too rich in gasoline, due to a clogged air filter or incorrect settings, black smoke will emerge from the mower. Replacing the air filter or adjusting the carburetor settings can often fix this issue. Check your lawn mower’s manual for guidance on how to adjust the carburetor or replace the air filter based on your specific model.
It’s essential to address smoking issues immediately to prevent long-term damage to your lawn mower’s engine. Identifying the cause by the color of the smoke not only simplifies troubleshooting but also helps you take swift, effective action to protect your machine.
Common Reasons for White or Blue Smoke
White or blue smoke from your lawn mower typically signifies oil issues. Here are common reasons why this might be happening:
Oil Spills on the Engine
Oil can spill onto the engine during maintenance or if the mower is tilted. This leads to white or blue smoke when the mower is turned on. Let the engine run for a few minutes; the heat should help burn off the excess oil. Always handle the mower carefully to avoid spills and check the manual for specific maintenance instructions.
Overfilled Oil Reservoir
Adding too much oil can result in excessive smoke. Check the oil level using the dipstick; remove excess if over the recommended level. Refer to your lawn mower’s manual for the correct procedure to check and adjust the oil.
Using Incorrect Oil Grade
Using the wrong type of oil can cause smoking issues. Incorrect oil affects engine performance and might lead to overheating. Always use the manufacturer-specified oil grade to ensure proper engine function and to prevent smoking problems.
Addressing Black Smoke
When your lawn mower is blowing black smoke, it’s burning too much fuel. This often means the air-to-gasoline ratio is off. An issue with the carburetor or a dirty air filter might be to blame. Let’s look at what to do in both situations.
Role of the Carburetor
The carburetor controls the mix of air and gasoline in your lawn mower’s engine. If it’s not allowing enough air, the mix is too rich with gasoline, leading to black smoke. You may need to adjust the carburetor. Your owner’s manual can guide you on how to do this. If the manual is not clear, consider seeking help from a professional. Keep in mind, a well-adjusted carburetor helps your mower run efficiently.
Air Filter Maintenance
Between uses, grass and debris can clog your lawn mower’s air filter. A dirty air filter restricts air flow to the carburetor. This causes too much gasoline in the mix and results in black smoke. To fix it, replace the air filter as needed. Check the manual for the correct type of filter and the recommended replacement schedule. Regular air filter checks and maintenance can prevent black smoke issues and keep your mower in top condition.
When to Seek Professional Help
Sometimes, despite our best efforts, lawn mower issues go beyond the scope of DIY repairs. It’s vital to know when to seek professional help to avoid causing further damage to your lawn mower. Tackling complex mechanical problems without the right expertise can be a costly mistake. Let’s discuss when it’s time to call in the experts.
Persistent Smoke Issues
If the smoke from your lawn mower persists even after you’ve taken all the recommended steps, it may indicate a deeper problem. An ongoing white or blue smoke issue could mean that there’s a consistent oil leak or that engine seals are failing. Black smoke that continues to billow after cleaning or replacing the air filter and adjusting the carburetor suggests a more intricate issue with the fuel system. In these cases, it’s best to consult a professional. They have the tools and knowledge to diagnose and repair problems that might not be obvious to the average user.
Serious Mechanical Concerns
Certain issues, like an air leak in the crankshaft or worn-out engine components, definitely require professional attention. The same applies if you suspect a fault in critical parts such as the pistons or the rings. If you’re not fully confident in tackling repairs like these, it’s time to seek out a reputable lawn mower repair service. A skilled technician can assess the severity of the situation and perform necessary repairs or part replacements. Remember, working on complex mechanical concerns without proper skill can result in further damage, void warranties, and potentially be unsafe.
Professional help ensures that your lawn mower is in good hands and can save you from the expenses that come with self-repair attempts gone wrong. It’s also worth checking if your mower is still under warranty, as you might be eligible for free or reduced-cost servicing. Don’t hesitate to ask for professional assistance when faced with persistent smoke issues or serious mechanical concerns.
Preventative Measures and Maintenance Tips
To keep your lawn mower running smoothly and prevent white or black smoke, regular maintenance is key. Stay ahead of potential issues with these tips.
Regular Oil and Air Filter Checks
Make it a habit to check your lawn mower’s oil and air filter regularly. This simple step can save you from future smoke and engine troubles.
Before each use, take a moment to look at the oil level using the dipstick. Fill or drain as needed, but never overfill. The right oil level is crucial for a smoke-free operation.
Change your air filter at the intervals suggested by your mower’s manual. A clean filter means better engine performance and less chance of black smoke.
Regular checks and timely maintenance can keep your mower in top condition and prevent the frustration of unexpected issues.
Understanding Your Lawn Mower’s Manual
Your lawn mower’s manual is your go-to resource. It holds all the information you need for proper care.
Read your manual carefully to understand your mower’s needs. This includes oil type, filter specifications, and maintenance schedules.
Follow your manual’s instructions when performing any maintenance to ensure you don’t unintentionally cause harm to your mower.
Your manual might also provide troubleshooting tips, which can be helpful if your mower starts smoking. Keep it in an easy-to-find place for quick reference.
By adopting these preventative measures and sticking to regular maintenance, you’ll likely experience fewer issues, such as white or black smoke, and enjoy a longer lifespan for your lawn mower.
FAQs about Lawn Mower Smoke
Low Oil Levels and White Smoke
Low oil levels in your lawn mower often lead to white smoke. Always check the oil dipstick before use. If it’s low, add the correct type specified in your manual. Never overfill, as this can also cause smoking issues.
Air Filter’s Role in Smoke Emission
A clogged air filter restricts airflow to the carburetor, enhancing black smoke. Regularly check and replace your lawn mower’s air filter. Follow the manufacturer’s guide on filter types and replacement intervals.
Myths about White Smoke
A common myth is that all white smoke indicates a serious engine problem. In fact, minor oil spills or low oil can cause white smoke, which is often fixable without professional help. Always verify the cause before assuming the worst.
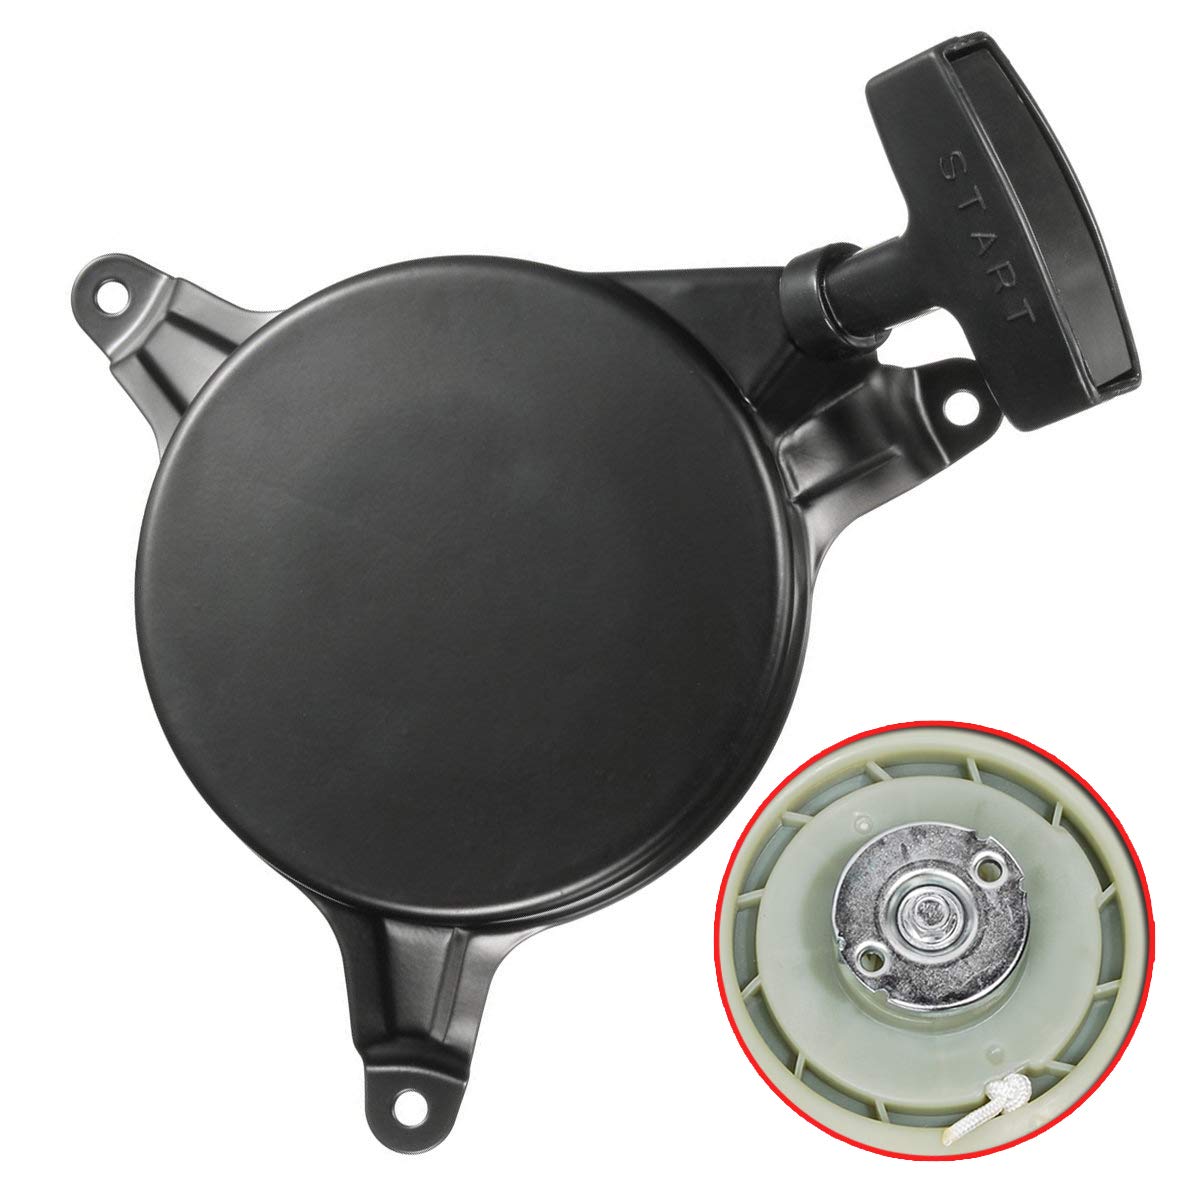
Fixing a Lawn Mower Pull Cord Stuck: A Quick Guide
Initial Checks and Safety Precautions
Before tackling a stuck lawn mower pull cord, safety is crucial. Starting with initial checks can prevent further damage and ensure a safe working environment. Below are some critical steps to take:
Inspect the Blades for Obstructions
First, look for blockages around the mower’s blades. Obstructions like rocks, sticks, or compacted grass can hinder blade movement. With the mower off, flip it carefully and clear any debris caught under the deck. Remember, always wear gloves during this process to protect your hands.
Disconnect the Spark Plug Before Maintenance
To prevent the mower from accidentally starting, disconnect the spark plug. This is a vital safety step. Pull the plug’s wire away gently but firmly until it’s free. Only now is it secure to examine and resolve the issue with your lawn mower pull cord being stuck.
Lubrication Methods
One of the simplest ways to fix a lawn mower pull cord stuck is by lubrication. A dry or dirty cord can cause friction, making it difficult to pull. Here’s how to apply this method effectively:
Using WD-40 to Ease the Cord
WD-40 is a well-known lubricant that can help loosen a stuck cord. Here’s a step-by-step approach to use it:
- Spray WD-40 directly onto the pull cord mechanism. Aim for the area where the cord retracts.
- Gently pull the cord a few times to work the lubricant in. Be patient, as it may take a little time for the WD-40 to penetrate.
- Wipe any excess lubricant off to prevent attracting dirt.
Repeat these steps if necessary. Lubrication may not always solve the problem, but it’s a quick and easy thing to try before moving onto more complex repairs.
Resolving Hydrolocking Issues
To fix a lawn mower pull cord stuck due to hydrolocking, follow these steps:
Removing Excess Oil from the Cylinder
Hydrolocking happens when oil floods the cylinder, making the piston unable to move. To address this:
- Remove the spark plug using a tool, and set it aside to dry.
- Pull the start cord several times to eject oil from the cylinder.
- Let any remaining oil evaporate before putting the spark plug back.
Ensuring the Spark Plug is Dry
The spark plug must be dry to work correctly. After removing excess oil:
- Wipe the spark plug with a clean cloth.
- Check for oil or residue and clean it thoroughly.
- When it’s completely dry, reattach the spark plug to the mower.
Follow these steps to help prevent your lawn mower pull cord from getting stuck due to hydrolocking.
Mechanical Fixes for the Pull Cord
When your lawn mower pull cord is stuck, mechanical issues are often to blame. Two common mechanical problems include a malfunctioning recoil spring system, and a worn or broken pull cord. Tackling these issues can restore the cord’s functionality. Here’s what to look for and how to fix it.
Examining and Adjusting the Recoil Spring System
The recoil spring system is key for a working pull cord. If this system jams, the cord will feel stuck. First, remove the mower’s cover to reveal the recoil mechanism. Look for tangles or misalignment in the pull cord. If tangled, carefully untangle it and ensure the cord rewinds smoothly onto the spool. If it’s loose, adjust the tension to make sure it retracts properly. Reassemble and test the cord.
Replacing the Pull Cord if Necessary
Sometimes, the cord itself is the issue. It could be frayed or broken inside the mechanism. If this is the case, you’ll need to replace it. Purchase a suitable replacement, making sure it’s the right thickness and length for your mower. Thread the new cord through the recoil assembly, tie it securely, and rewind the cord onto the spool. Ensure the cord is taught but not overly tight. Fit everything back together, and give it a pull to see if it has fixed the problem.
These steps can help remedy common mechanical problems with a lawn mower pull cord stuck. Regular maintenance and checks can prevent these issues, keeping your mower in top working condition. If at any stage you feel unsure, consult a professional.
Starter Assembly Maintenance
Proper maintenance of the starter assembly can prevent your lawn mower pull cord from becoming stuck. Here’s what you need to know to keep the starter mechanism in good working order.
Cleaning the Starter Mechanism
A clean starter mechanism is essential for smooth operation. Follow these simple steps:
- Disconnect the spark plug for safety.
- Remove screws to open the starter mechanism housing.
- Gently remove dust, debris, or old oil with a clean cloth.
- Reassemble the housing and reconnect the spark plug.
Keep the mechanism free from build-up to avoid starting issues with your mower.
Checking for Rusted Parts and Applying Oil
Rust can impede the movement of the starter mechanism. To address rust:
- Take apart the starter mechanism as before.
- Inspect for rust, especially on the ball bearings.
- Use fine steel wool to gently remove rust.
- Apply a small amount of oil to moving parts.
- Put everything back together and pull the cord to test.
Regularly check for rust and lubricate to ensure the pull cord remains unstuck.
By maintaining the starter assembly, you can help prevent the frustration of a stuck lawn mower pull cord. If you’re not comfortable with DIY fixes, don’t hesitate to seek professional help.
Additional Troubleshooting Tips
When addressing a lawn mower pull cord stuck, several other factors may come into play beyond the basics already covered. Here are additional troubleshooting tips that could help resolve the issue.
Ensuring Correct Oil Level
An incorrect oil level can cause problems with the mower starting. Check the oil level — it should be between the min and max marks on the dipstick. If low, top it off with the right type of oil for your mower.
Clearing Debris from Under the Deck
Debris trapped under the mower deck can impede blade and engine function. Turn off the mower and inspect underneath. Removing any buildup of grass, leaves, or mud can free up the blades, potentially easing the pull cord.
Verifying the Tension of the Stop/Start Cable
If the stop/start cable is too loose, it won’t properly disengage the brake. This adds tension to the pull cord, making it harder to pull. Adjust the cable to ensure it’s at the correct tension according to the manufacturer’s guidelines.
Assessing the Self-Propel Drive Belt
A dislodged self-propel drive belt might interfere with the engine’s operation. Check the belt to see if it has slipped or is damaged. If necessary, consult your mower’s manual to properly reattach or replace the belt.
These suggestions might resolve the issue of a lawn mower pull cord stuck. Regular checks and maintenance will keep your mower running smoothly.
When to Replace the Starter Assembly
The starter assembly is crucial for the pull cord to work effectively. If your lawn mower pull cord is stuck and the above methods have not worked, it might be time to consider replacing the entire starter assembly. Here’s how to identify if that’s the necessary step and how to go about it.
Identifying Mechanical Failure
Identify mechanical failure in the starter assembly by inspecting the recoil mechanism and the cord. Watch for these signs:
- The cord can’t retract back into the assembly.
- The recoil spring doesn’t have any tension.
- The assembly has visible rust or damage.
If you find any of these issues, a replacement of the starter assembly is likely needed.
How to Order and Replace the Starter Assembly
Ordering and replacing the starter assembly can be straightforward. Follow these steps:
- Locate the right replacement part, ensuring it matches your mower’s model.
- Disconnect the spark plug for safety before you begin.
- Remove the old starter assembly, usually secured with screws.
- Install the new starter assembly, attaching it firmly with screws.
- Reconnect the spark plug and test the pull cord.
If you’re unsure about the part or the process, consult the mower’s manual or contact a local dealer. For some engines, like Briggs & Stratton, you may need to visit a dealership for the proper part. Remember, frequent maintenance can prevent such issues, but when a replacement is necessary, following these instructions will help you get your mower back to work.
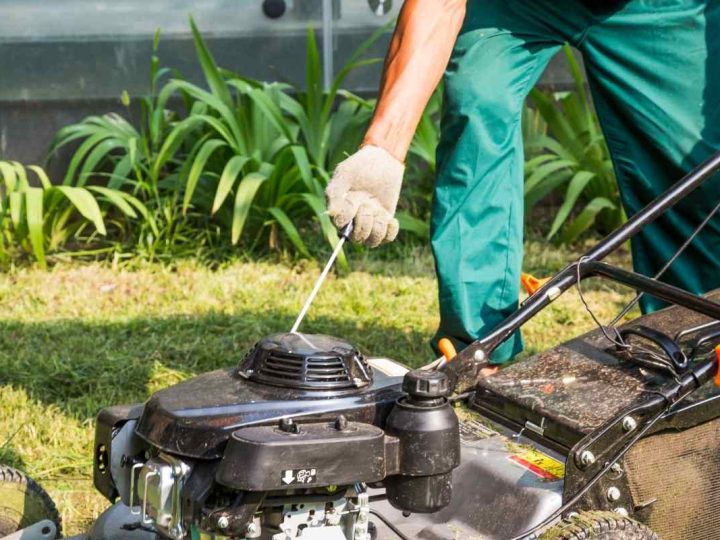
Fixing Lawn Mower Cord Won’t Pull: A Step-by-Step Guide
Introduction to Lawn Mower Cord Problems
Dealing with a lawn mower cord won’t pull can be aggravating. Often, a relaxed weekend plan to tend to your garden comes to a halt because the mower refuses to start. The pull cord is the lifeline of a manual start mower, and when it becomes stuck, it requires prompt attention. Recognizing that this is a common issue among various lawn mower models provides little comfort when facing a stubborn cord. Efficiently addressing this problem calls for a comprehensive understanding of the potential causes and the appropriate corrective measures. Whether you’re a seasoned gardener or new to lawn care, this guide presents a straightforward approach to troubleshoot and resolve lawn mower cord issues. Keep in mind, safety is paramount in the process. In the following steps, we’ll cover how to inspect and clear the blades, lubricate the cord, resolve hydrolocking instances, repair or replace the pull cord and recoil mechanism, and finally, how to inspect the starter assembly for rust and damage. Armed with these tips, you’re on the way to restoring your mower to working order and getting back to the lawn care you enjoy.
Safety First: Preparing to Fix the Lawn Mower Cord
Before attempting to fix a lawn mower cord that won’t pull, prioritize safety. Here’s what you should do:
- Turn off the mower – Ensure the mower’s engine is off and that it has cooled down.
- Disconnect the spark plug – This prevents the mower from accidentally starting. Grab the wire and gently pull it away from the plug.
- Wear protective clothing – Put on gloves to safeguard your hands and goggles to protect your eyes.
- Work in a clear area – Choose a well-ventilated space with ample room to move around the mower.
- Have your tools ready – Gather the necessary tools such as wrenches, pliers, and lubricant. This makes the process smoother.
- Refer to the manual – Before you start, check your mower’s manual for any specific safety instructions.
Taking these precautions helps you avoid injuries and additional damage to the mower. With these steps, you’re ready to tackle the cord issue safely.
Step 1: Inspecting and Clearing the Blades
Inspecting and clearing the mower blades is the first crucial step. Twigs, rocks, and clumps of grass can obstruct the blades, causing the cord to stick. Begin by making sure the spark plug is disconnected to prevent the mower from starting unexpectedly. Turn the mower over and carefully remove any debris that might be jamming the blade. This can often resolve the issue and allow the cord to pull freely.
Do this with care to avoid any injuries. Look for clumps of wet grass or mud that might be lodged tightly. Sometimes, just rotating the blade back and forth can dislodge small bits of debris. After clearing the area, reconnect the spark plug and try the pull cord again. If the cord still won’t pull, you may need to look into further steps outlined in this guide.
Step 2: Applying Lubricant to Ease the Cord
When your lawn mower cord won’t pull smoothly, lack of lubrication could be the issue. After checking for blade obstructions, the next simple step is to apply a lubricant. You want to aim for the cord itself and the parts it interacts with.
Here’s how to proceed with lubrication:
- Select the right lubricant – A silicone-based spray or WD-40 is often recommended by experts.
- Apply the lubricant – Spray a small amount directly onto the pull cord. Target areas where the cord retracts and on any exposed moving parts.
- Test the cord – After applying, gently pull the cord to distribute the lubricant. It might improve cord movement.
- Re-check the cord – If it’s still tough to pull, reapply a bit more lubricant. Be patient and try pulling a few more times.
Remember, it’s not a guaranteed fix, but many people find that lubrication helps make the cord easier to pull and can be part of regular mower maintenance. If the problem persists, additional steps outlined in this guide will be your next recourse.
Step 3: Resolving Hydrolocking Issues
When a lawn mower’s engine becomes hydrolocked, it means that fluid has entered the cylinder. This prevents the piston from moving correctly. Fixing this issue is crucial for the pull cord to work.
Here are the steps to resolve hydrolocking:
- Remove the spark plug: Carefully take out the spark plug to inspect for wetness, indicating fluid presence.
- Drain the fluid: With the spark plug out, pull the cord a few times. This helps eject any trapped fluid from the cylinder.
- Dry the spark plug: Clean and air-dry the spark plug or replace it if necessary.
- Allow air-dry: The engine cylinder needs to be dry. Wait a few hours after draining before reassembling.
- Reassemble and test: Put back the spark plug and attempt to start the mower.
By taking these steps, you should be able to fix the hydrolocking, making the pull cord move freely again. If this does not resolve the issue, further inspection might be needed.
Step 4: Examining and Repairing the Pull Cord and Recoil Mechanism
When your lawn mower cord won’t pull, checking the recoil mechanism is key. It’s responsible for winding the cord back into place. If it’s faulty, the cord can get stuck or feel loose. Here’s how to inspect and repair it:
- Access the recoil mechanism – Remove the mower’s housing to expose the recoil mechanism. This usually involves unscrewing a few bolts.
- Examine the recoil spring – A broken or dislodged spring could be the culprit. If this is the case, you might need to reset it or replace it.
- Check for tangled cord – If the cord is tangled, carefully remove it and straighten it out. Realign it correctly on the spool.
- Inspect for wear and tear – Look for any signs that the cord or its parts are worn out. If so, they will need replacements.
- Test the tension – Once the cord is in place, make sure it has the right tension. Too loose and it won’t retract; too tight and it could snap.
- Reassemble the housing – After making the necessary repairs, put the housing back on and secure it with the bolts.
- Give it a pull – With the spark plug still disconnected, carefully pull the cord. Check if it retracts smoothly. If it does, reconnect the spark plug and try starting the mower.
Common signs of recoil mechanism problems include a cord that pulls and retracts too quickly or slowly. Taking time to fix this will help you avoid further frustrations. If the problem remains after these steps, you may need a professional’s help or a full replacement of the recoil mechanism.
Step 5: Checking the Starter Assembly for Rust and Damage
When you have ruled out other issues, inspect the starter assembly for rust and damage. This part can sometimes be the reason why a lawn mower cord won’t pull. Here is a step-by-step guide to help you through this process:
- Remove the starter assembly housing – Unscrew the housing to get to the starter assembly.
- Look for rust on the ball bearings – Rust can prevent smooth movement.
- Clean with steel wool – If you find rust, gently scrub it off with fine steel wool.
- Lubricate the assembly – Apply a small amount of oil to the ball bearings.
- Check the spring – Make sure the recoil spring is wound properly and not damaged.
- Reassemble and test – Put everything back and pull the cord to see if it moves freely.
By ensuring that the starter assembly is clean and in good working condition, you increase the chance that your mower will start when you pull the cord. This is often an overlooked part of lawn mower maintenance, but it is essential for a properly functioning pull cord.

Additional Tips and Common Questions
When dealing with a lawn mower cord that won’t pull, you want quick, effective solutions. Here are additional tips and common questions to help streamline the process and provide clarity.
Quick Checks to Avoid Unnecessary Repairs
- Examine the cord before starting. Look for frays or knots that could hinder movement.
- Check the handle. Make sure you’re pulling the cord at the correct angle and with enough force.
- Review the mower’s history. Has this issue happened before? Recurring problems may need expert advice.
Frequently Asked Questions (FAQs)
- Can a lawn mower cord be too long? Yes, a cord that’s too long can tangle and create resistance.
- How often should I lubricate the pull cord? At least once a season or as needed.
- Are all pull cords replaceable? Generally, yes, most cords can be replaced with a similar type.
Understanding these additional tips can prevent unnecessary work and guide you through common setbacks. Along with these FAQs, maintaining regular mower inspections will aide in keeping cord issues at bay. In conclusion, always remember maintenance is key to a reliable lawn mower. Take the time to perform regular checks and you’ll avoid many common cord problems.
Conclusion: Maintaining Your Lawn Mower for Reliability
Keeping your lawn mower in good shape is key to reliable performance. Regular maintenance can prevent many common cord issues. Follow these final tips to keep your mower ready for action:
- Perform regular checks: Look over your mower before each use for wear or potential problems.
- Clean after use: Remove grass clippings and debris from the blades and undercarriage after mowing.
- Store properly: Keep your mower in a dry, safe place to avoid rust and other damage.
- Lubricate moving parts: Apply oil to the pull cord mechanics and other moving parts seasonally.
- Handle with care: Use the pull cord gently to avoid harsh tugs that can cause damage.
- Schedule yearly check-ups: Consider a professional service once a year for a thorough inspection.
By staying on top of maintenance, you’ll reduce downtime. This ensures your mower will start easily and run smoothly. Remember, a little care can go a long way in extending the life of your lawn mower. Keep it in prime condition, and it will keep your lawn looking its best.
