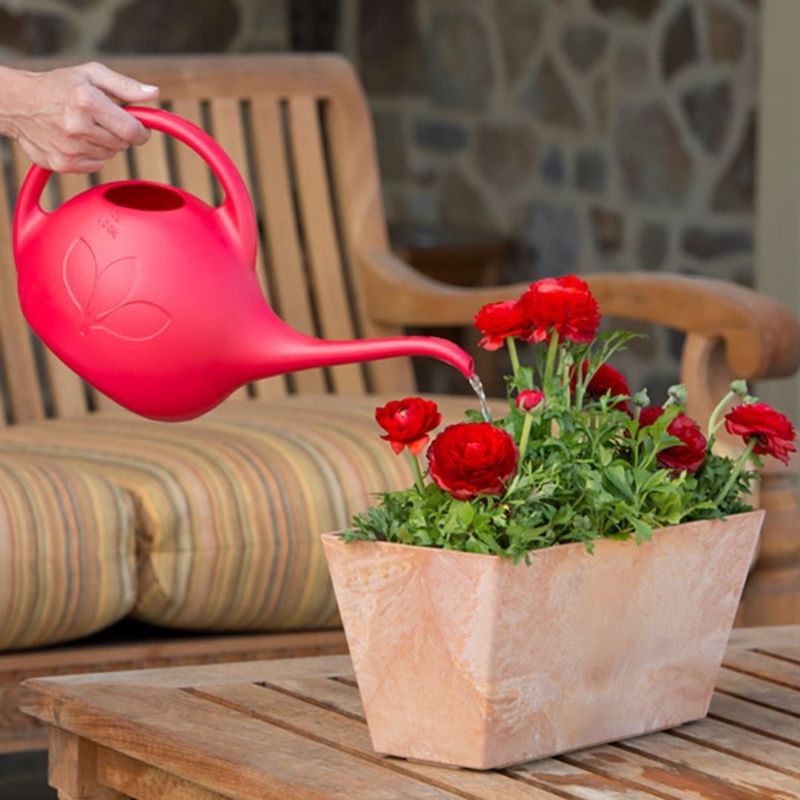
Choosing Your Can: Efficient Irrigation with 5-Gallon Watering Can
Benefits of Using a 5-Gallon Watering Can
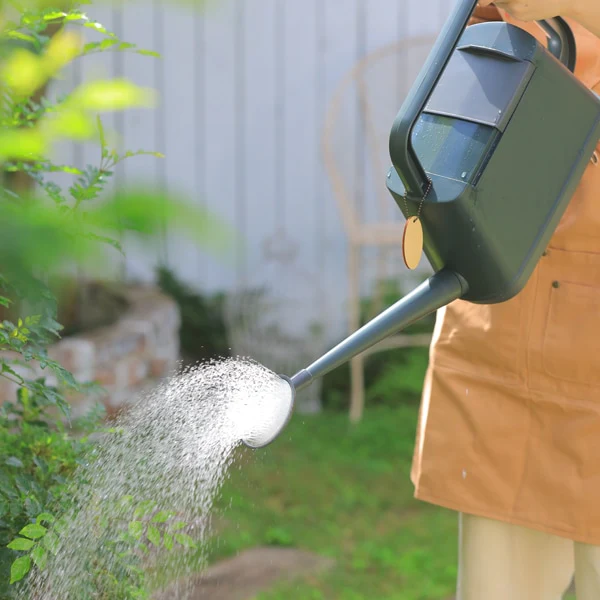
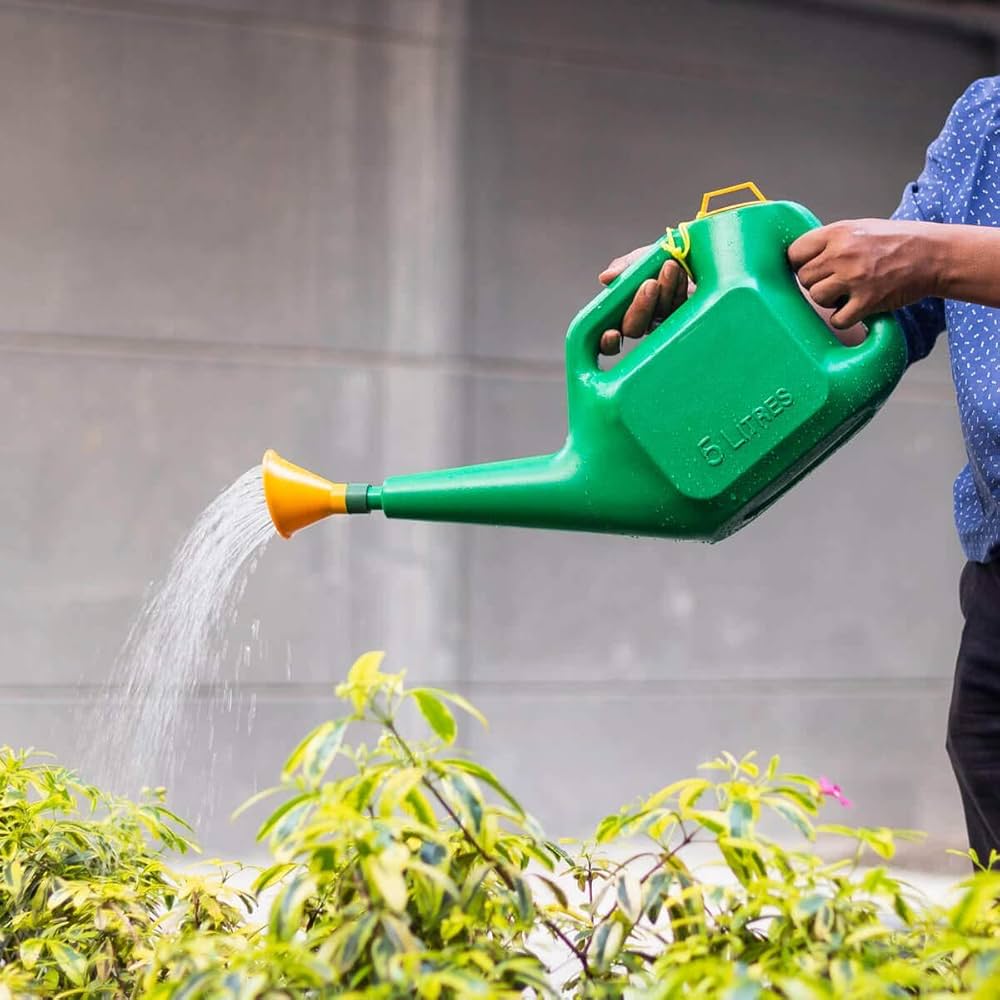
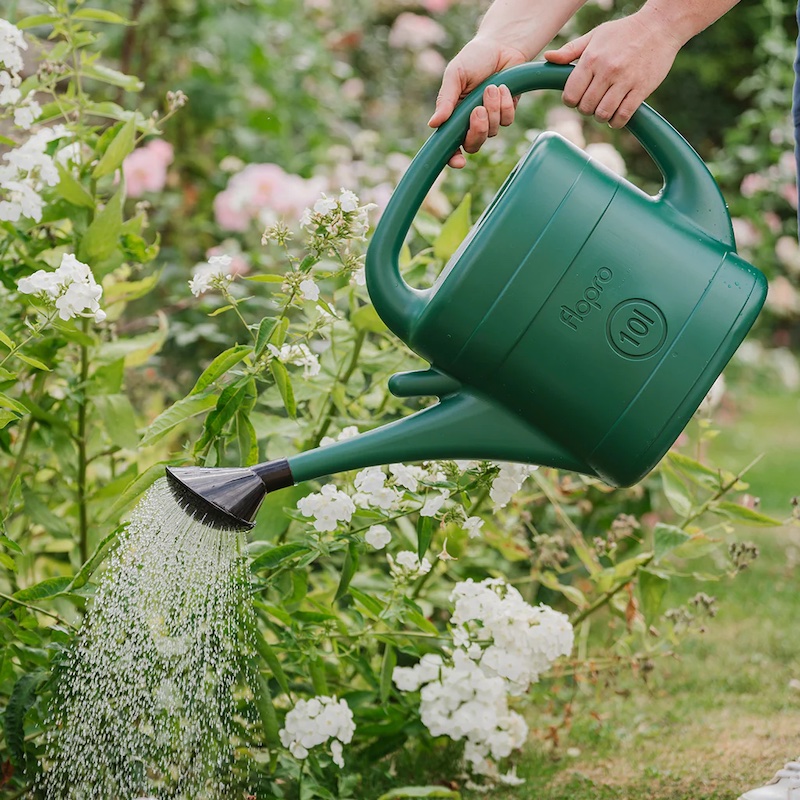
Using a 5-gallon watering can has many benefits for gardeners. Its large capacity cuts down on the need for frequent refills. This means more water for your plants in less time. You can water more thoroughly without the back and forth to a water source. It’s great for deep watering practices which encourage stronger root growth. This size also allows for the addition of liquid fertilizers, making feeding and watering a one-step process.
The easy-to-fill design of most 5-gallon watering cans save time and effort. They often come with sturdy handles. These help you carry a full can with ease. Some models have a sprinkle nozzle. This feature makes it simple to deliver a gentle shower to delicate plants. A single can serves both large garden areas and potted plants with efficiency.
In addition, the robust build of a 5-gallon watering can makes it a lasting tool. It stands up to tough outdoor conditions. With proper care, it could be a part of your gardening routine for years. Plus, using such cans means fewer plastic bottles and jugs in the environment. It’s a win both for you and the planet. Remember to look for these perks when choosing your own 5-gallon watering can.
Selecting the Right 5-Gallon Watering Can
Selecting the ideal 5-gallon watering can is crucial for your garden’s needs. First, think about material. Look for durable plastics or metals that resist rust and damage. They last longer and keep looking good. Some gardeners prefer metal for sturdiness, while others opt for plastic due to its lighter weight.
Next is the design. Choose cans with two handles if you need better control when pouring. For areas hard to reach, consider a can with a longer spout. Also look for a wide opening at the top. This makes filling and adding fertilizers easier.
Consider the nozzle type. A removable rose or sprinkle nozzle benefits various watering tasks. Some plants need a softer sprinkle, others require a steady stream. Check if the nozzle suits your garden’s needs.
Finally, look for a can with measurement markings. They help you monitor water usage and mix fertilizers accurately. A well-chosen 5-gallon watering can saves time, eases your effort in caring for plants, and improves your garden’s health.
How to Use a 5-Gallon Watering Can Effectively
To maximize the benefits of a 5-gallon watering can, follow these practical tips.
Know Your Plants’ Needs
Different plants have unique watering needs. Check how much water your plants need. Adjust how often and how much you water accordingly.
Use a Steady Pour
A steady pour ensures even distribution. It helps avoid soil erosion or seed displacement. Aim for a gentle flow to mimic natural rainfall.
Water at the Right Time of Day
Water plants early in the morning or late in the afternoon. This reduces water evaporation. It allows plants to absorb moisture more effectively.
Incorporate Water-Soluble Fertilizers
Mix water-soluble fertilizers in your 5-gallon watering can. This feeds plants while you water. Be sure to follow the instructions on the fertilizer package.
Keep an Eye on the Weather
Skip watering if rain is in the forecast. Nature can do the work for you. This saves on your water bill and conserves resources.
Practice Deep Watering
For deep-rooted plants, practice deep watering. Fill the can and pour slowly at the base of the plant. This encourages roots to grow deeper and stronger.
These tips ensure that you use your 5-gallon watering can to its fullest potential, promoting the health and growth of your garden while conserving water.
Water Conservation Tips with 5-Gallon Watering Cans
Conserving water is crucial when using a 5-gallon watering can for your garden. Heed these tips to make every drop count:
- Collect Rainwater: Use rain barrels to collect rainwater. Then, fill your 5-gallon watering can with this free resource. It slashes your water bill and is great for plants.
- Mulch Your Soil: Apply mulch around plants. It keeps moisture in the soil longer, so you water less often.
- Check for Leaks: Inspect your can for any leaks. A leaky watering can wastes water and is less efficient.
- Water the Base, Not the Leaves: Water at the base of the plant where the roots are. Wet leaves waste water and may cause disease.
- Use the Right Amount: Don’t overfill your can. Use only what you need for your current watering session.
- Water-saving Attachments: Consider a nozzle with water-saving features. This helps control the flow of water from your can.
Follow these tips to complement the efficient use of a 5-gallon watering can. They help conserve water, save money, and drive eco-friendly gardening practices. These small steps can make a big difference in maintaining a healthy and sustainable garden.
Different Types of 5-Gallon Watering Cans
When shopping for a 5-gallon watering can, you will find various types available. Each type caters to different gardening needs and preferences. Here are some common types you might encounter:
- Plastic Watering Cans: Lightweight and durable, plastic cans resist rust and weather damage. They come in many colors and often cost less than other materials.
- Metal Watering Cans: These are heavier but very sturdy. They usually last longer and have a classic look. Be sure to choose a rust-resistant metal.
- Galvanized Steel Cans: A specific type of metal can, galvanized steel resists rust well. They often feature a traditional design and are quite robust.
- Collapsible Watering Cans: Designed for easy storage, collapsible cans fold down when not in use. They are usually made of flexible materials like silicone.
- Recycled Watering Cans: Eco-friendly options made from recycled materials. These cans help reduce waste and support sustainable practices.
- Decorative Watering Cans: Some cans boast decorative designs. They can serve as garden ornaments as well as practical tools.
Choosing the right 5-gallon watering can depends on your specific garden layout, the plants you nurture, and your personal handling preference. Keep these options in mind to find the perfect match for your gardening activities.
Maintaining Your 5-Gallon Watering Can
A well-maintained 5-gallon watering can offer years of service in your garden. Here are some key maintenance tips to keep it in top condition:
- Rinse After Use: Always rinse out your watering can after use. This prevents residue build-up from fertilizers or sediment.
- Store Properly: Empty your can before storing it. Turn it upside down to drain any remaining water. This stops water from freezing and cracking the can in colder climates.
- Regular Checks: Inspect your can for any signs of damage, such as dents or holes. Small damages can turn into bigger issues if not addressed immediately.
- Handle with Care: Be gentle with your watering can. Dropping it or mishandling it can lead to punctures or other damage that could affect its efficiency.
- Clean the Nozzle: If your can has a rose or sprinkle nozzle, clean it regularly. This keeps the watering flow smooth and unblocked.
- Avoid Sun Damage: If made of plastic, keep your watering can out of direct sunlight when not in use. UV rays can weaken the plastic over time.
By following these simple steps, your 5-gallon watering can will remain a reliable tool for your gardening tasks. Proper care ensures your can’s longevity and helps in your quest for an eco-friendly and efficient garden.
Adapting 5-Gallon Watering Cans for Various Plants
When you use a 5-gallon watering can, consider the different types of plants you have. Each plant may require a unique approach to watering. Here’s how you can adapt your watering technique to various plants using your 5-gallon can:
- Adjust Water Flow: Some plants prefer a gentle shower, while others need a steadier stream. Use nozzles with different settings to control the water flow.
- Watering Deep-rooted Plants: For these, fill your can and slowly water the base. This encourages deep root growth.
- Handling Seedlings: Be extra gentle. Use a fine spray to avoid disturbing the delicate seeds or roots.
- Succulents and Cacti: These need less water. Avoid overwatering by using just a portion of your can’s capacity.
- Container Plants: They often need more frequent watering. Check the soil moisture level before deciding how much water to give.
- Large Shrubs and Trees: Give these a full can of water. It ensures water reaches deep into the soil.
By tailoring your watering practices, you ensure each plant gets the care it needs. Your 5-gallon watering can is a versatile tool in your gardening arsenal. It helps you meet the diverse watering needs of your garden with precision and ease.
DIY 5-Gallon Watering Can Ideas
Creating your own 5-gallon watering can is both rewarding and practical. Here are some creative DIY ideas:
- Repurpose Old Containers: Find an old container and transform it into a watering can. Drill holes in the lid for a sprinkle effect.
- Add a Spout: Attach a spout to a sturdy 5-gallon bucket. Ensure it’s well-secured to avoid leaks.
- Decorate with Paint: Make your can unique. Use outdoor paints to design and personalize it.
- Construct Handles: For easier carrying, add handles from old garden tools or durable materials.
- Recycle Water Bottles: Small holes pierced in caps of large bottles can act like a nozzle.
- Install Measurement Marks: Use waterproof markers to add measurement lines inside your can.
- Make It Collapsible: Use a flexible material to create a can that folds when empty for easy storage.
These DIY watering can projects not only save money but also spark creativity in your gardening tasks. Remember to keep the keywords ‘5 gallon watering can’ in mind as you choose materials and build your custom can. Stay within water conservation practices and tailor your can to your garden’s specific needs for both efficiency and sustainability.

Efficient Plant Growth: The Best Watering Can for Indoor Plants
Importance of Choosing the Right Watering Can
Selecting the best watering can for indoor plants is crucial. A good watering can helps to apply water efficiently and without waste. It also ensures that your plants receive the correct amount of water. This is important because too much or too little water can harm plant growth. The right watering can design makes the task easier and more enjoyable. Look for one that suits the size of your indoor garden and your physical abilities. A well-chosen watering can also minimize effort and reduce the risk of spills. Finally, a high-quality watering can is an investment. It will last longer and perform better than a cheaper, less durable option. In summary, the right watering can save time, keep plants healthy, and provide convenience.
Types of Watering Cans Suitable for Indoor Gardens
When choosing the best watering can for indoor plants, consider the different types. The marketplace offers various styles to suit every need. Here are the common types you’ll find:
- Plastic Watering Cans: These are lightweight and cost-effective. They come in many colors and sizes. They’re ideal for those on a budget.
- Metal Watering Cans: Often made from stainless steel or galvanized steel, these cans are durable. They’re heavier than plastic but can last for years.
- Ceramic Watering Cans: Ceramic adds a decorative touch to your garden space. However, these are more fragile than metal or plastic.
- Collapsible Watering Cans: Great for saving space. When not in use, you can fold them up and tuck them away.
- Watering Cans with Long Spouts: These are perfect for reaching tight spaces. The long spout offers precise watering, reducing spillage.
Each type has its benefits, so select the one that aligns with your indoor gardening needs. Think about the weight when full, ease of storage, and how well it pours. A good rule of thumb is to find a balance between functionality and aesthetics. You want your watering can to do the job well and look good in your indoor garden.
Factors to Consider When Selecting a Watering Can
Choosing the best watering can for indoor plants involves several considerations to ensure optimal performance and ease of use. Here are key factors to keep in mind:
- Watering Capacity: Consider the volume of water the can holds. A larger capacity means fewer refills, but it should not be too heavy when full.
- Can Material: The material of the can affects its durability and weight. Plastic is light, metal is sturdy, and ceramic is decorative.
- Spout Design: Look for a spout that provides a steady, controlled flow. A long spout can reach plants in tricky spots.
- Handle Comfort: Ensure the handle is comfortable to grip. This will make watering less taxing on your hands and wrists.
- Ease of Filling: The can should be easy to fill. A wide opening helps prevent water from spilling when pouring it in.
- Balance and Control: A good can should be easy to tilt and control. It should not tip over when it’s full or empty.
- Storage: If space is tight, consider a can that’s compact or collapsible. It should store away neatly when not in use.
- Ease of Cleaning: Select a can that’s easy to clean to prevent algae build-up and blockages. Removable spouts or open-topped designs work well.
Consider these factors together to find the best fit for your indoor gardening needs. The goal is to water your plants effectively with minimal effort and hassle.
The Best Watering Can Materials for Durability and Function
Choosing the right material for a watering can is key for both durability and functionality. Plastic, metal, and ceramic are the most common materials used. Each has unique benefits to consider. Here’s a breakdown:
- Plastic: Plastic is the go-to for those seeking lightness and affordability. It’s resistant to rust and can survive drops and falls. But, it may degrade over time with exposure to sunlight.
- Metal: Options like stainless steel or galvanized steel offer longevity. Metal watering cans can handle wear and tear, making them a sturdy choice. However, they will be heavier and may require more strength to use when full.
- Ceramic: Ceramic cans serve a dual purpose. They water your plants and add aesthetic value to your space. While less practical for frequent use due to their fragility, they’re perfect for decor and light watering needs.
The best watering can for indoor plants will blend practicality with endurance. Metal cans lead in durability, withstanding years of use. Plastic is preferred for its ease of handling, especially if you move your can often. Ceramic, while not as robust, offers an elegant touch to your indoor garden.
When selecting your can, take into account how it will harmonize with your daily gardening. Consider how often you’ll use it and where it will be stored. Durability and function are paramount, but so is choosing a material that fits your gardening lifestyle.
Ergonomic Designs for Comfort and Ease of Use
When choosing the best watering can for indoor plants, ergonomics play a huge role. Comfortable, ergonomic designs can prevent strain on your hands and back. Here are factors that point to a good ergonomic design.
- Lightweight Construction: A can that’s light when empty will be easier to handle when full.
- Curved Handles: Look for handles that match the natural grip of your hand. This design eases the stress on your wrists.
- Balanced Weight Distribution: When filled with water, a good can should feel balanced. This makes for easier lifting and carrying.
- Thumb-Controlled Water Valves: Some cans have valves that you control with your thumb. This gives you better control over the water flow and reduces hand fatigue.
- Back-Saving Length: For tall indoor plants, choose a can with a long spout. This prevents you from stooping.
Each of these features aims to reduce the effort required to water indoor plants. They help make the task a more enjoyable and pain-free experience. Keep these ergonomic qualities in mind to find the best watering can for your indoor garden comfort.
Watering Can Capacity and Size for Indoor Use
When seeking the best watering can for indoor plants, size and capacity matter. Aim for a can that matches your indoor gardening scale. Here are key points to keep in mind:
- Appropriate Capacity: Choose a watering can that holds enough water for your plants without needing constant refills. Yet, be wary of one too heavy when full.
- Size Matters: A large can might be hard to maneuver around tight spaces. A smaller one may fit better in an indoor setting.
- Weight When Full: Remember, water adds weight. A full can should be comfortable to carry around your garden.
- Compact Design: If space is limited, opt for a watering can with a sleek, space-saving design.
- Measurements: Some cans have measurements marked. This helps in providing precise amounts of water to your plants.
Selecting the right capacity and size will make your indoor gardening more efficient and enjoyable. A can that’s too big or small can make watering a chore. Strike a balance that works best with your indoor layout and plant collection.
Innovative Features in Modern Watering Cans
Modern watering cans come with smart features to enhance indoor gardening. These advancements offer convenience and cater to specific plant care needs. Below are innovative elements you might find in the best watering can for indoor plants:
- Adjustable Nozzles: Some cans feature nozzles with settings. You can switch from a gentle shower to a steady stream.
- Built-In Measuring Scales: Transparent or marked sides help measure water exactly. This ensures accurate watering.
- Lockable Sprinkler Heads: This function prevents accidental water release. It’s perfect for moving the can without spills.
- Ergonomic Trigger Handles: These reduce thumb fatigue. They let you control the water flow with minimal effort.
- Detachable Spouts: Easy removal and cleaning of the spout prevents clogs. This helps maintain a consistent water flow.
- Integrated Filters: Filters trap debris and prevent clogs. Clean water flows to your plants each time.
- Foldable or Collapsible Bodies: Great for small spaces. These cans shrink down for storage and expand for use.
- Dual-Function Designs: Some cans combine watering with other tasks. You might find cans with built-in misters for delicate plants.
Modern designs make indoor plant care easier and more effective. Always look for features that suit your specific gardening requirements. The right can with the right features can transform watering from chore to joy.
Tips for Maintaining Your Watering Can
Maintaining the best watering can for indoor plants ensures longevity and optimal performance. Here are some straightforward tips to keep your watering can in prime condition:
- Regular Cleaning: Empty your can after each use. Rinse it with clean water to prevent algae and mineral build-up.
- Check for Blockages: Inspect the spout and nozzle. Unclog any debris to maintain a steady water flow.
- Dry Properly: Avoid rust and wear by drying the can after cleaning. Store it in a dry place.
- Handle with Care: Even durable cans need careful handling. Avoid dropping or harsh treatments.
- Sunlight Protection: For plastic cans, limit direct sun exposure. Prolonged sunlight can cause the material to weaken.
- Regular Inspections: Look for signs of wear or damage. Replace parts like washers or seals if needed.
By following these simple maintenance steps, you ensure your watering can serves well for many seasons. Proper care also helps in precise and efficient watering, keeping your plants healthy and happy.
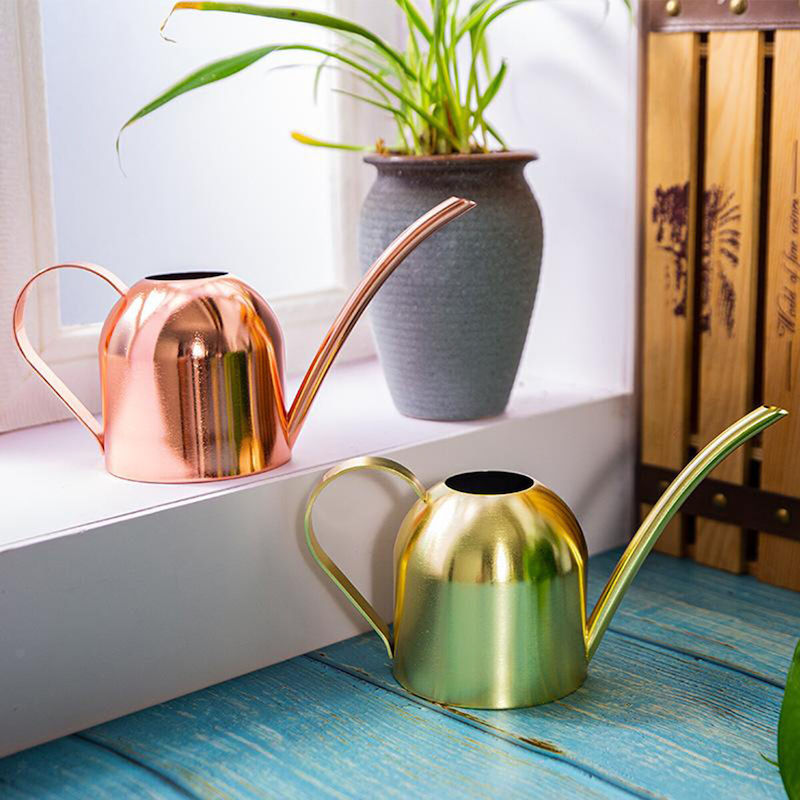
Decorative Watering Can Styles for Every Gardener’s Needs
The History of Watering Cans and Their Evolution
The watering can has a rich history, evolving through centuries. Originally, people used simple vessels like animal horns or sea shells to sprinkle water over plants. Over time, these tools transformed to meet gardener’s needs. By the 17th century, metal cans with a handle and spout became popular in Europe. These cans featured a rose—a removable nozzle that disperses water evenly, mimicking raindrops. This was a game-changer for seedlings and delicate flowers.
In the 19th century, the industrial revolution brought mass production. This made watering cans cheaper and more accessible to the average gardener. From there, designs exploded in variety. Materials switched up too. Metal remained a favorite, but plastic and ceramic options appeared. Each had its pros and cons, deciding factors for many garden lovers.
Today, the decorative watering can is both a tool and an art piece. Modern designs respect tradition but also break new ground. Some celebrate heritage with vintage looks. Others look forward, using innovative materials and styles. From basic functional models to those doubling as stunning garden decor, watering cans continue to blossom.
The evolution of watering cans reflects changing times and technologies. Yet, they remain a timeless staple in gardening culture. Whether serving as a practical item or a stylish statement, the watering can’s history showcases human ingenuity and our perennial love for gardening.
Comparing Materials: Metal vs. Plastic vs. Ceramic Watering Cans
Choosing the right material for a decorative watering can is crucial. It affects durability, weight, and style. Let’s compare metal, plastic, and ceramic options to find the best fit for your gardening needs.
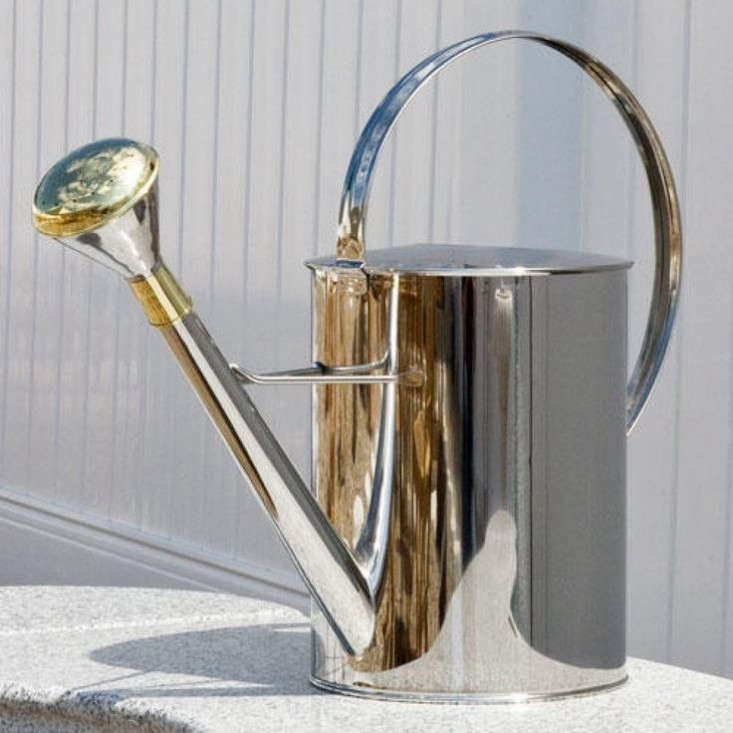
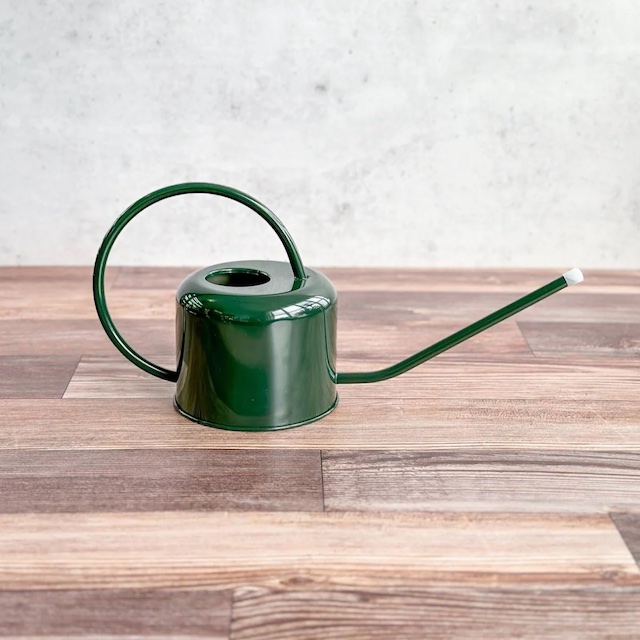
Metal Watering Cans
Metal cans are tough and last long. They come in classic designs that often appeal to traditional gardeners. These cans can handle the elements, making them ideal for outdoor use. On the downside, metal cans can be heavy, especially when full. They may also rust over time if not cared for properly.
Plastic Watering Cans
Plastic cans are lightweight and cost-effective. They suit gardeners who prefer easy-to-carry and affordable options. Plastic doesn’t rust, which is a plus. However, it might not withstand harsh weather as well as metal. Also, some gardeners may find plastic less attractive for decorative purposes.
Ceramic Watering Cans
Ceramic cans are beautiful and often serve as decor pieces. They work well indoors and can come in various colors and designs. Ceramic is fragile though and can crack or break if dropped. These cans are generally more expensive and heavier than plastic, making them less practical for regular use.
Each material offers unique benefits and drawbacks. Consider where and how you’ll use your decorative watering can. Factor in the weight, weather resistance, and style that suits your garden best.

Elegant Design Options for Indoor Use
When selecting a decorative watering can for indoor use, elegance is often a top priority. Many gardeners seek cans that complement their interior decor while being functional. Here are some design options you’ll find appealing for indoor gardening:
Sleek Stainless Steel Designs
Stainless steel cans offer a modern look with a sleek finish. They are durable and resist corrosion, making them a smart choice for watering indoor plants. The reflective surface adds a touch of sophistication to any room.
Charming Ceramic Varieties
Ceramic watering cans come in a myriad of colors and patterns. These cans double as art, beautifying shelves or windowsills even when not in use. Their sturdy construction means they last, but remember, they can be heavy and delicate.
Compact Plastic Options
For tight spaces, compact plastic cans are ideal. They’re light and easy to store in small cabinets or shelves. While functional, plastic variants come in diverse styles, ensuring they don’t sacrifice looks for practicality.
Glass Watering Globes
Glass globes are a unique and elegant choice. They slowly release water to plants, combining functionality with a decorative appeal. Their subtle design suits any interior style, and they’re perfect for maintaining moisture levels while you’re away.
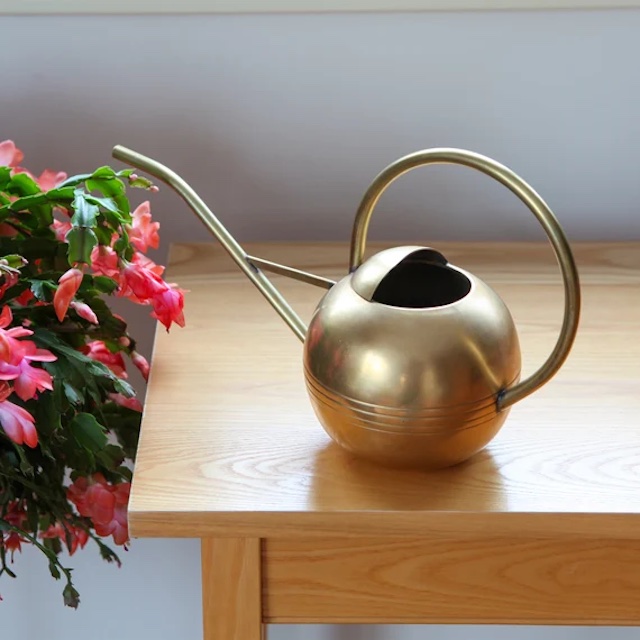
Brass Accents
Brass watering cans bring a vintage feel to your space. Their classic look, often with intricate details, can serve as a standout piece in your home. Plus, brass is resistant to corrosion, which is ideal for the humid environment of indoor gardening.
Your choice of an elegant decorative watering can for indoor use should align with both functionality and aesthetic. Keep in mind ease of use, weight, and overall style to find the perfect match for your home.
Functional and Stylish Watering Cans for Outdoor Gardens
When choosing a decorative watering can for outdoor gardens, function and style are key. These cans should endure outdoor conditions while boosting garden aesthetics. Here’s what to consider for an ideal outdoor option:
Durable and Weather-Resistant Materials
Look for materials that withstand sun, rain, and temperature changes. Metal cans, particularly those with a galvanized finish, resist rust and wear. Plastic varieties offer UV resistance and handle fluctuating weather well.
Large Capacities for Efficiency
Opt for larger capacities to reduce refill trips. This is efficient for watering multiple plants or larger gardens. However, consider the weight when full to ensure ease of use.
Ergonomic Designs for Comfort
Handle and spout design matter for comfort and control. Look for cans with a comfortable grip and a long, angled spout to reach plants easily.
Vibrant Colors and Patterns for Appeal
Select cans with colors or patterns that stand out. They can serve as a focal point in your garden setup. A pop of color adds life to your outdoor space.
Integrated Features for Convenience
Some cans include a sprinkler head or measuring lines. These features add convenience and precision to your watering routine.
Choosing a decorative watering can for outdoor use involves balancing practicality and style. Prioritize materials that last outdoors, comfort during use, and designs that complement your garden.
Hand-Painted and Artisan-Crafted Watering Cans
For those with an eye for unique artistry, hand-painted and artisan-crafted watering cans are treasures. They infuse personality and charm into your gardening essentials. Local artisans and crafters often use this as a canvas to showcase skill and creativity.
Locally Made, One-of-a-Kind Pieces
Hand-painted cans boast one-of-a-kind designs. Each carries the signature touch of its creator. These pieces reflect local culture and artistry. They are more than just tools; they tell a story and embody the love for craft.
Earth-Friendly and Sustainable Choices
Artisan watering cans often use sustainable methods and materials. They support the eco-conscious gardener. Choosing these cans means supporting local economies and reducing your carbon footprint.
Customization Options
Many crafters offer to customize your decorative watering can. You can request specific colors, patterns, or motifs. This service makes your watering can a personal statement piece. It also makes a thoughtful gift for fellow garden enthusiasts.
Durable and Functional Art
Don’t think these creations are only for display. Artisans design them for use too. They combine beauty with functionality. Expect durability and ergonomic features alongside the stunning visuals.
Hand-painted and artisan-crafted watering cans provide a delightful blend of art and utility. Consider one for a splash of elegance and tradition in your gardening routine.
Personalizing Your Watering Can: DIY Ideas
Adding a personal touch to your decorative watering can is fun and creative. It reflects your style and makes gardening even more enjoyable. Here are DIY ideas to personalize your watering can:
Custom Color Paint Jobs
Paint your can in colors that you love. Use spray paint for a smooth finish. Seal with a clear coat to protect against the weather.
Stenciled Designs
Apply stencils for neat patterns or shapes. Use acrylic paint and a sponge brush for best results. Remove the stencil while the paint is still wet for crisp lines.
Decoupage Art
Decoupage with fabric or paper cutouts adds character. Apply with decoupage glue and seal with a waterproof sealer. Choose themes that speak to your garden’s vibe.
Bejeweled Embellishments
Glue on gems or mosaics for sparkle and texture. Map out your design before you start. Use a strong adhesive designed for outdoor use.
Rope-wrapped Handles
Wrap the handle with jute or colored rope for a rustic look. Secure the ends with glue or clear tape. It gives a better grip and a bespoke feel.
Personalized Labels
Create labels with your plant names or inspiring quotes. Use waterproof markers or vinyl stickers. It’s both charming and functional, especially for garden novices.
DIY projects give a new life to your decorative watering can. They also make great gifts for friends who garden. Choose a DIY idea that excites you and have fun with the transformation.
Selecting the Right Size and Capacity for Your Needs
When looking for a decorative watering can, size and capacity are key. You need one that fits your garden’s scale. A large garden needs a can with more volume to save time on refills. For small indoor plants or herb gardens, a smaller can is enough.
Picking the Perfect Size
Choose a can that’s easy to lift and maneuver. For larger spaces, a can with a 2-gallon capacity works well. In tight indoor areas a 1-liter can should suffice. Remember, a full can gets heavy. It’s vital to find one that won’t strain your arms when watering.
Considering Watering Can Capacity
Think about the number of plants you have. More plants mean you’ll benefit from a larger capacity can. Be mindful not to choose one so big that it’s hard to pour from. A can that’s too big can also be awkward to store. Strike a balance between capacity and convenience.
Suitability for Plant Types
Determine the kind of plants you’re tending to. Delicate or small plants need gentle watering. A can with a small spout provides control and precision. For thirsty plants, a large spout can deliver more water quickly.
In summary, match the watering can’s size and capacity to your garden’s needs. Factor in space, number and type of plants, and how much water they need. With these considerations, you’ll find the perfect watering can that’s both useful and decorative.
The Best Places to Find and Purchase Decorative Watering Cans
When searching for the perfect decorative watering can, knowing where to look is key. Here are top places to find one:
Garden Centers and Nurseries
Local garden centers and nurseries often stock a variety of watering cans. You’ll find metal, plastic, and ceramic options suited for different uses. Staff can help you pick based on your garden’s needs.
Home Improvement Stores
Stores like Home Depot or Lowe’s offer watering cans that blend function with style. They have cans for every budget. Shopping in person lets you gauge the can’s feel and weight.
Online Marketplaces
Websites like Amazon and eBay feature a wide selection. From utilitarian to designer brands, it’s easy to compare prices and reviews. Plus, they deliver right to your doorstep.
Specialty Online Stores
Online stores specializing in gardening supplies curate selections for all styles. Sites like Gardener’s Supply Company provide quality cans that are also decorative. They often list materials and ergonomic details.
Antique Shops and Flea Markets
For vintage charm, check out antique shops and flea markets. You may find a unique, hand-painted piece. Prices can vary, so it’s worthwhile to explore and haggle.
Arts and Crafts Fairs
Local artisans display hand-crafted cans at these events. They’re perfect for unique and possibly customizable pieces. Supporting local artists feels good too.
Eco-Friendly and Artisan Retailers
Stores emphasizing sustainability and hand-made items stock eco-friendly cans. You’re likely to find something made with recycled materials.
In your hunt for the right decorative watering can, consider the array of choices. Weigh between brick-and-mortar stores or the convenience of online shopping. Always factor in your garden’s style and functional requirements when making your choice.
Japanese Watering Can: The Elegant Beauty Meets Functionality
The Art and Craftsmanship of Japanese Watering Cans
The Japanese watering can reflects a tradition of fine craftsmanship. Makers craft each can with care, ensuring not only beauty but also functionality. These watering cans often come from areas known for metalwork. Craftsmen use skills passed down through generations. They shape each piece with precision. Fine materials, like copper and brass, add to their elegance.
The making of a Japanese watering can is an art. Designers consider both form and function. They add details that make the cans not just tools, but also works of art. For instance, the spout design is a key aesthetic feature. The spouts are long and slender, allowing for a gentle flow of water. This design suits tender plants and seedlings well.
The handles are another aspect of their rich artistry. They offer a comfortable grip and balance. This ease of use shows the thoughtfulness in the Japanese approach. The balance ensures that gardeners can water plants with ease, a testament to the makers’ expertise.
Each Japanese watering can is unique. Artisans often leave their mark on every piece, symbol of pride in their work. Owning a Japanese watering can means having a piece of tradition. It also means appreciating an object that is both practical and beautiful.

Key Features That Make Japanese Watering Cans Unique
Japanese watering cans stand out for several reasons. Their distinct features not only set them apart aesthetically but also functionally. Here are the key elements that define their uniqueness:
- Precision Spouts: The spouts are long and narrow, designed to control water flow meticulously. This precision helps in watering small pots and delicate plants with ease.
- Craftsmanship: Each can showcases the craftsmanship of its maker. Handmade qualities ensure no two cans are identical, providing a sense of exclusivity.
- Material Quality: Made from high-grade copper or brass, Japanese watering cans resist corrosion. They sustain their luster over time, adding to their appeal.
- Balanced Handling: The handle design gives the user a comfortable grip and flawless balance. This feature makes watering effortless and precise, reducing strain on the arms.
- Aesthetic Appeal: Beyond function, these watering cans exhibit an aesthetic value. Their elegant shapes and lines make them decorative pieces in their own right.
By incorporating these features, Japanese watering can manufacturers achieve a harmonious blend of form and functionality. Each can serves not just as a gardening tool but also as an embodiment of traditional Japanese art. Gardeners often choose these cans for their reliability and the touch of refinement they add to gardening routines.
How Japanese Watering Cans Enhance Gardening Experience
Gardening is more than just a hobby; it’s an experience. Japanese watering cans translate that philosophy into a tool that enhances the overall gardening process. Their unique features are not just for show; they serve specific functions that can make gardening more efficient and enjoyable. Here are some ways Japanese watering cans can enhance your gardening experience:
- Precision Watering: Their carefully designed long and narrow spouts allow for precise watering. This helps gardeners nurture delicate flowers and seedlings without the risk of overwatering.
- Ergonomic Balance: The thoughtfully crafted handles provide an ergonomic advantage. They make holding and lifting the can easier, offering a balanced watering experience that is kind to your muscles.
- Aesthetic Enjoyment: The beautifully crafted designs turn watering into an aesthetic experience. Each glance at a Japanese watering can offers a visual delight, making every gardening session more inspiring.
- Longevity: The high-grade materials used in Japanese watering cans ensure they last for years. Their durability means better value over time, as the need for replacements is reduced.
- Quiet Serenity: The gentle flow of water from these cans adds a peaceful sound to the garden atmosphere. This contributes to a calming experience while tending to plants.
In conclusion, a Japanese watering can does more than water plants. It adds quality, beauty, and joy to the art of gardening. By choosing this tool, gardeners invest in an object that prioritizes both function and form, making each moment in the garden a sophisticated and serene affair.
Types of Japanese Watering Cans
In exploring the types of Japanese watering cans, one finds diversity in design and size. Below are some common types that exhibit the rich tradition and ingenuity behind their creation:
- Standard Cans: These are often the go-to choice for everyday gardening. They feature the classic long spout and a handle across the top. This design balances well in the hand for ease of use.
- Slim Cans: Perfect for small spaces and indoor plants, slim cans have narrower bodies. They are lighter and easy to manoeuvre in tight spots.
- Haws Cans: Named after a famous British design but embraced by Japanese artisans, these have a swan-neck spout. They’re great for gentle watering and reach under foliage.
- Tsuboishi Cans: Usually made from copper, these feature a unique, rounded shape. The name means ‘water jug stone’ in Japanese and reflects their pebble-like appearance.
- Modern Designs: Some cans incorporate modern elements like stainless steel. They offer a sleek look while maintaining functionality and durability.
Each type of Japanese watering can is designed not just for its utility, but to harmonize with the gardener’s needs, be it in a vast garden or a modest indoor setting. When choosing a Japanese watering can, consider the size of your garden, the types of plants you have, and the aesthetics that appeal to you. From standard cans to modern adaptations, the Japanese watering can embodies a blend of ancient tradition and contemporary gardening needs.
Choosing the Right Japanese Watering Can for Your Garden
Selecting the ideal Japanese watering can for your garden involves several considerations. Tailoring your choice to match your gardening style and the needs of your plants is crucial. Below are key factors to guide you in making the right selection:
- Assess Your Garden: Size matters. A larger garden will require a can with more capacity, while a smaller or indoor garden may benefit from a slim, lighter can. For large outdoor areas, a standard can might be most suitable, whereas for smaller indoor plants, a Tsuboishi or slim can would be more appropriate.
- Consider Plant Types: Delicate flowers and seedlings need gentle watering. A can with a long spout, like a Haws, is perfect for reaching under leaves and between tight plantings without causing damage.
- Comfort in Use: A can should feel good in your hands. Look for one with a handle design that offers a comfortable grip and balance to avoid straining while watering.
- Match Your Decor: If aesthetics are important to you, choose a can that complements your garden’s style. An elegant design can serve as a decorative piece when not in use.
- Storage Space: Don’t forget to account for where you will store your watering can. Ensure it fits comfortably in your garden shed or home without taking up excess space.
By considering these factors, you can pinpoint the best Japanese gardening can that brings efficiency and style to your gardening routine. Always remember, the keyword ‘japanese watering can’ not only signifies a gardening tool but an addition to your garden that combines functionality with artistic heritage.
The Importance of Material and Design in Japanese Watering Cans
The materials and design of a Japanese watering can are crucial. They dictate its durability, function, and aesthetics. Let’s delve into why these aspects are so important:
- Durability of Materials: Japanese watering cans often use copper or brass. These metals resist rust and last longer. You can count on these materials to uphold quality through the years.
- Functionality in Design: The design of a can affects its use. Long spouts provide precise watering. Balanced handles make cans easier to hold and pour. These features show how design enhances function.
- Aesthetic Qualities: Beauty is key in a Japanese watering can. Elegant shapes and polished surfaces catch the eye. They double as decor when not in use.
- Custom Design Elements: Artisans may add unique touches. Personal designs or symbols make each can special. They mirror the user’s style and the artistic tradition of Japan.
In short, when looking for a Japanese watering can, think about the material and design. They are not just about looks. They ensure the can serves well in the garden and lasts. Choose a can that is both practical and pleasing to the eye. Remember, with every use, you’re not just watering plants. You are holding a piece of art that values both your gardening needs and aesthetic pleasures. The phrase ‘japanese watering can’ stands for this harmony between beauty and utility.
Maintenance and Care Tips for Japanese Watering Cans
To keep your Japanese watering can in top condition, follow these simple maintenance and care tips:
- Regular Cleaning: After each use, rinse the can with water. It prevents buildup of minerals and dirt. If needed, use a soft brush to clean the spout.
- Proper Drying: Before storing, empty the can completely. This stops water from causing internal damage. Wipe the exterior with a dry cloth to prevent water spots.
- Avoid Chemicals: Stay clear of harsh cleaners. They can damage the can’s material. If you need to deep clean, use a mild soap and warm water mix.
- Polishing: For cans made of copper or brass, polish them occasionally. It keeps the metal shining. You can use a natural polish like lemon juice and salt.
- Storage: Store your can in a dry place. Protect it from extreme temperatures and direct sunlight. These conditions can cause the material to deteriorate.
- Inspection: Check the can regularly for signs of wear or damage. Look at seams and joints. Repair any leaks promptly to keep them functioning well.
By adhering to these tips, your Japanese watering can will continue to be both a useful tool and an attractive element in your gardening toolkit. Embrace the keywords ‘Japanese watering can’ as a symbol of care and quality that enhances your gardening practice.
Where to Find Authentic Japanese Watering Cans
Finding an authentic Japanese watering can be a delightful quest for any gardener. Here are practical avenues to explore:
- Specialty Gardening Stores: Many garden centers and specialty shops stock authentic Japanese watering cans. Look for stores with a focus on high-quality gardening tools.
- Online Marketplaces: Websites like Amazon and eBay often have listings for Japanese watering cans. Read seller reviews to ensure authenticity.
- Craft Fairs and Markets: Keep an eye out for local craft fairs or markets. Artisans sometimes sell their creations directly to the public.
- Direct From Japan: Consider buying directly from retailers or craftsmen in Japan. Online shops based in Japan may offer a wider selection.
- Collectors and Antique Shops: Some collectors and antique stores may have vintage or rare Japanese watering cans.
- Gardening Forums and Communities: Connect with fellow gardening enthusiasts. They might have tips on where to find these unique items.
Remember to verify the authenticity of the Japanese watering can before purchasing. Authentic cans often come with a maker’s mark or a certificate of authenticity. While searching, keep in mind the keywords ‘japanese watering can’ to narrow down your search to the genuine products. With these tips, you’re well on your way to acquiring a beautiful, functional piece of Japanese craftsmanship for your garden.
The Ultimate Guide to Choosing Your Best Outdoor Watering Can
Introduction to Outdoor Watering Cans
Gardening is both an art and a science. A crucial tool for any gardener is a reliable outdoor watering can. It ensures your plants get the water they need. The best outdoor watering can combines function and style, making garden work easier and more enjoyable. In this guide, we will explore various types, materials, and features of watering cans. These factors will help you find a can suited to your gardening tasks. We will also discuss how to balance size with manageability. Plus, we will look at how a watering can’s design can blend with your garden’s decor. Our goal is to help you make an informed choice for your gardening needs. Let’s dive into the world of outdoor watering cans.
Types of Outdoor Watering Cans
Choosing the best outdoor watering can is crucial for gardening. Multiple types cater to different needs. Here’s a rundown of the common ones you might encounter.
Traditional Cans
Traditional cans feature a classic design. They have a handle on the top and a long spout. These cans are ideal for general use. Their straightforward design makes them easy to fill and pour.
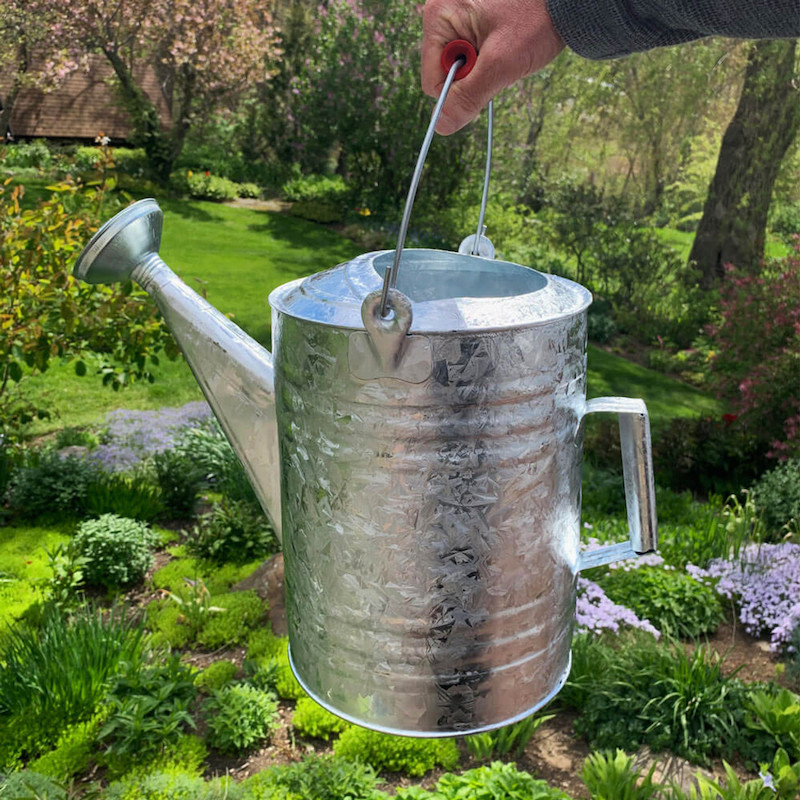
Galvanized Steel Cans
Galvanized steel cans resist rust and corrosion. These are great for longevity. They are heavier but highly durable. Their vintage look is also appealing to many gardeners.
Plastic Cans
Plastic cans are lightweight and affordable. They come in various colors and sizes. They are perfect if you are looking for something easy to carry or store.
Watering Cans with Removable Heads
These cans have detachable spout heads. This feature allows you to adjust the water flow. It is perfect for delicate plants or seedlings. You can switch between a gentle shower or a steady stream.
Each type serves a unique purpose. Consider your gardening style and plant needs when choosing. The best outdoor watering can should match both the practical and aesthetic requirements of your garden.
Factors to Consider When Selecting a Watering Can
When shopping for the best outdoor watering can, several factors are key. Consider these points before making a decision.
Plant Types
Different plants require different amounts of water. Look for a watering can that will suit all your plants. For varied needs, consider cans with adjustable spouts.
Garden Size
For large gardens, a can with higher capacity is convenient. A smaller can will serve for balcony or indoor gardens.
Handling Comfort
Choose a can with an ergonomic handle. It should be comfortable to hold even when full. This makes watering less tiring.
Water Flow Control
Consider cans with adjustable nozzles. This allows precise watering. Gentle showers are best for delicate plants, while stronger streams suit more robust greenery.
Durability
Opt for materials that withstand wear. Metal cans last longer but may be heavier. Plastic is lighter but may need replacing sooner.
Ease of Filling
The opening should allow easy filling. Wide openings are better to prevent spills.
Weigh each factor based on your needs. The best outdoor watering can will make watering Plants efficient and enjoyable.
Material Choices for Durability and Style
When selecting the best outdoor watering can, consider both durability and style. The material of the watering can plays a significant role in both aspects. Here’s a look at some common materials and their benefits.
Galvanized Steel
Galvanized steel cans boast toughness. They cope with harsh weather without rusting. The zinc coating protects them. These cans feel heavy, but they last many seasons. Their classic look appeals to traditional gardeners.
Plastic
Plastic cans are light and come in more colors. Their affordability makes them a popular choice. They are prone to wear but replaceable at little cost. Ideal for those who prefer ease over longevity.
Stainless Steel
Stainless steel cans resist rust and offer a modern appearance. They are more expensive, but they balance durability with a sleek design. These cans are a staple for a gardener valuing function and fashion.
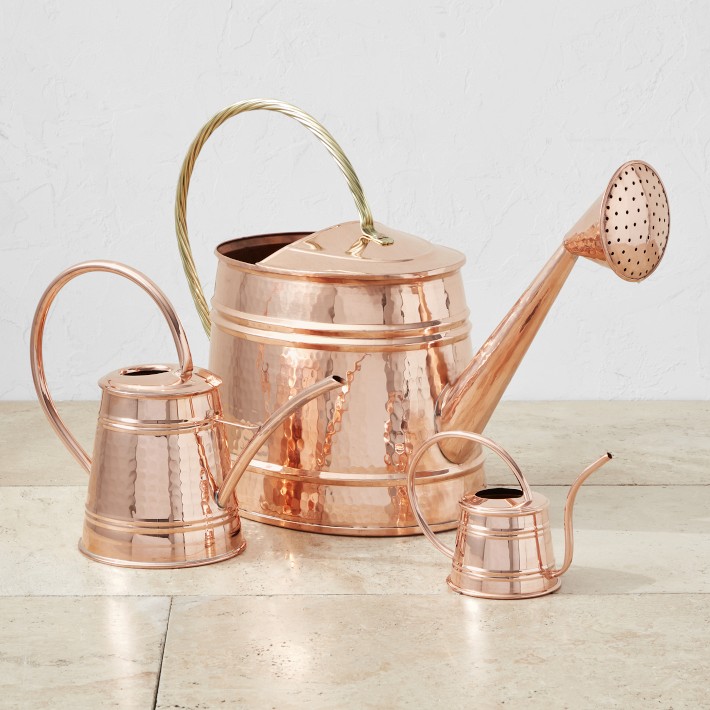
Copper
Copper watering cans are a premium option. They develop a unique patina over time. This look is perfect for gardens with a rustic or vintage feel. Keep in mind, copper is heavier and often pricier.
Ceramic
Ceramic cans can be beautifully crafted. They often come as part of a garden decor set. Though delicate, they make a statement piece. Be cautious as they can break easily if dropped.
Rubber
Rubber cans are flexible and crack-resistant. They are less common but provide a comfortable grip. Good for those seeking a unique, functional watering can.
Your choice should match your garden’s style and your practical needs. Each material has its pros and cons. Consider how often you garden and your personal taste when choosing your watering can’s material.
Capacity and Weight: Balancing Size and Manageability
Selecting the best outdoor watering can involves considering both capacity and weight. The right balance is vital.
Choosing the Right Capacity
The capacity you need depends on your garden’s size. A large garden needs a can that holds more water. This reduces trips to the tap. Small gardens benefit from a smaller can for easy handling. Remember, a larger can may become heavy when full, making it hard to manage.
Considering Weight for Comfort
The material of the can affects its weight. Metal cans are heavier but very durable. Plastic is light but may not last as long. Think about how much weight you can comfortably carry. Choose lighter cans if you’ll move a lot or have physical limitations.
Managing with the Right Design
A good design can make a heavier can more manageable. Look for a well-placed handle to balance weight. Some cans have dual handles. One on the top for carrying; one on the side for pouring.
Watering Can Weight when Full
Keep in mind the added weight of water. A full gallon of water weighs about 8.34 pounds (3.78 kg). Calculate this with your watering can’s empty weight. This ensures you don’t choose a can that’s too heavy to use when full.
By considering capacity and weight, you can find a watering can that’s easy to use. This makes your gardening more efficient and enjoyable. Select a can that you can handle comfortably and suits your garden’s watering needs.
Features for Enhanced Functionality
When shopping for the best outdoor watering can, keep an eye out for features that boost functionality. Enhanced features can make watering more efficient and your gardening more effective. Here are some to consider:
Adjustable Spouts
Look for watering cans with spouts that adjust. They let you change the water flow to fit different plant needs.
Measurement Markings
Some cans have clear measurement markings. This helps you track how much water you’re using.
Lockable Spray Nozzles
Cans with a lock feature on the nozzle allow for continuous spray. This means less effort during long watering sessions.
Detachable Rose Heads
Removable rose heads facilitate different watering patterns. This feature is great for tender seedlings or robust plants alike.
Handles with Comfort Grip
Handles with a soft grip reduce hand fatigue. Choose them for added comfort when watering.
Built-In Filters
Filters within the spout prevent clogs from debris. They ensure a steady, uninterrupted flow of water.
Stabilizing Base Design
A stable base design prevents the can from tipping over when set down. This feature ensures safety and convenience.
Fill Holes with Closure
A closure for the fill hole can prevent water spillage when moving the can.
By focusing on these features, you can find a watering can that makes gardening tasks easier. Choose those that match your gardening style and enhance your gardening experience. Keep functionality in mind to find the best outdoor watering can for your needs.
Aesthetics: Combining Function with Garden Decor
Choosing the best outdoor watering can is not just practical. It’s also about style. Your watering can should look good in your garden. It’s a tool you’ll use often. So it makes sense to pick one that you like to see. Here are ways to match your can’s look to your garden decor.
Match Garden Theme
If your garden has a theme, find a can that fits. For a modern space, choose a sleek, stainless steel can. A vintage garden might suit a galvanized steel or copper can.
Color Coordination
Plastic watering cans come in many colors. Pick one that complements your flowers or garden furniture. This adds to your garden’s overall charm.
Decorative Designs
Some watering cans have decorative patterns. These can act as a garden accent when not in use. Look for designs that reflect your personal style.
Statement Pieces
A unique or ornate watering can be a statement piece. A ceramic or beautifully crafted copper can works well here. But remember, it should be as functional as it is beautiful.
Your watering can does more than water plants. It shows your style and enhances your garden’s look. Keep aesthetics in mind when choosing. The best outdoor watering can is both useful and attractive.
Top Picks: Popular Outdoor Watering Cans on the Market
When you’re ready to buy, consider these top picks. These watering cans combine quality, style, and user satisfaction. They stand out in the market for their features and durability.
Best for Large Gardens
Look for cans with a high capacity for large gardens. They can hold more water so you make fewer trips to refill. A can with a comfortable handle and a sturdy base is ideal. This helps when moving a full and heavy can across vast areas.
Best for Durability
For a can that lasts many seasons, metal is a strong choice. Galvanized steel or stainless steel options resist rust and handle rough use well. They are heavier but worth the investment.
Best for Lightweight Ease
If easy carrying is important, go for a plastic can. They are lighter, making them perfect for quick and frequent watering tasks. Many also have adjustable nozzles for different water flow settings.
Best for Decorative Appeal
Cans made of copper or ceramic add a touch of elegance. They often feature intricate designs. These cans serve as decor when not in use. They are a delightful addition to any garden’s look.
Best for Innovative Features
Some cans offer creative solutions for common watering challenges. Look for options with lockable nozzles or detachable heads. These features aid in efficient watering of varied plant types.
Remember to assess each one based on factors like garden size, plant needs, and personal preference. The best outdoor watering can for you is one that meets your specific gardening requirements and aesthetic taste. Happy gardening!
Mastering Plant Care Tips: Small Watering Can for Indoor Plants
Selecting the Right Small Watering Can for Your Indoor Plants
Choosing the right small watering can for your indoor plants is crucial. You need a can that fits your hand comfortably and reaches your plants with ease. Look for designs that complement your indoor space. A can with a long spout helps target water exactly where it’s needed. Consider the material too – plastic, metal, or ceramic are common. Each has its pros and cons. Plastic cans are lightweight and cheap, but may not last as long. Metal cans are durable, though they can be heavier. Ceramic cans look great, but they can be fragile and pricey. Pick a size that holds enough water for all your plants, without refilling too often. A smaller can prevent over-watering, a common mistake. Remember, a small watering can for indoor plants should be practical and fit your watering habits well.
Key Features to Look for in a Small Watering Can
When shopping for a small watering can for indoor plants, certain key features can make all the difference in ease of use and plant health. Here are the features to prioritize:
- Ergonomic Design: Choose a can with a comfortable grip that reduces hand strain. An ergonomic handle is essential for regular use.
- Long Spout: A long and narrow spout allows for precision watering, reaching the soil rather than the leaves which can help prevent diseases.
- Material Quality: Opt for materials that balance durability and weight. Metal is sturdy, while plastic is light. Pick based on your preference and the can’s longevity.
- Volume Capacity: Consider the amount of water it holds. It should be enough to water all your plants without the need for constant refills.
- Detachable Rose: Some cans come with a detachable rose (the sprinkling head), which is useful for gentle watering of delicate plants.
- Balance and Control: A well-balanced can gives better control over the water flow, preventing spills and over-watering.
- Aesthetic Appeal: While functionality is key, a can with a design that complements your living space adds to the indoor aesthetic.
Look for these features to ensure your small watering can is not only functional but also a joy to use for your indoor gardening tasks.
The Importance of Watering Frequency for Indoor Plants
Getting the watering frequency right is key to the health of indoor plants. Each plant has unique needs. Some thrive on moisture, while others need dry soil between watering. Finding the right balance is crucial. Too much water leads to root rot and pest issues. Too little, and your plants may wilt and lose vigor. Use a small watering can for indoor plants to control the amount of water. This prevents the common problem of over-watering. Check the soil moisture before watering. If it’s damp, wait. If dry, it’s time to water. Stick to a routine to ensure regular care. Pay attention to changing seasons as well. Plants often need less water in winter. Adjust your watering schedule to suit these cycles. In summary, a proper watering frequency keeps plants healthy and strong. It’s a simple yet vital part of indoor plant care.
Best Practices for Watering Indoor Plants with a Small Can
When watering indoor plants, some best practices can help ensure your plants receive the right amount of water without causing harm. Here are some tips to get you started:
- Check The Soil: Before watering, always check the soil’s moisture. Use your finger or a moisture meter.
- Water Evenly: Ensure the water covers all the soil surface, not just one side. This helps roots grow evenly.
- Use Room Temperature Water: Cold water can shock plant roots. Let tap water sit until it reaches room temperature.
- Morning Watering: Water plants in the morning. This gives them time to absorb water before nightfall.
- Avoid Wet Leaves: Direct water at the soil to prevent leaf diseases. A small can with a long spout is perfect for this.
- Drain Excess Water: After watering, let excess water drain away. Plants shouldn’t sit in water.
- Regular Cleaning: Keep your small watering can clean. Residue can clog the spout and introduce bacteria to your plants.
- Adapt to Seasons: Watering needs change with seasons. Plants typically need less water in cooler months.
By following these simple best practices when using a small watering can for indoor plants, you’ll promote healthier growth and avoid common watering pitfalls.
Maintaining Your Small Watering Can for Longevity
Caring for your small watering can for indoor plants is key to its longevity. Here’s how to do it:
- Regular Cleaning: Empty and rinse after each use. This prevents algae and mineral buildup.
- Proper Storage: Keep your can indoors to protect from weather. This prevents rust and damage.
- Inspect Regularly: Check for leaks or clogs. Fix issues promptly to maintain function.
- Gentle Use: Handle your can with care. Avoid dropping it, especially if it’s made of ceramic.
- Avoid Sunlight: Store out of direct sunlight. Sun can weaken plastic over time.
- Rust Prevention: For metal cans, dry after use. This keeps rust at bay.
Following these tips will help ensure your small watering can for indoor plants stands the test of time, making plant care a smoother process.

Common Mistakes to Avoid When Watering Indoor Plants
Using a small watering can for indoor plants is a smart choice. But even with the right can, common mistakes can harm your plants. To keep plants thriving, be aware of these errors:
- Overwatering: This is the most frequent mistake. Soil should feel dry before you water again. Overwatered plants fall prey to root rot.
- Ignoring Signs: Plants signal their needs. Drooping, yellowing, or dry leaves mean it’s time to reassess your watering routine.
- Using Cold Water: Cold water shocks roots. Always use water at room temperature to avoid this shock.
- Uneven Watering: Water should reach all parts of the soil. A long spout on your can helps with even distribution.
- Watering at Night: It’s best to water in the morning. Night watering can lead to fungal growth due to lower evaporation rates.
- Forgetting Seasonal Changes: Plants often need less water in cooler months. Adjust your watering habits with the seasons.
- Not Cleaning the Can: Leftover water and debris in the can can breed bacteria. Clean after use to keep things fresh.
Steer clear of these watering missteps to keep your indoor garden healthy. The right practices make all the difference.
Creative Ideas for DIY Small Watering Cans
Making your own small watering can for indoor plants can be fun and rewarding. Here are some creative DIY ideas:
- Recycled Containers: Turn old bottles or jugs into watering cans. Clean them, then poke holes in the lids for a sprinkling effect.
- Canned Good Transformation: Empty cans can work too. Clean a large can, nail holes in the bottom, and attach a handle.
- Milk Jug Makeover: A milk jug with a punctured cap makes a great large-capacity watering can. Add a handle for ease.
- Teapot Repurposing: An old teapot can be a quaint watering can. It’s perfect for delicate watering with its built-in spout.
- PVC Pipe Method: Construct a can from PVC pipes. Fit with a cap and drill holes for a custom sprinkle pattern.
- Squeeze Bottle Solution: A clean squeeze bottle, like a ketchup bottle, lets you control water flow easily. Just fill and use.
- Spray Bottle Watering: For fine mists, use a spray bottle. This is ideal for plants that prefer a gentle touch.
- Wooden Box Can: Craft a wooden box with a handle and a spout for a rustic look. Seal it properly to hold water.
Remember, when you make a DIY small watering can, ensure it’s easy to fill, carry, and pour. Always test it to make sure it works as expected before using it on your plants.
Tips for Eco-Friendly Watering Practices with Small Cans
Being eco-friendly is important for both the planet and your plants. When using a small watering can for indoor plants, you can adopt several green practices. Here are some tips to help you water your plants in a sustainable way:
- Reuse Water: Collect rainwater or reuse water from household tasks, like rinsing fruits and vegetables, to water your plants.
- Water Conservation: Only water your plants when necessary. Over-watering not only harms the plants but also wastes water. Checking the soil’s moisture can help you water only when required.
- Eco-Friendly Materials: Choose watering cans made from recycled materials or sustainable sources. This reduces your carbon footprint.
- Local Plants: Opt for plants that are native to your area. They usually require less water and are better adapted to the local climate.
- Mulching: Apply organic mulch to your plant’s soil. It helps retain moisture and reduces the need to water frequently.
- Drip Irrigation: For larger indoor plant collections, consider a drip irrigation system from a reused container to minimize water usage.
- Scheduled Watering: Stick to a watering schedule that aligns with the natural needs of your plants. This ensures you’re not giving more water than necessary.
By following these straightforward eco-friendly practices with your small watering can for indoor plants, you’re not only saving water but also ensuring the health of your beloved green companions.
Lightness of Watering Can with Flowers: A Gardener’s Delight
The Origin and Popularity of Flower Watering Cans
The watering can with flowers is not just a tool, it’s a gardening icon. These cans date back centuries and have evolved over time. They began as simple containers used to transport water to thirsty plants. As gardening became more popular, the need for a specialized can arose. Metal cans with fixed spouts were among the earliest designs. They allowed gardeners to gently water plants without making a mess.
Watering cans became even more popular in the 19th century. This was when gardening emerged as a hobby for both the wealthy and the middle class. Well-designed cans became a symbol of the genteel gardening society. The designs became more intricate, with some featuring beautiful patterns or shapes.
Today, the popularity of watering cans with flowers endures. They serve both functional and decorative purposes. They come in a variety of materials, colors, and styles. Some gardeners choose classic metal cans for their durability. Others prefer plastic for its lightness and affordability. And then there are the decorative cans that bring charm to flower beds even when not in use.
The image of a watering can with flowers has also infused into popular culture. It’s a sign of growth, nurturing, and the simple joys of tending to nature. You’ll find the motif in art, literature, and home decor. It inspires people to connect with gardening and appreciate the beauty of growth.
In conclusion, the watering can with flowers has a rich origin. It is a beloved part of the gardening world’s history and continues to be a staple in gardens everywhere. Its timeless design and practicality ensure that it will remain in favor for many years to come.
Essential Features to Look for in a Watering Can
When it comes to gardening, a watering can with flowers is more than just a tool – it is an essential ally in caring for your plants. Here are key features to consider before choosing the right one:
- Ergonomic Design: Comfort in handling is vital. Look for cans with a balanced grip and a handle that fits well in your hand.
- Long Spout: A long spout provides precision. It lets you target the water exactly where it’s needed, avoiding wastage.
- Durability: A robust material ensures your can will last. Metal cans are strong, but consider the weight when full.
- Capacity: Size matters. A larger can means fewer trips to the tap, but it shouldn’t be so heavy that it’s hard to carry.
- Detachable Rose: The spout’s ‘rose’ distributes water evenly. Choose one that’s detachable for easy cleaning.
- Corrosion Resistance: Metal cans should have a rust-resistant coating. Plastic cans should be UV resistant to prevent cracking.
- Good Balance: When full, the can should be balanced. This makes it easier to carry and pour without straining.
In summary, the ideal watering can should provide comfort, precision, and endurance. While you aim for functionality, don’t forget about style. After all, gardening is not just about the plants; it’s about the joy and beauty that come with the process.
How to Choose the Right Size and Material for Your Watering Can
Choosing the right watering can for your garden is important. Consider the size of your garden and the types of flowers you have. If you have a large garden with many flowers, go for a larger can. For smaller gardens or indoor plants, a smaller can works best.
Here are some tips to pick the right size and material:
- Evaluate Your Strength: If you can lift heavy items, a large metal can might be fine. But if not, consider a lighter plastic can.
- Think About Storage: Larger cans take up more space. Make sure you have room to store it.
- Match with Garden Size: A big can for large gardens saves time. A small one is easier for patios or balconies.
- Consider the Material: Metal cans are tough and last long. They can be heavy, though. Plastic cans are lighter and easier to carry but may not last as long.
- Check Weather Resistance: For metal, make sure it’s rust-proof. For plastic, look for UV resistance.
- Reflect on Style: You might want a can that looks good. There are stylish options in both metal and plastic.
Remember, the perfect watering can with flowers makes gardening more pleasant. It balances size, weight, durability, and aesthetics. Take your time to choose one that suits your gardening needs.
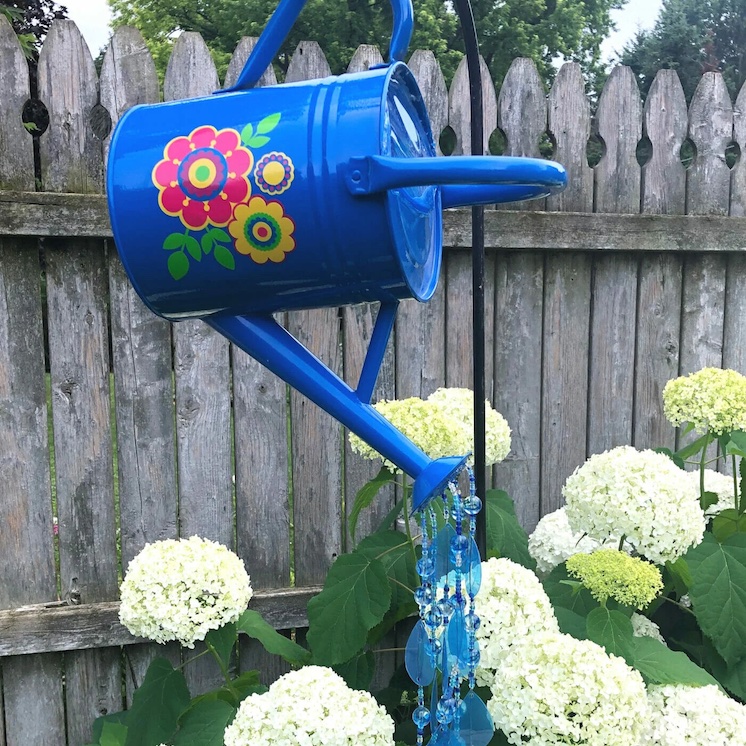
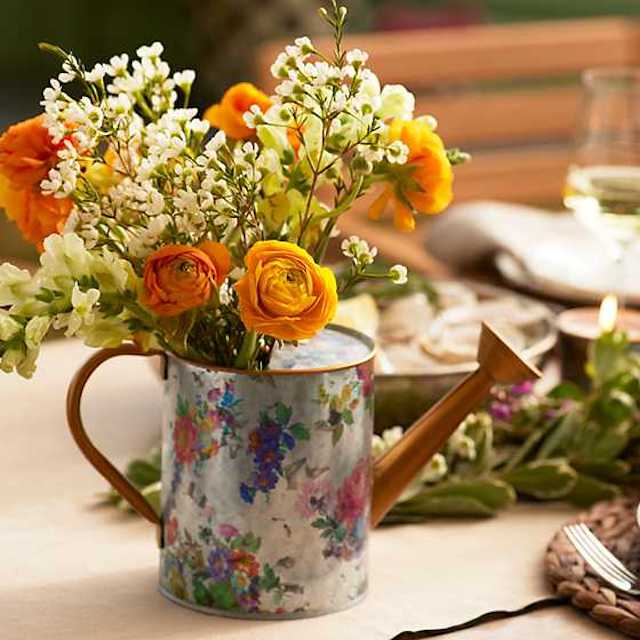
Decorative Watering Cans as Garden Ornaments
Watering cans with flowers don’t just serve a practical purpose. They are also stunning garden ornaments. Many gardeners use decorative cans to add a touch of whimsy and charm to their outdoor spaces. Using such cans can complement the blossoms and greenery in a garden.
Here’s why you might want to include a decorative watering can as a garden ornament:
- Aesthetic Appeal: A beautifully designed watering can acts as a statement piece. It enhances the garden’s visual interest.
- Complements Plants: An ornate can placed near your flowers can highlight their beauty. It shows off your personal style too.
- Versatility: These cans work well as centerpieces for garden tables or focal points in flower beds.
- Usefulness: They can still function as regular watering cans. So, they’re not just for looks.
- Seasonal Decor: Change them out with the seasons for a fresh look. They can hold seasonal blooms or decorations.
- Gift Option: They make great gifts for gardening enthusiasts. They’re both practical and pretty.
When choosing a decorative watering can, think about the materials and designs that fit your garden’s theme. Metal cans with intricate designs or colorful patterns add a rustic or vintage feel. Plastic cans come in bright colors and fun shapes that can bring a playful mood.
Remember, the key is to blend functionality with beauty. Your watering can with flowers should serve its watering purpose and also please the eye. With the right choice, even when not in use, your can will continue to delight everyone who sees it.
Tips for Watering Flowers: Techniques and Best Practices
Watering your flowers correctly is vital for their health and growth. Here are some effective tips and best practices when using a watering can with flowers:
- Water in the Morning: Water early to let plants dry out during the day. This helps prevent fungal diseases.
- Water at the Base: Aim close to the soil to avoid wetting the leaves. Wet leaves can attract pests and diseases.
- Check the Soil First: Before watering, see if the soil is dry. Over-watering can be just as harmful as not watering enough.
- Use the Right Technique: Pour gently to avoid soil erosion or displacing seeds. A detachable rose on the can helps with this.
- Regular Watering Schedule: Stick to a schedule. Regular watering helps plants establish stronger roots.
- Adjust for Weather Conditions: Water more during hot, dry periods. Cut down when it’s rainy or cool.
- Be Mindful of Different Plant Needs: Some plants need more water, others less. Learn what your flowers prefer.
By following these simple yet effective practices, you ensure your plants are watered just right, keeping them blooming and healthy. Remember that the goal is to mimic natural rainfall, providing your plants with what they need, without going to extremes.
The Role of Watering Cans in Sustainable Gardening
In sustainable gardening, every tool counts, and watering cans are no exception. They play a key role in conserving water. Here’s how a watering can with flowers helps in practicing sustainability in your garden:
- Direct Watering: They reduce water waste. You can target just the roots, where water is needed.
- Less Water Usage: With cans, you use less water than with hoses or sprinklers.
- Reusing Water: Collect rainwater in your can. This saves tap water for other uses.
- Controlled Water Flow: Cans prevent over-watering. This can lead to healthier plant growth and less water waste.
- No Power Needed: Unlike hose-end sprayers, cans don’t need electric or battery power. This lowers your carbon footprint.
- Durability: Metal watering cans often last longer than other types. This means less waste from replacing tools.
Choosing a watering can with flowers that suits your gardening style and ethics can be rewarding. It helps you do your part in protecting the environment. Remember, every drop counts when it comes to water savings and sustainability.
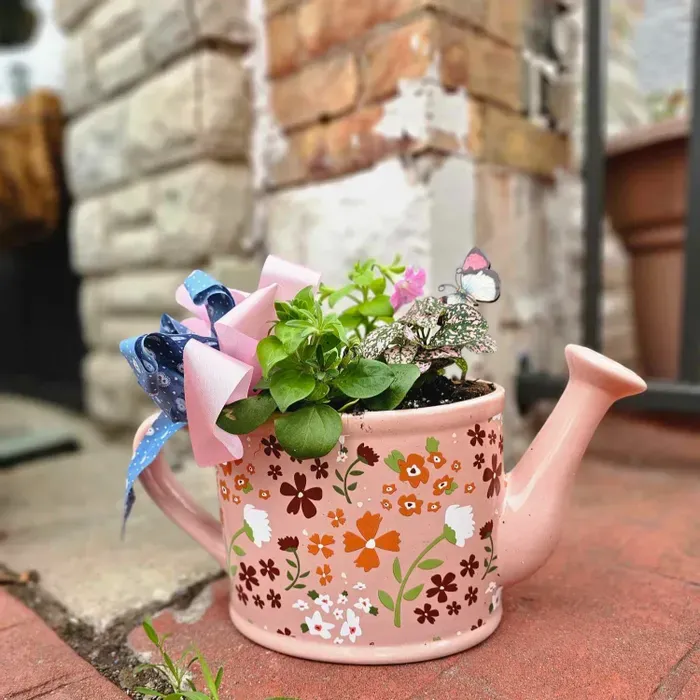
Creative DIY Ideas to Repurpose Old Watering Cans
When an old watering can is past its prime for its original purpose, it doesn’t have to head to the trash bin. With a bit of creativity, it can begin a second life as a distinctive piece of home or garden decor. Here are some inventive ways to repurpose your old watering can with flowers.
- Flower Vase: Use it as a rustic vase for fresh flowers. It can add charm to any room.
- Plant Pot: Convert it into a container for small plants or herbs. Just add some soil and seeds.
- Garden Art: Paint it in bright colors or patterns. Then place it in the garden as a unique art piece.
- Outdoor Lighting: Fit it with string lights. Hang it up to create a whimsical lighting feature.
- Bird Feeder: Modify the can to dispense birdseed. It can then serve as a delightful bird feeder.
- Water Fountain: With a pump, turn it into a mini-fountain. This can be a soothing garden addition.
- Decorative Storage: Store garden tools in it. This keeps them handy and decorates your shed.
By using these ideas, you give new life to something old. You also add a personal touch to your space. Plus, you reduce waste by repurposing what you might have thrown away. Join the upcycling trend and let your old watering can shine again!
Maintaining Your Watering Can for Longevity and Efficiency
Keeping your watering can in good shape extends its life and makes it more efficient. Proper maintenance means your can will consistently deliver the right amount of water to your flowers, without leaks or blockages. Here are some straightforward tips to maintain your watering can for both longevity and efficiency:
- Rinse After Use: Always rinse your can to prevent soil and fertilizer from building up. This avoids clogs.
- Regular Cleaning: Once a week, wash it with soapy water. Rinse thoroughly after washing.
- Check for Rust: Metal cans may rust over time. Treat any rusty spots with a rust inhibitor.
- Store Properly: Keep your can in a dry, shaded area to avoid sun damage and wear from the elements.
- Inspect for Damage: Look for dents, holes, or cracks that could affect watering flow. Repair or replace if needed.
- Handle with Care: Don’t drop or throw your can. Gentle use prevents breakage or distortion of shape.
- Maintain the Rose: Remove and clean the rose (the attachment that sprinkles water) regularly to ensure an even flow.
- Winter Care: In cold climates, empty your can before winter to prevent freezing and cracking.
Using these simple care steps, your watering can with flowers will remain a reliable tool for your gardening for years. Remember, a well-maintained tool is a gardener’s best friend, making every watering task more enjoyable and effective.
Modern Watering Can: Revolutionizing Plant Care for Gardening
The Evolution of Watering Cans
Watering cans have come a long way from simple containers. They started as basic vessels. People filled these with water to nurture their plants. Over time, changes began. Gardening needs evolved and technology advanced. This led to the modern watering can we know.
Earlier versions were often heavy and hard to handle. They were made of materials like metal or ceramics. These materials made sense back then. But they weren’t always practical. Gardeners longed for something lighter, more durable.
Enter plastic and other lightweight materials. These changed the game for watering utensils. Plastic cans were easier to carry and move. They didn’t rust like their metal counterparts either. This was a big plus for gardeners.
Fast forward to today. Modern watering cans boast a range of features. They come with ergonomic handles and balanced designs. This makes watering less of a chore and more of a joy. Long spouts with detachable heads are now common. They allow for precision watering, which is great for delicate plants.
The modern watering can isn’t just a tool. It’s a product of centuries of refinement. It shows how necessity and creativity can lead to innovation in everyday objects. With each redesign and material shift, the watering can has become more than just a container. It became an essential, efficient gardening ally.
Key Features of Modern Watering Cans
Modern watering cans offer a suite of features that cater to the needs of today’s gardeners. These features make plant care more efficient and user-friendly. Let’s look at some key characteristics that set modern watering cans apart from their traditional counterparts.
- Ergonomic Design: Contemporary watering cans feature ergonomic handles and balanced designs. This makes them comfortable to hold and use, reducing strain on your wrist and hand.
- Adjustable Spouts: Many models come with long spouts that have detachable or adjustable heads. This allows for precise watering, necessary for targeting the soil without drenching the foliage.
- Lightweight Materials: The use of plastics and lightweight composites means the cans are easy to carry. Even when full, they don’t add much weight, making it easier to water plants without fatigue.
- Durability: Modern materials are resistant to rust and decay. Unlike metal versions that could corrode over time, these watering cans last longer without losing functionality.
- Capacity Indicators: Some watering cans have clear markings to show water levels. This helps avoid overfilling and makes it easy to measure the amount of water used.
- Aesthetic Appeal: Current designs often incorporate stylish elements. They not only serve their purpose but also complement your garden’s look.
These are just a few features that modern watering cans offer. They combine practicality with style, making them a valuable tool for any gardener looking to take care of their plants efficiently and with ease.
How to Choose the Right Modern Watering Can
Choosing the right modern watering can is key to efficient plant care. Here’s how to find one that suits your needs:
- Consider Capacity: Think about the size of your garden. A larger capacity can make sense for big spaces. For small areas or indoor use, a smaller can works best.
- Assess the Material: Durability is important. Look for materials like lightweight composites. They last long and are easy to handle.
- Check the Design: Go for cans with ergonomic handles. They should feel comfortable in your hand and be easy to carry.
- Evaluate the Spout: If you have delicate plants, get a can with a detachable or adjustable spout. This helps target water right where it’s needed.
- Look for Extras: Features like capacity indicators can be very useful. They aid in measuring water and preventing over or under-watering.
- Match Your Style: Pick a watering can that looks good in your garden. Aesthetic appeal can enhance your gardening experience.
Remember, the modern watering can is not just about watering. It’s about doing it with ease, precision, and a touch of style. Keep these factors in mind to select the best can for your gardening needs.
The Role of Design and Aesthetics in Modern Watering Cans
Design and aesthetics play a key role in today’s modern watering can offerings. Gardeners today don’t just want a tool that’s functional; they seek one that fits their style and complements their garden space. As a factor, aesthetics has risen in importance, influencing buyer decisions just as much as practicality.
Attractiveness: A modern watering can often sports a sleek and stylish look. It may come in vibrant colors or feature elegant patterns. For the style-savvy gardener, these elements are a big draw.
Personalization: Some brands offer customizable options. They allow gardeners to match cans to their personal style or garden theme.
Visibility: The can’s design can make it a feature piece when not in use. A beautifully designed watering can sits well in a visible spot, adding to the garden’s overall aesthetic.
Influence on Mood: A good-looking tool can uplift the gardener’s mood and create a more enjoyable gardening experience. The effect of beautiful objects on our state of mind is well-documented, and garden tools are no exception.
Integration with Décor: For indoor gardeners, the watering can is often left in view. The modern watering can needs to blend with or enhance the interior décor. This is why design and aesthetics are essential.
In conclusion, the modern watering can serves a dual purpose. It’s both a functional tool for achieving plant health and an aesthetic accessory that enhances the gardening experience. In a world where form meets function, the modern watering can stands out as a testament to the harmonious blend of utilitarian and visual appeal.
Innovative Materials Used in Contemporary Watering Cans
Modern watering cans utilize innovative materials to enhance their functionality and durability. These materials cater to the diverse needs and preferences of gardeners. Here’s a look at some of the materials making a splash in today’s watering can designs:
- Recycled Plastics: Eco-friendly and lightweight, recycled plastics reduce environmental impact while providing strength.
- Stainless Steel: For gardeners who prefer a classic look with durability, stainless steel is rust-resistant and long-lasting.
- Galvanized Steel: It offers a rustic charm and robustness against corrosion, perfect for outdoor use.
- Silicone: Flexible and collapsible designs are possible with silicone, which is also resistant to breakage.
- Thermoplastic Elastomers (TPE): Combining rubber’s flexibility with plastic’s moldability, TPE is used for ergonomic grips and accents.
- Copper: Besides its elegant appearance, copper has natural antibacterial properties that benefit plant health.
With each of these materials, manufacturers of modern watering cans are pushing boundaries. They focus on combining durability with lightness and eco-conservation. Products with recycled content are becoming more favored. This trend reflects a growing consumer interest in sustainable gardening practices.
As you shop for a modern watering can, consider the materials. Think about longevity, comfort, and environmental impact. Pick a can that not only makes your gardening easier but also aligns with your values and style preferences.
Ergonomics and Comfort in Watering Can Design
When selecting a modern watering can, ergonomics and comfort are critical. They ensure gardening is enjoyable and not straining. Here’s how design plays a part in comfort:
- Handle Shape and Grip: Look for handles that fit naturally in your hand. A good grip reduces effort and strain.
- Weight Distribution: Cans should be balanced. Even when full, they should not feel too heavy on one side.
- Material Softness: Soft-touch materials on handles can prevent blisters and make long gardening sessions more comfortable.
- Ease of Pouring: The design should allow for smooth, controlled pouring. This helps avoid spills and water waste.
- Adjustability: Features like adjustable spouts add to comfort. They let you water plants at different heights without bending or stretching too much.
- Height and Size: Think about can height. Longer cans mean less bending. Smaller sizes reduce the need to lift heavy weights.
Good design in watering cans means you can work longer in the garden without discomfort. It also means caring for your plants is simpler and more satisfying. When shopping for a modern watering can, don’t just think about function. Consider how the design will make the task of watering your plants a breeze. Ergonomics and comfort should always be at the forefront of your choice.
Environmental Benefits of Using a Modern Watering Can
Using a modern watering can brings handy environmental perks. Eco-friendly gardening gets a boost with every pour. Here’s how these cans help the planet:
- Reduces Water Waste: Modern cans come with precise spouts. This means less water spills and less waste. It allows for targeted watering right where plants need it most.
- Recycled Material Use: Some cans are made from recycled plastics. This cuts down on waste in landfills. Choosing a can made from such materials supports recycling efforts.
- Durability: Long-lasting cans mean fewer replacements. This reduces the production demand and the resources used over time.
- Efficient Watering: With features like capacity indicators, you water plants just right. This helps conserve water resources.
- Non-Toxic Materials: Several modern cans use materials free from harmful chemicals. This keeps soils and water sources clean.
- Energy Conservation: Lightweight watering cans require less energy to ship. This cuts down on fuel consumption and greenhouse gas emissions.
- Minimalist Design: Sleek designs often need less material to make. This approach uses resources wisely.
To sum up, a modern watering can is good for your garden and the earth. It’s a smart choice for sustainable plant care. When picking out your next watering can, think of these eco-benefits. Choosing the right can makes a difference to the environment, one plant at a time.
Top Modern Watering Can Brands and Models
When looking for a modern watering can, consider top brands and models. They offer style and functionality. Here are some favorites:
- Haws: A British brand known for quality. Their watering cans have a classic design with a modern twist.
- OXO: This brand provides user-friendly gardening tools. Their cans feature comfortable grips and are easy to pour.
- Ikea: Known for home goods, Ikea also has practical and affordable watering cans.
- Bosmere: Bosmere’s cans are sturdy and often come with a rose spout for even watering.
- Bloem: Bloem offers cans that are stylish and made from recycled plastic.
- Gardman: With a range of outdoor products, Gardman’s watering cans are functional and durable.
These brands stand out for their innovation and design. A modern watering can from any of them would be a smart choice. They make watering plants a simple and stylish task. Remember to pick one that feels right for your gardening needs. Look for ergonomic design, capacity, and material that match your preference. Happy gardening!
Creative Gardening : An Elephant Watering Can with Playfulness
Unveiling the Charm of Elephant Watering Cans
Elephant watering cans aren’t just tools; they’re a unique touch to any garden. Their design captures the essence of playfulness and creativity. With their trunks raised high, these cans delight gardeners and nature lovers alike. Let’s delve into what makes elephant watering cans so special.
First off, their eye-catching design stands out. Unlike standard cans, these feature the adorable shape of an elephant. They turn a mundane task into something fun. Both kids and adults enjoy using them, making garden work a family affair.
Next, we notice the craftsmanship. Many elephant watering cans show fine details and colors. This adds whimsy to the daily watering routine. More than that, these cans can serve as decorative pieces. When not in use, they sit as cute ornaments among your plants.
Also, functionality pairs with the charm. A well-designed elephant watering can isn’t just for show. It should pour water smoothly from the trunk, giving you control over watering. This way, caring for your plants becomes simple and enjoyable.
Lastly, using an elephant watering can can inspire others. Seeing one in action might motivate friends and neighbors to embrace gardening. It shows how a little creativity can brighten everyday tasks.
In short, elephant watering cans bring joy and charm to the gardening experience. They blend fun design with practical use. As we explore further, we’ll find out what history they carry and how to pick the perfect one for your garden.
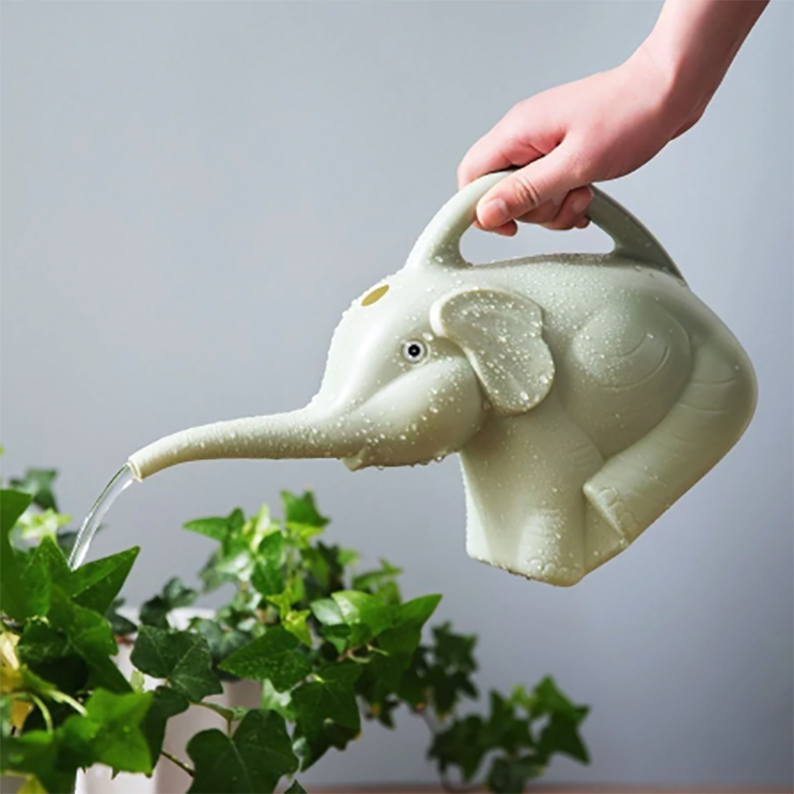
A Brief History of Novelty Watering Cans
The history of novelty watering cans is as rich as it is fascinating. Long before the elephant watering can made its playful entry into gardens, novelty watering cans were adding splashes of creativity to gardening. The concept began as a way to blend practicality with amusement.
In the 19th century, novelty cans appeared with the rise of the middle class. Gardeners wished to express individuality in their gardening tools. The cans often came in shapes like swans, ducks, and even mythical creatures. Their popularity grew as a statement of personal style.
The elephant watering can is a more recent addition. It joins the family of novelty cans as a beloved figure. Its unique shape draws inspiration from the natural world and exotic locales. It’s more than a garden tool; it’s a nod to wildlife and the joy they bring into our lives.
Figures from pop culture also found their way into watering can designs. These cater to fans and collectors. Over time, novelty watering cans became collectible items. Today, they spark joy and nostalgia, reminding us of the playfulness inherent in gardening.
Elephant watering cans, with their charming appearance, continue this tradition. They represent a blend of history, art, and functionality. They are a modern touch in the evolving story of novelty watering cans. Their presence in gardens keeps the whimsical spirit alive, connecting gardeners to a history of delight in everyday chores.
Essential Features to Consider When Choosing an Elephant Watering Can
When shopping for an elephant watering can, it’s important to think about several key features. These features will ensure that your can is not only cute but also functional and durable. Here are the essential features to consider:
- Design and Size: The design should reflect your style while being easy to handle. Pick a size that suits the scope of your gardening activities.
- Material: Plastic and metal are common. Metal lasts longer, but plastic is lighter. Think about which material fits your gardening needs best.
- Spout Length and Shape: The trunk, acting as the spout, should allow a precise stream of water. It will help you reach plants more easily.
- Capacity: Choose a watering can that has a capacity suitable for your garden. You want to avoid frequent refills.
- Ergonomics: The handle should be comfortable to hold, even when the can is full. This makes watering less tiring.
- Color and Finish: Colors can fade in the sun. Consider a can with UV-resistant colors or paint if it will be outdoors a lot.
- Durability: Good quality materials and construction mean your watering can will last many seasons.
- Price: Balance quality with how much you’re willing to spend. A good watering can is an investment in your gardening comfort.
By considering these features, you’ll find an elephant watering can that is a perfect balance of form and function, enhancing your gardening experience.
Integrating Elephant Watering Cans into Your Garden Decor
Elephant watering cans do more than water plants. They add character to your garden space. When picking one, imagine how it fits with your garden’s theme. A playful elephant can become a focal point in a whimsical setting.
Here are some tips to blend these cans into your garden decor:
- Use as a Centerpiece: Place your elephant watering can at the heart of your garden. Set it among flowers or on a decorative table.
- Pair with Plant Colors: Match the can’s color with nearby blooms. This creates harmony in your garden’s color palette.
- Create a Theme: Let the elephant can inspire a wildlife or safari theme. Add similar decorations to complete the look.
- Functional Art: Display your can where it’s easy to grab. Make it part of your routine, not just decor.
- Seasonal Switch: Change the can’s location with the seasons. This keeps your garden looking fresh.
Choosing an elephant watering can brings two benefits. It aids in plant care and lifts the garden’s aesthetic. Remember these tips and your garden will shine with personality.

DIY Guide: Crafting Your Own Elephant Watering Can
Crafting your own elephant watering can adds personal flair to your garden tools. If you’re feeling crafty, follow these simple steps to create a unique and functional piece for your gardening routine. Here’s how to get started:
- Gather Materials: You’ll need a sturdy plastic jug, permanent markers, paint, brushes, and a cutting tool.
- Design Outline: Sketch the elephant’s body shape on your jug. Include the trunk where the water will pour from.
- Cut and Shape: Carefully cut out the elephant’s silhouette from the jug. Smooth any rough edges.
- Paint Details: Use the markers and paint to add eyes, ears, and any other details to your elephant. Let the paint dry completely.
- Test Water Flow: Fill the can and test the water flow from the trunk. Make adjustments if necessary.
- Seal and Protect: Apply a clear sealant over the paint to protect it from water and sun damage.
- Personal Touch: Add your personal touch with additional decorations or accessories.
By following these steps, you’ll craft a watering can that’s not only practical but also a reflection of your creativity. It makes watering plants a delight and serves as a quirky addition to your garden decor. Plus, crafting your own elephant watering can will surely inspire conversation and a smile whenever you use it or show it off to friends and neighbors.
The Best Elephant Watering Cans on the Market
When searching for the ideal elephant watering can, there’s a range to choose from. Here’s a highlight of some of the best available on the market, offering balance in design, functionality, and price:
- The Classic Plastic: These cans are affordable and lightweight, perfect for daily use. They often come in vibrant colors, appealing to children’s love for bright objects.
- The Durable Metal: Metal elephant watering cans are sturdy and can withstand the elements. They usually have a vintage charm that appeals to collectors and traditionalists.
- Designer Touch: Some cans boast unique features by designers. They blend artistic vision with utility. Although higher in price, they make for a stunning piece in any garden.
- Eco-Friendly Options: Look for cans made from recycled materials. They’re good for the planet and add a sustainable touch to your garden tools.
- Multipurpose Cans: These watering cans don’t just water plants. They come with additional features like sprinkler heads for various gardening tasks.
When choosing an elephant watering can, consider how it will fit into your life. Whether it’s for everyday garden care, a gift for a nature-loving friend, or as part of your decor, the best choice combines your needs with whimsy and utility.
Caring for Your Elephant Watering Can: Maintenance Tips
Looking after your elephant watering can is key to its longevity. Here are practical tips to maintain it:
- Regular Cleaning: Empty and rinse your can after each use to prevent mold.
- Avoid Sun Damage: Store it away from direct sunlight to keep colors bright.
- Check for Leaks: Inspect the bottom and the trunk regularly for any holes or cracks.
- Gentle Use: Handle with care to avoid dents and damage, especially if it’s metal.
- Winter Storage: Drain and keep indoors during cold months to prevent freezing and cracking.
- Touch-Up Paint: Apply touch-up paint as needed to cover any scratches or chips.
- Handle with Care: Ensure to grip the handle firmly to prevent drops and slips.
- Proper Refilling: Use a hose or faucet gently to avoid denting when refilling.
By following these tips, your elephant watering can will keep its functionality and charm. Treat it well, and it will delight your garden for seasons to come.
Inspiring Ideas for Using Your Elephant Watering Can Beyond Gardening
Elephant watering cans aren’t just for gardens. Their unique design can serve many creative uses. Here’s how to use your elephant watering can for different purposes:
- Indoor Plant Care: It’s perfect for watering indoor plants. Its design adds charm to your interior decor.
- Children’s Water Games: Kids can use it to play water games during summer. It’s fun and safe for them.
- Home Decor: When not in use, it makes a cute decor piece. Place it on a shelf or table.
- Crafting Projects: Use it in crafting. It could be a part of an art project or a painting activity.
- Outdoor Fun: Fill it with bubble solution for kids to blow bubbles in the yard.
- Educational Tool: Teach children about watering plants or wildlife through play.
- Unique Vase: Use it as a quirky vase for fresh or dried flowers.
- Party Accessory: At garden parties, use it to hold utensils or as a centerpiece.
With these ideas, your elephant watering can brings value beyond gardening. Use it wisely, and it becomes a multipurpose tool. Whether for care, play, or decor, it proves to be a versatile item in any home.
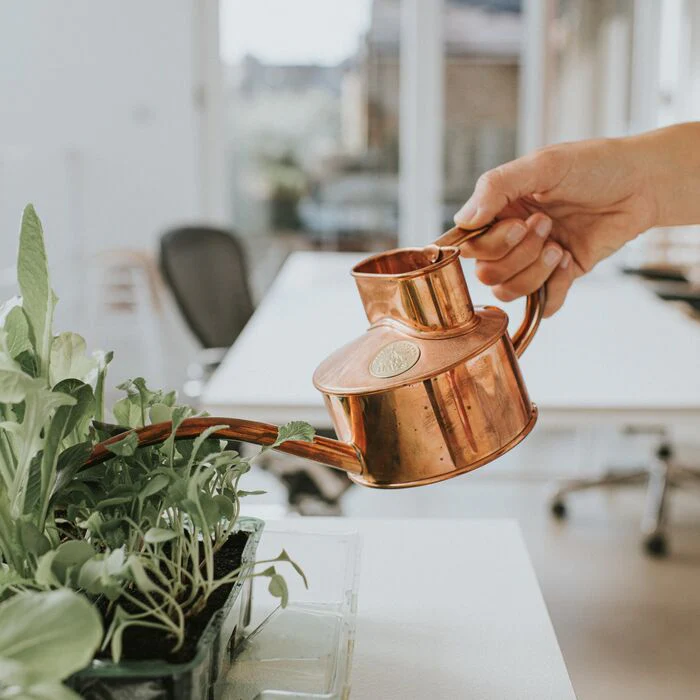
Choosing the Stainless Steel Watering Can: The Gardener’s Choice
Why Choose Stainless Steel for Your Watering Can
Choosing the right material for your gardening tools is crucial, and a stainless steel watering can is a top contender for several reasons. Stainless steel offers durability that is unmatched by plastic or ceramic. It resists rust, corrosion, and wear, making it ideal for outdoor use. With a stainless steel watering can, you don’t have to worry about the elements wearing it down over time.
Moreover, stainless steel is often favored for its sleek, modern appearance. It can blend in with various garden settings or stand out as a stylish accessory. This material is also non-reactive, meaning it won’t leach chemicals into your water or soil, keeping your plants safe. The weight of stainless steel provides a stable balance in a watering can, avoiding the clumsiness of lighter materials while ensuring it is not too heavy for regular use.
For those seeking a long-term investment in their gardening arsenal, a stainless steel watering can is a smart choice. Its long-lasting nature means you won’t have to replace it as often as other types, leading to savings over time. So, for a strong, attractive, and safe option for watering your garden, the stainless steel watering can holds its ground as the gardener’s choice.
Key Features to Look for in a Stainless Steel Watering Can
When shopping for a stainless steel watering can, consider these key features:
- Durability. A robust watering can will withstand frequent use and harsh weather. Stainless steel is ideal for its strength.
- Ergonomics. Find a can with a comfortable handle and well-balanced design. Avoid any strain on your wrists and arms.
- Capacity. Choose a size that matches your watering needs. Smaller for indoor plants, larger for outdoor gardens.
- Spout Design. Look for a spout that offers precision and control. Long spouts reach plants easily, while a removable rose attachment distributes water evenly.
- Easy to Clean. A smooth, rust-resistant surface simplifies cleaning. It ensures the can stays hygienic and free from buildup.
- Aesthetics. The watering can should also be pleasing to the eye. Opt for a design that matches your garden’s style.
In summary, a stainless steel watering can must be robust, ergonomic, aptly sized, with a functional spout, easy to clean, and attractive. These features ensure efficiency, convenience, and a touch of elegance in your gardening.
The Benefits of Using a Stainless Steel Watering Can in Your Garden
Using a stainless steel watering can has many benefits for the avid gardener. Its strong material withstands everyday wear and tear, making it a long-lasting tool in your gardening shed. Here are some advantages you’ll enjoy when using one in your garden:
- Resists Weather Damage. Stainless steel doesn’t rust or discolor. It keeps its good looks through sun, wind, and rain.
- Safe for Plants. This material won’t leach harmful chemicals. Your plants get pure water without any unwanted additives.
- Stays Clean. Its smooth surface makes it easy to wipe away dirt. You spend less time cleaning and more time gardening.
- Balanced Weight. Unlike heavier cans, stainless steel offers comfort. It’s easy to carry around without causing arm fatigue.
- Precision Watering. With a long spout, you can reach plants easily. This means less water waste and healthier, happier plants.
By using a stainless steel watering can, you assure quality care for your plants and ease for yourself. You’ll find this tool not just a practical choice but also a smart investment for any garden.
How to Maintain Your Stainless Steel Watering Can
Maintaining your stainless steel watering can is straightforward, ensuring its longevity and performance. Here are essential tips to keep it in great condition:
- Regular Cleaning. After use, rinse the can with water to remove dirt and debris. This prevents buildup and keeps the can looking new.
- Dry Thoroughly. Wipe the can with a dry cloth or let it air dry completely. This stops water spots and maintains the metal’s shine.
- Store Correctly. Keep your can in a dry, shaded place. Exposure to constant moisture or direct sun can damage the can over time.
- Watch for Dents. Handle your can with care to avoid dents. Although stainless steel is durable, severe impacts can harm its structure.
- Use Appropriately. Don’t use the watering can for chemicals or substances that might corrode the metal. Stick to water to ensure its integrity.
- Inspect Regularly. Check for any signs of wear, such as loose handles or spout issues. Address these promptly to avoid further damage.
By following these simple steps, your stainless steel watering can will continue to be a reliable tool for your gardening. Its sturdiness and easy maintenance make it a favorable choice for gardeners who value both function and form.
Top Picks: Popular Stainless Steel Watering Cans on the Market
When choosing a steel watering can, the market offers several top picks. Popular options often marry aesthetic appeal with functionality. Here are some favorites among gardeners:
- Sleek and Modern. Many gardeners prefer a can with a contemporary look. Look for ones with clean lines and a polished finish.
- Vintage Charm. Others might fancy a traditional style. These cans may feature antique designs with a classic feel.
- Compact and Convenient. For those with small gardens or indoor plants, a compact can is ideal. It’s easy to store and perfect for tight spaces.
- Large-Capacity Cans. If you have a big garden, choose a larger can. It will save you time, reducing the need for frequent refills.
- High-End Options. Some stainless steel watering cans come with a higher price tag. They boast superior craftsmanship and unique design elements.
- Budget-Friendly Finds. You can also find affordable options that don’t skimp on quality. These cans offer good value without breaking the bank.
The best stainless watering can for you depends on your personal preferences and gardening needs. Regardless of the choice, each option provides the durability and efficiency that stainless steel is known for. Keep the keywords ‘stainless steel watering can’ in mind as you shop to ensure you’re getting a product that will meet your gardening standards.
Aesthetics and Design: Finding a Watering Can That Fits Your Style
When picking a stainless steel watering can, think design as well as function. You want a can that looks good and works well. Here are things to consider to match your style:
- Style Match. Choose a can that complements your garden’s theme. Whether it’s modern or rustic, the right design enhances your space.
- Finish. Some cans have a shiny finish, others matte. Consider what look you prefer and what fits in with your other tools.
- Color. Stainless steel doesn’t mean just silver. Some options come in other colors or with decorative patterns.
- Shape. Look for unique shapes that make a statement. A well-chosen can becomes a focal point in your garden.
- Decorative Elements. Details like an embossed pattern or a designer label can add a touch of personal flair.
Remember to balance looks with practicality. A good watering can should not only fit your style but also be comfortable to use. With the right stainless steel watering can, you’ll water your plants in style and efficiency. Keep ‘stainless steel watering can’ in mind for a durable and chic choice.
The Importance of Size and Capacity for Your Gardening Needs
Choosing the right size for your stainless steel watering can is vital. Size and capacity should match your gardening needs for efficient watering. Here’s how you can determine what’s best for your garden:
- Garden Size. For large gardens, a can with a bigger capacity saves time. You won’t need to refill it as often. Conversely, a smaller can is best for indoor plants or small outdoor spaces.
- Plant Types. Some plants need more water than others. Make sure the can’s size aligns with the watering requirements of your plants.
- Frequency of Use. If you water often, go for a larger can to reduce the number of trips to the tap. Less frequent waterers might prefer a smaller can.
- Storage Space. Consider where you will store your watering can. A compact size is easier to store if space is limited.
- Weight When Full. Remember that a full can is heavier. Ensure that you can comfortably carry it around your garden without strain.
Tailoring the size and capacity of your stainless steel watering can to your specific gardening scenario makes for a more pleasant and effective gardening experience. Keep these pointers in mind while shopping for your ideal stainless steel watering can to ensure it serves your garden’s needs.
Environmental Considerations: Is Stainless Steel Eco-Friendly?
Choosing an eco-friendly option is crucial for many gardeners who care about the environment. A stainless steel watering can scores well on this front. Here is a closer look at its environmental aspects:
- Recyclability. Stainless steel is 100% recyclable. At the end of its life, you can recycle your can without any loss in quality.
- Durability. The long life of a stainless steel watering can means you buy less often. This reduces waste and the need for more resources.
- Toxicity. This material doesn’t leak harmful chemicals into the soil or water. This keeps your garden and the environment safe.
- Manufacturing Process. Making stainless steel can be resource-intensive. However, its durability offsets this over time.
When considering ‘stainless steel watering can’ in environmental terms, it’s a good choice. It’s durable, recyclable, and safe for your plants and the planet. Remember these points when shopping for an eco-friendly gardening tool.