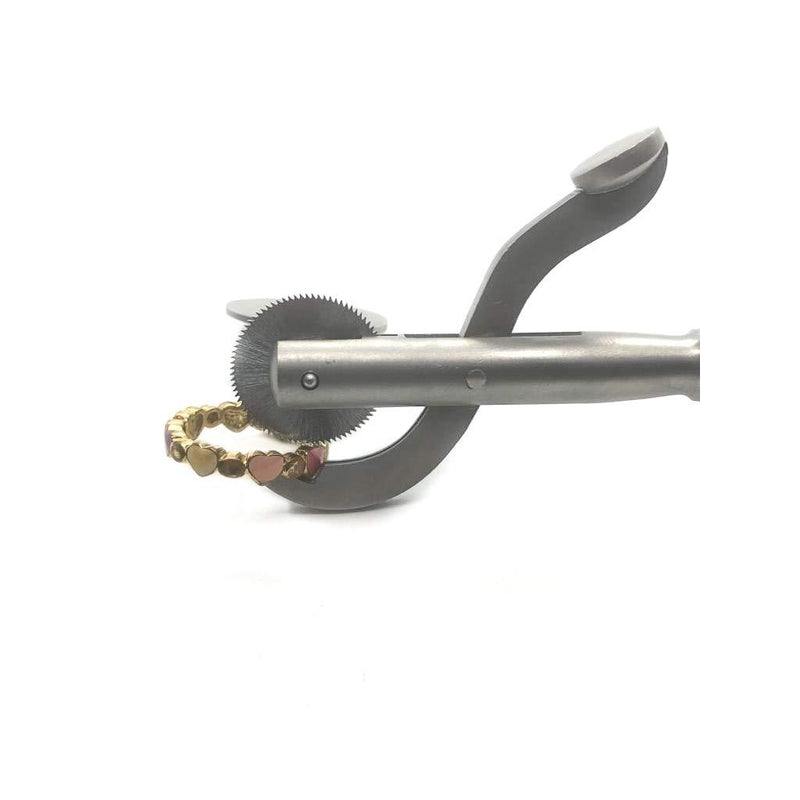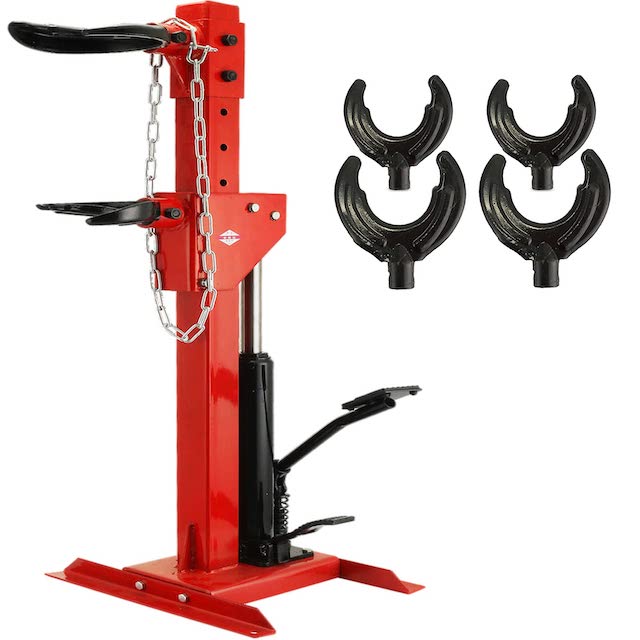
The Surprising Origin of Chainsaws in Childbirth
The Birth of the Chainsaw: From Childbirth Tool to Wood Cutting
The Need for a Solution in Difficult Childbirths-Were chainsaws invented for childbirth?
Were chainsaws invented for childbirth? In the past, childbirth was not just a challenge but often a life-threatening ordeal. Women’s lives were at stake, especially when the baby could not pass through the birth canal. Babies have always had relatively large skulls, which posed a significant problem in comparison to the width of a typical woman’s pelvic opening. When babies got stuck, the situation called for desperate measures. The need for an effective, life-saving solution in managing difficult childbirth scenarios was dire.
The Invention of the Chainsaw in the 18th Century
Addressing this need, the chainsaw’s invention emerged as an unlikely hero in the 18th century. Before this invention, mid-labor symphysiotomies, the removal of pelvic bone, were performed using a small knife, without anesthesia. Needless to say, it was excruciating and risky. Then, in 1780, two Scottish doctors, John Aitken and James Jeffrey, created the first chainsaw. Although it may conjure gruesome images, this primitive version of our modern chainsaw was small, about the size of a kitchen tool, and hand-cranked. Despite its intimidating reputation, the chainsaw provided a quicker, less painful process of widening the birth canal and, in effect, saved many mothers and babies from the perils of childbirth. It was a pioneering tool in the history of medical procedures, paving the way for the advancements that followed in the realm of surgical child delivery.
Understanding Symphysiotomies and Childbirth Challenges
Were chainsaws invented for childbirth? Childbirth has always come with significant challenges. One of these was the symphysiotomy, a daunting procedure.
The Symphysiotomy Procedure and Its Risks
In dire childbirth situations, a symphysiotomy was once a common practice. This surgical procedure involved cutting the fibrous cartilage of the pubic symphysis. It was to widen the pelvis, allowing the baby to be born. Doctors performed this without anesthesia, causing intense pain and risks of infection. The mother often endured long-term health issues post-surgery. There were also risks to the child during the process. Despite these dangers, symphysiotomies were crucial in emergencies. They addressed the fit of large infant skulls through the birth canal. The invention of chainsaws simplified this procedure. Yet, the process remained a high-risk option. Over time, medical advancements provided safer alternatives. Today, symphysiotomies are barely used, thanks to modern surgical techniques like the C-Section.
The Transition From Childbirth to Surgery
Chainsaws were not confined to childbirth for long. The innovation that began in the 18th century quickly spread to other areas of medicine. Doctors saw the potential for the chainsaw’s precise cutting ability to be beneficial in various surgical procedures. The clear success of chainsaws in childbirth laid the groundwork for their use in surgery.
Early Adaptations of Chainsaws in Medical Operations
The early chainsaw, despite its rudimentary design, revolutionized the way doctors approached surgery. Surgeons adapted the chainsaw for different medical operations, such as amputations. This era witnessed the transformation of chainsaws from a childbirth necessity to a surgical instrument. Its ability to make clean cuts became valuable for procedures that required the removal of bone. As medicine progressed, so did the role of the chainsaw in providing life-saving interventions. Even though it may be difficult to imagine a chainsaw used in a modern operating room, its early adaptations in medical operations were undeniable steps forward in the history of surgical practice. As surgical tools evolved, chainsaws also morphed, growing more specific to their eventual primary use: woodworking.
Chainsaws’ Evolution Into Modern Woodworking
After their debut in medical settings, chainsaws began a remarkable transition. This journey would take them from the operating room to the forest and workshop. Their evolution was both literal and conceptual, moving from specialized medical instrument to essential tool in woodworking.
How Chainsaws Grew Larger and More Powerful Over Time
Chainsaws developed significantly since their first medical use. Initially sized akin to small knives, these tools gained new forms and functions. As advancements in technology arose, so did the need for more efficient cutting tools. By the 19th century, chainsaws expanded in size. They adopted engines to replace hand cranks. Power sources evolved from manual labor to steam, and eventually, internal combustion engines.
This evolution was driven by the demand for faster and more reliable wood cutting. Woodworkers and lumberjacks embraced the chainsaw’s potential. They pushed for designs that could handle larger trees and tougher wood. As a result, the chainsaw’s blades became longer and the motors more robust. Safety features emerged to protect operators from the dangers inherent to powerful cutting devices. The chainsaw, once quiet and intricately operated, became a formidable force in forestry and construction.
These changes reflected broader social and industrial shifts. As societies grew and construction boomed, the chainsaw proved invaluable. It slashed the time required to fell trees and prepare lumber. This power enabled expansion, economic growth, and technological progress.
It is fascinating to observe how a tool once intended for childbirth has become a symbol of industrial strength. Today’s chainsaws are sophisticated machines. They bear little resemblance to their modest predecessors, yet they share a lineage of innovation that stretches back to their unexpected origins in medicine.
The Discontinuation of Chainsaws in Medical Practice
Were chainsaws invented for childbirth? The use of chainsaws in medical procedures has ceased. Their time in childbirth is now history. Today, we have advanced medical technologies and procedures far superior to the crude methods of the past.
Modern Alternatives to Symphysiotomies
Symphysiotomies are now almost entirely obsolete. Instead, medical professionals use safer, more controlled surgical techniques. These methods reduce the risks once inherent in childbirth.
The Development of the C-Section and its Role Today
The C-Section, or Cesarean delivery, has largely replaced symphysiotomies. It is a safe surgery, well-planned, and carefully performed. It allows for the delivery of babies when vaginal birth presents risks. C-Sections now play a vital role in facilitating safer childbirth worldwide.
The Historical Impact of Chainsaws on Childbirth
Were chainsaws invented for childbirth?
The chainsaw, now a common forestry tool, played a crucial role in medical history. It contributed significantly to the reduction of birth-related mortality rates. This invention reduced the dangers mothers and infants faced during childbirth.
Reduction in Birth-Related Mortality Rates
In the 18th century, childbirth posed fatal risks. The introduction of the chainsaw changed this. It enabled quicker, more precise pelvic bone removal. This reduced the time mothers and infants were in distress during delivery. The result was fewer deaths and complications. The chainsaw’s success in childbirth procedures was a historic milestone. It was a tool that saved countless lives during a period of medical uncertainty.
Chainsaws as a Step Toward Safer Childbirth Methods
The chainsaw set the stage for advancement in childbirth safety. Its precise and efficient method was a leap forward. It paved the way for modern techniques, like the C-Section. The C-Section is now a commonplace and controlled surgery. It offers an alternative to risky, traditional delivery methods. Thanks to the chainsaw, safer childbirth practices evolved. This evolution continues to protect mothers and newborns today.
Reflecting on the Progress of Childbirth Practices
Were chainsaws invented for childbirth? Childbirth, once a perilous journey, has been transformed by modern medicine. Efforts to make delivery safer have never ceased, evolving from rudimentary techniques to today’s best practices. As we reflect on the journey from chainsaw-assisted childbirth to the advanced procedures available today, it’s remarkable to see how far we have come. The focus has shifted to minimizing risk and maximizing comfort and safety for both the mother and the child.
Safer Protocols and the Role of Birth Assistants
Today’s childbirth protocols stress safety above all. Gone are the days of high-risk procedures with questionable outcomes. In their place, we have meticulously developed safety measures, hygiene standards, and pain management strategies. Birth assistants, including doulas and midwives, play a vital role in this safe and supportive birth environment. They provide continual care and assist during labor, which helps reduce anxiety and improve the overall birthing experience.
Gratitude for 21st-Century Childbirth Innovations
We often take for granted the medical advancements that allow for safe deliveries. Looking back, we should feel thankful for the progress that has been made. From the gruesomeness of chainsaws in the delivery room to the precise and sterile environment of today’s operating theaters, the transformation is astounding. Every successful delivery is a testament to centuries of medical innovation and a reminder to be grateful for 21st-century childbirth practices.
Origins Uncovered: What Chainsaws Were Really For
The Surprising Medical Origins of Chainsaws
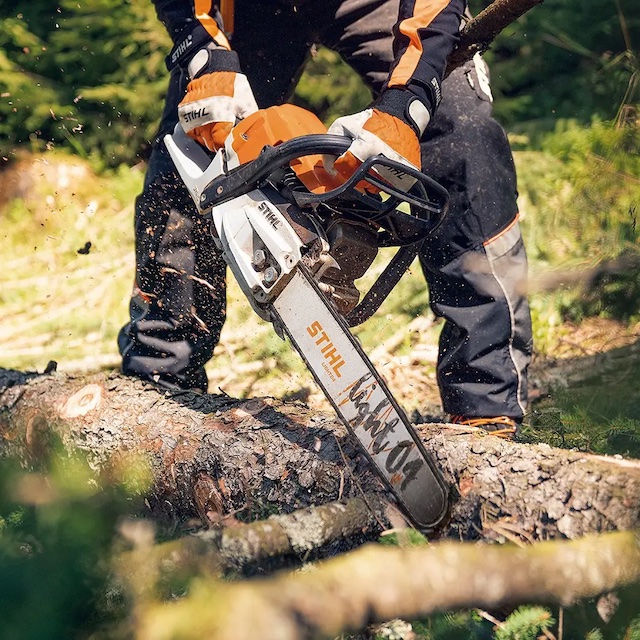
What were chainsaws originally invented for? Most know chainsaws for woodcutting, yet their startling beginnings tell a different story. These power tools, today synonymous with lumberjacking, had original purposes unrelated to forestry. Their invention was driven by a medical necessity – easing childbirth complications.
Early Medical Instruments for Childbirth
Before the modern chainsaw’s birth, its ancestor played a crucial role in medicine. In the 18th century, difficulties in childbirth prompted the creation of tools to assist delivery. Early chainsaw models were hand-cranked implements. They were designed to cut through bone and cartilage. This made it easier to remedy difficult births that endangered mothers and children. The devices aimed to speed up symphysiotomies, widening the space for the baby to be born.
In these earlier times, childbirth interventions varied in brutality and risk. But the rudimentary chainsaw model offered a more targeted approach. Despite its benefit, the practice of using such medical chainsaws faded. This was due to emerging C-sections’ increasing success and safety.
Aitken and Jeffray’s Role in the Invention
Enter Scottish doctors John Aitken and James Jeffray. They paved the way for the chainsaw’s medicinal usage with a remarkable invention. In the late 18th century, they designed a prototype to aid in childbirth, known as a ‘flexible saw’. Their version featured a chain with small teeth – quite different from the roaring engines of today’s timber industry.
The original chainsaw was a manual tool. It was much smaller, more precise, and hand-operated. Aitken and Jeffray’s design focused on minimizing the risks associated with difficult deliveries. This early version did not see widespread use. Yet, it was a significant step that inspired the evolution of the tool beyond its medical roots.
Evolution from Medical Tool to Woodcutting Device
The chainsaw has undergone a remarkable transformation since its medical beginnings.
Advances in Design and Technology
Early chainsaws were far different from the ones we know. Designed for medical use, they were hand-cranked, small, and precise. By the start of the 20th century, technology had advanced. Saws used for wood became more robust, powered by electricity or gasoline. Metal and engine advancements allowed chainsaws to become portable. This made woodcutting easier and faster for workers.
Transition to Timber Industry Applications
What were chainsaws originally invented for? Not for the timber we know now. But, as the industrial era grew, so did the need for efficient tools. The chainsaw moved from the operating room to the forest. Patents for machines like the ‘Chain Sawing Machine’ and the ‘Endless Chain Saw’ surfaced. They aimed at transforming lumber production. These inventions cut down giant trees and made wooden boards. The shift redefined the chainsaw’s purpose, making a new mark in the timber industry.
The Development of the Osteotome
The osteotome marked a significant advancement in medical tool design. This device, akin to early chainsaws, was essential in surgeries. What were chainsaws originally invented for? They began as medical instruments, which evolved into the osteotome.
Heine’s Influence on Chainsaw Mechanics
German physician Bernhard Heine’s creation, the osteotome, came in 1830. His design included a toothed wheel and handle. It enhanced the mechanics of the chainsaw. Heine’s osteotome used a hand-cranked gear to fasten the cutting process. This invention influenced modern chainsaw development.
Applications in Surgery and Beyond
Initially, the osteotome’s purpose was surgical, aiding in bone cutting. Its precision made it fit for delicate operations. As a result, it was used in childbirth to ease labor and surgery to remove diseased bone. Over time, its use expanded. The mechanism inspired the portable chainsaws we use in timber work today.
Implementing Chainsaws in the Timber Industry
In the timber industry, the chainsaw is a vital tool. Its journey from a medical device to a logging essential is remarkable.
From Manual Saws to Mechanical Goliaths
The transformation was striking. Early chainsaws were small, and doctors operated them by hand. But loggers needed more power and size. As wood demand grew, the designs shifted. By the 1900s, chainsaws had become larger. They were mechanical beasts compared to their modest beginnings. They sliced through huge trees, revolutionizing the timber trade. This shift was part of the industry’s push for efficiency.
James Shand’s Portable Chainsaw Patent
In 1918, a leap forward occurred. Canadian James Shand patented the first portable chainsaw. This invention made cutting trees faster and easier than ever. Shand’s design allowed one person to carry the chainsaw to the work site. Before this, two men were needed just to handle the saw. This advancement was a game-changer. It set the stage for more innovations in the chainsaw’s design and function.
The Influence of Chainsaws in Emergency Childbirth Methods
The chainsaw’s history is intertwined with emergency childbirth. Before the evolution of the device for timber, it served as a vital instrument in medical procedures.
Alternatives to Symphysiotomy in the 18th Century
In the 18th century, symphysiotomy was a common practice. This procedure involved cutting the pubic symphysis to ease childbirth. Alternatives were scarce and often brutal. Craniotomies and C-sections carried high risks. They often led to the death of the mother or child. Before chainsaws, doctors used knives. These posed a severe risk of injury to the mother. The introduction of the chainsaw offered a more controlled method. It was seen as a medical breakthrough of its time. This instrument, though primitive, aimed to improve the process. With a focus on safety and efficiency, it facilitated symphysiotomies.
Modern Reinterpretations of Birth Assistance Tools
Today, medical technology has greatly evolved. Tools like chainsaws have nothing to do with childbirth. Modern birth assistance is less invasive and more precise. New methods prioritize the health and well-being of mother and child. The chainsaw’s design principles live on in some contemporary tools. Devices like the electric scalpel and laparoscopic equipment reflect past innovations. They offer precision that 18th-century doctors could only imagine. The chainsaw’s legacy in medicine is a testament to the constant drive for improvement. It stands as an example of how technology can evolve to meet the needs of different times.
Ethical and Technological Impacts
Medicine has come a long way in terms of ethical practices. Earlier, medical tools like the early chainsaw raised questions on surgical safety. Back in the 18th century, there were fewer guidelines. This often put patients at risk. Today, there are strict ethical rules to protect patients during surgeries.
A Look at Medical Ethics and Practices Then and Now
What were chainsaws originally invented for? Their history shows us how medical ethics have evolved. Back then, doctors used rudimentary chainsaws in childbirth with the best intentions. However, such practices today would be unthinkable. The focus now is on minimizing pain and risk. We’ve established clear ethical standards. They ensure safe and humane treatment for all patients. Modern medicine respects the patient’s dignity and consent.
How Technological Innovation Influenced Medical Procedures
Technology has reshaped medical practices. The development of the chainsaw led to the osteotome. This set the stage for further inventions. Now, we have precise tools that offer safety and efficiency. These tools have changed how we approach medical issues. They result in better outcomes for patients. Technological leaps have also reduced the need for invasive procedures. This has increased patient recovery rates. Overall, technological progress has made surgeries safer and more effective.
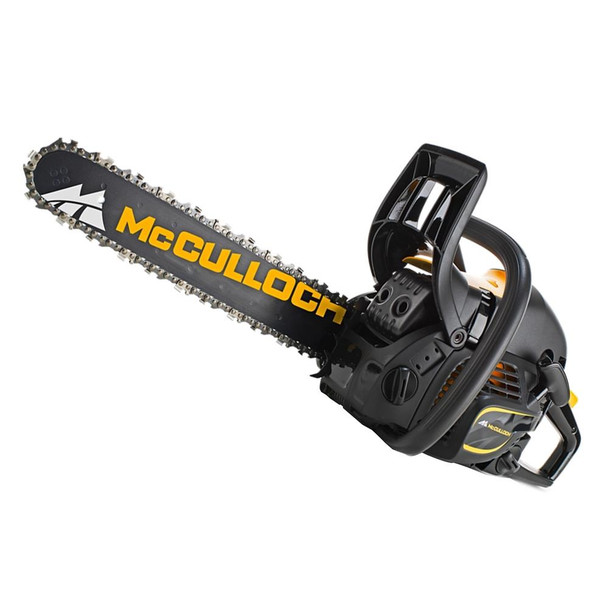
Mcculloch Chainsaws: Maintenance Tips for Longevity
Introduction to Mcculloch Chainsaws
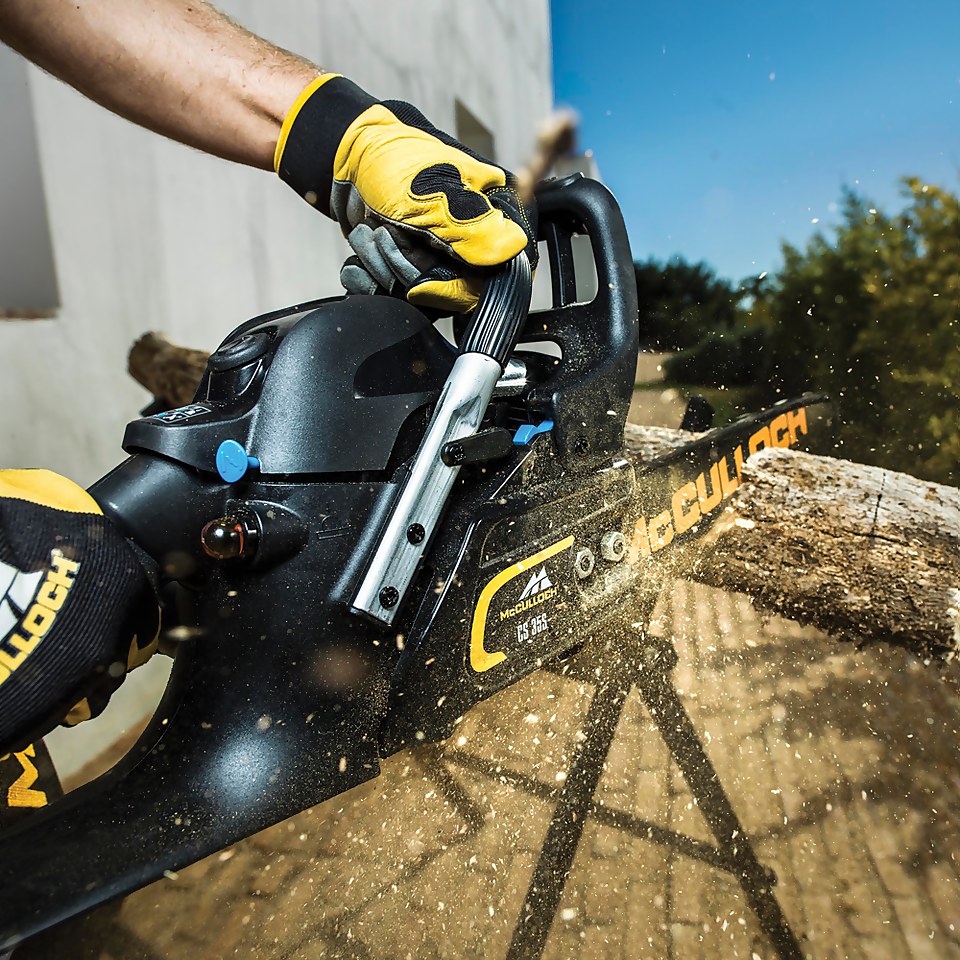
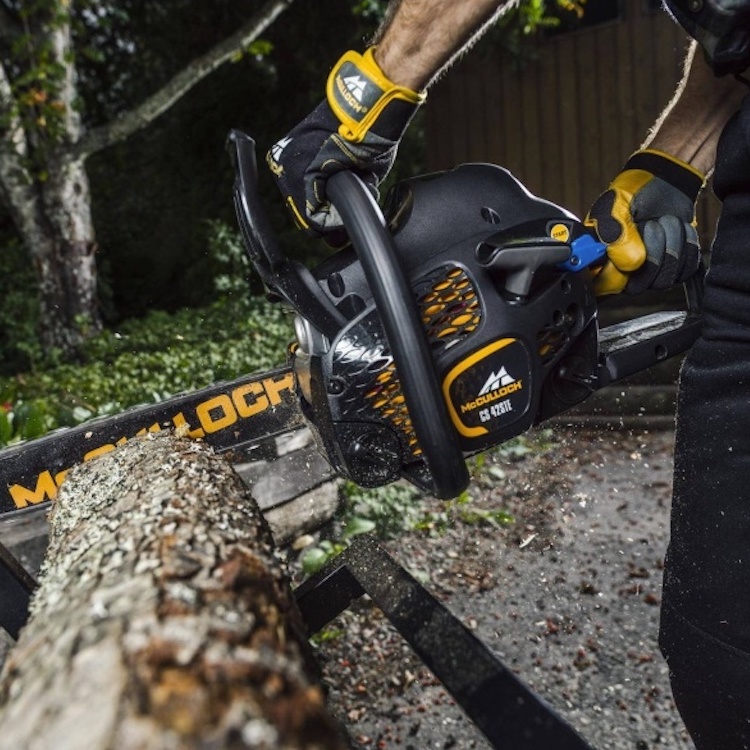
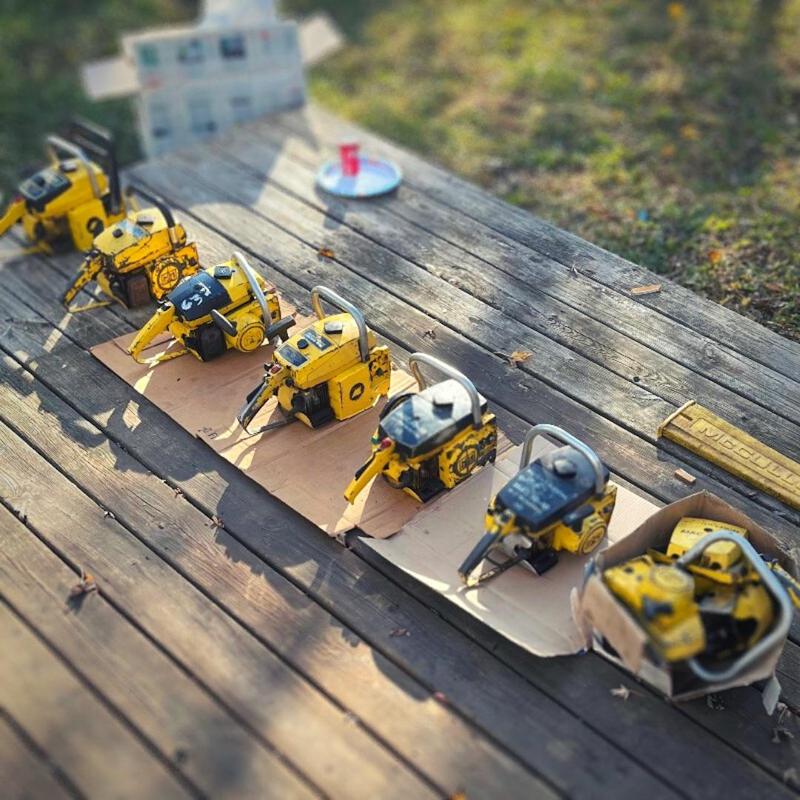
Mcculloch chainsaws have carved a niche in the market with their durability and efficiency. Known for reliable performance, they cater both to homeowners with backyard duties and professionals facing rugged demands. But even the sturdiest tool needs timely maintenance. Proper care extends the life of these powerful machines and ensures peak performance during every use. Whether pruning limbs or cutting down trees, a well-maintained chainsaw is crucial. In this section, we will explore the foundations of Mcculloch chainsaws and the key steps to maintain them. This will set the stage for more detailed maintenance tips, ensuring your chainsaw runs smoothly for years to come.
Essential Maintenance Tools for Your Chainsaw
To keep your Mcculloch chainsaws in top condition, you need the right tools. A few essentials include a sturdy workbench or surface, a chainsaw sharpening kit, a cleaning brush or blower, and an air filter maintenance kit. Ensure you have a set of screwdrivers and round files that match the chainsaw’s chain pitch size for precise adjustments.
For internal inspections and repairs, keep a spark plug wrench and a tachometer handy. A grease gun is crucial for proper bar and sprocket maintenance. Don’t forget to have a pair of sturdy gloves and safety glasses to protect yourself while working on the chainsaw.
Each tool plays its part in maintaining your chainsaw, from cleaning debris to precise tuning of the engine. Store these tools in a clean, dry place so they’re always ready when it’s time for chainsaw maintenance. By having these essential tools on hand, you ensure that you can perform regular upkeep that will prolong the life and performance of your Mcculloch chainsaws.
Regular Cleaning and Air Filter Maintenance
Maintaining your Mcculloch chainsaws requires regular cleaning. This not only keeps the chainsaw looking good but also prevents the build-up of decomposing materials that could hinder performance. For starters, after every use, wipe the chainsaw’s body with a clean cloth. Pay extra attention to the chain and bar; remove all sawdust and sap. Use a brush or compressed air to clear out debris from hard-to-reach areas.
Keeping the air filter clean is critical for the engine to run optimally. To clean the air filter, first, remove it according to the manufacturer’s instructions. Wash it gently with soapy water if it’s a reusable type, or replace it if it’s paper-based and looks worn out. After washing, make sure the filter is completely dry before reinstalling. Check the filter regularly, especially if you’re working in dusty conditions.
Remember to inspect the cooling fins and carburetor area for any dirt accumulation. Use a soft brush or cloth to carefully clean these parts. Routine cleaning of these elements ensures that your Mcculloch chainsaws maintain high efficiency and longevity.
The Importance of Chain Sharpness and Tension
Maintaining chain sharpness is key to your McCulloch chainsaw’s performance. A sharp chain cuts quickly, reduces the workload on the engine, and provides cleaner cuts. To check for dullness, look for signs such as small wood chips or a need for increased pressure during cutting. Sharpen the chain regularly using the right size file and guide from your sharpening kit.
Ensuring proper chain tension is just as crucial. A chain that’s too tight can wear out the bar and put extra strain on the motor. On the other hand, a loose chain might jump off the bar and pose a safety risk. Check tension before starting work, and after every few cuts. The chain should snap back into place when pulled away from the bar but shouldn’t sag. Adjust as needed, following your chainsaw’s manual for guidance.
Both these aspects, sharpness and tension, are vital for efficient chainsaw operation. They help prolong your chainsaw’s life and protect you from potential hazards. By monitoring and adjusting the chain sharpness and tension, your McCulloch chainsaws will be ready for any task at hand.
Replacing Chainsaw Parts: When and How
Regular maintenance of your Mcculloch chainsaws will at times involve replacing parts. Recognizing when to replace parts is crucial for safety and performance. Certain components, like chains, bars, and sprockets, wear down with use. A worn-out chain can affect cutting efficiency. Look for signs like uneven wear, cracked links, or dull cutters. If you notice these issues, it’s time for a replacement. Similarly, inspect the bar for signs of wear, such as deep grooves or bending. When a bar is worn out, it can cause the chain to run unevenly and increase the risk of kickback.
Replacing a chainsaw part starts with consulting the manual. It will guide you on the correct parts and the steps for safe replacement. Always buy quality parts designed for Mcculloch chainsaws to ensure compatibility. When replacing the chain, make sure it matches the size and pitch of the previous one. Turn off the chainsaw and let it cool down before you start any work. Use gloves to protect your hands from sharp edges.
First, remove the side plate by loosening the nuts or bolts. Take out the worn chain, and guide the new chain around the bar. Ensure it sits snugly in the guide slots and the teeth are facing the right direction. Adjust the tension to the recommended level, then replace the side plate and tighten the nuts. Test the tension again before using the chainsaw.
It’s important to maintain the parts you’re not replacing too. Clean any sawdust or debris from the chainsaw, specifically around the chain area and the oil ports. This ensures your new parts work smoothly with the existing components.
By knowing when and how to replace parts on your McCulloch chainsaws, you help extend its service life. This translates to better performance and reduced chance of accidents due to faulty parts. Follow these steps carefully to keep your chainsaw in top shape.
Fuel and Lubrication Best Practices
To keep your Mcculloch chainsaws running smoothly, proper fuel and lubrication are key. These best practices help prevent engine damage and ensure peak efficiency during use. Remember, using the right mix and quality of fuel and oil will protect your chainsaw’s engine and keep it running for years. Here are the best practices you should follow.
Choose the Right Fuel
Always use fresh, high-quality gasoline for your Mcculloch chainsaw. The fuel should not be more than 30 days old to prevent engine issues. If you’re using a gas-oil mix, make sure to blend it at the recommended ratio. This is often 50:1, but check your manual to be sure. Use a canister designed for fuel to store and mix your gas and oil. This will keep it clean and prevent contamination.
Use High-Quality Chainsaw Oil
For the oil mix, use oil that is specific for chainsaws. Never use motor oil, as it won’t give the proper protection your chainsaw needs. Chainsaw oil is designed to cling to the chain at high speeds. This lubricates the chain and bar, reducing wear. It also helps to carry away debris that could cause damage.
Regularly Check Fuel and Oil Levels
Before each use, check the fuel and oil levels. Top them up if needed. Always do this in a well-ventilated area, away from any flames. Never refill the chainsaw while the engine is hot or running. Let it cool first to reduce the risk of fire.
Follow the Correct Fueling and Oiling Procedures
When filling up, keep the chainsaw level to avoid spills. Wipe up any spills immediately. After fueling, always replace the caps tightly. When adding chain oil, fill to the indicated level and not beyond. Overfilling can cause leaks and may attract dirt.
By following these fuel and lubrication best practices, you will ensure the longevity and consistent performance of your Mcculloch chainsaws. Regular attention to these details can save you from costly repairs or replacements down the line.
Safe Storage Solutions for Chainsaw Longevity
Proper storage is crucial for extending the life of your Mcculloch chainsaws. Here’s how to store your chainsaw safely:
Choose a Dry, Clean Place
Find a space that is dry and free from dirt for your chainsaw. Moisture can cause corrosion, and dirt can clog up essential parts.
Drain the Fuel Before Long-Term Storage
Empty the fuel tank if you won’t be using your chainsaw for extended periods. This prevents the fuel from going stale and gumming up the engine.
Remove the Chain and Bar
After cleaning, remove the chain and bar. Store them separately after lubricating lightly to prevent rust.
Protect Against Dust and Pests
Cover your chainsaw with a breathable cloth or a chainsaw cover. This will keep out dust and discourage pests from nesting.
Keep Away from Extreme Temperatures
Avoid storing your chainsaw in places with extreme temperatures. Extreme cold or heat can damage the chainsaw’s components over time.
By following these storage solutions, you’ll keep your Mcculloch chainsaws in good condition, ready for their next use. Remember, a chainsaw that is stored properly will save you time and money on maintenance and repairs.
Troubleshooting Common Issues
When using Mcculloch chainsaws, you might encounter some common problems. Knowing how to troubleshoot can save you time and reduce the need for professional repairs. Here are some issues you might face and their potential solutions:
Chainsaw Won’t Start
If your chainsaw won’t start, first check the fuel mix and ensure it’s fresh. Look at the spark plug for any damage or dirt. If the plug is dirty, clean it. If damaged, replace it. Also, check the air filter and clean or replace it if necessary. Make sure the choke is properly set for starting.
Chain Moves Slowly or Not at All
A chain that moves slowly or not at all could be too tight or lack proper lubrication. Adjust the tension using the guidelines in your manual. Also, check the oil level and top up if needed. Ensure the oil ports are not clogged with debris.
Chainsaw is Leaking Oil
An oil leak could be due to overfilling the oil reservoir or a loose oil cap. Make sure to fill the oil to the right level and secure the cap properly. Examine the chainsaw for any damaged seals or cracked parts and replace them as needed.
Chain Dulls Quickly
A chain that dulls quickly could be cutting dirty wood or hitting the ground during use. Clean the wood before cutting and be mindful of the chain’s position. Use the sharpening kit to maintain the chain’s edge and avoid premature dullness.
Engine Overheats
An overheating engine could mean a dirty air filter or cooling fins. Clean them as per the maintenance section. Also, make sure the fuel mix is correct. Using the wrong mix can cause the engine to overheat.
By keeping an eye out for these common issues and knowing how to fix them, you’ll keep your Mcculloch chainsaws running effectively. Regular maintenance combined with troubleshooting know-how leads to lasting performance and reliability.
Conclusion: The Benefits of Proper Maintenance
Maintaining Mcculloch chainsaws guarantees safety and efficiency. When you follow the tips shared, you avoid frequent repairs saving money and time. A clean, sharp, and well-oiled chainsaw ensures effortless cutting. You face fewer work interruptions and achieve better results. Regular part checks and replacements keep your chainsaw in top shape. This pushes its lifespan further, offering years of reliable service.
Clean storage is key for preservation. It protects from rust, dirt, and pests ensuring next use is as good as the last. Knowing how to troubleshoot empowers you to fix small issues fast. It also helps you to understand your chainsaw more deeply.
Investing in maintenance tools, storing fuel correctly, and sharpening the chain, all contribute to the longevity of your Mcculloch chainsaw. It is a commitment to your safety, the chainsaw’s performance, and ultimately, your satisfaction. Remember, a well-maintained chainsaw is a symbol of your work’s quality and dedication.
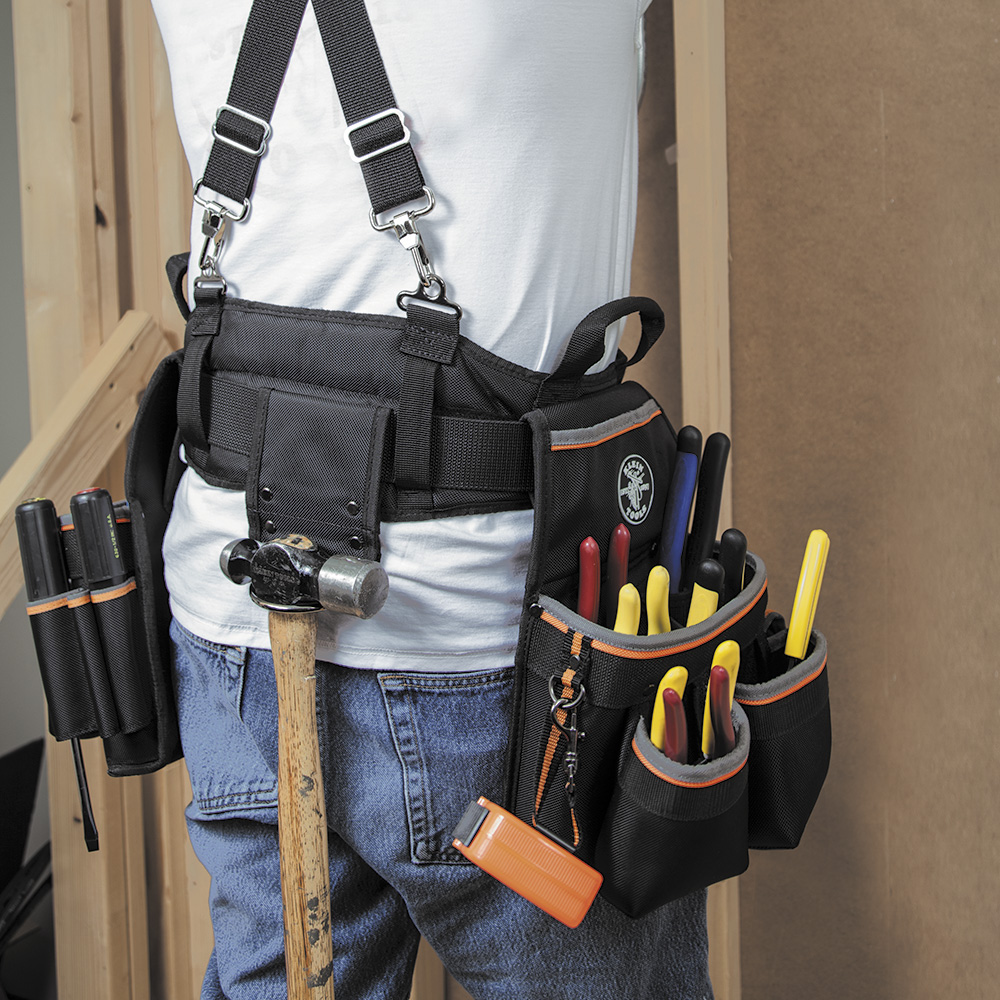
The Ultimate Guide to Klein Tool Belt
Introduction
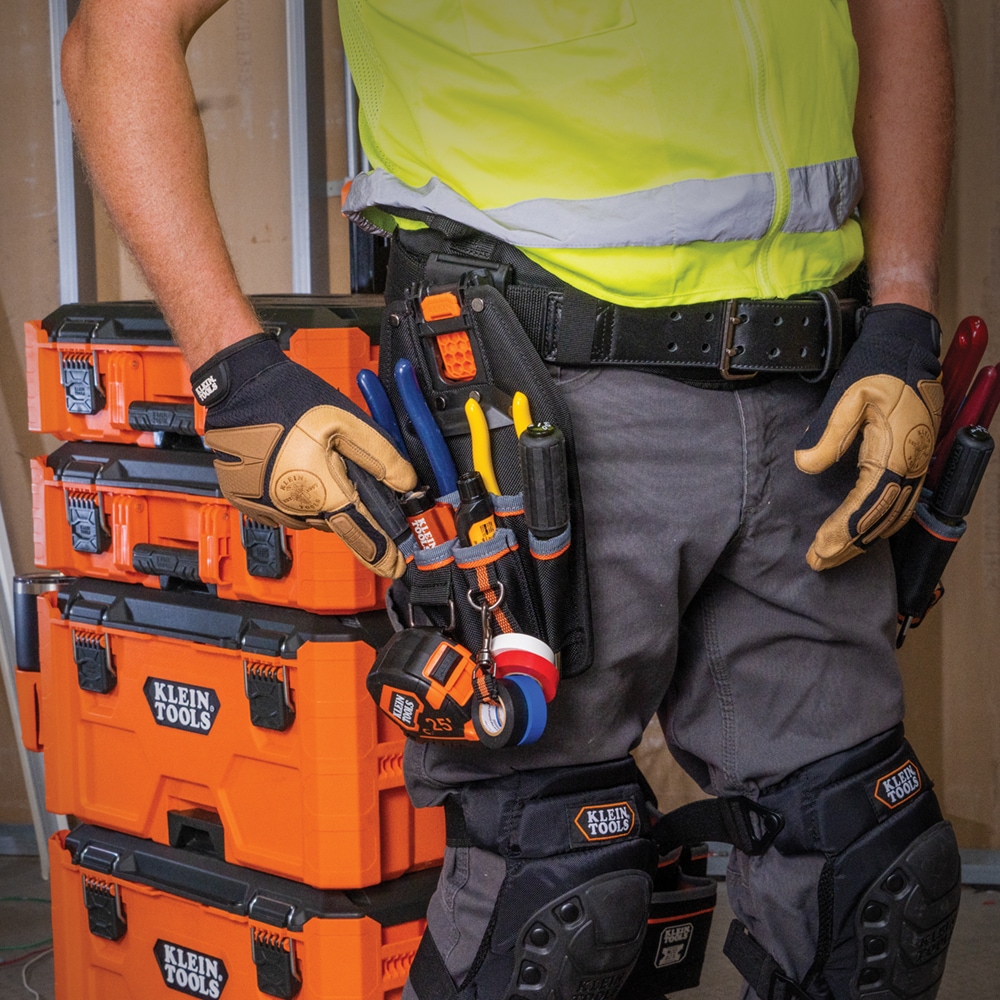
When it comes to working on construction sites, maintenance projects, or any hands-on task, having a reliable tool belt is essential. Klein Tools, a leading manufacturer of professional-grade hand tools and accessories, offers a range of high-quality tool belts designed to make your job easier. In this comprehensive guide, we will explore the features and benefits of the Klein tool belt, as well as provide valuable tips on choosing the right one for your needs.
Part 1: Understanding the Klein Tool Belt Brand
1.1. History and Reputation
Klein Tools has been in business for over 160 years, earning a reputation for producing durable, reliable, and innovative products. The company’s commitment to quality and innovation has made it a trusted name in the construction and electrical industries.
1.2. Product Range
Klein offers a diverse range of tool belts to accommodate various trades and applications. From electricians and carpenters to plumbers and HVAC technicians, there’s a Klein tool belt designed to meet the unique needs of every professional.
Part 2: Features and Benefits of Klein Tool Belts
2.1. Durability and Construction
Klein tool belts are built to last, constructed with high-quality materials such as heavy-duty nylon, leather, and riveted seams. This ensures that the belt can withstand the rigors of daily use and hold up against the weight of heavy tools.
2.2. Comfort and Functionality
Klein tool belts are ergonomically designed to provide maximum comfort and ease of movement. Padded, adjustable straps, breathable mesh fabric, and multiple pockets and pouches make it easy to organize and carry your tools without strain or discomfort.
Part 3: Choosing the Right Klein Tool Belt for Your Needs
3.1. Trade-specific Belts
Klein offers specialized tool belts tailored to the unique needs of different trades. Electricians, for example, may require a belt with specific features such as multiple loops for carrying screwdrivers, wire strippers, and pliers. Carpenters, on the other hand, may prefer a belt with ample pouches for holding nails, screws, and other fasteners.
3.2. Sizing and Fit
It’s important to choose a tool belt that fits comfortably and securely around your waist. Klein offers a range of sizes to accommodate different body types, and adjustable straps ensure a custom fit. Proper sizing and fit will prevent the belt from slipping or causing discomfort during long hours on the job.
Part 4: Maintenance and Care Tips
4.1. Cleaning and Storage
To prolong the life of your Klein tool belt, it’s important to clean and store it properly. Regularly wiping down the belt with a damp cloth and mild soap will remove dirt and debris. While storing it in a dry, cool place will prevent mildew and damage.
4.2. Inspection and Repair
Regularly inspect your tool belt for signs of wear and tear, such as fraying seams or broken buckles. Address any issues promptly to prevent further damage and ensure the safety of your tools while on the job.
Part 5: Customer Reviews and Testimonials
5.1. Professional Feedback
Many professionals in the construction and electrical trades rely on Klein tool belts for their daily work. By reading customer reviews and testimonials, you can gain insight into the experiences and satisfaction levels of those who have used Klein tool belts in real-world scenarios.
5.2. Recommendations and Considerations
Based on the feedback of fellow professionals, you can make a more informed decision about which Klein tool belt is best suited to your specific needs and requirements. Look for patterns in the reviews, such as durability, comfort, and functionality, to guide your decision-making process.
Part 6: The Durability of Klein Tool Belts
When it comes to the durability of tool belts, Klein has set the standard in the industry. Klein tool belts are constructed with high-quality materials such as heavy-duty nylon, leather, and rivets, ensuring that they can withstand the rigors of daily use on the job site. The reinforced stitching and double-layered construction on certain models provide added strength and durability, making them ideal for carrying heavy tools and equipment. Additionally, the metal buckles and hardware are designed to withstand wear and tear, further enhancing the longevity of the belts.
Klein tool belts are also resistant to abrasions, tears, and punctures, ensuring that they can hold up in tough working conditions. Whether you’re working in construction, electrical, or any other trade, you can count on Klein tool belts to stand the test of time and keep your tools secure and easily accessible. The durability of Klein tool belts is a significant factor in their popularity among tradespeople and professionals who rely on their equipment to get the job done.
Part 7: Comfort and Ergonomics of Klein Tool Belts
In addition to durability, comfort and ergonomics are essential considerations when choosing a tool belt. Klein tool belts are designed with the user’s comfort in mind, featuring padded belts, ergonomic padding, and adjustable straps to provide a customized fit. This helps to alleviate strain and pressure on the hips and lower back, allowing for extended wear without discomfort or fatigue. The inclusion of breathable, moisture-wicking materials also ensures that the belts remain comfortable to wear in various climates and working conditions.
Klein tool belts can distribute weight evenly and provide easy access to tools. And reducing the need for constant bending, reaching, and readjusting. This ergonomic design not only enhances comfort but also improves efficiency and reduces the risk of strain-related injuries. Whether you’re climbing ladders, bending, or kneeling, Klein tool belts are engineered to move with you and keep your tools within reach. The combination of durability, comfort, and ergonomics makes Klein tool belts a top choice for professionals who demand reliability and performance from their gear.
Part 8: Customization and Versatility of Klein Tool Belts
Klein offers a range of tool belts that are fully customizable to suit individual preferences and job requirements. With options for different pocket configurations, pouch sizes, and tool attachments, tradespeople can personalize their belt to accommodate the specific tools and accessories they need for their work. This versatility allows for efficient organization and easy access to essential items. Reducing time spent searching for tools and increasing productivity on the job site.
In addition to customization, Klein tool belts are versatile. Offering compatibility with various tool pouches, holders, and accessories. This allows users to expand and modify their belt as needed. And adapting to different tasks and tools without the need for multiple belts. The ability to customize and adapt Klein tool belts to specific needs sets them apart as a practical and flexible solution for professionals across a range of trades and industries. With Klein tool belts, users can be confident that they have the right tools at hand, no matter the job at hand.
Conclusion
Not only are Klein tool belts are functional and durable, but they also boast a professional and stylish appearance. This makes them a popular choice among tradespeople and professionals who take pride in their tools and equipment.
In conclusion, Klein tool belts are a reliable and versatile solution for professionals and tradespeople who require a convenient and efficient way to carry their tools on the job. With their ergonomic design, durability, and practical features, Klein tool belts are a top choice for those seeking a high-quality and dependable tool-carrying solution.
In conclusion, a Klein tool belt is an invaluable accessory for anyone who works with hand tools in a professional capacity. By understanding the brand, features, and benefits of Klein tool belts, as well as how to choose the right one for your needs, you can maximize your efficiency and comfort on the job. With proper care and maintenance, a Klein tool belt will serve you well for years to come.
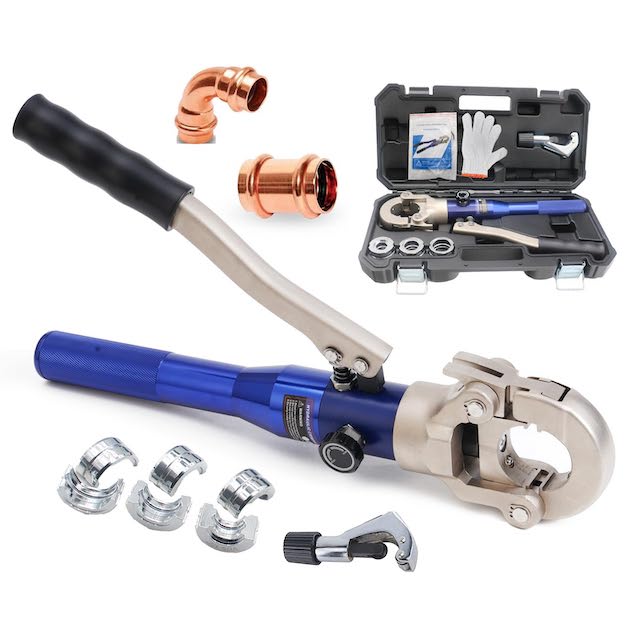
The Ultimate Guide to Copper Pipe Crimping Tool
Introduction
Copper pipe crimping tools have become essential for professionals and DIYers alike when it comes to installing plumbing systems. These tools are designed to create a secure and reliable connection between copper pipes and fittings, ensuring that the plumbing system functions effectively. In this comprehensive guide, we will explore everything you need to know about copper pipe crimping tool, including their benefits, types, usage, and maintenance.
Part 1: Understanding Copper Pipe Crimping Tools
Level 1: What are Copper Pipe Crimping Tools?
Copper pipe crimping tools are devices used to join copper pipes and fittings using a crimping method. The tool compresses a copper ring around the connection, creating a tight seal that prevents leaks and ensures the proper flow of water within the plumbing system. These tools come in various sizes and designs to accommodate different pipe diameters and fittings.
Level 2: Benefits of Using Copper Pipe Crimping Tools
One of the main advantages of using copper pipe crimping tools is the reliability of the connections they create. Unlike traditional soldering methods, crimped connections do not rely on heat, making them suitable for use in areas where open flames are prohibited. Additionally, crimped connections are less likely to develop leaks over time, providing long-term durability and peace of mind for homeowners and professionals.
Part 2: Types of Copper Pipe Crimping Tools
Level 1: Manual Crimping Tools
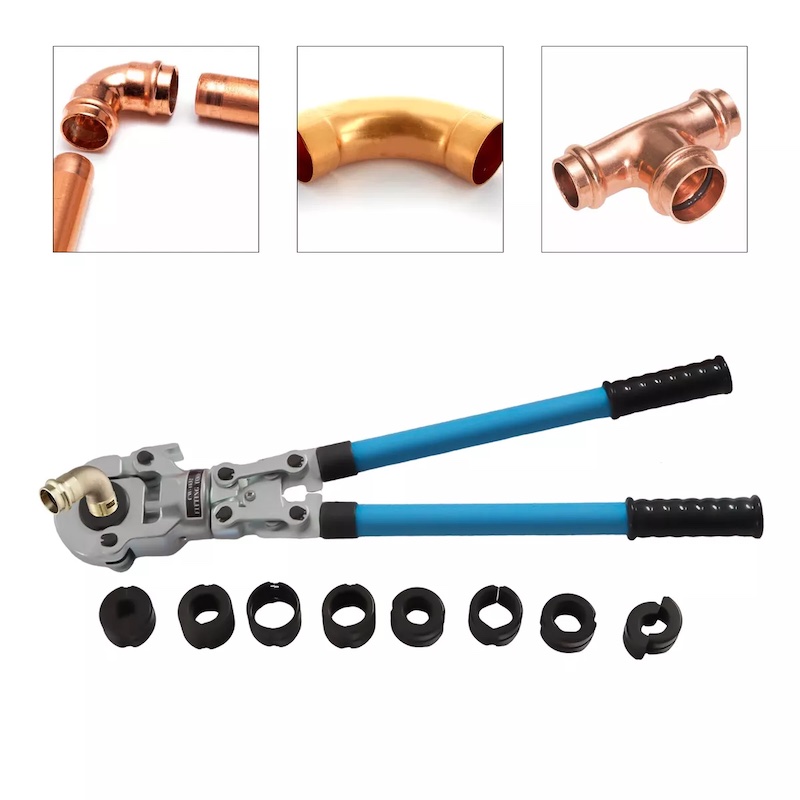
Manual crimping tools are suitable for occasional use or for smaller plumbing projects. These tools require physical exertion to compress the copper ring around the connection, and while they are cost-effective, they may be less efficient for larger-scale projects.
Level 2: Battery-Powered Crimping Tools
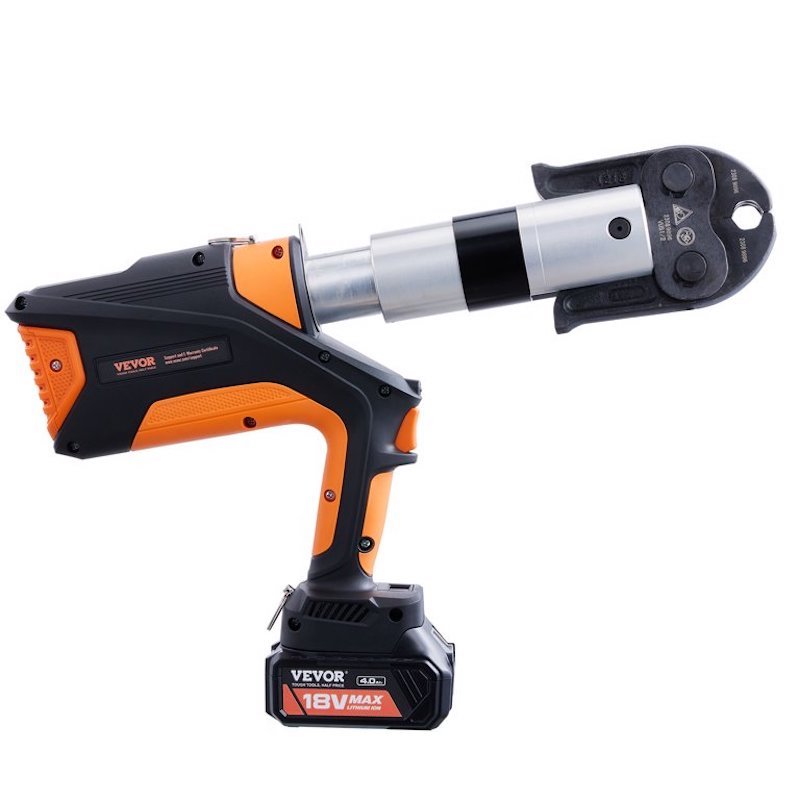
Battery-powered crimping tools for professionals who require a higher level of productivity and precision. These tools are powered by rechargeable batteries, allowing for effortless operation and consistent crimping results. While they may come at a higher price point, the efficiency and convenience they offer make them a worthwhile investment for those in the plumbing industry.
Part 3: Using a Copper Pipe Crimping Tool
Level 1: Preparing the Work Area
Before using a copper pipe crimping tool, it’s essential to prepare the work area by ensuring that the pipes and fittings are clean and free of debris. This will help facilitate a secure and proper connection when crimping.
Level 2: Crimping Process
To use a copper pipe crimping tool, insert the appropriate-sized copper ring onto the pipe, followed by the fitting. Position the tool over the connection and squeeze the handles to compress the ring. The tool will then create a secure crimp, forming a reliable seal between the pipe and fitting.
Part 4: Maintenance of Copper Pipe Crimping Tools
Level 1: Regular Inspections
It’s important to regularly inspect copper pipe crimping tools for signs of wear and tear. Check for any damage to the handles, jaws, and crimping mechanism, and replace any worn parts to ensure the tool continues to function properly.
Level 2: Cleaning and Lubrication
After each use, clean the copper pipe crimping tool to remove any dirt or debris that may have accumulated. Additionally, lubricate the moving parts of the tool to maintain smooth operation and prevent premature wear.
Part 6: Proper Usage and Maintenance of Copper Pipe Crimping Tool
Proper usage and maintenance of a copper pipe crimping tool are essential for ensuring its longevity and effectiveness. To use the tool correctly, it’s crucial to familiarize yourself with the manufacturer’s instructions and recommendations. This may include specific instructions on how to crimp different sizes and types of pipes, as well as guidelines for applying the appropriate amount of force during the crimping process.
Regular maintenance is also key to keeping the tool in good working condition. This may involve keeping the tool clean and free of debris, inspecting it for any signs of wear or damage, and replacing any worn or damaged parts as needed. It’s also important to store the tool properly when not in use, ideally in a clean and dry environment to prevent rust and corrosion.
By using the tool correctly and maintaining it properly, you can ensure that it will continue to perform effectively and reliably for many years to come.
Part 7: Safety Considerations When Using a Copper Pipe Crimping Tool
While copper pipe crimping tools are relatively safe to use when used properly, it’s important to take certain safety precautions to minimize the risk of accidents and injuries. One of the main safety considerations when using a crimping tool is to always wear appropriate personal protective equipment, such as safety goggles and gloves, to protect yourself from any potential hazards.
It’s also important to use the tool in a well-ventilated area to prevent inhaling any fumes or dust during the crimping process. Additionally, make sure to keep your hands and fingers away from the crimping area to avoid accidental injuries.
When using the tool, always follow the manufacturer’s instructions and guidelines to ensure safe and proper operation. This may include using the correct size and type of crimping die for the specific pipe you are working with and applying the appropriate amount of force during the crimping process.
By following these safety considerations, you can minimize the risk of accidents and injuries while using a copper pipe crimping tool.
Part 8: Advantages of Using a Copper Pipe Crimping Tool
There are several advantages to using a copper pipe crimping tool for joining copper pipes. One of the main benefits is the speed and ease of the crimping process, which allows for quick and efficient installation of piping systems. This can be especially advantageous in larger plumbing or HVAC projects where time is of the essence.
Another advantage of using a crimping tool is the reliability and durability of the connections it creates. Their strength and resistance to leaks, are making them a popular choice for many plumbing and HVAC applications. Additionally, crimped connections are also less prone to corrosion and other types of deterioration over time, which can further increase the longevity of the piping system.
Copper pipe crimping tools are also relatively compact and portable, making them easy to use in tight spaces and on-the-go installations. This can be particularly beneficial for plumbers and HVAC technicians who need to work in confined areas or on various job sites.
Overall, the advantages of using a copper pipe crimping tool make it a valuable and versatile tool for joining copper pipes in a wide range of applications.
Conclusion
Using a copper pipe crimping tool is relatively straightforward. The tool with a specific crimping jaw that matches the size and type of the pipe and fitting. Once the jaw is in place, the user simply needs to apply the appropriate amount of force to crimp the pipe and fitting together. This creates a secure and watertight seal that will prevent leaks and ensure the integrity of the piping system.
In conclusion, a copper pipe crimping tool is an essential tool for anyone working with copper piping systems. These tools are designed to make the process of crimping copper pipes fast, easy, and reliable, and are available in manual, battery-powered, and hydraulic options. By choosing the right tool for the job, users can ensure that their copper piping systems are installed securely and efficiently.
In conclusion, copper pipe crimping tools are a valuable asset for anyone involved in plumbing projects, offering a reliable and efficient method for creating secure connections. By understanding the different types of crimping tools, how to use them, and how to maintain them, you can ensure that your plumbing system will function effectively for years to come. Whether you’re a professional plumber or a DIY enthusiast, investing in a quality copper pipe crimping tool is a decision that will pay off in the long run.
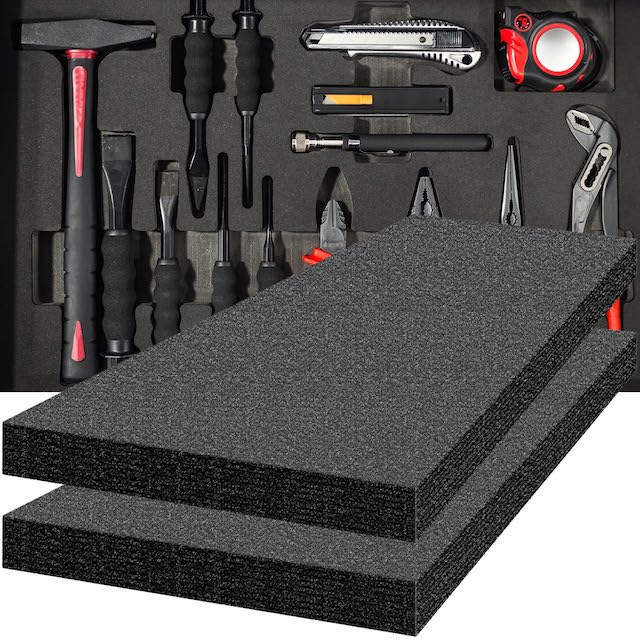
Tool Box Foam: Maximizing Organization and Efficiency
Introduction
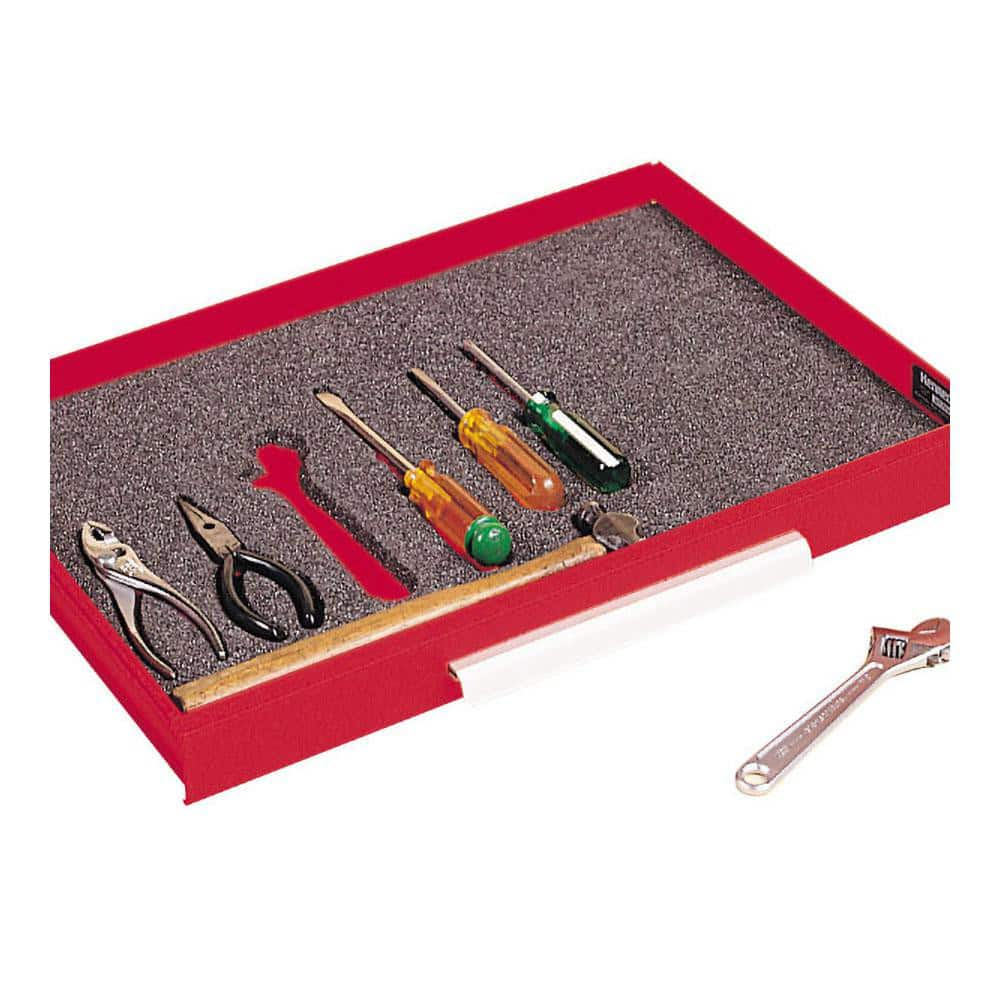
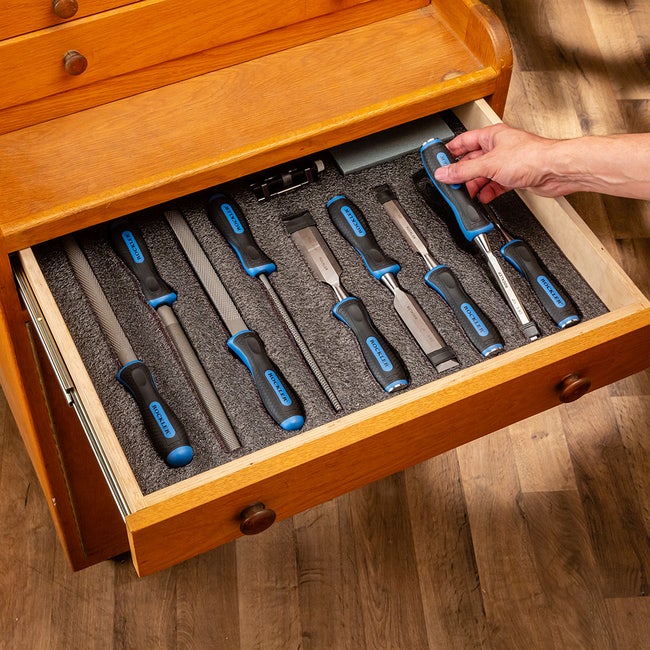
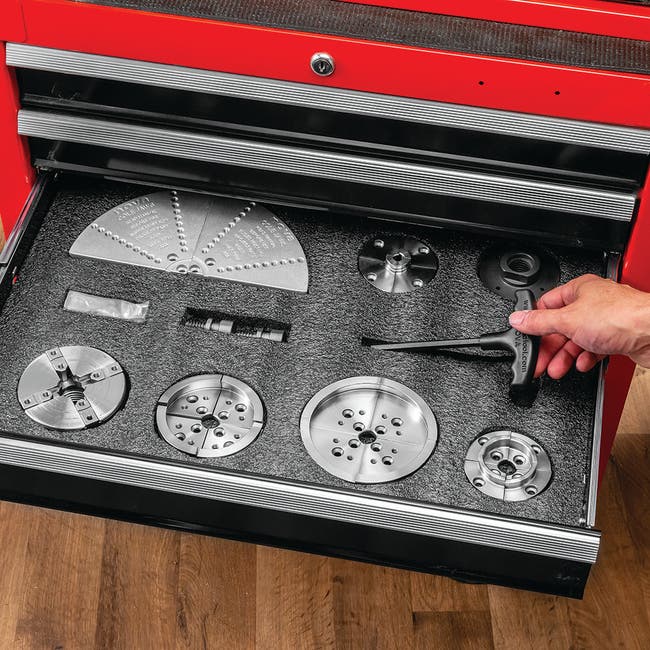
Tool box foam is a versatile and practical solution for organizing and protecting your tools. Whether you are a professional mechanic, woodworker, or DIY enthusiast, having an organized tool box can save you time and frustration, leading to increased productivity and efficiency. In this comprehensive guide, we will explore the benefits of using tool foam, different types and styles available, and how to best utilize it to keep your tools safe and easily accessible.
Part 1: Understanding the Benefits of Tool Box Foam
Level 1: Protection and Organization
Tool box foam provides a secure and organized storage solution for your tools, preventing them from shifting or becoming damaged during transportation. The foam’s custom fit design ensures that each tool has its own designated space, preventing them from coming into contact with each other and causing friction or damage. This not only protects your tools but also prolongs their lifespan, saving you money in the long run.
Level 2: Time-Saving and Efficiency
By having a designated spot for each tool, tool box foam can significantly reduce the time spent searching for the right tool. This not only reduces frustration but also increases efficiency, allowing you to complete tasks more quickly and effectively. Additionally, the visual organization provided by tool box foam makes it easy to see if any tools are missing, preventing the loss of valuable equipment.
Part 2: Types and Styles of Tool Box Foam
Level 1: Pre-Made Foam Inserts
Pre-made foam inserts come in a variety of shapes and sizes to fit different tool boxes and tools. They are designed to fit specific tool sets and can be easily customized by cutting out the desired shapes to accommodate your tools. This type of foam provides a quick and convenient solution for organizing your tools, with minimal effort required.
Level 2: Customizable Foam Sheets
Customizable foam sheets allow you to create a completely tailored storage solution for your tools. These sheets can be easily cut and shaped to fit any tool box, regardless of size or shape. Customizable foam sheets provide the flexibility to create a unique arrangement for your tools, maximizing efficiency and organization.
Part 3: Utilizing Tool Box Foam for Maximum Efficiency
Level 1: Tool Organization
Utilize tool box foam to create a system for organizing your tools based on their frequency of use or specific job requirements. This will make it easier to locate and access the tools you need, saving time and increasing productivity. Consider using different colored foam for different tool categories or departments to further streamline organization.
Level 2: Custom Tool Storage
Customizing your tool foam to fit the exact shape and size of your tools ensures a secure and snug fit. This prevents tools from rattling around during transport and minimizes the risk of damage. Moreover, having a dedicated spot for each tool makes it easy to notice if any tools are missing.
Part 4: Tips for Maintaining and Cleaning Tool Box Foam
Level 1: Regular Cleaning
Regularly cleaning your tool foam is essential to maintain its effectiveness and prolong its lifespan. Dust and debris can accumulate over time, causing the foam to lose its grip and protection. Use a vacuum cleaner or compressed air to remove any buildup, and ensure the foam is completely dry before placing your tools back in the box.
Level 2: Replacing Worn Foam
As tool box foam is used over time, it may become worn or lose its shape. When this happens, it is important to replace the foam to continue protecting your tools effectively. Keep an eye out for any signs of wear and tear, and replace the foam inserts as needed to maintain optimal tool organization and protection.
Part 5: Benefits of Using Tool Box Foam Inserts
Using tool box foam inserts offers a range of benefits that make them a popular choice for organizing and protecting tools. One significant advantage is the customization options that foam inserts provide. By using a foam insert, individuals can create a unique organization system tailored exactly to their specific tools. This level of customization allows for better organization, which in turn leads to increased efficiency and productivity.
Furthermore, tool foam inserts provide excellent protection for tools. The foam’s soft yet durable material helps prevent damage to the tools from shifting and banging into one another during transport. This protection not only extends the life of the tools but also ensures that they remain in good working condition when needed.
In addition, using foam inserts in tool boxes can also improve workplace safety. This is particularly important in industrial settings where an organized and secure tool storage system is critical to maintaining a safe work environment.
Overall, the benefits of using tool foam inserts are numerous. From improved organization to increased tool protection and enhanced workplace safety, foam inserts offer a practical and efficient solution for tool storage and organization needs.
Part 6: How to Customize Tool Box Foam Inserts
Customizing tool foam inserts is a straightforward process that allows individuals to create a tailored organization system for their tools. To begin customizing foam inserts, individuals will need to measure the interior of their tool box and the shapes of their tools. This will help ensure a precise fit for the foam inserts. Next, the measurements should be transferred onto the foam sheet, and the outlines of the tools can be traced onto the foam with a marker.
Once the outlines are traced, individuals can use a sharp utility knife to carefully cut out the shapes from the foam. It’s important to take your time and cut along the lines as accurately as possible to create a snug fit for each tool.
After all the shapes are cut out, the foam inserts can be placed into the tool box, and the tools can be positioned into their designated slots. Customizing tool box foam inserts allows individuals to create a personalized and efficient tool organization system that maximizes space and protects tools from damage during transport or storage.
Part 7: Tips for Maintaining Tool Box Foam Inserts
While tool box foam inserts are durable and provide excellent protection for tools, it’s essential to properly maintain them to ensure their longevity and effectiveness. Here are several tips for maintaining tool foam inserts:
- Regular cleaning: Over time, foam inserts can accumulate dust, dirt, and debris. Regularly remove the inserts from the tool box and clean them using a mild detergent and warm water. Allow the foam to air dry completely before returning it to the tool box.
- Check for damage: Inspect the foam inserts periodically for signs of wear, tear, or damage. Look for any fraying, tearing, or compression in the foam that could compromise its ability to protect tools. Replace any damaged foam inserts as needed.
- Use protective covers: Consider using protective covers for the foam inserts to further shield them from dirt and debris. These covers can be easily removed and washed, extending the life of the foam inserts.
- Store in a dry environment: Moisture can damage foam inserts over time. Store the tool box in a dry environment and avoid exposing the foam inserts to excessive humidity.
By following these maintenance tips, individuals can prolong the life of their tool box foam inserts and ensure they continue to provide excellent protection and organization for tools.
Conclusion
Tool box foam is a practical and efficient solution for organizing and protecting your tools. By utilizing the benefits of tool foam, understanding the different types and styles available, and learning how to best utilize it, you can maximize the efficiency of your tool storage. With a well-organized and protected tool box, you can save time, reduce frustration, and increase productivity, ultimately improving the quality and efficiency of your work.

The Ultimate Guide to Diamond Plate Tool Box
Introduction
When it comes to organizing and safely storing your tools, a diamond plate tool box is an essential addition to any workshop or vehicle. These rugged and durable tool boxes not only provide a secure place to keep your tools, but they also add a touch of style to your workspace. In this comprehensive guide, we will explore the benefits of diamond plate tool boxes, the various types available on the market, and the best practices for choosing and maintaining them.
Part 1: Understanding Diamond Plate Tool Boxes
Level 1: What is a Diamond Plate Tool Box?
A diamond plate tool box is a storage container typically made from aluminum or steel. It is characterized by its distinctive diamond-shaped pattern on the surface, which not only adds to its visual appeal but also provides added strength and durability. These tool boxes are commonly used in pickup trucks, trailers, and workshops to store and organize tools and equipment.
Level 2: Benefits of Diamond Plate Tool Boxes
The diamond plate design not only enhances the aesthetic appeal of the tool box but also serves a functional purpose. The raised pattern provides added strength to the material, making it more resistant to dents, scratches, and other forms of damage. Additionally, the textured surface helps to prevent slipping and sliding of tools and equipment stored inside the box. Furthermore, diamond plate tool boxes are known for their lightweight yet sturdy construction, making them ideal for both professional and DIY enthusiasts.
Part 2: Types of Diamond Plate Tool Boxes
Level 1: Different Designs and Configurations
Diamond plate tool boxes come in a variety of designs, including crossover, chest, underbody, and side mount. Crossover tool boxes are installed behind the cab of a pickup truck, chest tool boxes are rectangular and sit in the bed of a truck, underbody tool boxes are mounted underneath the bed of a truck, and side mount tool boxes are attached to the truck bed rail.
Level 2: Materials and Finishes
While most diamond plate tool boxes can also come in a range of finishes including polished aluminum, black powder-coated steel, and stainless steel. Each material and finish has its own set of benefits, such as corrosion resistance, added durability, and enhanced aesthetics.
Part 3: Choosing the Right Diamond Plate Tool Box
Level 1: Considerations for Selecting a Tool Box
When choosing diamond plate tool boxes, it’s important to consider factors such as the size of your vehicle, the type and amount of tools you need to store, and your budget. For example, a contractor with a large assortment of heavy-duty tools may require a larger crossover tool box, whereas a DIY enthusiast may only need a smaller chest tool box for occasional use.
Level 2: Customization and Additional Features
Many diamond plate tool boxes come with customizable options such as added storage compartments, built-in tool trays, and secure locking mechanisms. It’s important to consider these additional features to ensure that the tool box meets your specific storage and organizational needs.
Part 4: Maintaining Your Diamond Plate Tool Box
Level 1: Cleaning and Care
To maintain the appearance and functionality of your diamond plate tool boxes, regular cleaning and care are essential. This includes removing dirt and debris, polishing the surface to remove any scratches, and applying a protective sealant to help prevent oxidation and corrosion.
Level 2: Preventing Damage and Wear
Proper use and maintenance of your tool box can help prevent unnecessary wear and damage. Avoid overloading the tool box, and take care when moving heavy or sharp tools in and out of the box to prevent dents and scratches on the diamond plate surface.
Part 5: Installing and Securing Your Diamond Plate Tool Box
Level 1: Installation Best Practices
The installation process for a diamond plate tool box will vary depending on the type and location of the box. Properly securing the tool box to your vehicle or workshop is essential for safety and security.
Level 2: Security Options
For added peace of mind, consider installing additional security measures such as padlocks, tamper-proof hinges, and reinforced locking mechanisms to prevent theft and unauthorized access to your tools and equipment.
Part 6: Care and Maintenance of Your Diamond Plate Tool Box
To ensure your diamond plate tool boxes remains in top condition, proper care and maintenance is essential. Here are some tips to keep your tool box looking great and functioning effectively for years to come.
Firstly, regular cleaning is key to maintaining the appearance of the diamond plate surface. A mild soap and water solution can be used to remove any dirt, grime, or grease buildup. It’s important to avoid using harsh chemicals or abrasive cleaners, as they can damage the finish of the diamond plate.
Additionally, it’s a good idea to regularly inspect the tool box for any signs of wear or damage. Check for any loose or missing fasteners, hinges, or handles, and make any necessary repairs or replacements as soon as possible to prevent further damage.
Finally, consider investing in a protective coating to keep your diamond plate tool box looking its best. There are various sealants and polishes available specifically designed for diamond plate surfaces, which can help to prevent oxidation and corrosion, and keep the tool box looking shiny and new.
By following these care and maintenance tips, you can ensure your diamond plate tool box remains in top condition and continues to be a reliable storage solution for your tools and equipment.
Part 7: Customization Options for Diamond Plate Tool Boxes
Diamond plate tool boxes are not only practical and durable, but they also offer a range of customization options to suit your specific needs and preferences. Whether you’re looking to add extra functionality or personalize the appearance of your tool box, there are various options available to help you create the perfect storage solution.
One popular customization option is the addition of drawers or dividers, which can help to organize and separate your tools and equipment, making it easier to find what you need quickly.
Another popular option for customization is the addition of custom decals or graphics to personalize the appearance of your diamond plate tool boxes. Whether you want to add your company logo, a personal touch, or simply enhance the visual appeal of the tool box, custom decals can be a fun and creative addition to your storage solution.
Finally, consider adding accessories such as LED lighting, power outlets, or built-in tool racks to enhance the functionality of your tool box and make it even more convenient to use.
With a range of customization options available, you can create a diamond plate tool box that perfectly suits your needs and reflects your personal style.
Part 8: Benefits of Investing in a Diamond Plate Tool Box
When it comes to storing and organizing your tools and equipment, a diamond plate tool box offers a range of benefits that make it a valuable investment for any workshop or vehicle. Here are some of the key benefits of investing in a diamond plate tool box.
Security: Many diamond plate tool boxes feature locking mechanisms to keep your tools and equipment safe and secure. This provides peace of mind, especially when storing valuable tools or equipment in your workshop or vehicle.
Organization: With a range of sizes and configurations available, diamond plate tool boxes provide ample storage space for all your tools and equipment, making it easy to keep everything organized and accessible.
Versatility: Diamond plate tool boxes are versatile storage solutions, suitable for use in workshops, garages, or on vehicles. Whether you need a compact toolbox for small hand tools or a larger chest for power tools and equipment, there’s a diamond plate tool box to suit your needs.
Visual Appeal: The distinctive diamond plate pattern adds a stylish and professional look to your workshop or vehicle, giving it a polished and rugged appearance.
By investing in a diamond plate tool box, you can enjoy the benefits of durable, secure, and organized storage for your tools and equipment, while also adding a touch of style to your workspace.
Conclusion
In conclusion, a diamond plate tool box is a must-have accessory for anyone looking to keep their tools organized, secure, and easily accessible. With their durable construction, versatile designs, and customizable options, these tool boxes are an invaluable addition to any workshop or vehicle. By understanding the various types of diamond plate tool boxes, choosing the right one for your needs, and properly maintaining and securing it, you can ensure that your tools are protected and readily available whenever you need them.
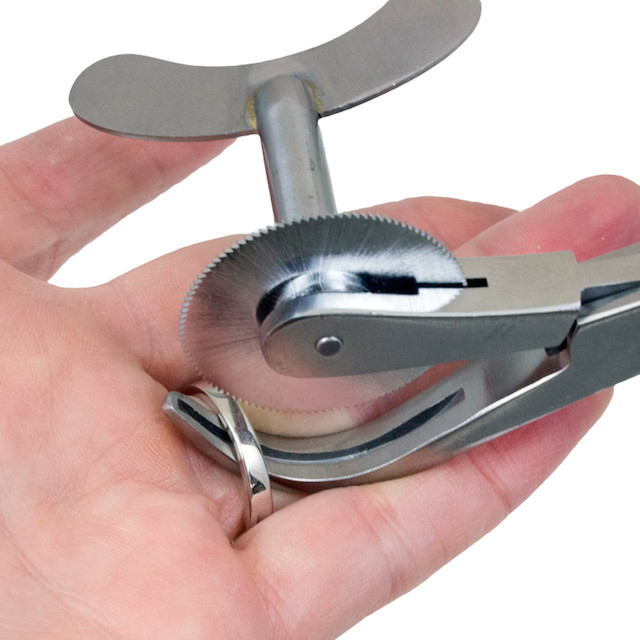
Ring Cutter Tool: Everything You Need to Know
Introduction
Ring cutter tools are a vital tool in the medical, emergency, and industrial fields. With their ability to safely and quickly cut through metal, plastic, and other materials, ring cutters have become essential for a wide range of applications. In this comprehensive guide, we will explore the different types of ring cutter tools, their uses, benefits, and how to choose the best one for your needs.
Part 1: What is a Ring Cutter Tool?
Level 1: Definition and Purpose
A ring cutter tool is a handheld device designed to safely and effectively remove rings from fingers and other body parts. It is commonly used by emergency medical professionals, firefighters, and industrial workers to remove metal, plastic, and other types of rings in emergency situations.
Level 2: Components and Design
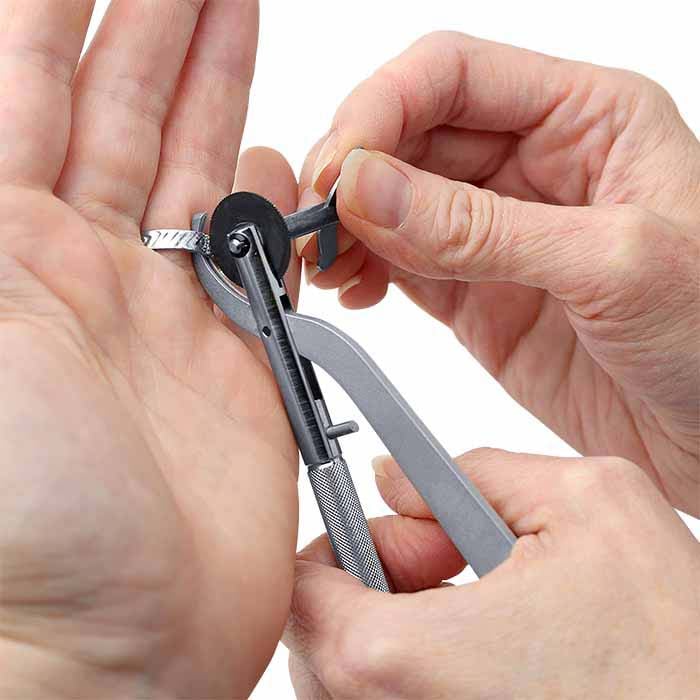
Ring cutter tools typically consist of a circular cutting blade, a handle, and a method for adjusting the size of the cutting blade. The cutting blade is often made of high-quality steel and is designed to be sharp and durable to effectively cut through various types of materials.
Part 2: Types of Ring Cutter Tools
Level 1: Manual Ring Cutters
Manual ring cutters require the user to turn a handle or knob to operate the cutting blade. These types of ring cutters for their precision and control, are making them suitable for delicate situations where the removal of a ring needs to be done with care.
Level 2: Electric Ring Cutters
Electric ring cutters utilize a motor to power the cutting blade, making them ideal for quickly and efficiently removing rings in emergency situations. These types of ring cutters are commonly used in hospitals, clinics, and emergency response teams due to their speed and convenience.
Part 3: Uses of Ring Cutter Tools
Level 1: Medical Applications
Ring cutter tools are essential in medical settings, where they are used to remove rings that have become stuck on fingers due to swelling, injury, or other medical conditions. Medical professionals rely on ring cutters to safely and swiftly remove rings without causing further harm to the patient.
Level 2: Industrial and Construction Applications
In industrial and construction settings, ring cutter tools can remove rings that have become trapped on machinery, equipment, or other objects. These tools are essential for ensuring the safety of workers and preventing injuries in hazardous work environments.
Part 4: Benefits of Using Ring Cutter Tools
Level 1: Safety
Ring cutter tools are designed to safely remove rings without causing harm to the user or the person wearing the ring. Their precision and control make them a safer alternative to other methods of ring removal, such as cutting or prying the ring off.
Level 2: Versatility
Ring cutter tools are versatile and can remove a wide range of rings made from different materials, including metal, plastic, and titanium. This versatility makes them an essential tool for various industries and applications.
Part 5: How to Choose the Best Ring Cutter Tool
Level 1: Consider the Application
For medical settings, a manual ring cutter may be preferable for its precision, while electric ring cutters are suitable for emergency response teams and industrial applications.
Level 2: Quality and Durability
Look for ring cutter tools made from high-quality materials that are durable and long-lasting. A sharp and reliable cutting blade is essential to ensure the safe and efficient removal of rings in various situations.
Part 6: Types of Ring Cutter Tools
There are several types of ring cutter tools available on the market, each designed for a specific purpose and suited to different needs. The most common type is the handheld ring cutter, which resembles a pair of pliers with a sharp cutting blade. This type of tool is best for cutting through metal rings, such as those found on fingers or toes. Another type is the table-mounted ring cutter, in industrial settings and is capable of cutting through larger, thicker metal rings. These tools are typically more powerful and can handle a wider range of materials.
It’s important to choose the right type of ring cutter tool for the job at hand. For medical professionals, a portable and easy-to-use handheld ring cutter may be ideal, while industrial workers may require a more heavy-duty table-mounted cutter. By selecting the right type of ring cutter tool, you can ensure a safe and efficient cutting process.
Part 7: Safety Considerations When Using a Ring Cutter Tool
Using a ring cutter tool requires careful consideration of safety measures to prevent accidents and injuries. Whether cutting a metal ring off a patient’s finger in a medical setting or using a ring cutter tool in an industrial environment, it’s essential to prioritize safety at all times.
Before using a ring cutter tool, it’s crucial to read the manufacturer’s instructions and familiarize yourself with the proper operation of the tool. Additionally, ensure that the cutting blade is sharp and in good condition to avoid unnecessary strain and potential accidents during use. When using a handheld ring cutter, it’s important to maintain a firm grip on the tool and position it correctly around the ring to prevent slipping or accidental cuts to the skin.
In a medical setting, it’s important to take precautions to protect the patient’s skin and ensure they are comfortable and calm during the cutting process. Providing adequate pain relief and ensuring the patient is in a stable and comfortable position can help reduce the risk of injuries and complications.
In an industrial setting, workers should wear appropriate personal protective equipment, such as gloves and eye protection, to safeguard against potential hazards. Additionally, following proper training and safety protocols for using ring cutter tools is essential to minimize the risk of accidents and injuries.
By prioritizing safety and taking necessary precautions when using a ring cutter tool, you can prevent accidents and ensure a smooth and efficient cutting process.
Part 8: Maintenance and Care for Ring Cutter Tools
To ensure the longevity and effectiveness of ring cutter tools, proper maintenance and care are essential. Regular maintenance can help prevent issues such as dull blades, malfunctioning parts, and other potential problems that may compromise the tool’s performance.
One of the most important aspects of maintaining a ring cutter tool is keeping the cutting blade sharp and in good condition. It’s also important to keep the tool clean and free of debris, as buildup can affect the tool’s performance and potentially cause damage. Regular inspection of the tool for any signs of wear, damage, or malfunction is crucial to identify and address any issues before they escalate.
Proper storage of ring cutter tools is also important, as exposure to moisture, extreme temperatures, or other environmental factors can lead to corrosion or damage. It’s advisable to store ring cutter tools in a dry, clean, and secure location to protect them from potential harm.
By taking the time to properly maintain and care for ring cutter tools, you can extend their lifespan, ensure their effectiveness, and reduce the risk of accidents or malfunctions during use.
Conclusion
Ring cutter tool is a valuable tool in medical, emergency, and industrial fields, offering a safe and effective way to remove rings from fingers and other body parts. By understanding the different types of ring cutters, their uses, benefits, and how to choose the best one for your needs, you can confidently select the right tool for your specific application. Whether in a medical emergency or a construction site, a reliable ring cutter tool is an essential part of any toolkit.
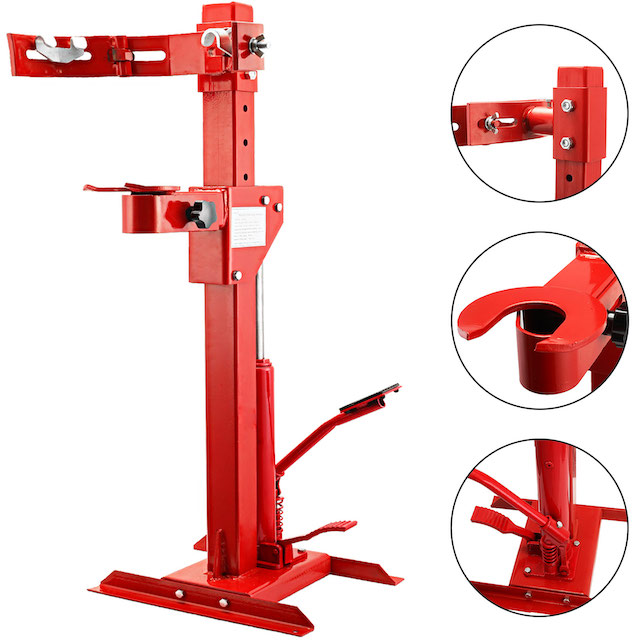
Coil Spring Compressor Tool: Everything You Need to Know
Introduction
When it comes to working on suspension systems, having the right tools is crucial. One tool that is essential for any mechanic or DIY enthusiast is the coil spring compressor tool. This tool is designed to safely and effectively compress coil springs, making it easier to remove and install them. In this comprehensive guide, we will explore everything you need to know about coil spring compressor tools, including how they work, the different types available, their uses, safety precautions, and much more.
Part 1: Understanding Coil Spring Compressor Tools
Level 1: What is a coil spring compressor tool?
A coil spring compressor tool is a device that is used to compress coil springs in order to safely remove or install them from a vehicle’s suspension system. It is typically made of heavy-duty steel and features adjustable arms that can accommodate a wide range of spring sizes and types.
Level 2: How does a coil spring compressor tool work?
The basic function of a coil spring compressor tool is to compress the coil spring by tightening the tool’s arms, which reduces the overall size and tension of the spring. This allows for safe removal or installation of the spring without the risk of injury or damage to the vehicle.
Part 2: Types of Coil Spring Compressor Tools
Level 1: Internal vs. External Coil Spring Compressor Tools
There are two main types of coil spring compressor tools: internal and external. Internal compressors are inserted inside the coil spring, while external compressors sit on the outside of the spring. Each type has its own advantages and limitations, so it’s important to choose the right one for the job at hand.
Level 2: Other Variations of Coil Spring Compressor Tools
In addition to internal and external compressors, there are other variations of coil spring compressor tools, such as manual vs. hydraulic, and single-action vs. double-action. Each type is designed for specific applications and can offer different levels of convenience and ease of use.
Part 3: Uses of Coil Spring Compressor Tools
Level 1: Removing and Installing Coil Springs
The primary use of a coil spring compressor tool is to remove and install coil springs in a vehicle’s suspension system. This is often necessary when performing suspension repairs, upgrades, or modifications.
Level 2: Other Applications
Coil spring compressor tools can also be used for other applications, such as compressing valve springs and other types of springs in various mechanical assemblies. Their versatile design makes them a valuable tool for a wide range of automotive and mechanical tasks.
Part 4: Safety Precautions When Using Coil Spring Compressor Tools
Level 1: Proper Handling and Maintenance
It is crucial to handle and maintain coil spring compressor tools properly to ensure safe and effective use. This includes inspecting the tool for any damage or wear before each use, and using it in accordance with the manufacturer’s guidelines.
Level 2: Personal Protective Equipment and Safe Practices
When using a coil spring compressor tool, it’s important to wear appropriate personal protective equipment, such as safety glasses and gloves. Additionally, following safe practices, such as working on a stable surface and releasing the tension on the spring slowly, can help prevent accidents and injuries.
Part 5: Tips for Choosing the Right Coil Spring Compressor Tool
Level 1: Consider the Application
When choosing a coil spring compressor tool, it’s important to consider the specific application and requirements. For example, if you frequently work on a wide range of vehicles, a universal compressor tool may be more suitable than a model designed for a specific make and model.
Level 2: Quality and Durability
Investing in a high-quality coil spring compressor tool is essential for safety and performance. Look for a tool made of heavy-duty materials, with adjustable arms and a secure locking mechanism. Additionally, consider user reviews and ratings to ensure you are getting a durable and reliable tool.
Part 6: Precautions and Safety Measures when using a Coil Spring Compressor Tool
When using a coil spring compressor tool, it is important to take proper precautions to ensure safety. Here are some important safety measures to consider when using a coil spring compressor tool:
- Ensure that the tool is securely mounted and the spring is properly aligned before compressing.
- Never exceed the maximum load capacity of the tool.
- Always wear protective gear such as safety goggles and gloves to prevent injury from flying debris or sharp edges.
- Use caution when releasing the compressed spring to avoid sudden movements and potential injury.
- Keep hands, fingers, and other body parts away from the compressed spring at all times.
- Inspect the tool and the spring for any damage or defects before use.
- Never use a damaged or defective tool to compress a spring.
- Always follow the manufacturer’s instructions and recommendations for safe use of the tool.
- Avoid using the compressor tool in wet or slippery conditions to prevent accidents.
- If in doubt about how to use the tool safely, seek professional advice or assistance.
By following these safety measures and taking proper precautions, you can minimize the risk of injury when using a coil spring compressor tool.
Part 7: Types of Coil Spring Compressor Tools
There are several types of coil spring compressor tools available on the market, each designed for specific applications and spring sizes. Here are some common types of coil spring compressor tools:
- External Coil Spring Compressors – These tools are designed to compress the coil spring from the outside, allowing for easy removal and installation.
- Internal Coil Spring Compressors – These tools are inserted inside the coil spring to compress it from within, often used for tighter spaces or specific vehicle models.
- Hydraulic Coil Spring Compressors – These tools use hydraulic power to compress the spring, offering greater control and ease of use.
- Manual Coil Spring Compressors – These tools require manual effort to compress the spring, often using a ratcheting mechanism for tightening.
- Universal Coil Spring Compressors – These versatile tools are designed to work with a wide range of spring sizes and types, offering flexibility and convenience.
Each type of coil spring compressor tool has its own advantages and limitations, so it is important to choose the right tool for the specific application and spring size.
Part 8: Maintenance and Storage of Coil Spring Compressor Tools
Proper maintenance and storage of coil spring compressor tools are essential to ensure their longevity and performance. Here are some tips for maintaining and storing your compressor tool:
- Regularly inspect the tool for any signs of wear or damage, such as bent or worn components, and replace or repair as needed.
- Keep the tool clean and free from debris, grease, or other contaminants that could affect its performance.
- Store the tool in a dry and secure place, away from moisture, extreme temperatures, or direct sunlight.
- Lubricate moving parts and threads regularly to prevent rust and ensure smooth operation.
- Follow the manufacturer’s recommendations for maintenance and lubrication to prolong the life of the tool.
- Use the tool according to its specified load capacity and application to prevent premature wear and damage.
- When not in use, store the tool in its original packaging or a designated storage case to protect it from damage and keep all components together.
By following these maintenance and storage tips, you can ensure that your coil spring compressor tool remains in good condition and performs reliably for years to come.
Conclusion
A coil spring compressor tool is an indispensable tool for anyone working on suspension systems. Understanding how these tools work, the different types available, their uses, safety precautions, and tips for choosing the right one can help you make informed decisions and use these tools effectively and safely. By following the information in this guide, you can confidently tackle coil spring-related tasks and keep your suspension system in top condition.
The Mini Excavator: Versatile & Powerful for Construction Projects
Introduction
Mini excavator has become an essential piece of equipment in the construction industry, offering a wide range of capabilities in a compact and versatile package. As the name suggests, mini excavators are smaller in size compared to their larger counterparts, making them ideal for navigating tight spaces and performing tasks with precision and agility. In this comprehensive guide, we will delve into the various aspects of mini excavators, including their features, applications, benefits, maintenance, and purchasing considerations.
Part 1: Features of Mini Excavators
Level 1: Engine and Hydraulics
Mini excavators are typically powered by diesel engines, providing the necessary strength and efficiency to operate the machine’s hydraulic system. The hydraulics are responsible for powering the excavator’s movements, including the ability to dig, lift, and rotate. Some models may also feature advanced hydraulic systems that offer increased performance and fuel efficiency.
Level 2: Attachments and Accessories
One of the key benefits of mini excavators is their compatibility with a wide variety of attachments and accessories. These can include buckets of different sizes, hydraulic hammers, augers, grapples, and thumbs, among others. The ability to quickly and easily switch between attachments makes mini excavators highly adaptable for different tasks and job requirements.
Part 2: Applications of Mini Excavators
Level 1: Construction and Landscaping
Mini excavators are commonly used in construction and landscaping projects for tasks such as digging trenches, excavating foundations, and grading or leveling terrain. Their compact size allows them to maneuver in tight areas, making them ideal for urban construction sites and residential landscaping projects.
Level 2: Utilities and Infrastructure
In addition to construction and landscaping, mini excavators are often utilized for utility and infrastructure work, such as installing or repairing water, sewer, and electrical lines. Their precise digging capabilities and ability to access confined spaces make them indispensable for these types of projects.
Part 3: Benefits of Mini Excavators
Level 1: Maneuverability and Accessibility
The compact size of mini excavators enables them to access tight or confined spaces that larger excavators cannot reach. This makes them extremely valuable for urban construction projects, residential areas, and other sites with limited maneuvering space.
Level 2: Versatility and Efficiency
Mini excavators offer a high level of versatility due to their compatibility with various attachments and accessories. This allows operators to perform a wide range of tasks with a single piece of equipment, increasing efficiency and reducing the need for multiple machines on a job site.
Part 4: Maintenance of Mini Excavators
Level 1: Regular Inspections and Lubrication
As with any piece of heavy equipment, regular maintenance of mini excavators is crucial to ensure optimal performance and longevity. This includes conducting routine inspections, checking fluid levels, and lubricating moving parts to prevent wear and tear.
Level 2: Preventive Maintenance and Repairs
In addition to routine maintenance, mini excavators should undergo preventive maintenance at scheduled intervals to address any potential issues before they escalate. This can include replacing worn components, servicing the hydraulic system, and addressing any performance issues that may arise.
Part 5: Purchasing Considerations for Mini Excavators
Level 1: Size and Weight Class
When considering the purchase of a mini excavator, it’s important to determine the appropriate size and weight class for the intended applications. Different models offer varying capabilities in terms of digging depth, reach, and lifting capacity, so it’s crucial to select a machine that aligns with the specific requirements of the job.
Level 2: Brand Reputation and Dealer Support
Choosing a reputable brand with a history of quality and reliability is essential when purchasing a mini excavator. Additionally, evaluating the level of support provided by dealers in terms of parts availability, service, and warranty coverage can significantly impact the overall ownership experience.
Part 6: Benefits of Mini Excavators
Mini excavators are versatile and powerful machines that offer a wide range of benefits for various construction and landscaping projects. One of the main advantages of mini excavators is their compact size, which allows them to access and work in tight spaces that larger excavators cannot reach. This makes them ideal for residential and urban construction projects where space is limited.
Another benefit of mini excavators is their ease of transportation. Their lightweight and compact design allows them to be easily transported from one job site to another, reducing downtime and increasing efficiency. In addition, mini excavators are equipped with advanced technology and features that improve productivity and precision. Such as hydraulic systems, variable track width, and ergonomic controls.
Mini excavators are also cost-effective due to their lower fuel consumption and maintenance costs compared to larger models. They require less manpower to operate and can perform a wide range of tasks, including digging, trenching, grading, demolition, and more. This makes them a valuable investment for contractors and rental companies looking to increase their capabilities and profitability.
Overall, the benefits of mini excavators make them an essential tool for a variety of construction and landscaping projects. Their compact size, ease of transportation, advanced features, and cost-effectiveness make them an ideal choice for both professionals and DIY enthusiasts.
Part 7: Uses of Mini Excavators
Mini excavators are versatile machines that can be used for a wide range of applications in the construction and landscaping industry. Their compact size and powerful capabilities make them ideal for various tasks, including earthmoving, trenching, demolition, and more. Additionally, mini excavators can be equipped with a variety of attachments to further expand their versatility and functionality.
One of the most common uses of mini excavators is digging and trenching. Their compact design allows them to access tight spaces and maneuver with precision. Making them suitable for excavation work in urban and residential areas. Mini excavators are also used for landscaping projects, such as digging holes for planting trees, shrubs, and other vegetation.
In addition to digging and trenching, mini excavators are often used for material handling and transportation. They can be equipped with buckets, forks, and grapples to move and load materials such as soil, gravel, rocks, and debris. Mini excavators are also used for demolition work, such as breaking concrete. Removing structures, and clearing debris.
Furthermore, mini excavators are used for grading and leveling tasks, such as creating slopes, terraces, and foundations. Their advanced hydraulic systems and adjustable track width allow for precise control and accuracy when shaping the terrain. Overall, the versatility and capabilities of mini excavators make them an essential tool for a wide range of construction and landscaping projects.
Part 8: Maintenance Tips for Mini Excavators
Proper maintenance is essential for ensuring the optimal performance and longevity of mini excavators. Routine maintenance and care can help prevent costly repairs and downtime. As well as it can ensure the safety of operators and bystanders. Here are some maintenance tips for mini excavators:
- Regular inspections: Conduct daily, weekly, and monthly inspections of the mini excavator to check for signs of wear, damage, or fluid leaks. Inspect the hydraulic systems, tracks, engine, and attachments for any issues that may affect performance.
- Fluid checks and changes: Check the levels of engine oil, hydraulic fluid, and coolant regularly and top them off as needed. Follow the manufacturer’s recommendations for fluid changes and use high-quality oils and lubricants.
- Cleaning and lubrication: Keep the mini excavator clean and free of dirt, debris, and corrosion. Regularly grease the moving parts, tracks, and attachments to reduce friction and prevent premature wear.
- Track maintenance: Inspect the tracks for wear and tear, adjust the tension, and replace any damaged or worn components. Proper track maintenance is crucial for ensuring stability, traction, and maneuverability.
- Filter replacements: Regularly replace the air, fuel, and hydraulic filters to maintain the cleanliness and efficiency of the mini excavator’s systems. Clean filters help prevent contamination and prolong the life of the engine and hydraulic components.
By following these maintenance tips and conducting regular servicing and repairs, mini excavator owners and operators can ensure the reliability, safety, and performance of their machines. Proper maintenance practices also contribute to the overall productivity and profitability of construction and landscaping projects.
Conclusion
In addition to their versatility and maneuverability, mini excavators are also known for their fuel efficiency and low operating costs. Their compact size and lightweight design make them easy to transport to and from job sites. Reducing transportation expenses and increasing productivity.
Overall, mini excavator is an essential piece of equipment in the construction and landscaping industries, providing a versatile, efficient, and cost-effective solution for a wide range of excavation and material handling tasks. Their compact size, maneuverability, and versatility make them an invaluable asset for any construction or landscaping project.
Mini excavators have solidified their place as indispensable tools in the construction and landscaping industries. Offering a combination of power, versatility, and maneuverability in a compact package. Their ability to perform a wide range of tasks with precision and efficiency makes them a valuable asset for any job site. Understanding their features, applications, benefits, maintenance requirements, and purchasing considerations. Operators and contractors can make informed decisions regarding the use and acquisition of mini excavators.
