I. Introduction
A. The Allure of Garden Paths: Enhancing Your Outdoor Spaces
Garden paths are more than just functional pathways that guide visitors through your outdoor haven; they are also aesthetic elements that can significantly enhance the overall ambiance and appeal of your landscaping. Whether you envision winding paths amidst lush greenery, straight walkways leading to a tranquil patio, or stepping stones connecting various garden areas, these paths can add a touch of charm and character to your outdoor space.
With a wide range of materials and designs available, creating custom garden paths can be a fun and rewarding DIY project. Among the various options, paving molds have emerged as a popular choice for homeowners seeking a versatile, cost-effective, and aesthetically pleasing solution.
B. Unveiling the Benefits of Paving Molds: A Practical Choice for DIY Enthusiasts
Paving molds offer a multitude of advantages that make them an attractive choice for DIY enthusiasts embarking on garden path projects:
-
Affordability: Compared to traditional paving materials like bricks or stones, paving molds are significantly more budget-friendly, allowing you to create beautiful walkways without breaking the bank.
-
Versatility: Paving molds come in a vast array of shapes, sizes, and textures, providing endless possibilities for customizing your garden paths to match your desired style and landscaping. Whether you prefer classic brickwork, intricate cobblestone patterns, or natural stone-inspired designs, there’s a mold to suit your aesthetic vision.
-
Durability: Concrete, the primary material used with paving molds, is renowned for its strength and resilience. This ensures that your garden paths can withstand heavy foot traffic, harsh weather conditions, and the wear and tear of time, providing years of enjoyment.
-
Easy Installation: The DIY nature of paving molds makes them simple to install, even for those with limited experience in home improvement projects. With careful preparation, the right tools, and a bit of patience, you can transform your garden with beautiful walkways in no time.
II. Gathering the Essentials: Preparing for Your Garden Path Project
Before embarking on your garden path creation journey, it’s crucial to gather the necessary materials and tools to ensure a smooth and successful project.
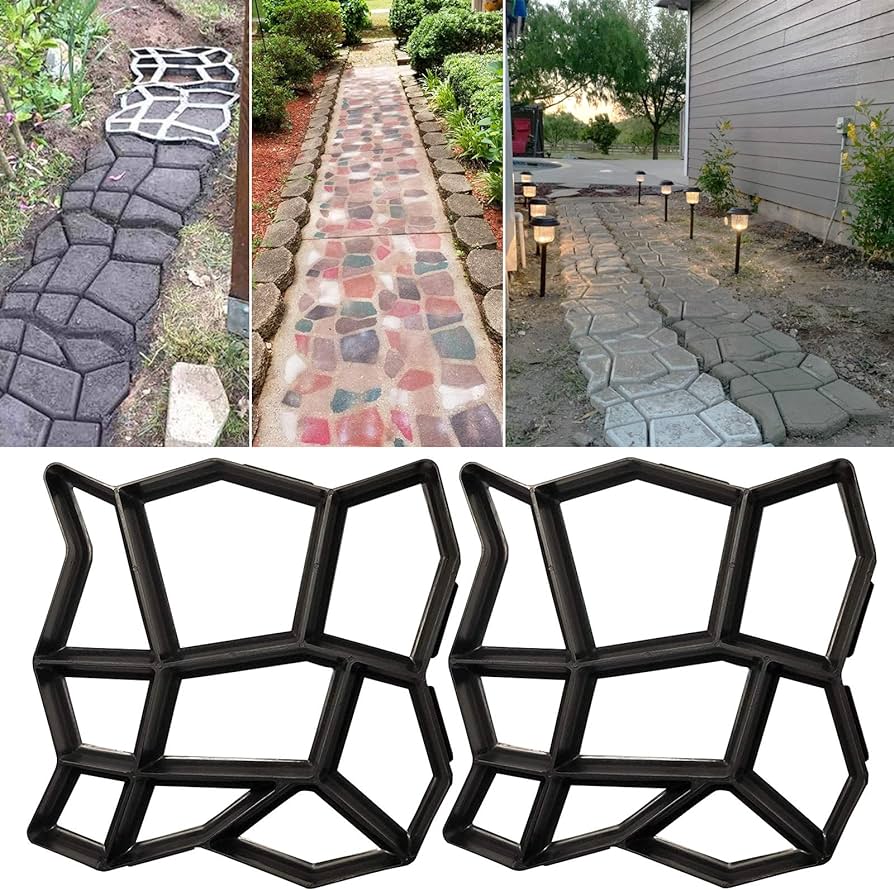
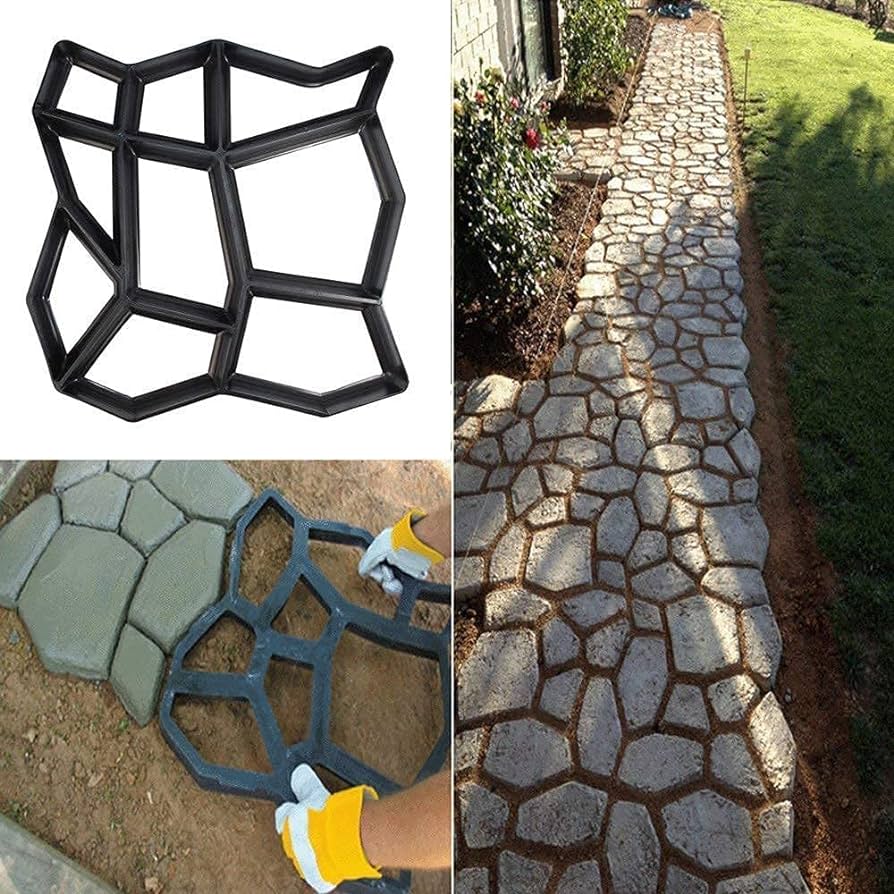
A. Selecting the Right Molds: Choosing the Perfect Design for Your Garden
The first step in your paving mold adventure is selecting the molds that will bring your vision to life. Consider the overall style and aesthetic of your garden when making your choice. Do you prefer the clean lines of geometric shapes, the natural charm of stone-inspired patterns, or the timeless elegance of classic brickwork? Once you’ve determined the desired style, explore the wide variety of mold options available at home improvement stores and online retailers.
B. Acquiring the Necessary Materials: Ensuring You Have Everything You Need
To ensure a seamless garden path project, assemble the essential materials before you begin:
-
Concrete Mix: Choose a high-quality concrete mix suitable for outdoor use and the desired thickness of your garden path pavers.
-
Mold Release Agent: Apply a mold release agent to prevent the concrete from sticking to the molds and ensure easy removal.
-
Mixing Tools: A shovel, bucket, and mixing stick or drill with a mixing paddle are essential for preparing the concrete mixture.
-
Safety Gear: Wear gloves, safety glasses, and a dust mask to protect yourself during the concrete mixing and pouring process.
-
Edging Materials: Install edging materials around the perimeter of the garden path to contain the concrete and create a clean edge.

III. The Art of Concrete Paving: Step-by-Step Instructions
With your materials and tools in hand, it’s time to transform your garden with your DIY creations:
A. Preparing the Site: Creating a Smooth and Level Foundation
-
Clear the Area: Remove any debris, vegetation, or uneven surfaces from the path area.
-
Excavate the Site: Excavate the site to the desired depth, ensuring a level and compacted base. This will provide a stable foundation for your garden path.
-
Install Edging Materials: Install edging materials around the perimeter of the garden path to contain the concrete and create a clean edge. This will help prevent the concrete from spreading and maintain a defined path shape.
B. Mixing the Concrete: Achieving the Perfect Consistency
-
Follow Instructions: Carefully follow the instructions on the concrete mix packaging to determine the correct water-to-powder ratio. This will ensure that the concrete has the right consistency for pouring and setting properly.
-
Mixing Process: In a large mixing tub or wheelbarrow, gradually add water to the concrete powder while mixing thoroughly. Use a shovel or a drill with a mixing paddle to ensure a uniform mix.
- Desired Consistency: Aim for a consistency similar to thick pancake batter – the mixture should be pourable but not too runny. If the concrete is too dry, it will be difficult to work with and may not fill the molds properly. Conversely, excessively wet concrete can be weak and prone to cracking.
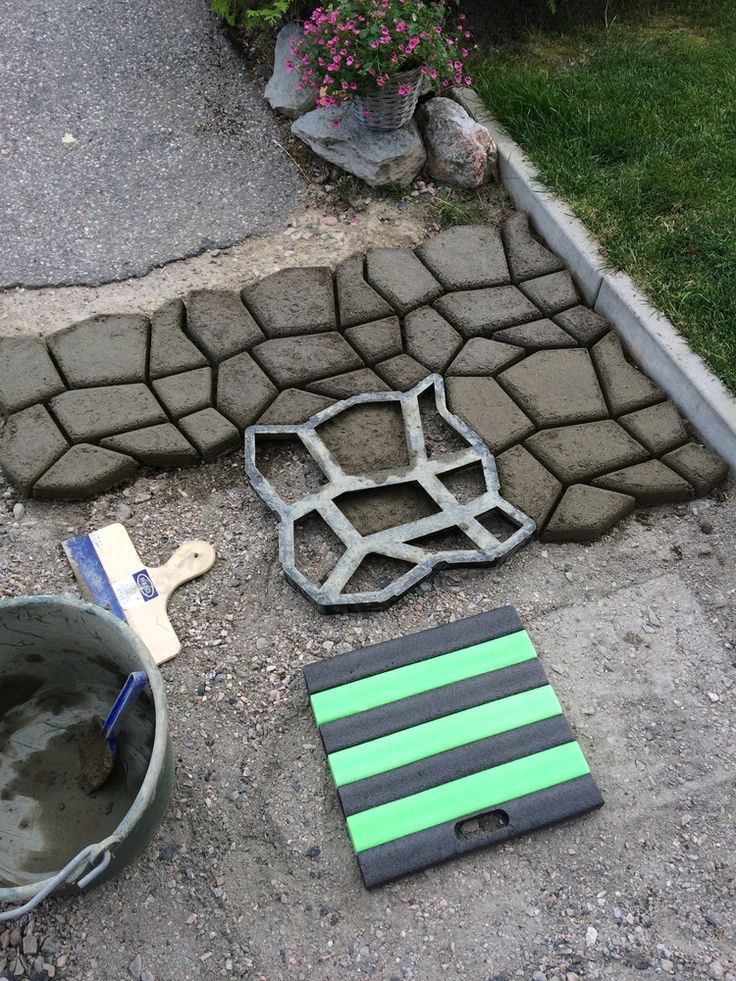
C. Pouring and Leveling the Concrete: Creating a Uniform Surface
-
Mold Release Agent: Apply mold release agent to the inside of each mold, ensuring even coverage. This will prevent the concrete from sticking and allow for easy removal of the molds after curing.
-
Mold Placement: Place the molds on the prepared site, ensuring they are level and properly spaced. Use a level to check for any unevenness and adjust the molds as needed. Maintain consistent spacing between the molds to create a seamless look for your garden path.
-
Concrete Pouring: Pour the concrete mixture into the molds, filling them to the desired level. Avoid overfilling the molds, as excess concrete can spill over and create uneven edges.
-
Leveling the Surface: Use a trowel or screed to level the concrete surface within the molds. Scrape off any excess concrete that spills over the mold edges. This will ensure a smooth and uniform finish for your garden path pavers.
IV. Curing and Finishing Touches: Ensuring a Lasting and Beautiful Creation
A. Allowing the Concrete to Cure: Patience is Key to a Strong Finish
-
Covering the Molds: Cover the filled molds with plastic sheeting to retain moisture and promote proper curing. This will prevent the concrete from drying out too quickly, which can lead to cracking.
-
Curing Time: Allow the concrete to cure for a minimum of 24 hours, or as recommended by the specific concrete mix instructions. Resist the urge to walk on or disturb the curing concrete, as this can cause cracking or damage. Curing allows the concrete to gain strength and ensure the longevity of your garden path.
B. Releasing the Molds and Finishing the Surface
-
Mold Removal: After the curing period is complete, gently remove the molds from the cured concrete. Take care to avoid damaging the edges or pattern of the concrete pieces.
-
Imperfection Correction: Examine the concrete pavers for any small imperfections or gaps in the surface. Fill these imperfections with a patching compound specifically designed for concrete to create a smooth and even finish.
-
Surface Protection: Apply a concrete sealer to the surface of your newly created pavers. This will protect them from moisture, stains, and fading, ensuring their beauty and longevity for years to come. Choose a sealer with a glossy or matte finish, depending on the desired aesthetic for your garden path.
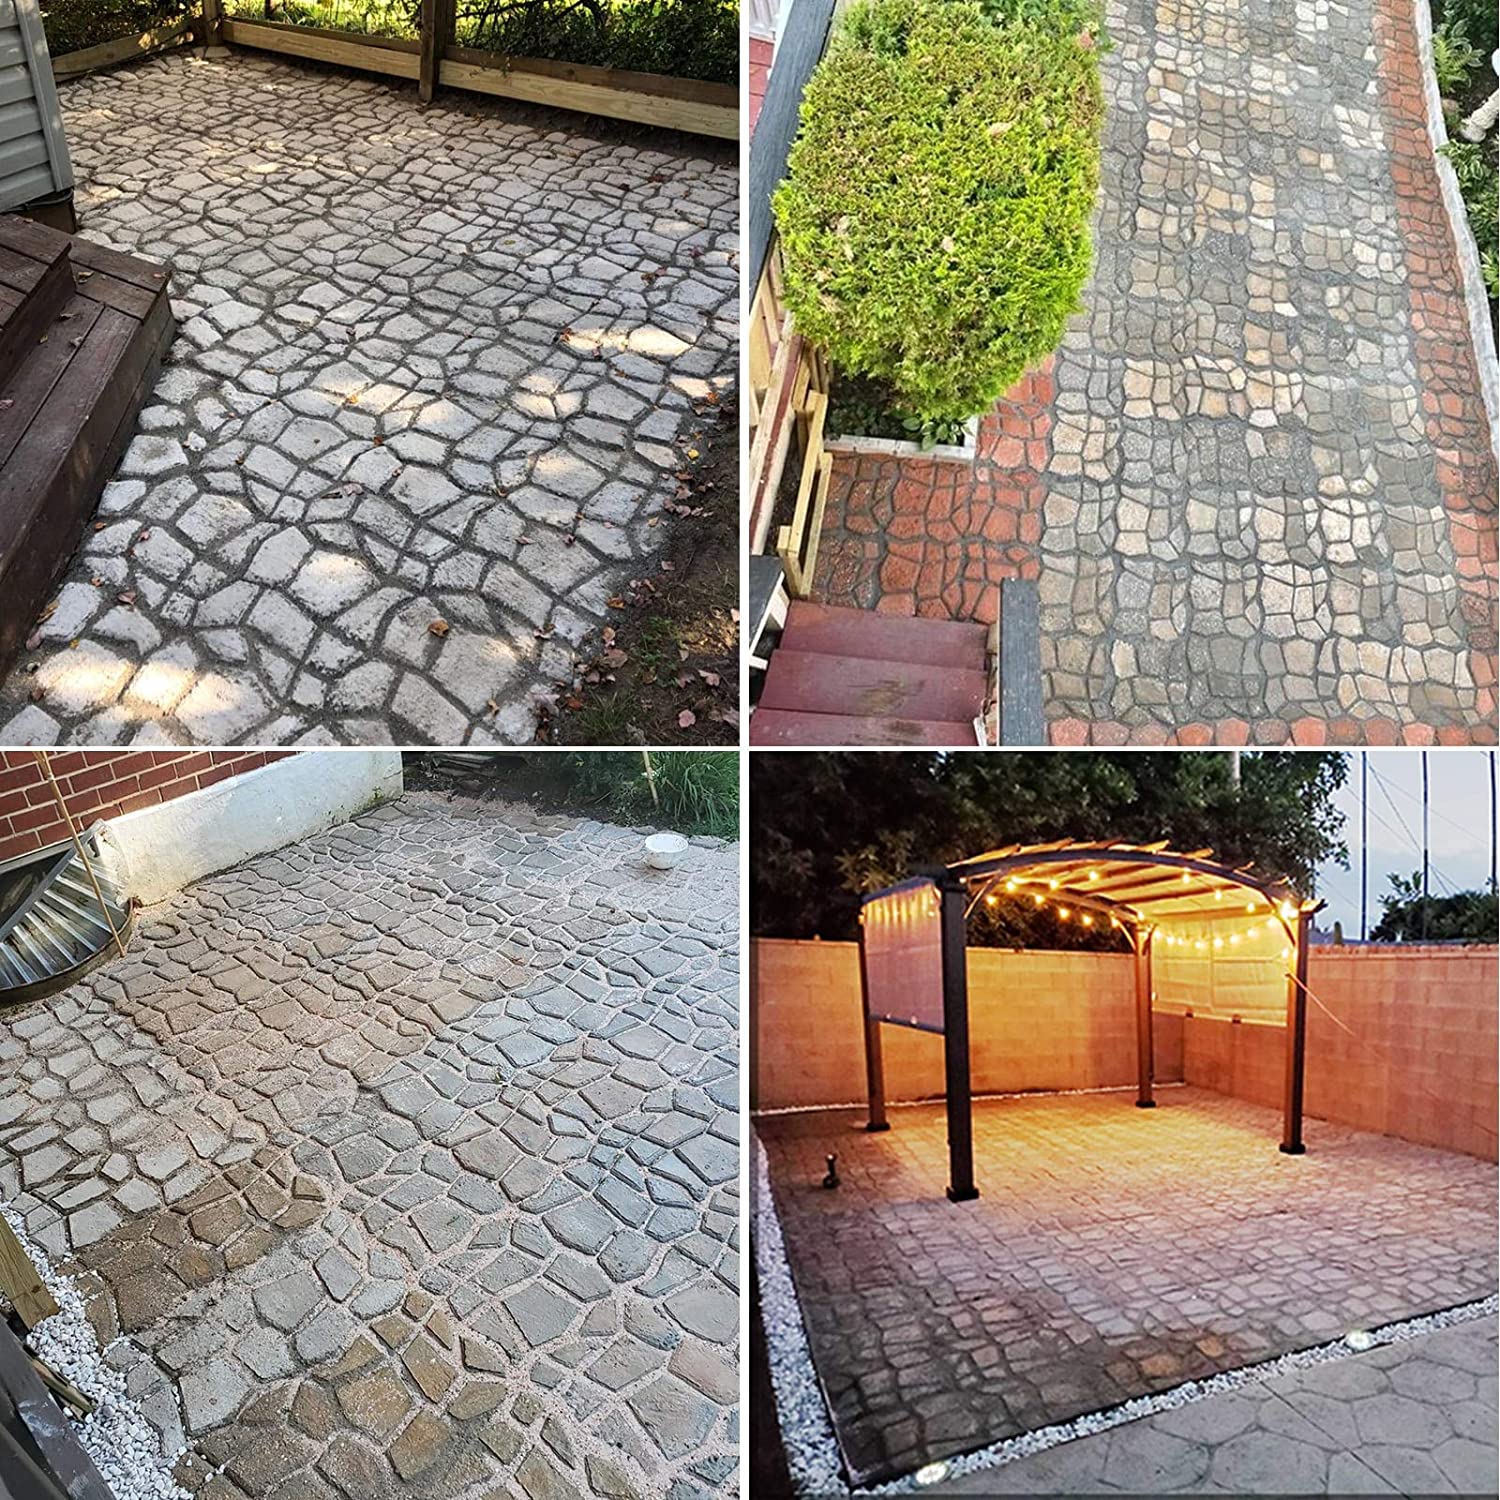
V. Embracing the Satisfaction of DIY Beauty
With careful planning, preparation, and the use of concrete paving molds, you can transform your garden into a beautiful and functional space. The process of creating your own custom garden path pavers offers not only a cost-effective alternative to traditional materials but also the immense satisfaction of bringing your vision to life through DIY ingenuity. So, unleash your creativity, gather the necessary tools and materials, and embark on your garden path adventure. With a little effort and these helpful tips, you can pave the way for a more enjoyable and visually stunning outdoor space.