In the realm of home décor, where personal style and creativity reign supreme, hand-painted flower pots emerge as a delightful avenue for self-expression and artistic exploration. These humble vessels, once ordinary containers for greenery, can be transformed into vibrant masterpieces, seamlessly blending the natural beauty of plants with a touch of personalized flair. Whether you’re a seasoned artist seeking a new canvas or a curious beginner eager to unleash your inner creativity, this comprehensive guide will equip you with the knowledge and techniques to craft hand-painted flower pots that will brighten your space and bring joy to your gardening endeavors. 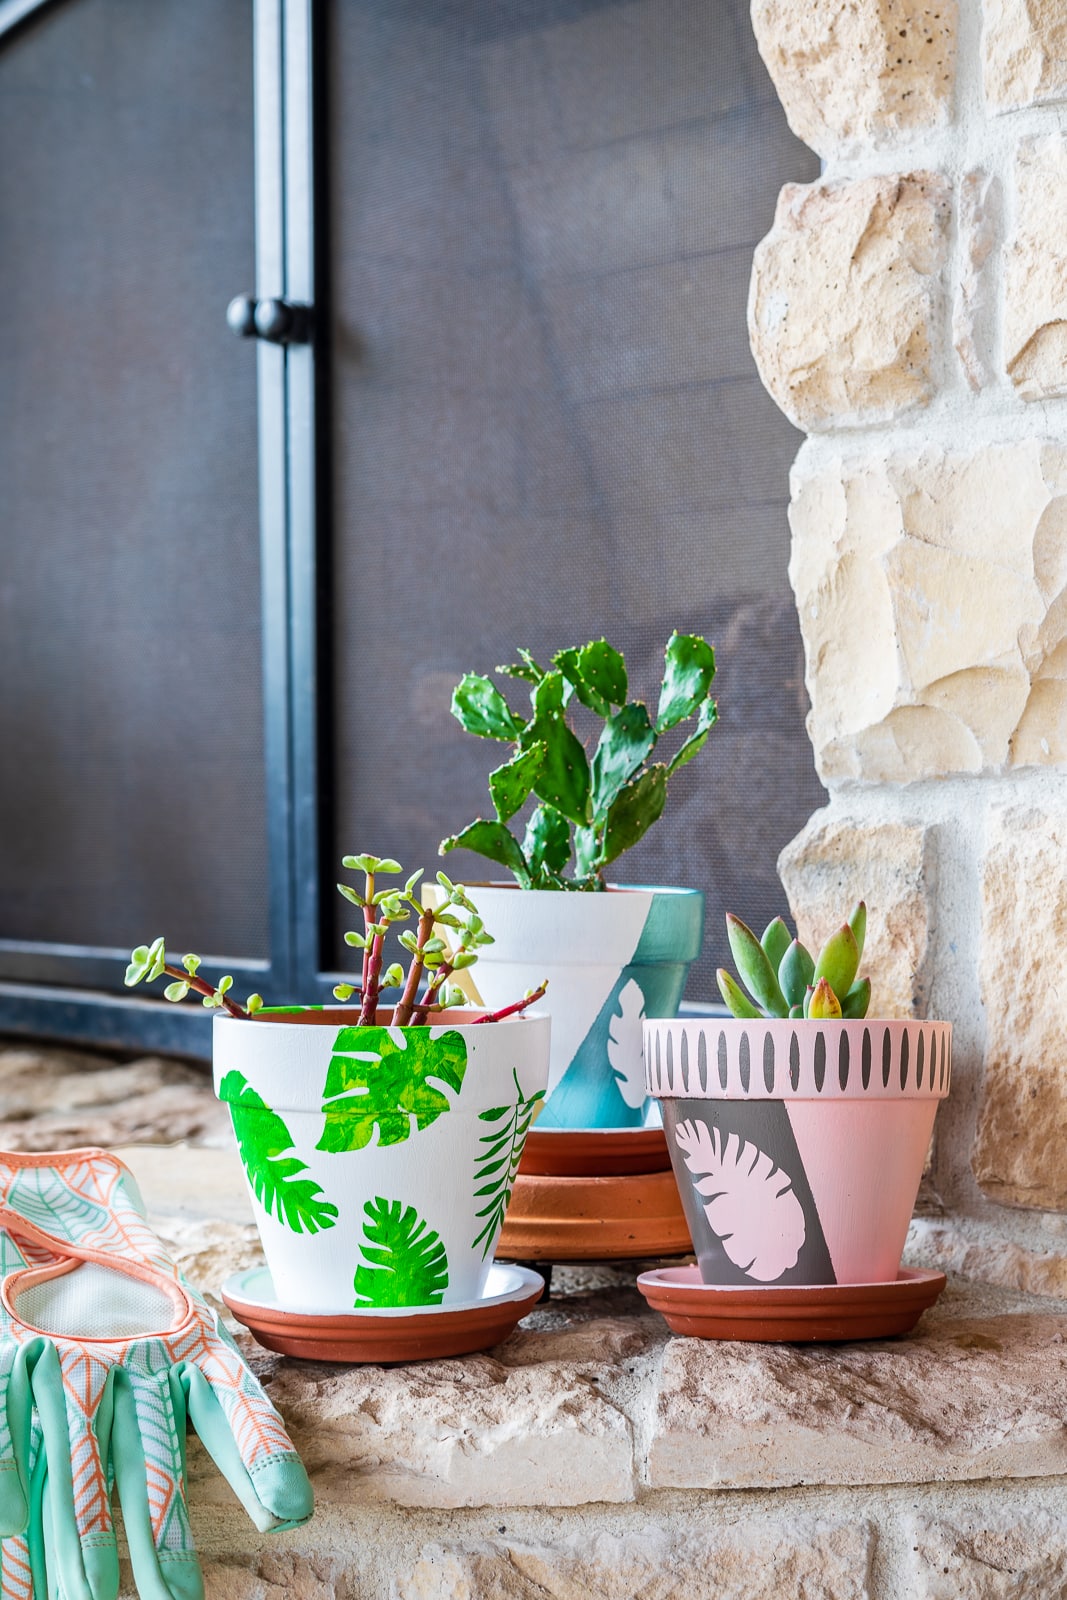
Embarking on a Creative Journey: Gathering Inspiration and Materials
Before embarking on your hand-painting adventure, it’s essential to gather inspiration and assemble the necessary materials to fuel your creative journey.
Seeking Inspiration from the World Around You:
-
Nature’s Palette: Immerse yourself in the wonders of nature, drawing inspiration from the vibrant hues of flowers, the intricate patterns of leaves, and the graceful forms of branches. Allow the natural world to ignite your imagination and guide your design choices.
-
Artistic Exploration: Venture into art galleries, museums, or online platforms to discover a diverse range of artistic styles and techniques. Observe how artists use color, composition, and texture to create visually captivating works of art.
-
Personal Preferences: Reflect on your personal style and the overall aesthetic of your living space. Consider the colors, patterns, and textures that harmonize with your décor, ensuring your hand-painted flower pots seamlessly blend into your home’s ambiance.
Gathering the Tools of the Trade:
-
Flower Pots as Your Canvas: Select flower pots that complement the size and style of your plants, considering the overall aesthetic you wish to achieve. Ensure the pots are clean, dry, and free of any debris that could hinder the painting process.
-
Acrylic Paints: A World of Colors: Choose acrylic paints that offer a vibrant range of colors, suitable for use on various surfaces. Consider purchasing a set of basic colors that you can mix and match to create your desired palette.
-
Paintbrushes: Your Artistic Instruments: Acquire a variety of paintbrushes in different sizes and shapes, enabling you to create delicate lines, broad strokes, and intricate details. Experiment with different brush types to discover the ones that best suit your artistic style.
-
Primer: Laying the Foundation: Opt for a high-quality primer to create a smooth and even base for your paint, enhancing color adhesion and vibrancy.
-
Sealant: Protecting Your Masterpiece: Choose a sealant specifically designed for acrylic paints to protect your artwork from moisture, fading, and scratches, ensuring its longevity.
-
Embellishments: Adding a Touch of Flair: Gather embellishments such as glitter, beads, or stencils to add texture, dimension, and a touch of personal flair to your designs.

Preparing the Stage for Creativity: Cleaning, Priming, and Sanding
With your inspiration and materials at hand, it’s time to prepare the flower pots for their artistic transformation.
Cleaning and Drying: Creating a Smooth Canvas:
- Thoroughly clean the flower pots using mild soap and water to remove any dirt, dust, or debris. Allow the pots to air dry completely before proceeding to the next step.
Priming: Enhancing Adhesion and Vibrancy:
- Apply a coat of primer to the entire surface of the flower pots, ensuring even coverage. Primer creates a base that allows the paint to adhere better and enhances the vibrancy of the colors.
Sanding (Optional): Achieving a Smooth Finish:
- For a smoother painting surface, lightly sand the primed pots using fine-grit sandpaper. This step is particularly beneficial for removing any imperfections or bumps from the primer layer.
Designing and Sketching: Bringing Your Vision to Life
With the flower pots prepared, it’s time to unleash your creativity and bring your design vision to life.
Brainstorming Ideas: Exploring Endless Possibilities:
-
Sketch out your design ideas on paper, experimenting with different patterns, colors, and compositions. Allow your imagination to run wild and explore various artistic styles.
-
Considering Plant Placement: Keep in mind the placement of your plants, ensuring the design complements the overall appearance of the potted arrangement. Consider the size and shape of the plants when selecting patterns and colors.
-
Transferring the Design (Optional): If desired, lightly transfer your sketched design onto the flower pot using a pencil or tracing paper. This step can provide a guide for painting, ensuring precise placement of elements.
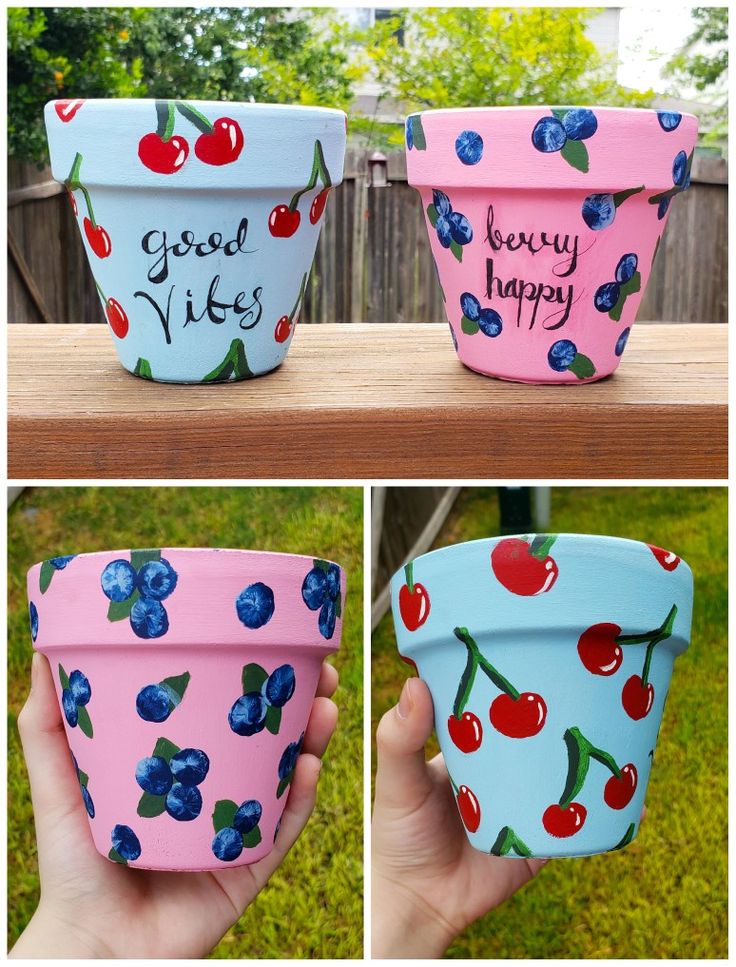
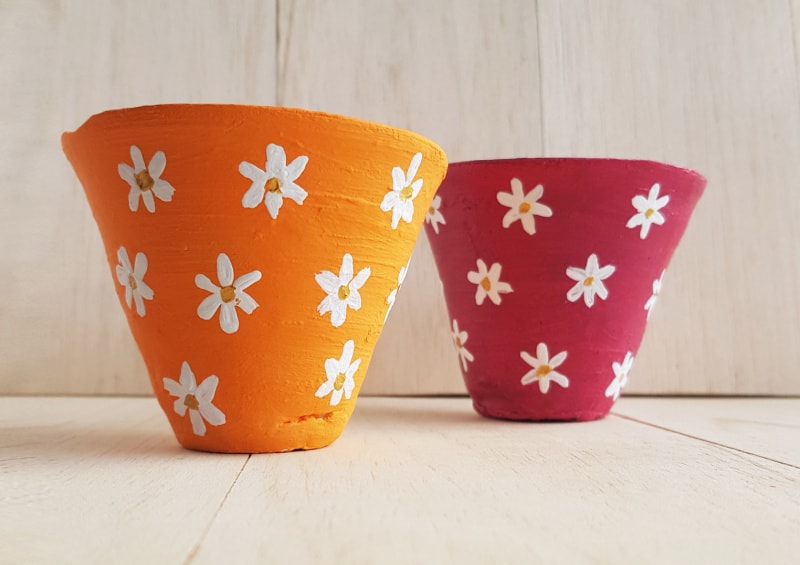
Applying Paint and Adding Details: Your Artistic Expression
With your design in mind, it’s time to transform your flower pots into vibrant masterpieces.
-
Choosing Base Colors: Select base colors that complement the overall color scheme of your space and the natural hues of the plants you intend to house in the pots. Experiment with color mixing to create custom shades that perfectly match your vision.
-
Painting Techniques: Employ acrylic paints and your chosen brushes to carefully paint your chosen patterns, shapes, or motifs onto the flower pots. Start with larger base colors and gradually add details and finer lines.
-
Layering and Blending: Don’t be afraid to layer colors and experiment with blending techniques to create depth and dimension in your artwork. Use a damp brush to soften harsh lines and create smooth transitions between colors.
-
Incorporating Details: Elevate your design by adding intricate details such as dots, lines, borders, or small geometric shapes. These details can frame your artwork and add visual interest.
Enhancing with Embellishments: Adding a Personal Touch
Once the base colors and details are complete, you can further personalize your hand-painted flower pots by incorporating various embellishments.
-
Glitter and Beads: For a touch of sparkle and texture, apply glitter or beads to specific areas of the design using glue or a brush-on adhesive. Experiment with different glitter colors and bead sizes to create a unique effect.
-
Stencils for Precise Designs: If you desire precise patterns or intricate designs, stencils can be a valuable tool. Choose stencils with patterns that complement your overall design and carefully apply paint through the stencil cutouts.
-
Textural Techniques: Explore various techniques like stippling (using a short, tapping motion with the brush) or sponging (applying paint with a sponge) to introduce different textures and visual effects to your artwork.

Sealing and Protecting Your Artwork: Ensuring Longevity
After completing your artistic masterpiece, it’s crucial to protect your creation from the elements to ensure its longevity.
-
Applying Sealant: Once the paint is completely dry, apply a coat of sealant specifically designed for acrylic paints. This sealant will protect the artwork from moisture, fading, and scratches, preserving its vibrancy for years to come.
-
Additional Coats for Durability: Consider applying multiple coats of sealant, especially if your flower pots will be placed outdoors or exposed to direct sunlight. Each additional coat enhances the protective barrier.
-
Allowing Drying Time: Allow the sealant to dry completely according to the manufacturer’s instructions before using or planting anything in the pots.
Displaying Your Hand-Painted Creations: Showcasing Your Work
With your hand-painted flower pots complete and protected, it’s time to find the perfect spot to showcase your artistic achievements.
-
Choosing the Right Location: Select a location in your home that receives ample natural light, allowing the vibrant colors and intricate details of your artwork to shine. Consider placing your creations near windows, on shelves, or as table centerpieces.
-
Grouping or Arranging Individually: Decide whether to group your hand-painted flower pots together to create a visually impactful display or arrange them individually as focal points throughout your living space.
-
Complementing Your Décor: Harmonize your hand-painted flower pots with other décor elements in your space, such as throw pillows, curtains, or artwork. Consider the overall color scheme and style of your décor when choosing placement and grouping arrangements.
Additional Tips and Inspiration: Fueling Your Creativity
As you embark on your hand-painted flower pot adventure, here are some additional tips and sources of inspiration to keep your creative juices flowing:
-
Practice Makes Perfect: Before diving into your final flower pots, practice painting on scrap materials like cardboard or old plates. This allows you to refine your technique, experiment with colors, and gain confidence before tackling the real deal.
-
Nature’s Inspiration: Draw inspiration from the natural world around you. Observe the vibrant hues of flowers, the intricate patterns of leaves, or the graceful forms of branches and incorporate these elements into your designs.
-
Embrace Imperfections: Remember, hand-painted art thrives on its uniqueness. Embrace the slight imperfections that may arise during the process, as they add character and charm to your creations.
Conclusion: A World of Creative Expression Awaits
Hand-painting flower pots is a rewarding and enriching endeavor that allows you to personalize your living space, express your artistic flair, and nurture your plants in a unique and stylish way. By following these simple steps, gathering inspiration, and experimenting with different techniques, you can transform ordinary flower pots into vibrant masterpieces that bring joy to your home and elevate your gardening experience. Remember, the beauty of hand-painted art lies in its individuality and the personal touch it brings to your surroundings. So, unleash your creativity, embrace the process, and let your imagination transform your flower pots into works of art that reflect your unique style.