Tools for Watering Plants: Choosing Best Outdoor Watering Can
Importance of Choosing a Quality Watering Can
Choosing the best outdoor watering can is more than picking a tool for watering plants. It’s about finding a reliable partner for your gardening routine. A quality watering can offers the right balance between functionality and ease of use, ensuring your plants get the care they need without causing unnecessary strain on your part.
Here are key reasons why you should invest in a quality watering can:
- Consistent Water Flow: The best outdoor watering can provides a steady and uniform flow of water, mimicking natural rainfall. This is critical for the health of your plants, as it ensures that water reaches the roots without causing soil erosion or disturbing the plant base.
- Comfort During Use: Gardening should not be painful or exhausting. With a well-designed watering can, you can water your plants without discomfort or the risk of injury. This is especially important for gardeners who spend a lot of time tending to their plots.
- Durability: You want a watering can that lasts throughout the seasons. Durable materials and construction means your investment will stand up to regular use and the elements, saving you money in the long term.
- Efficient Watering: A high-quality watering can help you conserve water by allowing for more precise watering. This not only benefits the environment but also ensures that each plant receives the optimal amount of moisture needed.
- Aesthetic Value: Let’s not forget the visual appeal. The best outdoor watering can also serves as a decorative element in your garden, complimenting your outdoor space with its design and style.
Remember, a cheap watering can might save you a few dollars, but investing in a robust and efficient one pays off through healthier plants, easier gardening, and lasting value.
Factors to Consider When Selecting an Outdoor Watering Can
Selecting the best outdoor watering can involves several important factors. Consider not only aesthetics but also how each feature will impact your gardening tasks. Let’s take a closer look at these factors to help you find the watering can that best suits your needs.
Material Durability
The material of a watering can affects its lifespan and usability. Look for materials like galvanized steel or high-density plastic. These options resist corrosion and can handle the elements. Durable materials mean fewer replacements and better value over time.
Capacity and Weight
A can’s size dictates how much water you can carry. But remember, a full watering can get heavy. Aim for a size that balances capacity with what you can comfortably lift and carry. This helps to prevent strain during prolonged gardening sessions.
Design and Comfort
A well-designed watering can make your job easier. Look for cans with a comfortable grip and balance. Features like a contoured handle and a top handle can support your wrist and make pouring effortless.
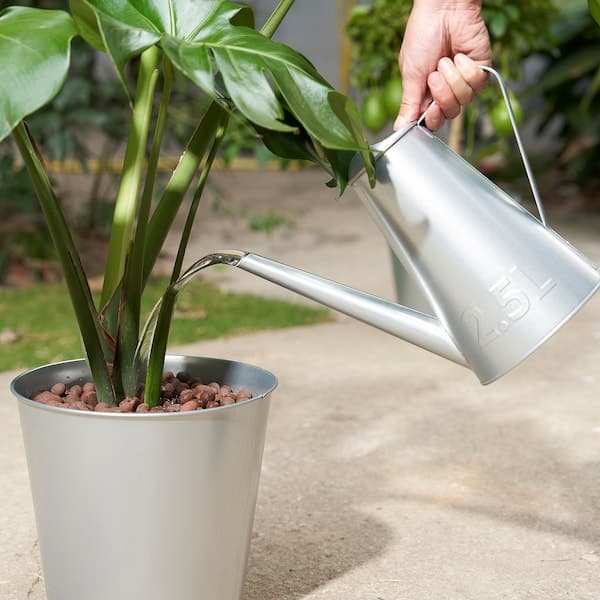
Spout Length and Type
The length and type of the spout determine how water reaches your plants. A longer spout can water hard-to-reach plants. Some spouts come with detachable roses for a gentle shower. Choose one that matches the precision you need for your plants.
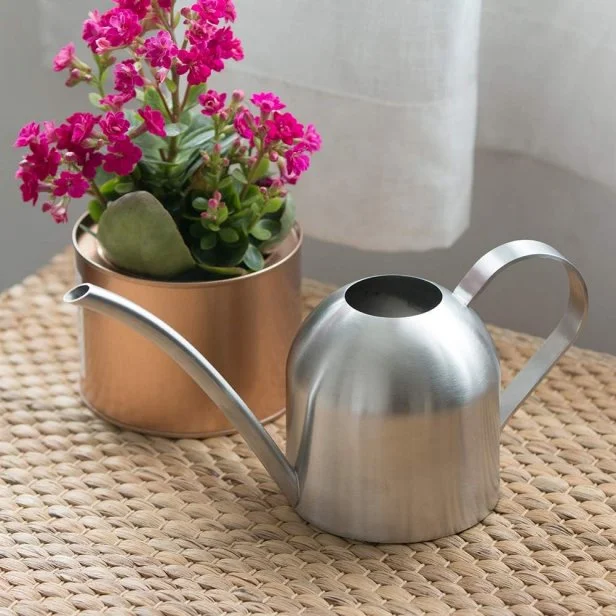
Types of Outdoor Watering Cans
When seeking the best outdoor watering can, you’ll encounter various types crafted from different materials. Each has its own benefits and ideal uses. Let’s explore three common types: plastic watering cans, metal watering cans, and decorative watering cans.
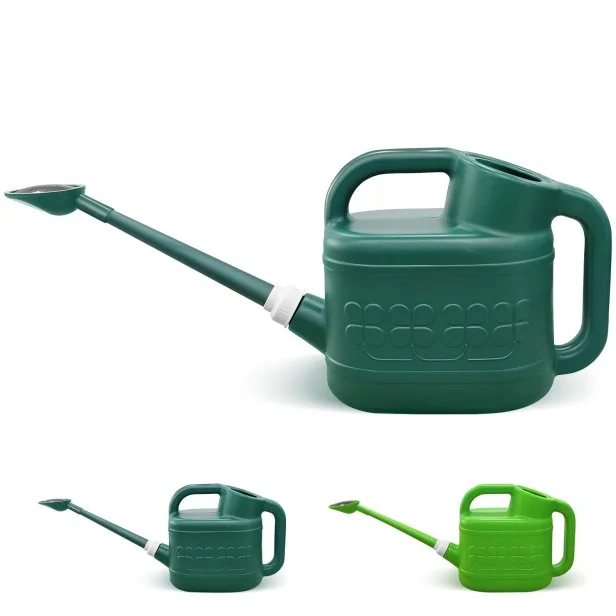
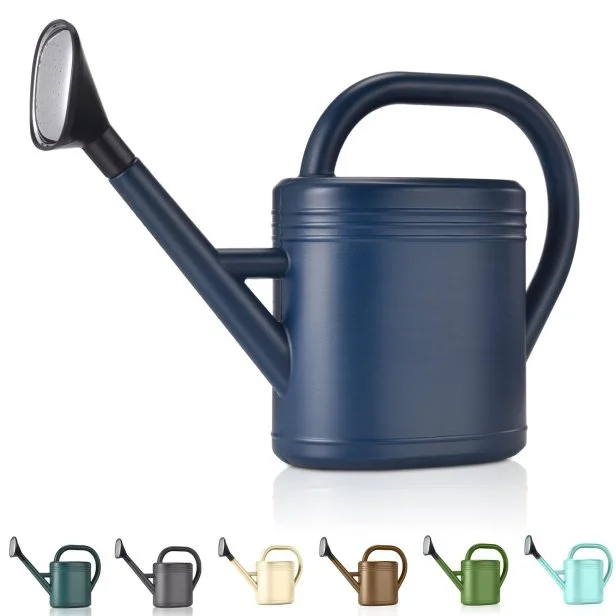
Plastic Watering Cans
Plastic watering cans are lightweight, affordable, and come in many shapes and sizes. They are a go-to for casual gardeners due to their ease of use and low cost. High-density plastics can also offer UV resistance, adding to their lifespan. The drawback is that they may not be as durable as metal options and can become brittle over time.
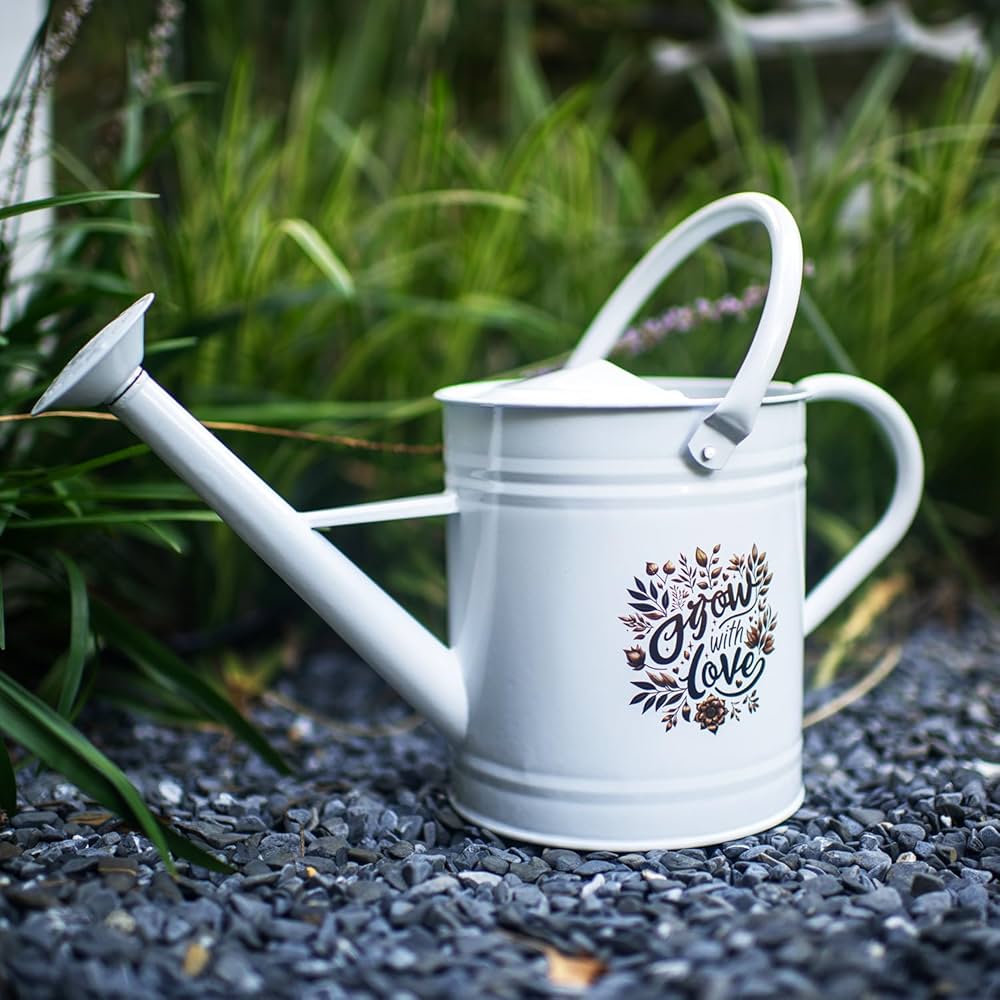
Metal Watering Cans
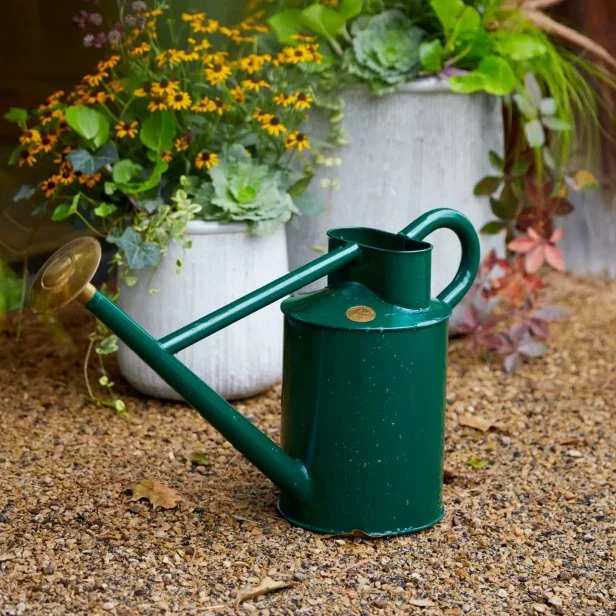
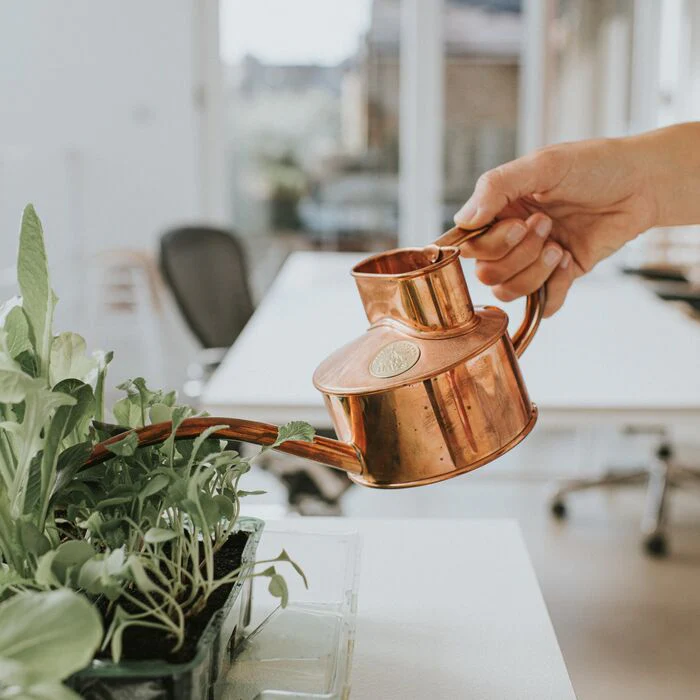
Metal watering cans, typically made from galvanized steel or stainless steel, are known for their durability and sturdiness. They can withstand harsh weather and resist rust, especially those with a zinc coating. Metal cans often have a traditional look, fitting well in gardens seeking a classic vibe. However, they are heavier than plastic and can be more expensive.
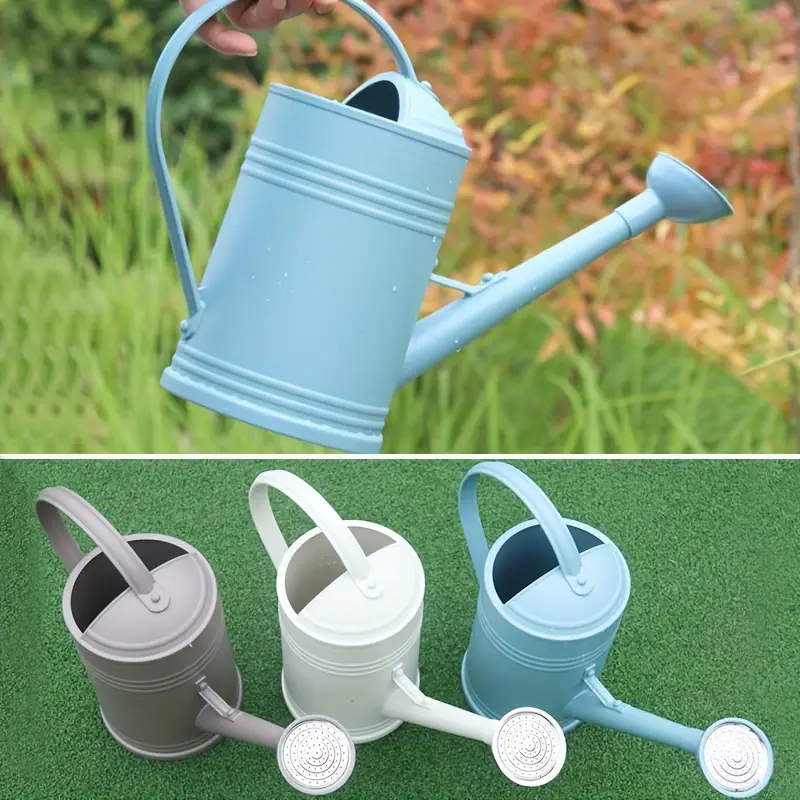
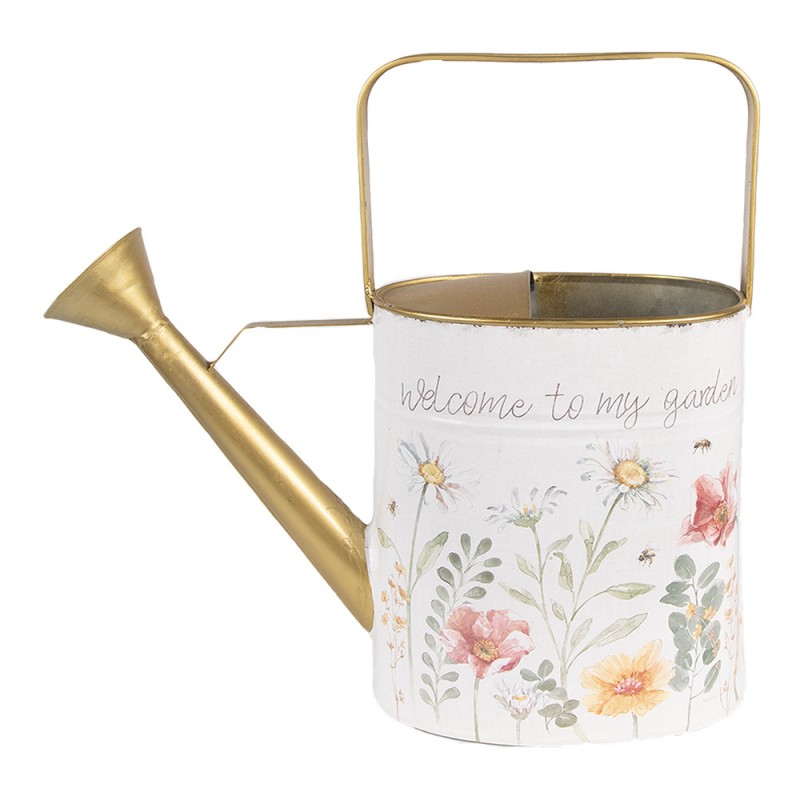
Decorative Watering Cans
Decorative watering cans serve a dual purpose. They provide practicality while also adding an aesthetic touch to your garden. These cans may feature unique designs, colors, and finishes. While they can be fully functional, their primary focus is often on style rather than professional-grade durability or ergonomics. They make great gifts for gardening enthusiasts who appreciate a beautiful tool.
Features to Look For in the Best Watering Cans
When shopping for the best outdoor watering can, you should focus on features that enhance functionality and user experience. Here are some must-have features that make a watering can stand out among the rest.
Ergonomic Handles
Ergonomic handles are a game-changer for comfort and ease of use. They reduce hand fatigue and make carrying even a full can feel more balanced and less cumbersome. When the grip feels right, watering becomes a more enjoyable task.
Detachable Roses and Sprinklers
The versatility of a watering can is greatly improved with detachable roses and sprinklers. These allow for a gentle rain-like stream or a more focused pour. Depending on your plant’s needs, being able to switch between these modes is incredibly useful.
UV Resistance and Frost Proofing
If your watering can will spend a lot of time outdoors, it should resist UV rays and frost. UV-resistant materials prevent the can from weakening and cracking due to sun exposure. Frost-proofing is essential to ensure the can doesn’t crack or break when temperatures drop. These features extend the life of your watering can, making it a dependable tool through all seasons.
Top Rated Outdoor Watering Cans on the Market
Finding the best outdoor watering can means looking for top-rated products that gardeners trust. Here are some top performers that gardeners consistently rate highly for their quality, durability, and ergonomic design.
Fiskars Easy Pour Watering Can
This can is known for its lightweight design and easy-to-pour spout. With an ergonomic handle, it allows for comfortable watering, even when full. It has a large capacity, so you can water more plants with fewer trips.
Bloem Deluxe Watering Can
The Bloem Deluxe combines function with style. It features a removable sprinkle nozzle for a gentle shower and is made with UV-stabilized plastic to resist sun damage. Its well-balanced design makes it easy to carry and use.
Gardman Galvanized Steel Watering Can
For those who prefer metal cans, the Gardman is a great choice. Made from durable galvanized steel, it stands up to rough weather. Its long spout provides precise watering and has a corrosion-resistant coating.
Haws Heritage Watering Can
The Haws Heritage is a classic. It’s crafted from high-quality plastic, making it both lightweight and hardy. Its iconic design includes a brass-faced rose for fine spray and a comfortable handle.
Remember, the best outdoor watering can for you depends on your specific needs. Consider capacity, durability, and how it feels in your hand. These top-rated models offer a great start to finding your perfect gardening companion.
Maintaining Your Outdoor Watering Can
To keep your best outdoor watering can in top shape, regular maintenance is crucial. Here’s what you need to know.
Cleaning and Storing
Always empty your watering can after each use. Rinse it with clean water to remove dirt and debris. For detailed cleaning, use mild soap and a scrub brush. Avoid harsh chemicals that can damage the can’s material. After cleaning, dry your watering can thoroughly to prevent mold growth.
Store your watering can upside down in a dry, shaded area. This ensures that no water remains inside, which could lead to rust or frost damage. If you have a detachable rose or sprinkler, take it off and store it separately. Keep these tips in mind to extend your watering can’s life.
Preventing Rust and Wear
For metal watering cans, moisture is the main cause of rust. Always dry your can well after use. To prevent rust, you can apply a clear coat of rust-resistant spray. Just make sure it’s safe for plants.
For plastic cans, avoid prolonged sun exposure to prevent UV damage. Store them away from extreme temperatures and direct sunlight. With these care strategies, your watering can will remain a reliable tool for many seasons.
Final Tips for Watering Your Plants Effectively
To ensure your plants thrive, effective watering is essential. Keep these tips in mind when using your best outdoor watering can:
Choose The Right Time of Day
Water early in the morning or late in the afternoon. This reduces water evaporation and helps plants absorb more moisture.
Observe Your Plants
Look at your plants. If they droop or the soil feels dry, it’s time to water. Over-watering is as harmful as under-watering, so be observant.
Water at the Base
Pour water near the plant base. This ensures the roots get water, not just the leaves. It lowers the risk of leaf diseases too.
Use The Right Amount
Give enough water to reach deep roots. This encourages growth and strengthens your plants. Avoid shallow watering that doesn’t reach deeper roots.
Be Consistent
Water regularly. Stick to a schedule. Consistent watering helps establish a routine, beneficial for plant health.
By following these simple tips, you’ll water your plants effectively, leading to a lush, vibrant garden.
The Best Watering Can for Indoor Plants for Indoor Gardeners
Importance of Proper Watering for Indoor Plants
Proper watering is vital for indoor plants. It ensures they grow healthy and strong. Over-watering can lead to root rot, a common issue many indoor plant owners face. It kills roots, leaving plants unable to absorb nutrients. On the other hand, under-watering causes plants to wilt and can stunt growth. Soil needs the right balance of moisture. Without it, plants can’t perform photosynthesis well, affecting their overall health.
When choosing the best watering can for indoor plants, consider how its design helps with proper watering. A good can delivers water evenly. It avoids water logging and helps prevent dry spots. Consider cans with a long spout for reaching tight spaces. Such cans promote even watering at the plant’s base without wetting the leaves too much. Wet leaves can attract pests and diseases. Thus, proper watering tools are key to plant health and should be a top priority for indoor gardeners.
Factors to Consider When Selecting a Watering Can
When searching for the best watering can for indoor plants, several factors are key. Your choice impacts how well you can manage the watering needs of your plants. Here are important factors to consider:
Size and Capacity
Choose a size that fits your indoor garden. Large cans hold more water but could be too heavy when full. Small cans are lighter, easier to handle, but need more refills. Reflect on the number of plants and their water requirements before you decide.
Material and Durability
Watering cans come in different materials such as plastic, metal, or ceramic. Plastic is lightweight and often more affordable. Metal is more durable but can be heavy. Ceramic adds a decorative touch but can break easily. Pick a material that meets your balance of durability and ease of use.
Spout Design and Water Flow Control
A long spout can reach plants at the back of shelves or in tight spots. Look for a can with a detachable rose or adjustable nozzle. Such features allow you to control the water flow, reducing spillage and ensuring a gentle watering for delicate plants.
Comfort and Ergonomics
Comfort matters for regular use. Handles should offer a good grip and not strain your wrist. A balanced design prevents tipping when pouring. Opt for ergonomically designed cans for ease during longer watering sessions.
Aesthetics and Design
The look of the watering can may also be important. Pick a design that complements your interior decor. Many stylish options are available that serve both function and form. A good-looking watering can add charm to your plant care routine.
Top Watering Cans for Indoor Plant Care
Finding the best watering can for indoor plants depends on quality, functionality, and design. We have looked at several factors that play a role in choosing the right watering can. Now, let’s explore some of the top options that cater to the needs of your indoor garden.
Plastic Watering Cans
Plastic watering cans are a great lightweight option. They come in various sizes, making it easy to find one that suits your indoor space. Look for one with a detachable spout to control water flow, vital for delicate plants. Plus, they’re usually more cost-effective, offering a practical solution without compromising on functionality.
Metal Watering Cans
Metal watering cans boast durability and sturdiness. They stand out as long-term investments for your garden. Choose a can with a comfortable handle to ease the strain on your wrist. If you go for a metal option, ensure it has a coating to prevent rust, keeping your can functional for years to come.
Novelty and Decorative Watering Cans
For those who value aesthetics, novelty and decorative watering cans are perfect. They provide an extra touch of style to your gardening routine. While they are functional, these cans often serve as a decor piece as well. Remember to weigh their practicality with their appearance to select a can that best serves your plants’ needs as well as adds beauty to your space.
Tips for Watering Indoor Plants
Understanding Your Plants’ Water Needs
Each indoor plant has unique water needs. Learn what these are to water effectively. Some plants prefer dry soil between waterings, while others thrive in moist conditions. Check the soil with a finger-test or use a moisture meter. Knowledge of each plant’s preferences is key.
Techniques for Even Water Distribution
Ensure every plant gets the right amount of water. Use a watering can with a long spout for hard-to-reach areas. Water slowly to let the soil absorb moisture evenly. A detachable rose attachment helps disperse water gently, preventing soil disruption or mess.
Avoiding Overwatering and Underwatering
Overwatering and underwatering can harm your indoor plants. Use pots with drainage holes. Empty saucers after watering to avoid sitting water. Allow the topsoil to dry before watering again for most plants. Adjust your watering routine with the seasons, as indoor plants often need less water in winter.

Maintenance and Cleaning of Watering Cans
Proper maintenance is vital to extend the lifespan of a watering can. Whether it’s plastic, metal, or ceramic, consistent cleaning prevents algae growth and mineral deposit buildup. It keeps your tool in good condition and ensures that water flows freely, which is crucial for the well-being of your indoor plants. Here’s how to keep your watering cans clean and ready for use.
Routine Cleaning Tips
- Empty the can: Always empty residual water to prevent stagnant water that can harbor bacteria.
- Rinse with water: Regularly rinse the inside of the can with clean water to wash away leftover debris.
- Use mild soap: Occasionally, wash with a mild detergent to remove any slime or algae buildup.
- Scrub the spout: Use a bottle brush to clean the spout and remove clogs to ensure an even water flow.
- Air dry: Let the can completely air dry between uses to prevent moisture accumulation.
- Store properly: Keep your watering can in a dry place away from direct sunlight to avoid wear.
Preventing Rust and Corrosion on Metal Cans
Metal watering cans are durable but prone to rust if not cared for properly. To prevent rust and maintain their functionality:
- Dry immediately: After each use, thoroughly dry your metal can to prevent moisture from sitting.
- Oil the joints: Apply oil to moving parts like handles or roses to keep them functioning smoothly.
- Check for damage: Regularly inspect your can for scratches or chips in the paint that could expose metal.
- Use liners: Consider using a plastic liner if your metal can has begun to rust or corrode.
- Seasonal care: If you live in a humid area, you might need to give your can extra attention to avoid corrosion.
By following these maintenance and cleaning guidelines, the best watering can for indoor plants you’ve chosen will serve you well throughout your gardening endeavors.
Where to Buy the Best Watering Cans for Indoor Plants
Once you’ve decided on the best watering can for indoor plants, the next step is finding where to buy one. There are multiple options, and it’s all about convenience and variety.
Local Gardening Stores
Local gardening stores are a great place to start. Here, you can often find a selection of watering cans that you can physically examine. You’ll get a feel for their size and balance. Plus, the staff at these stores can provide personalized advice. They can help you choose a can that fits your specific indoor plant care needs. Local stores also support your community’s economy.
Online Retailers and Garden Centers
For a wider selection, online retailers and garden centers are your best bet. They offer a vast array of options, from the basic to the most stylish and decorative watering cans. Shopping online is convenient – you can compare prices and read customer reviews from the comfort of your home. Look for online stores with good return policies, in case the product doesn’t meet your expectations upon arrival.
When you shop, remember to balance your plant’s needs with the features of the can. Size, material, and spout design are all important features. Use the tips from this guide to make an informed choice for your indoor plants.
Final Thoughts on Making the Right Choice
When it comes to indoor plant care, a reliable watering can is a gardener’s best friend. Remember, the best watering can for indoor plants is one that meets both your and your plants’ needs effectively. Consider the size and volume that suit your space, the materials that align with your usage, and the design that matches your home aesthetic. The spout design should cater to the delicate watering needs of your plants, while ergonomic features ensure comfort during use.
Choosing wisely will not only simplify your plant care routine but also contribute to the overall health and growth of your indoor greenery. Keep in mind the tips and factors previously discussed, as they will guide you in selecting a can that’s easy to maintain and serves you for years. Whether in local stores or through online retailers, invest time in comparing options to find that perfect balance between functionality, durability, and style.
With proper maintenance and cleaning, your chosen watering can will be a lasting tool in your gardening arsenal. Let it reflect your commitment to nurturing your indoor plants, all while complementing your living space. Go forward with the knowledge shared here, and make a choice that you’ll be satisfied with each time you water your beloved plants.
Watering Can with Long Spout: Long Spout Watering Can Benefits
The Importance of Proper Watering Techniques
Proper watering techniques are crucial for plant health. They ensure that water reaches the roots without waste. A watering can with long spout provides precision and control. This minimizes water spillage and soil erosion around plants. Precise watering also prevents fungal diseases caused by excess moisture on leaves. It’s vital for seedlings and young plants, as overwatering can be as harmful as under-watering. By using a watering can with long spout, gardeners can avoid these risks and promote strong plant growth.
Features of a Long Spout Watering Can
When looking for the ideal watering can with long spout, certain features stand out. These include the spout’s length and shape, the material of the can, and additional design elements like handles and measurement markings.
Spout Length and Shape
Long spouts typically range from 6 to 12 inches. They allow you to reach plants easily, even those at the back of a deep flowerbed or high on a shelf. The right spout shape ensures a gentle flow of water, reducing the risk of dislodging soil or damaging delicate plants.
Material
Watering cans come in various materials like plastic, metal, and ceramics. Each has its pros and cons. Plastic is lightweight and affordable. Metal is durable and often more stylish. Ceramics offer an artistic touch but can be fragile.
Handle and Measurement Markings
A comfortable handle is key for ease of use. Some watering cans with long spouts include ergonomic handles that reduce strain on the wrist. Measurement markings on the side of the can are beneficial for mixing fertilizers or monitoring water usage.
Crafting these features together, a watering can with long spout becomes not just a tool, but a gardening ally. The right can makes watering efficient, easy, and suited to your garden’s needs.
Advantages of Long Spout Watering Cans for Indoor Plants
Indoor plants add beauty and a touch of nature to any home. But caring for them involves precise watering, often in tight spaces. A watering can with long spout offers several advantages for keeping these plants healthy and thriving. Here we’ll delve into the specific benefits of using a long spout watering can for indoor gardening.
Precise Watering in Tight Spaces
Indoor plants are often placed in areas where space is limited, like on window sills or shelves. The extended reach of a long spout allows you to water these plants without moving them, which reduces stress on the plants and the risk of spills.
Controlled Water Flow
A delicate flow is key to watering without disturbing the soil or damaging the plant. The design of a long spout offers this control, making it easy to prevent over-watering and soil erosion.
No More Wet Leaves
Wet foliage can lead to fungal diseases in plants. The precision of a long spout targets the water directly at the soil, avoiding leaves and stems which keeps your plants healthier.
Convenience and Comfort
Watering indoor plants with a long spout is not just beneficial for the plants, but it’s also easier for you. Avoiding the need to stretch, bend or reach awkwardly means watering your indoor garden can be a comfortable experience.
By investing in a watering can with long spout, indoor plant enthusiasts can ensure their green friends get the right amount of water with minimal effort and maximum precision.
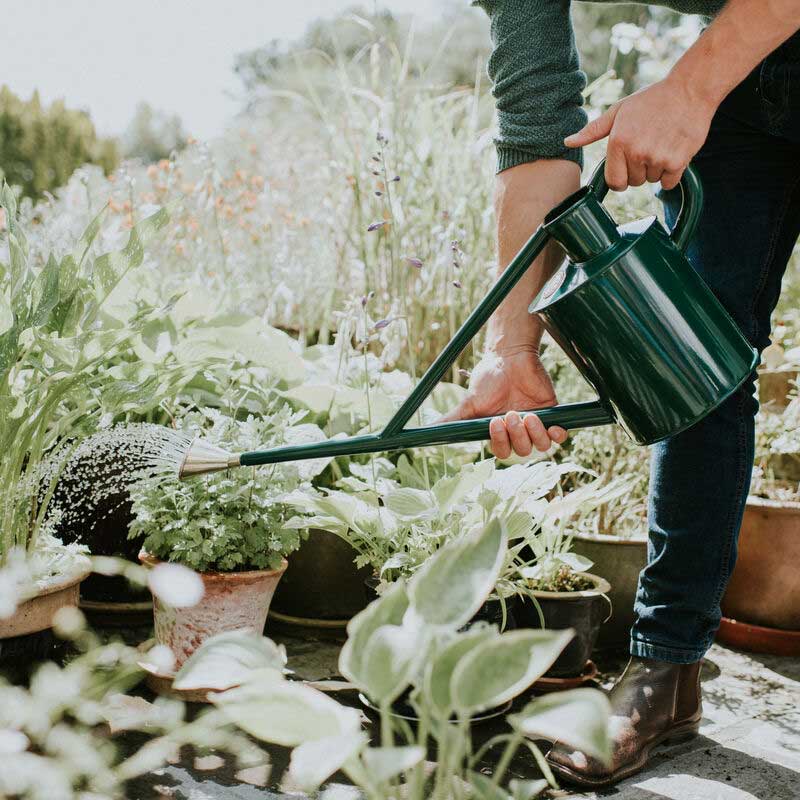
How a Long Spout Enhances Outdoor Gardening
Outdoor gardening can be a rewarding but challenging task. A watering can with long spout offers unique benefits that enhance the gardening experience even outside. Here we highlight how a long spout can make outdoor gardening more efficient and enjoyable.
Easy Reach to Distant and Dense Plants
Outdoor gardens often feature plants that are spread out or nestled in dense arrangements. A long spout allows you to reach these plants without stepping on other foliage. You can water with precision, ensuring each plant gets its share.
Better Water Conservation
Water is precious, especially in drier climates or during summer months. A watering can with long spout reduces water waste by targeting the water exactly where it’s needed. This means less runoff and more water going to your plants’ roots.
Enhances Watering for Hanging Baskets and Raised Beds
Hanging baskets and raised beds add beauty to outdoor spaces but can be tricky to water. The extension of a long spout ensures you can comfortably reach these without overexertion. Now it’s easier to keep those hard-to-reach plants hydrated.
Prevents Soil Displacement and Erosion
A gentle water flow is crucial outdoors to avoid soil erosion around your plants. With a long spout, the water cascades smoothly onto the soil, without disturbing it. This protects the plant’s root environment and keeps your garden looking neat.
By using a watering can with long spout, gardeners find they have more control and can tend to their outdoor gardens with less effort and better results.
Choosing the Right Long Spout Watering Can for Your Garden
Selecting the perfect watering can with long spout for your garden involves several factors. A good fit depends on garden size, plant types, and your own comfort. Here are key points to consider when making your choice.
Consider Your Garden Size
For large gardens, choose a can with a higher capacity to avoid frequent refills. Small gardens may need a lighter, more manageable size.
Look at the Types of Plants You Have
Delicate plants need a gentle water flow. Ensure the spout design suits the watering needs of your specific plants.
Assess the Weight When Full
Remember that water adds weight. Test if you can comfortably carry the can when it’s full. It should feel balanced and easy to handle.
Check the Spout Length and Design
A longer spout helps with hard-to-reach areas. Make sure the spout design allows for a controlled water flow that’s right for your garden.
Test the Handle Comfort
An ergonomic handle makes watering less tiring. Look for a handle that fits well in your hand and doesn’t strain your wrist.
By paying attention to these aspects, you can find a watering can with long spout that works best for you and your garden. The right choice will save you time, reduce effort, and help your plants flourish.
The Ergonomic Benefits of Using a Long Spout Watering Can
Gardening can be tough on your body. Using a watering can with long spout makes a big difference. It helps you avoid bending too much or stretching. You can maintain a comfortable stance while watering. This helps prevent back and shoulder pain. The design of the spout means you won’t have to twist your wrist awkwardly. This reduces the risk of wrist strain.
An ergonomic handle adds to the benefits. It makes sure your grip is natural and relaxed. This helps in holding and lifting the can, even when full. Look for a can with a handle that feels right in your hand.
Choosing a watering can with long spout that is well-balanced is important. It should feel stable and easy to tip for watering, without sudden jerks. This makes watering your garden less tiring and more enjoyable.
Overall, an ergonomic watering can takes care of you as you take care of your plants. It’s a win-win for both your garden’s health and your own comfort.
Maintenance and Care for Long Spout Watering Cans
Proper maintenance is key to the longevity of any gardening tool, especially a watering can with long spout. To keep your watering can in good condition, here are simple steps you can follow:
Clean Regularly
Dirt and debris can clog the spout, so clean your can after each use. Rinse it with water to remove any dirt from inside the spout and can.
Check for Leaks
Inspect your can for any signs of leaks. Small holes can be patched, but larger damage might mean it’s time for a new can.
Store in a Dry Place
Keep your watering can in a dry area to prevent rust and damage. If it’s made of metal, this step is particularly important.
Handle with Care
Avoid dropping or banging the can. This can cause dents or breakage, especially if your can is ceramic.
Avoid Harsh Chemicals
If you mix fertilizers or other chemicals in your watering can, choose ones that won’t corrode the material. Always rinse the can thoroughly after use.
By taking care of your watering can with long spout, you’ll ensure it remains a reliable gardening ally for years to come.
The Aesthetic Appeal of Long Spout Watering Cans in Garden Design
Beyond their practical benefits, watering cans with long spouts also add elegance to your garden. Their sleek design can complement a variety of garden styles. Here’s how these stylish tools can enhance the visual appeal of your outdoor space:
Visual Harmony with Plants
The elongated shape of a long spout watering can creates a natural flow in design. It mirrors the graceful lines of garden plants. This harmony between tool and nature enhances the garden’s overall beauty.
Variety in Materials and Colors
Long spout watering cans are available in different materials and colors. Some have a vintage look; others are modern and sleek. You can choose one that fits your garden’s theme. Metal cans in copper or galvanized steel can add a rustic touch, while bright plastics can bring a pop of color.
Sculptural Qualities
A watering can with long spout is not just a tool but also a piece of art. When not in use, it can serve as a sculptural element that adds interest to your garden. Place it thoughtfully on a garden bench or among your plants as a decorative feature.
Complements Garden Ornaments
These watering cans go well with other garden decorations. They can be part of a collection of ornamental gardening tools that enhance the visual allure of your garden. Pairing a stylish can with statues, wind chimes, or bird baths can create a curated look.
Incorporating a watering can with long spout into your garden isn’t just about utility. It’s about adding charm and character. It reflects your personal style and flair for garden design. Selecting one that appeals to your aesthetic sense can make gardening even more enjoyable.
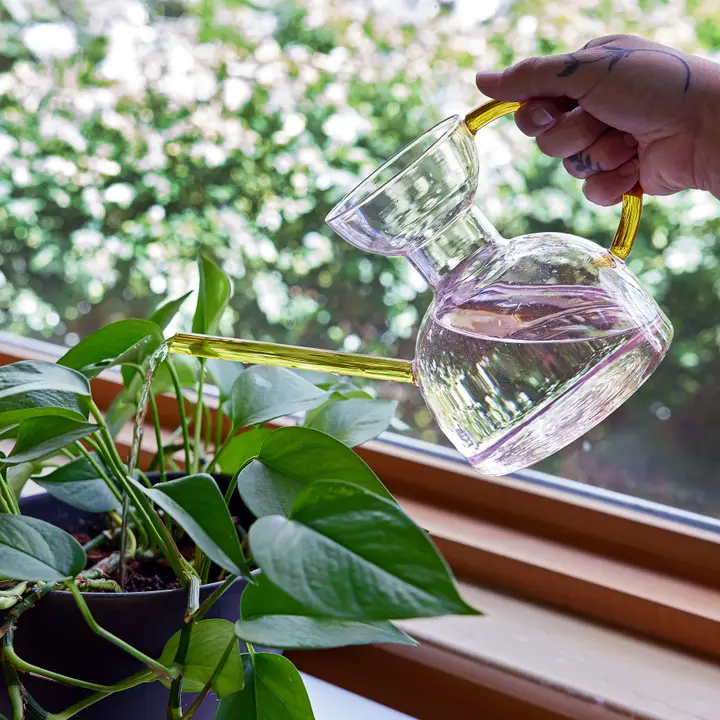
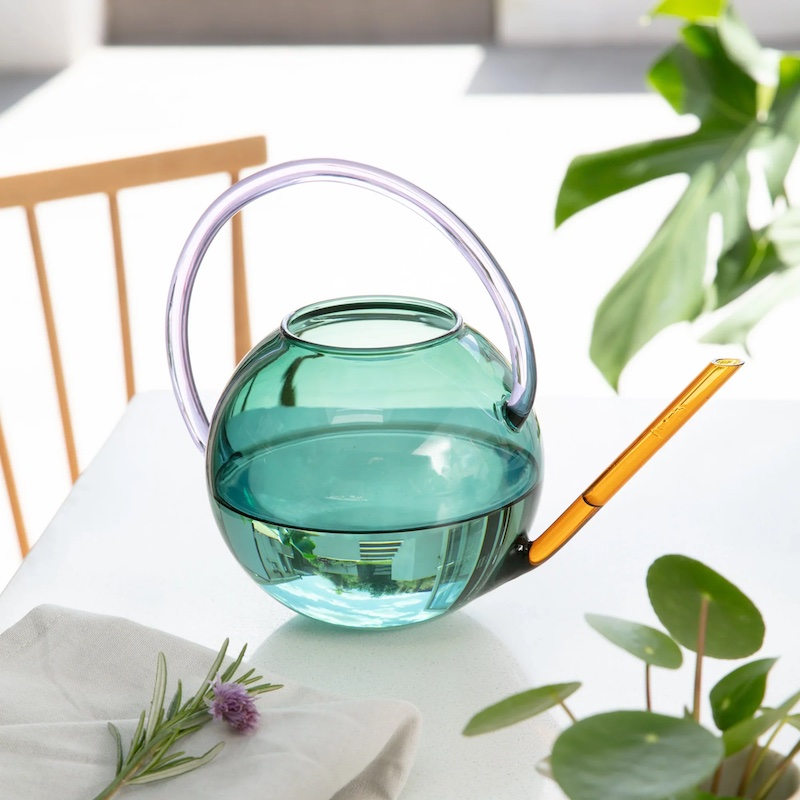
Sustainable Gardening: The Glass Watering Can Revolution
The Rise of Eco-Friendly Gardening Practices
In recent years, gardeners worldwide are turning to eco-friendly practices. More are choosing to avoid plastics and other non-sustainable materials in their gardens. This shift to greener methods aligns with a broader global push for environmental responsibility. One notable trend is the use of a glass watering can. These watering cans offer several benefits that go beyond just sustainability.
With their sleek and transparent design, glass watering cans are not just garden tools. They are a statement about the gardener’s commitment to the environment. The glass material is 100% recyclable, making it a more sustainable choice. Unlike plastic cans, glass ones do not release harmful chemicals into the soil or water. They help protect the delicate balance of garden ecosystems.
Gardeners are also finding that using a glass watering can is beneficial for plant health. The smooth surface of glass prevents bacterial growth, which is common in plastic variants. This means the water stays purer and healthier for the plants. Additionally, with the rise of organic gardening, the glass watering can is an ideal companion. It ensures that the water used is clean and free from contaminants.
This rise of eco-friendly gardening practices, including the adoption of glass watering cans, represents a positive step. Gardeners are not just beautifying their spaces. They are contributing to a healthier planet. The glass watering can stands as a symbol of this sustainable movement.

Aesthetic and Functional Benefits of Glass Watering Cans
Glass watering cans go beyond practicality; they are also a style statement for the eco-conscious gardener. The clear and elegant design of a glass watering can adds a touch of sophistication to any garden. It serves as a focal point, reflecting the care and thought put into the garden’s aesthetic. These cans blend seamlessly with the natural environment, complementing the beauty of vibrant flowers and lush greenery.
In terms of functionality, glass watering cans surpass many traditional options. Their transparency ensures that gardeners can easily monitor the water level. This helps in preventing over-watering or under-watering, both of which can be detrimental to plant health. The spout design also plays a critical role, and many glass cans come with a drip-resistant spout. This feature allows for precise watering, directing the flow to the base of the plants, which is where water is most needed.
Furthermore, the ergonomic designs of these glass watering cans contribute to ease of use. They often come with comfortable handles, balancing the weight even when full. This makes the task of watering less strain on the hands and wrists, allowing for longer gardening sessions without discomfort.
Lastly, being made of glass, these watering cans do not suffer from the rust or corrosion that can plague metal cans. Nor do they become brittle and crack as plastic cans can over time when exposed to the elements. The robustness of glass materials ensures that these cans can withstand the test of time, making them a worthwhile investment for any gardener.
Overall, glass watering cans stand out for their elegance and effectiveness, offering gardeners a perfect mix of style and practicality.
Choosing the Right Glass Watering Can for Your Garden
Selecting the ideal glass watering can for your garden involves several factors. Here are key elements to consider:
- Capacity: Think about the size of your garden. A larger capacity is better for big gardens, while a smaller one suits tight spaces.
- Design: Look for a spout that allows precise water flow. This means less waste and more targeted watering.
- Comfort: Ensure the handle is comfy for your grip. Remember, a full can could be heavy.
- Balance: A well-designed can will distribute weight evenly. This makes it easier to carry and pour.
- Materials: High-quality glass is a must. It should resist scratches and breakage.
By focusing on these points, you’ll find a glass watering can that not only caters to the needs of your plants but also aligns with sustainable gardening practices. You’ll contribute to eco-friendliness while making a smart, long-term investment for your gardening toolkit.
The Durability and Longevity of Glass Watering Cans
When considering garden tools, durability is key. Glass watering cans stand out in this regard. Their resilience against common issues faced by other materials is noteworthy. Here’s why glass watering cans tend to last longer:
- Resistant to Wear: Glass doesn’t degrade like plastic or corrode like metal. High-quality glass withstands frequent use.
- Weatherproof: They handle the elements well. Sunlight and extreme temperatures won’t compromise their integrity.
- Ease of Maintenance: Cleaning is simple, preventing buildup that could degrade other materials.
Investing in a glass watering can means opting for a long-lasting garden solution. It withstands the rigors of regular gardening, providing peace of mind along with eco-friendly benefits.
How Glass Watering Cans Contribute to Sustainable Gardening
Glass watering cans play a crucial part in sustainable gardening. They promote a green lifestyle in several ways:
- Recyclability: Glass is 100% recyclable. Unlike plastics, you can recycle glass over and over without a loss in quality or purity. By using glass watering cans, gardeners reduce waste.
- Chemical-Free: Glass doesn’t release harmful chemicals. Plastic can leach chemicals into soil and water. Glass keeps gardens free from these toxins.
- Durability: Glass lasts longer than plastic or metal alternatives. This means fewer replacements and less waste entering the environment.
- Ecosystem Protection: A glass watering can won’t disrupt the garden’s ecosystem. It’s clear that safer, cleaner water supports healthier plant growth and soil composition.
- Energy Conservation: Producing glass requires less energy compared to some other materials for similar durability. This contributes to a lower carbon footprint overall.
In essence, switching to a glass watering can is a simple act with powerful outcomes. It’s about more than watering plants. It reflects a commitment to the Earth and future generations. By choosing sustainable tools, gardeners play an active role in protecting the environment. They help create a legacy of responsible living and true connection with the natural world.
Caring for Your Glass Watering Can to Ensure Long-Term Use
To guarantee your glass watering can lasts, proper care is essential. Here are simple steps to follow:
- Regular Cleaning: Rinse your can after each use to prevent algae or mineral buildup. Use mild soap and warm water for a deeper clean.
- Safe Storage: Keep your can in a spot safe from knocks or drops. Extreme temperatures can be harmful, so store your can inside when not in use.
- Avoid Rough Handling: Glass is durable but not unbreakable. Handle your can with care to prevent chips or cracks.
- Check for Damage: Inspect your can regularly. Look for any signs of wear that could cause leaks.
- Use Soft Water: If possible, fill your can with soft water. Hard water can leave deposits that affect the glass’s clarity over time.
By following these care tips, your glass watering can will remain a garden ally for years. Simple efforts in maintenance contribute to its longevity, aligning with the principles of sustainable gardening and ensuring ongoing eco-friendly practices. Keep in mind that caring for your tools is as important as caring for your plants.
Innovative Designs in Glass Watering Cans
Innovative designs in glass watering cans are boosting their popularity among gardeners. Designers are getting creative, blending function with style. New features cater to a gardener’s need for both efficiency and visual appeal. Curved spouts, comfortable handles, and varied sizes are just the start.
One standout innovation is the integration of measurement markings inside the can. These help gardeners track water usage precisely. They ensure plants receive the right amount of water, with no guesswork.
Another design feature is ergonomic handles. They are crafted for a good grip, reducing hand fatigue. This makes watering a big garden less tiring.
Many glass watering cans now also have wide bases. These provide stability to prevent tipping over. The wide base also allows for easy filling from various water sources.
Designers have introduced decorative patterns etched into the glass. These beautify the cans, making them garden art pieces. Patterns range from simple frosted lines to intricate, nature-inspired motifs.
Some glass watering cans have removable spouts. This flexibility accommodates different types of plants. With a twist, gardeners can switch from a wide spray to a focused stream.
The trend of sustainable gardening solutions is evident in these designs. Each serves a purpose while being kind to the planet.
Gardeners are thrilled with these new glass watering can designs. They offer both function and sustainability, with a dash of beauty. They prove that eco-friendly tools can also be innovative and stylish.
In summary, the glass watering can is undergoing a design revolution. The new features enhance gardening, align with sustainable practices, and double as decorative pieces.
Glass vs. Plastic: Environmental Impact Comparison
When looking at watering cans, the material choice is vital. Here’s a comparison between glass and plastic:
- Resource Consumption: Glass is more resource-intensive to produce than plastic. But it lasts much longer, meaning less frequent replacement.
- Recycling Efficiency: Glass can be recycled endlessly without quality loss. Plastic recycling is less efficient and can degrade over time.
- Pollution: Plastic is notorious for polluting ecosystems as it breaks down into microplastics. Glass does not pollute in this way.
- Health Impact: Glass is non-toxic and doesn’t release chemicals. Plastic can leach harmful substances into soil and water, affecting plant and human health.
- Energy Usage: Though glass production initially requires more energy, plastic’s repeated production due to its shorter lifespan may equal or surpass this.
- Overall Impact: Glass has a more significant initial environmental impact. Over time, however, its durability and non-toxicity make it a greener choice compared to plastic.
In conclusion, while glass watering cans have a higher upfront environmental cost, their long lifespan and lack of harmful byproducts make them the eco-friendlier option in the long run. By choosing glass over plastic, gardeners can minimize their environmental footprint and support a sustainable future.
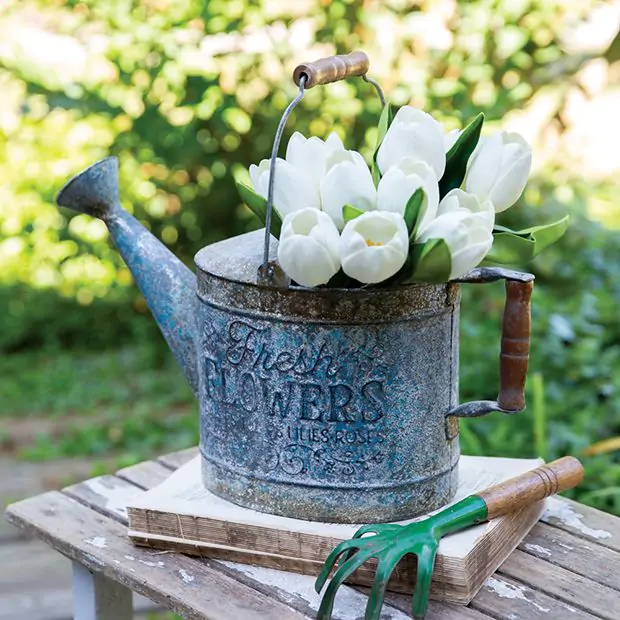
Antique Watering Can Collecting Guide: Era’s Culture & Technology
The History of Watering Cans
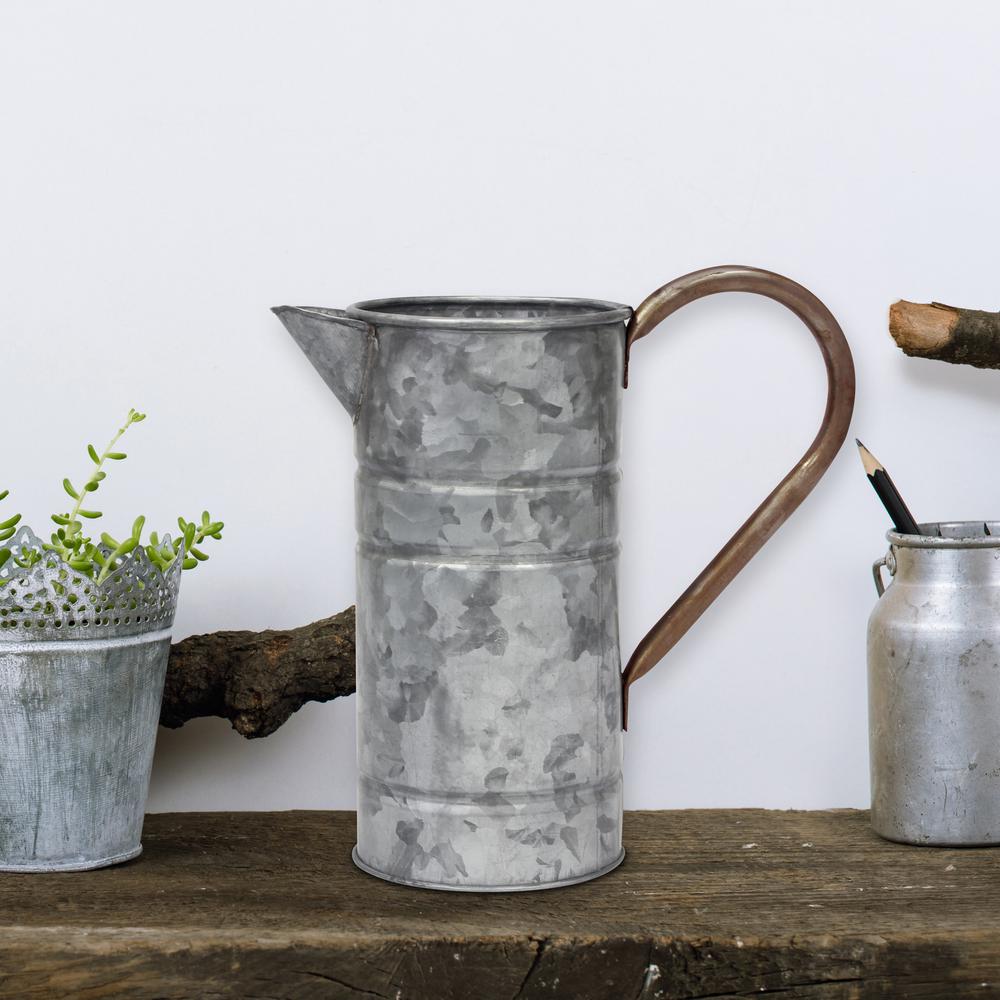
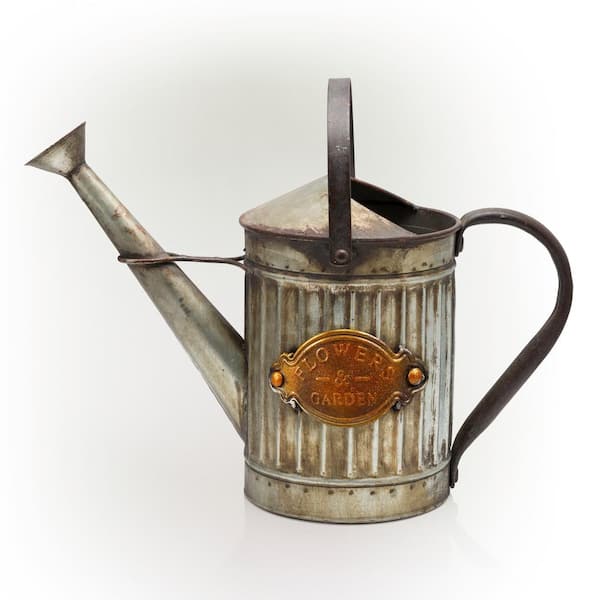
The history of the antique watering can is both rich and varied. These practical tools date back centuries. They have been pivotal for garden care across cultures. Originally, people used simple containers to carry water to plants. Over time, these evolved into more refined designs. The 17th century saw the rise of metal watering cans. They became artful and intricate with progression.
In the 1800s, watering cans spread widely due to the industrial revolution. Mass production made them household items. They came in various shapes and sizes, unique to different regions. The antique watering cans we see today are remnants of these times. They often reflect the era’s culture and technology.
Collectors value cans for their design, material, and markings. A can’s handle, spout shape, and decorations can indicate its age. Old cans might show craftsmanship now lost in modern times. Skilled artisans once hand-made these items. They used materials like brass, copper, and galvanized steel.
The antique watering can is not just a tool but a window into history. Its development mirrors changes in manufacturing, art, and gardening. For collectors, understanding the history is key. It helps identify authentic pieces and tells a story of past lives. Remember, each antique watering can has a tale to whisper. It’s an echo of hands that once toiled in gardens long before ours.
Identifying Antique Watering Cans
Identifying antique watering cans can be a fascinating journey into the past. Here are key points to help decipher their age and authenticity:
- Examine the Material: Antique watering cans were often made with materials like brass, copper, and galvanized steel. Look for signs of these materials to establish antiquity.
- Assess the Craftsmanship: Artisanal details, like hand-made features and intricate designs, suggest a can’s historical value. Machine-made details might indicate a more modern make.
- Check the Design: Pay attention to the can’s handle and spout shape. Unique or customary designs can signal the era it comes from.
- Search for Markings: Maker’s marks, stamps, or inscriptions are clues to identity and provenance. These marks were often unique to the creator or region.
- Consider the Patina: A genuine antique shows its age through patina – the natural wear and tarnishing over time. A lack of patina may require a closer examination.
- Consult Reference Guides: Utilize collector’s books and online resources to compare your finds. They can provide valuable information for identification.
By focusing on these aspects, collectors can often determine the age, origin, and sometimes even the story behind each antique watering can. Remember to handle these items delicately as they are not just collectibles but pieces of history.
Factors that Affect the Value of Antique Watering Cans
When adding antique watering cans to your collection, you want to ensure you’re making a valuable choice. Here are key factors that can affect their worth:
- Age and Rarity: Generally, the older and rarer a watering can, the more valuable it can be. Collectors often seek unique pieces with significant history.
- Condition: The overall state of the watering can is critical. Pieces with minimal wear, free of dents and rust, can demand a higher price.
- Originality: Cans that have maintained their original components are usually more valued than those that have been repaired or altered.
- Provenance: Knowing the history and previous ownership can raise a can’s value, especially if it has been owned by notable persons or comes from a famous collection.
- Aesthetic Appeal: Some collectors look for watering cans with artistic or aesthetic qualities, such as elaborate designs or historical styles that resonate with current trends.
- Maker’s Mark: Antique watering cans with a maker’s mark or identifiable branding can have an increased value due to their identified heritage and authenticity.
- Cultural Significance: Cans that symbolize a particular era or cultural movement are often more sought after than those without such context.
By considering these factors, collectors can determine which antique watering cans are likely to appreciate over time and contribute meaningful stories to their collections.
Where to Find Antique Watering Cans
Finding antique watering cans is an exciting hunt. Here are some top spots to search for these treasures:
- Antique Shops: These stores specialize in vintage items. They often have a selection of watering cans. Check local shops to find pieces with local history.
- Estate Sales: Estate sales can be a goldmine for antique collectors. They may uncover rare and well-maintained cans from old households.
- Auctions: Keep an eye on local and online auction houses. They sometimes list antique watering cans with detailed descriptions.
- Online Marketplaces: Websites like eBay and Etsy offer a wide range of antiques. Use filters to narrow down your search to watering cans.
- Flea Markets: Stroll through flea markets to spot unique finds. You might haggle down the price on a hidden gem.
- Collectibles Fairs: Fairs often attract many sellers. They bring various options and potential bargain deals.
- Specialist Forums and Groups: Connect with other collectors online. They may have leads on where to find these antiques or offer cans for sale.
- Antique Shows: Travel to larger antique shows. They bring together many vendors, increasing your chances to find a special can.
Remember to use your knowledge from the previous sections when hunting for antique watering cans. It helps verify authenticity and value.
The Dos and Don’ts of Buying Antique Watering Cans
When you’re in the market for an antique watering can, it’s easy to get swept up in the excitement. However, there are several dos and don’ts you should keep in mind to ensure you make a savvy purchase.
- Do Your Research: Gather as much knowledge as possible about antique watering cans. Understanding their history, styles, and materials can help you make informed decisions.
- Do Inspect for Authenticity: Always check for signs of authenticity, such as material, craftsmanship, and markings. Be thorough in your examination.
- Do Set a Budget: Know what you’re willing to spend and stick to it. Antique watering cans can range greatly in price.
- Do Ask Questions: When possible, speak with the seller. Ask about the can’s history, condition, and any restorations.
- Don’t Rush to Buy: Take your time. A hasty decision can lead to buyers’ remorse, especially if you later discover issues with the can.
- Don’t Ignore Flaws: While patina adds character, significant damage may affect the value. Understand the difference between acceptable wear and severe damage.
- Don’t Overlook Provenance: A watering can with a well-documented history may be more valuable. Try to obtain this information when available.
- Don’t Forget about Size and Practicality: Consider how the can will fit into your collection. Ensure you have the space to properly display or store it.
By following these dos and don’ts, you can confidently add to your collection. You’ll find joy in each antique watering can, knowing you’ve made a thoughtful and educated choice.
How to Care for Your Antique Watering Can Collection
Caring for your antique watering can collection is essential to preserve its value and beauty. Here are straightforward tips to maintain these historical pieces:
- Handle with Care: Always use both hands when handling. These cans are often fragile due to their age.
- Clean Gently: Use a soft cloth to dust. For deeper cleaning, use a mild soap and water solution. Rinse and dry immediately.
- Avoid Abrasive Materials: Never use harsh chemicals or rough brushes. These can damage the material and patina.
- Store Properly: Keep cans in a dry, climate-controlled environment. Moisture and extreme temperatures can cause harm.
- Minimize Sunlight: Direct sunlight can fade and weaken metal over time. Show your collection in a well-lit but shaded spot.
- Regular Inspections: Check your cans regularly for signs of wear or damage. Early detection can prevent further decay.
- Professional Restoration: If restoration is necessary, enlist a professional. They know how to preserve the can’s historical integrity.
By following these steps, your antique watering can collection will continue to reflect its rich history. Remember, each piece represents a story from the past and deserves your careful attention.
Displaying Your Antique Watering Can Collection
Once you’ve gathered your treasured antique watering cans, it’s time to display them proudly. The way you showcase your collection can speak volumes about its importance to you. Here are tips for creating an attractive and respectful display:
- Choose the Right Space: Pick a spot that doesn’t get too much sunlight to avoid fading. Ensure the area is dry and stable.
- Display with Balance: Arrange your watering cans by size or period to create visual harmony. Put larger cans at the back and smaller ones in front.
- Use Stands or Mounts: Elevate your rarer cans on stands or secure mounts. This not only adds dimension but also protects them from being knocked over.
- Add Information Cards: Consider placing cards next to each can. Include the era, origin, and any unique story it might have.
- Rotate Your Collection: Keep your display fresh by switching out cans occasionally. This also prevents long-term exposure to any damaging conditions.
- Group by Theme: If you have multiple cans from a particular era or style, group them together. This creates a focused narrative for viewers.
A thoughtfully curated display allows you to share your passion for antique watering cans with others. It transforms your collection into an educational and visually engaging experience. Take care to place each can where it is safe, seen, and celebrated.
Antique Watering Can Replicas vs. Originals
When you explore the market for antique watering cans, you’ll encounter both originals and replicas. Knowing the difference is crucial as it impacts both value and satisfaction. Here’s what to keep in mind:
- Look for Age Signs: Originals have a history that replicas lack. Seek signs of aging like patina, wear, and natural tarnishing.
- Check the Craftsmanship: Originals often show handmade details. Replicas may have uniformity that hints at modern mass production.
- Evaluate Materials: True antiques are from brass, copper, or galvanized steel. Replicas might use less authentic or cheaper materials.
- Examine Markings: Genuine antiques often bear maker’s marks. Replicas may skip this detail or use markings that seem off.
- Assess the Price: If the deal seems too good, think twice. Originals usually cost more due to their historical value.
- Research Provenance: Ask for the history of the can. Originals often have stories attached, while replicas do not.
- Trust Your Instincts: If something feels not quite right, it may be a replica. Use your knowledge of antiques to guide you.
By being vigilant, you can differentiate between a valuable original and a less valuable replica. This knowledge ensures that you add pieces of true worth to your antique watering can collection.
Reliable Tools: Maximizing Efficiency with a 5 Gallon Watering Can
The Basics of a 5 Gallon Watering Can
Gardening requires reliable tools, and a 5 gallon watering can is essential. With this size, it’s possible to hydrate a large number of plants without refilling often. Knowing the basics of this handy tool will enhance your gardening routine.
Firstly, its capacity allows for a significant amount of water, making it ideal for bigger gardens. It’s crucial to select a can that has a strong handle. This ensures you can manage the weight when it’s full. A durable spout is also important. It directs the water flow and prevents spills.
Most 5 gallon cans come in either plastic or metal. Plastic models are lighter and generally less expensive. However, metal cans often last longer and can withstand more wear and tear.
The design of your watering can should include a comfortable grip and balance. This is vital when carrying it across your garden. Some cans have additional features like adjustable nozzles or removable heads to control water flow. These can help target specific areas or distribute water more evenly.
In summary, knowing the basics of a 5 gallon watering can sets you up for gardening success. Look for strong handles, a sturdy spout, and a design that offers comfort and balance. Deciding between plastic or metal will depend on personal preference and your garden’s needs.
Selecting the Right 5 Gallon Watering Can for Your Garden
Choosing the ideal 5 gallon watering can for your garden is a thoughtful process. Here are key factors to consider:
- Material: Decide between plastic and metal. Plastic is lighter and may be easier to lift when full. Metal is sturdier and can handle more use over time.
- Handle Strength: Ensure the handle is robust enough to support a full can’s weight. A weak handle can break and cause spills.
- Spout Design: Look for a spout that offers precise watering. A long spout can reach plants further away, and a spout with a rose (sprinkler head) is great for gentle watering.
- Comfort and Balance: Make sure the watering can feels comfortable in your hand. Check that it balances well when filled, reducing strain on your arms.
- Capacity Indicators: Some cans have clear markings showing volume levels. These can help prevent overfilling and make mixing fertilizers precise.
- Extra Features: Adjustable nozzles or detachable heads can offer versatility in watering methods. These are beneficial for gardens with diverse plant types.
When selecting your 5 gallon watering can, balance practicality with your garden’s specific needs. A right choice minimizes effort and maximizes plant health. Keep these considerations in mind to find a watering can that becomes an asset to your gardening tasks.
Benefits of Using a 5 Gallon Watering Can in Gardening
Using a 5 gallon watering can provides numerous benefits that are well worth considering. Here’s why this size is advantageous for gardeners:
- Reduces Refilling Frequency: A larger capacity means less time spent going back and forth to refill, allowing you to water more plants quickly.
- Supports Deep Watering: With more water on hand, you can give each plant a thorough soak necessary for deep root growth.
- Enhances Time Efficiency: By reducing the need for multiple trips to a water source, you save time that can be used for other gardening tasks.
- Ideal for Larger Gardens: If you have a big garden area, a 5 gallon watering can is perfect for covering more ground without needing a hose.
- Promotes Consistent Watering: The ample size helps ensure all your plants receive the same amount of water, which is crucial for even growth.
- Useful for Mixing Fertilizers: When adding nutrients, the large volume allows for consistent fertilizer distribution.
- Physically Easier: Despite its size, when properly filled and carried, it can be more ergonomic than smaller, more frequently filled cans.
By investing in a 5 gallon watering can, you provide your garden with consistent and efficient watering, facilitating healthier plant life and saving you time in your gardening routine.
Tips for Filling and Carrying a 5 Gallon Watering Can
Using a 5 gallon watering can simplifies your gardening, but it comes with challenges. Here are tips to fill and carry it safely and efficiently.
- Start with Half: When new to using a large can, start with half. It’s easier to handle and gives you a feel for the weight.
- Use a Hose: Fill your can with a hose. It’s quick and prevents spills.
- Smooth Lift: Bend your knees and lift with your legs. Keep the can close to your body to avoid back strain.
- Two Hands: Always use both hands. One on the handle and the other supports the bottom.
- Take Breaks: If you feel tired, take a break. Set the can down gently to rest.
- Steady Pace: Walk slowly. A steady pace helps you balance and avoids water sloshing out.
- Rotate Arms: If one arm gets tired, switch hands. It helps distribute the weight evenly.
By following these tips, you can manage a 5 gallon watering can with ease. It’s about maintaining control and being mindful of your body’s comfort. Happy gardening!
Efficient Watering Techniques with a 5 Gallon Can
Maximizing your watering efforts with a 5 gallon watering can involves more than just filling and pouring. Applying water efficiently ensures your plants get the moisture they need without waste. Here are some effective techniques to optimize your garden’s watering routine:
- Target the Roots: Focus on the base of the plant where the roots are. This directs water precisely where needed. Avoid wetting the foliage to reduce disease risk.
- Water Early or Late: Evaporation is less during the cooler hours. Watering in the early morning or evening gives plants time to absorb moisture.
- Use a Rose Attachment: Attaching a rose to your can’s spout breaks the stream into droplets. This provides a gentle shower, perfect for seedlings and delicate plants.
- Consistent Pattern: Establish a watering pattern. Start at one end of your garden and work systematically to the other. This helps you remember which plants you’ve watered.
- Soak, Don’t Sprinkle: Give plants a deep soak rather than a light sprinkle. This encourages deeper root growth and drought tolerance.
- Mulch the Base: After watering, mulch around the base of your plants. Mulch helps maintain soil moisture and temperature.
- Watch the Weather: If rain is in the forecast, you might skip watering. Too much moisture could harm plants or wash away nutrients.
By using these efficient watering techniques, you’re on your way to nurturing a thriving garden with your 5 gallon watering can. Practice these tips for best results, and watch your garden flourish with health and vigor.
Maintaining Your 5 Gallon Watering Can for Longevity
To keep your 5 gallon watering can in top shape, maintenance is key. Here are simple yet effective ways to ensure its longevity:
- Regular Cleaning: After each use, rinse your can with clean water. This prevents dirt buildup and clogs.
- Inspect for Damage: Look for any signs of wear, like cracks or rust. Fix small issues before they get worse.
- Store Properly: Keep your can in a shaded, dry place. Exposure to harsh weather can degrade materials.
- Handle with Care: Carry your can correctly to avoid straining the handle. Use both hands and don’t drag it on the ground.
- Avoid Chemicals: If you mix fertilizers, flush the can afterward. Chemical residues can corrode metal or damage plastic over time.
- Periodic Replacement Parts: If you have a can with a removable spout or rose, replace these parts when they show wear.
By following these straightforward tips, your 5 gallon watering can will remain a dependable tool for many seasons.
Innovative Accessories for Your 5 Gallon Watering Can
To enhance your gardening with a 5 gallon watering can, bring in innovative accessories. These add-ons can save time and tailor the watering experience to your garden’s needs.
- Timers and Sensors: Attach a timer to your can for a more controlled watering schedule. Moisture sensors help you water only when plants need it, preventing overwatering.
- Water Level Indicator: A clear gauge can show how much water is left. You won’t have to guess or open the can to check.
- Ergonomic Handles: Upgrade to an ergonomic handle for better grip and comfort. This helps when carrying a full can across the garden.
- Can Caddies or Trolleys: These wheeled platforms make it easier to move a full can without lifting, saving your back.
- Water Filters: If you use rainwater, a filter can remove debris and keep the water clean for your plants.
- Longer Spouts: They extend your reach and can water hard-to-access plants with ease.
Invest in these smart accessories for your 5 gallon watering can. They can upgrade your gardening routine, making it more efficient and enjoyable. Happy gardening!
Environmental Advantages of Using Large-Capacity Watering Cans
Large-capacity watering cans, like the 5 gallon variety, offer environmental benefits that align with sustainable gardening practices. Here are some ways they contribute to environmental conservation:
- Less Water Wastage: By carrying more water per trip, you minimize wastage from spills. Less water is lost to runoff or evaporation as you move between sources and plants.
- Reduction in Plastic Use: If you use a metal 5 gallon watering can, it may last longer than plastic ones, reducing the need for replacements and, hence, plastic waste.
- Energy Savings: Filling a watering can less frequently requires less energy. This can mean less fuel or electricity is used if you use a powered water source.
- Encourages Rainwater Harvesting: A larger can is ideal for collecting rainwater, a sustainable and environmentally-friendly source. This practice conserves treated tap water and can improve plant health.
- Promotes Healthier Plant Growth: Deep watering supports strong root systems, which can reduce the need for chemical fertilizers and pesticides. Healthier plants also contribute to a better ecosystem.
- Supports Drought-Resilient Gardens: By encouraging deep watering techniques, large watering cans help plants adapt to drought conditions, which is crucial in areas with water scarcity.
By making thoughtful choices, such as using a 5 gallon watering can, gardeners can positively impact the environment while nurturing their gardens.
The Decorative Watering Can Designs for Indoor Plants
The Importance of Proper Watering for Indoor Plants
Ensuring your indoor plants receive the right amount of water is crucial for their health. Over-watering can lead to root rot, a common issue that hinders plant growth. Under-watering, on the other hand, can dry out the roots and weaken the plant. A decorative watering can not only add style to your plant care routine but also help you water effectively. It’s important to understand each plant’s unique watering needs. The right watering can design can offer precise control over the water flow. This control enables you to reach the soil directly without splashing and wetting the leaves, which can cause fungal infections.
An appropriate watering can with a long spout is ideal for targeted watering, reducing water wastage. Using a decorative watering can also serves as a visual reminder to care for your plants regularly. Keep in mind that the type of indoor plant you have can dictate the kind of watering can you might need. For example, succulents require less frequent watering than tropical plants, which may need a more consistent watering schedule. Balancing beauty with functionality, a decorative watering can be a perfect tool for maintaining the health and vitality of your indoor plants.
Classic Watering Can Designs and Their Appeal
Classic watering can designs have stood the test of time due to their functional elegance. These designs typically feature a balanced combination of a curved handle and a long spout. The iconic shape is not just for looks; it provides an ergonomic grip for ease of watering. Often made from materials such as galvanized steel or copper, these cans offer durability. The rustic aesthetic of a classic decorative watering can serves as a nod to traditional gardening.
In addition, the patina that develops on metal cans over time adds a touch of antiquity. It appeals to those who enjoy vintage or rustic home decor. Moreover, many plant enthusiasts believe traditional designs blend seamlessly into both indoor and outdoor settings. This timeless appeal makes the classic decorative watering can a popular choice for gardeners. Its simplicity does not clash with the natural beauty of the plants. Also, a classic can is often a go-to for those seeking a reliable and understated tool that gets the job done. Using such watering cans not only ensures efficient hydration for your plants but also adds a decorative element to your plant care routine.
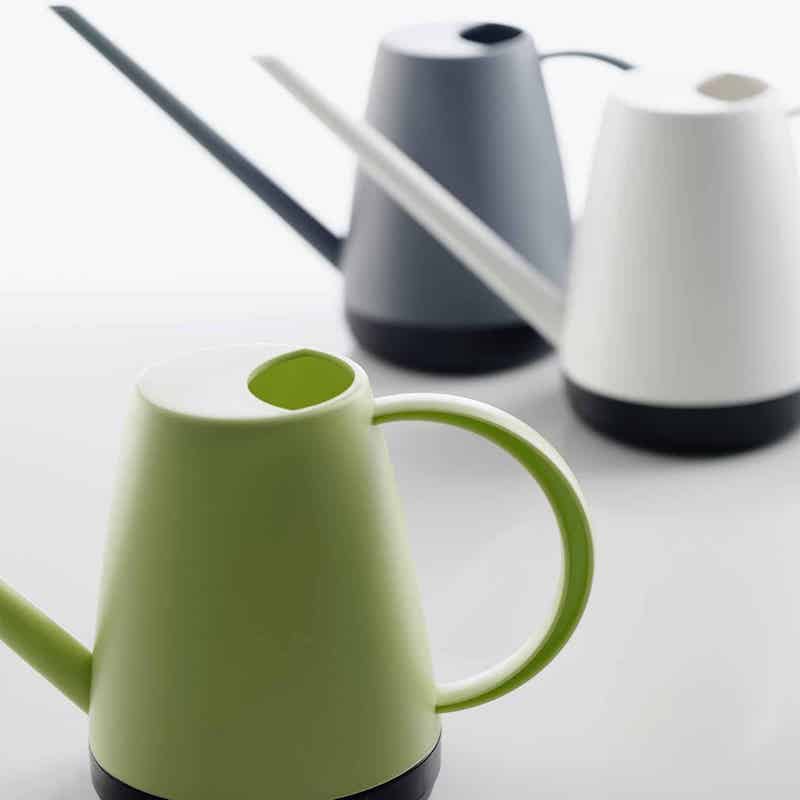
Modern Watering Cans for a Contemporary Look
Modern watering cans offer more than just utility; they enhance the aesthetic of your indoor garden. These cans showcase sleek lines, bold colors, and innovative designs that fit well in contemporary spaces. Unlike classic styles, modern decorative watering cans often emphasize minimalism and functionality. Manufacturers use materials such as stainless steel, plastic, or recycled materials to capture a clean, sophisticated vibe.
Distinctive Shapes and Designs: The modern decorative watering can might come in unexpected shapes. Some are cylindrical, others might be rectangular. The handles and spouts might feature artistic curves or geometric angles. These designs can double as decor when they’re not in use.
Vibrant and Neutral Colors: Color is a significant aspect of modern cans. They are available in an array of colors, ranging from bright, eye-catching hues to understated, chic shades. It allows gardeners to match their watering can with their interior design palette or plant pots.
Combining Form and Function: High functionality is key in modern designs. They often come with detachable spouts for different watering pressures and ergonomic handles for comfortable grip. Designers integrate these features without compromising the watering can’s sleek silhouette.
Innovative Materials: The modern decorative watering can is also about materials. Designers often choose durable and lightweight alternatives over traditional metals. Some modern cans are made to be environment-friendly, suggesting a shift towards sustainability in gardening tools.
Multifunctional Accessories: Many modern cans include additional features such as measurement markings for precise watering, or in-built filters to prevent debris from clogging the spout. These accessories promote a more efficient watering routine.
In conclusion, when you choose a modern watering can, you’re selecting a tool that meets your watering needs while reflecting your style. The modern decorative watering can is a statement piece that stands out among classic options and provides an effortless blend of form and function.
Decorative Watering Cans as Functional Art Pieces
Choosing a decorative watering can that functions as an art piece is not just practical; it adds aesthetic value to your plant care. These watering cans become a focus in your indoor space, hinting at your personal style and love for gardening. When not in use, they can sit on a shelf or table, merging with your home’s decor as a standalone sculpture. Many owners feel proud to display these cans as part of their interior landscape.
Statement Designs: The unique designs of these decorative watering cans turn them into conversation starters. An artistic watering can might feature intricate patterns, bold graphics, or hand-painted details that showcase your personal taste.
Material Craftsmanship: Craftsmanship is central to these art pieces. The materials used, such as hand-blown glass or custom-forged metal, bring a high-quality and unique touch that mass-produced items cannot match.
Versatility in Use: Despite their artfulness, functional art watering cans are crafted to be fully functional. This ensures you can water plants with ease while enjoying the beauty of your can.
Reflecting Personal Aesthetics: Whether you favor a bohemian, minimalist, or avant-garde style, there’s a decorative watering can to suit your aesthetic. It’s the perfect way to infuse your personality into the daily ritual of plant maintenance.
By selecting a watering can that is both a functional tool and a piece of art, you create a more engaging and visually pleasing plant care experience. It’s about celebrating the beauty of the everyday and bringing joy to what might once have been considered a mundane task.
Eco-Friendly Watering Can Options
In the pursuit of sustainability, eco-friendly watering can options have emerged. These cans support green living and reduce environmental impact. Made from biodegradable materials or recycled products, they help gardeners maintain eco-conscious practices.
Biodegradable Materials: Some eco-friendly cans are crafted from natural materials that decompose over time. For instance, bamboo, which is fast-growing and sustainable, is a popular choice. It breaks down after its useful life, leaving minimal environmental footprint.
Recycled Plastics: Manufacturers are repurposing plastic waste to create watering cans. This approach keeps plastics out of landfills and oceans. Plus, it reduces the need for new plastic production.
Upcycled Designs: Creative minds turn old items into unique watering cans. Old bottles or containers get a second life as a decorative watering can. This not only saves resources but also adds a personal touch to your gardening tools.
Water Conservation Features: Some eco-friendly cans include features that promote water conservation. They might have nozzles that control water flow or systems that reuse household water.
Sustainable Production Processes: The creation of the can matters as well. Brands that use solar power or other renewable energy in production are making strides. They offer products with a lower carbon footprint.
By choosing an eco-friendly decorative watering can, you contribute to a healthier planet. You also support the industry moving towards sustainable practices. Next time you’re shopping, consider options that are kind to the earth and stylish for your home.
Watering Can Materials: Pros and Cons
When selecting a decorative watering can, the material is a crucial factor to consider. Here’s a quick look at the pros and cons of various materials commonly used:
Metal Watering Cans:
Pros: Metal cans are sturdy and long-lasting. They can withstand frequent use. Their weight gives them a stable base when full, reducing the risk of tipping over. Over time, metals like copper develop a unique patina adding to their charm.
Cons: They can be heavy, especially when filled with water, making them less ideal for those with limited strength. Metal cans may rust if not properly cared for. They are also usually more expensive than plastic options.
Plastic Watering Cans:
Pros: Plastic is lightweight, making it easy to carry, even for those with less hand strength. It’s often more affordable and comes in a variety of colors.
Cons: Plastic can degrade over time, especially when exposed to sunlight, leading to cracks and leaks. Some may not like the feel of plastic or its appearance compared to metal or ceramic cans.
Ceramic Watering Cans:
Pros: Ceramic offers a classic look and can be glazed in many decorative finishes. They often have intricate designs and can serve as a decor piece.
Cons: They are fragile and can crack or break if dropped. Ceramic cans are also heavier and typically more expensive due to their craftsmanship.
Stainless Steel Watering Cans:
Pros: Stainless steel is rust-resistant and durable. It has a sleek, modern appearance and is often used in contemporary designs.
Cons: These can show water spots and fingerprints, requiring more maintenance. Like other metal cans, they can be heavier and pricier.
When choosing your decorative watering can, weigh the pros and cons of each material against your needs and style preferences. Consider durability, weight, cost, and aesthetics to find the perfect fit for your indoor plant care.
Tips for Choosing the Right Watering Can for Your Plants
Selecting the correct decorative watering can for your indoor plants involves more than just style. Here are some tips to help you make the best choice for the health of your plants and the aesthetics of your home.
Consider Plant Needs: Each plant has distinct watering requirements. Ensure the can’s size and spout design fit the needs of your plant species.
Evaluate Space: Look at your indoor space. Choose a size that is easy to handle and store in your home.
Check the Spout: Long spouts reach the base of plants with ease, preventing leaf wetness. A detachable spout can offer versatility.
Test Ergonomics: Pick it up, if possible. It should feel comfortable in your hand, even when full.
Think About Durability: A sturdy can lasts longer. Metal can be strong, but also heavy. Plastic is light but may not last as long.
Assess Capacity: A larger capacity means fewer trips to refill, but it will be heavier. Balance convenience with comfort.
Match Your Decor: A decorative watering can should also fit your room’s style. Choose one that complements your interior.
Look for Extra Features: Measurement markings and filters are helpful for precise and clean watering.
By keeping these tips in mind, you’ll find a watering can that serves as a practical tool and enhances your home decor. Remember, the best choice will blend functionality with personal taste, making plant care a pleasure.
Creative DIY Watering Can Ideas
Adding a personal touch to your gardening tools can be rewarding, and DIY watering can ideas offer just that. Here are some creative suggestions to get you started:
Repurpose Household Items: Look around for items that can be transformed. An old teapot or a milk jug can become a unique watering can with a few modifications. Drill holes in the lid for a makeshift spout.
Decorate with Paint: Give an old can a new life with a coat of paint. Use stencils to add patterns or let your creativity flow with freehand designs. Make sure to use waterproof paint.
Add Comfort to Handles: Wrapping the handle with twine or soft fabric can add comfort and style. It’s a simple change that makes a big difference in handling the can.
Create a Mosaic Look: Glue pieces of broken ceramic or glass to a plain watering can. This not only recycles but also creates a colorful masterpiece.
Incorporate Nature: Attach shells, stones, or wooden elements to your can. These can give a rustic or beachy feel to your watering routine.
Go Green with Bottles: Plastic bottles come in handy for small plants. Poke holes in the cap, fill with water, and you have an instant watering device.
By exploring these DIY options, you’re on your way to having a decorative watering can that’s both functional and expressive of your personal style.

Choosing the Perfect Small Watering Can for Indoor Plants
Overview of Small Watering Cans for Indoor Use
When tending to indoor plants, the right tools matter. A small watering can for indoor plants is vital for thorough, gentle watering. These cans come in various styles and sizes, tailored for the indoor gardener’s needs. They are designed for ease of use in limited spaces such as apartments or offices where large garden equipment would be impractical.
Efficient small watering cans reduce spillage and help target water flow to the plant’s base, not the leaves. This ensures the roots receive the moisture they need without wasting water. Comfortable handles and long spouts help reach plants with ease. Furthermore, these watering cans often boast aesthetic appeal, doubling as decor. They’re not just functional tools but part of the indoor landscape.
Utilizing a small watering can for indoor plants promotes healthy growth. It allows for precision in watering frequency and volume—a key factor in plant care. Remember, over-watering and under-watering can both harm your plant babies. Thus, a suitable small watering can is an investment in your indoor garden’s success and your plants’ longevity.
The Importance of Proper Watering for Indoor Plants
Proper watering is crucial for the health of indoor plants. Each plant has distinct moisture needs. Over-watering can lead to root rot, a common issue that harms or even kills plants. Conversely, under-watering stresses plants. They may wilt, drop leaves, or stop growing. Finding a balance is key.
A small watering can for indoor plants helps you control the water amount. It ensures you give just enough to keep the soil moist, not soggy. Most indoor plant species thrive in evenly moist soil. Hence, frequent light watering is often better than soaking the soil less often.
Using a small watering can also prevents water from splashing on the leaves. Wet foliage makes plants prone to fungal diseases. By directing the water straight to the soil, you promote root growth. This strengthens plants over time.
Moreover, proper watering with a small can keeps plants looking attractive. It helps maintain the aesthetic value of your indoor garden. Well-cared-for plants contribute to a pleasant indoor atmosphere. They can also improve air quality by increasing humidity levels.
In summary, using a small watering can for indoor plants ensures careful, precise watering. This contributes greatly to the health and beauty of your indoor garden. Remember, proper watering is as important as the right light, soil, and nutrients.
Factors to Consider When Choosing a Small Watering Can
Choosing the right small watering can for indoor plants is crucial. It’s not just about picking any can. You must consider a few factors to ensure you end up with the perfect one for your green friends. Here are key points to keep in mind:
- Size and Capacity: Think about how many plants you have and their water needs. A too-large can will be cumbersome, while a too-small one will mean more refilling trips.
- Material: Options include plastic, metal, and ceramic. Plastic is lightweight and affordable. Metal is durable and often has a classic look. Ceramic adds a decorative touch but can be heavy.
- Design and Comfort: Look for a can with an ergonomic handle. It should feel comfortable in your hand. Also, consider if you prefer a traditional design or a modern look.
- Spout Length and Design: A long spout can reach plants better and control the water flow. Some spouts have a detachable rose that distributes water evenly.
- Weight: Once filled, the can should still be easy to handle. Test the weight when buying, if possible, to avoid strain on your wrists.
- Ease of Filling: The opening should be wide enough to fill easily under most sinks. However, it should not be so wide that it causes spillage when pouring.
- Durability: You want a can that will last. Check reviews or ask for recommendations to find a reliable watering can.
- Price: Set a budget but remember, investing more in a quality product can save money in the long run.
- Aesthetic Preference: If you consider your watering can part of your decor, choose a style and color that match your space.
Reviewing these factors will help guide your decision when choosing a small watering can for indoor plants. With the right tool, watering becomes a simple, soothing routine benefiting both you and your plants.
Best Materials for Indoor Watering Cans
When selecting a small watering can for indoor plants, material choice is key. Each material offers benefits and potential drawbacks tailored to gardening needs. Here’s a quick guide to the best materials:
- Plastic: Plastic cans are lightweight and affordable, ideal for everyday use. They come in various colors and are resistant to rust. However, they may be less durable than other materials.
- Metal: Metal watering cans are sturdy and enduring; often providing a rustic or sophisticated look. They can be made of stainless steel or galvanized metal, which resist rusting. But, they might be heavier and more expensive than plastic.
- Ceramic: Ceramic offers an elegant, decorative option. These cans can double as a piece of art in your home. Despite their beauty, they are heavier and can break if dropped.
- Glass: While less common, glass watering cans add a contemporary flair. They allow you to see the water level, but they’re fragile and best used for delicate watering tasks.
In conclusion, the best material for a small watering can for indoor plants depends on your preferences for weight, durability, functionality, and design. Consider how often you’ll use the can, your budget, and whether you want it to complement your interior decor.
Top Features to Look For in a Small Watering Can
When searching for the perfect small watering can for indoor plants, you should consider several top features. These features will ensure ease of use and adequate care for your plants. Let’s explore what to look for:
- Adjustable Spout: A detachable or adjustable spout allows you to control the water flow. This is crucial for different plant needs.
- Ergonomic Handle: A well-designed handle reduces hand fatigue. Look for a handle that feels good to hold and balances well when the can is full.
- Water Level Indicator: If you have a translucent or clear watering can, a water level indicator is helpful. It shows how much water is left.
- Balance and Stability: A good watering can should not tip over easily. It should remain stable when you set it down, even when it’s full.
- Fine Rose Attachment: For delicate plants, a rose attachment that disperses water gently is a plus. It mimics soft rain and reduces impact on the soil.
- Easy to Clean: Your watering can should be simple to clean. Smooth, accessible surfaces help prevent mold or bacteria build-up.
- Fill Hole Size and Position: The fill hole should be big enough to pour water into without spilling. But it shouldn’t make pouring out difficult.
- Aesthetic Design: Many people like their watering cans to look good. Find one that fits your style and adds to your home decor.
By keeping these features in mind, you will find a small watering can that not only does the job but makes indoor gardening a more enjoyable activity.
Popular Brands and Models of Small Watering Cans
When it comes to finding the perfect small watering can for indoor plants, several brands stand out. They offer models that hit the mark in design, functionality, and durability. Here are a few popular choices:
- Haws: Known for high-quality, Haws offers beautiful metal and plastic cans. Many feature a long spout perfect for reaching plants. Their ergonomic designs make watering comfortable and precise.
- Ikea: Ikea’s watering cans are sleek and modern. They come in economical options, but don’t skimp on design or usability.
- Bosmere: Bosmere cans often include a detachable rose and are praised for balance and ease of pouring.
- Oxo: Oxo watering cans are best known for convenience. Their cans typically have a comfortable grip and are easy to fill and clean.
- Gardman: Gardman models bring both functionality and style. They offer metal cans that are durable and sometimes feature ornate designs.
- Bloem: For those who prefer plastic, Bloem provides lightweight and colorful options that resist rust and are easy to handle.
- Fiskars: Fiskars is well-regarded for a balance between form and function. Their cans may include spouts with adjustable flow for versatile watering.
Each of these brands has a variety of models to offer, ensuring you’ll find a small watering can that fits your indoor gardening needs perfectly.
Care and Maintenance Tips for Your Small Watering Can
Taking care of your small watering can is essential for its longevity. Here are simple tips to maintain it:
- Rinse After Use: Always rinse your can after watering. This helps prevent mineral buildup from the water.
- Dry Properly: Let your can air dry. Turn it upside down to avoid water collecting and causing rust or mold.
- Store Inside: If possible, keep your can indoors. This protects it from weather damage.
- Check for Leaks: Regularly check for leaks or cracks. Fix them early to avoid water waste.
- Clean Monthly: Give your can a thorough clean monthly. Use mild soap and warm water. Rinse well.
- Inspect Spouts and Roses: Look at spouts and roses for clogs. Clear them out to ensure even water flow.
- Handle with Care: Be gentle with your can, especially if it’s made of materials like ceramic or glass that can break easily.
- Avoid Chemicals: Don’t use harsh chemicals to clean your can. They can damage it over time.
- Refresh the Look: If your can is metal, you might need to paint it occasionally. This can prevent rust and keep it looking new.
With these care tips, your small watering can for indoor plants will remain a reliable tool for your gardening needs. Plus, it will continue to look great as part of your home decor.

DIY Small Watering Can Ideas for Plant Enthusiasts
For those who love a touch of personality and creativity in their plant care routine, DIY small watering cans are a fantastic project. Not only are they practical, but they also allow you to tailor the design to your aesthetic preferences and functionality needs. Here are some DIY ideas that plant enthusiasts can try:
- Recycled Containers: Turn an old plastic bottle into a small watering can. Simply poke holes in the cap for a makeshift rose and decorate the exterior.
- Painted Cans: Take a simple metal can and give it new life with waterproof paint. Choose colors and patterns that match your space.
- Decorative Elements: Glue on stones, shells, or beads to personalize your watering can. These elements add charm and texture.
- Upcycled Glass Bottles: Glass wine or liquor bottles make elegant watering cans. Fit them with spouts or drill holes in the cork for a delicate flow.
- Wooden Handles: Add a wooden handle to a metal can for a rustic look. It’s functional and brings a natural feel to your gardening tools.
- Fabric Wraps: Cover a plastic watering can with fabric for a chic, soft appearance. Use weather-resistant fabrics for durability.
- Chalkboard Labels: Stick a chalkboard label onto your can. Write plant names or watering schedules on it for organized care.
With these DIY small watering can ideas, you’ll have a functional and unique tool for your indoor garden. They’re perfect for making the task of watering your plants a little more special and personal.
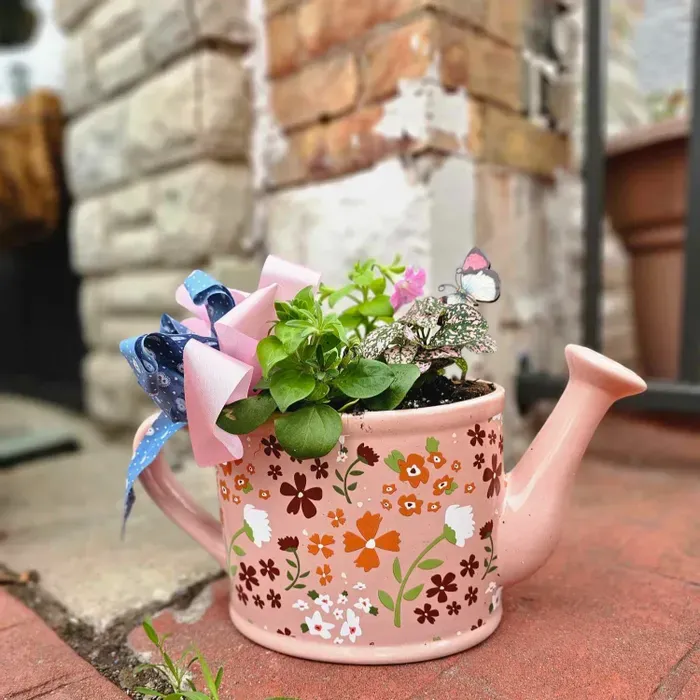
Creative Plant Watering: Using the Watering Can with Flowers
The Aesthetic Appeal of Watering Cans with Flowers
Watering cans with flowers charm any garden space with their allure. They blend function and beauty, creating a delightful visual experience for gardeners and onlookers alike. Here are some aspects that enhance their aesthetic appeal:
- Vibrant Colors and Patterns: Many watering cans come in bright colors and decorative patterns. When filled with flowers, they become vibrant garden highlights.
- Varied Shapes and Sizes: From classic to modern designs, watering cans offer diverse shapes that cater to personal style while serving as planters.
- Decoration and Utility Combined: A watering can with flowers is not just a tool but a decor piece. It nourishes plants and embellishes your garden’s look.
- Seasonal Themes: You can switch flowers seasonally, creating themes that keep your outdoor space fresh and inviting year-round.
- Natural Contrast: The metallic or plastic sheen of the can contrasts with the softness of the blooms. This contrast draws the eye and lends a touch of sophistication.
Incorporating a watering can with flowers can transform the way you view garden maintenance. It turns a routine task into a celebration of beauty and creativity. The next time you reach for your watering tool, consider the charming effect it could have when adorned with a floral arrangement.
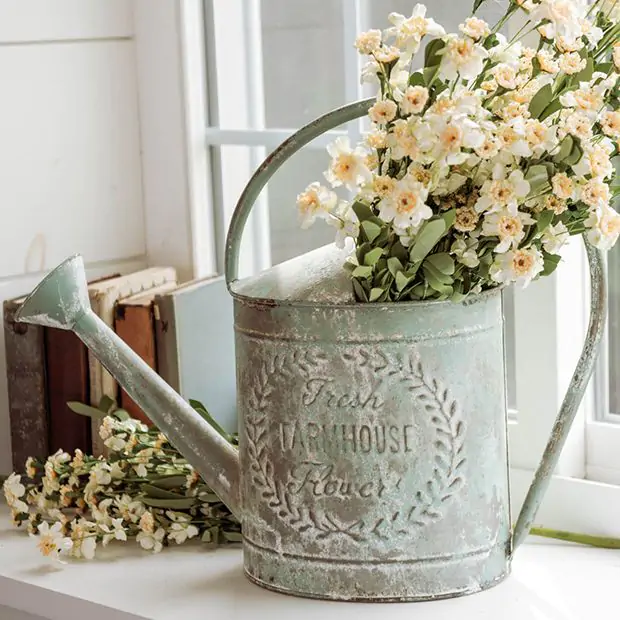
Choosing the Right Watering Can for Decorative Plant Care
Selecting the right watering can for both plant care and decoration is crucial. Here are factors to consider:
- Material: Choose between durable metal cans or lightweight plastic. Each has its own visual appeal.
- Size and Capacity: Match the size of the can to the size of your garden and the water needs of your plants.
- Design and Pattern: Look for cans with attractive patterns or colors that complement your outdoor space.
- Spout Type: A long, slender spout allows for precise watering, while a broader spout is good for general use.
- Ergonomics: Ensure the handle is comfortable to grip, even when the can is full.
- Balance: A well-designed watering can should be balanced, making it easier to carry and pour.
Remember, the key is to find a balance between functionality and aesthetics that fits your gardening style. The watering can you choose should not only be suitable for your practical needs but also enhance the beauty of the space it occupies.
Innovative Uses for Watering Cans in Garden Design
Garden design thrives on creativity, and integrating watering cans with flowers elevates it further. Here are some innovative ideas to consider:
- Create a Hanging Garden: Suspend watering cans with strong wires or ropes. Fill them with cascading blooms to craft a vertical focal point.
- Pathway Edging: Line your garden paths with watering cans filled with flowers. They provide a charming border and guide visitors along the walkway.
- Herb Towers: Stack cans strategically to build a tower. Plant herbs in each for a practical, space-saving garden piece.
- Watering Can Fountain: Transform a can into a fountain by adding a pump. Water flowing out the spout creates a serene garden sound.
- Garden Lighting: Place solar lights inside clear watering cans for a magical evening glow.
These ideas blend decoration with innovation, making watering cans key players in garden design. They add whimsy and a touch of the unexpected to any garden space.
Essential Tips for Watering Plants with Decorative Cans
When using a watering can with flowers for watering plants, you should keep a few things in mind to ensure your plants thrive while maintaining the can’s decorative charm. Here are some essential tips:
- Check Drainage: Ensure the can has proper drainage. This prevents water from pooling and damaging the flowers.
- Water Evenly: Supply an even water flow to avoid overwatering some plants while under-watering others.
- Mind the Weight: A full can can be heavy. Fill it to a manageable weight to prevent spills and strain.
- Keep Clean: Rinse the can after each use to keep it free of dirt and debris. This preserves its beauty and function.
- Monitor Plant Needs: Different plants need different amounts of water. Tailor your watering habits to each plant’s unique requirements.
- Avoid Wet Leaves: Aim for the soil rather than the leaves to reduce the risk of leaf diseases.
- Use Room Temperature Water: Cold water can shock plants. Use water that is at room temperature.
By paying attention to these tips, you’ll cater to your plants’ watering needs without sacrificing the aesthetic value of your decorative watering can with flowers. This balance of practicality and style can make your garden care routine a true joy.
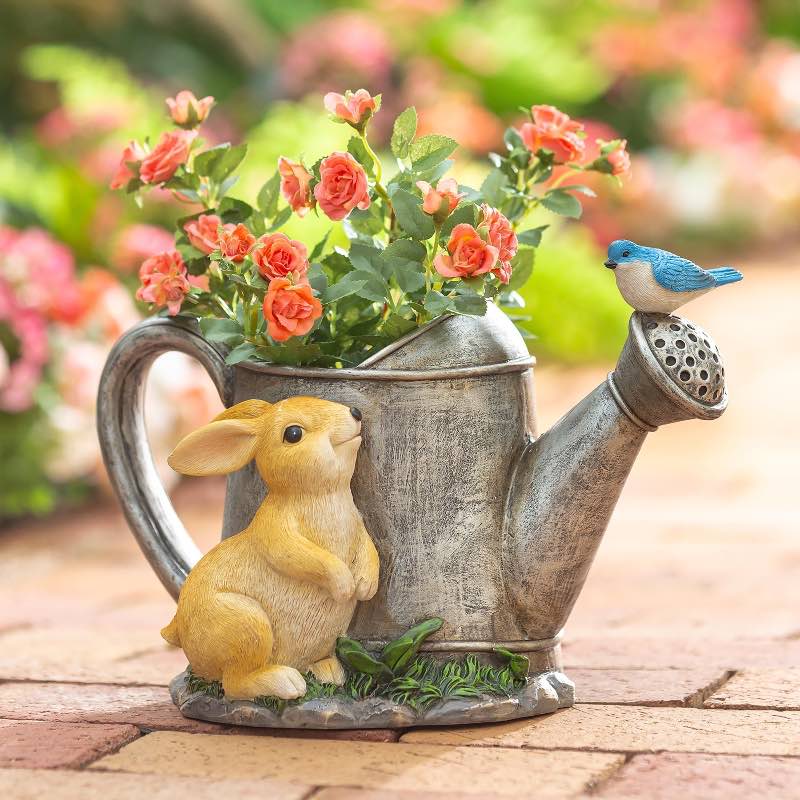
The Benefits of Adding Flowers to Your Watering Routine
Bringing flowers into your watering routine has numerous benefits that go beyond their visual charm. They serve to create a more enjoyable and engaging gardening experience. Here are some reasons to consider adding flowers to your watering can:
- Boosts Mood: The presence of flowers triggers happy emotions and heightens feelings of satisfaction. Watering plants becomes a more uplifting activity.
- Encourages Consistency: With flowers attached to your watering routine, you’re more likely to stick to a watering schedule. It adds delight to a regular task.
- Improves Air Quality: Flowers can help clean the air around them. As you water your plants, you’re also helping to purify your garden environment.
- Attracts Pollinators: Flowers added to watering cans may attract bees, butterflies, and other pollinators. This is good for your garden’s health.
- Enhances Learning: Gardening with a decorative watering can teaches about various plant needs and flower varieties. It’s an education every time you water.
- Inspires Creativity: A flowering watering can inspires you to think creatively about your garden design. It adds a touch of artistry to garden work.
By integrating a watering can with flowers into your gardening routine, you’re not only making your space beautiful but also enriching your experience with every pour. Embrace the functional and emotional perks that this lovely combination can provide.
Crafting Your Own Floral Watering Can
Crafting a floral watering can is simple and rewarding. Here’s how you can create one:
- Choose Your Can: Pick a watering can that reflects your style. Metal or plastic, select one that’s easy to handle.
- Select Flowers: Go for flowers that match the can’s look. Choose blooms that are durable and easy to care for.
- Prepare the Can: Clean the watering can thoroughly. Drill additional holes if needed for drainage.
- Plan Your Design: Decide where the flowers will go. Think about the arrangement based on the can’s shape.
- Add Soil: Fill the can with proper soil. Use quality potting mix to support plant health.
- Plant the Flowers: Gently plant the flowers in the soil. Ensure they’re spaced well for growth.
- Water Your Creation: Use a gentle flow to water the plants. Avoid disturbing the soil and flowers.
- Place Strategically: Position your floral watering can where it’s visible and adds charm to the space.
Creating a watering can with flowers can be a delightful weekend project. It adds a personal touch to your garden and can serve as a beautiful centerpiece. Remember to keep the keywords ‘watering can with flowers’ in mind as you plan your project, ensuring your creation is as practical as it is picturesque.
Maintenance and Care for Flower-Adorned Watering Cans
Maintaining a watering can with flowers requires attention to detail. Follow these simple steps for lasting charm and function:
- Regular Cleaning: Wash your can inside and out to prevent dirt buildup. Use mild soap and water.
- Inspect for Damage: Look for rust on metal cans or cracks in plastic. Repair or replace as needed.
- Adequate Drainage Check: Make sure there are enough holes at the can’s bottom. This prevents root rot in flowers.
- Protect from Weather: Store the can inside or in a sheltered spot when not in use. This keeps the flowers safe from harsh conditions.
- Refresh the Flowers: Change out wilted blooms. This keeps your can looking fresh and attractive.
- Frequent Water Changes: Change the water regularly to keep it clean for both plants and flowers.
- Sunlight Monitoring: Place the can where it gets suitable sunlight. Ensure it’s not too harsh for the flowers.
By carefully maintaining your watering can with flowers, you’ll enjoy its beauty for seasons to come. It becomes a standout feature in your garden that blends functionality with an eye-catching display.
Incorporating Watering Cans with Flowers into Different Garden Styles
Incorporating a watering can with flowers into various garden styles can elevate the look of your outdoor space. Here’s how you can add this creative touch, while considering different garden styles:
- Cottage Gardens: For the classic cottage garden, choose vintage or antique-style watering cans. Fill them with a mix of wildflowers and herbs for a rustic charm.
- Modern Gardens: Opt for sleek, metallic watering cans with bold-colored flowers. This creates a striking contrast that complements the minimalist feel of a modern garden.
- Balcony Gardens: Space is at a premium here. Use small watering cans to add greenery without taking up much room. They’re perfect for perching on railing edges or small tables.
- Vegetable Gardens: Amidst the veggies, a watering can with bright flowers can be both functional and visually appealing. It can also act as a pollinator attractor, aiding in vegetable growth.
- Zen Gardens: In a tranquil Zen garden, place a simple, elegant watering can with serene white or pastel flowers. It can add to the calming effect of the space.
- Children’s Gardens: Engage kids with colorful, playful watering cans. Fill them with brightly hued, hardy flowers that can withstand a bit of playful neglect.
- Butterfly Gardens: Attract more butterflies by choosing flowers they love. Lavender and daisies in a watering can will look picturesque and invite these beautiful creatures.
No matter the garden style, a watering can with flowers can find its place. It not only adds a touch of beauty but also reminds us to nurture nature regularly. By using watering cans creatively, you make the act of watering plants more enjoyable and your garden more inviting.
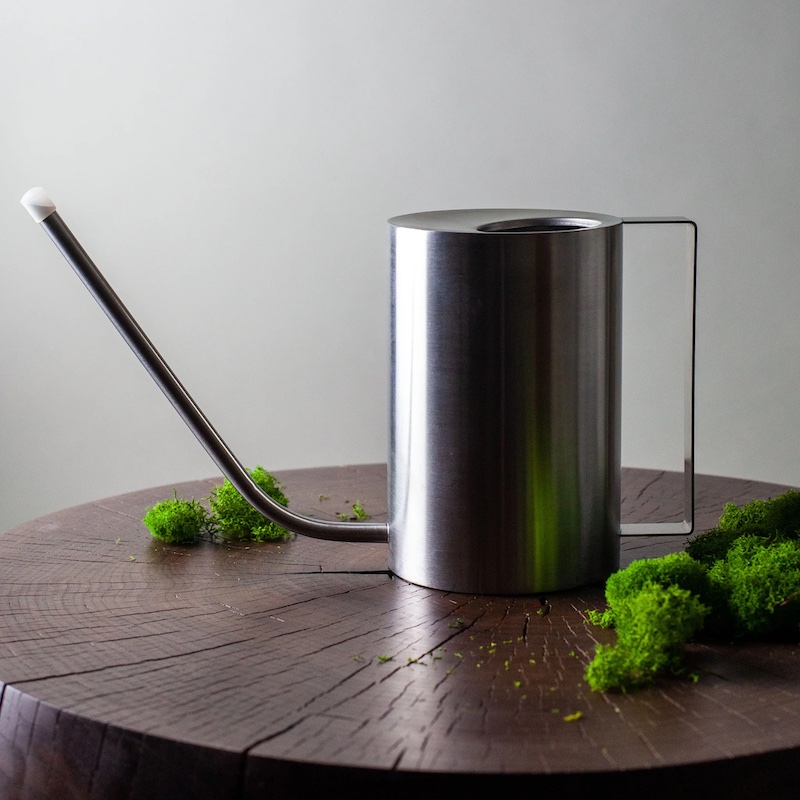
The Innovative Modern Watering Can for Every Gardener
The Evolution of Watering Cans: From Traditional to Modern
The watering can has come a long way from its humble beginnings. Earlier models were simple containers with a spout, often made from metals that would corrode over time. As gardening became a popular pastime, the need for more efficient and comfortable-to-use watering cans grew. This led to the development of the modern watering can, incorporating new features to cater to today’s gardening enthusiasts.
Modern watering cans boast a fusion of form and function. They incorporate ergonomic handles and spouts designed for precise watering. Gone are the days of heavy, rust-prone metal cans. Now, gardeners have the option to choose from a variety of materials, including lightweight plastics and rust-resistant metals. The aesthetics have also changed, with many modern watering cans showcasing sleek and contemporary designs that are as decorative as they are functional.
As gardens vary in size and complexity, so too have watering cans evolved to meet these needs. From basic designs for the casual indoor plant keeper to sophisticated models for the extensive outdoor gardener, the modern watering can offers a tailored experience. They can include features like adjustable spray nozzles, easy-to-fill openings, and comfortable grips, all while keeping the style in mind. With a modern watering can, gardeners can nurture their plants with precision and ease, making the act of watering less of a chore and more of a pleasurable gardening ritual.
Key Features of a Modern Watering Can
A modern watering can is not just a container for water; it’s a gardener’s ally. Here are key features that make it stand out:
Ergonomic Design
An ergonomic design ensures comfort and ease of use. Look for a watering can with a handle that is easy to grip. It should balance well in your hand, even when full. The best designs reduce strain on your wrist and make watering a breeze.
Durable Materials
Today’s watering cans use materials that last. Choose ones made from lightweight plastics or stainless steel. These materials resist rust and can handle sunlight exposure. Look for a watering can that feels sturdy yet not too heavy.
Precision Watering: Spouts and Nozzles
A modern watering can should deliver water right where it’s needed. Long spouts and adjustable nozzles make this possible. They help you reach under leaves and direct water to the soil, not the foliage.
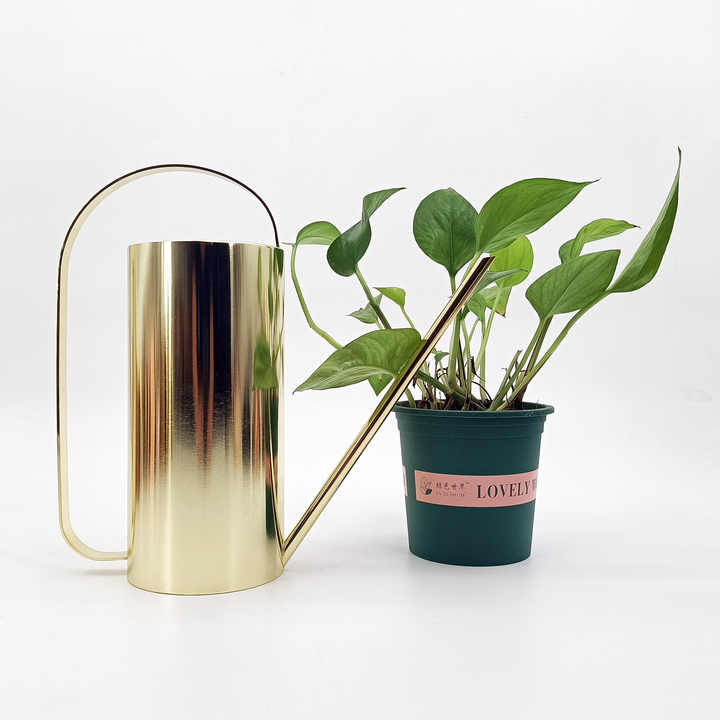
Types of Modern Watering Cans
When selecting a modern watering can, one must consider the setting they will use it in. Different environments require unique features for optimal functionality. Below are types of modern watering cans designed for specific uses.
Indoor Watering Cans
For indoor plant care, watering cans are compact and designed to prevent water from spilling. An indoor watering can often has a slender spout for targeted watering, helping to avoid water waste. Its size is perfect for fitting into tight spaces between pots. The lightweight nature of these cans makes them easy to maneuver around the home.
Outdoor Watering Cans
Outdoor watering cans cater to the demands of a larger garden space. They come with greater capacity, often ranging from one to several gallons. Outdoor cans may feature a more durable build to withstand the elements. They also have broader spouts or attachable heads for widespread irrigation, making them suitable for a variety of plants.
Self-Watering Cans
Self-watering cans provide a solution for gardeners who cannot water their plants daily. They come with a mechanism that slowly releases water over time. This ensures that plants receive consistent moisture, even in the gardener’s absence. These cans are ideal for both indoor and outdoor use and are particularly useful for diligent plant care during busy schedules or vacations.
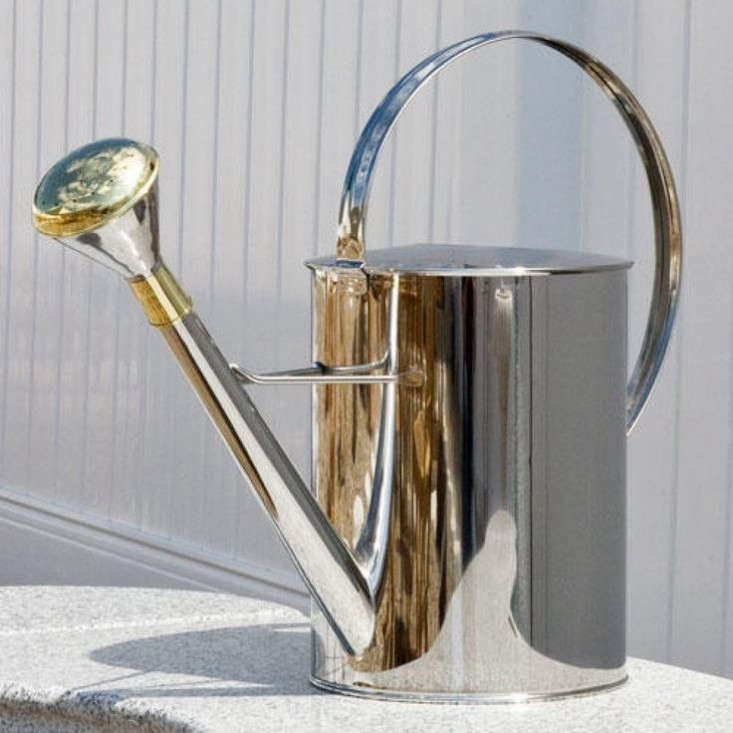
Must-Have Watering Cans for Different Types of Gardeners
Gardeners each have their unique needs, factoring in the plants they grow and the space available. A modern watering can should align with their gardening style and requirements. Gardening in various settings emphasizes the need for specialized watering cans. Below are the essential modern watering cans for different types of gardeners.
The Urban Gardener
Urban gardeners often deal with limited space and may have balcony gardens or small potted plants. A modern watering can for the urban gardener is compact and stylish. It should have a slender spout to navigate tight spaces and deliver water with precision. Urban gardeners benefit from models that are space-efficient and can be easily stored.
The Succulent Enthusiast
Succulents require a delicate touch and minimal water. Enthusiasts must invest in a modern watering can with a fine mist nozzle or a very narrow spout. This ensures gentle watering that avoids over-saturation of the soil. The ideal can is small, allowing for careful control and avoiding excess moisture.
The Vegetable Grower
Vegetable growers require a robust modern watering can with a larger capacity. This is crucial for tending to the water needs of vegetable beds efficiently. They may also need detachable, wider spouts or spray heads for even distribution of water across a larger area. Durability is key, as vegetable gardening involves frequent, often daily watering.
Innovative Watering Can Designs
When it comes to innovative design, modern watering cans have more to offer than ever before. Designers have taken both functionality and storage into account, pushing the boundaries of what a watering can can be. Two standout design advancements include collapsible watering cans and decorative options, which suit a range of gardening styles and storage situations.
Collapsible Watering Cans
Collapsible watering cans represent a leap in convenience and storage solutions. These cans are perfect for gardeners who struggle with limited space. Typically made from flexible materials like silicone, they expand to hold water when in use and collapse flat when empty. This feature makes them easy to tuck away in between uses. They are lightweight and often come with detachable spouts for easy cleaning. Ideal for the modern lifestyle, these cans blend functionality with smart design.
Decorative Watering Cans
In contrast, decorative watering cans double as garden art. These cans are crafted not just for watering but also to enhance the beauty of the space they inhabit. Made from materials like copper, ceramic, or elegantly painted metals, they often feature intricate designs. While these aren’t always the most practical for larger gardening tasks, they are perfect for displaying on a shelf or using for small, indoor plants. They bring a touch of elegance to the act of gardening and make for a great conversation piece.
How to Choose the Right Watering Can for Your Needs
Choosing the right modern watering can be vital. Your choice should match your gardening routine and the plants you care for. Consider these aspects before making your purchase.
Capacity and Size
The size of your garden influences your watering can’s capacity. For small indoor spaces, choose a compact watering can. Consider a larger one for outdoor gardens. Remember to balance size with comfort in handling.
Functionality Versus Aesthetics
Functionality should be top priority. But aesthetics matter too. Go for a watering can that performs well and aligns with your style. It should be easy to use and look good in your garden. Prioritize features like ergonomic handles and adjustable nozzles. But don’t overlook an appealing design that suits your taste.
Care and Maintenance for Your Watering Can
Proper care ensures your modern watering can lasts longer and remains effective. Follow these simple tips to maintain its condition.
Cleaning and Storage Tips
After each use, empty your watering can to prevent algae growth or sediment buildup. Clean it regularly with a mild soap solution and rinse thoroughly. Avoid harsh chemicals that could damage materials. Store the can in a dry place, away from direct sunlight to prevent fading and material degradation. If your can is collapsible, ensure it is dry before folding to avoid mildew.
Longevity and Replacement
Inspect your modern watering can often for signs of wear, such as cracks or rust. Replace any worn components, like o-rings or nozzles, to maintain functionality. With attentive care, a good quality watering can will serve you well for many seasons. When it’s time to replace your can, look for signs of irreversible damage or leaks. Proper disposal is also important. Recycle materials if possible and consider eco-friendly options for your next purchase. Regular maintenance paired with timely replacement will make your gardening efforts both enjoyable and sustainable.