Carburetor Maintenance: Cleaning Lawn Mowers
Recognizing Symptoms of a Dirty Carburetor
When your lawn mower struggles to start, the carburetor may be dirty. This small device mixes air and fuel to power the engine. If it’s gummed up or corroded, the engine won’t start. Watch for signs like the engine stopping soon after it starts, black smoke from the muffler, increased fuel use, or rough running. Over time, a dirty carburetor can cause overheating and complete engine stoppage. If these signs are ignored, the lawn mower might not start or could die during use. How to clean carburetor on lawn mower? Regular cleaning and maintenance of the carburetor can prevent these issues. It’s a crucial step in keeping your lawn mower running smoothly. So, knowing the symptoms is the first step to tackling carburetor issues before they turn into bigger problems. A well-maintained carburetor helps ensure your lawn mower starts and runs as expected, cutting your lawn efficiently without added stress or cost.
Locating the Carburetor on Lawn Mowers
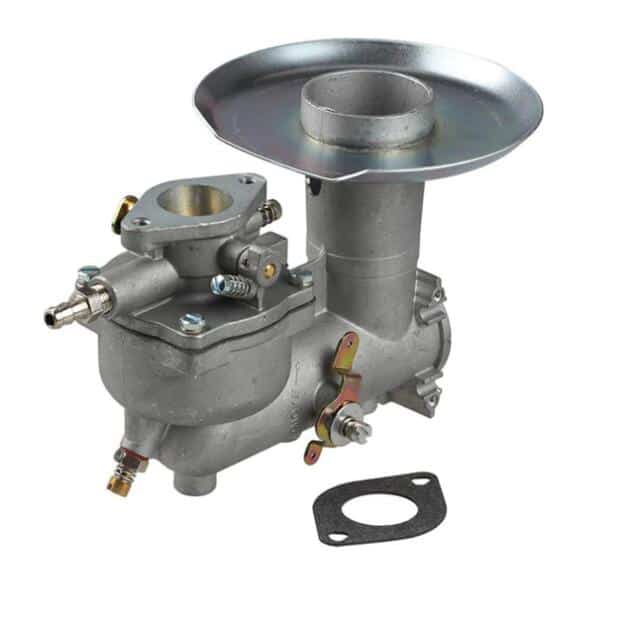
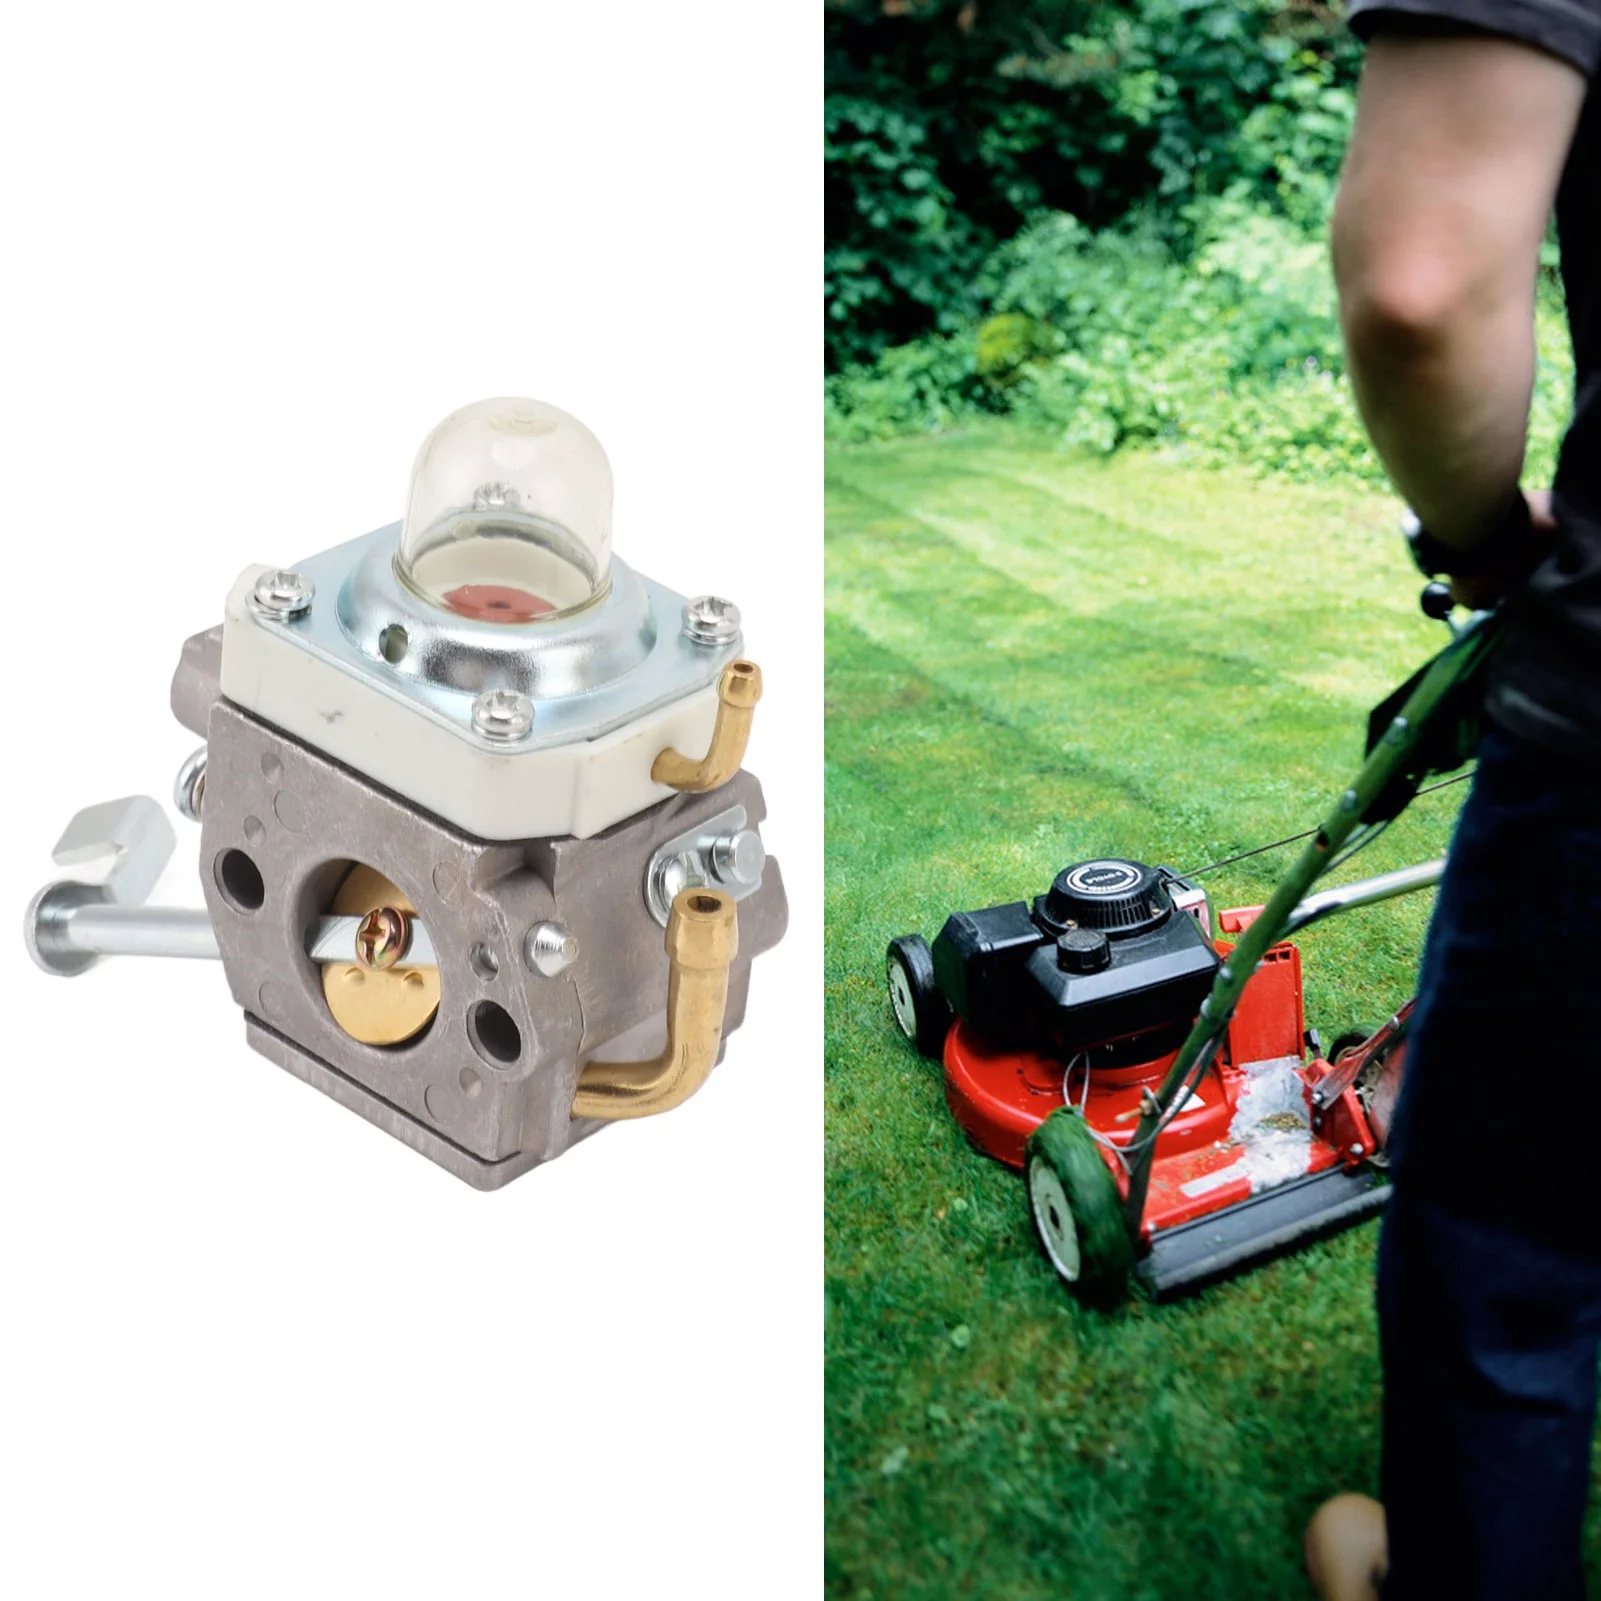
Before you can clean or check the carburetor, you need to find it. Typically, the carburetor is a small, metal part shaped like a box or cylinder. It’s located near the air filter and engine, held in place by screws or bolts.
To find the carburetor, follow the fuel line from the gas tank to where it connects to the engine. The connection spot is where the carburetor sits. If you’re still unsure, refer to your lawn mower’s owner manual. It should clearly state where the carburetor is located for your specific model.
Understanding the Function of the Carburetor
The carburetor on a lawn mower serves a crucial role. It mixes air and fuel for the engine to run. This mix is vital for combustion and, thus, the engine’s power. If the balance is off, the engine might not start or could run poorly. A clean carburetor ensures a smooth mix, which leads to efficient engine performance. Regular carburetor maintenance can prevent engine problems and prolong the mower’s life. Cleaning the carburetor is part of good lawn mower care. Without it, your mower may experience problems or stop running altogether. Remember, a fully functioning carburetor is key to a well-running lawn mower.
Preparing for Carburetor Cleaning
Before starting the carburetor cleaning process, prepare your workspace. Turn off the engine and ensure it has cooled down. This prevents burns during disassembly. Clean the external surface of the engine area to remove loose dirt and debris. This helps keep internal parts clean when you disassemble them.
Set up a well-lit, clean workbench. Organize your tools and supplies needed for the job. Items will include a screwdriver, nitrile gloves, carburetor cleaner, nut driver, socket set, needle-nose pliers, and a bucket for parts.
Disconnect the spark plug cable for safety. This ensures the engine does not start accidentally. Clear and secure your work area. This helps in keeping track of small parts and fasteners during disassembly. Preparations make the cleaning process smoother and safer.
Step-by-Step Process to Remove and Clean the Carburetor
Cleaning your lawn mower’s carburetor is vital for smooth operation. Here’s a simple guide to help you expertly remove and clean the carburetor.
- Turn Off the Mower: Ensure your mower is off and has cooled down. This reduces the risk of burns.
- Access the Carburetor: Start by removing the air filter to expose the carburetor. Depending on your model, you might need a screwdriver.
- Remove the Carburetor: Wear gloves for protection. Use a nut driver or socket set to undo the bolts securing the carburetor. Disconnect any linkage cables carefully.
- Clean External Parts: Spray carburetor cleaner over the exterior. This helps loosen grim and debris.
- Disassemble the Carburetor: Take apart the carburetor cautiously. Remember the arrangement of parts to ensure proper reassembly.
- Clean Internal Parts: Use carburetor cleaner to clean jets and other passages. You can soak the parts if they are very dirty.
- Reassemble and Reinstall: Once everything is clean and dry, put the carburetor back together. Reattach it to the mower, ensuring all connections are secure.
- Test the Mower: Start the mower to check if the carburetor functions well. Listen for smooth engine operation without interruptions.
Regular cleaning prevents common mower issues. Following these steps ensures your carburetor remains in good condition, improving your mower’s lifespan and performance.
Cleaning the Carburetor Without Removal
Cleaning your lawn mower’s carburetor doesn’t always require removal. Follow these steps for a quick clean.
- Turn Off the Mower: Ensure the mower is off and cooled down to avoid burns.
- Disconnect the Spark Plug: This prevents the engine from starting accidentally during the cleaning process.
- Remove the Air Filter: Check how it is attached—either by clips or screws—and remove it. Also, clean or replace the air filter as needed.
- Spray Carburetor Cleaner: Directly spray cleaner into the carburetor throat and over the jets. Manipulate the throttle and choke to work the cleaner into tough spots.
- Use Compressed Air: Following the cleaner, use compressed air to blow out debris from corners and jets.
- Reinstall the Air Filter and Spark Plug Wire: Once cleaning is complete, put the air filter and spark plug wire back in place.
By performing these steps, you help ensure your lawn mower runs efficiently without needing to remove the carburetor. Regular light cleaning can support optimal performance and extend the life of your mower.
Identifying When to Clean Your Lawn Mower Carburetor
Knowing when to clean your lawn mower’s carburetor is crucial. Look for signs of trouble. If you notice starting issues or inconsistent engine performance, consider cleaning. Also check for black smoke or excessive fuel consumption. These can indicate a dirty carburetor.
Remember, seasonal changes affect your lawn mower. After winter, give it a thorough cleaning. This prevents problems from prolonged inactivity. Also, if you use your mower frequently, more frequent cleanings may be needed.
Here are simple indicators that it’s time to clean the carburetor:
- The lawn mower is hard to start.
- The engine runs roughly or stalls during use.
- You see black smoke exiting the muffler.
- The mower consumes more fuel than usual.
Routine inspections can catch dirt buildup early. Visual checks of the carburetor may reveal grime and debris. If it’s been a year since your last cleaning, don’t wait for symptoms. Schedule a cleaning to maintain performance.
Remember, carburetor care is part of your mower’s overall health. Clean it regularly and your lawn mower will reward you with reliable service for years to come.
Conclusion and Final Maintenance Checks
In summary, keeping the carburetor on your lawn mower clean is essential for optimal performance. Follow the guide we provided to address common symptoms like rough running or trouble starting. You now know how to find and identify the carburetor, understand its critical role, and perform both removal cleaning and quick maintenance without removal.
After cleaning your lawn mower’s carburetor, there are a few final checks to ensure everything is in working order:
- Check the Engine: Start the mower and listen. A smooth, steady sound means a job well done.
- Look for Smoke: No black smoke should come from the muffler. If there is, recheck your work.
- Inspect Fuel Consumption: Over time, see if the mower uses fuel efficiently. Less consumption is better.
- Observe Mower Performance: The mower should start easily and run without stalling.
Timely carburetor maintenance, along with regular oil changes and blade sharpening, will help prolong the life of your mower. As you prepare for different seasons, remember to clean the carburetor after winter or before a period of long storage. Stick to a maintenance schedule and always address any issues promptly for lasting mower reliability.
How to clean carburetor on lawn mower? In conclusion, proper carburetor care is a crucial part of lawn mower maintenance. It guarantees fewer repairs and extends the life of your mower. With this knowledge and regular attention, you can ensure your lawn mower remains a dependable tool for your gardening needs.
White Smoke From Lawn Mower: Causes and Fixes
Introduction to Lawn Mower Smoke Issues
Encountering smoke while mowing your lawn can be alarming. White smoke from lawn mower when starting? Understanding why your lawn mower is emitting smoke is crucial to troubleshooting the problem effectively. Whether it’s black or white smoke from lawn mower when starting, various factors can be the cause, and they typically indicate something is amiss with your mower’s internal functions.
White or blue smoke often emerges due to oil-related issues. For instance, oil might have spilled onto the engine or the oil reservoir may be filled too much. Conversely, black smoke usually points to an over-consumption of gasoline, often due to carburetor problems or a dirty air filter.
Most of these issues are manageable with some basic mechanical knowledge and a thorough read through your mower’s manual. However, if the problem seems complicated or persists after you’ve attempted a fix, seeking professional lawn mower repair might be the best course of action. Let’s delve deeper into the types of smoke you might see and what they generally signify about the state of your lawn mower.
Types of Smoke Emitted by Lawn Mowers
White or Blue Smoke
White or blue smoke from a lawn mower generally signifies oil-related issues. This type of smoke typically arises when oil has spilled onto the engine or if the oil reservoir is overly full. Tipping the mower or mowing on excessive slopes can cause oil spills. If oil spills on the engine, the lawn mower may emit white or blue smoke until the excess oil burns off. Should you notice this type of smoke, check and adjust the oil levels and ensure that you’re using the proper oil type meant for your mower.
Black Smoke
Black smoke often indicates that the lawn mower is using too much gasoline. This usually results from a problem with the carburetor not mixing the right amount of air and gasoline or a clogged air filter that restricts airflow. If your lawn mower is emitting black smoke, consider checking the air filter first and replace it if necessary. Adjusting or cleaning the carburetor can also solve the issue. If black smoke continues even after these troubleshooting steps, it may indicate a deeper mechanical problem.
Common Causes of White Smoke
White smoke from lawn mowers is usually not a sign of a major problem. It often points to oil-related issues within the lawn mower’s engine. Let’s look at some common causes.
Oil Spill on the Engine
An oil spill on the engine is the most frequent cause of white smoke. This can happen when you change the oil or if the mower tips over. If you mow on steep slopes, oil can also spill onto the engine. The white smoke is simply the oil burning off. To fix it, clean any spilled oil and run the mower until the smoke clears.
Overfull Oil Reservoir
Putting too much oil in the mower can lead to white smoke. Check the oil level with the mower’s dipstick. If it’s above the ‘full’ line, drain some oil until it’s at the correct level. Then start the mower and let it run for a short while. Watching the smoke disappear should assure you that the problem is resolved.
Incorrect Oil Type or Grade
Using the wrong type or grade of oil can cause white smoke. Each lawn mower needs a specific oil type as recommended in the owner’s manual. If you’ve used the wrong oil, drain it and replace with the appropriate type. Work carefully to avoid spills and excess oil, and monitor for any further smoke emissions.
How to Diagnose and Fix White Smoke
When dealing with white smoke from a lawn mower when starting, a few steps can help you diagnose and resolve the issue efficiently. Here are some actions you can take to identify and fix the sources of white smoke.
Checking and Adjusting Oil Levels
Checking the oil level is imperative. Use the mower’s dipstick, found at the oil reservoir. First, remove the dipstick and clean it with a rag. Then, reinsert it completely and pull it out again to check the oil mark. If it’s above the ‘full’ line, you need to drain some oil. Carefully pour out a small amount and check again until the level is correct. Start the mower and observe; if white smoke continues, but lessens, it’s likely resolving.
Understanding the Role of the Carburetor
The carburetor plays a crucial role in regulating the air and fuel mixture. If this mixture is too rich with fuel, your mower might emit white smoke. Check for any blockages or dirt in the carburetor that might be affecting its function. Cleaning the carburetor with appropriate tools and solutions may solve the issue. If unsure, consult your mower’s manual for specific instructions or consider professional help.
Replacing the Air Filter
A dirty or clogged air filter might cause improper air intake, leading to an unbalanced mix and resultant smoke. Locate your mower’s air filter — usually situated in a metal or plastic box near the carburetor. Remove the filter and assess its condition. If it shows signs of significant dirt accumulation, replace it with a new one, following the specifications in the owner’s manual. Afterwards, run the mower to see if the smoke decreases, suggesting a resolved issue.
When to Seek Professional Lawn Mower Repair
Sometimes, DIY fixes for a smoking lawn mower don’t cut it. If you’ve tried troubleshooting with no luck, it’s time to call in the experts. Let’s discuss when professional help is needed.
Persistent Blue or White Smoke
If white or blue smoke from the lawn mower when starting persists even after correcting oil levels and ensuring the use of proper oil, there might be a deeper issue. Continuous smoke could mean oil leaks in parts you can’t see or reach, or it might signal wear in engine seals or gaskets. When smoke lingers after all your efforts, it’s wise to seek a repair service.
Ongoing Black Smoke Emission
Black smoke usually points to fuel issues. If changing the air filter and cleaning or adjusting the carburetor haven’t stopped the smoke, the problem may be more complex. Potential issues could be with the fuel pump, injector, or other engine components. Continuous black smoke, despite your repair attempts, suggests it’s time to get a professional’s opinion.
Dealing with lawn mower smoke can be tricky. If fixes are out of your range, or if you’re unsure about the cause, professional help can save you time and prevent further damage. Repair experts can offer the right diagnosis and treatment for your mower’s smoking issue.
Preventative Measures and Maintenance Tips
To keep your lawn mower running smoothly and smoke-free, routine maintenance is essential. Here are some preventative tips to help you maintain your lawn mower’s performance.
Regularly Checking Oil Levels
Make it a habit to check oil levels before each use. Doing so can prevent overfilling and oil spills. Use the dipstick to measure, and fill only to the recommended mark.
Proper Mowing Techniques to Avoid Oil Spills
When mowing, use flat surfaces to prevent oil from spilling over the engine. If you have to mow on slopes, keep them gentle – under 15 degrees when possible.
Keeping Air Filters Clean
Inspect the air filter frequently, especially in dusty conditions. Clean or replace the filter as needed to ensure optimal airflow and prevent that troublesome black smoke.
FAQs on Lawn Mower Smoke Problems
White smoke from a lawn mower when starting might cause concern. Here are answers to some frequently asked questions that can help you understand the issue better.
Can low oil cause white smoke?
Yes, low oil can lead to white smoke. Check your mower’s oil level if you see this smoke.
Can dirty air filters cause white smoke?
No, dirty filters often cause black smoke, not white. Black smoke means too much gas is burning.
Does white smoke always mean a blown head gasket?
White smoke does not always signal a blown gasket. It often suggests spilled oil or low oil.
How much white smoke is normal from exhaust?
Any white smoke from a lawn mower is not normal. Smoke indicates a potential issue to fix.
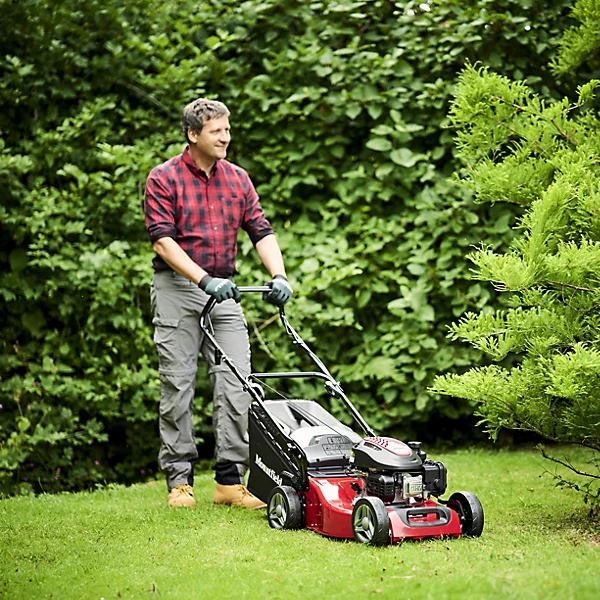
Fixing a Lawn Mower That Won’t Start Post-Winter
Common Reasons for Post-Winter Starting Issues
If your lawn mower won’t start after winter, a few common issues might be the cause. Stale fuel is a typical culprit for mowers that have sat unused for several months. Over the winter, fuel can degrade and lose its combustibility, making it difficult for the engine to start. Another common problem is the battery. Lawn mower batteries may lose their charge when not in use for extended periods. Moisture accumulation and corrosion of the battery contacts can also prevent the engine from starting. Spark plugs are another potential issue; they can become dirty or corroded during the off-season. Lastly, oil viscosity changes with temperature. Thickened, old oil may not lubricate the engine parts as needed for a smooth start. To avoid such problems, it’s crucial to perform proper maintenance before storing your mower for winter.
Signs of Stale Fuel in Your Lawn Mower
Knowing the signs of stale fuel can save you time and frustration. Watch for these indicators:
- Fuel Color Change: Fresh fuel is typically clear or has a light yellow hue. If it turns brown, it’s stale.
- Strange Odor: Stale fuel often has a sour or unpleasant smell, unlike fresh gasoline’s typical odor.
- Engine Trouble: If the mower is hard to start or doesn’t start at all, stale fuel may be the cause.
- Visible Gumming: Look for sticky residues, which are products of fuel degradation, around the fuel tank or carburetor.
If you notice any of these signs, it is likely that your lawn mower won’t start after winter due to stale fuel. It’s essential to address this problem promptly to prevent further issues.
Steps to Drain and Replace Stale Fuel
If your lawn mower won’t start after winter, stale fuel could be the problem. To fix this, follow these steps:
- Safety First: Always work in a well-ventilated area away from any flames or sparks. Shut off the mower completely.
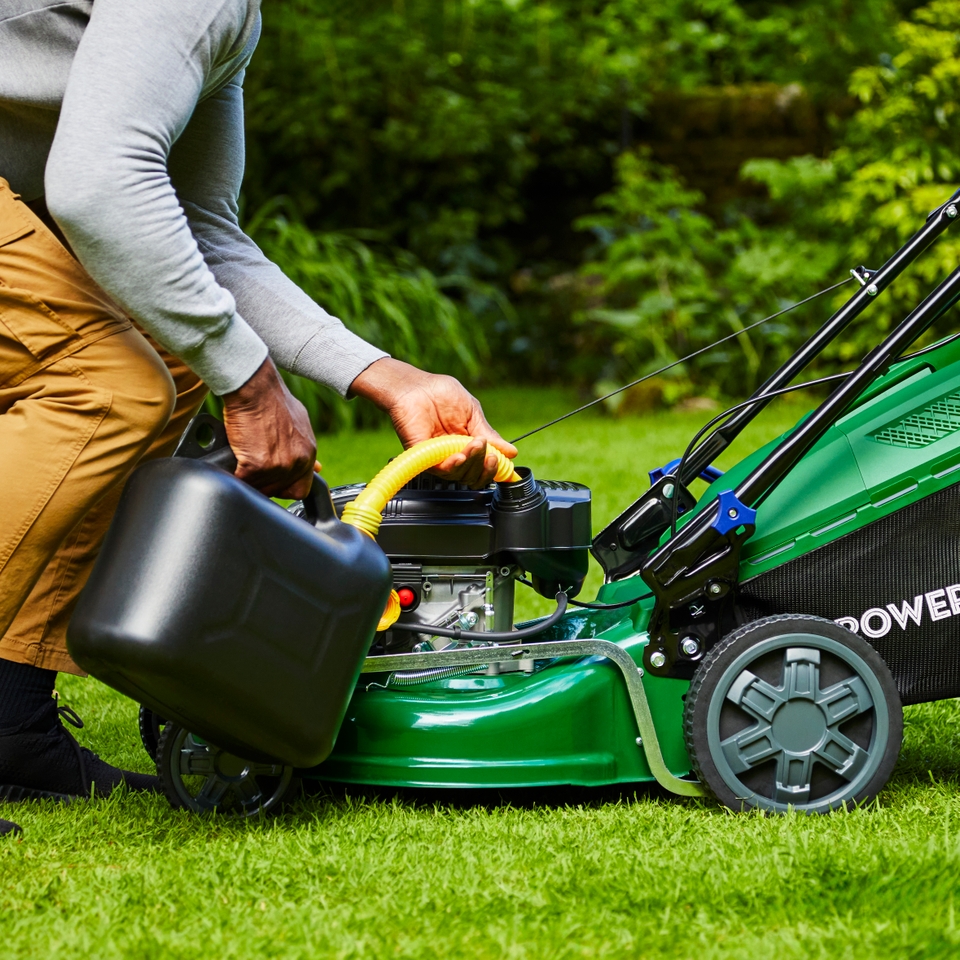
- Drain Old Fuel: Locate the fuel tank and carefully drain the stale fuel into an approved container.
- Dispose Properly: Take the old fuel to a recycling center or hazardous waste disposal facility.
- Clean the Tank: Wipe the inside of the tank with a clean cloth to remove any residue.
- Refill with Fresh Fuel: Use new, fresh fuel from a reliable source. Don’t use leftover fuel from the previous season.
- Check the Fuel Line: Ensure the fuel line is clean and free of blockages.
- Replace Fuel Filter: If your lawn mower has a fuel filter, now is a good time to replace it.
With fresh fuel in your lawn mower, it stands a better chance of starting smoothly after winter. This step is crucial in eliminating starting issues related to stale fuel.
Importance of Fresh Fuel for Lawn Mowers
Using fresh fuel for your lawn mower is crucial. It ensures a reliable start and optimal engine performance. During winter, your mower’s fuel can degrade and cause starting problems. Fresh fuel means better combustion, which is key for engine health. Here’s why fresh fuel matters:
- Prevents Engine Wear: Stale fuel can cause engine wear and tear. Fresh fuel keeps the engine clean.
- Enhances Performance: Fresh fuel helps your lawn mower run smoothly and efficiently.
- Reduces Maintenance: Using fresh fuel can cut down on maintenance needs and costs.
Make sure to fill up with new, high-quality fuel for the coming mowing season. Remember to avoid using last year’s fuel. It might have gone stale in the can. For the best care of your lawn mower, consider getting fuel from a garden machinery supplier. They usually stock the freshest options. If the mower doesn’t start after a fuel change, stale fuel might be left in the carburetor. You may need this part cleaned by a professional to solve the issue.
What to Do If Your Mower Still Won’t Start
If your lawn mower won’t start after winter even with fresh fuel, consider these tips:
- Check the Carburetor: Stale fuel can leave residue in the carburetor. It may need cleaning.
- Inspect Spark Plugs: Dirty or damaged spark plugs can prevent starting. Replace if necessary.
- Evaluate the Battery: Ensure the battery is charged. Clean any corrosion from contacts.
- Look at the Oil: Change old or thickened oil that can hinder engine movement.
- Clear Air Filters: A blocked air filter can stifle the engine. Clean or replace it.
- Review the Fuel Line: The line could be clogged. Also, check for cracks or damage.
- Safety Switches: Mowers have safety features. Make sure all safety devices are engaged.
- Consult the Manual: Your mower’s manual may have troubleshooting tips specific to the model.
If these steps don’t solve the issue, it may be time to seek help from a professional. They can pinpoint and fix complex issues. Remember, dealing with lawn mower repairs safely is crucial. If you’re unsure of any steps, professional assistance is the best choice.
Maintenance Tips to Prevent Future Winter Starting Problems
Preventive maintenance is key to ensuring your lawn mower starts smoothly after winter. Follow these simple tips to avoid common issues like stale fuel and battery problems.
- Stabilize the Fuel: Before winter storage, add a fuel stabilizer to the tank. This prevents the fuel from degrading.
- Run the Engine Dry: After adding stabilizer, run the mower until it stops. This ensures no fuel remains in the engine.
- Disconnect the Battery: Remove the battery and store it in a cool, dry place. Charge it periodically over winter.
- Change the Oil: Replace old oil with new, which helps protect the engine’s internal parts.
- Clean or Replace Spark Plugs: Dirty spark plugs can cause starting issues. Clean or replace them as needed.
- Lubricate Moving Parts: Apply lubricant to all moving parts to prevent rust and corrosion.
- Cover the Mower: Use a breathable cover to protect your mower from dust and moisture.
By implementing these maintenance tips, your lawn mower will be well-prepared for the next cutting season.
When to Seek Professional Help for Your Lawn Mower
Sometimes, despite your best efforts to troubleshoot, your lawn mower might still face issues that are too complex to handle on your own. In such cases, seeking professional help becomes necessary. Here are some scenarios when it’s advisable to call in the experts:
- Persistent Starting Issues: If your lawn mower won’t start after winter even after trying all the troubleshooting steps, it may have an underlying issue that requires professional attention.
- Complex Mechanical Failures: Problems like internal engine damage or failures in the transmission system are best handled by professionals.
- Electrical Issues: If there are signs of electrical faults such as non-responsive start switches or erratic behavior of the mower, these could indicate deeper electrical issues that need expert handling.
- Severe Fuel System Problems: If problems persist even after cleaning the carburetor and replenishing with fresh fuel, the fuel system might need a more thorough examination or repair which should be done by a technician.
- Safety Concerns: If at any point you feel that continuing to troubleshoot could be unsafe, or if the mower shows signs of potential safety hazards, it is best to consult with a professional.
Professionals have the tools, training, and parts to diagnose and fix issues more comprehensively. While it might cost more upfront, professional repair can save time and extend the life of your lawn mower, potentially preventing further issues during the cutting season.
Preparing Your Lawn Mower for the Cutting Season
Proper preparation can make your lawn mower start smoothly after winter. Here’s how you can prepare your mower for the upcoming cutting season:
- Check All Parts: Inspect your mower for any loose, damaged, or missing parts. Fix them before starting.
- Clean the Mower: Remove dirt, grass clippings, and debris from the mower’s undercarriage and blades.
- Sharpen Blades: Dull blades make cutting tough. Sharpen them for a clean cut.
- Lubricate Where Needed: Apply oil to moving parts to ensure they work smoothly.
- Check Tire Pressure: If your mower has tires, ensure they are properly inflated.
- Test the Controls: Make sure all levers and controls function correctly.
- Connect the Battery: If you disconnected it for winter, reconnect the battery.
If you’ve followed these steps but your lawn mower won’t start after winter, review the earlier troubleshooting tips again. These include checking for stale fuel, spark plug issues, and battery problems. Remember that regular maintenance is key to a hassle-free start. Each spring, make it a routine to prepare your mower, so you’re ready to go when the grass starts growing.
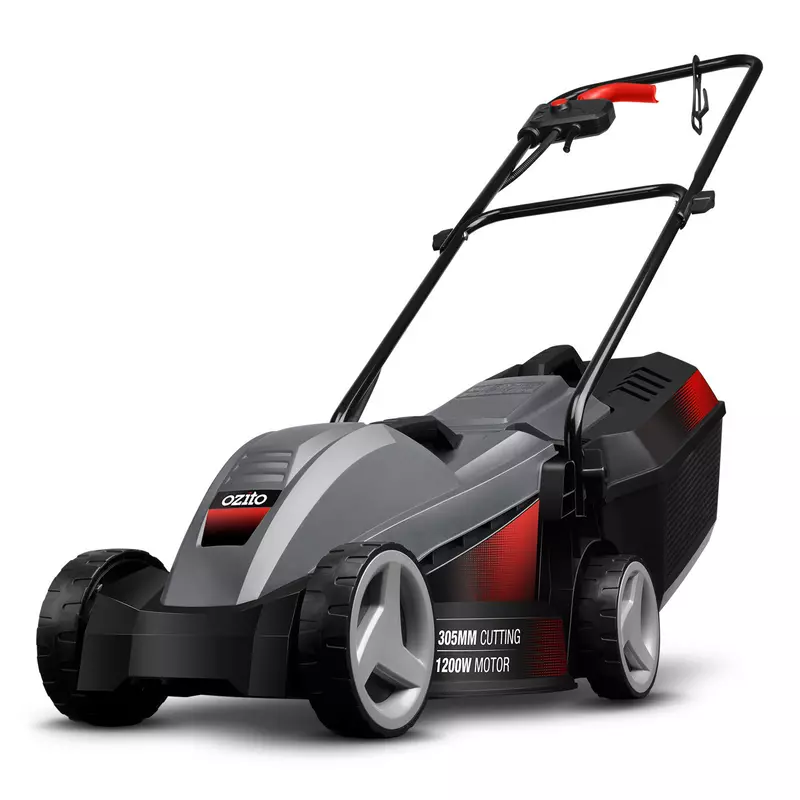
5 Key Steps to Start Your Lawn Mower
How to Start Lawn Mower?
- Check the oil and gasoline levels in the mower. If the oil is low or the gasoline is old, fill or replace as needed.
- Pull out the choke knob if your mower has one, to aid the engine in starting.
- If your mower has a primer bulb, press it a few times to give the engine extra fuel and help it start easier.
- Grasp the handle on the pull cord and slowly pull it out until you feel resistance. Then give it a sharp pull to start the engine.
- Once the engine starts, release the pull cord slowly to allow it to recoil back into place.
- If the engine does not start on the first try, wait a few seconds and then try again. If it still doesn’t start after a few attempts, check the spark plug, air filter, and fuel system for issues.
- Once the mower has started, allow it to run for a few minutes to warm up before beginning to mow.
- If your mower has an electric start, simply turn the key or push the button to start the engine. Make sure the battery is charged and connected before attempting to use the electric start feature.
Preparing to Start Your Lawn Mower
Before firing up your lawn mower, proper preparation is key. Ensuring your mower is adequately prepared helps avoid common start-up issues and promotes efficient operation.
Checking Gas and Oil Levels
Begin by ensuring your mower has enough gas and oil. For gas, open the mower’s gas cap and check the level inside the tank. It’s crucial to fill it if it’s low. For the oil, locate the oil cap, usually marked with an oil icon, and remove it to check oil levels with the dipstick. Add oil if the dip level shows it’s necessary. These steps are essential for a smooth start and to prevent engine damage.
Ensuring a Clear and Level Starting Area
Find a clear and flat area to start your mower. Remove any obstacles like rocks, toys, or large sticks that could hinder the mower’s path or damage the blades. Starting on a level surface prevents tipping and ensures safety when pulling the starter cord.
Inspecting and Maintaining the Spark Plug
Proper spark plug maintenance is crucial for starting your lawn mower effortlessly. Below, we dive into the steps to keep your spark plug in excellent condition.
Locating and Cleaning the Spark Plug
Identify the spark plug’s location, generally at the front or side of the mower’s engine. Remove the spark plug cap. Use a spark plug wrench to unscrew and remove the plug. Check for dirt or corrosion, and carefully clean it with a wire brush. If it’s in good condition, reattach it securely.
Checking for Spark Plug Wear and Replacing if Necessary
Inspect the spark plug for signs of wear such as cracks or heavy soiling. Discoloration and visible wear often indicate that it’s time to replace the spark plug. Choose a replacement that matches your mower’s specifications. After replacing it, ensure it is securely tightened to prevent any start-up issues.
Fuel System and Carburetor Priming
Understanding the Importance of Fresh Fuel
Fresh fuel is vital for starting your lawn mower. Gas can go bad over time, making it harder to start your engine. Be sure to empty old gas from the tank, and fill it with new, unleaded fuel. This simple step can prevent many starting issues related to fuel quality.
How to Prime the Carburetor for a Smooth Start
A primed carburetor ensures the right mix of air and fuel for the engine. To prime, locate the bulb near the carburetor and press it 3-5 times. This pushes fuel directly into the carburetor. Priming is critical, especially if you haven’t used the mower in a while. It preps the engine for a hassle-free start.
Adjusting the Throttle and Choke Settings
Properly setting the throttle and choke ensures a smooth lawn mower start-up.
Finding the Right Throttle Position for Start-Up
Locate the throttle lever on your lawn mower. You can typically find it near the handle or on the engine body. Set the throttle lever to a mid to high position before starting. This adjustment is crucial for the engine to run smoothly from the start.
Using the Choke for Cold Starts
Use the choke if starting the mower in cold conditions. Find the choke control, usually near the throttle. Move it to the ‘choke’ position when the engine is cold. This helps to enrich the fuel mixture, making it easier to start the engine. Once the mower starts and warms up, return the choke to its normal position.
Starting the Mower with the Starter Cord
Now that you’ve prepared your lawn mower, it’s time to start it up using the starter cord.
The Proper Technique for Pulling the Starter Cord
Stand behind your mower and firmly hold the handle. Grasp the starter cord handle with your other hand. Plant your feet solidly on the ground. Pull the cord briskly in one smooth motion. You might need several attempts. Persist until the engine starts, then let go of the cord.
Troubleshooting Tips if the Engine Doesn’t Start
If the engine doesn’t roar to life, don’t worry. Check for a few common issues. Make sure the spark plug is correctly attached. Confirm that the mower has fresh gas and oil. If you have a primer bulb, press it a few more times. Ensure the choke is on if the engine is cold. Check that the throttle is in the right position. If the cord is hard to pull, remove debris from under the mower. If these tips don’t work, refer to your mower’s manual or seek a professional’s help.
Post-Start Adjustments and Checks
Once you’ve successfully started your lawn mower, it’s essential to make a few adjustments and checks. This ensures the mower operates efficiently and safely during its use.
Adjusting the Mower Height Settings
After starting your lawn mower, adjust the cutting height. Locate the adjustment lever near the mower’s wheels. Set it to a higher or lower notch depending on your lawn’s requirements. This ensures your grass is cut to the ideal height, contributing to healthier lawn growth.
Clearing the Discharge Chute for Optimal Performance
Check the discharge chute, which is the pathway through which grass exits the mower. Remove any debris or grass clippings that might clog it. A clear chute ensures that grass is evenly discharged, maintaining consistent performance and preventing blockages that could hinder your mowing.
Routine Lawn Mower Care and Maintenance
Proper care extends a lawn mower’s life and ensures it starts easily.
Regular Cleaning and Storage
Keep your mower clean by wiping off grass and debris after each use. Store it in a dry place to prevent rust and damage.
Seasonal Maintenance Tips for Longevity
Before mowing season, change the oil, replace the air filter, and sharpen the blades. Check belts and replace if worn at the season’s end.
Troubleshooting Common Starting Issues
When your lawn mower won’t start, it can be frustrating. To get back to mowing quickly, try these troubleshooting techniques for common issues.
Dealing with a Flooded Engine
A flooded engine can prevent your mower from starting. Here’s what to do:
- Wait: Give the mower 15 minutes. Let excess fuel evaporate.
- Check: Remove the spark plug and look for wetness, indicating fuel presence.
- Dry: If wet, clean the plug with a rag, dry the gap, and reinsert.
- Try Again: After fixing the issue, attempt to start the mower.
Addressing Problems with Old or Stale Gas
Old gas can degrade and make starting the engine tough. Here’s how to resolve this:
- Empty: Safely remove old gas from the tank.
- Refresh: Fill the tank with fresh, unleaded fuel.
- Stabilize: Consider adding a fuel stabilizer to avoid future problems.
- Start: With fresh fuel, your mower’s engine should start more easily.
Remember, routine checks and maintenance will reduce the chances of these issues. Keep your lawn mower in good condition to ensure a smooth start every time.
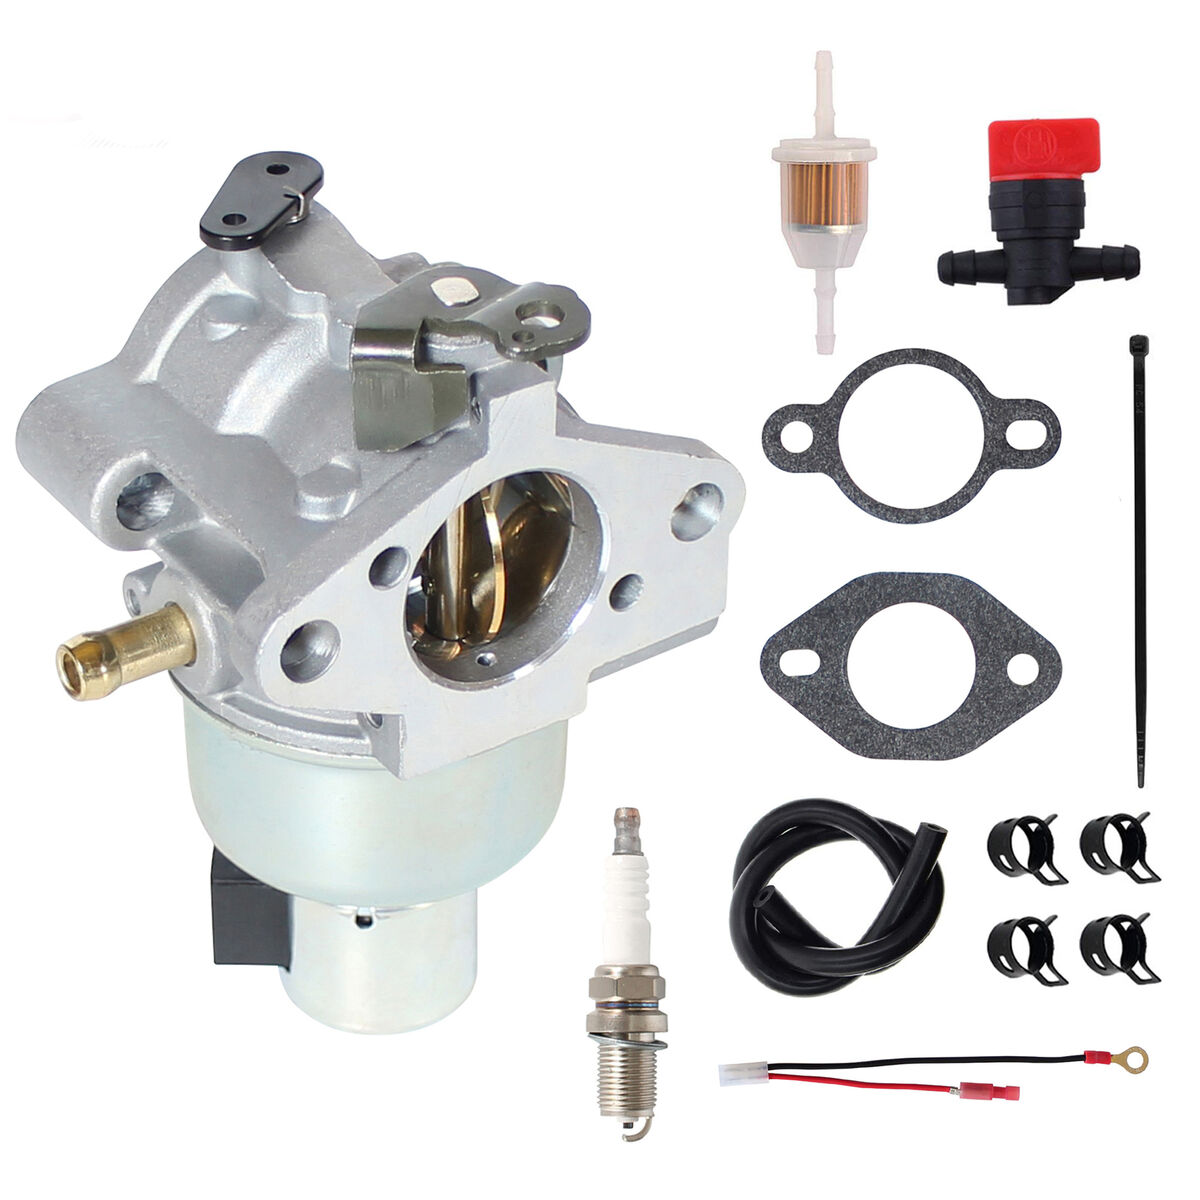
Step-by-Step Guide: Cleaning Your Lawn Mower Carburetor
Introduction
A well-maintained lawn mower is crucial for keeping your garden in top shape. The carburetor, being a vital component, determines how effectively your mower runs. It manages the engine’s air and gasoline mixture, enabling your mower to start smoothly and continue running efficiently. Understanding how to clean a lawn mower carburetor is important not only for optimal performance but also to extend the life of your machine. How to clean a lawn mower carburetor? This guide will walk you through the clear signs that your carburetor needs cleaning, the tools you will require, and a step-by-step process for cleaning. Simplify your maintenance routine and ensure your lawn mower functions effectively with our comprehensive guide.
Signs Your Lawn Mower Carburetor Needs Cleaning
Recognizing the signs that your lawn mower carburetor requires cleaning is crucial for its maintenance and efficiency. One clear sign is difficulty in starting the mower. If the mower does not start or takes multiple attempts, this might be due to a clogged carburetor. Another symptom is an irregular running engine; if the engine starts but stutters or runs unevenly, the carburetor might be dirty. Additionally, a noticeable increase in fuel consumption can indicate that the carburetor is not mixing the fuel and air properly due to being unclean.
Excessive smoke from the mower is also a sign that the carburetor could be clogged. This occurs because the improper fuel mixture leads to incomplete burning of fuel. Lastly, if the mower performs poorly even after you’ve checked other components, the carburetor should be inspected. Regular checks will help you identify these signs early, making it easier to maintain your mower’s performance and extend its lifespan.
Tools and Materials Needed for Cleaning
Before you begin the process of cleaning your lawn mower carburetor, gathering the right tools and materials is essential. Here is a comprehensive list to ensure you have everything you need:
- Screwdrivers: Needed to remove screws from the carburetor.
- Wrench set: Useful for detaching the carburetor and other connections.
- Carburetor cleaner: Specifically designed to dissolve dirt and buildup without damaging the carburetor parts.
- Compressed air: Helps in blowing out dust and debris from tight spaces within the carburetor.
- Soft brushes or an old toothbrush: For gently scrubbing the carburetor components without scratching them.
- Pliers: Might be needed to remove clamps or other tight components.
- Rags or towels: Useful for wiping off excess cleaner and dirt.
- Container: To keep small parts like screws and clamps, so they don’t get lost.
- New gaskets and O-rings (optional, but recommended): To replace old, worn-out parts to ensure a good seal during reassembly.
Having these tools and materials ready not only simplifies the cleaning process but also helps in accomplishing it more efficiently. This preparation step is crucial for learning how to clean a lawn mower carburetor effectively.
Preparing Your Lawn Mower for Cleaning
Before you start the task of cleaning your lawn mower carburetor, proper preparation is essential to ensure safety and efficiency. Here are the steps you need to follow to prepare your lawn mower for a thorough carburetor cleaning:
- Turn Off the Mower: Make sure the lawn mower is completely turned off and that the ignition key is removed. This prevents the engine from accidentally starting while you’re working on it.
- Disconnect the Spark Plug: To enhance safety, disconnect the spark plug. This step is a crucial safety measure that stops the engine from igniting during the cleaning process.
- Drain the Fuel: Empty the fuel tank to prevent any fuel spillage or accidental ignition. You can use a siphon pump or carefully tip the mower to pour out the fuel into a container.
- Clean the Exterior: Wipe down the mower’s exterior with a rag to remove any dirt, grass clippings, or debris. This helps in preventing any external dirt from getting into the carburetor during the cleaning.
- Arrange Your Workspace: Set up a clean, well-lit workspace with ample room to place your tools and the parts you’ll remove. A clear table or a flat surface in a well-ventilated area is ideal.
- Gather Your Tools: Have all the tools and materials listed in the previous section at hand. This includes screwdrivers, wrenches, carburetor cleaner, compressed air, and soft brushes.
By following these preparatory steps, you’ll create a safe and efficient environment for learning how to clean a lawn mower carburetor. These initial steps are just as important as the actual cleaning process.
Step 1: Accessing the Carburetor
The first step in learning how to clean a lawn mower carburetor is gaining access to it. Follow these clear, simple steps to reach the carburetor of your lawn mower:
- Locate the Air Filter: The carburetor is usually situated behind the air filter. Find the air filter housing and remove its cover. Usually, this involves unscrewing or unclipping the cover.
- Remove the Air Filter: Carefully take out the air filter. If it’s dirty or damaged, consider replacing it after cleaning the carburetor.
- Expose the Carburetor: With the air filter removed, you will see the carburetor attached to the fuel line and throttle. It’s typically held in place by a couple of bolts or screws.
- Detach the Fuel Line: Before you can remove the carburetor, you must detach the fuel line. Be ready with a rag or small container to catch any fuel that may drip out.
- Unscrew the Bolts: Use your screwdrivers or wrench set to loosen the bolts or screws that are securing the carburetor to the mower.
- Carefully Remove the Carburetor: Once the bolts are removed, gently take the carburetor out of its position. Make sure you keep track of any small parts or connections.
Now that you have accessed the carburetor, you can move on to disassembling and cleaning its parts. Proper access is crucial for a thorough cleaning, so take your time with this step to ensure everything is done right.
Step 2: Disassembling the Carburetor
After accessing the carburetor, the next phase is disassembling it for cleaning. Here’s how to carefully dismantle the carburetor to prepare it for a thorough cleaning:
- Document the Process: Before disassembling, take pictures of the carburetor. This will help you remember how to reassemble it correctly.
- Remove the Bowl: At the bottom of the carburetor, you’ll find a bowl attached by a nut or a screw. Remove this to access the inside components.
- Take Out the Float: The float controls the flow of fuel into the carburetor. Carefully remove the pin that holds the float to take it out.
- Remove the Jet Screws: Jets are tiny screws inside the carburetor that control the fuel and air mix. Use a screwdriver to carefully remove them.
- Pull Out the Needle Valve: Alongside the float, you’ll find the needle valve. This needs to be gently removed.
- Keep All Parts Organized: As you remove each part, place them neatly on a clean towel or container. This keeps them safe and organized.
By disassembling the carburetor carefully and methodically, you ensure that every component gets the cleaning attention it requires. This also helps avoid any damage to the parts. The next steps will involve cleaning these components before reassembling them.
Step 3: Cleaning the Carburetor Components
Now that you have disassembled the carburetor, it’s time to clean each component thoroughly. Here’s a step-by-step guide to ensure every part is cleaned properly:
- Use Carburetor Cleaner: Spray carburetor cleaner generously on each part. Make sure to cover all surfaces.
- Scrub with Brushes: Use soft brushes or an old toothbrush to scrub the parts gently. Pay attention to crevices and hidden areas where dirt accumulates.
- Rinse with Water: After scrubbing, rinse the parts with water to remove any remaining cleaner and loose dirt.
- Dry Completely: Shake off excess water and use compressed air to blow away moisture from small parts. Let all parts air dry on a clean towel.
- Inspect for Damage: While the parts are drying, inspect each for any signs of wear or damage. Replace parts as needed.
By following these cleaning steps, you ensure that each component of the carburetor is free from dirt and grime. This process helps in maintaining the efficiency of your lawn mower.
Step 4: Reassembling and Reattaching the Carburetor
After thoroughly cleaning each component of the carburetor, the next crucial step is to reassemble and reattach it to your lawn mower. Here’s how to methodically proceed to get your carburetor functioning smoothly again:
- Check all parts: Ensure all cleaned parts are dry and free from damage. Replace any that are worn out.
- Reassemble the carburetor: Start by placing the needle valve back in position, followed by the float and securing it with the pin. Next, carefully screw back the jets.
- Attach the bowl: Realign the bowl to the bottom of the carburetor and secure it with the original nut or screw.
- Reconnect the carburetor: Position the carburetor back to its original place. Fasten it using bolts or screws as required.
- Reattach the fuel line and air filter: Connect the fuel line and ensure there are no leaks. Place a new or cleaned air filter back in its housing.
- Double-check connections: Make sure all connections are tight and secure to prevent any operational issues.
- Test the mower: Before using the mower in your lawn, start it to ensure it runs smoothly. Listen for any irregularities in the engine’s performance.
Correctly reassembling and reattaching the carburetor not only ensures your lawn mower runs efficiently but also extends the life of the engine. Taking the time to do this right will save you from potential issues and additional maintenance down the line.
Tips for Maintaining Your Carburetor
Maintaining your lawn mower carburetor is essential for ensuring long-term performance. Here are practical tips to keep it in top condition:
- Regular Cleaning: Consistently clean your carburetor every few months or as recommended in your mower’s manual. This prevents buildup and ensures smooth operation.
- Check for Wear: Regularly inspect the carburetor for signs of wear or damage. Replace worn parts promptly to avoid more serious issues.
- Use Fresh Fuel: Always use fresh, clean fuel in your mower. Old or contaminated fuel can clog the carburetor.
- Store Properly: When not in use, particularly during off-season, store your mower in a clean, dry place. This prevents rust and dirt accumulation in the carburetor.
- Avoid Moisture: Try to keep the carburetor dry as moisture can cause corrosion and other issues.
- Regular Tune-ups: Schedule regular tune-ups from a professional. They can spot issues that might not be obvious and ensure your mower remains in excellent condition.
By following these tips, you can extend the life of your lawn mower carburetor and improve the overall performance of your mower.
Conclusion
In wrapping up our step-by-step guide on how to clean a lawn mower carburetor, remember it’s a valuable skill. With the right tools and a bit of patience, you can keep your mower running efficiently. Start by identifying signs that suggest a need for cleaning, such as difficulty starting or irregular engine performance. Gather your tools and prepare the workspace properly before starting. Systematically proceed through each step, ensuring careful disassembly, thorough cleaning, and cautious reassembly.
Regular maintenance, including carburetor cleaning, not only improves mower performance but also extends its lifespan. Make use of fresh fuel, store your mower correctly, and conduct frequent checks for wear and tear. Remember to schedule professional tune-ups to catch issues you might miss. This guide aims to make lawn mower carburetor cleaning approachable for anyone, regardless of their mechanical expertise.
By maintaining a clean carburetor, you’re investing in the longevity of your lawn mower and the health of your lawn. Embrace the knowledge shared in this guide and take pride in mastering an essential aspect of lawn mower maintenance.
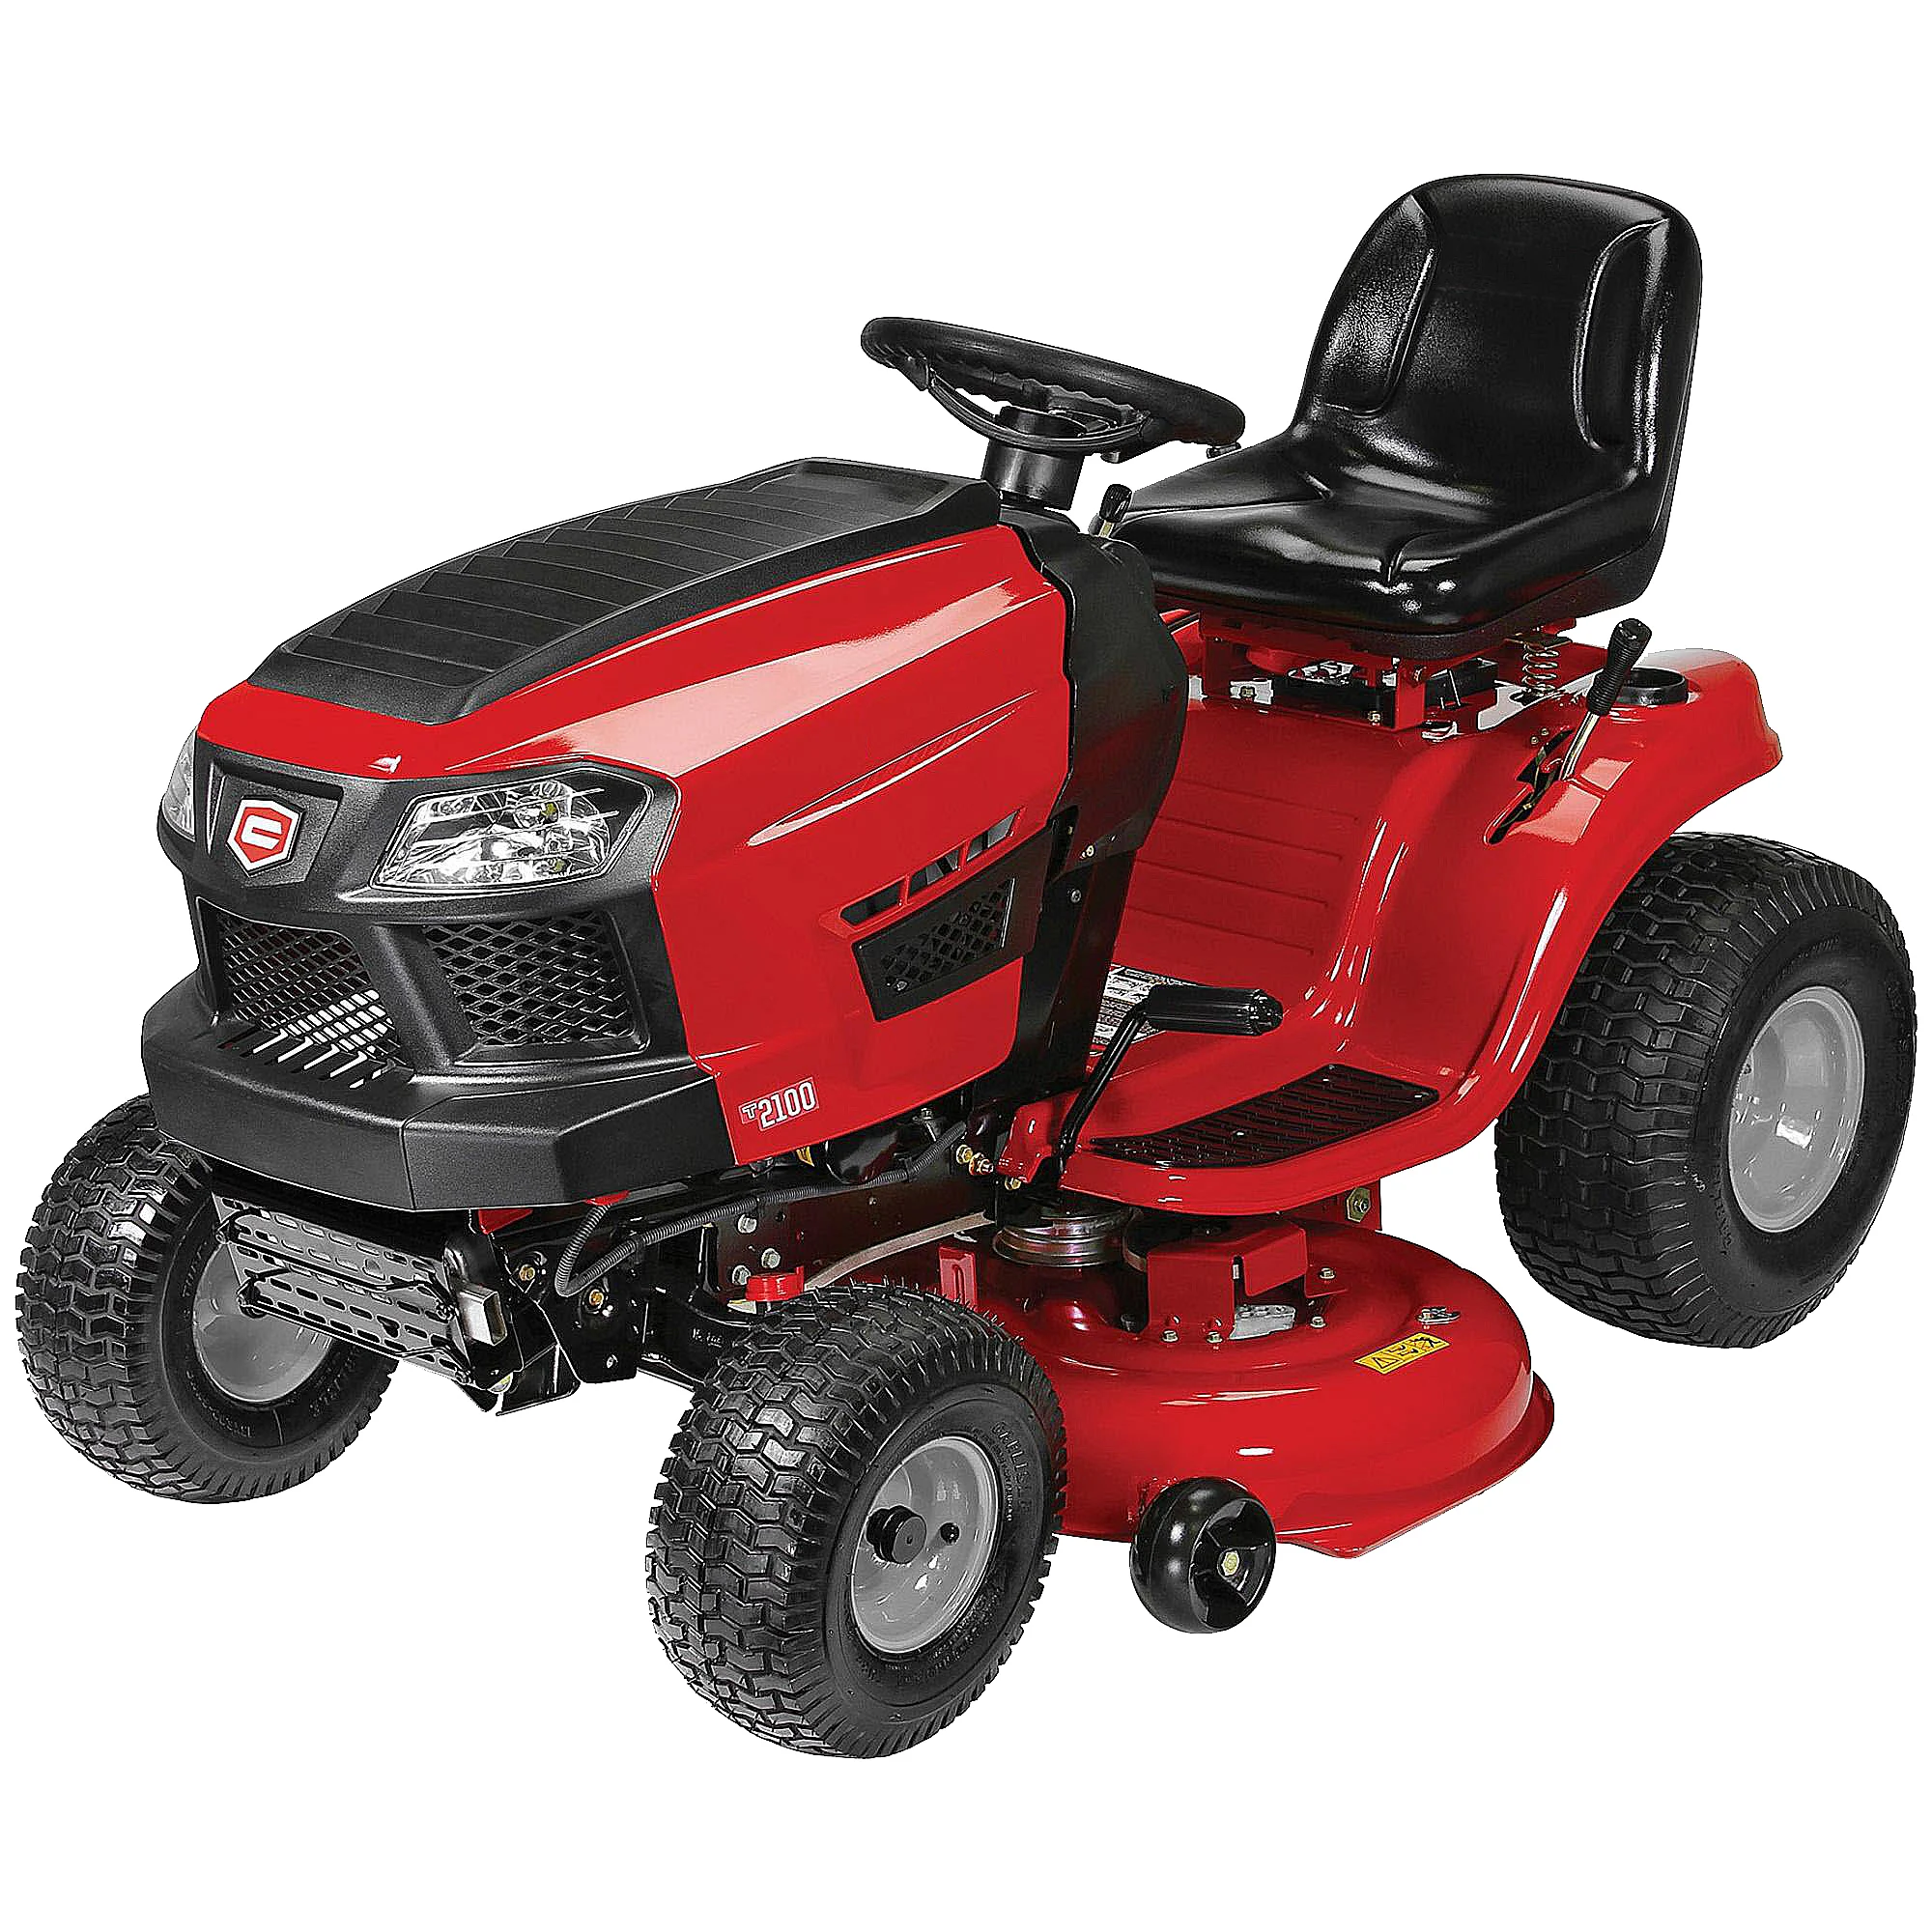
Quick Lawn Mower Repairs Done Right
Introduction to Lawn Mower Maintenance
Maintaining a lawn mower is key to its longevity and performance. Like any piece of machinery, a lawn mower requires regular attention to function at its best. Neglect can lead to more significant issues over time. A well-maintained lawn mower not only cuts grass effectively but also saves you money on future repairs. The basics of lawn mower maintenance involve routine checks and cleaning in lawn mower repair shop. You should regularly inspect your mower for signs of wear or damage, especially after extensive use. This includes looking at blades, belts, and other movable parts. A clean mower is important as well; grass clippings and debris can clog the machine and hinder performance. Cleaning after every use is a good practice.
Regular oil changes and air filter replacements also play a huge role. These help ensure that the engine runs smoothly and efficiently. It’s also essential to keep an eye on the spark plug and replace it if necessary. Dull blades can damage your lawn and the mower, so it’s critical to sharpen or replace them as needed. Keeping the tires inflated properly will ensure easy maneuverability. Attention to these care points can extend the life of your lawn mower. As much as routine maintenance is crucial, identifying common issues early can prevent them from becoming bigger problems. The next section of our blog will cover the signs of wear and tear that every lawn mower owner should be aware of.
Identifying Common Lawn Mower Issues
Before heading to a lawn mower repair shop, it’s beneficial to understand the common issues your lawn mower might encounter. Being able to identify problems early can save time and avoid costly repairs later.
Signs of Wear and Tear
Regular check-ups can reveal signs of wear and tear. You might notice:
- Dull or damaged blades.
- Wear on cables or pull cords.
- Loose or missing parts.
- Uneven or abnormally noisy operation.
These signs indicate it’s time for maintenance or possibly repair.
Engine Problems and Solutions
Engine issues in lawn mowers are frequent and can vary from simple to complex. Common engine problems include:
- Trouble starting the engine.
- Smoke coming from the mower during operation.
- The engine running rough or stalling.
- Unusual noises like knocking or sputtering.
Solutions may range from cleaning the carburetor to replacing the spark plug. If troubleshooting doesn’t fix the issue, consult a professional at a lawn mower repair shop.
Step-by-Step Guide for Basic Repairs
Caring for your lawn mower involves some basic repairs that you can do yourself. These repairs ensure that your mower performs well and lasts longer. This guide will walk you through simple procedures such as replacing blades and changing oils and filters.
Replacing Blades
Replacing the blades on your lawn mower is crucial for maintaining a clean, healthy lawn. Here are the steps to follow:
- Safety First: Disconnect the spark plug to ensure the mower can’t start accidentally.
- Access the Blades: Turn the mower on its side, blade side up.
- Remove the Blades: Use a wrench to loosen the bolts that hold the blades in place. Remove the blades carefully.
- Install New Blades: Place the new blades and secure them with the bolts. Ensure they are tight and correctly positioned.
- Check Balance: Make sure the blades are balanced to prevent mower vibrations and uneven cuts.
Changing Oil and Filters
Regular oil and filter changes are vital to keep your lawn mower’s engine running smoothly. Here’s how to do it:
- Drain Old Oil: Position an oil collection pan under the mower. Remove the oil drain plug and let oil flow out.
- Replace Oil Filter: If your mower has an oil filter, replace it. Unscrew the old filter and screw on a new one.
- Add New Oil: Insert the drain plug back and fill the engine with new oil, according to the manufacturer’s specifications.
- Change Air Filter: Remove the old air filter and replace it with a new one. This ensures your engine gets clean air for combustion.
By following these steps, you can perform essential maintenance that will keep your lawn mower in good shape, allowing it to perform its best. If you encounter issues or are unsure about performing these tasks, consult a professional lawn mower repair shop.
Advanced Diagnostic Techniques
When DIY fixes and routine maintenance don’t cut it, advanced diagnostic techniques become crucial. These methods help pinpoint the exact nature of complex lawn mower issues, ensuring effective solutions.
Understanding Diagnostic Equipment
Professional lawn mower repair shops employ advanced diagnostic equipment. These tools help technicians assess the mower’s condition more accurately. Common diagnostic tools include engine analyzers, spark testers, and compression testers. This equipment provides a deeper insight into the internal workings of the lawn mower.
Computerized Diagnostics
Many modern lawn mowers feature computerized systems. Repair shops use specific software to read these systems. Computerized diagnostics can identify problems that manual checks might miss. This method speeds up the detection process, leading to faster repairs.
Performance Tests
Performance tests are another essential diagnostic technique used by skilled technicians. These tests check the lawn mower under working conditions. Issues like engine efficiency, blade sharpness, and overall functionality are examined.
Using advanced diagnostic techniques allows the lawn mower repair shop to offer precise and reliable services. These methods help ensure that your mower returns to optimal performance, saving you time and money in the long-run.
Selecting the Right Repair Shop
When your lawn mower hits a snag, choosing the right repair shop is critical. It guarantees quality work and ensures your mower’s longevity. However, the abundance of service providers can make this choice seem daunting. There are key factors to consider when selecting a lawn mower repair shop that stands out for its reliability and excellence.
What to Look for in a Service Provider
- Reputation: Check customer reviews and testimonials. Highly praised shops often deliver quality service.
- Experience: Seek out shops with skilled technicians who have extensive experience with lawn mower repairs.
- Customer Service: A good repair shop is responsive and communicates clearly about services and costs.
- OEM Parts: Quality repairs use Original Equipment Manufacturer (OEM) parts for compatibility and reliability.
- Warranty: Shops that offer a warranty on their repairs are more trustworthy and stand behind their work.
- Turnaround Time: Consider how quickly the shop can complete your lawn mower repair. Fast service reduces downtime.
- Price Transparency: Look for clear pricing with no hidden costs. Fair prices indicate an honest service provider.
By considering these factors, you can avoid poor service and ensure your lawn mower is in the right hands.
Questions to Ask Before Service
Before you commit to a lawn mower repair shop, make sure to ask:
- Experience with Your Model: Does the shop have the right expertise to handle your specific lawn mower?
- Repair Timeline: How long will the repair take?
- Cost Estimate: Can they provide a clear and detailed quote?
- Service Guarantees: What kind of guarantees or warranties do they offer on their work?
- Parts Used: Are they using OEM parts, and do they have them readily available?
- Additional Services: Do they provide any additional maintenance that could prevent future issues?
Asking these questions arms you with the information needed to make an informed decision, ensuring you receive the best possible service for your lawn mower’s repair.
Preventative Maintenance Tips
Proper maintenance can save you from frequent repairs and extend the life of your lawn mower. Implementing preventative care is straightforward and manageable if you make it a part of your regular routine. Staying on top of these tasks will ensure that your lawn mower remains in optimal working condition, reducing the chances of unexpected breakdowns.
Regular Cleaning and Care
To keep your lawn mower running smoothly, clean it after each use. Removing grass clippings, dirt and debris prevents clogging and corrosion. Check for loose screws and bolts, and tighten them as necessary. Always store your lawn mower in a dry place to avoid rust and damage.
- Clean the Deck: Use a hose to wash off grass clippings from the mower’s deck.
- Inspect for Damage: Look for any signs of wear or cracks on the mower.
- Lubricate Moving Parts: Apply lubricant to all moving parts to reduce friction.
- Check the Fuel: Use fresh fuel and shake off water condensation in the tank before use.
Offering your mower this attention not only maintains its efficiency but also gives you the chance to spot potential issues before they escalate into major problems requiring a visit to the lawn mower repair shop.
Seasonal Maintenance Checklist
Seasonal maintenance is crucial for the longevity of your lawn mower. At the start and end of the mowing season, a comprehensive check-up can help avoid common issues.
- Spring Checklist:
- Change the oil and oil filter.
- Replace or clean the air filter.
- Sharpen or replace the mower blades.
- Check the spark plug and replace it if worn.
- Fall Checklist:
- Drain fuel or add a stabilizer for storage.
- Clean or replace the spark arrestor.
- Lubricate cables and controls.
- Inspect and clean the battery terminals.
Building these seasonal maintenance practices into your schedule can drastically reduce the likelihood of experiencing inconvenient and costly repairs, keeping your lawn mower repair shop visits to a minimum.
Utilizing Professional Lawn Mower Repair Services
Even with regular upkeep, lawn mowers can face issues beyond basic DIY skills. When such situations arise, it’s important to seek professional lawn mower repair services. These services offer expert handling and the proper tools to fix complex problems. Here are key benefits of professional services and signs that indicate it’s time to step away from DIY and call the experts.
Benefits of Expert Handling
A professional lawn mower repair shop brings many benefits:
- Expertise: Technicians have the knowledge to diagnose and repair intricate issues.
- Efficiency: Quick and reliable repair work means less downtime for your mower.
- Quality Parts: Repair shops often use OEM parts, which are more dependable.
- Warranty: Many shops offer service guarantees, safeguarding your investment.
- Advanced Tools: Professionals use the right tools that you may not have at home.
By choosing expert services, you ensure that your mower gets the best care. This can extend its life and save money in the long run.
When DIY Isn’t Enough
Sometimes, DIY repairs are not sufficient to resolve lawn mower problems. These signs suggest that it’s time to seek professional help:
- Recurring Issues: If a problem keeps coming back, experts can find a lasting fix.
- Complex Engine Trouble: When starting issues or noises persist, a repair shop can dig deeper.
- Electrical Problems: Experts can handle electrical faults safely and effectively.
- Lack of Tools: If repairs need special tools, professionals will have them.
When faced with these challenges, it’s wise to entrust your mower to a skilled lawn mower repair shop. They can provide the attention and service your equipment needs. Remember, investing in professional repairs can lead to better performance and longer life for your lawn mower.
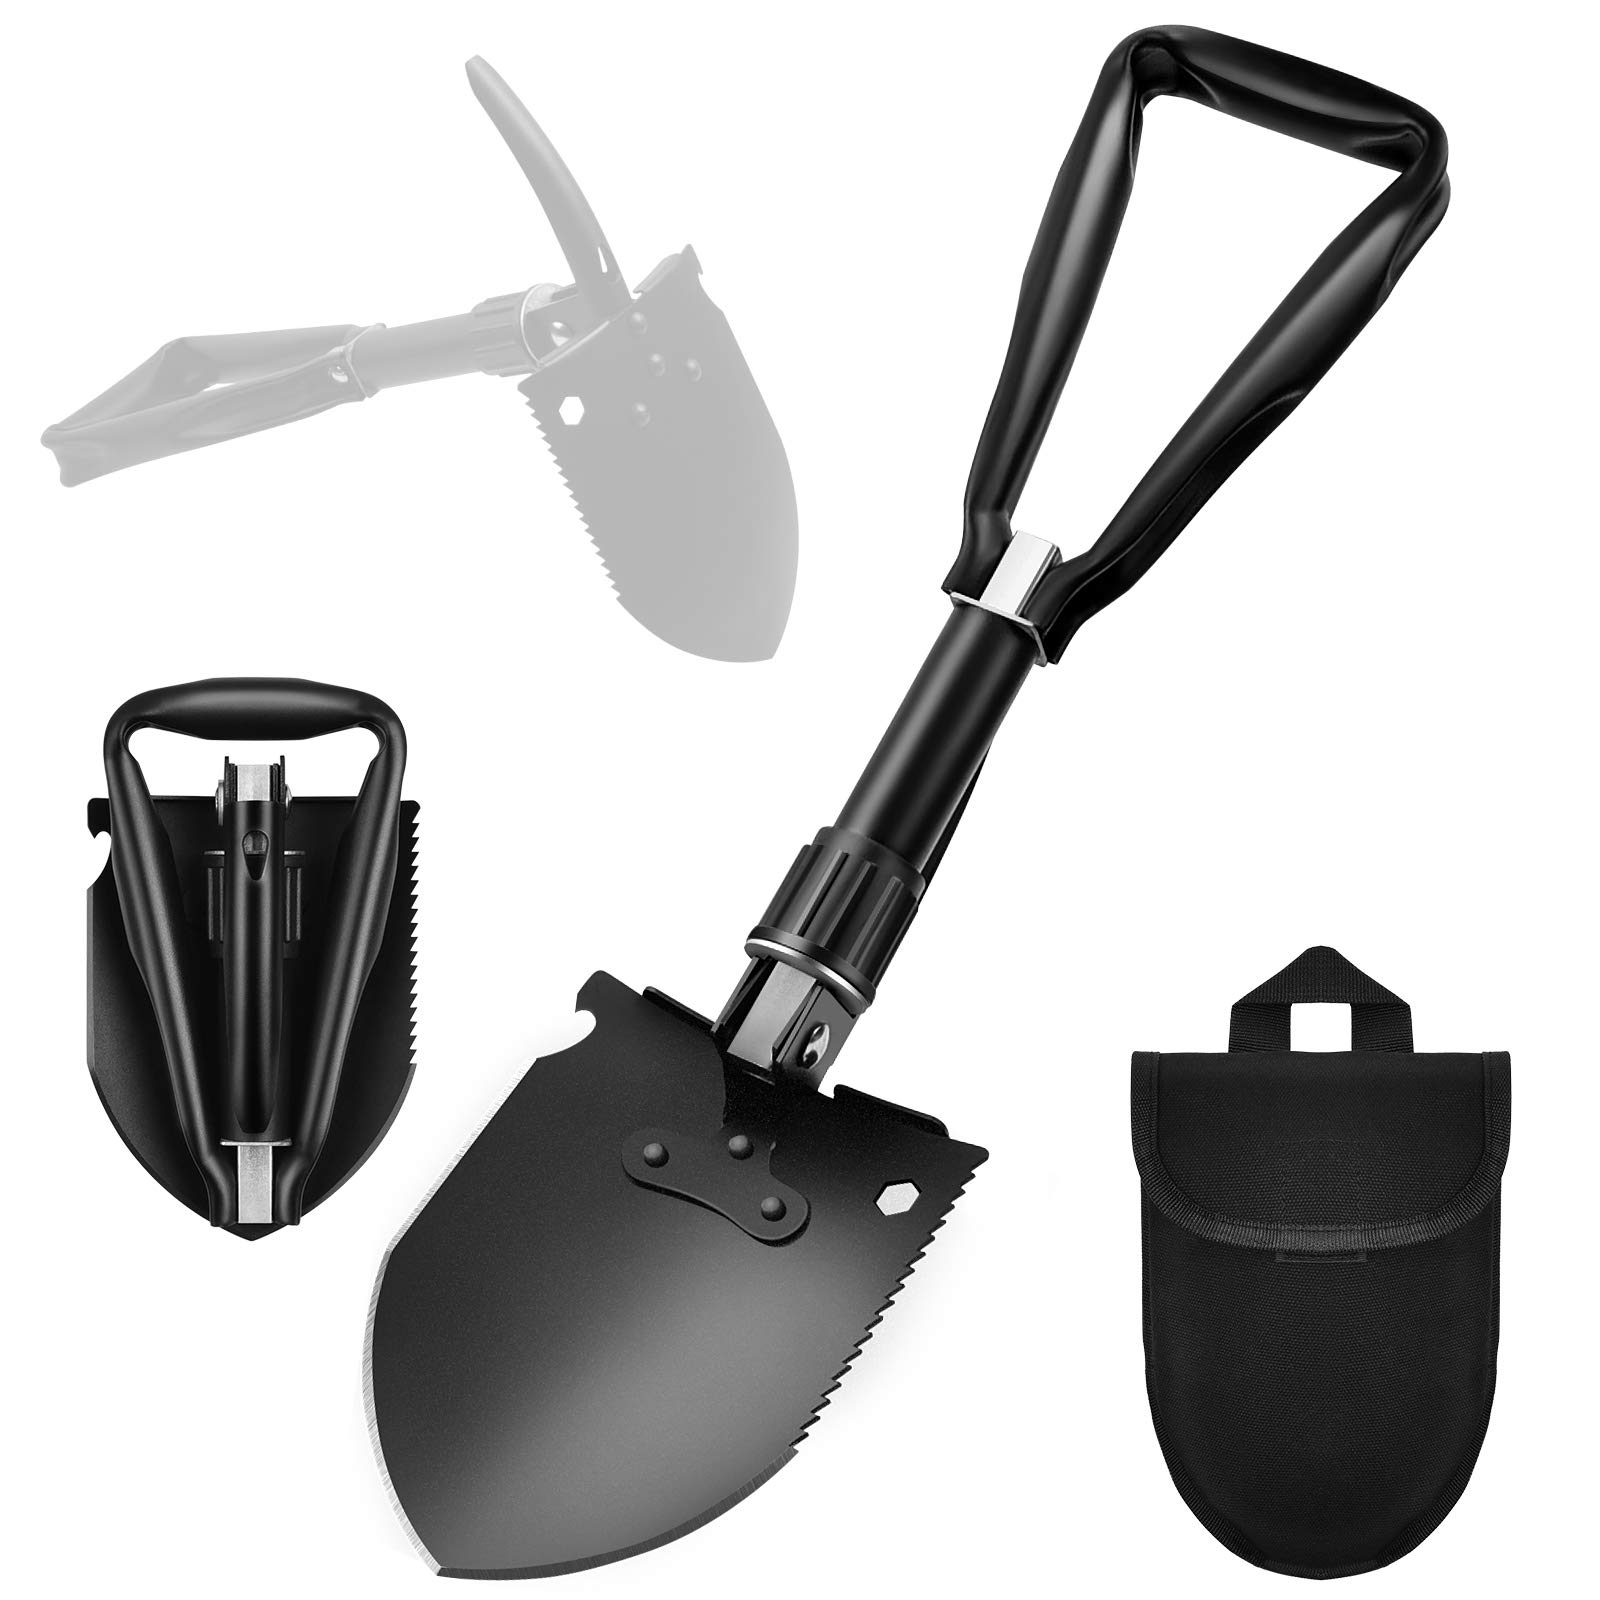
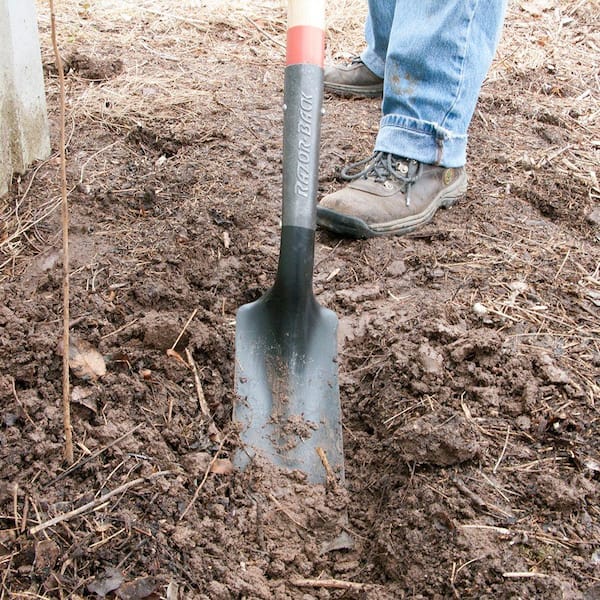
The Guide to Trenching Tool: Everything You Need to Know
Introduction
When it comes to digging trenches, having the right tools for the job is crucial. Whether you are a professional landscaper, a DIY enthusiast, or a construction worker, having the right trenching tools in your arsenal can make the task at hand much easier and more efficient. In this comprehensive guide, we will discuss everything you need to know about trenching tools, including the different types of tools available, their uses, and how to choose the right tool for your specific needs.
Part 1: Types of Trenching Tools
1.1 Handheld Trenching Tools
- Shovels: Traditional shovels are a popular choice for digging trenches as they are versatile and can be used for a variety of tasks.
- Mattocks: Mattocks have a pick on one end and a wide, flat blade on the other, making them ideal for digging through hard soil and roots.
1.2 Power Trenching Tools
- Trenching Machines: Trenching machines are powered tools that are used for digging large, deep trenches quickly and efficiently.
- Trenching Excavators: Trenching excavators are heavy-duty machines that are capable of digging trenches of various sizes and depths.
Part 2: Uses of Trenching Tools
2.1 Landscaping
- Installing irrigation systems: Trenching tools are essential for laying down piping for irrigation systems in gardens and lawns.
- Planting trees and shrubs: Trenching tools can be used to dig trenches for planting trees and shrubs, creating a healthy environment for the roots to grow.
2.2 Construction
- Installing utility lines: Trenching tools are used to dig trenches for laying down utility lines, such as water, gas, and electrical lines.
- Creating drainage systems: Trenching tools are essential for creating drainage systems to prevent water from pooling around buildings and structures.
Part 3: Choosing the Right Trenching Tool
3.1 Consider the Type of Soil
- For soft soil, a standard shovel or mattock may be sufficient, while harder soil may require a power trenching tool such as a trenching machine or excavator.
- Consider the presence of rocks and roots, as these may require specialized trenching tools or attachments.
3.2 Depth and Width of the Trench
- For shallow trenches, handheld trenching tools may be sufficient, while deeper and wider trenches may require the use of power trenching tools.
- Consider the specific dimensions required for the trench, as this will determine the type of tool needed.
Part 4: Safety Considerations
4.1 Protective Gear
- When using trenching tools, it is important to wear protective gear such as gloves, safety goggles, and steel-toed boots to prevent injury.
- For power trenching tools, hearing protection and respiratory protection may also be necessary.
4.2 Underground Utilities
- Always ensure that you are aware of the location of underground utilities before digging trenches to avoid potential accidents and damage to infrastructure.
- Consider using ground-penetrating radar or contacting your local utility company to locate underground utilities before beginning any trenching work.
Part 5: Proper Maintenance and Storage
5.1 Cleaning and Inspection
- After each use, it is important to clean trenching tools thoroughly to remove dirt, debris, and moisture that can cause rust and corrosion.
- Regularly inspect trenching tools for wear and tear, and replace any damaged or worn parts to ensure optimal performance and safety.
5.2 Storage and Transport
- Store trenching tools in a dry, secure location to prevent rust and damage.
- When transporting trenching tools, ensure that they are properly secured and protected to prevent damage and accidents.
Part 6: Benefits of Using a Trenching Tool
Trenching tools offer several benefits that make them an essential addition to any construction or landscaping arsenal. One of the main advantages of using a trenching tool is the efficiency it provides in digging trenches. With the right tool, trenches can be dug quickly and easily, saving time and effort. Trenching tools also provide precision, allowing for accurate digging and reducing the risk of errors in trench placement.
Another benefit of trenching tools is their versatility. These tools for a wide range of applications, are including laying down pipes and cables, installing irrigation systems, and creating drainage ditches. Trenching tools are also available in various sizes and configurations to accommodate different trenching requirements, making them suitable for a variety of projects.
Furthermore, trenching tools are designed to be durable and reliable, ensuring they can withstand the rigors of regular use in challenging conditions. The robust construction of these tools means they can handle demanding tasks without succumbing to wear and tear easily. This durability makes them a cost-effective investment for professionals and individuals who frequently undertake trenching work.
In addition to their practical benefits, trenching tools also contribute to safety on the job site. By providing a specialized tool for trenching, workers can minimize the risks associated with manual trench digging, such as back strain and exposure to hazardous materials. This can lead to a safer work environment and reduce the likelihood of workplace accidents.
Overall, the use of trenching tools offers numerous advantages, including efficiency, versatility, durability, and safety. These benefits make them a valuable tool for various trenching projects, contributing to enhanced productivity and effectiveness on the job site.
Part 7: Maintaining and Caring for Trenching Tools
To ensure the ongoing functionality and effectiveness of trenching tools, it is essential to implement a proper maintenance and care routine. Proper maintenance helps to extend the lifespan of the equipment, minimize downtime due to breakdowns, and ensure safe operation during trenching tasks.
One crucial aspect of maintaining trenching tools is regular cleaning. After each use, you should remove the dirt, debris, and any potentially corrosive substances that may have accumulated during the operation. This prevents the build-up of damaging particles and ensures that the tool remains in optimal condition.
In addition to cleaning, it is important to inspect the trenching tool for any signs of wear or damage. This includes checking for loose or damaged components, worn cutting edges, and any indications of rust or corrosion. Identifying and addressing these issues promptly can prevent them from escalating into more significant problems that could compromise the tool’s performance.
Another essential aspect of maintenance is lubrication. Trenching tools contain moving parts that require proper lubrication to function smoothly and prevent premature wear. Applying the appropriate lubricant to the tool’s components as per the manufacturer’s recommendations helps to maintain their functionality and extend their lifespan. Furthermore, storing trenching tools properly is crucial to prevent damage and ensure their longevity. A well-organized storage area will also help to prevent accidents and ensure the tools remain in good condition.
Part 8: Choosing the Right Trenching Tool for Your Project
Selecting the appropriate trenching tool for a specific project is essential to ensure efficiency, productivity, and safety. With a variety of trenching tools available, from manual to powered options, it is crucial to consider various factors when choosing the right tool for the job.
The size and scope of the trenching project are significant factors to consider when selecting a trenching tool. For smaller-scale projects or precision work, a manual trenching tool, such as a hand trencher, may be sufficient. These tools offer greater control and maneuverability, making them suitable for intricate trenching tasks.
In contrast, larger-scale projects with more extensive trenching requirements may benefit from powered trenching tools, such as trenchers or excavators. Powered tools can significantly reduce the time and effort required for digging trenches, making them ideal for projects with high-volume trenching needs. Additionally, powered trenching tools are capable of handling tougher soil conditions and larger trench dimensions, making them suitable for more extensive projects.
The type of soil and ground conditions also play a critical role in choosing the right trenching tool. Different soil types, such as clay, sand, or rocky soil, may require specific tools or attachments to effectively dig trenches. Additionally, the presence of obstacles, such as tree roots or rocks, may necessitate specialized trenching tools with capabilities to handle these challenges.
Conclusion
Trenching tools are essential for a wide range of tasks, from landscaping to construction, and having the right tool for the job can make all the difference. By understanding the different types of trenching tools available, their uses, and how to choose the right tool for your specific needs, you can ensure that your trenching projects are completed safely and efficiently. Remember to always prioritize safety, proper maintenance, and storage when working with trenching tools.
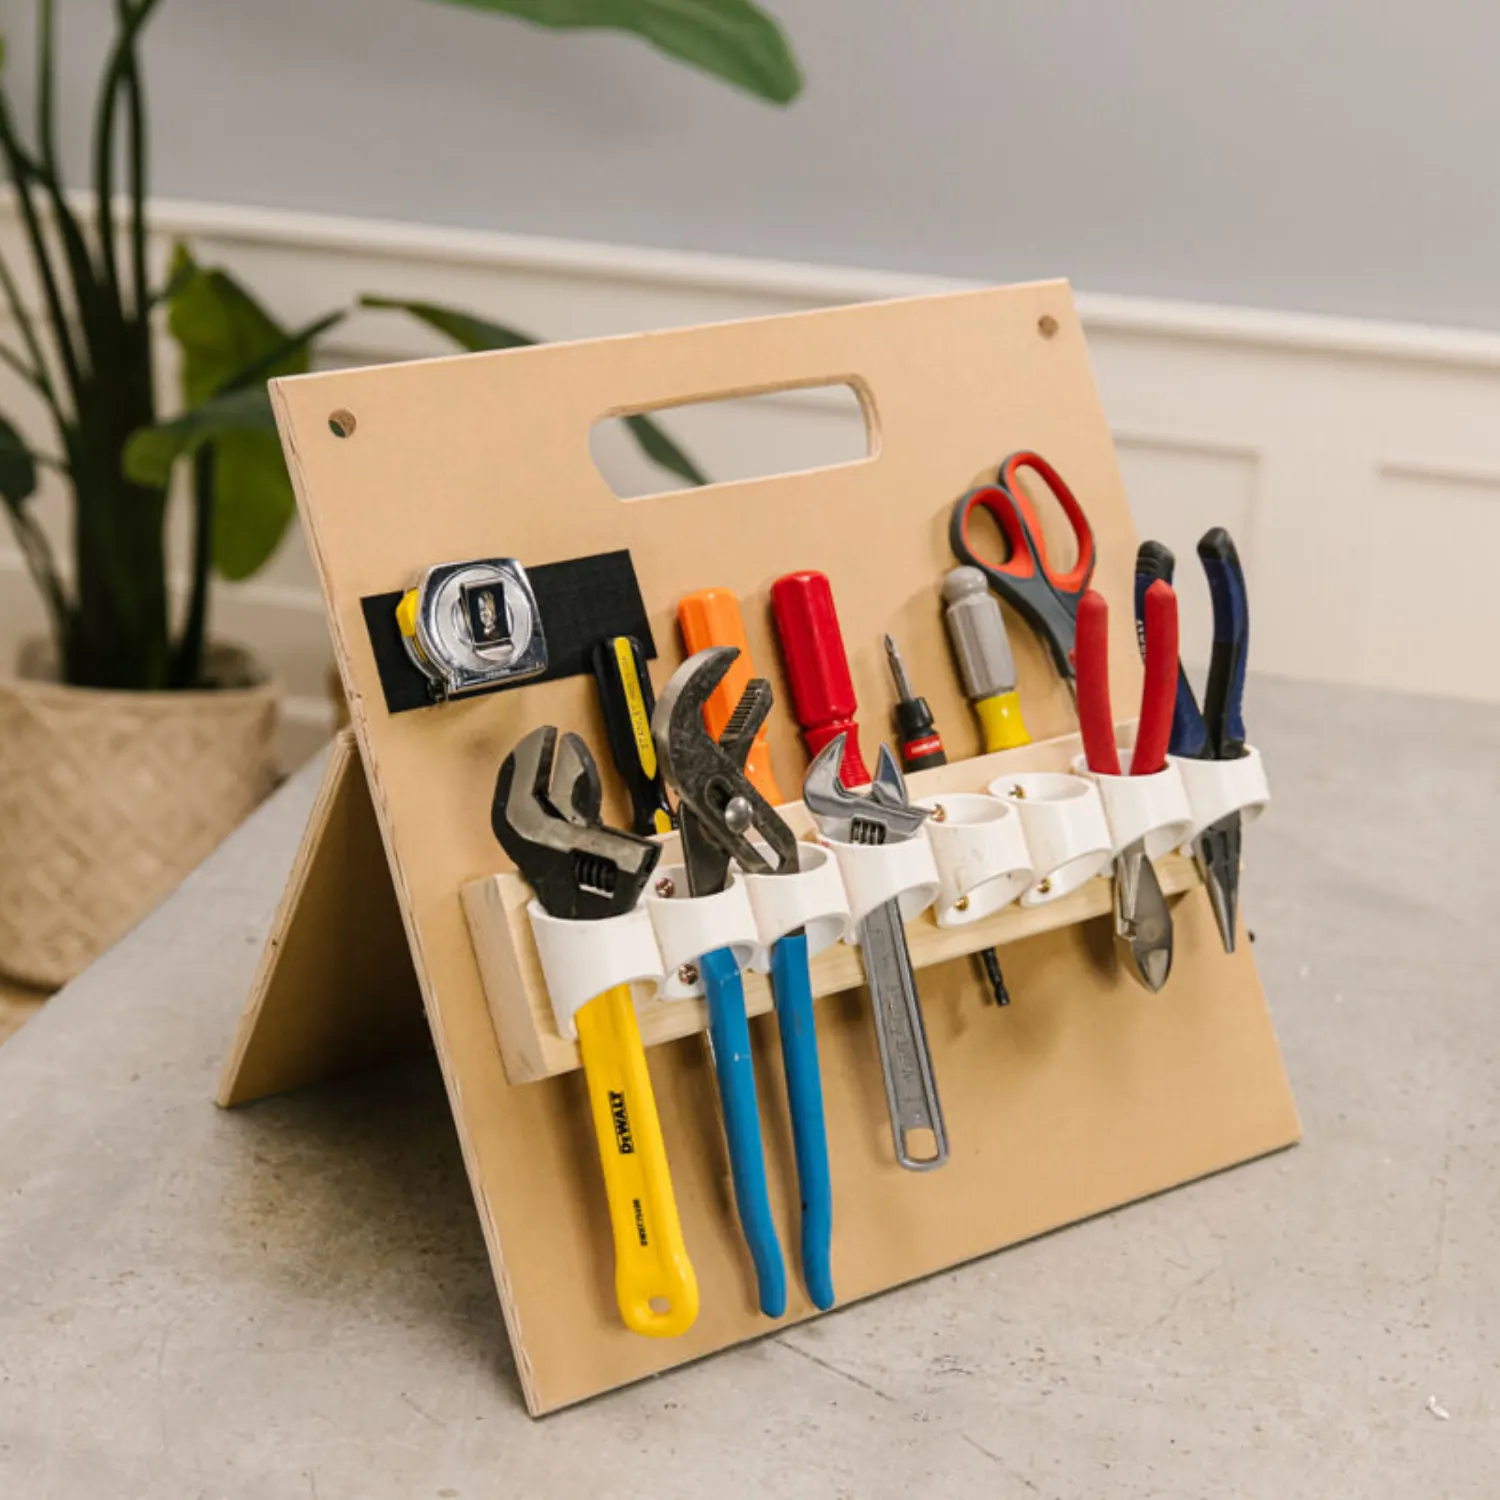
Ultimate DIY Tool Storage: Organize Your Workshop Like a Pro
Introduction
When it comes to DIY projects, having a well-organized and efficient workshop is essential. Without proper storage for your tools, it’s easy to lose track of what you have and where everything is located. Fortunately, with a little creativity and some simple DIY solutions, you can create the perfect tool storage system for your workshop. In this guide, we’ll explore the best DIY tool storage ideas to help you organize your workspace like a pro.
Part 1: Wall-mounted Tool Storage
Level 1: Pegboard Storage
Pegboards are a versatile and cost-effective tool storage solution for any workshop. By mounting a pegboard on your wall, you can easily hang and organize your tools for quick and easy access. Use hooks, shelves, and baskets to store everything from hammers and screwdrivers to power drills and saws.
Level 2: Magnetic Tool Strip
Another excellent way to store hand tools is with a magnetic tool strip. Simply mount a metal strip on your wall and attach magnetic tool holders to keep your screwdrivers, pliers, and other metal tools organized and easily accessible.
Part 2: DIY Tool Cabinet
Level 1: Customizable Tool Cabinet
A DIY tool cabinet is an excellent way to store and organize all of your tools in one convenient location. Build a custom cabinet with shelves, drawers, and compartments to fit all of your tools and hardware. Add a rolling base to make it easy to move around your workshop as needed.
Level 2: Tool Cabinet Organization
Once you have your tool cabinet built, it’s important to organize it in a way that makes it easy to find what you need. Use drawer dividers, storage bins, and labels to keep everything neat and tidy. Consider adding foam inserts to the drawers to keep your tools snug and secure.
Part 3: Mobile Tool Cart
Level 1: Utility Cart
A mobile tool cart is a versatile storage solution that can be easily moved around your workshop. Use a utility cart with multiple shelves and compartments to store your tools, hardware, and supplies. Look for a cart with locking wheels to keep it in place when you’re working.
Level 2: Tool Cart Organization
To make the most of your mobile tool cart, organize it with specific zones for different types of tools. Use magnetic bars to hang small metal tools, install hooks for hanging larger tools, and use bins and dividers to keep everything in its place. Consider adding a pegboard to the side of the cart for additional storage.
Part 4: DIY Tool Rack
Level 1: Lumber Tool Rack
A DIY lumber tool rack is a simple and inexpensive way to store your long-handled tools such as shovels, rakes, and hoes. Use scrap lumber to build a rack with notches to hold the tools in place. Mount it on the wall or behind a door to keep your tools organized and out of the way.
Level 2: PVC Tool Rack
For smaller hand tools, consider building a DIY PVC tool rack. Use PVC pipe to create individual slots for each tool, allowing you to hang them neatly on the wall. This can be a space-saving and efficient way to store your tools while keeping them easily accessible.
Part 5: Portable Tool Storage
Level 1: Tool Tote
A portable tool tote is a convenient way to keep your most-used tools organized and ready to go. Look for a durable tote with multiple pockets and compartments to keep your tools secure and easy to find. Consider a tote with a clear top so you can quickly see what’s inside.
Level 2: Tool Bucket Organizer
For larger tools or a collection of various items, consider a tool bucket organizer. This is a great way to keep all of your tools and supplies together in one easy-to-carry container. Look for a bucket with a lid to keep everything secure and protected from the elements.
Part 6: Creative DIY Tool Storage Ideas
When it comes to DIY tool storage, creativity can go a long way. There are numerous creative ways to store and organize your tools using everyday items or repurposed materials. One popular option is to use old pallets to create a wall-mounted tool storage system. By attaching hooks, shelves, and containers to the pallet, you can customize the storage to fit your specific tools. Another creative idea is to repurpose old tin cans by attaching them to a board and using them to store small hand tools or other small items.
If you’re looking for a more organized and aesthetically pleasing way to store your tools, consider using pegboard. Pegboard is a versatile material that can be easily cut to fit any space and can hold a variety of hooks, shelves, and hangers. You can also paint the pegboard to match your workshop decor, adding a pop of color to your storage solution.
For those with limited space, utilizing magnetic strips or bars can be a game-changer. By attaching the strips to the walls or the underside of shelves, you can easily hang metal tools such as wrenches, pliers, and screwdrivers, keeping them within arm’s reach without taking up valuable surface area.
Part 7: DIY Tool Storage Solutions for Small Spaces
Living in a small space doesn’t mean you have to sacrifice organization and functionality when it comes to storing your tools. In fact, there are plenty of DIY tool storage solutions tailored specifically for small spaces that can help you keep your tools organized and easily accessible.
One popular option for small space storage is utilizing the area behind a door. By attaching a pegboard or a rack to the door, you can create an efficient and space-saving tool storage solution. This allows you to keep your tools organized without taking up any valuable floor or wall space.
Another idea for small space storage is to utilize vertical space. This can be achieved by installing shelves or utilizing vertical storage systems to maximize the space available. By making use of the vertical space, you can keep your tools organized and easily accessible without overcrowding the room.
If your small space has limited floor space, consider using a rolling tool cart. This allows you to store your tools in a compact and mobile manner, making it easy to move around and access your tools when needed.
Part 8: DIY Tool Storage: Tips for Customizing Your Workspace
When it comes to DIY tool storage, one size does not fit all. Every workshop is unique, and customizing your tool storage to fit your specific needs and space is crucial for achieving an efficient and organized workspace. Here are some tips for customizing your DIY tool storage:
- Take inventory of your tools: Before you begin building or installing storage solutions, take stock of all the tools you have and consider how often you use them. This will help you determine what type of storage will best suit your needs.
- Consider workflow: When planning your tool storage, think about the workflow in your workshop. Try to keep frequently used tools easily accessible while storing less frequently used tools in a more out-of-the-way location.
- Customize your storage solutions: Don’t be afraid to get creative and customize your storage solutions to fit your specific tools. Consider using dividers, custom-sized shelves, or specific tool holders to ensure everything has a place and stays organized.
- Utilize the entire space: Make use of all available space in your workshop, including walls, ceilings, and even the back of doors. By maximizing your space, you can keep your tools organized and easily accessible.
By applying these tips and customizing your DIY tool storage solutions, you can create a workspace that is tailored to your needs and allows you to work efficiently and effectively.
Conclusion
With these DIY tool storage solutions, you can transform your workshop into an organized and efficient space that makes every DIY project a breeze. Whether you choose to build a custom cabinet, create a mobile tool cart, or simply hang a pegboard on your wall, there are plenty of options to fit your needs and budget. By taking the time to organize and store your tools properly, you’ll save time and frustration in the long run and be able to tackle any project with ease.
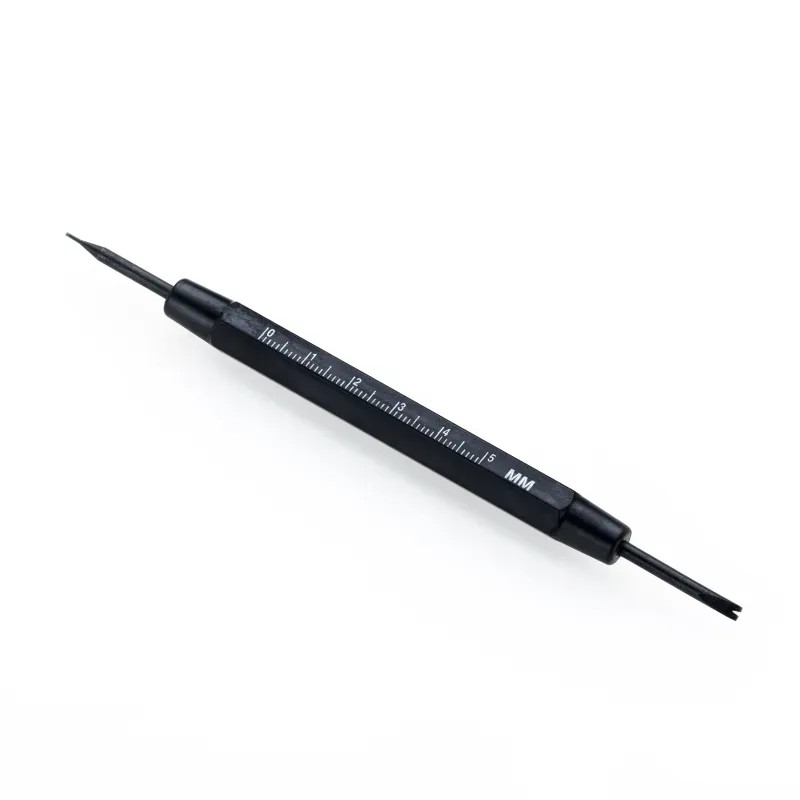
The Guide to Spring Bar Tool: Everything You Need to Know
Introduction:
Spring bar tools are an essential accessory for any watch enthusiast or collector. These handy tools are used to remove and insert spring bars, which are the small metal pins that hold a watch strap or bracelet in place. In this comprehensive guide, we will explore the different types of spring bar tools, how they work, and tips for using them effectively. Whether you are a novice or seasoned watch aficionado, this article will provide you with everything you need to know about spring bar tools.
Part 1: Understanding Spring Bars
Level 1: What Are Spring Bars?
Spring bars are small, spring-loaded metal pins that are used to secure watch straps or bracelets to the lugs of a watch case. They come in various sizes and can be made of stainless steel, brass, or other materials.
Level 2: How Do Spring Bars Work?
Spring bars have two small spring-loaded ends that can be depressed to fit into the lug holes of the watch case. Once released, the springs hold the watch strap or bracelet in place securely.
Part 2: Types of Spring Bar Tools
Level 1: Basic Spring Bar Tools
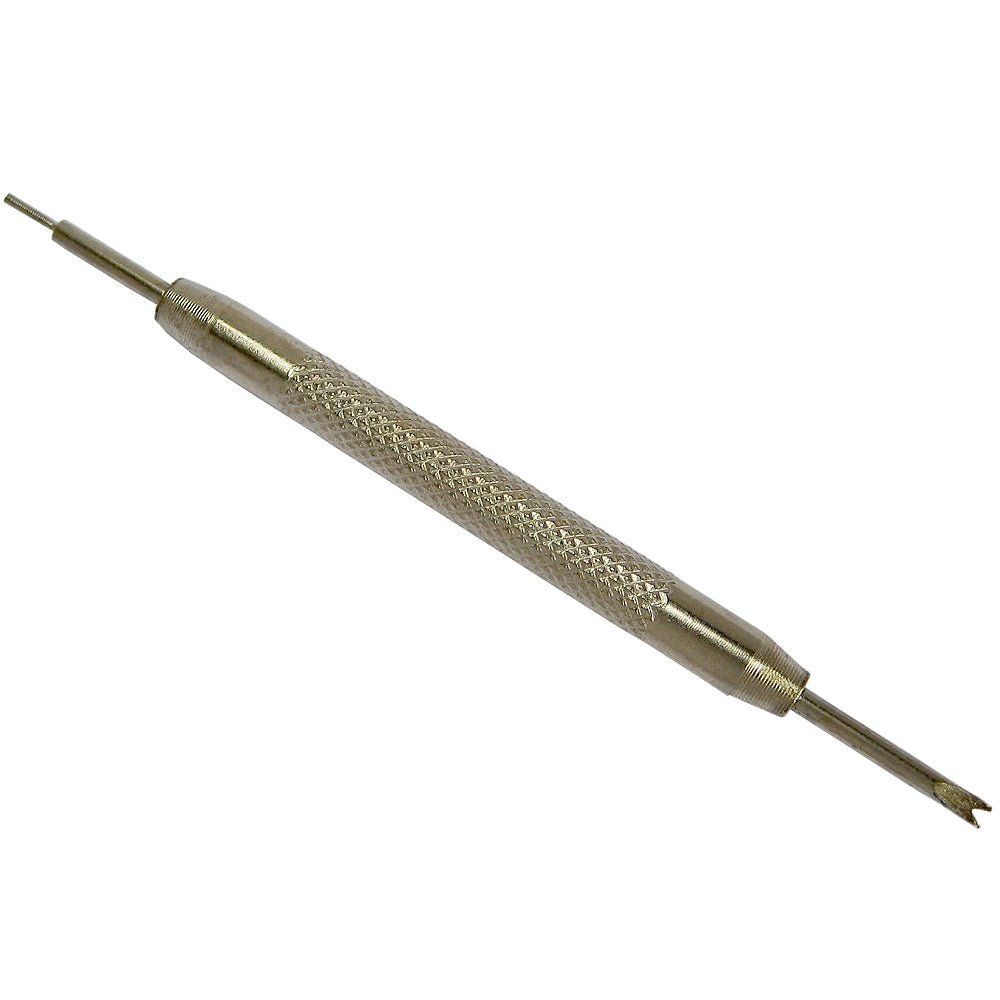
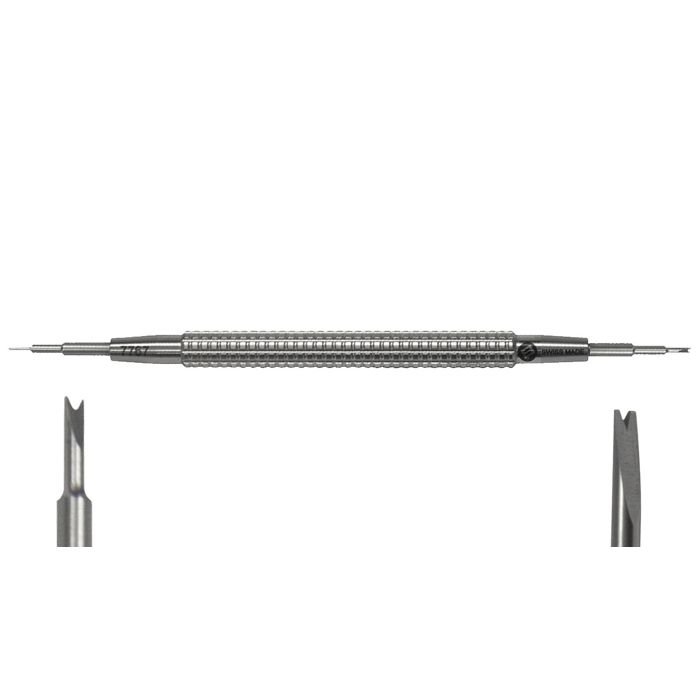
Basic spring bar tools consist of a handle with a pointed, forked end that is used to compress the spring bars and remove them from the watch lugs. These tools are simple and straightforward to use.
Level 2: Advanced Spring Bar Tools
Advanced spring bar tools may have additional features, such as interchangeable tips, adjustable pins, or ergonomic handles. These tools are designed for more precise and versatile use.
Part 3: How to Use a Spring Bar Tool
Level 1: Removing Spring Bars
To remove a spring bar, place the forked end of the spring bar tool between the watch strap and the lug. Gently press down on the spring bar to compress it, then carefully pull the strap away from the lug.
Level 2: Inserting Spring Bars
To insert a spring bar, place the forked end of the spring bar tool between the watch strap and the lug. Press down on the spring bar to compress it, then align the spring bar with the lug hole. And release the tool to secure the strap in place.
Part 4: Tips for Using Spring Bar Tools Effectively
Level 1: Use the Right Size
It is essential to use the correct size of spring bar tool for your watch’s lug width. Using the wrong size tool can damage the watch case or the spring bars.
Level 2: Take Your Time
When using a spring bar tool, it is crucial to be patient and take your time. Rushing can lead to accidental scratches or damage to the watch or strap.
Part 5: Maintenance and Care for Spring Bar Tools
Level 1: Cleaning and Lubricating
Periodically clean and lubricate your spring bar tools to ensure smooth operation. Remove any dirt or debris and apply a small amount of lubricant to the moving parts.
Level 2: Storage
Store your spring bar tools in a dry and clean place to prevent rust or corrosion. Keep them in a protective case or pouch to avoid damage.
Part 6: Importance of Quality Spring Bar Tools
When it comes to working with spring bars, having a high-quality spring bar tool becomes essential. A quality spring bar tool is not only durable but also ensures precision and control when removing and inserting spring bars. The tips of the tool should be sharp and precise to easily manipulate the spring bars without causing damage to the watch or watch band.
Additionally, a quality spring bar tool will have a comfortable grip that allows for extended use without causing hand fatigue. The handle should provide a good grip and for ease of use. This is especially important for professionals or hobbyists who frequently work with watch bands and straps.
Moreover, a good spring bar tool is versatile and compatible with various types and sizes of spring bars. It should be able to accommodate different watch band thicknesses and watch case designs. This versatility ensures that the tool can meet a wide range of watch models and styles.
In conclusion, a quality spring bar tool is a crucial investment for anyone who regularly works with watches and watch bands. It will provide precision, control, and versatility, ultimately making the process of removing and inserting spring bars much easier and safer.
Part 7: Types of Spring Bar Tools
There are several different types of spring bar tools available on the market. Each designed to serve a specific purpose or accommodate various preferences. The most common types of spring bar tools include the standard forked end tool, the pointed end tool, and the double-sided forked end tool.
The standard forked end tool features two thin, fork-shaped tips that are used to compress the spring bar ends and release them from the watch lugs. This type of tool is versatile and can be used for most watch bands and straps.
The pointed end tool, on the other hand, features a pointed tip on one end and a forked tip on the other. The pointed tip is used to push spring bars out of the watch lugs. While the forked tip is used to compress and insert spring bars. This type of tool is great for working with watches that have limited space between the lugs.
Finally, the double-sided forked end tool has two forked tips of different sizes on opposite ends of the handle. This allows for versatility in handling different sizes of spring bars and watch bands.
Ultimately, the choice of spring bar tool comes down to personal preference and the specific needs of the user. Each type of tool has its own advantages and may be better suited for different watch bands and watches.
Part 8: Tips for Using a Spring Bar Tool
Using a spring bar tool requires a certain level of skill and knowledge to avoid any damage to the watch or watch band. Here are some tips for using a spring bar tool effectively and safely:
- Choose the right tool for the job – Select a spring bar tool that is suitable for the type of watch band and watch case you are working with.
- Use masking tape – To prevent scratching the watch case or lugs, apply masking tape before using the spring bar tool.
- Hold the watch securely – When removing or inserting spring bars, ensure that the watch is held securely in place to prevent any accidental damage or slipping.
- Work in a well-lit area – Proper lighting is essential to see the spring bars and work with precision.
- Be patient – Take your time and work slowly and carefully to avoid any mishaps or accidents.
By following these tips, you can effectively use a spring bar tool to remove and insert spring bars without causing any damage to your watch or watch band.
Conclusion:
In conclusion, spring bar tools are an indispensable accessory for any watch enthusiast. Understanding the different types of spring bar tools, how to use them effectively. The proper maintenance will ensure that you can confidently work with your watches and watch straps. Whether you are changing straps for fun or performing repairs, it will make the process much smoother and enjoyable. With this guide, you now have all the knowledge and tips to make the most out of your spring bar tool.
Understanding the Swedge Tool: Everything You Need to Know
Introduction:
The swedge tool is a versatile and essential tool in the world of metalworking and blacksmithing. It is used to form a taper or bend in metal and is a vital part of creating various metal components such as leaf springs, blades, and other metal objects. In this comprehensive guide, we will delve into the intricacies of the swedge tool, its uses, types, and how it plays a significant role in metalworking.
Part 1: Understanding the Swedge Tool
Level 1: What is a swedge tool?
A swedge tool, also known as a swage block or swage tool, is a tool used in metalworking to form, shape, or bend metal. It typically consists of a block of steel with various concave and convex shapes, which are used to shape the metal.
Level 2: The history and evolution of swedge tool
The use of swedge tools dates back to ancient times, where blacksmiths would use hammers and anvils to bend and shape metal. Over the years, swedge tools have evolved into more specialized and efficient tools. With different shapes and sizes to accommodate various metalworking needs.
Part 2: Types of Swedge Tools
Level 1: Different types of swedge tools
Swedge tools come in various forms, including handheld tools, swage blocks, and swage dies.
Level 2: Uses and applications of different types of swedge tools
Handheld swedge tools are typically used for smaller metalworking tasks, such as creating decorative details on metal objects. Swage blocks are used for more significant metalworking projects, such as shaping blades, while swage dies are used in conjunction with a power hammer for precise shaping and forming of metal.
Part 3: The Uses of Swedge Tool
Level 1: Common uses of swedge tools
Swedge tools are used in a wide range of metalworking tasks, including creating tapers, forming bends, and shaping metal to create precise and intricate designs.
Level 2: Unique applications of swedge tools
Aside from traditional metalworking tasks, swedge tools are also used in other industries such as jewelry making, where they are used to shape and form metal for the creation of intricate jewelry pieces.
Part 4: How to Use a Swedge Tool
Level 1: Basic steps in using a swedge tool
Using a swedge tool involves securely clamping the metal in place and then using a hammer or power hammer to shape the metal against the swedge block or die.
Level 2: Advanced techniques and tips for using a swedge tool
Advanced users may employ different techniques such as hot forging and cold forging when using a swedge tool. These techniques require a deeper understanding of metal properties and advanced metalworking skills.
Part 5: Maintaining and Caring for Swedge Tools
Level 1: Proper maintenance of swedge tools
Regularly cleaning and oiling swedge tools is essential to prevent rust and maintain their effectiveness.
Level 2: Extending the lifespan of swedge tools
By using the swedge tools correctly and storing them in a dry and secure place, their lifespan can be extended, saving time and money in the long run.
Part 6: Benefits of Using a Swedge Tool
Swedge tools offer various benefits for metalworking and blacksmithing tasks. One of the primary advantages of using a swedge tool is its versatility. It can be used for a wide range of operations, including shaping, forming, and bending metal. This makes it a valuable tool for creating intricate designs and patterns in metalwork.
Additionally, the swedge tool allows for precise and accurate results, thanks to its sharp and well-defined edges. This makes it easier to create clean and uniform bends and shapes in the metal. The tool also provides excellent control, allowing the user to manipulate the metal with ease and precision.
Furthermore, using a swedge tool can help speed up the metalworking process, as it allows for efficient shaping and forming of the metal. This can be particularly beneficial in a production environment, where speed and efficiency are crucial. The tool’s ease of use and ability to produce consistent results also make it a valuable asset for both amateur and professional metalworkers.
In summary, the swedge tool offers several key benefits, including its versatility, precision, and efficiency. These qualities make it an indispensable tool for anyone working with metal, whether for artistic, industrial, or practical purposes.
Part 7: Types of Swedge Tools
There are several types of swedge tools available, each designed for specific metalworking tasks and applications. One common type is the round swedge, which is used for creating rounded shapes and contours in metal. This type of swedge tool is especially useful for forming decorative or functional elements in metalwork, such as handles, brackets, and ornamental details.
Another type of swedge tool is the flat swedge, which is designed for creating flat or straight bends in the metal. This type of tool is often used for forging and shaping metal bars, sheets, and plates, and is essential for creating straight edges, angles, and corners in metalwork.
Additionally, there are specialized swedge tools, such as the V-shaped swedge, which is designed for creating V-shaped bends in the metal. This type of tool is particularly useful for forming sharp angles and precise V-shaped grooves in metalwork.
Overall, the choice of swedge tool depends on the specific metalworking task at hand and the desired outcome. Metalworkers can achieve precise and high-quality results in their work.
Part 8: How to Maintain a Swedge Tool
Proper maintenance of swedge tools is essential for ensuring its longevity and performance. To keep a swedge tool in good condition, it is important to keep it clean and free of rust or corrosion. After each use, the tool should be wiped down with a clean, dry cloth to remove any dirt.
Additionally, regular oiling of swedge tools is recommended to prevent rust and corrosion. A light coating of oil applied to the tool’s surface will help protect it from moisture and other damaging elements. It is also important to store the swedge tool in a clean, dry place to prevent rust and damage.
Inspecting swedge toos regularly for any signs of wear, damage, or deformation is also crucial. If any issues are noticed, such as dull edges or cracks, the tool should be repaired or replaced as needed. Keeping the swedge tool in good condition will ensure that it continues to perform effectively and produce high-quality results in metalworking tasks.
Conclusion:
Swedge tools in the production of tool and die components, which are essential in the manufacturing industry for producing a wide range of products. Additionally, swedge tools play a crucial role in the fabrication of agricultural equipment, such as plows, harrows, and cultivators. The ability of swedge tools to form and shape metal with precision ensures the durability and reliability.
In summary, swedge tools have diverse applications in metalworking. They include the formation of aircraft components, automotive parts, architectural elements, industrial equipment, and agricultural implements. The versatility and precision of swedge tools make them indispensable in a wide range of metalworking applications. It is ensuring the production of high-quality components for various industries.
The swedge tool is a fundamental tool in the world of metalworking, with a rich history and versatile applications. Understanding the different types of swedge tools, their uses, and maintenance is crucial for anyone involved in metalworking. The swedge tool is an indispensable tool that will continue to play a vital role in shaping. And forming metal for years to come.
