
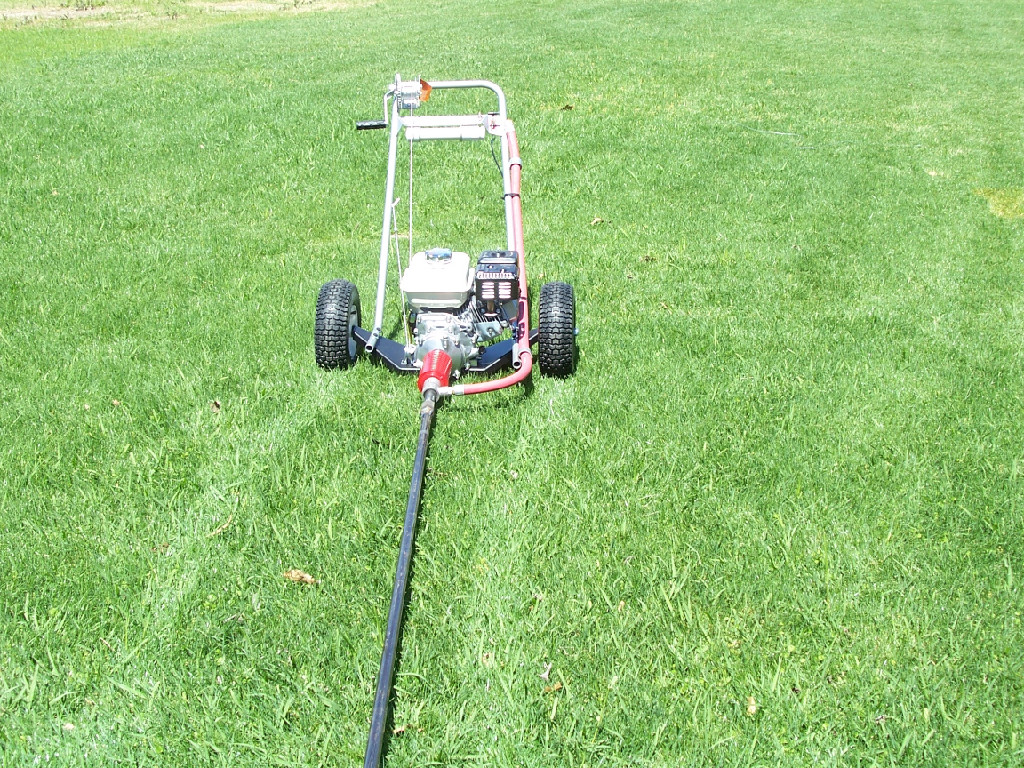
What is a self propelled lawn mower

In the realm of lawn care, where lush green carpets meet the demands of homeowners and enthusiasts, self-propelled lawn mowers stand as a testament to innovation and convenience. These ingenious machines, imbued with the power of self-propulsion, have transformed the way we approach lawn maintenance, replacing strenuous pushing with effortless gliding. Embark on a journey to uncover the intricacies of self-propelled lawn mowers, exploring their mechanisms, benefits, and the diverse range of options available to suit every lawn care need.
Unveiling the Essence of Self-Propulsion
At the heart of a self-propelled lawn mower lies a captivating blend of mechanical ingenuity and practical application. Unlike their push mower counterparts, self-propelled models harness the power of an internal combustion engine or an electric motor to propel themselves forward, eliminating the need for manual pushing. This transformative feature revolutionizes lawn care, allowing users to focus on steering and maneuvering the mower rather than expending physical effort.
Delving into the Mechanisms of Self-Propulsion
The power of self-propulsion manifests in a variety of forms, each tailored to deliver optimal performance and cater to specific needs. Gasoline-powered self-propelled lawn mowers, the most common type, utilize a traditional internal combustion engine to generate power. This power is then transmitted to the wheels via a gear-driven or hydrostatic transmission system, setting the mower in motion. Electric self-propelled lawn mowers, on the other hand, draw their energy from a battery pack, powering an electric motor that drives the wheels. Hybrid self-propelled lawn mowers, a testament to technological advancement, combine the efficiency of an electric motor with the extended runtime of a gasoline engine, offering a versatile solution.
Transmission Systems: The Power Brokers
The transmission system serves as the intermediary between the power source and the wheels, translating engine power into propelling force. Gear-driven transmissions, characterized by their simplicity and affordability, employ a series of gears to transfer power to the wheels. Hydrostatic transmissions, renowned for their smooth operation and variable speed control, utilize hydraulic fluid to transmit power, providing a more user-friendly experience. Hybrid transmissions, a fusion of gear-driven and hydrostatic technologies, offer a balance of efficiency and performance.
Control Mechanisms: At Your Command
Self-propelled lawn mowers empower users with intuitive control mechanisms, allowing them to regulate the mower’s speed and direction with precision. Traditional handle-based controls, often found on rear-wheel drive models, provide a familiar and straightforward interface. Lever-based controls, typically featured on front-wheel drive and zero-turn mowers, enhance ergonomic comfort and offer more precise speed adjustments. Electronic controls, the epitome of modern technology, enable users to seamlessly control the mower’s speed and direction using buttons or touchscreens.
A Spectrum of Self-Propelled Lawn Mowers: Tailored to Every Need
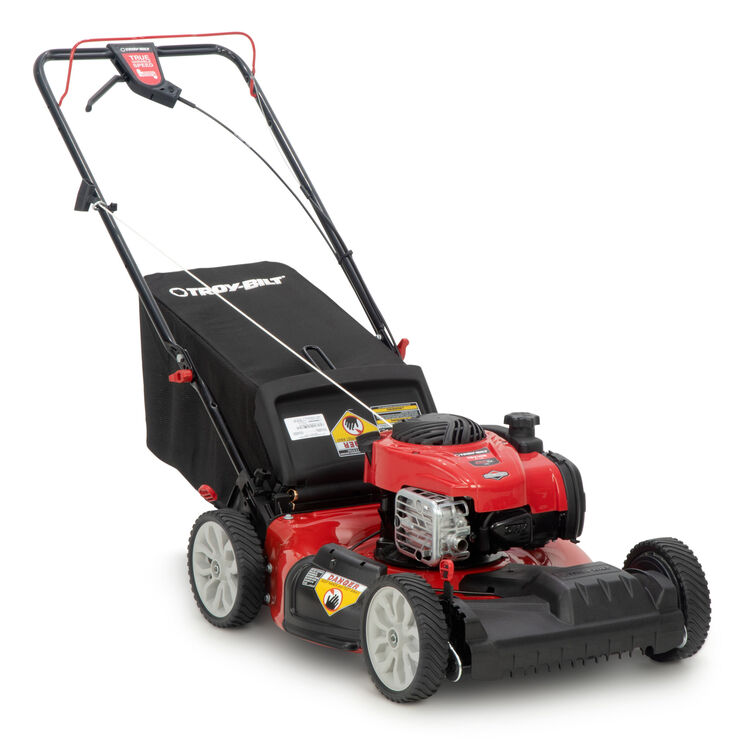
The world of self-propelled lawn mowers encompasses a diverse range of options, each designed to address specific lawn care requirements and preferences. Rear-wheel drive mowers, the most common type, offer classic maneuverability and handling, making them ideal for flat lawns and straightforward mowing tasks. Front-wheel drive mowers, equipped with powered front wheels, excel at tackling slopes and uneven terrain, providing superior traction and stability. All-wheel drive mowers, the pinnacle of power and grip, conquer the most challenging landscapes, making them suitable for large properties and demanding mowing conditions. Zero-turn mowers, renowned for their exceptional maneuverability, enable tight turns and precise edging, transforming lawn care into an art form.
Informed Decision-Making: Choosing the Right Self-Propelled Lawn Mower
Selecting the ideal self-propelled lawn mower demands a careful assessment of individual needs and lawn care requirements. Lawn size plays a crucial role in determining the appropriate mower type, with larger lawns benefiting from the efficiency of all-wheel drive models, while smaller spaces may find rear-wheel drive mowers sufficient. Terrain considerations influence the choice between rear-wheel drive for flat lawns and front-wheel or all-wheel drive for slopes and uneven surfaces. Personal preferences, such as the desired level of maneuverability and handling, further guide the selection process.
Effortless Lawn Care: The Benefits of Self-Propelled Lawn Mowers
Self-propelled lawn mowers revolutionize lawn care by introducing a host of compelling benefits that elevate the mowing experience. Reduced physical strain and fatigue stand as a hallmark advantage, as the mower does the work, not the user’s arms and legs. This translates into increased mowing speed and efficiency, allowing users to cover more ground in less time, completing tasks faster. Enhanced maneuverability and handling empower users to navigate slopes, obstacles, and tight spaces with ease, making lawn care less demanding and more enjoyable.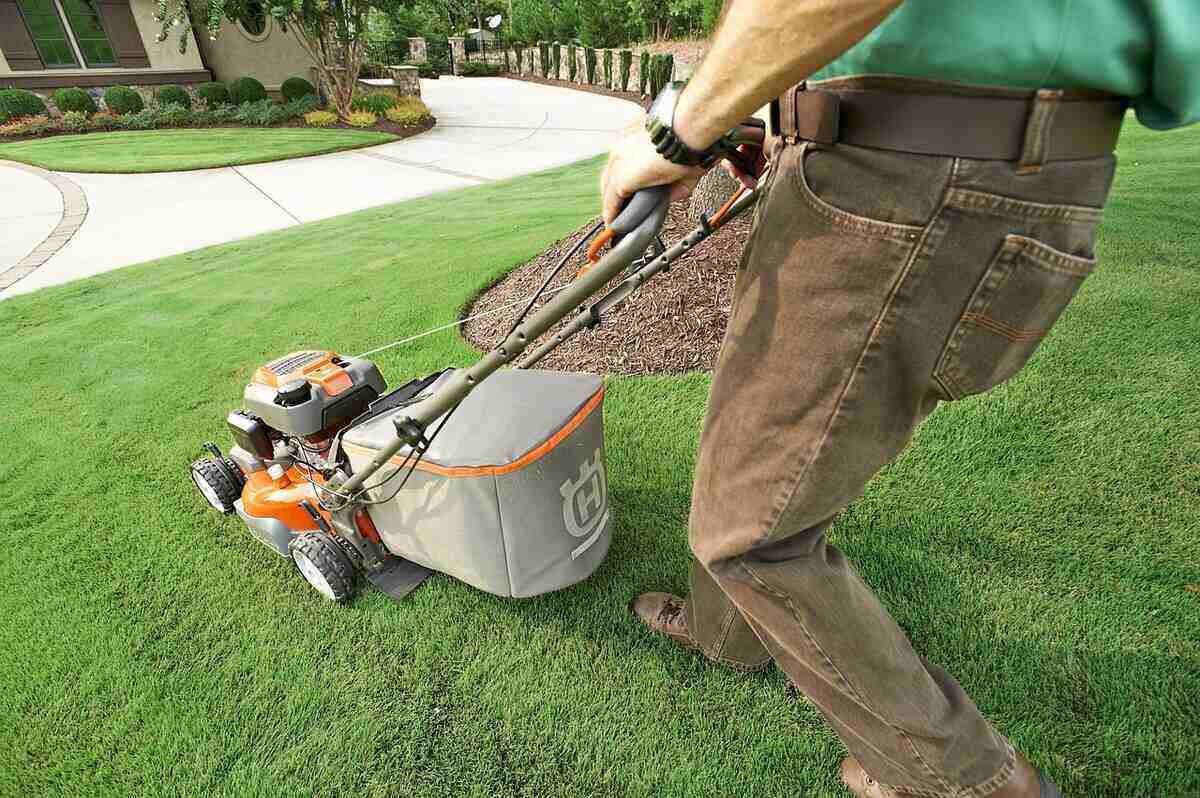
Features to Enhance Your Self-Propelled Mowing Experience
Beyond the core functionalities, self-propelled lawn mowers offer a variety of features that further elevate the mowing experience and cater to diverse user preferences.
-
Cutting Width: This refers to the swath of grass cut in a single pass by the mower. Wider cutting widths translate to less time spent mowing larger lawns, while narrower widths provide superior maneuverability for intricate mowing tasks or navigating around obstacles.
-
Cutting Height Adjustment: Precise control over grass height is vital for maintaining a healthy lawn. Self-propelled lawn mowers typically offer multiple cutting height settings, allowing users to adjust the blade position to suit the desired grass length and seasonal conditions.
-
Mulching Capabilities: Mulching lawn mowers shred grass clippings into fine particles that decompose and return nutrients to the soil, promoting healthy grass growth and reducing the need for fertilizer. This environmentally friendly feature eliminates the need for bagging or raking grass clippings, saving time and effort.
-
Bagging Options: For those who prefer a cleaner mowing experience or have specific lawn care requirements, self-propelled lawn mowers can be equipped with grass collection bags. These bags capture grass clippings during mowing, allowing for easy disposal or composting.
-
Additional Features: Modern self-propelled lawn mowers often boast a range of additional features that enhance convenience and functionality. Side discharge allows grass clippings to be deposited to the side of the mower, while washout ports simplify cleaning after mowing. LED headlights illuminate the mowing path during low-light conditions, and cruise control maintains a consistent mowing speed for effortless operation.

Operating and Maintaining Your Self-Propelled Lawn Mower for Peak Performance
Ensuring the longevity and optimal performance of your self-propelled lawn mower requires a commitment to proper operation and maintenance practices.
-
Pre-Mowing Checklist: Before embarking on your mowing adventure, take a few moments to perform a pre-mowing inspection. Verify that tire pressure is at the recommended level, ensure blades are sharp for clean cuts, and check engine oil levels for optimal performance.
-
Mowing Techniques: For a smooth and efficient mowing experience, maintain a consistent speed while avoiding overloading the mower by attempting to cut too much grass at once. Varying mowing patterns helps prevent uneven cutting and promotes healthy lawn growth.
-
Regular Maintenance: Extend the lifespan of your self-propelled lawn mower by adhering to a regular maintenance schedule. Clean the mower thoroughly after each use, removing grass clippings and debris from the undercarriage and blade. Sharpen blades regularly to ensure clean cuts and prevent grass tearing. Regularly check for any mechanical issues and address them promptly.
-
Winter Storage: If you reside in a region with harsh winters, take steps to properly store your self-propelled lawn mower during the off-season. Empty the fuel tank to prevent deterioration, disconnect batteries to avoid discharge, and store the mower in a dry, sheltered location to protect it from the elements.
Prioritizing Safety: Essential Precautions for Operating Self-Propelled Lawn Mowers
Operating a self-propelled lawn mower requires adherence to safety protocols to ensure a hazard-free mowing experience.
-
Protective Gear: Always wear appropriate protective gear while mowing. This includes eye protection to shield your eyes from flying debris, hearing protection to mitigate noise exposure, and sturdy footwear for secure footing on uneven terrain.
-
Mind Your Surroundings: Maintain a safe distance from children and pets during operation to prevent accidental injuries. Avoid mowing on wet or slippery surfaces, as this can lead to loss of traction and potential accidents. Be aware of your surroundings and watch out for obstacles or uneven terrain hazards.
-
Safe Operation Practices: Follow the manufacturer’s safety instructions carefully. Familiarize yourself with the mower’s controls and operation procedures before starting. Never leave a running mower unattended, and always disengage the self-propulsion mechanism before stopping or turning the mower off.
By prioritizing safety and adhering to operational guidelines, you can ensure a secure and enjoyable mowing experience with your self-propelled lawn mower. Remember, a well-maintained mower not only performs optimally but also contributes to a safer and more efficient lawn care routine.
Lifted Lawn Mower Elevate Your Lawn Care
In the realm of lawn care, standard lawn mowers have long reigned supreme, dutifully taming suburban yards and manicured landscapes. However, for those seeking to conquer more challenging terrain and venture beyond the confines of traditional lawn care, a new breed of mower has emerged: the lifted lawn mower. These formidable machines, imbued with enhanced capabilities and off-road prowess, have transformed the way we approach lawn maintenance and outdoor adventures.
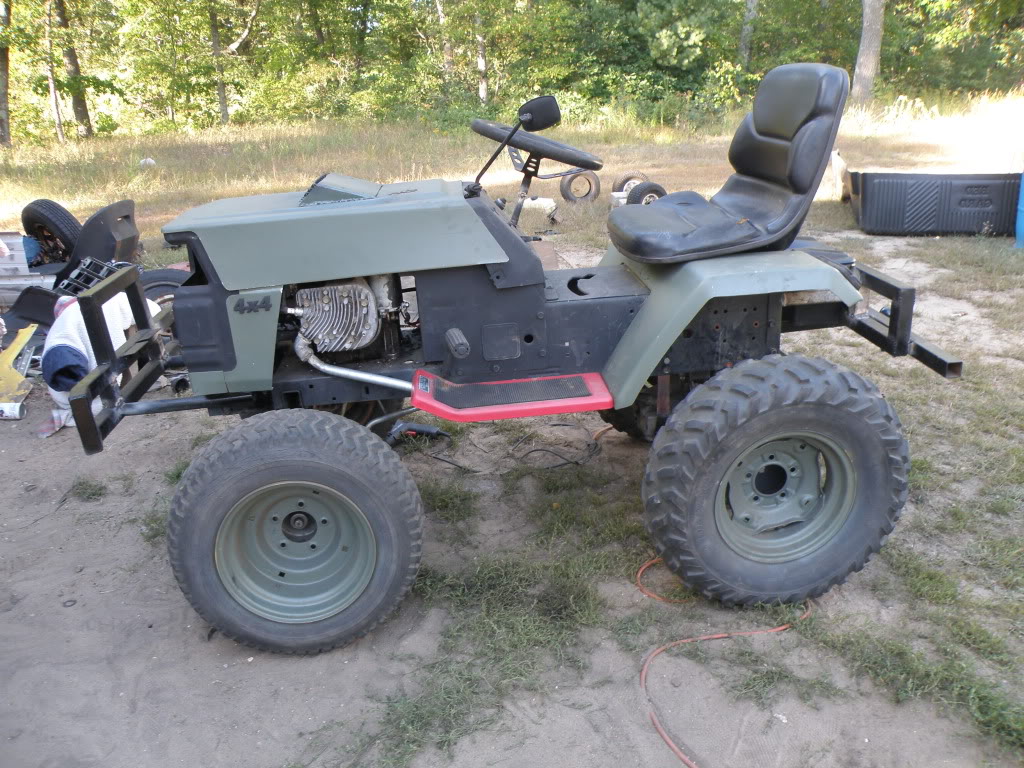
Unveiling the Allure of Lifted Lawn Mowers
Lifted lawn mowers, characterized by their elevated stance and rugged construction, offer a compelling blend of practicality and excitement. By strategically raising the mower deck and chassis, these machines transcend the limitations of their standard counterparts, unlocking a world of possibilities.
Benefits: Unleashing the Power of Height
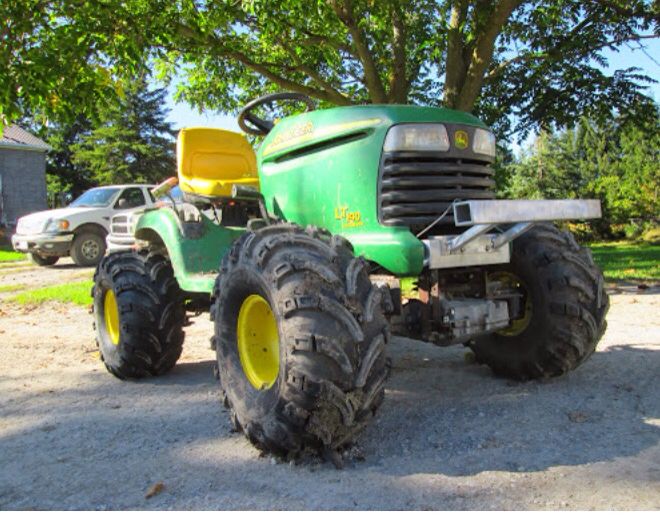
At the heart of a lifted lawn mower’s appeal lies its transformative ability to conquer uneven terrain and obstacles with newfound ease. Increased ground clearance empowers these machines to navigate rough patches, steep inclines, and even rocky landscapes with unwavering stability. Additionally, the elevated perspective provides an enhanced vantage point of the mowing area, ensuring a more precise and efficient mowing experience.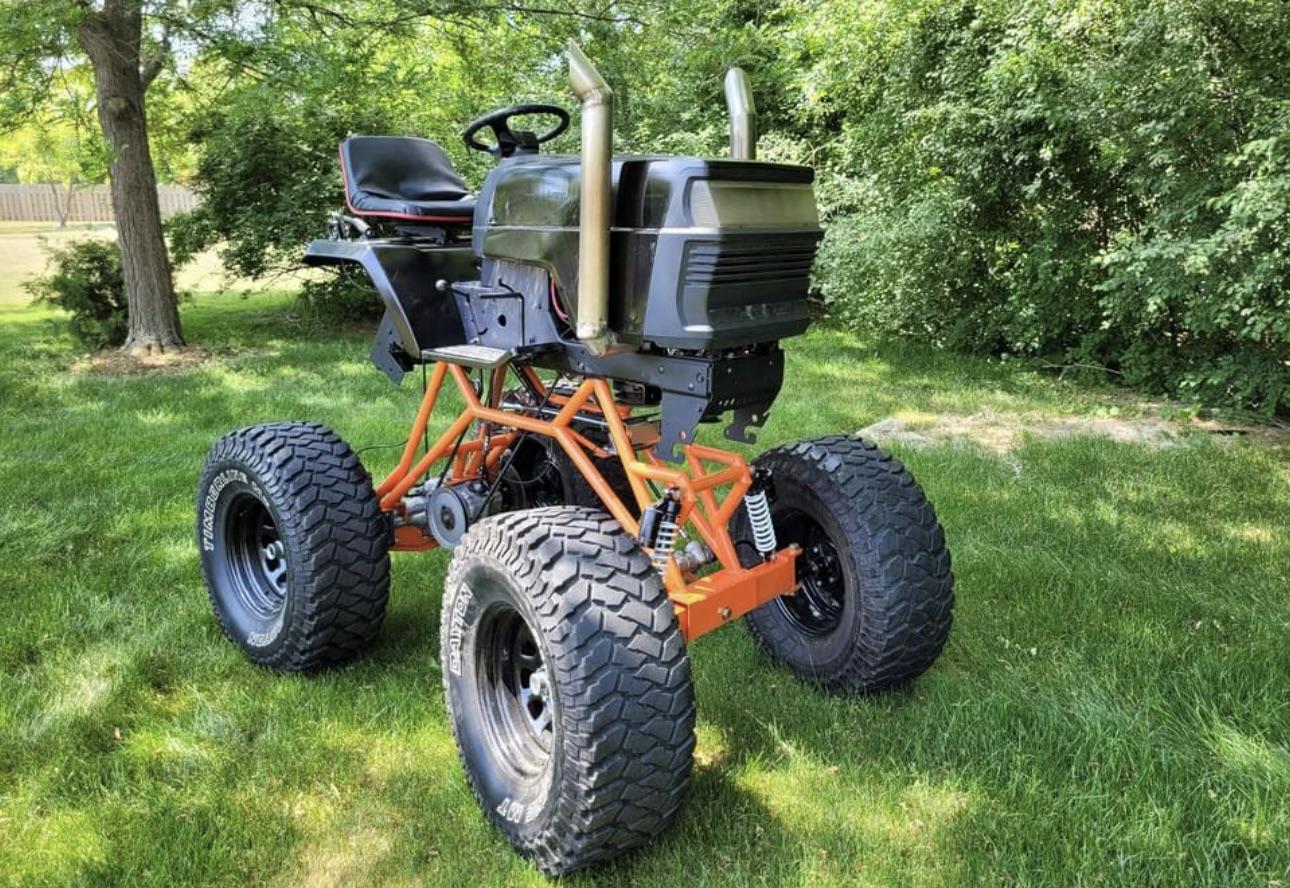
Types of Lifted Lawn Mowers: Catering to Diverse Needs
The world of lifted lawn mowers encompasses a diverse range of configurations, each tailored to address specific needs and preferences. Spindle lifts, employing individual spindle extensions, offer a straightforward approach to height adjustment. Axle lifts, on the other hand, elevate the entire mower chassis, providing a more substantial increase in ground clearance. Body lifts, achieved through custom brackets, raise the mower body itself, while suspension lifts enhance ground clearance by upgrading the mower’s suspension components.
Selecting the Ideal Lift Kit: A Matter of Informed Choice
Choosing the right lift kit for your lawn mower demands careful consideration of several factors. The type of mower, the desired lift height, budgetary constraints, and personal riding style all play a role in determining the most suitable option. Additionally, ensuring compatibility between the lift kit and the specific lawn mower model is paramount. Consulting with experienced mechanics or lawn mower specialists can prove invaluable in navigating the selection process.
Installation and Safety: Prioritizing Prudence
The installation of a lift kit, whether undertaken by qualified mechanics or DIY enthusiasts, should adhere to strict safety protocols. Proper installation techniques are crucial for maintaining the mower’s stability, handling, and center of gravity. During operation, lifted lawn mowers demand heightened awareness of their altered characteristics, exercising caution on slopes and uneven terrain.
Performance Enhancements: Pushing the Boundaries
For those seeking to maximize the capabilities of their lifted lawn mower, a range of performance enhancements beckons. Upgrading tires to larger, off-road-specific models provides enhanced traction and grip, while aggressive tread patterns tackle challenging terrain with unwavering confidence. Performance upgrades, such as exhaust systems or air intakes, can further elevate the mower’s capabilities.
Off-Road Adventures: Unveiling Hidden Horizons
Lifted lawn mowers transcend the boundaries of traditional lawn care, unlocking a world of off-road adventures. Exploring trails and traversing rough terrain, once inaccessible to standard mowers, becomes a reality. Clearing brush and debris from overgrown areas or remote properties transforms these machines into versatile tools for land management. During winter months, lifted lawn mowers can even tackle snow removal tasks with surprising efficiency.
Legal and Regulatory Considerations: Navigating the Rules
Before embarking on off-road expeditions, it is essential to familiarize oneself with local regulations and ordinances governing the use of lifted lawn mowers. Potential insurance implications and safety concerns should also be carefully evaluated. Operating lifted lawn mowers responsibly and adhering to safety guidelines is paramount to ensuring a safe and enjoyable experience.
Maintenance and Care: Ensuring Longevity
Regular maintenance of lift kits and associated components is crucial for maintaining the optimal performance and longevity of a lifted lawn mower. Inspecting tires, suspension, and other affected parts for wear and tear is essential. Proper lubrication and adjustments ensure that the lift kit functions smoothly and efficiently.
Conclusion: Embracing the Lifted Lawn Mower Experience
Lifted lawn mowers, with their enhanced capabilities and off-road prowess, offer a compelling alternative to standard lawn mowers. By elevating your lawn care experience, these machines transform mundane tasks into exhilarating adventures. Whether conquering challenging terrain, exploring hidden frontiers, or tackling snow removal duties, lifted lawn mowers redefine the possibilities of outdoor power equipment. Approach the world of lifted lawn mowers with informed decision-making, prioritize safe operation, and prepare to embrace a whole new dimension of lawn care and outdoor exploration.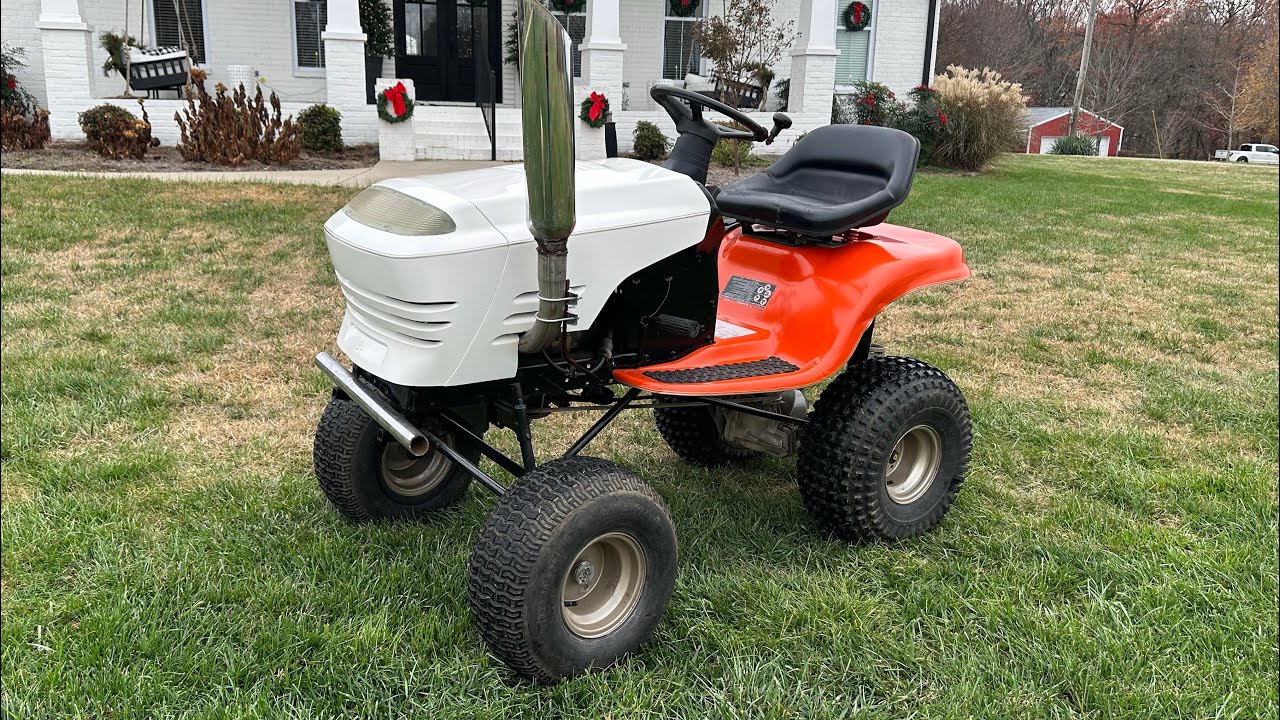
The DIY Approach: Lifting Your Lawn Mower Yourself
For the mechanically inclined individual, tackling the installation of a lift kit on their own lawn mower can be a rewarding experience. However, venturing down the DIY path requires careful planning and meticulous execution. Here’s a breakdown of the essential steps involved:
-
Gather Your Tools and Materials: Before commencing, ensure you have the necessary tools and the specific lift kit compatible with your lawn mower model. Consult online resources or manuals for detailed instructions specific to your chosen lift kit. Standard tools like wrenches, sockets, screwdrivers, and a jack will likely be required.
-
Preparation is Key: Begin by thoroughly cleaning the work area and ensuring ample space for maneuvering the lawn mower. Drain the mower’s fuel and engine oil to prevent spills during the installation process. Disconnect the spark plug wire to eliminate the risk of accidental ignition.
-
Following Instructions: Meticulously follow the lift kit’s installation instructions, paying close attention to each step. Disassemble the necessary components of the lawn mower to facilitate the installation of the lift kit parts. Double-check all connections and tighten them to the specified torque values using a torque wrench.
-
Safety First: Throughout the process, prioritize safety. Utilize jack stands to securely support the raised mower during installation. Wear safety glasses and gloves to protect yourself from potential hazards. If you encounter any difficulties or uncertainties, don’t hesitate to consult a qualified mechanic for assistance.
The Financial Investment: Weighing the Costs
The cost of transforming your lawn mower into a lifted machine can vary depending on several factors. The type of lift kit, the complexity of the installation process (DIY versus professional), and any additional performance upgrades all contribute to the overall financial investment. Spindle lifts tend to be the most budget-friendly option, while suspension lifts often require more extensive modifications and carry a higher price tag. Factor in the potential cost of replacement tires and any necessary maintenance to arrive at a comprehensive financial picture.
The Future of Lifted Lawn Mowers: Innovation and Expansion
The realm of lifted lawn mowers is constantly evolving, with manufacturers developing innovative solutions to enhance their capabilities and appeal. New lift kit designs promise easier installation processes and improved stability. Additionally, the integration of technological advancements like ride control systems and advanced traction control could revolutionize the off-road lawn mower experience. As the popularity of lifted lawn mowers continues to rise, we can expect further innovations and advancements that push the boundaries of performance and functionality.

Power of Lathes: A Comprehensive Guide to Lathe Projects
Introduction
In the realm of woodworking and metalworking, lathes stand as indispensable tools, capable of transforming raw materials into intricate masterpieces. Whether you’re a seasoned craftsman or an aspiring woodworker, lathe projects offer an avenue to unleash creativity, hone skills, and produce functional or decorative items that enhance your home or workshop.
Understanding Lathes and Their Capabilities
Lathes are machines that rotate a workpiece, allowing a cutting tool to shape it into desired forms. They primarily function to create cylindrical or conical shapes, with the ability to perform various operations, including:
-
Turning: Removing material from the workpiece to create a smooth, rounded surface.
-
Facing: Flattening the end of a workpiece perpendicular to its axis.
-
Boring: Enlarging an existing hole or creating a new one within the workpiece.
-
Threading: Cutting helical grooves onto the workpiece to create a screw-like pattern.
-
Parting: Separating a workpiece into two distinct pieces along a defined line.
Essential Lathe Tools and Accessories
To embark on your lathe projects, you’ll need a basic set of tools and accessories:
-
Lathe Tool Rest: A support for the cutting tool, ensuring precise control and stability during operation.
-
Cutting Tools: A variety of cutting tools, including chisels, gouges, and parting tools, for different shaping tasks.
-
Chucks and Adapters: These secure the workpiece to the lathe spindle, allowing for various types of mounting.
-
Measuring Tools: Calipers, micrometers, and gauges for accurate measurement and dimension control.
-
Safety Gear: Protective glasses, gloves, and a dust mask to safeguard yourself from hazards.

Types of Lathes and Their Applications
Lathes come in various types, each suited for specific purposes:
-
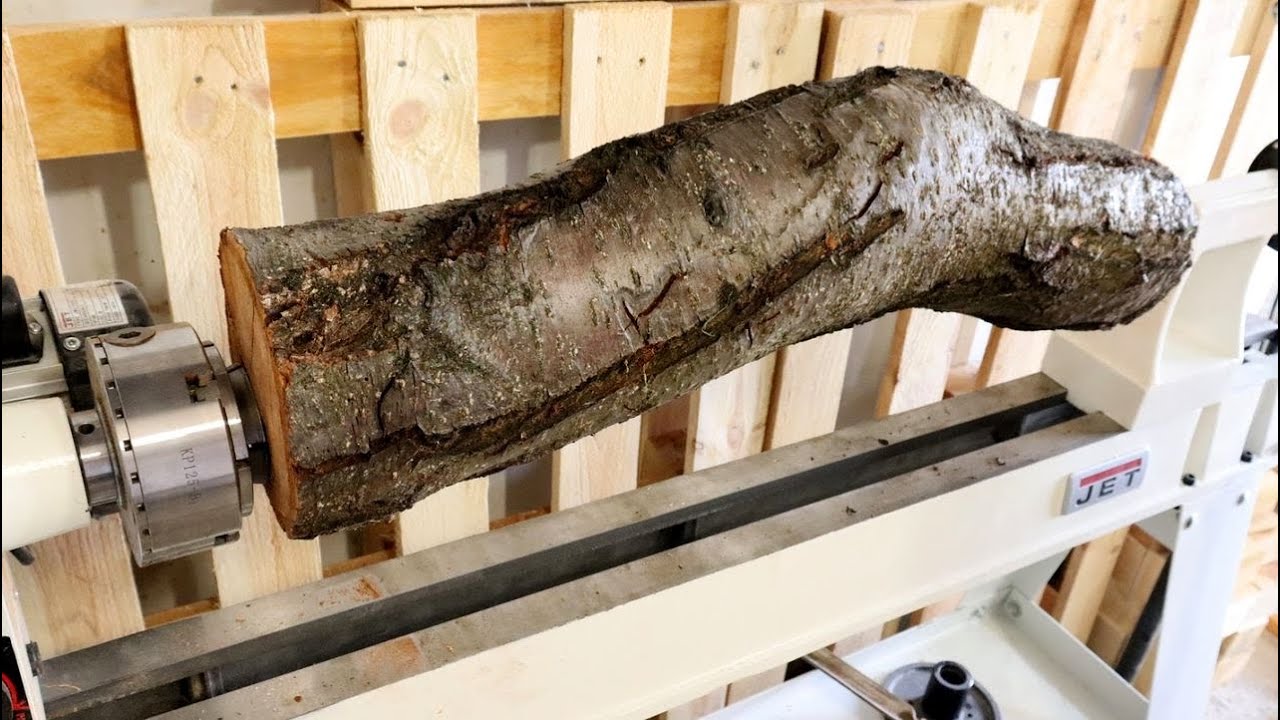
Wood Lathes: Designed for shaping wooden workpieces, ideal for creating bowls, spindles, and decorative elements.
-
Metal Lathes: Precision instruments for machining metal workpieces, producing parts like gears, shafts, and bushings.
-
Mini Lathes: Compact and versatile, suitable for small-scale projects in both wood and metalworking.
Choosing the Right Lathe Project
When selecting a lathe project, consider your skill level, available tools, and desired outcome. Start with simple projects like bowls or spindles to gain confidence, then progress to more complex tasks like threading or parting.
Safety Guidelines for Lathe Operations
Safety is paramount when working on a lathe. Always follow these guidelines:
-
Secure the workpiece: Ensure the workpiece is firmly mounted in the chuck or between centers to prevent accidents.
-
Maintain proper posture: Stand with a balanced stance, knees slightly bent, and keep your hands away from rotating parts.
-
Wear appropriate PPE: Use protective glasses, gloves, and a dust mask to shield yourself from hazards.
-
Never operate the lathe while impaired: Avoid operating the lathe while under the influence of alcohol or drugs.
-
Stay alert and focused: Maintain full attention on the task at hand and avoid distractions while operating the lathe.
Basic Lathe Operations for Beginners
Start with these fundamental lathe operations to master the basics:
-
Rough Turning: Initial shaping of the workpiece to remove excess material and establish the desired form.
-
Smoothing: Refining the surface of the workpiece to eliminate irregularities and achieve a smooth finish.
-
Detailing: Adding intricate details, such as grooves, ridges, or decorative elements, to enhance the appearance.
-
Sanding: Smoothing the surface with sandpaper to achieve a polished, professional finish.
Intermediate Lathe Projects to Elevate Your Skills
Once you’ve mastered the basics, venture into these intermediate projects:
-
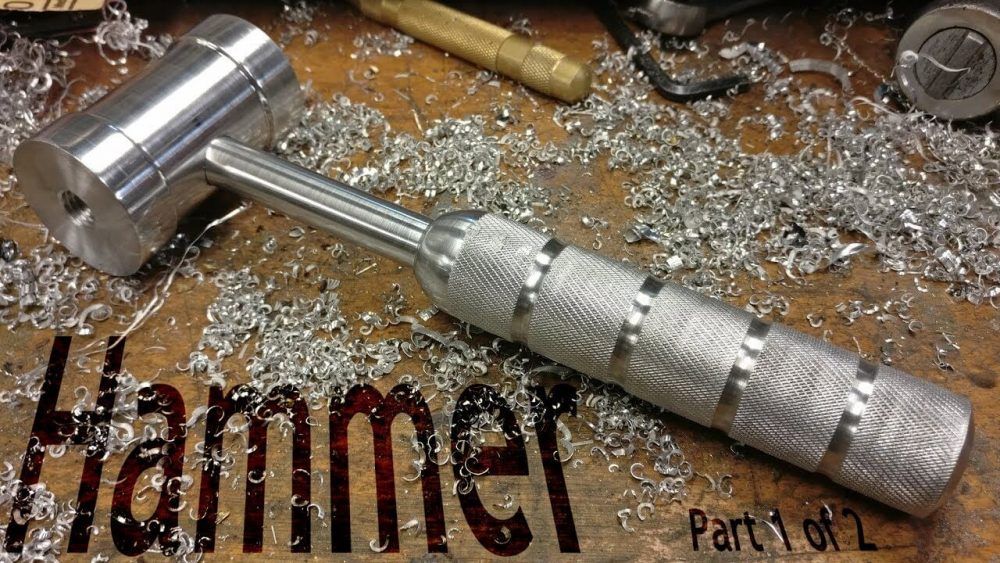
Creating a Pen: Combine woodturning and metalworking skills to craft a personalized pen.
-
Turning a Bowl with a Foot: Shape a wooden bowl with a decorative foot for added elegance.
-
Threading a Bolt: Learn the process of creating screw threads on a metal workpiece.
-
Making a Candle Holder: Design and turn a wooden candle holder with intricate details.

Advanced Lathe Projects for Experienced Craftsmen
For experienced woodworkers and metalworkers, these projects offer a challenge:
-
Turning a Chess Set: Create a complete chess set from wood, including intricate pieces and a board.
-
Machining a Gear: Produce a functional gear from metal using precise lathe techniques.
-
Turning an Intricate Spindle: Shape a complex spindle with multiple decorative elements and varying diameters.
-
Creating a Custom Table Lamp: Design and turn a unique table lamp from wood or metal.
-
Resources for Learning Lathe Techniques
Embarking on lathe projects can be an exciting yet daunting experience. Here are some resources to enhance your learning journey:
- Books and Online Tutorials: Numerous books and online tutorials cater to woodturning and metalworking, offering detailed instructions, project ideas, and safety tips.
- Lathe Forums and Communities: Online forums and communities connect aspiring and experienced lathe enthusiasts, allowing for knowledge sharing, troubleshooting assistance, and project inspiration.
- Woodworking or Metalworking Classes: Consider enrolling in woodworking or metalworking classes to gain hands-on experience and personalized guidance under the supervision of a skilled instructor.
- YouTube Channels: Many YouTube channels dedicated to woodworking and metalworking offer instructional videos featuring lathe techniques, project demonstrations, and valuable tips.
Maintenance and Care for Your Lathe
Just like any tool, proper care is crucial to ensure your lathe’s longevity and optimal performance. Here are some maintenance practices:
- Cleaning and Lubrication: Regularly clean your lathe to remove wood shavings, metal debris, and dust buildup. Follow the manufacturer’s instructions for lubricating moving parts to prevent friction and wear.
- Sharpening Cutting Tools: Maintain sharp cutting tools for efficient and clean cuts. Learn how to sharpen your lathe tools using a sharpening stone or invest in a sharpening jig.
- Belt Maintenance: Inspect and replace lathe belts if they show signs of wear or damage. Proper belt tension is crucial for smooth operation.
- Storage: When not in use, store your lathe in a clean, dry environment to prevent rust and dust accumulation. Cover the lathe to protect it from dust and debris.
Safety Beyond the Basics: Advanced Safety Techniques for Experienced Users
As you progress in your lathe projects, consider incorporating these advanced safety techniques:
- Using Outboard Tools: Learn the safe use of outboard tools, such as steady rests and follower rests, to provide additional support and stability during specific turning operations.
- Dust Collection Systems: Implement a dust collection system on your lathe to minimize dust inhalation and maintain a clean work environment.
- Sharpening Techniques for Specific Tools: Mastering sharpening techniques for different lathe tools, like skew chisels and parting tools, ensures optimal cutting performance and reduces the risk of accidents.
- Advanced Workholding Techniques: With experience, explore advanced workholding techniques like chucking techniques and using centers for longer workpieces. Always prioritize safe and secure workpiece mounting.
The Future of Lathe Technology: Embracing Innovation
The realm of lathe technology is constantly evolving, introducing exciting advancements for woodworkers and metalworkers alike. Here’s a glimpse into what the future holds:
- CNC Lathes: Computer Numerical Control (CNC) lathes offer increased precision and automation for complex projects.
- Digital Readouts: Digital readouts provide real-time data on speed, feed rates, and tool positions, enhancing control and accuracy.
- Variable Speed Drives: Variable speed drives offer a wider range of speeds, allowing for optimal tool selection and efficient cutting across different materials.
- Safety Features: Advanced lathes may incorporate built-in safety features, such as automatic shut-off mechanisms in case of emergencies.
These advancements, along with continued exploration and innovation, promise to enhance the capabilities and safety of lathes, further empowering woodworkers and metalworkers to create their masterpieces.
Under driveway boring tool rental
Introduction
In the realm of home improvement and construction, venturing beneath the surface often presents a challenge, particularly when it comes to installing underground utilities, irrigation systems, or drainage pipes. Traditional excavation methods, involving extensive digging and trenching, can disrupt landscapes, damage existing infrastructure, and generate significant labor costs. Fortunately, a solution lies in the form of driveway boring tool rentals, empowering DIY enthusiasts and professional contractors alike to navigate underground installations with precision, efficiency, and minimal disruption.
Understanding Driveway Boring Tool Rentals
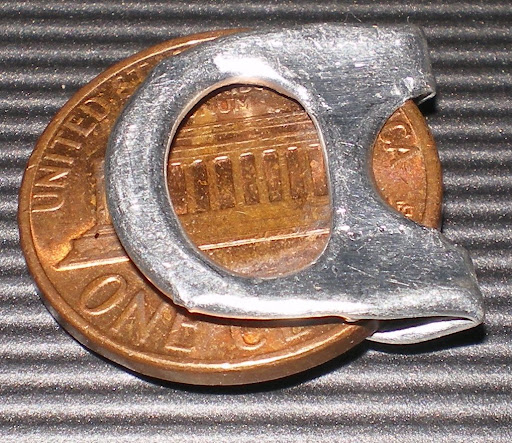
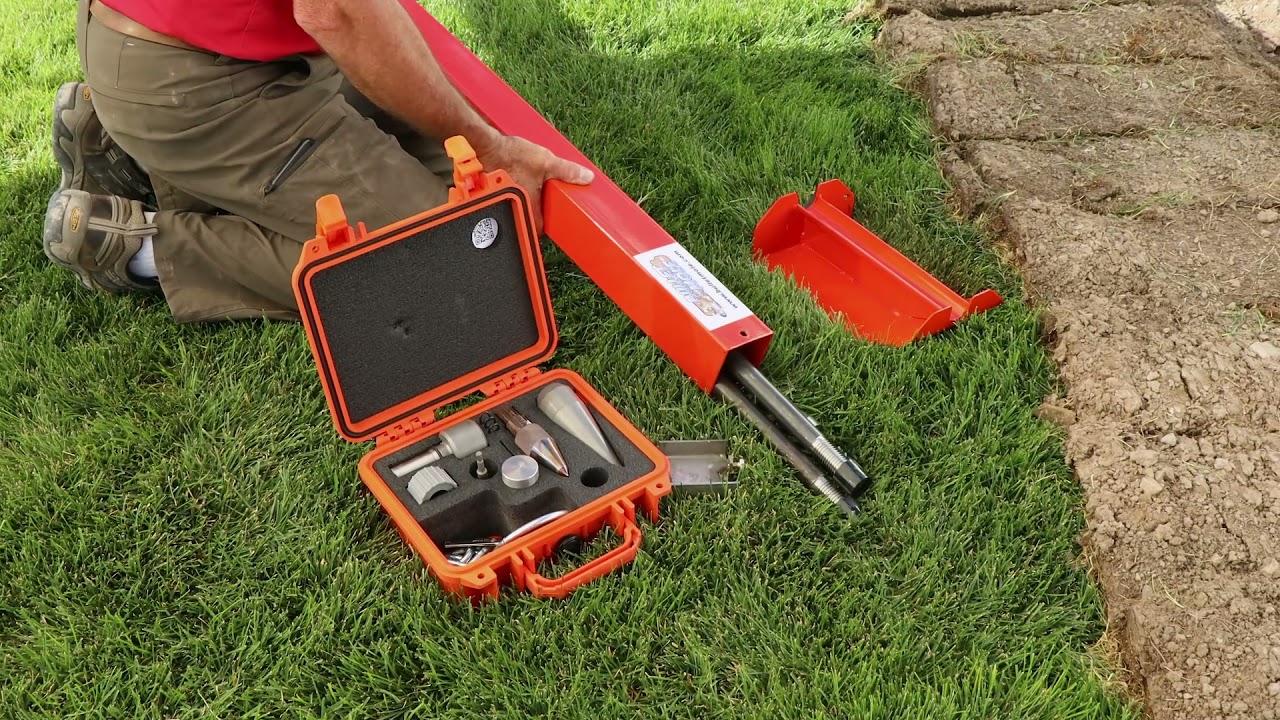
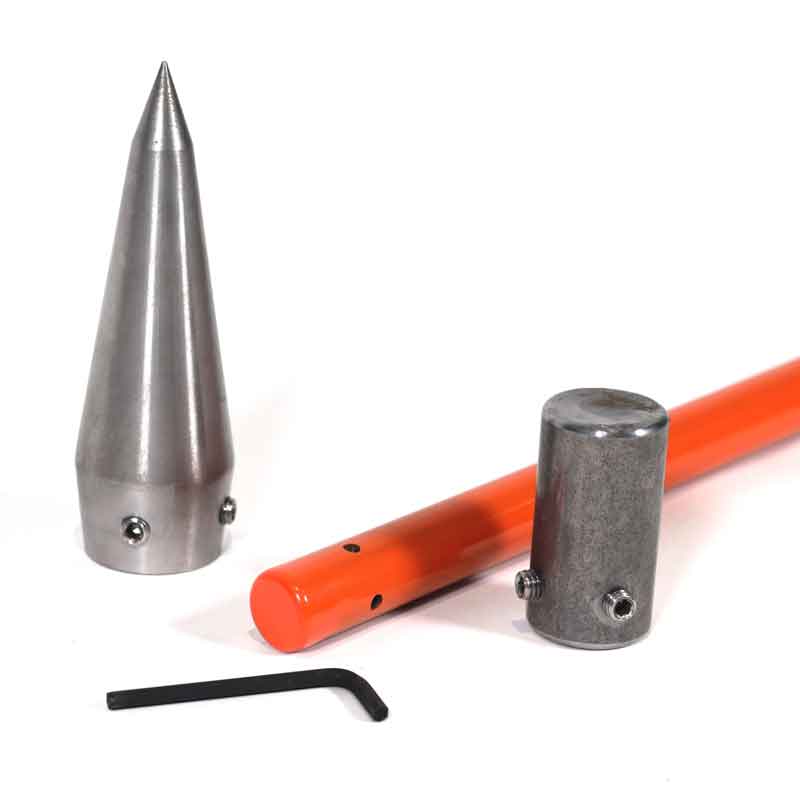
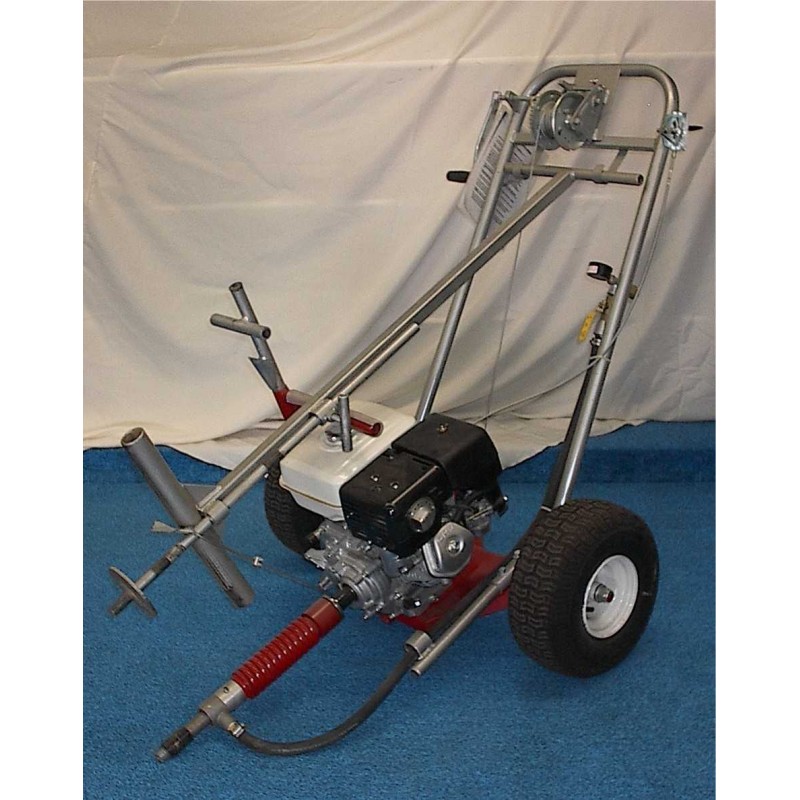
Driveway boring tool rentals, also known as underground piercing tools, are specialized equipment designed to create clean, straight bore holes beneath driveways, sidewalks, and other hardscapes. These tools utilize various power sources, including pneumatic, hydraulic, and electric motors, to drive a cutting head through the soil, leaving behind a smooth, compact passage for the installation of pipes, cables, or conduits.
Driveway boring tools come in a variety of sizes and capacities, catering to projects ranging from simple utility line installations to complex landscaping and drainage systems. The size of the tool is determined by the diameter of the bore hole required, while its capacity dictates the length and depth of the bore it can effectively create.
Applications of Driveway Boring Tools
The versatility of driveway boring tools extends beyond mere pipe installation. Their ability to create precise, underground pathways makes them ideal for a wide range of applications, including:
-
Installing utility lines: Electricity, gas, water, and telecommunications lines can be seamlessly routed underground without disturbing existing landscaping or hardscapes.
-
Laying irrigation or drainage pipes: Efficient irrigation systems and drainage solutions can be established beneath the surface, ensuring optimal water distribution and preventing waterlogging.
-
Creating pathways for fencing or landscaping: Driveway boring tools can precisely cut paths for fence posts, landscaping elements, or decorative features, minimizing disruption to the surrounding landscape.
-
Establishing conduit for cable or fiber optic lines: Cable and fiber optic lines can be securely installed underground, providing reliable connectivity for homes and businesses.
Advantages of Using Driveway Boring Tools
Driveway boring tools offer a multitude of advantages over traditional excavation methods, making them a preferred choice for both DIY enthusiasts and professional contractors:
-
Minimized Landscape Disruption: Driveway boring tools create targeted bore holes, leaving the surrounding landscape virtually undisturbed. This is particularly beneficial in areas with mature landscaping, delicate plants, or intricate hardscapes.
-
Reduced Excavation Material: Compared to traditional excavation, driveway boring tools generate significantly less excavated material. This not only saves on labor costs for disposal but also minimizes the environmental impact of the project.
-
Protection of Underground Utilities: The precise drilling action of driveway boring tools minimizes the risk of damaging existing underground utilities, such as gas lines, water pipes, or electrical cables.
-
Clean and Professional Appearance: The resulting bore holes create a clean and professional-looking finish, eliminating the unsightly scars left behind by traditional excavation methods.
Choosing the Right Driveway Boring Tool
Selecting the appropriate driveway boring tool for a specific project is crucial for ensuring efficient and successful completion. Here’s a step-by-step guide to making an informed choice:
-
Assess Project Requirements: Determine the diameter and length of the bore hole required to accommodate the pipes or cables being installed.
-
Consider Soil Conditions: Evaluate the soil type and hardness, as different soils may require specific cutting heads or tool settings.
-
Evaluate Power Source Availability: Consider the availability of a power source, whether pneumatic, hydraulic, or electric, to match the tool’s requirements.
-
Choose a Tool with Adequate Capacity: Select a tool with sufficient power and capacity to handle the project’s length and depth requirements.
-
Prioritize Safety Features: Opt for a tool equipped with safety features such as overload protection, emergency stop mechanisms, and proper guards.
Driveway Boring Tool Rental Process
Renting a driveway boring tool involves a straightforward process to ensure a smooth and successful project:
-
Research and Select a Reputable Rental Company: Choose a reputable rental company with a history of providing well-maintained equipment and knowledgeable staff.
-
Reserve the Desired Tool and Accessories: Reserve the desired tool and any necessary accessories, such as cutting heads, extension shafts, and safety gear.
-
Inspect the Tool: Before accepting the tool, thoroughly inspect it for any signs of damage or malfunction.
-
Complete Paperwork and Deposit: Complete the necessary rental paperwork and provide a security deposit.
-
Receive Operational Instructions: Obtain thorough instructions on the safe operation and maintenance of the tool from the rental company’s staff.
Operating a Driveway Boring Tool Safely
Safety should always be the top priority when operating a driveway boring tool. Follow these guidelines to minimize risks:
-
Wear Appropriate PPE: Equip yourself with personal protective equipment (PPE) including safety glasses, gloves, and hearing protection. Safety glasses shield your eyes from flying debris, gloves safeguard your hands from cuts and abrasions, and hearing protection minimizes noise exposure during operation.
-
Ensure a Stable Work Area: Choose a level and stable work area to prevent the tool from tipping or losing control. Clear the surrounding area of obstacles and ensure a secure footing.
-
Follow Manufacturer’s Instructions: Carefully read and adhere to the manufacturer’s instructions for the specific tool being rented. This includes understanding proper operation techniques, recommended cutting depths, and safety precautions.
-
Avoid Overloading the Tool: Don’t push the tool beyond its capacity by forcing it through overly hard soil or attempting to drill excessive lengths in one go. Take breaks and allow the tool to cool down to prevent overheating and potential damage.
-
Be Aware of Underground Utilities: Before starting any excavation project, contact your local utility companies to mark the location of underground lines. This helps to avoid accidental damage to gas lines, water pipes, or electrical cables.
-
Exercise Caution with Obstacles: If you encounter unexpected obstacles during boring, such as rocks or roots, stop immediately. Assess the situation and consult the manufacturer’s instructions or seek assistance from a professional if needed.
-
Never Operate Under the Influence: Operating a driveway boring tool while under the influence of alcohol or drugs is extremely dangerous. Always maintain a clear and focused mind to ensure safe and proper operation.
Maintaining a Driveway Boring Tool for Optimal Performance
Proper maintenance of a rented driveway boring tool ensures optimal performance and minimizes the risk of malfunctions during your project. Here are some key maintenance tips:
-
Keep the Tool Clean: Regularly remove dirt, debris, and mud buildup from the tool’s exterior and cutting head. This prevents clogging and ensures smooth operation.
-
Lubricate Moving Parts: Consult the manufacturer’s manual and lubricate all moving parts according to the recommended schedule. This reduces friction and wear and tear on the tool’s components.
-
Inspect for Damage: Before each use, thoroughly inspect the tool for any signs of damage, such as loose bolts, worn cutting bits, or leaking hoses. Address any issues promptly to avoid operational problems.
-
Store Properly: When not in use, store the tool in a dry and secure location. Protect it from extreme temperatures, moisture, and dust to ensure it’s in optimal condition for the next project.
Troubleshooting Common Driveway Boring Tool Issues
Even with proper care, minor issues can arise during operation. Here’s how to address some common driveway boring tool problems:
- The tool isn’t cutting through the soil:
- Check for dull or damaged cutting bits. Consider replacing them with sharpened or new ones.
- Adjust the cutting depth according to the soil conditions and project requirements.
- Ensure the tool is properly aligned and not encountering any obstructions within the bore hole.
- The tool is overheating:
- Allow the tool to cool down before resuming operation. Avoid continuous use for extended periods.
- Check for proper lubrication of moving parts as excessive friction can lead to overheating.
- If overheating persists, consult the manufacturer’s instructions or contact the rental company for assistance.
- The tool is making strange noises:
- Identify the source of the noise. Loose components may cause rattling or clunking sounds.
- Consult the manufacturer’s manual for troubleshooting steps based on the specific noise.
- If the noise persists or indicates a more serious issue, stop using the tool and seek professional help.

Conclusion
Driveway boring tool rentals offer a valuable solution for navigating underground installations with efficiency and minimal disruption. By understanding the applications, benefits, and proper usage of these tools, DIY enthusiasts and professionals alike can tackle various projects from utility line installations to intricate drainage systems. Remember, prioritizing safety, selecting the appropriate tool, and maintaining proper equipment operation are paramount for a successful outcome. So, the next time your project demands venturing beneath the surface, consider the illuminating path offered by driveway boring tool rentals.
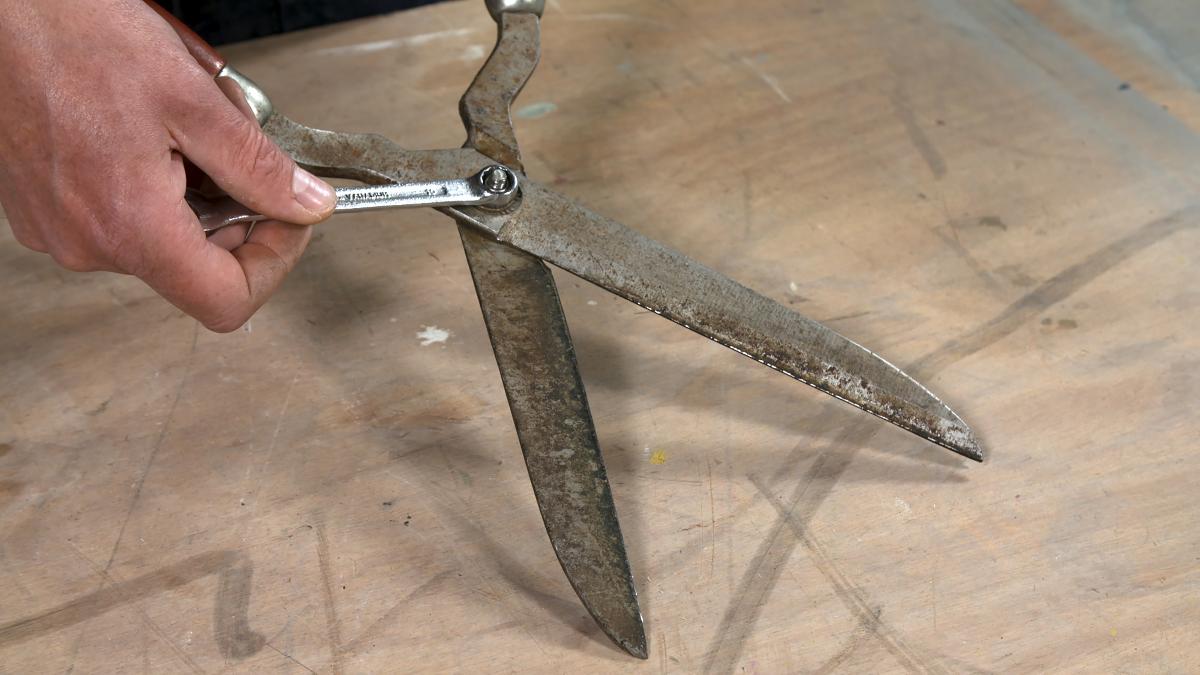
How to sharpen garden tools

In the realm of gardening, sharp tools are not just a luxury but a necessity. A dull hoe will struggle to break through hard soil, while a blunt pruner will leave ragged cuts on your plants. Sharpening your garden tools regularly will not only make your gardening tasks easier and more enjoyable but also extend the lifespan of your tools and prevent them from becoming damaged.
Understanding the Importance of Sharp Tools
Sharp garden tools offer several benefits:
-
Improved Efficiency: Sharp tools cut through soil and plant material with ease, reducing the effort required and saving you time and energy.
-
Cleaner Cuts: Sharp blades make precise cuts, minimizing damage to plants and promoting healthy growth.
-
Reduced Wear and Tear: Dull tools require more force to operate, putting increased strain on both the tool and the user, leading to premature wear and tear.
-
Safety: Sharp tools are less likely to slip or cause accidents, ensuring a safer gardening experience.
Identifying Dull Tools
Knowing when your garden tools need sharpening is crucial for maintaining their effectiveness and preventing damage. Here are some signs of dull tools:
-
Increased Effort: If you find yourself exerting more force than usual to use your tools, it’s likely they need sharpening.
-
Ragged Cuts: Dull blades will leave ragged, uneven cuts on plants, hindering their growth and potentially causing damage.
-
Pulling or Tearing: Instead of slicing cleanly through material, dull tools may pull or tear, causing damage to plants and soil.
-
Uneven Wear: Dull blades tend to wear unevenly, leading to an unbalanced tool that is difficult to control.
Sharpening Techniques: A Toolbox of Options
Various sharpening techniques can be employed to restore your garden tools to their former sharpness. The most suitable method depends on the type of tool and the severity of the dullness.
-
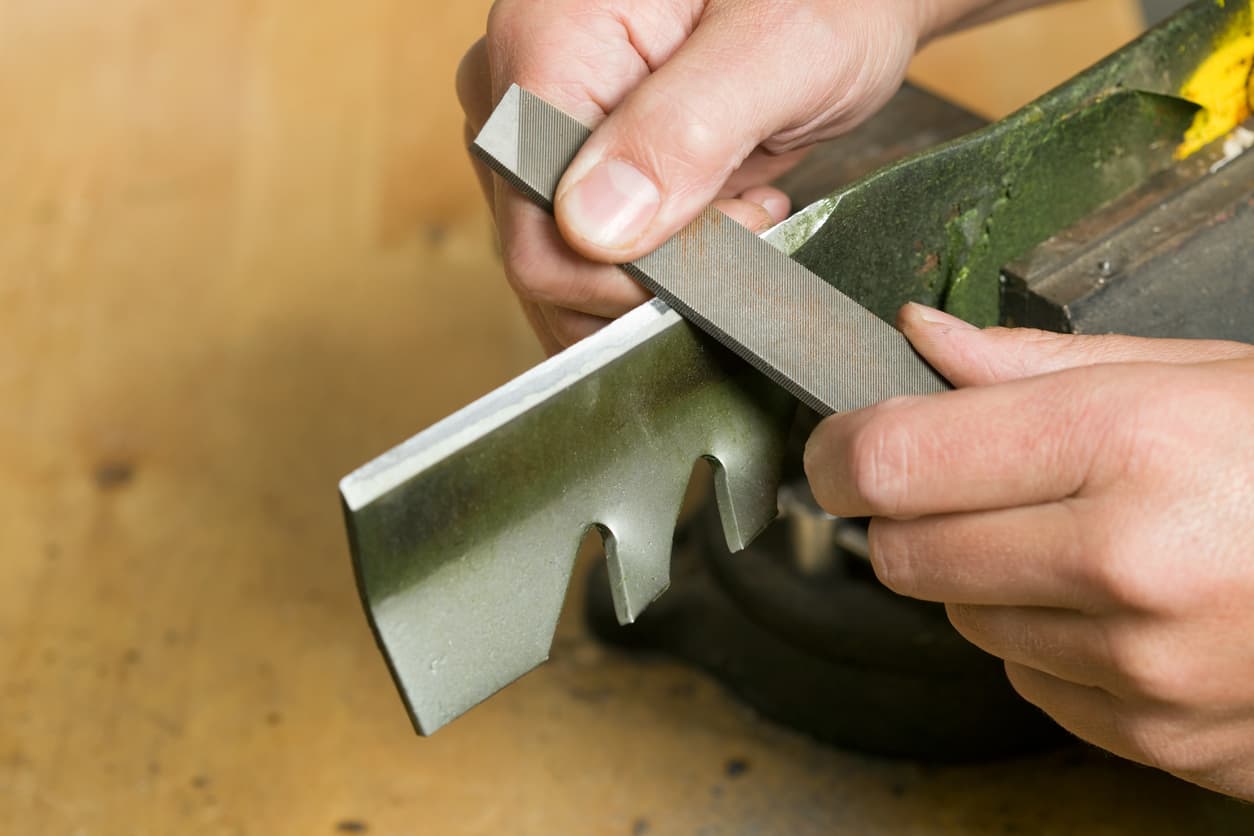
File Sharpening: A file is a versatile tool for sharpening various types of garden tools, including hoes, spades, and pruners. Choose a file with the appropriate grit for the tool and angle it correctly to achieve a sharp edge.
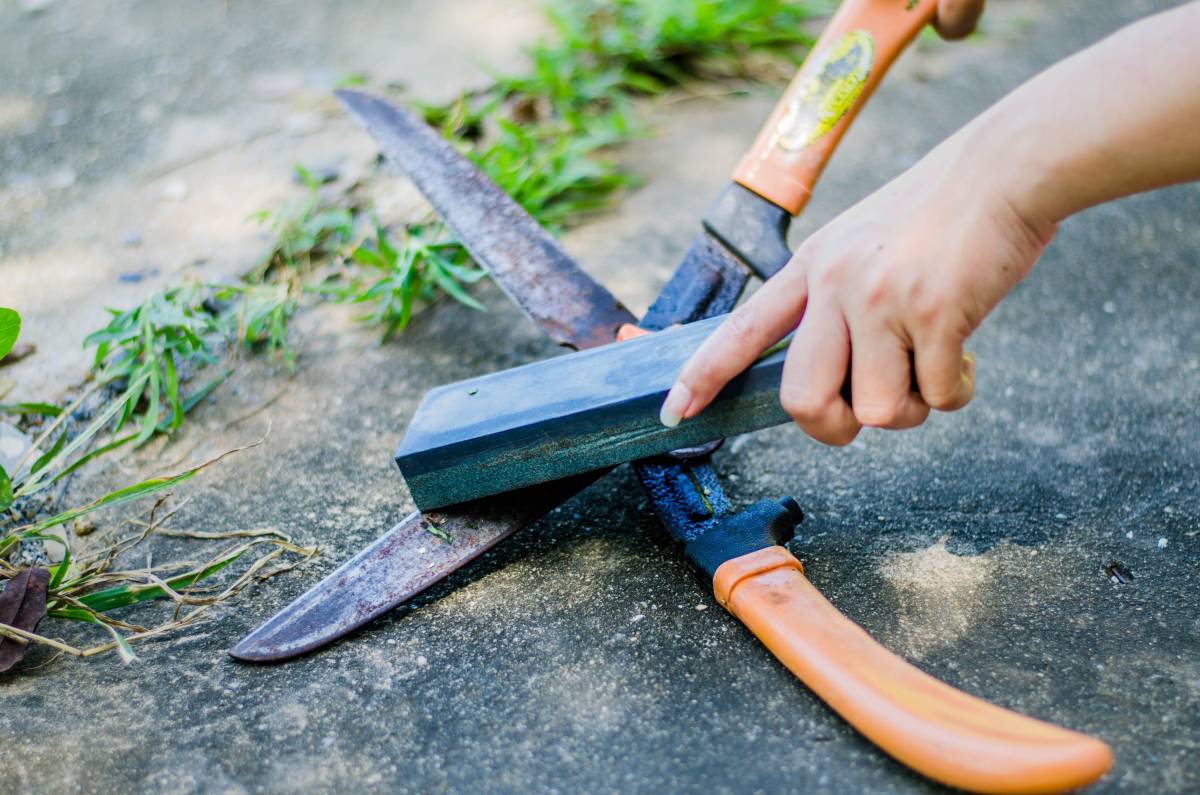
-
Whetstone Sharpening: A whetstone, also known as a sharpening stone, offers a finer sharpening method, particularly for pruners and other tools with delicate blades. Use a water or oil-based whetstone and follow a consistent sharpening motion.
-
Sharpening Tools: Specialized sharpening tools, such as sharpening wheels or motorized sharpeners, can provide quick and efficient sharpening for certain tools, such as lawnmower blades.
Sharpening Specific Tools: A Targeted Approach
Different garden tools require specific sharpening techniques:
-
Hoes and Spades: Sharpen the bevel, the angled edge of the blade, using a file or whetstone. Maintain a consistent angle throughout the sharpening process.
-
Pruners: Use a whetstone to sharpen the inner and outer edges of the blade, maintaining the original angle. Avoid over-sharpening, as this can weaken the blade.
-
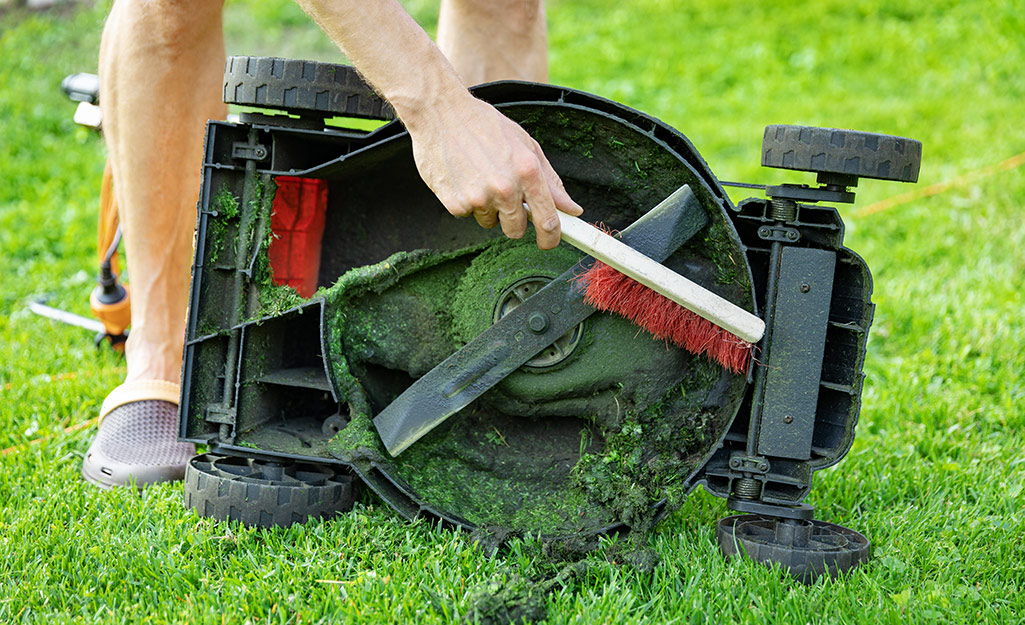
Lawn Mower Blades: Specialized sharpening tools or professional sharpening services are recommended for lawn mower blades.
Safety Precautions: Protecting Yourself and Your Tools
Sharpening garden tools involves potential hazards, so safety precautions are essential:
-
Wear Protective Gear: Use safety glasses and gloves to protect your eyes and hands from sparks, metal shavings, and sharp edges.
-
Secure the Tool: Properly clamp or hold the tool in place to prevent it from slipping during sharpening.
-
Maintain Proper Angle: Use the correct sharpening angle for the tool to ensure a sharp and effective edge.
-
Avoid Over-Sharpening: Excessive sharpening can weaken the blade and make it more prone to breakage.
Sharpening Frequency: A Schedule for Sharpness
The frequency of sharpening depends on the type of tool and the intensity of its use. A general guideline is to sharpen:
-
Hoes and Spades: After each use or at least once a month during peak gardening seasons.
-
Pruners: Before each use, especially for delicate tasks like pruning flowers or shrubs.
-
Lawn Mower Blades: Once a season or after several hours of mowing.
Conclusion: A Sharp Edge for a Greener Garden
Regularly sharpening your garden tools is an investment in both your gardening efficiency and the health of your plants. By following the appropriate sharpening techniques and safety precautions, you can keep your tools sharp, extend their lifespan, and enjoy a more rewarding gardening experience. Remember, a sharp edge makes all the difference in a greener, more productive garden.
Additional Tips for Sharpening Garden Tools:
-
Start with a clean tool: Before sharpening, clean the tool to remove dirt, debris, and rust.
-
Use light, even strokes: Avoid applying too much pressure when sharpening, as this can damage the blade.
-
Maintain a consistent angle:* Consistency is key for creating a sharp and even edge.
-
Feel for the burr: As you sharpen, a fine metal burr will form on the opposite side of the sharpened edge. This can be removed with a few light strokes on a flat file.
-
Sharpening stones require lubrication: Water-based whetstones require lubrication with water, while oil-based stones require oil.
-
Practice makes perfect: Sharpening takes practice. Don’t be discouraged if it takes a few tries to achieve a sharp edge.
-
Consider professional sharpening: For complex tools or those requiring a very fine edge, professional sharpening services are a good option.
Storing Sharpened Tools: Maintaining the Edge
Once your tools are sharpened, proper storage practices are crucial to maintaining their sharpness:
-
Clean and dry tools: After each use, clean and dry your tools thoroughly before storing them. Moisture can contribute to rust and dulling.
-
Oil metal surfaces: Apply a light coat of oil to metal surfaces to prevent rust and corrosion.
-
Store tools properly: Hang tools on a rack or store them in a dry, well-ventilated place. Avoid storing them in damp sheds or garages.

Conclusion: A Sharper Garden Awaits
By incorporating a regular sharpening routine into your gardening practices, you’ll be rewarded with a set of tools that perform flawlessly. Sharp tools will make your gardening tasks easier and more enjoyable, while also promoting the health and growth of your plants. Remember, a sharp edge is the key to unlocking a more efficient and rewarding gardening experience. So, embrace the art of sharpening, and watch your garden flourish under the touch of finely honed tools!
-

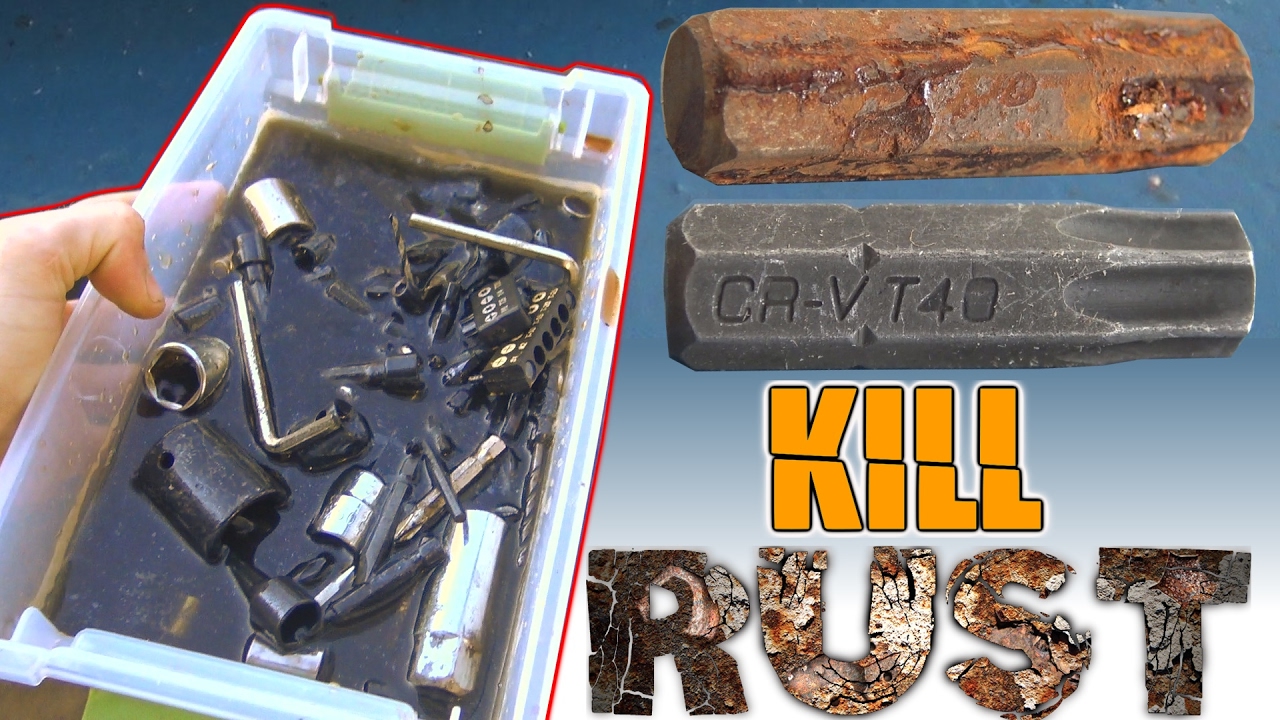
How to get rust off tools

In the realm of DIY projects, home repairs, and outdoor adventures, tools stand as faithful companions, enabling us to tackle tasks with precision and efficiency. However, these trusty implements are not immune to the passage of time and the relentless grip of corrosion. Rust, the bane of metalwork, can gradually transform once-gleaming tools into dull, unsightly objects, hindering their performance and reducing their lifespan.
Fear not, fellow tool enthusiasts, for there exists an arsenal of effective methods to combat rust and restore your tools to their former glory. This comprehensive guide will delve into the world of rust removal, equipping you with the knowledge and techniques to reclaim your tools from corrosion’s clutches.
Understanding Rust: The Enemy at the Gates
Before embarking on the rust removal crusade, it’s crucial to grasp the nature of the adversary we face. Rust, scientifically known as iron oxide, is a reddish-brown compound that forms when iron or steel comes into contact with oxygen and moisture. This electrochemical process, known as oxidation, gradually consumes the metal, leading to its deterioration and loss of structural integrity.
The Rust Removal Arsenal: Mechanical, Chemical, and Electrolytic Methods
To combat rust effectively, we must employ a diverse range of strategies, each tailored to the specific task at hand. Let’s explore the three main categories of rust removal methods:
-
Mechanical Methods: When direct physical action is required, mechanical methods come to the fore. Wire brushes, with their bristly abrasives, excel at removing loose rust and surface corrosion. Sanding, using sandpaper of varying grits, provides a finer approach, smoothing out rough surfaces and removing stubborn rust patches. For heavy-duty rust removal, abrasive blasting techniques, such as sandblasting or bead blasting, employ pressurized streams of abrasive particles to blast away rust and restore the underlying metal.
-
Chemical Methods: For rust that has penetrated deeper into the metal, chemical methods offer a more potent solution. Vinegar, a common household staple, proves surprisingly effective against rust. Simply soak the rusted tool in a vinegar solution for several hours, and the acidic properties of vinegar will dissolve the rust. Baking soda, another versatile kitchen ingredient, can be formed into a paste and applied to the rusted area, neutralizing the rust and facilitating its removal. Commercial rust removers, available in various forms, offer a more concentrated approach, often containing powerful chemicals that break down rust bonds.
-
Electrolytic Methods: When dealing with stubborn rust that resists other methods, electrolytic methods harness the power of electricity to extract rust from the metal. In saltwater electrolysis, the rusted tool is submerged in a saltwater solution and connected to the negative electrode of a battery. The positive electrode is attached to a scrap piece of metal. As electricity flows, the rust ions are attracted to the positive electrode, transferring from the tool to the scrap metal. Baking soda electrolysis follows a similar principle, using a baking soda solution instead of saltwater.
Choosing the Right Weapon for the Rust Battle
The choice of rust removal method depends on several factors:
-
Severity of Rust: For light rust, mechanical methods like wire brushing or sanding may suffice. For heavier rust, chemical or electrolytic methods are often necessary.
-
Tool Type: Delicate tools may require gentler methods like vinegar or baking soda to avoid damage. For sturdier tools, harsher methods like abrasive blasting or commercial rust removers can be employed.
-
Safety Considerations: Always prioritize safety when working with rust removers. Wear protective gloves and eye gear, ensure adequate ventilation, and avoid skin contact with chemicals.
Preparing the Tool for Rust Removal: A Precursor to Success
Before applying any rust removal method, proper preparation is essential:
-
Cleaning: Begin by cleaning the tool to remove dirt, grease, and loose debris. This will allow the rust removal method to work more effectively.
-
Loose Rust Removal: Use a wire brush or sandpaper to remove loose rust flakes, exposing the underlying metal.
-
Protecting the Surroundings: Cover any surrounding surfaces with plastic or drop cloths to prevent damage from rust removers or abrasive particles.

Applying the Rust Removal Method: A Tactical Approach
With the tool prepared, it’s time to apply the chosen rust removal method:
-
Mechanical Methods: For wire brushing, use a brush with appropriate stiffness for the task. For sanding, start with a coarse grit and gradually progress to finer grits. For abrasive blasting, follow the instructions for the specific equipment.
-
Chemical Methods: For vinegar, soak the tool in a solution of white vinegar and water for several hours. For baking soda, apply the paste to the rust and let it sit for several hours. For commercial rust removers, follow the product instructions carefully.
-
Electrolytic Methods: For saltwater electrolysis, submerge the tool in a saltwater solution and connect it to the negative electrode of a battery. Connect the positive electrode to a scrap of metal. For baking soda electrolysis, follow the same procedure but use a baking soda solution instead of saltwater.
Neutralizing the Foe and Protecting Your Tools from Future Onslaught
Once the rust has been removed, it’s crucial to neutralize any remaining rust remover and prevent rust from returning:
-
Neutralization: Rinse the tool thoroughly with clean water to remove any residual rust remover. Baking soda can be used to neutralize any remaining acidic traces.
-
Drying: Dry the tool completely with a clean cloth to prevent further corrosion. Moisture is a key ingredient in the rust formation process.
-
Prevention: Apply a protective coating to the tool, such as oil, wax, or a rust-inhibiting spray. This will create a barrier against moisture and oxygen, hindering future rust development.
-
Storage: Store your tools in a dry, well-ventilated place to minimize exposure to moisture. A dehumidifier can be helpful in particularly humid environments.
Safety First: A Shield Against Chemical Hazards
Rust removal methods, particularly those involving chemicals, necessitate prioritizing safety:
-
Protective Gear: Always wear gloves and eye protection to shield yourself from contact with chemicals or flying debris.
-
Ventilation: Ensure adequate ventilation when using chemical rust removers. Open windows and doors or work in a well-ventilated area.
-
Chemical Handling: Avoid contact with skin and eyes. If contact occurs, flush the affected area with clean water immediately and seek medical attention if necessary.
-
Disposal: Dispose of used chemicals and rust particles responsibly, following local regulations. Never pour chemicals down the drain.

Conclusion: A Gleaming Arsenal Awaits
By understanding the nature of rust, employing the appropriate removal methods, and prioritizing safety, you can effectively reclaim your tools from the clutches of corrosion. With a clean, rust-free arsenal at your disposal, you can tackle any DIY project or home repair with renewed confidence. Remember, proper maintenance and storage practices are crucial in preventing rust from returning, ensuring your tools remain reliable companions for years to come.
-
How often to sharpen lawn mower blades
In the realm of lawn care, a well-maintained lawn mower stands as a trusty companion, tirelessly battling overgrown grass and maintaining pristine green carpets. However, even these stalwart machines can fall victim to the passage of time, their once-sharp blades becoming dull and ineffective.
Dull lawn mower blades can wreak havoc on your lawn, leaving behind uneven cuts, torn grass blades, and increased mowing time. They can also put a strain on your mower’s engine, leading to reduced efficiency and potential damage.
Fear not, fellow lawn care enthusiasts! This comprehensive guide will equip you with the knowledge and tools to keep your lawn mower blades sharp and your lawn healthy.
Understanding the Importance of Sharp Blades
Imagine your lawn mower blades as tiny scissors. Just as dull scissors struggle to cut paper cleanly, dull lawn mower blades struggle to slice through grass blades. Instead, they tear and pull, leaving behind ragged edges and an unhealthy lawn.
Sharp blades, on the other hand, glide through grass like a hot knife through butter. They create clean cuts that promote healthy growth, reduce the risk of lawn diseases, and make mowing a breeze.
Recommended Sharpening Frequency: A Balancing Act
The frequency with which you should sharpen your lawn mower blades depends on a variety of factors, including lawn size, grass type, mowing frequency, and the presence of obstacles. As a general rule of thumb, aim to sharpen your blades 2-3 times per mowing season.
For smaller lawns with less frequent mowing, you may be able to get away with sharpening once a season. However, for larger lawns, tougher grasses, or frequent mowing, more frequent sharpening may be necessary.
Signs of Dull Blades: A Call to Action
Just like a dull knife can reveal itself through uneven cuts and torn food, dull lawn mower blades send out their own distress signals. Here are some telltale signs that your blades need some love:
-
Uneven Mowing: If your lawn looks patchy and uneven, with some areas taller than others, it could be a sign that your blades are dull and struggling to cut consistently.
-
Torn Grass Blades: Take a closer look at the individual grass blades after mowing. If they appear torn and frayed rather than cleanly cut, it’s another indication that your blades need sharpening.
-
Increased Mowing Time: If it seems like it’s taking longer and longer to mow your lawn, even with regular maintenance, dull blades could be the culprit. Dull blades require more effort to cut grass, leading to longer mowing times and increased fuel consumption.
Sharpening Methods: DIY or Professional?
The path to sharp lawn mower blades can be taken in two ways: the DIY route or the professional approach. Each has its own advantages and disadvantages.
DIY Sharpening: A Hands-on Approach
For the DIY enthusiast, sharpening lawn mower blades can be a rewarding and cost-effective task. With the right tools and a bit of know-how, you can restore your blades to their former glory.
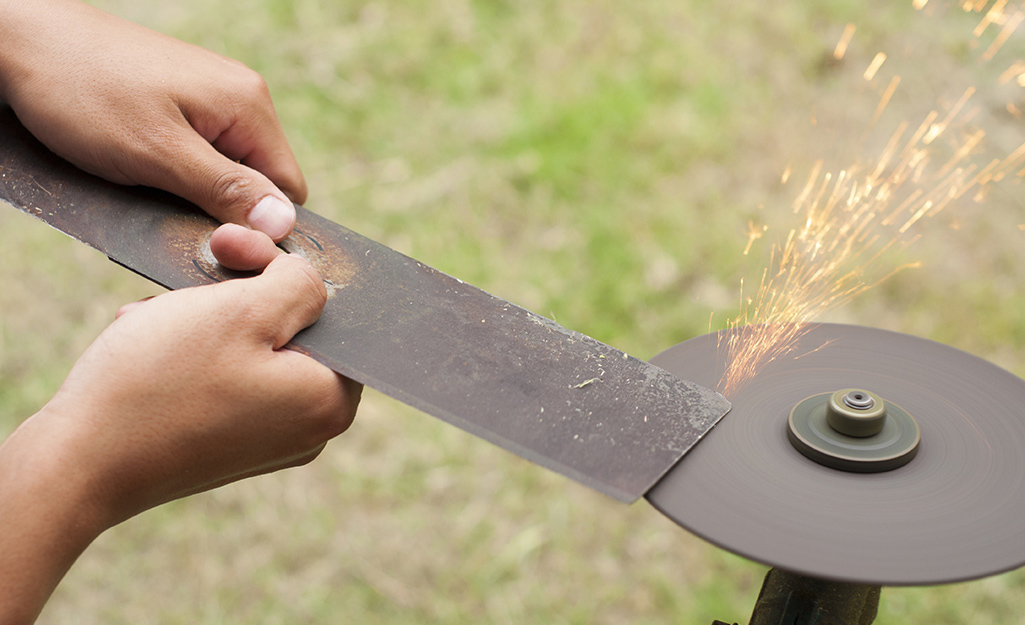
Two common methods for DIY sharpening are using a sharpening stone and using a bench grinder. A sharpening stone is a handheld abrasive tool that allows for precise control over the sharpening process. A bench grinder, on the other hand, is a powered tool that can sharpen blades more quickly and efficiently.
Professional Sharpening: Convenience and Expertise
If you’re short on time, lack the necessary tools or experience, or simply prefer the peace of mind that comes with professional care, seeking out a reputable lawn mower sharpening service is a great option.
Professional sharpeners have the expertise and equipment to handle even the most complex sharpening tasks, ensuring that your blades are sharpened to the correct angle and with the utmost precision.
Preventive Maintenance: Keeping Blades Sharp for Longer
While regular sharpening is essential, there are steps you can take to extend the lifespan of your lawn mower blades and reduce the frequency of sharpening.
-
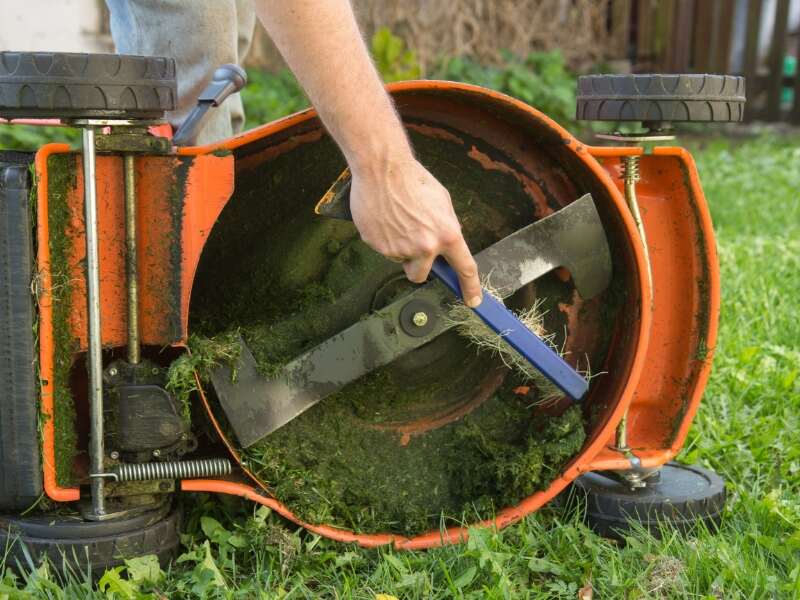
Regular Cleaning: After each mowing session, take a few minutes to clean your lawn mower blades, removing any grass clippings or debris that can accumulate and dull the edges.
-
Proper Storage: When storing your lawn mower for the off-season, ensure that the blades are clean and dry to prevent rust and corrosion.
Environmental Impact of Sharp Blades: A Greener Approach
Using sharp lawn mower blades not only benefits your lawn and your mower but also contributes to a healthier environment.
Sharp blades promote healthy grass growth, reducing the need for excessive mowing and the associated fuel consumption. They also minimize the risk of lawn diseases, which can require harmful pesticides.
Choosing the Right Sharpening Tools:
-
Sharpening Stone: For those who prefer a traditional approach, a sharpening stone offers good control and is relatively inexpensive. Choose a medium-grit stone for lawn mower blades.
-
Bench Grinder: If speed and efficiency are priorities, a bench grinder can be a great option. However, it requires more practice to maintain the correct angle and avoid overheating the blade.
-
Sharpening Jigs: These specialized tools help maintain the correct angle during sharpening, especially if using a bench grinder. This can be particularly beneficial for beginners.
Safety First:
-
Eye Protection: Always wear safety glasses when sharpening lawn mower blades to protect your eyes from flying debris.
-
Gloves: Wearing gloves protects your hands from cuts and scrapes while handling the blades.
-
Secure Work Surface: Ensure your work surface is stable and level to prevent the mower blade from slipping during sharpening.
Sharpening Tips:
-
Sharpen Both Sides: Sharpen both the top and bottom edges of the blade for a clean, even cut.
-
Maintain the Angle: Strive to maintain the original angle of the blade during sharpening. A steeper angle may result in a more durable but less efficient cut, while a shallower angle may provide a cleaner cut but be less durable.
-
Sharpen Evenly: Use consistent strokes to achieve a uniform sharpness across the entire length of the cutting edge.
Beyond Sharpening: Blade Replacement
In some cases, depending on the extent of damage or wear, your lawn mower blades may need to be replaced entirely. Here are some signs that a replacement might be necessary:
-
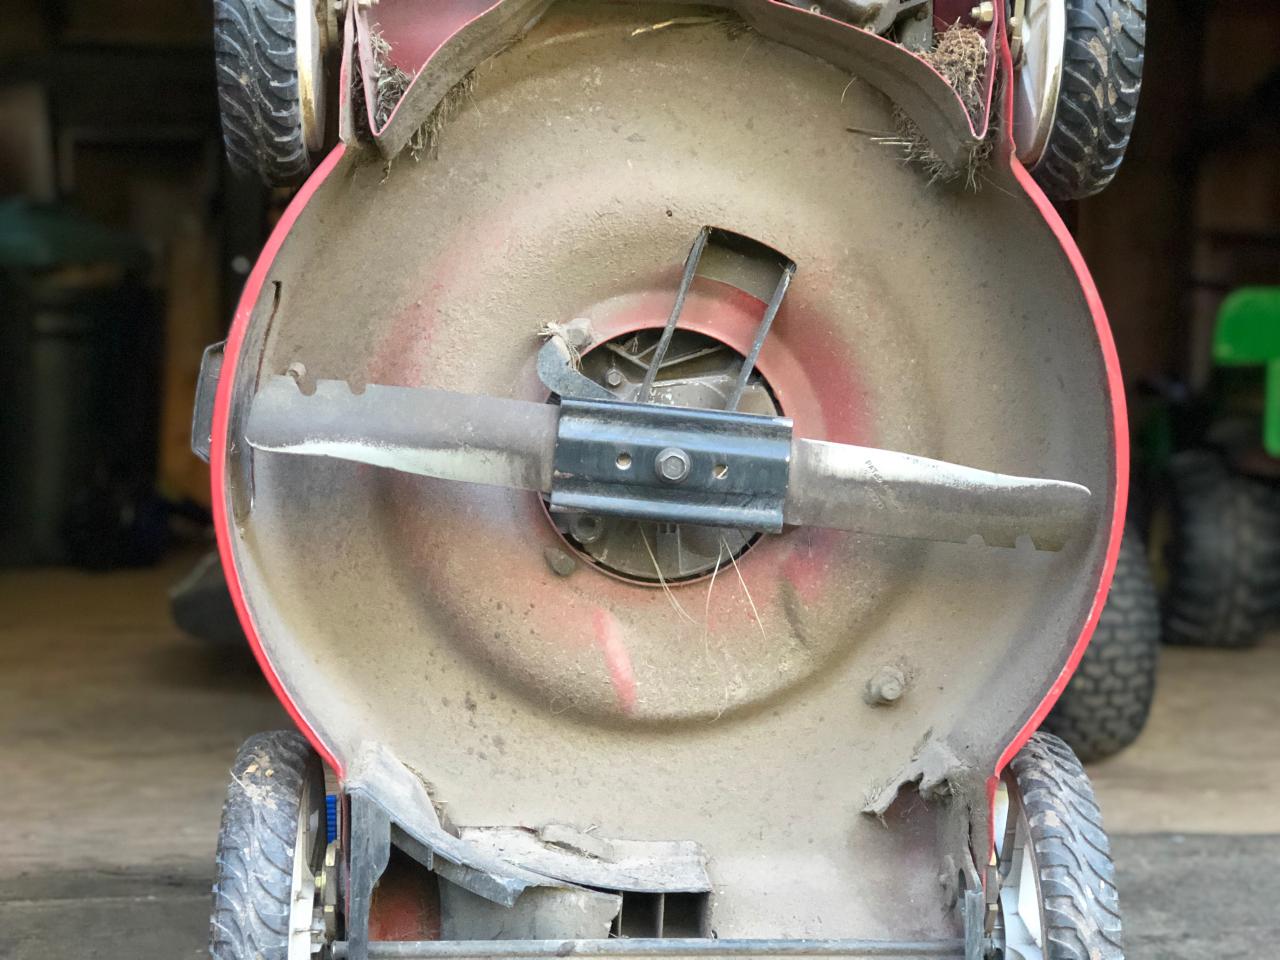
Excessive Nicks or Cracks: Deep nicks or cracks in the blade can compromise its integrity and pose a safety hazard.
-
Bent or Warped Blades: A bent or warped blade will not cut evenly and can damage your lawn mower.
-
Signs of Metal Fatigue: If the blade appears thin or shows signs of metal fatigue, it’s best to replace it for safety reasons.
Conclusion: A Final Note
Keeping your lawn mower blades sharp is a crucial aspect of maintaining a healthy lawn and a well-functioning mower. By following the tips and choosing the methods outlined in this guide, you can ensure your lawn remains a source of pride and your mower continues to be a reliable partner in your quest for a perfect green haven. Remember, a little effort on your part can make a big difference in the long run. Now get out there and conquer that overgrown grass with confidence!

Squatted Lawn Mower Mowing Down the Norm
In the realm of lawn care, standard lawn mowers reign supreme, dutifully traversing backyards and maintaining pristine green carpets. However, amidst this sea of uniformity, a rebellious subculture has emerged, transforming ordinary mowers into eye-catching, performance-driven machines known as squatted lawn mowers.
These customized creations, characterized by their lifted front ends and lowered rear ends, have captured the attention of lawn care enthusiasts worldwide. Their aggressive stance and enhanced performance have made them a symbol of creativity, rebellion, and a passion for pushing the boundaries of lawn care.
Understanding the Allure of Squatted Lawn Mowers
The appeal of squatted lawn mowers lies in their unique blend of style and performance. Their aggressive stance, reminiscent of muscle cars or lowered trucks, exudes a sense of boldness and rebellion, setting them apart from their conventional counterparts.
Beyond aesthetics, squatted lawn mowers offer tangible performance benefits. The lowered rear end improves weight distribution, enhancing traction and stability, particularly on uneven terrain. The lifted front end increases ground clearance, allowing the mower to navigate obstacles with ease.
Moreover, squatted lawn mowers often feature customized wheels and suspension components, further enhancing their handling and performance. The result is a lawn mower that not only looks good but also delivers a superior mowing experience.
Essential Components for a Squatted Lawn Mower
Transforming a standard lawn mower into a squatted beast requires careful consideration of the components involved. The key elements include:
-
Suspension Modifications: The suspension system plays a crucial role in achieving the desired squatted stance. Methods such as spindle lifts, drop axles, and air suspension kits can be employed to raise the front end and lower the rear end.
-
Wheel Size Changes: Swapping out the standard wheels for larger ones can further enhance the squatted look and provide a smoother ride. However, it’s essential to consider the impact on ground clearance and potential compatibility issues.
-
Bodywork Adjustments: Minor adjustments to the bodywork, such as trimming the front bumper or relocating the headlights, may be necessary to complement the squatted stance and maintain a clean, streamlined appearance.
Safety Considerations and Potential Drawbacks
While squatted lawn mowers offer a unique blend of style and performance, safety must always be a top priority. Excessive lowering can reduce ground clearance, potentially causing the mower to scrape against obstacles or damage the underside.
Additionally, modifications to the suspension and steering systems can alter the mower’s handling characteristics, requiring a period of adjustment to ensure safe operation. It’s crucial to test the modified mower in a controlled environment before venturing into open areas.
Legal Regulations and Local Restrictions
Before embarking on a squatted lawn mower project, it’s essential to research and comply with any applicable legal regulations or local restrictions regarding modified vehicles. These regulations may vary by jurisdiction and can cover aspects such as vehicle height, safety equipment, and noise levels.
Failure to adhere to local laws can result in fines, legal issues, and potential safety hazards. Always prioritize safety and ensure your squatted lawn mower meets the legal requirements for safe operation.
DIY vs. Professional Installation
The decision to squat a lawn mower yourself or seek professional assistance depends on your mechanical expertise, comfort level, and budget. DIY squatting can be a rewarding experience, allowing you to customize your mower to your exact specifications and save on labor costs.
However, if you lack mechanical experience or have complex modifications in mind, seeking professional installation is highly recommended. Experienced technicians can ensure proper installation, alignment, and safety checks, providing peace of mind and avoiding potential issues.
Showcasing Examples of Squatted Lawn Mowers
The world of squatted lawn mowers is a canvas of creativity and personalization. From subtle modifications to extreme transformations, enthusiasts worldwide are pushing the boundaries of design and performance.
Some popular styles include the “slammed” look, featuring an extremely lowered stance and oversized wheels, and the “muscle car” look, characterized by a pronounced front lift and aggressive stance.
The Future of Squatted Lawn Mowers
The popularity of squatted lawn mowers shows no signs of waning. As technology advances and enthusiasts continue to experiment, we can expect to see even more innovative modifications and performance enhancements.
The possibility of squatted lawn mowers becoming more mainstream exists, potentially influencing lawn mower designs and trends. Manufacturers may incorporate squatted elements into their standard models, catering to the growing demand for these unique machines.
Conclusion: A Subculture Thriving
Squatted lawn mowers have carved a niche in the lawn care world, representing a subculture of creativity, rebellion, and a passion for pushing the boundaries of the ordinary. Their unique blend of style and performance has captured the hearts of enthusiasts worldwide, transforming lawn mowing from a mundane chore into an expression of individuality.
As the squatted lawn mower movement continues to evolve, we can expect to see even more innovation, customization, and a thriving community of enthusiasts. So, whether you’re a seasoned lawn care veteran or a curious newcomer, the world of squatted lawn mowers offers a unique perspective on lawn care, inviting you to explore the possibilities and unleash your inner lawn mower rebel.
Additional Resources
Delving deeper into the world of squatted lawn mowers requires venturing beyond this guide. Here are some valuable resources to fuel your passion:
-
Online Forums and Communities: These online havens connect enthusiasts from all over the world, allowing you to share ideas, showcase your creations, and seek advice from experienced squatters.
-
Websites and Blogs: Dedicated websites and blogs offer a wealth of information, including tutorials on squatting techniques, inspiration galleries featuring stunning examples, and news about the latest trends and developments.
-
Social Media Groups: Social media groups provide a platform for enthusiasts to connect, share pictures and videos of their squatted lawn mowers, and participate in discussions about all things squatted.

Glossary of Terms
-
Spindle Lift: A method of raising the front end of a lawn mower by modifying the spindles that connect the wheels to the deck.
-
Drop Axle: A method of lowering the rear end of a lawn mower by replacing the stock axle with a lower one.
-
Air Suspension Kit: A system that replaces the traditional coil springs with air bags, allowing for precise adjustment of the ride height and creating a truly “slammed” stance.
-
Stance: The overall posture of the lawn mower, determined by the relative heights of the front and rear ends. A squatted lawn mower has a lower rear end and a higher front end.
With this comprehensive guide and the additional resources provided, you are now equipped to navigate the exciting world of squatted lawn mowers. Remember, prioritize safety, embrace your creativity, and join the thriving community of lawn care rebels who are redefining the way we mow our lawns.

Taming the Oil Drip: Fixing Lawn Mower Oil Leaks
In the realm of lawn care, the humble lawn mower stands as a silent warrior, tirelessly battling overgrown grass and maintaining pristine yards. However, even these stalwart machines are not immune to mechanical woes, and one common issue that can plague lawn mowers is oil leaks.
While oil leaks may seem like a minor inconvenience, they can have serious consequences if left unchecked. Oil is the lifeblood of your lawn mower’s engine, providing lubrication and cooling to keep it running smoothly. A leak can rob your engine of this vital fluid, leading to premature wear, reduced performance, and even costly repairs.
But fear not, fellow lawn care enthusiasts! This comprehensive guide will equip you with the knowledge and tools to tackle those pesky oil leaks, ensuring your lawn mower remains a reliable ally in your quest for a picture-perfect lawn.
Understanding the Role of Oil in Lawn Mowers
Before delving into the world of oil leaks, it’s crucial to understand the vital role oil plays in your lawn mower’s engine. As the engine’s internal components whiz and whir, oil acts as a protective barrier, reducing friction and preventing metal-on-metal contact.
Imagine your engine as a bustling city, with countless tiny parts moving in intricate harmony. Oil serves as the city’s transportation system, ensuring that each component receives the lubrication it needs to function smoothly. Without oil, this bustling city would grind to a halt, much like your lawn mower’s engine would without proper lubrication.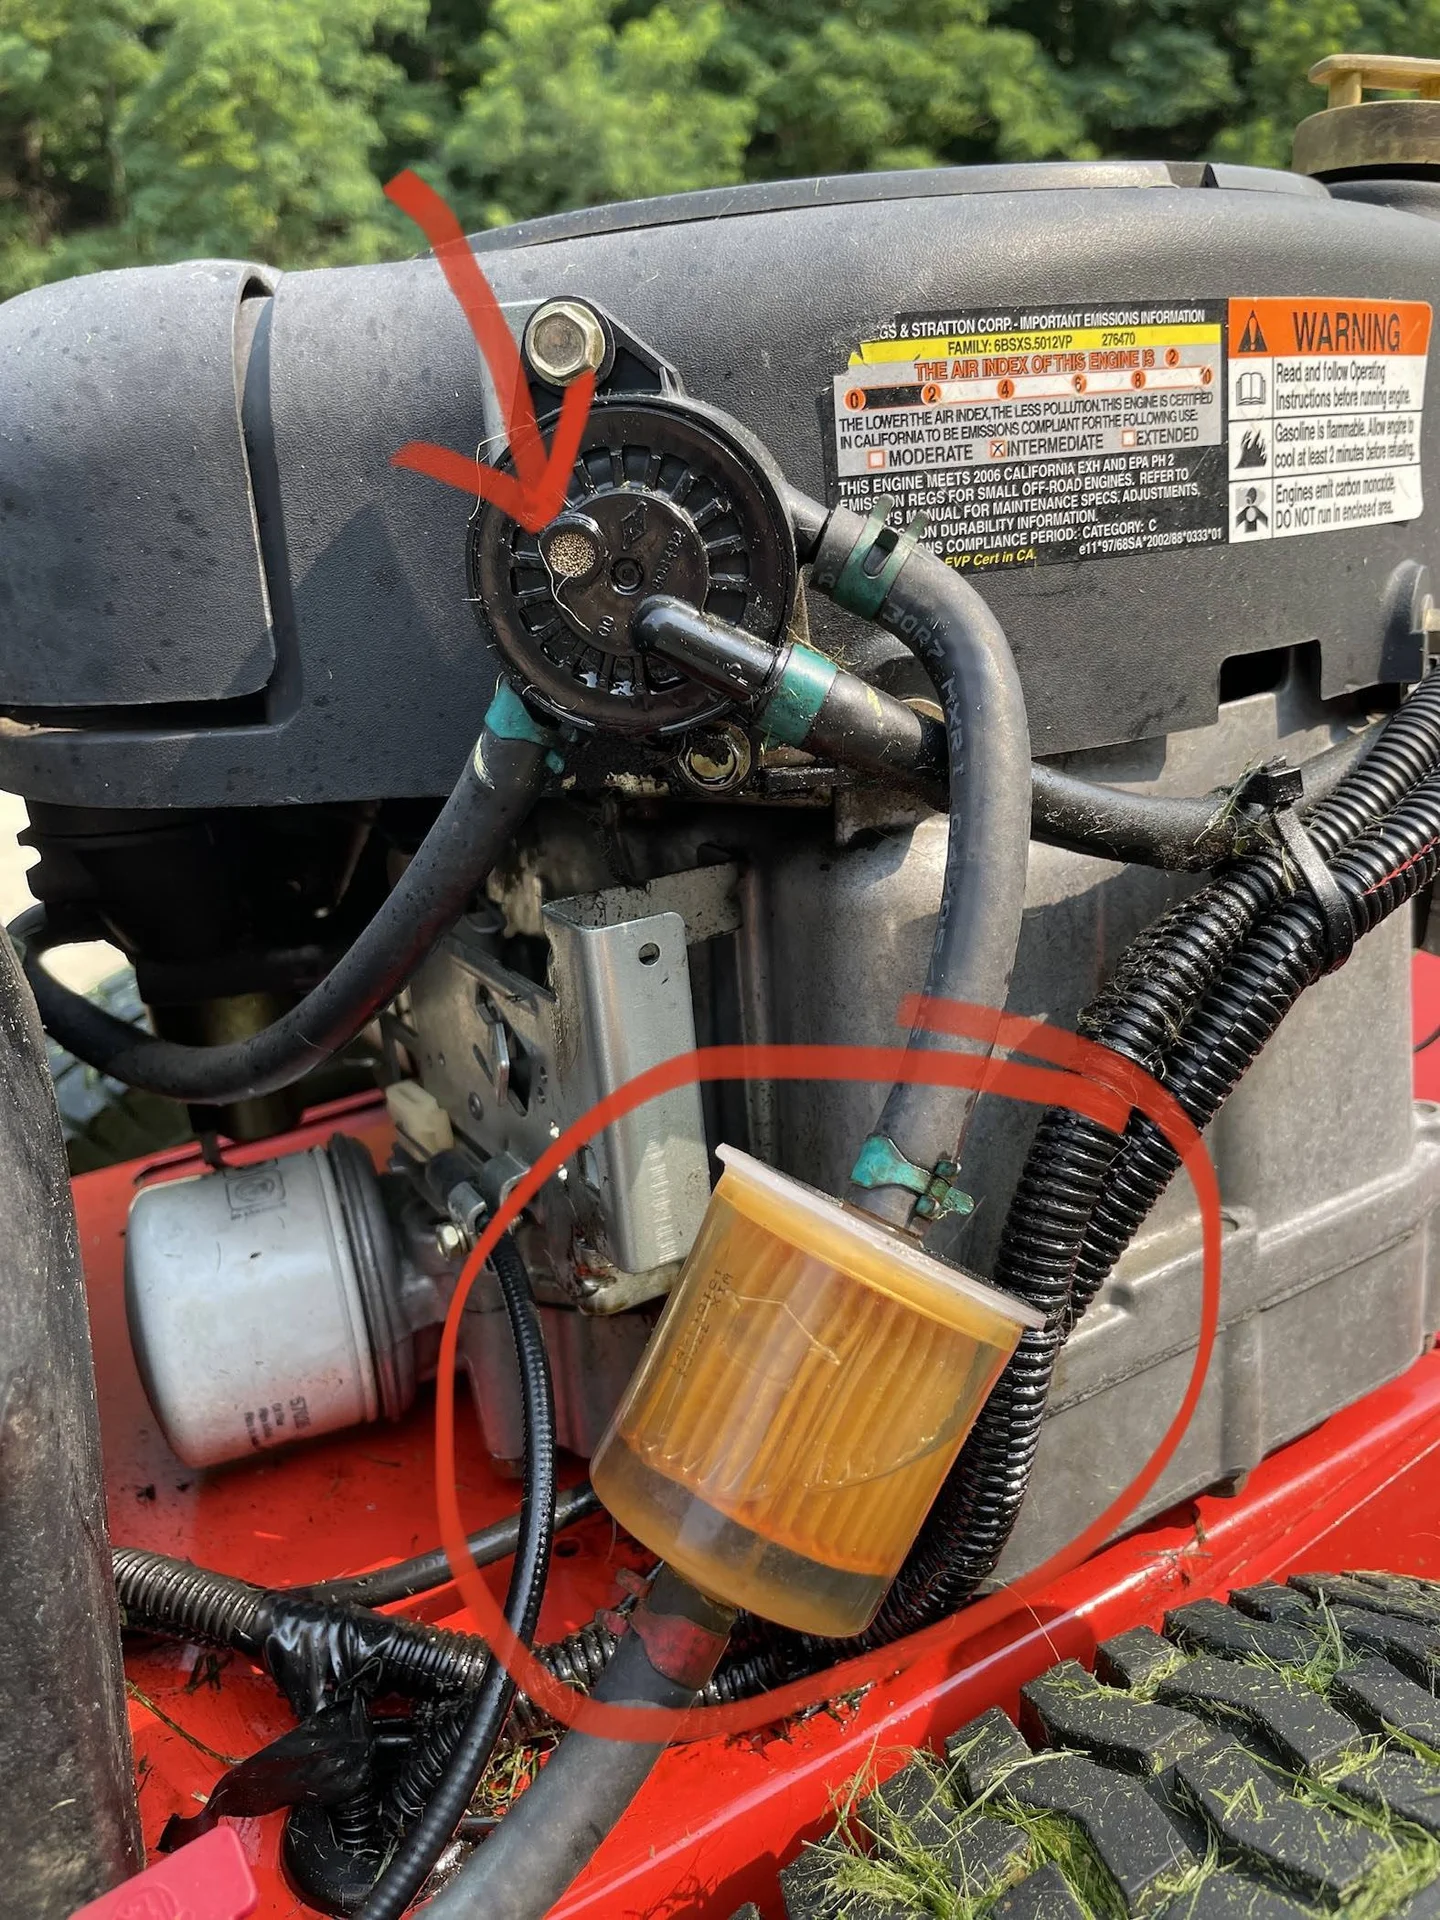
Common Causes of Lawn Mower Oil Leaks
Now, let’s explore the potential culprits behind those pesky oil leaks. While oil leaks can occur in various locations, there are a few common areas to keep an eye on.
-
Dipstick: This handy tool, used to check oil levels, can sometimes become loose or damaged, allowing oil to escape.
-
Oil Filler Cap: This cap seals the oil filler hole, preventing oil from spilling out. If the cap is cracked, loose, or missing, you’ve found your leak source.
-
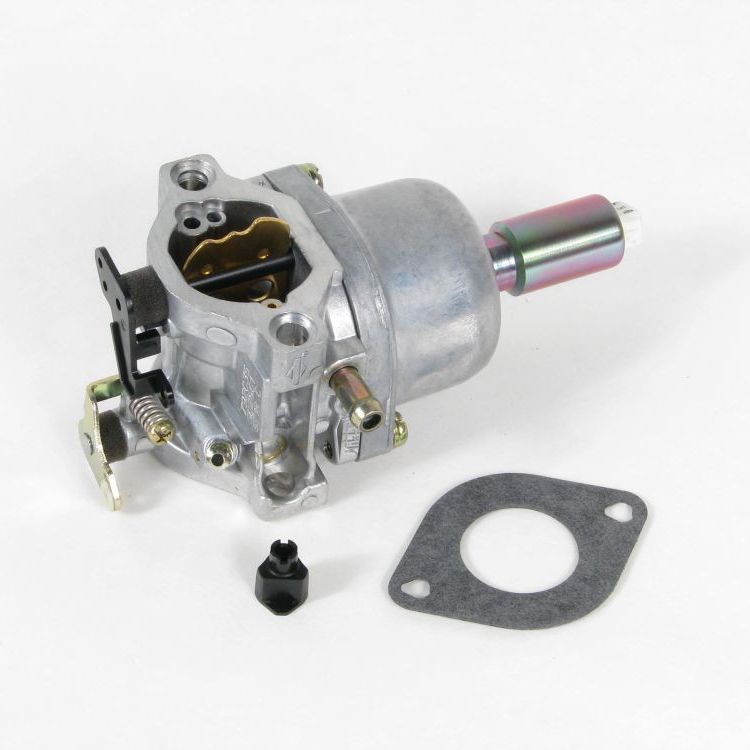
Gaskets: These thin seals lie between various engine components, preventing oil from leaking out. Over time, gaskets can wear out or become damaged, leading to leaks.
-
Seals: Similar to gaskets, seals create a tight barrier between components. Like gaskets, they can wear out or become damaged, causing leaks.
Identifying Oil Leaks: Visual Clues and Smoke Signals
Detecting an oil leak early is crucial to prevent further damage and costly repairs. Here are some telltale signs to watch for:
-
Visual Inspection: Keep an eye out for visible oil stains on your lawn mower’s body, especially around the areas mentioned earlier.
-
Smoke Signals: Run your lawn mower for a few minutes and observe the exhaust. If you notice a bluish or white smoke plume, it could indicate an oil leak burning off.
Remember, regular inspections are your best defense against oil leaks. Make it a habit to check your mower for signs of leaks after each use.
Troubleshooting and Fixing Oil Leaks: A Step-by-Step Guide
Once you’ve identified the source of the leak, it’s time to take action. Here’s a general guide to fixing common oil leaks:
-
Tightening Loose Fittings: If the leak is coming from a loose fitting, such as the dipstick or oil filler cap, simply tighten it securely using a wrench or screwdriver.
-
Replacing Worn Gaskets: For leaks involving gaskets, you’ll need to replace the damaged gasket. This may require some disassembly of the engine, so consult your lawn mower’s manual for specific instructions.
-
Using Sealants: For leaks around seals, you can use a sealant to fill in any gaps and create a tight seal. Apply the sealant according to the product’s instructions.
Professional Assistance: When to Seek Help
While some oil leaks can be tackled by DIY enthusiasts, others may require professional assistance. If you’re dealing with a complex leak, involving major engine components, or lack the mechanical expertise, it’s best to consult a qualified lawn mower technician.
A reputable technician can accurately diagnose the problem, perform the necessary repairs, and ensure your lawn mower is back in top condition.
Preventive Maintenance: Preventing Oil Leaks in the First Place
An ounce of prevention is worth a pound of cure. Regular maintenance can go a long way in preventing oil leaks from occurring in the first place.
-
Check Oil Levels Regularly: Use the dipstick to check your oil level before each use and add oil if necessary.
-
Inspect Gaskets and Seals: During regular maintenance, inspect gaskets and seals for signs of wear or damage. Replace them as needed.
-
Clean Your Mower Regularly: Keep your lawn mower clean to prevent dirt, debris, and moisture from accumulating around seals and gaskets, potentially causing leaks.

Environmental Impact of Oil Leaks: Protecting Our Planet
Beyond the impact on your lawn mower, oil leaks can have a detrimental effect on the environment. Leaked oil can seep into the soil and contaminate groundwater, harming plant life and wildlife.
-
Proper Oil Disposal: Always dispose of used oil responsibly. Never pour it down the drain or onto the ground. Many local recycling centers accept used oil.
-
Environmentally Friendly Practices: Consider using environmentally friendly lawn care practices, such as composting grass clippings and using natural fertilizers. These practices can help reduce your lawn mower’s reliance on oil and minimize the potential environmental impact of leaks.
Conclusion: Maintaining a Healthy Lawn Mower
By understanding the role of oil, identifying leaks, addressing them promptly, and implementing a regular maintenance routine, you can ensure your lawn mower operates smoothly and reliably for years to come. A well-maintained lawn mower not only delivers a superior mowing experience but also protects your investment and contributes to a healthy environment.
So, the next time you encounter an oil leak, don’t despair. With the knowledge and tools provided in this guide, you can tackle the problem head-on, ensuring your lawn mower continues to be a valuable partner in your quest for a perfect lawn.

Additional Resources:
This guide provides a general overview of lawn mower oil leaks. For more specific information, consider consulting the following resources:
-
Lawn mower repair manuals and online guides: Consult your lawn mower’s manual for specific instructions on troubleshooting leaks for your model. Many websites offer detailed repair guides and tutorials.
-
Videos and tutorials on troubleshooting and fixing oil leaks: Visual learners may find videos and tutorials particularly helpful. These resources can provide step-by-step guidance on fixing common oil leaks.
-
Information on proper oil disposal and environmentally friendly lawn care practices: Learn more about responsible oil disposal and discover environmentally friendly lawn care practices to reduce your impact on the environment.
With a little knowledge, proactive maintenance, and a willingness to take action, you can overcome the challenge of oil leaks and ensure your lawn mower remains a dependable ally in your journey towards a lush and vibrant lawn.
-

The Art of Chainsaw Maintenance
In the realm of power tools, chainsaws stand as undisputed champions, their sharp teeth and mighty engines conquering the wilderness with untamed efficiency. However, like any formidable force, chainsaws demand respect and proper care. Regular maintenance is not merely an option; it’s an essential ritual that ensures your chainsaw remains a loyal companion, not a temperamental beast.
The Daily Grind: Essential Checks for a Smooth Run
Before each use, a quick once-over is your best defense against unexpected breakdowns. Start by inspecting the chain, the lifeblood of your chainsaw. Ensure it’s sharp and tensioned correctly, a delicate balance that guarantees smooth cuts and minimizes strain on the engine. Next, check the oil level and lubricate the chain, providing the vital lubrication that keeps the chain from grinding against the bar, generating friction and premature wear.
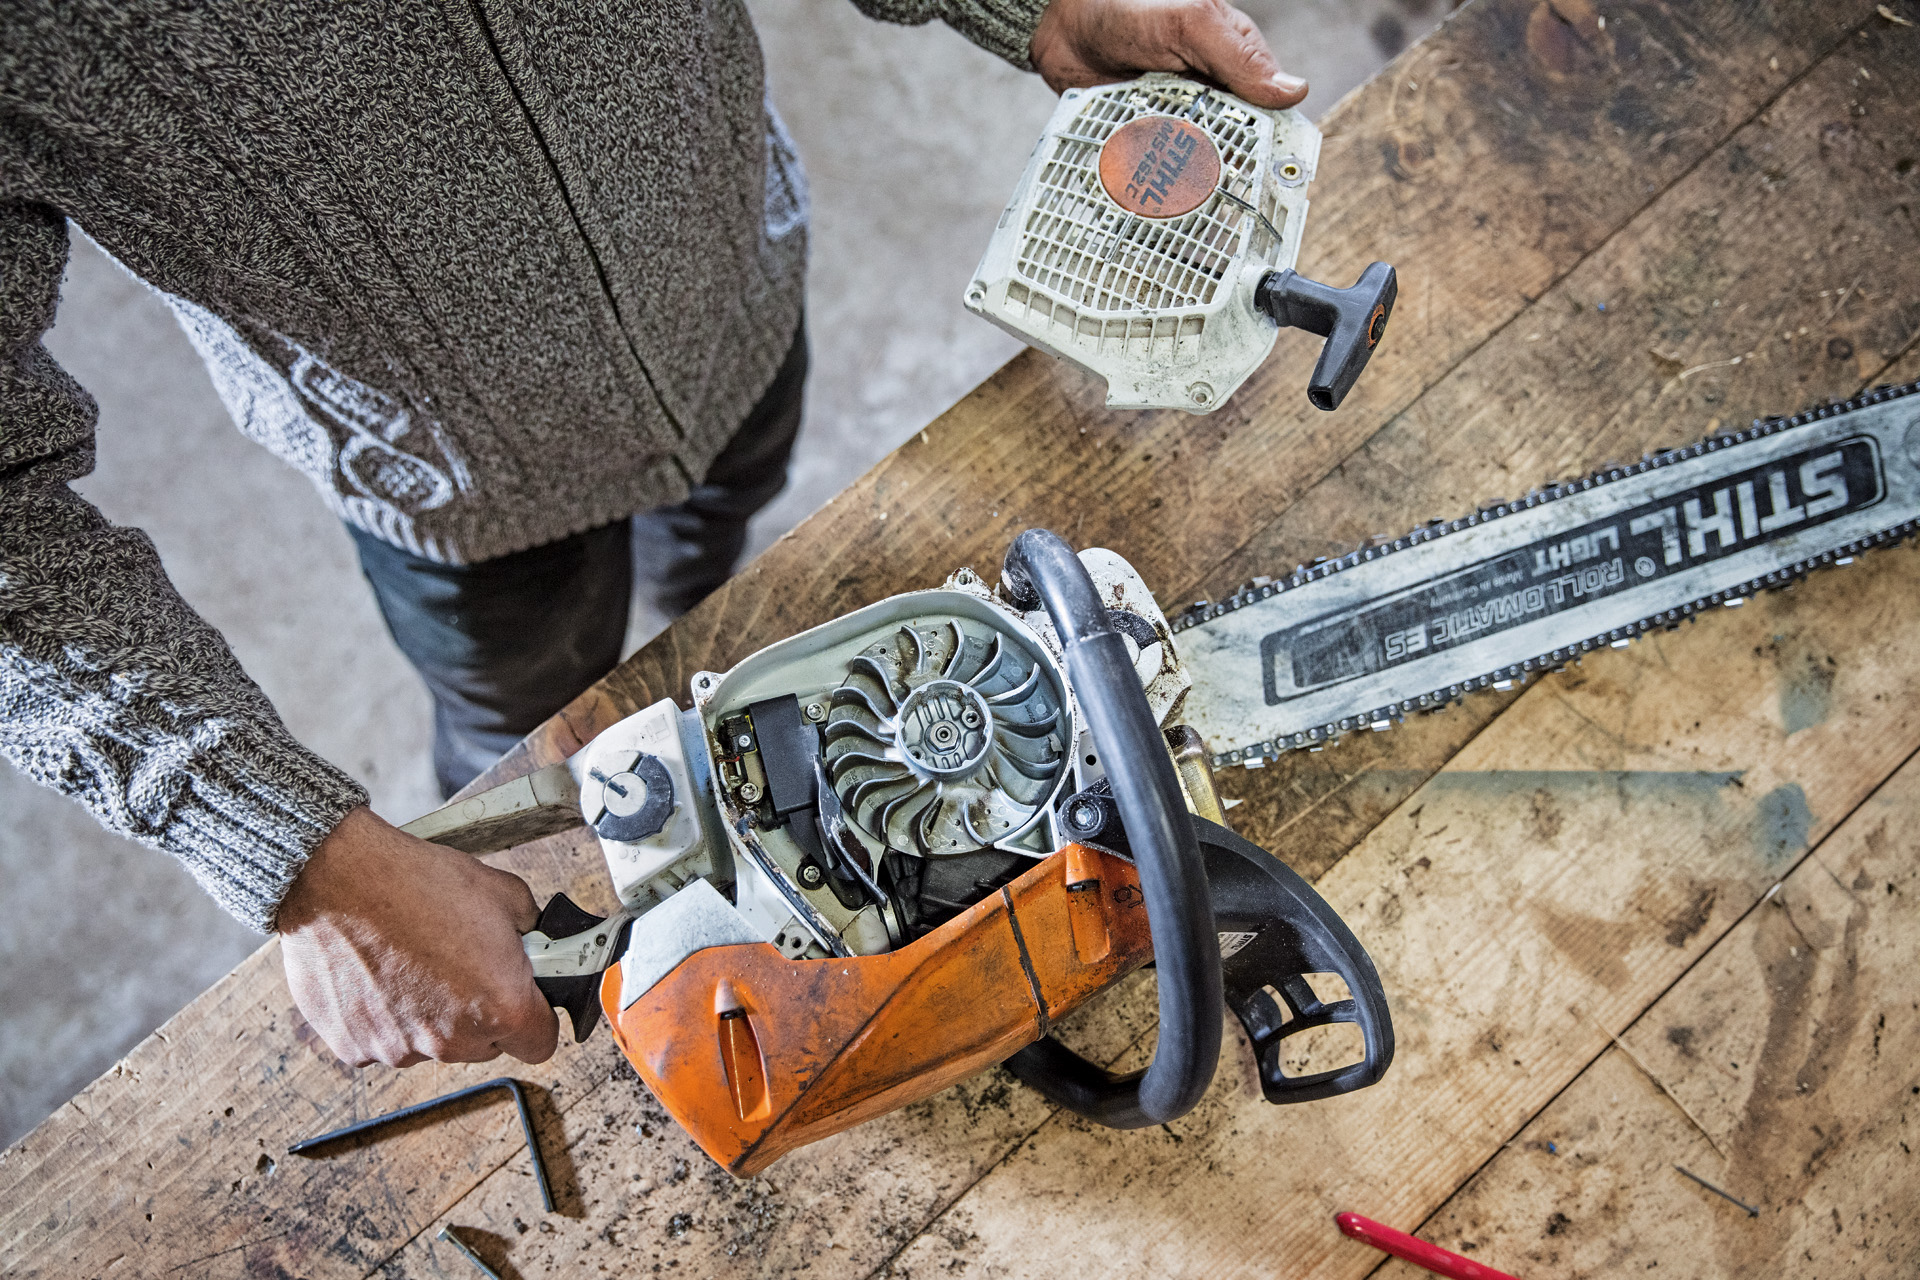
Examine the bar, the guiding rail along which the chain dances. Check for wear and damage, as a worn-out bar can lead to chain derailment or kickback, a sudden and dangerous backward motion of the chainsaw. Next, turn your attention to the air filter, the breathing apparatus of your chainsaw. A clogged filter restricts airflow, starving the engine and causing performance issues. Clean it regularly to keep your chainsaw breathing easy.
Finally, give the starter cord and recoil spring a quick inspection. These unsung heroes ensure a smooth start, and any signs of wear or damage should prompt replacement to avoid frustrating no-starts.
Weekly Rituals: Deeper Dives for Optimal Performance
Once a week, dedicate some time to a more thorough examination of your chainsaw. Start by cleaning the spark plug, the ignition point that ignites the fuel-air mixture. A dirty spark plug can lead to hard starting and misfires. Check the gap between the electrodes and adjust if necessary.
Next, inspect the cooling fins, the aluminum fins that dissipate heat from the engine. If clogged with debris, they can’t do their job, causing the engine to overheat. Clean them gently with a brush or compressed air. Check the fuel lines for leaks, as fuel leaks not only waste precious fuel but also pose a fire hazard.
Tighten loose screws and bolts, ensuring that your chainsaw remains a cohesive unit. If the chain appears dull, don’t hesitate to sharpen it, as a sharp chain is crucial for optimal performance and safety.
Monthly Maintenance: A Deeper Dive into the Inner Workings
Once a month, delve deeper into the inner workings of your chainsaw. Start by cleaning the carburetor, the complex heart of the engine that mixes fuel and air. A dirty carburetor can cause a range of issues, from rough idling to stalling. Consult your owner’s manual for specific cleaning instructions.
Check the fuel filter, a small screen that prevents impurities from entering the carburetor. A clogged filter can starve the engine of fuel. Replace it if necessary. If the air filter hasn’t been replaced during your weekly checks, this is the time to do so.
Inspect the muffler, the device that reduces engine noise. A damaged muffler can not only be excessively loud but also indicate internal engine issues. Check the brake system, the safety feature that stops the chain in case of kickback. Ensure it’s functioning properly and replace any worn components.
Sharpening the Chain: The Art of a Razor-Sharp Edge
A sharp chain is the key to a smooth, efficient, and safe cutting experience. A dull chain increases the risk of kickback, strains the engine, and leads to premature wear. Sharpening your chain regularly is essential.
Invest in a quality chainsaw sharpening tool, such as a file, grinder, or filing guide. Each tool has its advantages, so choose the one that suits your preferences and skill level. Master the proper filing angles and techniques, ensuring that each tooth is sharpened evenly and to the correct depth.
Fuel and Oil: The Lifeblood of Your Chainsaw
The type of fuel and oil you use plays a crucial role in the performance and longevity of your chainsaw. Always use the fuel type recommended by your chainsaw manufacturer. Mixing fuel and oil in the proper ratio is essential; too much oil can clog the engine, while too little can lead to lubrication issues.
Choose the right bar and chain oil, considering the viscosity grade recommended by the manufacturer and the climate and cutting conditions you’ll be facing. Check the oil level regularly and top up as needed.
Safety First: Essential Precautions for a Hazard-Free Experience
Chainsaws are powerful tools that demand respect. Always work in a safe environment, clearing the work area of debris and obstacles that could cause you to stumble or lose control. Wear appropriate personal protective equipment (PPE), including safety glasses, gloves, ear protection, and sturdy boots.
Maintain a safe distance from others and structures to avoid accidental injuries or property damage. When handling the chainsaw, carry it properly, with the chain pointed away from you and your body. Start and stop the chainsaw in a safe manner, following the manufacturer’s instructions. Finally, develop proper cutting techniques to maximize efficiency and minimize risk.
Storing Your Chainsaw: A Secure Haven for Your Powerhouse
Once your work is done, don’t simply abandon your chainsaw. Before storing it, clean the exterior to remove debris that could attract moisture or pests. Store the chainsaw in a dry, well-ventilated area, protected from extreme temperatures and direct sunlight. If storing for an extended period, drain the fuel and oil to prevent gumming and clogging in the carburetor and fuel lines.
Troubleshooting Common Problems: When Your Chainsaw Coughs
Even with the best maintenance, your chainsaw might encounter hiccups. Common problems include hard starting, poor performance, excessive smoke, oil leaks, and chain skipping or breaking. Don’t panic! Familiarize yourself with these issues and their potential causes. Refer to your chainsaw’s owner’s manual for specific troubleshooting steps and solutions.
For more complex problems, consider consulting a qualified chainsaw technician. Their expertise can diagnose and fix issues beyond your comfort level, ensuring your chainsaw is back in top shape in no time.
Conclusion: The Rewards of a Well-Maintained Chainsaw
Regular chainsaw maintenance might seem like a chore, but the rewards are undeniable. A well-maintained chainsaw is a reliable and efficient tool, a loyal partner that tackles any cutting task with ease. Proper maintenance extends the life of your chainsaw, saving you money on repairs and replacements in the long run.
Most importantly, investing in maintenance prioritizes safety. A well-maintained chainsaw minimizes the risk of kickback and other accidents, allowing you to focus on the job at hand with confidence. Remember, a little care goes a long way. By incorporating these practices into your routine, you can transform your chainsaw from a potentially dangerous tool into a dependable and enjoyable companion, ready to conquer any cutting challenge.