
The Ultimate Guide to Fly Swatters: Types, Techniques, and Best Practices

In the realm of household pest control, few tools hold as much iconic status as the humble fly swatter. This simple yet effective weapon has been battling pesky flies for generations, providing a satisfying smack of victory and a sense of control over these uninvited guests. But like any weapon, the fly swatter is most effective when wielded with skill and knowledge. This comprehensive guide will equip you with the expertise to transform you into a fly-swatting maestro, ensuring your home remains a fly-free haven.
Navigating the Maze of Fly Swatter Types
The world of fly swatters is not a one-size-fits-all affair. Each type boasts unique characteristics and applications, catering to diverse needs and preferences.
Traditional Wooden Swatters: These classic fly swatters feature a flat wooden head attached to a handle, offering a simple and effective solution for swatting larger flies. Their durability and low cost make them a popular choice.
Electric Swatters: For those seeking a more powerful and modern approach, electric swatters deliver a jolt of electricity upon contact with a fly, instantly eliminating the pest. These swatters are particularly effective against larger and more persistent flies.
Tennis Racket Fly Swatters: For a touch of fun and versatility, repurposing an old tennis racket as a fly swatter can be surprisingly effective. The large surface area allows for broad swings, making it ideal for swatting multiple flies at once.
Mastering the Art of Fly-Swatting Techniques
Effective fly-swatting is not just about brute force; it’s about precision, timing, and strategy. Here’s how to elevate your fly-swatting skills to a whole new level:
Observation and Anticipation: Before striking, take a moment to observe the fly’s movements and anticipate its next flight path. This will give you a head start and increase your chances of a successful swat.
Positioning and Swing: Position yourself strategically, ensuring you have a clear path to the fly. Swing with a smooth, controlled motion, aiming for the fly’s body rather than its wings.
Follow-Through: After making contact, don’t let go of the swatter immediately. Maintain a follow-through motion to ensure the fly doesn’t escape.
Fly Swatter Safety: A Top Priority
While fly swatters are generally safe, it’s important to exercise caution, especially when using electric models:
Child and Pet Safety: Keep children and pets away from fly swatters, especially when they are in use. Explain the dangers of electricity and ensure they understand the proper handling of electric swatters.
Manufacturer’s Instructions: Always follow the manufacturer’s instructions carefully, including guidelines for cleaning, battery replacement, and proper usage.
Avoid Touching the Electric Mesh: Never touch the electric mesh on an electric swatter while it is powered on. This can cause an electrical shock.
Choosing the Right Fly Swatter for Your Needs
The type of fly swatter you choose can significantly impact your fly-swatting success. Consider these factors:
Fly Type: If larger flies are your primary concern, a traditional wooden swatter or electric swatter may be effective. For smaller, more agile flies, a tennis racket swatter can provide more precision.
Size and Weight: Choose a swatter that is a comfortable size and weight for you. A swatter that is too large or too heavy can be difficult to maneuver and may cause fatigue.
Personal Preference: Ultimately, the choice of fly swatter comes down to personal preference. Experiment with different types to find one that suits your style and swatting technique.
Fly Swatter Maintenance and Care
Proper care and maintenance will extend the life of your fly swatter and keep it performing at its best:
Cleaning Wooden Swatters: For wooden swatters, wipe down the surface with a damp cloth to remove dirt and debris. Avoid using harsh chemicals or abrasive cleaners.
Caring for Electric Swatters: For electric swatters, follow the manufacturer’s instructions for cleaning and replacing batteries. Store them in a cool, dry place when not in use.
Proper Storage: Store all fly swatters in a safe place away from direct sunlight and extreme temperatures. This will prevent them from warping or cracking.
Fly Swatter Alternatives: Exploring Additional Options
While fly swatters are a classic and effective tool, they are not the only weapon in the fight against flies. Here are some alternative methods to consider:
Fly Traps: Employ fly traps that lure flies using bait and then trap them inside. These traps are particularly effective for controlling large fly populations.
Sticky Traps: Sticky traps use a sticky adhesive to capture flies that land on them. These traps are discreet and can be placed in strategic locations.
Natural Repellents: Utilize natural repellents like citronella candles or citronella oil sprays to create a barrier against flies.
These repellents offer a pleasant fragrance and are safe for children and pets. However, their effectiveness may vary depending on the fly species and the severity of the infestation.
The Final Splat: A Fly-Free Future Awaits
By understanding the diverse types of fly swatters, mastering effective swatting techniques, and prioritizing safety, you are now armed to wage war on those pesky flies with confidence. Remember, the right fly swatter, coupled with a strategic approach and proper maintenance, can significantly reduce fly populations in your home.
Don’t hesitate to explore the vast array of fly swatters and alternative methods available. Whether you opt for the classic wooden swatter, the high-tech electric option, or a repurposed tennis racket, there’s a perfect fly-swatting solution waiting for you. Embrace the satisfaction of a successful swat and create a fly-free haven for yourself and your loved ones.
Bonus: Resources to Enhance Your Fly-Swatting Prowess
- Online fly swatter reviews and comparisons to identify the ideal swatter for your needs and budget.
- Pest control websites and forums packed with valuable tips on fly identification, prevention strategies, and safe and effective fly control methods.
- DIY fly trap tutorials to equip you with the knowledge to create your own fly-trapping solutions.
- Reputable hardware stores staffed with knowledgeable experts who can offer personalized advice on choosing and using fly swatters and other fly control solutions.
With this wealth of information at your disposal, you are well on your way to becoming a fly-swatting champion. So, the next time a fly dares to invade your space, remember the techniques you’ve learned, choose your weapon wisely, and deliver a resounding swat that sends a clear message: your home is a fly-free zone!

Choosing the Right Bug Zapper: Types, Placement, and Maintenance Tips

As the sun casts its golden glow upon our outdoor spaces, beckoning us to bask in its warmth and revel in the beauty of nature, an unwelcome troupe of uninvited guests often joins the party – pesky insects. From the incessant buzzing of mosquitoes to the irritating bites of flies, these intruders can quickly transform a tranquil outdoor haven into a battleground against the forces of nature. Enter the bug zapper, a beacon of hope in the fight against these airborne nuisances.
Navigating the Maze of Bug Zapper Types
In the realm of bug zappers, where technology meets the desire for a pest-free outdoor experience, a variety of options awaits. Each type boasts its unique characteristics and applications, catering to diverse needs and preferences. Transition: When considering bug zappers options, electric grid bug zappers, the most common and recognizable type, emit an electric current between two metal grids. Attracted by the light, insects make contact with the grid, meeting their demise. Their effectiveness and affordability make them a popular choice. On the other hand, ultraviolet light bug zappers, utilizing ultraviolet (UV) light to lure insects, emit a wavelength that mimics the moonlight insects follow for navigation. As insects approach the light, they are sucked into a fan and trapped. These zappers are effective against a wider range of insects, including moths and gnats.
Propane-powered bug zappers, releasing a steady plume of carbon dioxide, mimic human breath, a powerful attractant for mosquitoes. Conquer large outdoor spaces with these mosquito-slaying zappers! Unlike traditional zappers, these innovative models attract even mosquitoes that don’t care for UV light. They achieve this by emitting a plume that mimics human breath, a natural mosquito magnet. Once those pesky insects get close, a powerful fan sucks them in and traps them, keeping your evenings bite-free.
Decoding the Factors that Shape Your Choice
Selecting the right bug zapper is not a mere whim; it’s a strategic decision that aligns with your outdoor pest control needs. Several factors demand careful consideration to ensure you find the perfect match.
Coverage Area: Consider the size of your outdoor space and choose a bug zapper with an effective coverage area that can adequately control the insect population. For smaller patios or balconies, a compact zapper is sufficient, while larger yards or gardens may require a more powerful model.
Bug Type: Identify the types of insects prevalent in your area and choose a bug zapper specifically designed to attract and eliminate those pests. If mosquitoes are your primary concern, an UV light zapper or a propane-powered zapper may be the best choice. For flies and gnats, an electric grid zapper can be effective.
Safety Features: Prioritize safety by selecting a bug zapper with protective features that minimize the risk of accidental contact with humans or pets. Look for zappers with grounded grids, outer protective cages, and low-voltage designs.
Additional Features: Explore additional features that enhance the effectiveness and convenience of your bug zapper. Weatherproofing is crucial for outdoor use, while timers can automate operation and silent operation ensures a peaceful outdoor experience.
Brands that Elevate the Bug Zapping Experience
In the realm of bug zappers, certain brands stand out as beacons of quality, performance, and innovation, earning the trust of homeowners and pest control enthusiasts worldwide.
The renowned American brand, Black & Decker, celebrates its bug zappers for their durable and reliable nature, featuring innovative designs and effective pest control capabilities. These bug zappers boast large coverage areas, meaning they can effectively control pests across a wide space. They also pack a punch with multiple insect attraction methods, luring in a variety of unwanted visitors. And for peace of mind, these zappers come loaded with safety features to keep you, your family, and your pets protected.
Flowtron, another American stalwart, has garnered a reputation for delivering exceptional pest control performance with their high-quality bug zappers. These zappers are crafted from premium materials and feature advanced technologies, such as dual UV light tubes and variable power settings.
Havahart, a company dedicated to humane pest control solutions, offers a range of bug zappers that combine effectiveness with safety. Their zappers are known for incorporating protective grids, low-voltage designs, and non-toxic pest elimination methods.
Nurturing Your Bug Zapper to Longevity
Like any faithful companion, your bug zapper deserves proper care and attention to ensure a long and pest-free partnership. By following these simple guidelines, you’ll extend the life of your zapper and keep it performing at its best.
Cleaning: Regularly inspect your bug zapper for dead insects and debris that can accumulate on the grid or surrounding areas. Clean the grid periodically using a soft brush or a mild detergent solution to prevent damage and ensure optimal performance.
Inspection: Before each pest control season, thoroughly inspect your bug zapper for any signs of damage, such as loose connections, cracked casings, or damaged grids. Replace any worn or broken parts promptly to prevent safety hazards and ensure effective operation.
Storage: When not in use, store your bug zapper in a cool, dry place away from direct sunlight and extreme temperatures. This prevents the zapper from cracking or becoming brittle and ensures it remains in good condition for the next pest control season.
Strategic Placement: Unleashing the Zapping Power
With your trusty bug zapper in hand and a clear understanding of its capabilities, it’s time to unleash its power! Here’s how to strategically place your zapper for maximum effectiveness:
Targeting the Buffet: Don’t place your zapper directly next to seating areas or food preparation zones. This can attract beneficial insects like ladybugs and create an unpleasant dining experience.
Guarding Entryways: Consider placing your zapper near entryways, patios, and decks, where insects are most likely to enter your outdoor space. This creates a perimeter of defense against airborne pests.
Position your zapper in a partially shaded area to attract insects while minimizing the impact on your outdoor ambiance, as many insects are attracted to light.
Safety First: A Pledge for Responsible Zapping
Safety is paramount when using a bug zapper. Here are some precautions to keep in mind:
Electrical Safety: Exercise caution with electrical cords and avoid placing the zapper near water sources. Always unplug the zapper before cleaning or performing maintenance.
Pet and Child Safety: Keep children and pets away from the zapper while it’s in operation. Ensure the zapper is placed securely and cannot be easily knocked over.
Following Instructions: Always follow the manufacturer’s instructions for safe operation and maintenance of your bug zapper. This includes proper disposal of dead insects and avoiding touching the grid while it’s powered on.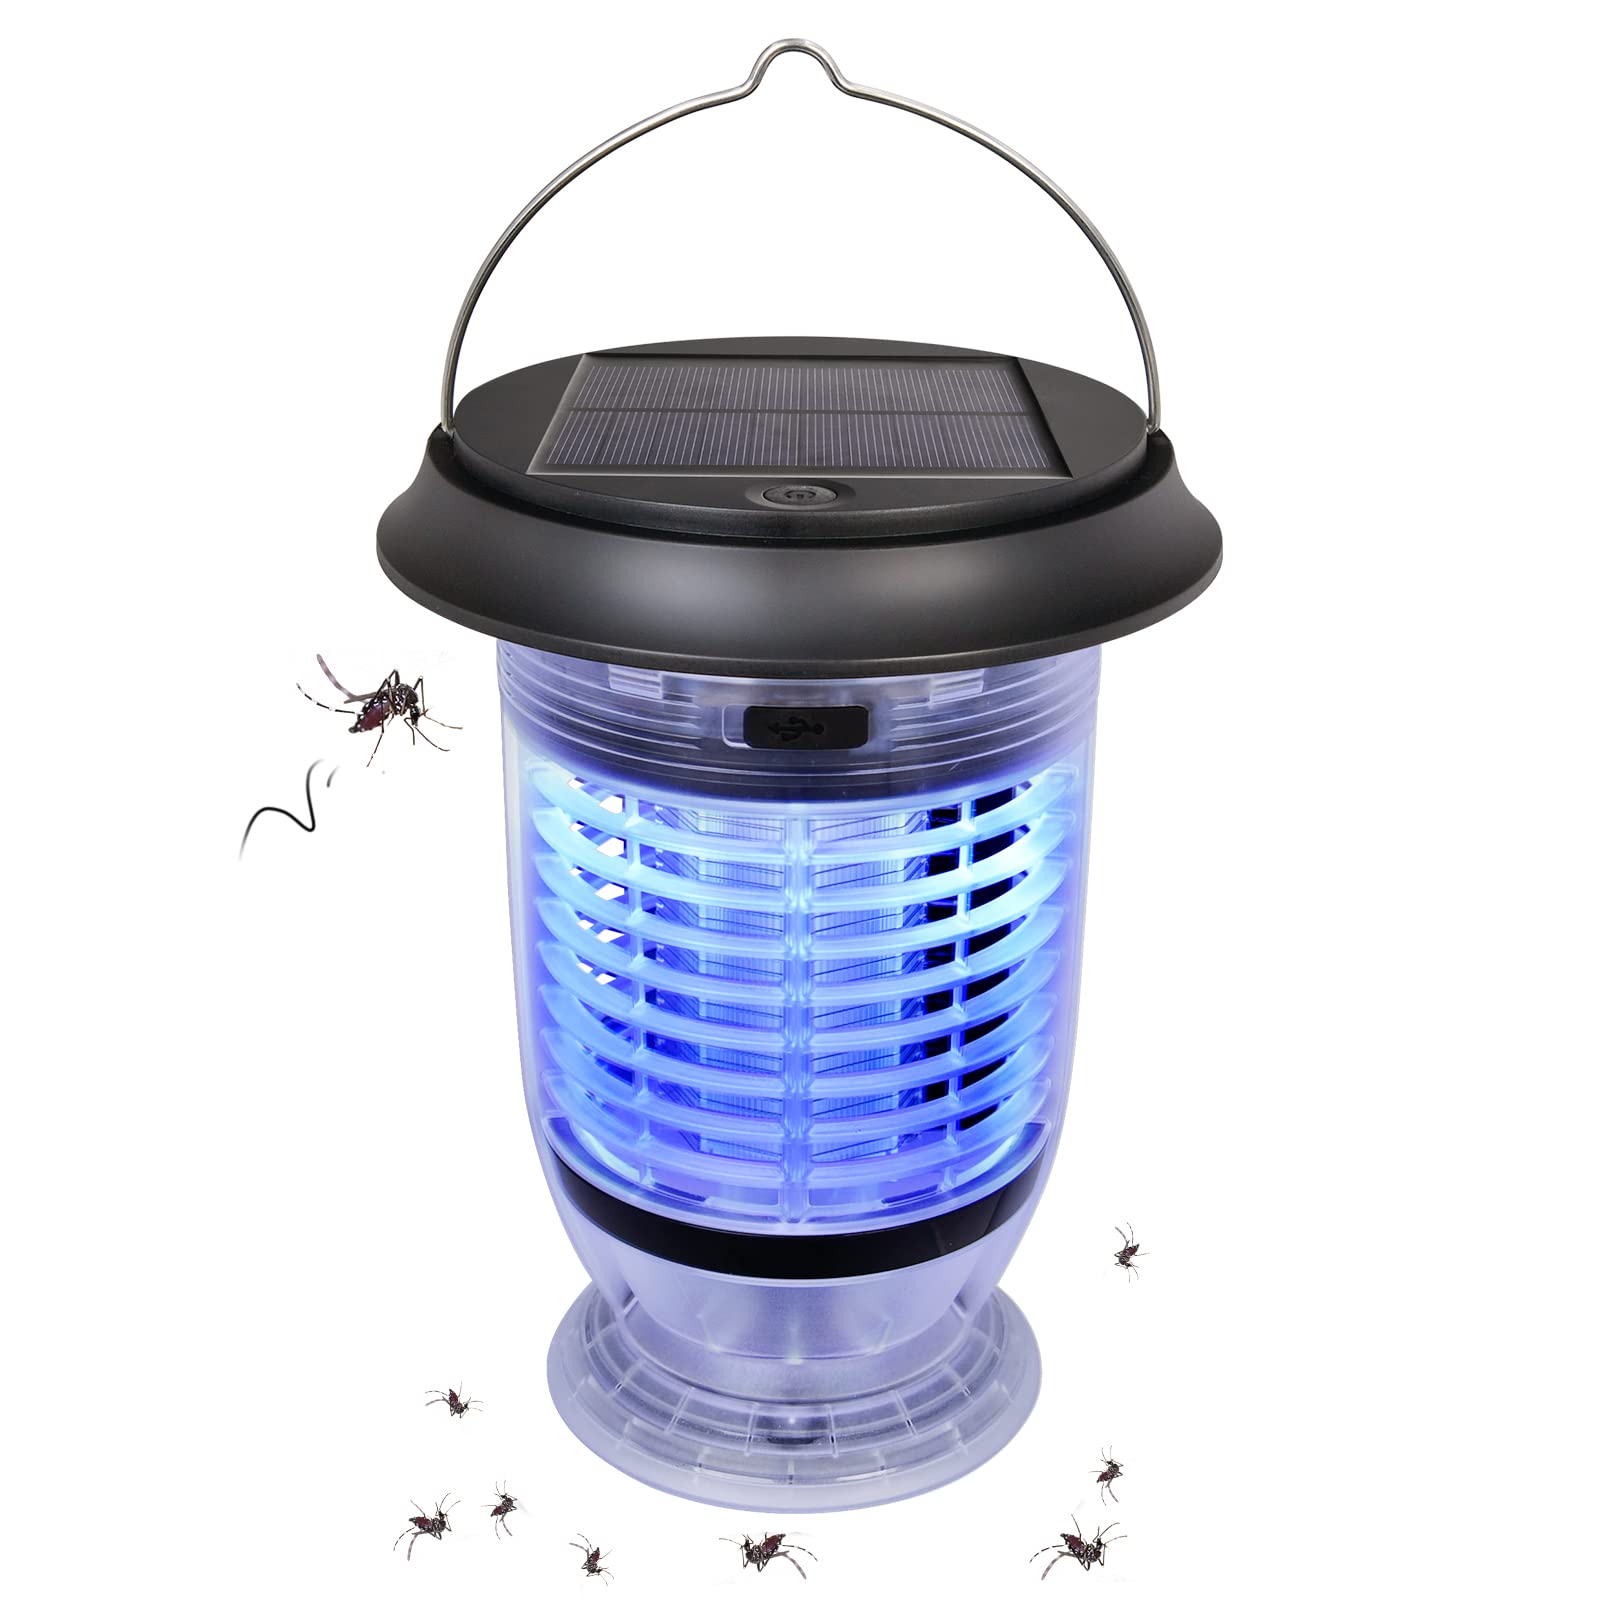
Bug Zapper Alternatives: Exploring Additional Options
While bug zappers offer a powerful solution, they are not the only weapon in the fight against outdoor pests. Here are some alternative methods to consider:
Natural Repellents: Utilize natural repellents like citronella candles or citronella oil sprays to create a barrier against mosquitoes and other insects. These are safe for children and pets and offer a pleasant fragrance.
Mosquito Traps: Employ mosquito traps that lure insects using carbon dioxide or light, then trap them inside a container. These traps are effective for specific purposes but may require regular emptying.
Habitat Modification: Consider modifying your outdoor space to make it less attractive to insects. Eliminate standing water sources, trim overgrown vegetation, and keep trash cans sealed to reduce potential breeding grounds.
Conclusion: A Bug-Free Oasis Awaits
Now that you understand the diverse types of bug zappers, their functionalities, and the importance of proper use and maintenance, you are equipped to create a more peaceful and pest-free outdoor haven.
Remember, the right bug zapper, coupled with strategic placement, safety precautions, and potentially even alternative methods, can significantly reduce insect populations and enhance your outdoor enjoyment. Explore the vast array of zappers and alternatives available, and embark on a journey of creating a tranquil oasis, free from the buzzing and biting of unwanted insect guests.
Bonus: Unveiling Additional Resources
- By conducting online bug zapper reviews and comparisons, you can identify the perfect zapper for your needs and budget. In addition, pest control websites and forums provide valuable tips on insect identification, prevention strategies, and safe and effective pest control methods. Furthermore, DIY bug zapper maintenance tutorials can equip you with the knowledge to tackle minor repairs and extend the life of your zapper. Moreover, reputable hardware stores employ knowledgeable experts who can offer personalized advice on choosing and using bug zappers and other pest control solutions. By accessing this wealth of information, you can master outdoor pest control, ensuring your summer evenings are filled with laughter, relaxation, and minimal buzzing interruptions.

The Ultimate Guide to Garden Water Guns: Types, Uses, and Maintenance Tips

In the realm of gardening, where nature’s artistry intertwines with human care, the garden water gun stands as a versatile tool, a playful companion that transforms ordinary watering tasks into refreshing experiences. Whether it’s gently nurturing delicate blooms, powerfully cleaning patios, or engaging in exhilarating water fights, the garden water gun proves its worth as a true asset in any gardener’s arsenal. Embark on a journey into the world of garden water guns, exploring their diverse types, essential considerations, and effective usage techniques, transforming your gardening experience into a symphony of fun and functionality.
Navigating the Maze of Garden Water Gun Types
As you venture into the aisles of hardware stores or browse online marketplaces, you’ll encounter a dazzling array of garden water guns, each vying for your attention. To make an informed decision, it’s crucial to understand the distinct characteristics and applications of each type.
Pistol grip water guns, the most common and user-friendly variety, offer a comfortable grip and easy maneuverability, making them ideal for everyday watering tasks. Their compact design and trigger-style operation allow for precise control over water flow.
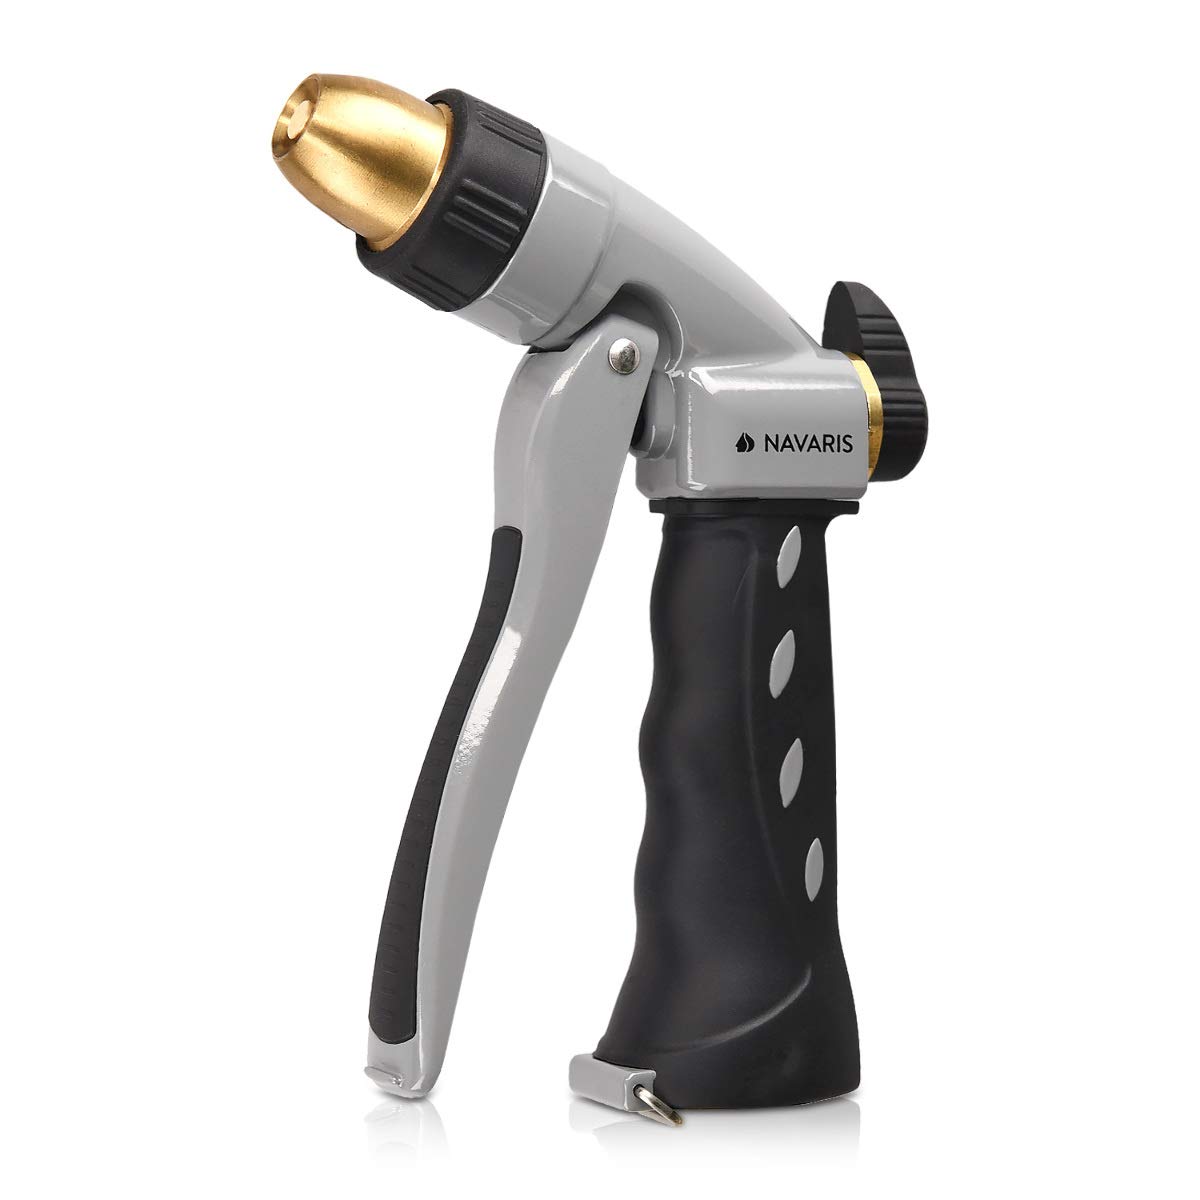
Lever grip water guns, known for their durability and powerful streams, are perfect for tackling tougher jobs like cleaning driveways or washing cars. Their sturdy construction and lever-activated mechanism provide a steady flow of water, even under high pressure.
Hose-end water guns, the most economical option, attach directly to your garden hose, eliminating the need for a separate handle. They offer a wide range of spray patterns, from gentle mists to powerful jets, catering to diverse watering needs.
Decoding the Factors that Shape Your Choice
Selecting the right garden water gun is not a mere whim; it’s a strategic decision that aligns with your gardening and cleaning needs. Several factors demand careful consideration to ensure you find the perfect match.
Spray Patterns: The versatility of a garden water gun lies in its ability to deliver water in a variety of patterns. Jet streams, ideal for cleaning hard surfaces, offer a concentrated blast of water. Cone sprays, suitable for watering plants, provide a wider coverage area. Misting patterns, gentle on delicate foliage, produce a fine, refreshing mist.
Water Flow: The water flow rate of your water gun determines the speed and intensity of the watering stream. A higher flow rate is ideal for cleaning tasks or watering large areas, while a lower flow rate is suitable for delicate plants or conserving water.
Durability: Durability is paramount, especially if you plan to use your water gun frequently or for heavy-duty tasks. Choose a water gun made from high-quality materials, such as metal or reinforced plastic, that can withstand regular use and potential abuse.
Comfort: Ergonomics play a crucial role in ensuring a comfortable and enjoyable watering experience. Consider the grip size, handle shape, and weight of the water gun to avoid hand fatigue or discomfort during extended use.
Brands that Elevate the Garden Water Gun Experience
In the realm of garden water guns, certain brands stand out as beacons of quality and performance, earning the trust of gardeners and DIY enthusiasts worldwide.
Melnor, a renowned American brand, is celebrated for its innovative designs and user-friendly features. Their water guns are known for their comfortable grips, adjustable spray patterns, and leak-proof seals.
Gilmour, another American stalwart, has garnered a reputation for its durable construction and reliable performance. Their water guns are crafted from high-quality materials and feature rugged designs to withstand demanding use.
Dramm, a family-owned American company, prides itself on crafting premium water guns using the finest materials. Their water guns are known for their exceptional durability, corrosion resistance, and weather tolerance.
Aqua Joe, a global brand with a focus on innovation and affordability, offers a wide range of garden water guns that cater to diverse needs. Their water guns are known for their lightweight designs, multiple spray patterns, and value-for-money pricing.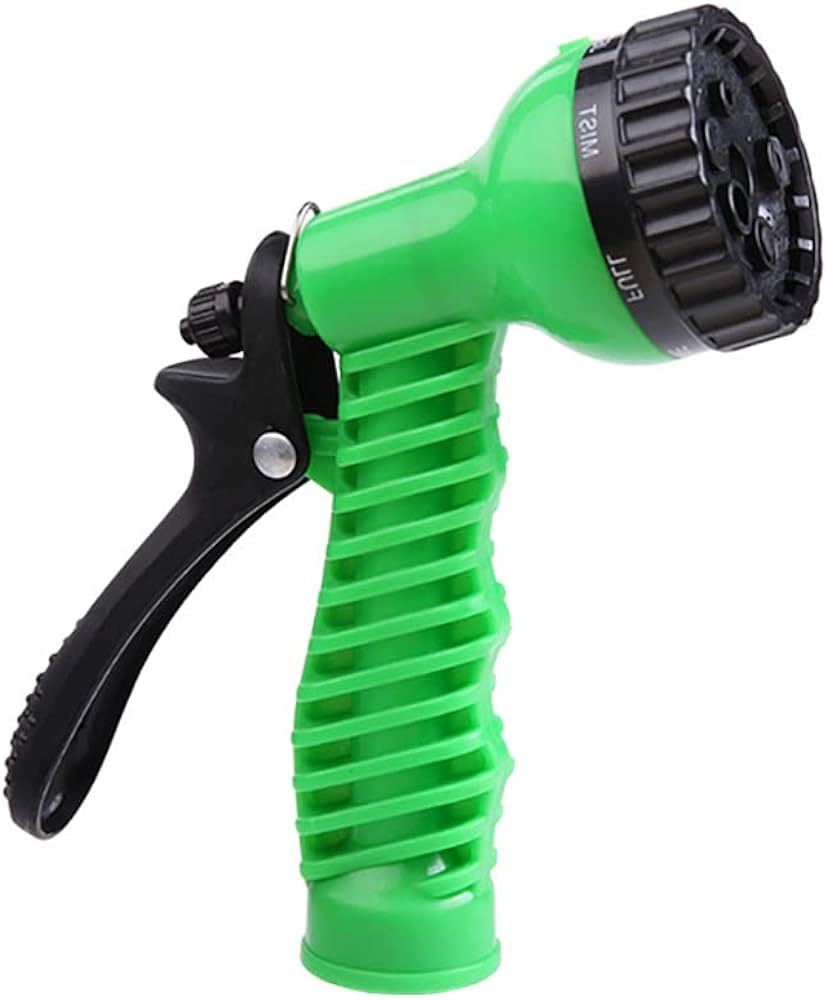
Nurturing Your Garden Water Gun to Longevity
Like any faithful companion, your garden water gun deserves proper care and attention to ensure a long and fruitful partnership. By following these simple guidelines, you’ll extend the life of your water gun and keep it performing at its best.
Cleaning: Regularly inspect your water gun for dirt, debris, and mineral buildup. Clean it periodically using a mild detergent and water solution to prevent corrosion and ensure smooth operation.
Inspection: Before each watering or cleaning season, thoroughly inspect your water gun for leaks, cracks, or signs of wear and tear. Replace any damaged parts promptly to prevent water loss and potential damage to your water source or surroundings.
Storage: When not in use, store your water gun in a cool, dry place away from direct sunlight and extreme temperatures. This prevents the water gun from cracking or becoming brittle.
Harnessing the Power of Your Garden Water Gun
With your trusty garden water gun in hand and the knowledge of its capabilities, you’re ready to conquer a variety of tasks in your garden and beyond. Here’s how to unlock the full potential of your water gun:
Effective Watering Techniques:
- Matching Spray to Plant: Utilize the adjustable spray patterns to your advantage. Gentle misting is ideal for delicate seedlings and leafy greens, while a cone spray is suitable for established plants and shrubs. Avoid using powerful jet streams on fragile plants, as they can damage leaves and stems.
- Targeting the Roots: Focus the water flow at the base of the plant, where it’s most needed for root absorption. Watering the foliage can waste water and promote fungal diseases.
- Early Morning or Evening: Water your plants early in the morning or late in the evening to minimize water evaporation caused by the heat of the day. Cooler temperatures allow for better water absorption by the plants.

Beyond Watering: Unveiling Creative Applications
- Cleaning Champion: Unleash the cleaning power of your water gun! A forceful jet stream is perfect for removing dirt and grime from patios, decks, and outdoor furniture. Remember to adjust the pressure to avoid damaging delicate surfaces like painted wood.
- Car Care Companion: Give your car a quick wash with a gentle spray pattern. This is a great way to remove dust and loose dirt before a more thorough car wash.
- Water Wars: Embrace the playful side of gardening! Engage in refreshing water fights with friends and family on a hot summer day. Remember to use a gentle spray pattern and ensure everyone is participating safely.
Safety First: A Gardener’s Pledge
Safety is paramount when wielding your garden water gun. Here are some precautions to keep in mind:
- Water Pressure: Exercise caution when dealing with pressurized water systems. Leaks or loose connections can cause forceful water sprays that can lead to injuries. Turn off the water supply before starting any maintenance or repairs.
- Supervise Play: Never leave children unattended around running water guns. Ensure responsible use and avoid aiming the water gun at people or electrical outlets.
- Eye Protection: Consider wearing protective eyewear when using powerful spray patterns, especially for cleaning tasks or when working near flying debris.
Enhancing Your Garden Water Gun Experience
A plethora of garden water gun accessories awaits to elevate your watering and cleaning experience:
- Nozzles: Invest in interchangeable nozzles to further customize your spray patterns. Fog nozzles offer an ultra-gentle mist for delicate seedlings, while soaker nozzles deliver a steady stream of water ideal for deep root watering.
- Filters: Attach a filter to your water gun to prevent clogs caused by dirt or debris in your water source. This ensures a smooth flow of water and protects the internal mechanisms of your water gun.
- Hose Connectors: Utilize quick-connect hose connectors for effortless attachment and detachment of your water gun to your garden hose. This saves time and eliminates the need for fumbling with threaded connections.
The Final Bloom: A Garden Water Gun Odyssey Concludes
By demystifying the world of garden water guns, from their diverse types and features to essential care and effective usage techniques, you are now equipped to transform your gardening and cleaning routines. Remember, the right water gun, coupled with proper care and responsible use, becomes a multi-purpose tool in your gardening arsenal. Explore the vast array of water guns and accessories available, and embark on a journey of creating a thriving oasis, all while keeping your garden clean and your spirits high.
Bonus: Unveiling Additional Resources
- Online garden water gun reviews and comparisons to identify the perfect water gun for your needs and budget.
- Gardening websites and forums packed with valuable tips on watering techniques, plant care, and effective use of garden tools.
- DIY garden water gun maintenance tutorials to equip you with the knowledge to tackle minor repairs and extend the life of your water gun.
- Reputable hardware stores staffed with knowledgeable experts who can offer personalized advice on garden water gun selection and usage.
With this wealth of information at your disposal, you are well on your way to becoming a garden water gun maestro, ensuring your gardening endeavors are not only fruitful but also enjoyable and efficient.

Selecting the Right Garden Water Connectors: Tips, Types, and Installation Guidelines

In the realm of gardening, where nature’s artistry intertwines with human care, a seamless irrigation system stands as the lifeline, ensuring that plants and lawns receive the vital hydration they need to thrive. At the heart of this system lie the humble yet essential garden water connectors, the unsung heroes that connect hoses, sprinklers, and other components, orchestrating the smooth flow of water from source to destination. Embark on a journey into the world of garden water connectors, exploring their diverse types, essential considerations, and installation guidelines, transforming your irrigation experience into a symphony of efficiency.
Navigating the Maze of Garden Water Connector Types
As you venture into the aisles of hardware stores or browse online marketplaces, you’ll encounter a dazzling array of garden water connectors, each vying for your attention. To make an informed decision, it’s crucial to understand the distinct characteristics and applications of each type.
Threaded connectors, the most traditional type, feature male and female ends with external and internal threads, respectively. These connectors are renowned for their secure and durable connections, making them ideal for permanent installations.
Quick-connect connectors, also known as push-fit connectors, offer a convenient and hassle-free alternative. These connectors feature a locking mechanism that allows for quick attachment and detachment without the need for tools.
Specialty connectors, designed for specific purposes, cater to unique irrigation needs. Barbed connectors, with sharp teeth that pierce the hose wall, are ideal for attaching hoses to sprinklers or other components. Compression connectors, utilizing a compression sleeve and nut, provide a tight seal for rigid pipes.
Decoding the Factors that Shape Your Choice
Selecting the right garden water connectors is not a mere whim; it’s a strategic decision that aligns with your irrigation needs and preferences. Several factors demand careful consideration to ensure you find the perfect match.
Size: Let the size of your connectors be dictated by the diameter of your hoses and the thread size of the water source or irrigation components. Ensure a mismatch-free connection to prevent leaks and ensure optimal water flow.
Material: Durability, corrosion resistance, and weather tolerance are key considerations when choosing connector material. Brass, renowned for its strength and longevity, is a popular choice. Plastic, lightweight and affordable, is suitable for temporary use. Stainless steel, offering superior corrosion resistance, is ideal for outdoor applications.
Features: Additional features can enhance your irrigation experience. Leak-proof gaskets prevent water loss, swivel connections eliminate hose twisting, and integrated filters protect against debris.
Brands that Elevate the Garden Water Connector Experience
In the realm of garden water connectors, certain brands stand out as beacons of quality and performance, earning the trust of gardeners worldwide.
Melnor, a renowned American brand, is celebrated for its innovative designs and user-friendly features. Their connectors are known for their leak-proof seals, swivel connections, and ergonomic grips.
Gilmour, another American stalwart, has garnered a reputation for its durable construction and reliable performance. Their connectors are crafted from high-quality materials and feature rugged designs to withstand demanding use.
Dramm, a family-owned American company, prides itself on crafting premium connectors using the finest materials. Their connectors are known for their exceptional durability, corrosion resistance, and weather tolerance.
Gardena, a German company with a global presence, brings its expertise in engineering and design to the garden water connector market. Their connectors are known for their innovative features, sleek designs, and European quality.
Nurturing Your Garden Water Connectors to Longevity
Like any faithful companion, your garden water connectors deserve proper care and attention to ensure a long and fruitful partnership. By following these simple guidelines, you’ll extend the life of your connectors and keep them performing at their best.
Cleaning: Regularly inspect your connectors for dirt, debris, and mineral buildup. Clean them periodically using a mild detergent and water solution to prevent corrosion and ensure smooth operation.
Inspection: Before each irrigation season, thoroughly inspect your connectors for leaks, cracks, or signs of wear and tear. Replace any damaged connectors promptly to prevent water loss and potential damage to your irrigation system.
Storage: When not in use, store your connectors in a cool, dry place away from direct sunlight and extreme temperatures. This prevents the connectors from cracking or becoming brittle.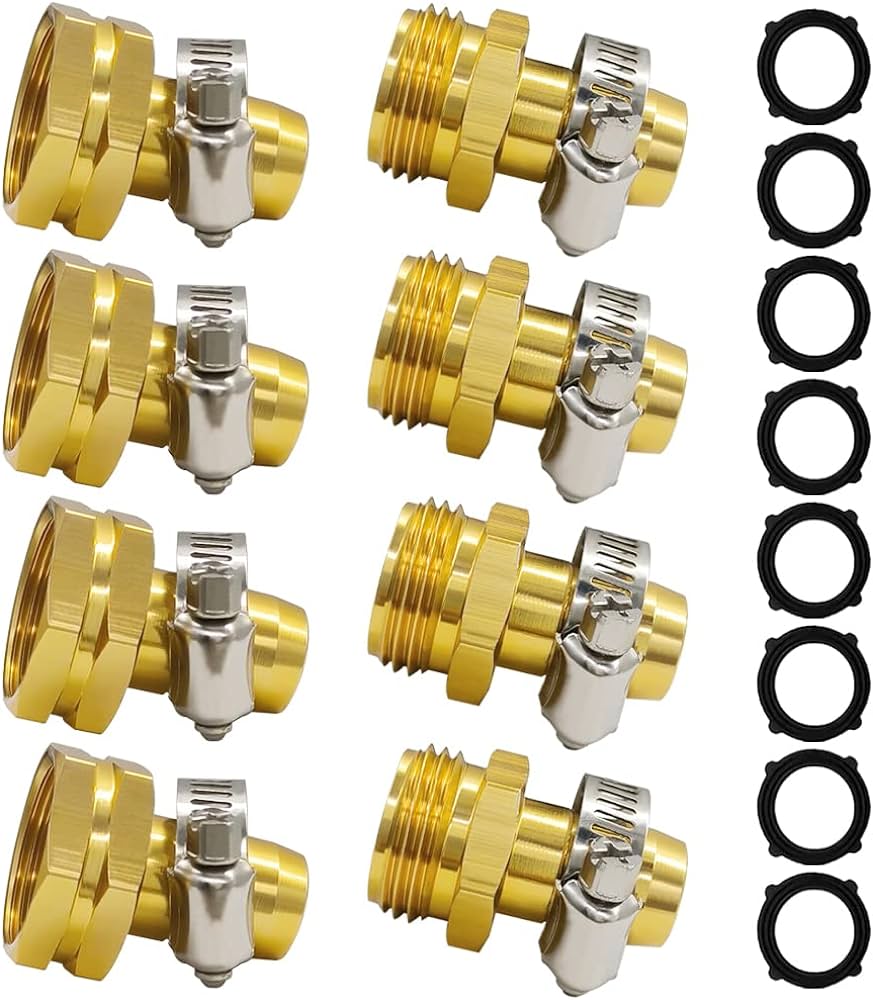
Troubleshooting: Conquering Garden Water Connector Woes
Even the most faithful garden water connectors can encounter occasional challenges. Here’s a roadmap to navigate common problems and restore your connectors to peak performance.
Leaks: Identify the source of the leak by inspecting the connector for damaged gaskets, loose threads, or cracked fittings. Tighten loose connections, replace worn gaskets, or use sealant on threaded connections to stop leaks.
Loose Connections: Tighten loose connections using wrenches or pliers. Avoid overtightening, as this can damage the connector or hose. If the connection remains loose, replace the connector.
Restricted Water Flow: Remove any Restricted Water Flow: Remove any debris that might be lodged within the connector by flushing it with clean water. If the issue persists, the filter (if present) might be clogged. Clean or replace the filter to restore normal water flow.
Safety First: A Gardener’s Pledge
Safety is paramount when wielding your garden water connectors. Here are some precautions to keep in mind:
Water Pressure: Exercise caution when dealing with pressurized water systems. Leaks or loose connections can cause forceful water sprays that can lead to injuries. Turn off the water supply before starting any maintenance or repairs.
Electrical Hazards: Keep your connectors away from electrical cords and power tools to prevent potential shocks. Disconnect electrical devices before connecting or disconnecting hoses.
Supervision: Supervise children and pets around running water to prevent accidents or unsupervised water play.
A Universe of Garden Water Connector Accessories
A plethora of garden water connector accessories awaits to enhance your irrigation experience and transform your connectors into multifunctional tools.
Adapters and Reducers: Utilize adapters and reducers to connect components with different thread sizes, ensuring seamless compatibility within your irrigation system.
Extensions: Invest in hose extensions to connect distant watering points or expand the reach of your hose without the need for additional connections. This minimizes leaks and simplifies watering tasks.
Shut-off Valves: Install shut-off valves at strategic points in your irrigation system to control water flow to specific areas or isolate sections for repairs. This allows for targeted watering and simplifies maintenance.
The Final Bloom: A Garden Water Connector Odyssey Concludes
By demystifying the world of garden water connectors, from their various types and features to essential care and troubleshooting techniques, you are now equipped to make informed decisions and utilize your connectors effectively. Remember, the right connectors, coupled with proper care and maintenance, become the silent heroes of your irrigation system, ensuring a smooth flow of life-giving water to your cherished plants and lawns. Explore the vast array of connectors and accessories available, and embark on a journey of creating a thriving oasis, all thanks to the silent but essential heroes – garden water connectors.
Bonus: Unveiling Additional Resources
To further enhance your irrigation expertise, delve into the following resources:
- Online garden water connector reviews and comparisons to identify the perfect connectors for your needs.
- Irrigation system guides packed with valuable tips on system design, component selection, and installation techniques.
- DIY garden water connector repair tutorials to equip you with the knowledge to tackle minor connector issues.
- Reputable gardening websites and forums to connect with fellow gardening enthusiasts and glean valuable insights on irrigation best practices.
- Local hardware stores staffed with knowledgeable experts who can offer personalized advice and recommendations on garden water connector selection and installation.
With this wealth of information at your disposal, you are well on your way to becoming a garden water connector maestro, ensuring your irrigation system functions flawlessly, transforming your garden into a haven of flourishing beauty.

Garden Hoses: Choosing the Right Type, Maintenance, and Best Practices

Navigating the Maze of Garden Hose Types
As you venture into the aisles of hardware stores or browse online marketplaces, you’ll encounter a dazzling array of garden hoses, each vying for your attention. To make an informed decision, it’s crucial to understand the distinct characteristics and benefits of each type.
Vinyl hoses, the most common and affordable option, are crafted from durable PVC material, offering lightweight flexibility and resistance to UV rays. However, their lifespan may be shorter compared to other types.
Rubber hoses, renowned for their exceptional durability and strength, are constructed from heavy-duty rubber, providing superior resistance to kinks, abrasion, and extreme temperatures. Their sturdiness comes at a higher price point.
Hybrid hoses, a harmonious blend of vinyl and rubber, combine the affordability of vinyl with the durability of rubber. Their reinforced construction offers a balance between performance and cost.
Specialty hoses, designed for specific applications, cater to unique gardening needs. Soaker hoses, with porous walls, are ideal for sub-surface irrigation, while expandable hoses, compact and lightweight, contract when not in use for easy storage.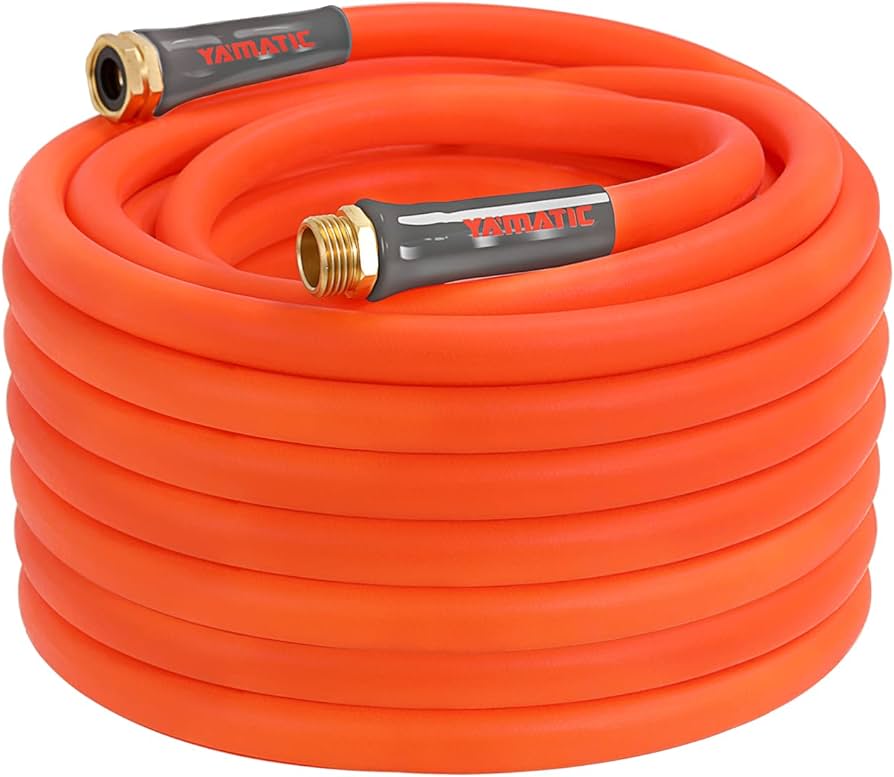
Decoding the Factors that Shape Your Choice
Selecting the right garden hose is not a mere whim; it’s a strategic decision that aligns with your gardening needs and preferences. Several factors demand careful consideration to ensure you find the perfect match.
Length: Let the length of your hose be dictated by the distance between your water source and the furthest watering point. Avoid excessive length, as it can lead to water pressure loss and unnecessary weight.
Diameter: The diameter of your hose determines water flow and pressure. A wider diameter hose delivers water faster and with more force, ideal for larger lawns or tasks requiring high pressure. For smaller gardens or delicate plants, a narrower diameter hose may be sufficient.
Material: Durability, flexibility, and weather resistance are key considerations when choosing hose material. Vinyl offers affordability and flexibility, rubber boasts durability and strength, while hybrid hoses strike a balance.
Features: Additional features can enhance your gardening experience. Kink resistance prevents frustrating interruptions, burst resistance protects against water damage, crush resistance ensures durability, and swiveling connections prevent hose twisting.
Brands that Elevate the Garden Hose Experience
In the realm of garden hoses, certain brands stand out as beacons of quality and performance, earning the trust of gardeners worldwide.
Gilmour, a renowned American brand, is celebrated for its innovative designs and durable construction. Their hoses are known for their kink resistance, crush resistance, and comfortable grips.
Melnor, another American stalwart, has garnered a reputation for its user-friendly features and affordable prices. Their hoses often feature swiveling connections, ergonomic handles, and innovative watering nozzles.
Dramm, a family-owned American company, prides itself on crafting high-quality hoses using premium materials. Their hoses are known for their exceptional durability, kink resistance, and weather resistance.
Goodyear, a global leader in tire manufacturing, brings its expertise in rubber technology to the garden hose market. Their hoses are renowned for their superior strength, flexibility, and resistance to extreme temperatures.
Nurturing Your Garden Hose to Longevity
Like any faithful companion, your garden hose deserves proper care and attention to ensure a long and fruitful partnership. By following these simple guidelines, you’ll extend the life of your hose and keep it performing at its best.
Storage: When not in use, coil your hose neatly and store it in a cool, shaded area, away from direct sunlight and extreme temperatures. This prevents the hose from cracking or becoming brittle.
Prevention: Avoid dragging your hose over rough surfaces or sharp objects, which can cause damage. Also, keep it away from electrical cords and power tools to prevent potential hazards.
Cleaning: Regularly inspect your hose for leaks and damage. If you notice any issues, address them promptly. Clean the hose periodically to remove dirt, debris, and mildew buildup.
Replacement: As your hose ages, it may become more susceptible to leaks and kinks. When signs of wear and tear become evident, consider replacing your hose with a new one to ensure optimal performance.
Watering Wisdom: Unleashing the Power of Your Garden Hose
With your trusty garden hose in hand, it’s time to transform your watering technique into an art form. Embrace these tips to maximize efficiency and conserve water while nourishing your plants and lawns.
Effective Watering: Water your plants deeply but infrequently, targeting the root zone instead of the leaves. Early morning or late evening watering minimizes evaporation and ensures maximum water absorption.
Harnessing Attachments: Utilize watering nozzles or sprinklers to control water flow and distribution. Choose nozzles with adjustable spray patterns for precise watering of delicate plants or powerful bursts for cleaning decks.
Conservation Champions: Embrace water conservation practices. Consider using a hose timer to automate watering and prevent overwatering. Utilize a rain barrel to collect rainwater for a more sustainable watering solution.
Troubleshooting: Conquering Garden Hose Woes
Even the most faithful garden hoses can encounter occasional challenges. Here’s a roadmap to navigate common problems and restore your hose to peak performance.
Leaks: Identify the source of the leak by inspecting the hose for cracks or loose connections. Tighten loose connections or replace damaged sections with hose repair kits.
Kinks: Kinks can disrupt water flow and damage your hose. To prevent kinks, choose a kink-resistant hose and avoid sharp bends or twists while storing or using it. If a kink occurs, gently straighten the hose without applying excessive force.
Low Pressure: Low water pressure can hinder effective watering. Check for leaks or blockages in the hose or at the water source. Ensure a tight connection between the hose and the faucet. If the issue persists, consult a plumber to rule out water pressure problems within your house.
Safety First: A Gardener’s Pledge
Safety is paramount when wielding your garden hose. Here are some precautions to keep in mind:
Electrical Hazards: Keep your hose away from electrical cords and power tools to prevent potential shocks.
Mind the Pressure: Exercise caution when using your hose under pressure. Avoid spraying yourself or others with high-powered water streams.
Supervise Playtime: Keep children and pets away from running hoses to prevent accidents or unsupervised water play.
A Universe of Garden Hose Accessories
A plethora of garden hose accessories awaits to enhance your watering experience and transform your hose into a multifunctional tool.
Nozzles and Sprinklers: Explore a diverse range of nozzles and sprinklers, each offering unique spray patterns and watering capabilities.
Timers and Reels: Utilize hose timers for automated watering schedules and hose reels for convenient storage and handling of your hose.
Guides and Supports: Invest in hose guides or wall-mounted hose hangers to prevent tangles and keep your hose organized.
The Final Bloom: A Garden Hose Odyssey Concludes
By demystifying the world of garden hoses, from their various types and features to essential care and troubleshooting techniques, you are now equipped to make informed decisions and utilize your hose effectively. Remember, the right hose, coupled with proper care and mindful watering practices, becomes an extension of your gardening passion, nurturing vibrant landscapes and flourishing plant life. Explore the vast array of hoses and accessories available, and embark on a journey of discovery, transforming your garden into a haven of flourishing beauty, all thanks to the silent hero – the garden hose.
Bonus: Unveiling Additional Resources
To further enhance your gardening expertise, delve into the following resources:
- Online hose reviews and comparisons to identify the perfect hose for your needs.
- Watering guides packed with valuable tips on proper watering techniques and plant-specific watering requirements.
- DIY garden hose repair tutorials to equip you with the knowledge to tackle minor hose issues.
- Reputable gardening websites and forums to connect with fellow gardening enthusiasts and glean valuable insights.
- Local gardening centers staffed with knowledgeable experts who can offer personalized advice and recommendations.
With this wealth of information at your disposal, you are well on your way to becoming a garden hose maestro, ensuring your plants and lawns receive the care they deserve to thrive for seasons to come.

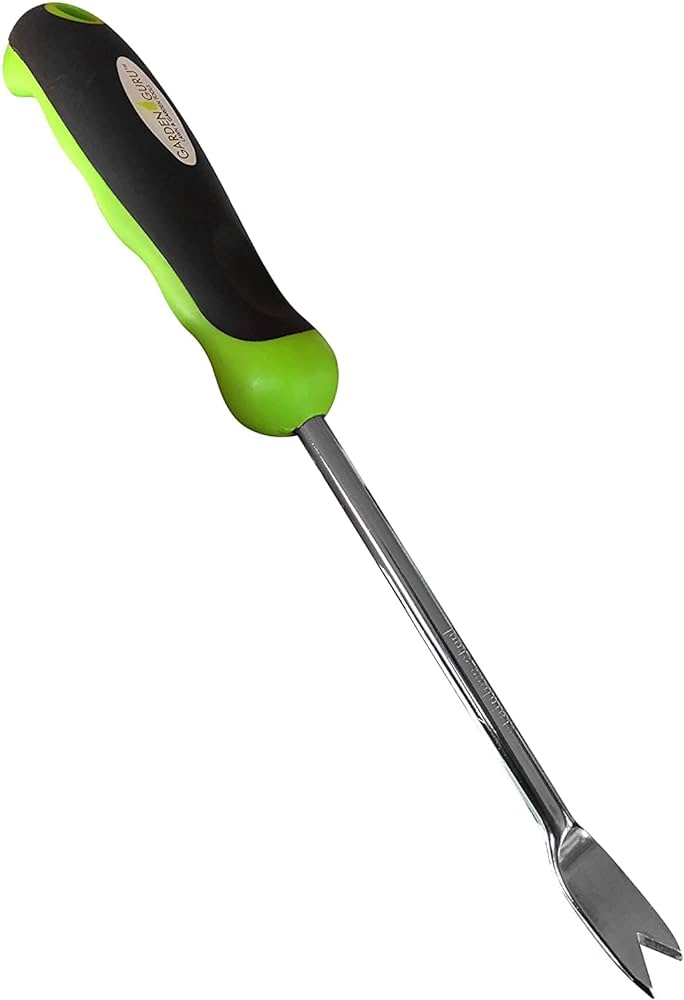
Serrated Hand Shovel for Effortless Digging

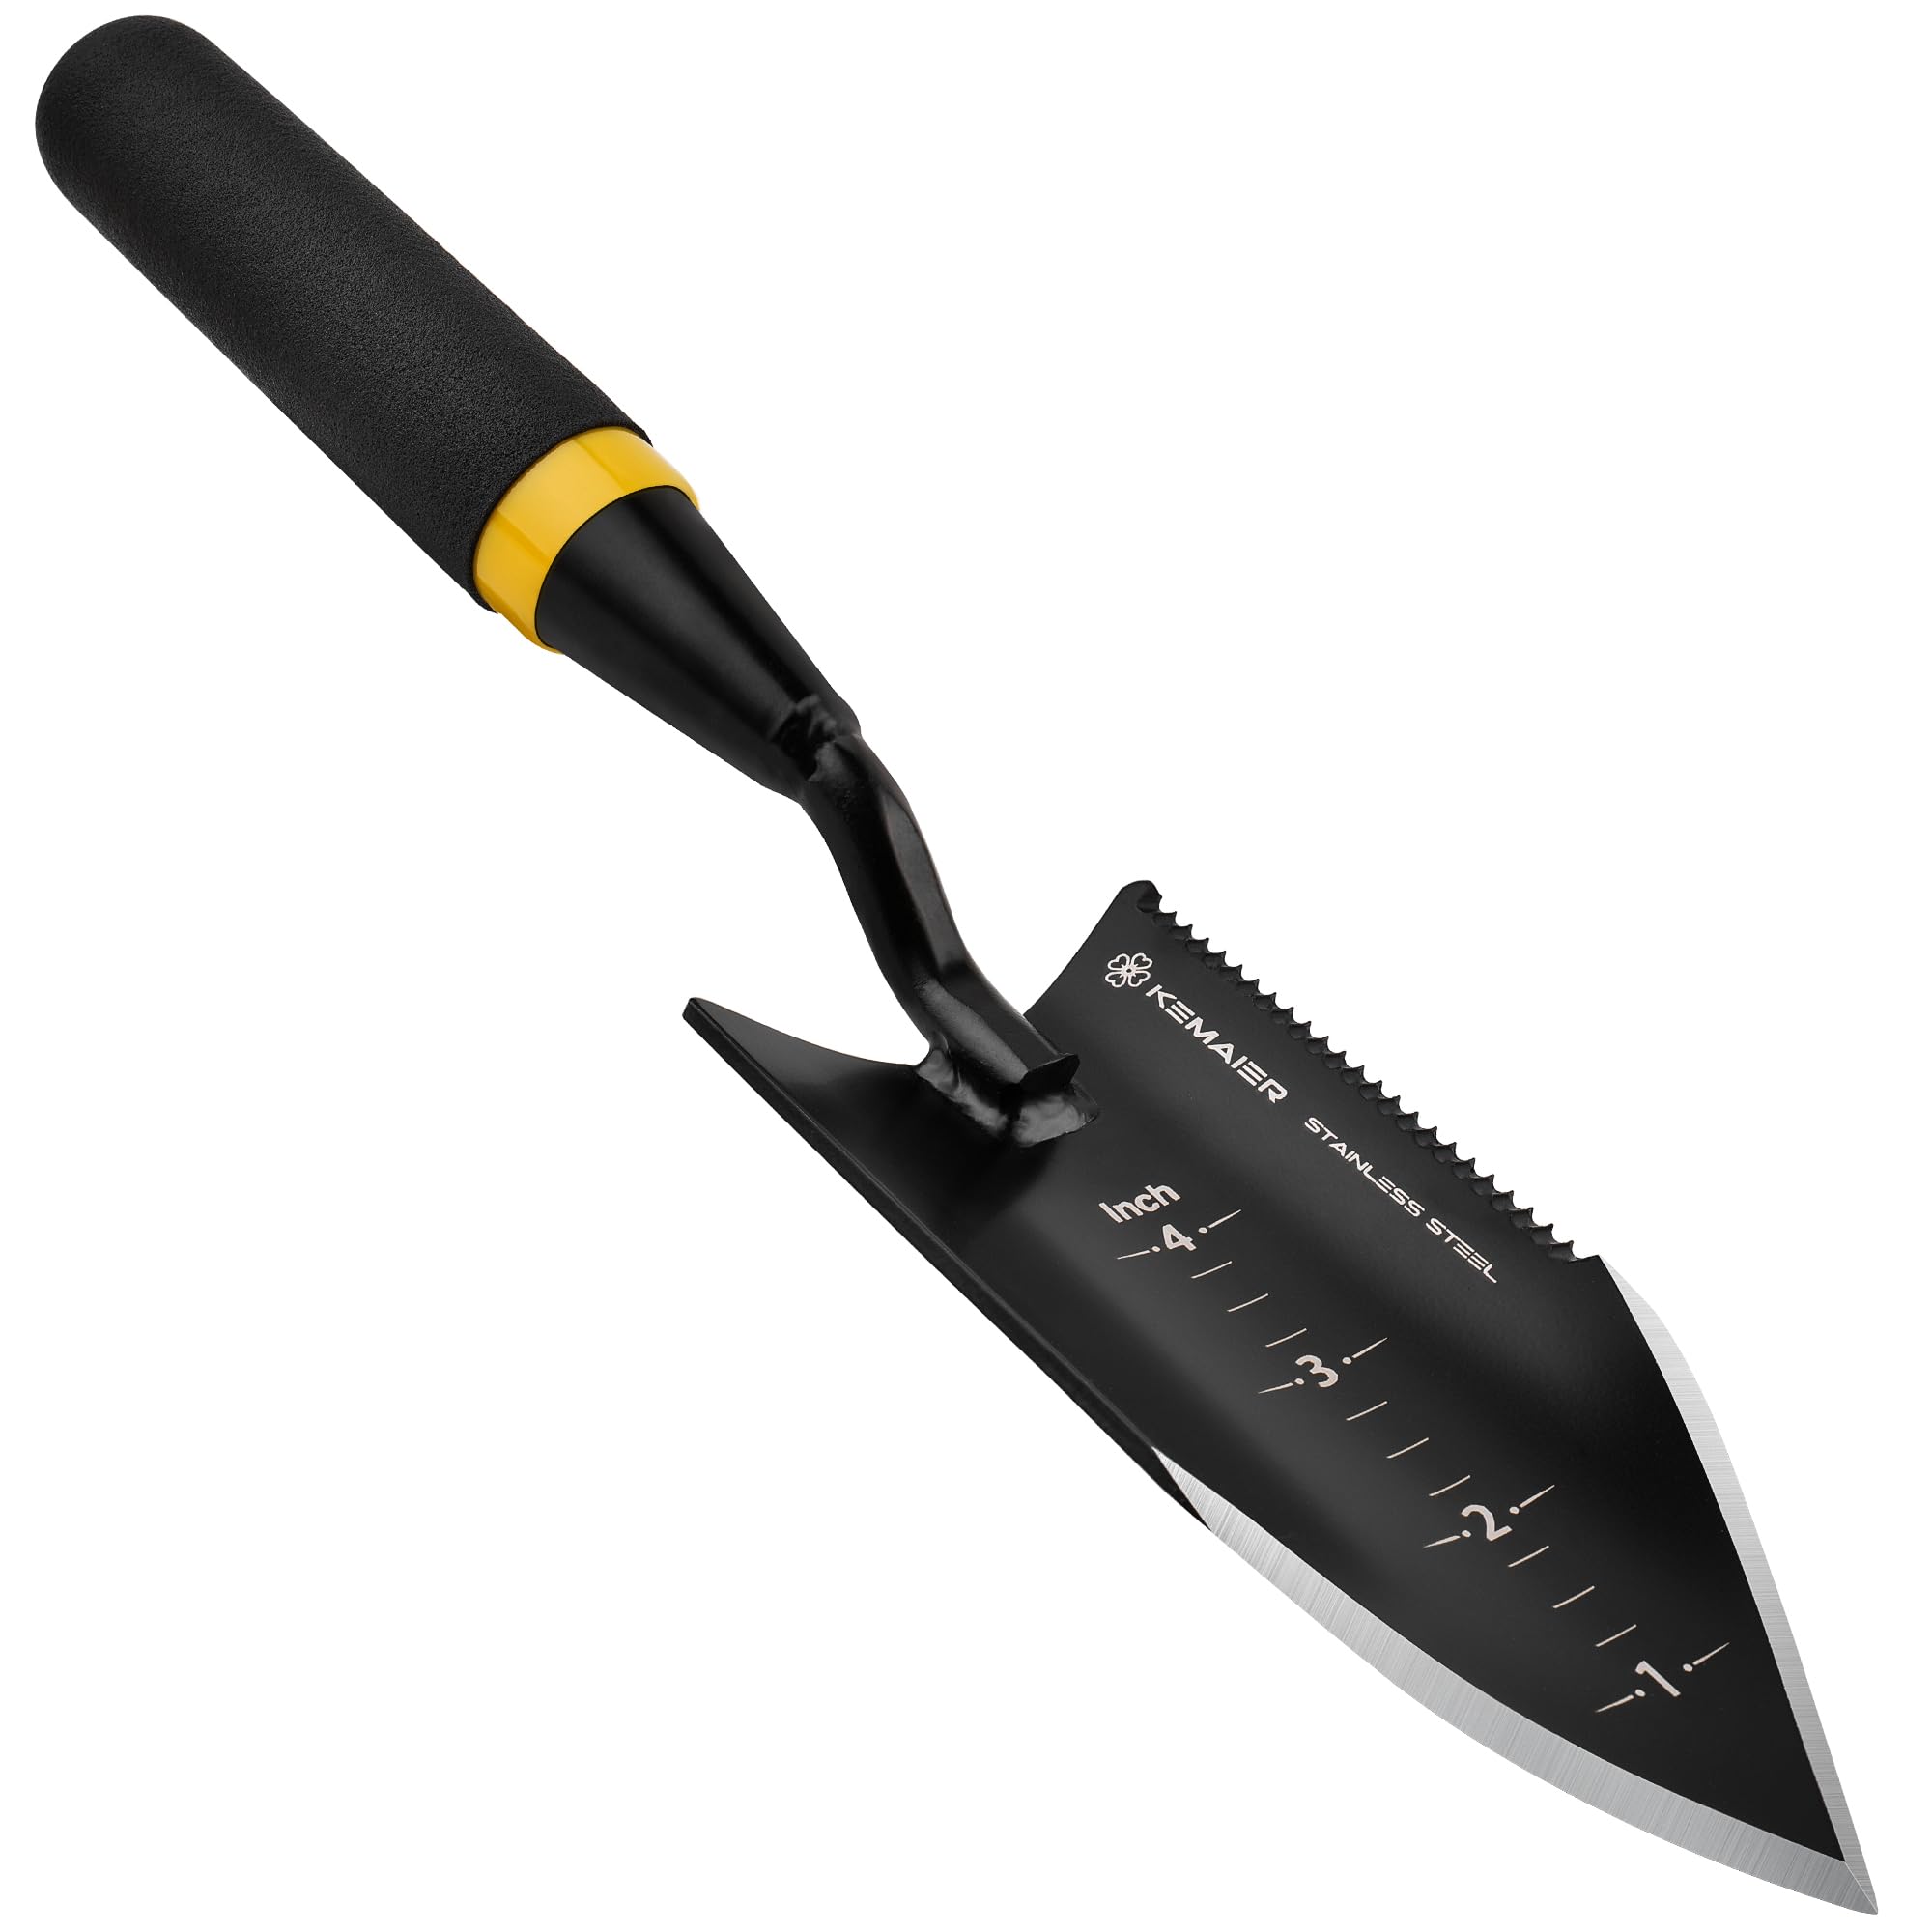
In the realm of gardening tools, the humble hand shovel stands as a versatile and indispensable companion for tasks ranging from planting seedlings to transplanting mature shrubs. However, when tackling tough terrain or stubborn roots, traditional shovels can meet their match. This is where the serrated hand shovel emerges as a game-changer, revolutionizing the way gardeners approach digging and landscaping projects.
Unveiling the Power of Serrated Blades
Serrated hand shovels, as the name suggests, feature a blade adorned with teeth that resemble those of a saw. These strategically placed serrations are the key to their superior performance, transforming the digging experience from a struggle to a smooth, effortless process.
Imagine attempting to dig through a bed of dense, root-bound soil with a traditional shovel. The smooth blade would likely glide over the roots, leaving them intact and hindering your progress. With a serrated hand shovel, however, the story is entirely different. The serrations act like tiny knives, slicing through roots and compacted soil with ease, making even the most challenging digging tasks a breeze.
Design and Construction: A Closer Look
Beyond their serrated blades, serrated hand shovels boast a range of design features that enhance their functionality and durability.
-
Blade Material: Serrated hand shovel blades are typically crafted from high-quality carbon steel or stainless steel. These materials provide the necessary strength and resistance to wear and tear, ensuring that your shovel can handle even the most demanding digging jobs.
-
Handle Design: Ergonomics plays a crucial role in the design of serrated hand shovels. Many models feature comfortable, non-slip grips that reduce hand fatigue and provide a secure hold, even when your hands are wet or sweaty. Additionally, some handles incorporate shock-absorbing features to minimize the impact on your joints and wrists.
Popular Serrated Hand Shovels on the Market
With a growing recognition of their benefits, serrated hand shovels are gaining popularity among gardeners of all levels. Here are a few highly rated options to consider:
-
Fiskars X27 Super Sharp Serrated Transplanter: This lightweight and versatile shovel features a razor-sharp serrated blade and an ergonomic handle, making it ideal for transplanting, weeding, and other delicate tasks.
-
Bully Tools 16-Inch Transplanter with Serrated Edge: This heavy-duty shovel boasts a durable carbon steel blade with aggressive serrations, perfect for tackling tough digging jobs in rocky or root-bound soil.
-
AMES 14-Inch Serrated Edge Transplanter: This classic design features a stainless steel blade with fine serrations, making it a great choice for precise digging around delicate plants and bulbs.

Choosing the Right Serrated Hand Shovel for Your Needs
Selecting the right serrated hand shovel depends on several factors, including the size of your garden, the type of soil you have, the tasks you’ll be using it for, and your personal preferences.
-
Blade Size and Shape: Consider the size of the planting holes or trenches you’ll be digging when choosing a blade size. The shape of the blade can also be important; a pointed blade is ideal for digging in tight spaces, while a wider blade is better for moving larger amounts of soil.
-
Handle Length and Grip: The length of the handle should be comfortable for your height and digging style. A longer handle provides more leverage for tough digging, while a shorter handle offers better maneuverability in tight spaces. The grip material should be comfortable and non-slip to prevent blisters and fatigue.
Techniques for Mastering Serrated Hand Shovel Digging
To fully harness the power of your serrated hand shovel, employ proper digging techniques:
-
Stance and Grip: Stand with your feet shoulder-width apart and your knees slightly bent. Grip the handle firmly with both hands, one near the top and the other closer to the blade.
-
Utilizing the Serrations: When encountering roots or tough soil, angle the blade slightly and use a sawing motion to cut through the material. The serrations will do the work, making digging easier and more efficient.
-
Leveraging the Blade: For lifting soil or plants, use the full length of the handle and your body weight to leverage the blade. This will make lifting easier and reduce strain on your back.

Maintaining Your Serrated Hand Shovel for Optimal Performance
Proper care will ensure that your serrated hand shovel remains a reliable garden companion for years to come:
-
Cleaning and Drying: After each use, wash the blade and handle with soapy water and dry them thoroughly to prevent rust and corrosion.
-
Sharpening the Serrations: Over time, the serrations may become dull. Use a sharpening file or whetstone to maintain their sharpness for optimal digging performance.
-
Proper Storage: Store your shovel in a dry, protected location when not in use. Hanging it on a wall or storing it in a tool shed will help prevent damage.
-
Troubleshooting Common Issues and Maintaining Safety
Even the most durable tools can encounter occasional problems. Here’s how to address common issues with your serrated hand shovel:
-
Bent or Damaged Blades: Minor bends can sometimes be straightened with care. However, for severe bends or cracks, replacing the blade is necessary to ensure safety and functionality.
-
Loose or Wobbly Handles: Tighten any loose screws or bolts securing the handle. If the handle itself is damaged, consider replacing it for optimal control and safety.
-
Blade Coating Issues (if applicable): Some serrated hand shovels feature a protective coating on the blade. If the coating becomes chipped or damaged, refer to the manufacturer’s instructions for recommendations on repair or replacement.
Safety should always be a priority when using any gardening tool. Here are some essential safety precautions to remember with serrated hand shovels:
-
Avoid Blade Contact: Always keep your hands and fingers away from the blade while digging to prevent accidental cuts.
-
Wear Protective Gloves: Wearing gardening gloves protects your hands from blisters, cuts, and dirt while digging.
-
Maintain Situational Awareness: Be mindful of your surroundings and potential hazards like underground utilities or sprinkler lines before digging.
Optimizing Your Digging Experience with Additional Tips
By incorporating these additional tips into your gardening routine, you can further enhance your experience with a serrated hand shovel:
-
Choosing the Right Time to Dig: Early mornings or evenings are ideal times to dig when the soil is cooler and more moist, making it easier to work with.
-
Loosening the Soil: Before digging, especially in compacted areas, use a garden fork or a tool like a broadfork to break up the soil. This will make it significantly easier to penetrate with your serrated hand shovel.
-
Utilizing a Digging Fork: For particularly stubborn roots or rocky soil, consider using a digging fork in conjunction with your serrated hand shovel. The digging fork can help loosen the soil and break up large roots, making it easier to manage with the shovel.
Conclusion: A Worthy Investment for Every Gardener’s Arsenal
Serrated hand shovels are a valuable addition to any gardener’s toolkit. Their ability to tackle tough digging tasks with ease, coupled with their versatility and comfortable design, makes them a game-changer for various gardening projects. Whether you’re a seasoned green thumb or a budding enthusiast, a serrated hand shovel can empower you to conquer challenges, cultivate success, and experience the joy of effortless digging in your garden.
-

Trim with Ease: Fiskars Shear Ease Grass Shears
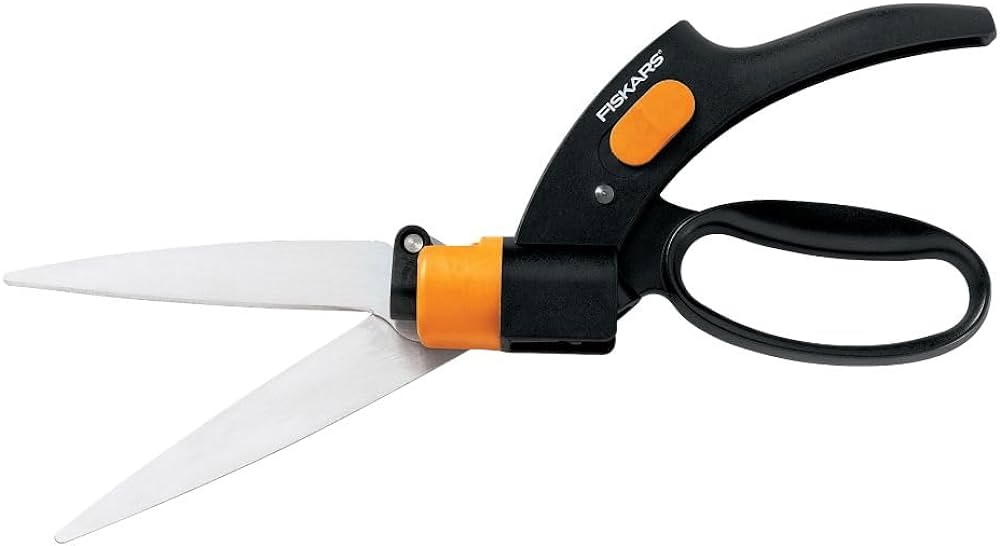
A well-manicured lawn is not only aesthetically pleasing but also contributes to the overall health and vitality of your outdoor space. However, maintaining the edges and borders of your lawn can be a tedious task, often requiring the use of bulky trimmers or time-consuming hand trimming. Enter the Fiskars Shear Ease Grass Shears, a revolutionary tool that empowers gardeners to achieve precise and effortless grass trimming with minimal strain.
Unboxing and Design Highlights
Upon receiving your Fiskars Shear Ease Grass Shears, you’ll discover a package containing the shears themselves, a protective blade cover, and clear instructions for assembly and use. The shears immediately impress with their sleek, ergonomic design, featuring lightweight aluminum handles and comfortable non-slip grips. The blades, crafted from high-quality hardened steel, exude durability and sharpness, promising years of reliable performance.
Effortless Operation and Versatility
Operating the Fiskars Shear Ease Grass Shears is a breeze. The natural grip position ensures a comfortable hold, while the rotating head allows you to adjust the cutting angle for optimal trimming at various heights and angles. The shears’ unique Shear Ease mechanism prevents the blades from jamming, ensuring smooth and effortless operation even through thick or overgrown grass.
Maintenance and Longevity
Proper care will ensure that your Fiskars Shear Ease Grass Shears remain in top condition for years to come. After each use, wipe down the blades and handle with a damp cloth to remove dirt and debris. Periodically sharpen the blades using a whetstone or honing tool to maintain their sharpness. When not in use, store the shears in their protective blade cover to prevent damage.
Troubleshooting Common Issues
Should you encounter any issues with your Fiskars Shear Ease Grass Shears, fret not. For jammed blades, simply open and close the shears repeatedly to dislodge any trapped grass or debris. If the blades are bent or damaged, they can be replaced with genuine Fiskars replacement blades. For issues with the rotating head mechanism, refer to the instruction manual for detailed troubleshooting steps.
Tips for Effective Grass Trimming
To achieve the best results when trimming your grass, consider these tips:
-
Timing is key: Trim your grass during the cooler morning or evening hours to avoid heat stress on the plants.
-
Preparation is essential: Ensure the grass is dry and free from debris before trimming.
-
Efficiency and safety: Use long, sweeping motions to trim efficiently, and always maintain a stable stance while trimming.

Safety Precautions for Optimal Use
Safety should always be a priority when using any gardening tool. With the Fiskars Shear Ease Grass Shears, follow these precautions:
-
Avoid blade contact: Keep your hands and fingers away from the blades at all times.
-
Protect your eyes: Wear protective eyewear to shield your eyes from flying debris.
-
Maintain stability: Stand firmly on level ground while trimming to prevent falls.
Comparing the Fiskars Shear Ease Grass Shears to Alternatives
When considering the Fiskars Shear Ease Grass Shears, it’s worth comparing them to similar products. While other grass shears may offer similar features, the Fiskars model stands out for its exceptional sharpness, smooth operation, and durable construction. Its lightweight design and comfortable grips further enhance its user-friendliness.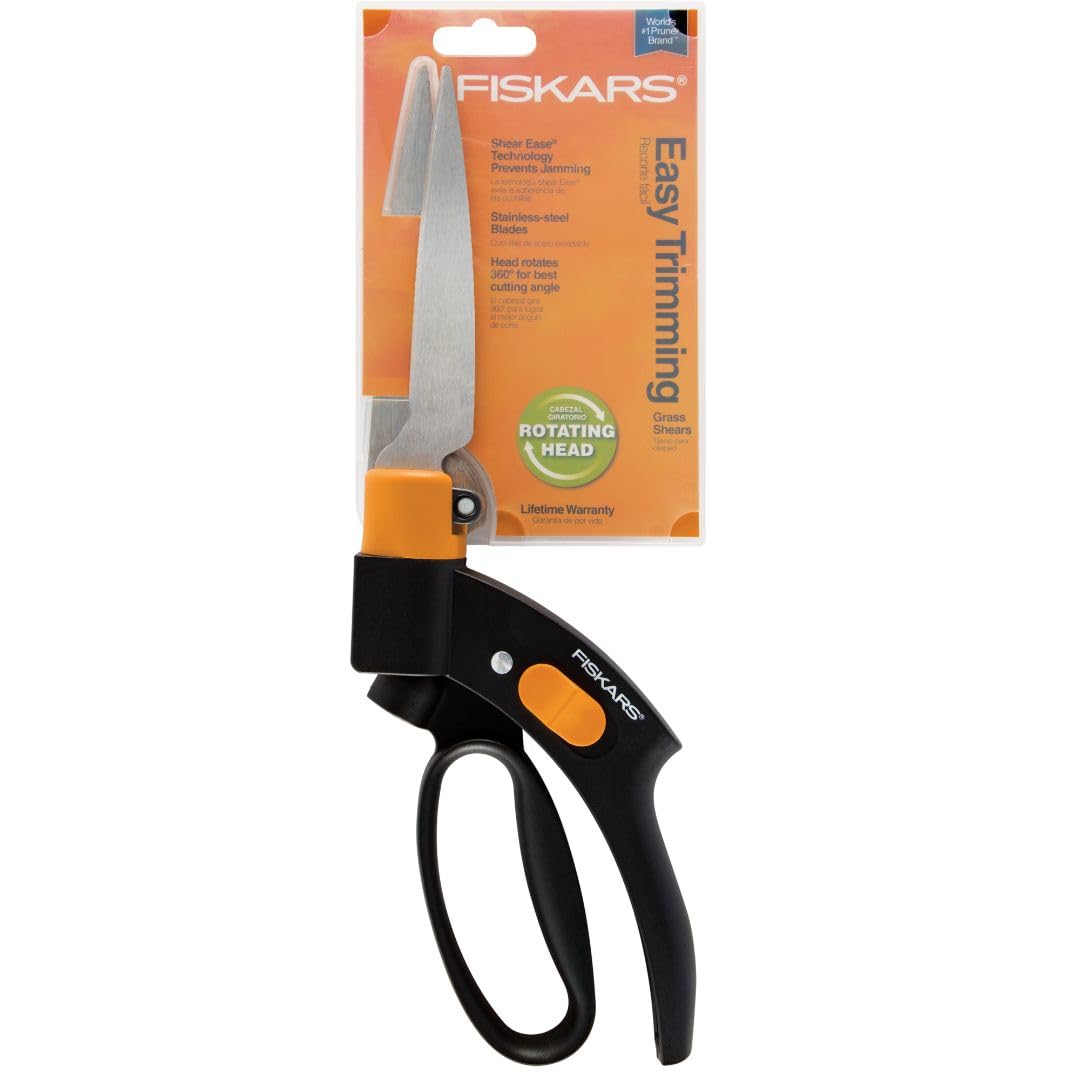
Customer Reviews and Overall Assessment
Customer reviews for the Fiskars Shear Ease Grass Shears overwhelmingly positive, praising their ease of use, effectiveness, and durability. Users particularly appreciate the shears’ ability to tackle tough trimming tasks with minimal effort. Overall, the Fiskars Shear Ease Grass Shears consistently earn high ratings and positive feedback, solidifying their reputation as a must-have tool for any gardener.
A Gardener’s Essential Tool
In conclusion, the Fiskars Shear Ease Grass Shears prove to be an invaluable addition to any gardener’s toolkit. Their combination of precision, ease of use, and durability makes them ideal for trimming edges, borders, and hard-to-reach areas with minimal strain. Whether you’re a seasoned gardener or a novice homeowner, the Fiskars Shear Ease Grass Shears will transform your grass trimming experience into a task you’ll relish rather than dread.
Advanced Features of the Fiskars Shear Ease Grass Shears
Beyond the core functionalities, the Fiskars Shear Ease Grass Shears boast several advanced features that enhance user experience:
-
PowerLever Technology: This innovative technology incorporates a built-in leverage system within the handles. By squeezing the handles, you activate the PowerLever, multiplying your cutting force and making it easier to tackle thick or stubborn grass.
-
Lifetime Blade Warranty: Fiskars’ commitment to quality is evident in their lifetime blade warranty. This warranty provides peace of mind, knowing that any manufacturer’s defect in the blades will be covered for the lifespan of the shears.
-
Replaceable Blade Design: While the blades are built to last, the option to replace them once they become excessively worn ensures continued optimal performance. Fiskars offers readily available replacement blades, guaranteeing longevity for your shears.
Beyond Grass Trimming: Exploring Additional Uses
The versatility of the Fiskars Shear Ease Grass Shears extends beyond simply trimming grass. Here are some unexpected yet effective ways to utilize these shears in your garden:
-
Trimming Flowers and Shrubs: The sharp blades make them ideal for shaping flower beds and maintaining the desired size and form of small shrubs or bushes.
-
Harvesting Herbs and Vegetables: Use the shears to precisely cut herbs like basil or chives, or harvest delicate vegetables like green beans.
-
Deadheading Flowers: Encourage new blooms by using the shears to remove spent flowers from your plants, promoting continued growth and a vibrant floral display.
Fiskars Shear Ease Grass Shears: A Sustainable Choice
For environmentally conscious gardeners, the Fiskars Shear Ease Grass Shears are a sustainable choice. Here’s why:
-
Durable Construction: Built to last, these shears minimize waste associated with disposing of frequently replaced, low-quality tools.
-
Reduced Power Consumption: Compared to gas-powered trimmers, the shears require no electricity or fuel, reducing your carbon footprint.
-
Effortless Maintenance: Routine cleaning and occasional sharpening are all that’s required to maintain the shears, minimizing the need for replacements and additional resource consumption.
By choosing the Fiskars Shear Ease Grass Shears, you’re not only investing in a quality tool but also making a responsible choice for a more sustainable future.

Gardener’s Essential: The Best Weed Puller Tools Garden
A lush, thriving garden is a sight to behold, a testament to the dedication and care of its owner. However, this idyllic vision can be marred by the unwelcome presence of weeds, those persistent botanical intruders that compete for nutrients, water, and sunlight, hindering the growth of your prized plants. Fortunately, the battle against weeds is not without its heroes – weed puller tools stand ready to assist you in reclaiming your garden’s glory.
Understanding the Weed Menace
Before delving into the world of weed puller tools, it’s crucial to recognize the enemy we face. Weeds are not merely unsightly; they pose a significant threat to the health and well-being of your garden. Their relentless growth can:
-
Rob nutrients: Weeds siphon essential nutrients from the soil, depriving your cherished plants of the sustenance they need to thrive.
-
Block sunlight: As weeds sprout and spread, they cast shadows over your plants, limiting their access to the vital sunlight they require for photosynthesis.
-
Harbor pests and diseases: Weeds can provide a haven for harmful pests and diseases, further jeopardizing the health of your garden ecosystem.

An Arsenal of Weed Puller Tools
In the fight against weeds, a diverse range of weed puller tools stands as your arsenal. Each tool brings unique strengths to the battle, making them suitable for different weed types and garden conditions. Let’s explore the most common weed puller tools:
-
Hand weeders: These compact tools are ideal for tackling individual weeds in small areas.
-
Fork-style hand weeders: Their pronged design effectively loosens and extracts weeds, including taproots.
-
Dandelion pullers: Specifically designed to combat the stubborn dandelions, these tools feature a deep, V-shaped claw that grips the root firmly.
-
Hori-hori knives: Versatile tools, hori-hori knives combine a sharp blade for cutting weeds with a serrated edge for loosening soil.

-
-
Long-handled weeders: For larger garden areas, long-handled weeders offer leverage and reduce strain on your back.
-
Stand-up weed pullers: These tools allow you to remove weeds while standing upright, eliminating the need for stooping or bending.
-
Lever-action weeders: Utilizing a lever mechanism, these weeders amplify your force, making it easier to pry out stubborn weeds.
-
Rolling weeders: These innovative tools feature rotating wheels that effectively dislodge and remove weeds from the soil.
-
Choosing Your Weed Puller Weapon
With an array of weed puller tools at your disposal, selecting the right one for your garden is essential. Consider these factors:
-
Weed type: Different tools are better suited for specific weed types. For instance, dandelion pullers excel against dandelions, while fork-style weeders handle taproots effectively.
-
Garden size: For larger gardens, long-handled weeders provide reach and reduce strain. For smaller areas, hand weeders are maneuverable and efficient.
-
Personal preferences: Consider your physical limitations and preferences. Some tools require more force or involve bending, while others offer ergonomic designs.

Unleashing Effective Weed Removal Techniques
To maximize the effectiveness of your weed puller tools, employ proper technique and timing:
-
Timing is key: Target weeds when they are young and still small, making them easier to remove.
-
Hand weeders: Dig around the root of the weed with the prongs or blade, ensuring you extract the entire root.
-
Long-handled weeders: Position the tool over the weed and press firmly into the soil. For lever-action weeders, apply pressure on the lever to dislodge the weed. For rolling weeders, roll the tool over the weeds to uproot them.
-
Additional tips: Loosen the soil before pulling, dispose of weeds properly to prevent regrowth, and consider using natural weed control methods.
Cultivating a Weed-Free Garden
Prevention is always better than cure. Implement these strategies to minimize weed growth:
-
Regular weeding: Make weed pulling a regular part of your garden maintenance routine.
-
Mulching: Apply a layer of mulch around your plants to suppress weed growth and retain soil moisture.
-
Healthy soil: Maintain healthy soil by adding organic matter and ensuring proper drainage.

Long-Term Weed Control Strategies
For persistent weed problems, consider these long-term strategies:
-
Natural weed deterrents: Utilize natural weed deterrents like vinegar, salt, or cornmeal gluten.
-
Weed-resistant plants: Choose plants that are naturally resistant to common weeds in your area.
-
Professional help: For severe weed infestations, seek assistance from a professional gardener or landscaper.
-
Conquering Weed Challenges
Despite your best efforts, some weeds may prove particularly troublesome. Here’s how to tackle common challenges:
-
Stubborn weeds: For deep-rooted weeds, like dandelions, a combination of tools and techniques might be necessary. Try digging around the root with a hori-hori knife before using a dandelion puller.
-
Hard-to-reach areas: For weeds growing in tight spaces or near delicate plants, a hand weeder with a sharp tip or a narrow claw can offer more maneuverability.
-
Fast-growing weeds: Certain weeds may seem to reappear overnight. Persistence is key! Regularly weeding and applying weed control methods will eventually deplete their seed bank in the soil.
-
Selecting the Perfect Hand Weeder
Hand weeders, with their compact size and versatility, are a gardener’s trusty companions for tackling weeds in tight spaces or around delicate plants. However, with an array of options available, choosing the ideal hand weeder can feel overwhelming. Here’s a breakdown of two common types to help you find your perfect match:
-
Fork-style hand weeder:
-
Design: Featuring a forked head with two or three prongs, this classic hand weeder excels at extracting weeds with taproots. The prongs dig deep into the soil, allowing you to grasp the root firmly and pull it out in its entirety.
-
Applications: Ideal for dandelions, thistles, and other deep-rooted weeds. The narrow prongs can also navigate between closely spaced plants without causing damage.
-
-
Claw hand weeder:
-
Design: This hand weeder features a single, V-shaped claw at the tip. The claw effortlessly grips the base of the weed stem, making it suitable for removing shallow-rooted weeds and weeds growing in cracks or crevices.
-
Applications: Perfect for eliminating crabgrass, purslane, and other shallow-rooted weeds. The claw design also proves effective for grabbing weeds growing close to walls or edging.
-
The Power of Leverage: Long-Handled Weed Pullers
For larger gardens or those who suffer from back pain, long-handled weed pullers offer a solution. These tools leverage your body weight and provide greater reach, reducing strain and making weeding a more comfortable and efficient experience. Let’s explore two popular long-handled weed pullers:
-
Stand-up weed puller:
-
Design: This innovative tool boasts a long handle and a foot pedal mechanism. The forked head resembles a traditional hand weeder, but on a larger scale.
-
Applications: Ideal for those with back problems or who prefer to weed while standing upright. The foot pedal allows you to easily push the prongs into the soil and extract weeds without bending.
-
-
Lever-action weed puller:
-
Design: This long-handled weed puller features a lever mechanism that amplifies your pulling force. The head typically consists of claws or prongs for gripping weeds.
-
Applications: Well-suited for stubborn weeds with deep roots or thick stems. The lever mechanism provides the extra power needed to remove these weeds without excessive effort.
-
-
Conclusion: A Weed-Free Future Awaits
By equipping yourself with the right weed puller tools, knowledge, and strategies, you can transform your garden from a weed-infested battlefield into a flourishing haven for your prized plants. Remember, consistency and a proactive approach are key to achieving a weed-free paradise. So, arm yourself with your chosen weed puller tool, embrace the satisfaction of a weed-free garden, and watch your plants flourish!
-

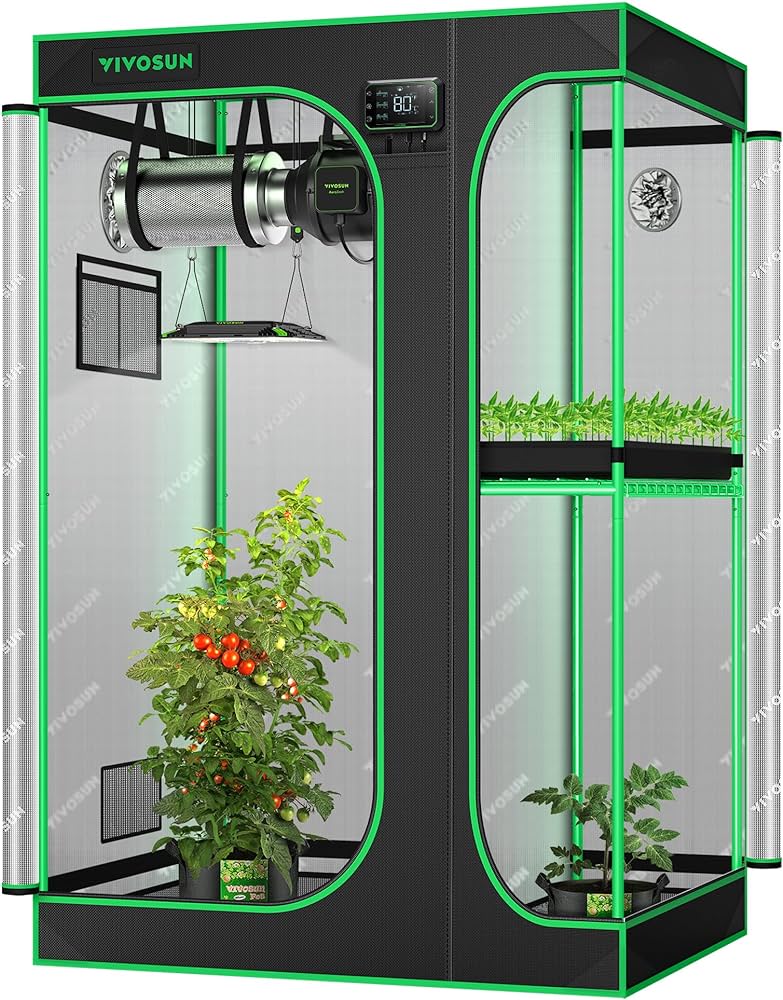
VIVOSUN Grow Tents: Your Guide to Indoor Gardening Success
I. Introduction
VIVOSUN grow tents are a popular choice for indoor gardeners of all levels of experience. They provide a controlled environment that is ideal for growing plants year-round, regardless of the climate outside. With a VIVOSUN grow tent, you can create the perfect conditions for your plants to thrive, resulting in increased yields and healthier crops.
II. Types of VIVOSUN Grow Tents
VIVOSUN grow tents come in a variety of sizes and styles to suit your specific needs. Here are some of the most popular options:
- Size: VIVOSUN grow tents are available in a wide range of sizes, from small 2′ x 2′ tents to large 8′ x 8′ tents. The size of the tent you choose will depend on the number of plants you want to grow and the available space in your home.
- Features: VIVOSUN grow tents come with a variety of features, such as ventilation ports, reflective Mylar lining, and easy-access doors. Some tents also include additional features, such as grow lights and ventilation systems.
- Applications: VIVOSUN grow tents can be used to grow a variety of plants, including fruits, vegetables, herbs, and flowers. They are also popular for growing cannabis.
III. Key Features of VIVOSUN Grow Tents
VIVOSUN grow tents are known for their high quality and durability. Here are some of the key features that make them a popular choice for indoor gardeners:
- High-quality materials: VIVOSUN grow tents are made from high-quality materials that are designed to withstand the rigors of indoor gardening. The tent frame is made from heavy-duty steel, and the tent cover is made from durable, tear-resistant canvas.
- Durable construction: VIVOSUN grow tents are built to last. The double-stitched seams and reinforced corners ensure that the tent can withstand even the most demanding growing conditions.
- Reflective Mylar lining: The reflective Mylar lining helps to maximize light penetration and distribution, which can lead to increased yields.
- Ventilation ports: VIVOSUN grow tents come with multiple ventilation ports that allow for proper air circulation. This helps to prevent the buildup of heat and humidity, which can lead to mold and mildew growth.
- Easy assembly: VIVOSUN grow tents are easy to assemble, even for beginners. The tents come with clear instructions and all of the necessary hardware.

IV. Benefits of Using VIVOSUN Grow Tents
There are many benefits to using VIVOSUN grow tents, including:
- Optimal growing conditions for plants: VIVOSUN grow tents provide the perfect environment for plants to thrive. They allow you to control the temperature, humidity, and light levels, which are all essential for plant growth.
- Increased yields: With a VIVOSUN grow tent, you can create the ideal conditions for your plants to produce high yields.
- Protection from pests and diseases: VIVOSUN grow tents help to protect your plants from pests and diseases. The enclosed environment keeps pests out, and the controlled temperature and humidity levels help to prevent the growth of mold and mildew.
- Control over the growing environment: With a VIVOSUN grow tent, you have complete control over the growing environment. You can adjust the temperature, humidity, and light levels to create the perfect conditions for your plants.
- Year-round growing capabilities: VIVOSUN grow tents allow you to grow plants year-round, regardless of the climate outside. This is especially beneficial for gardeners who live in areas with cold winters or short growing seasons.
V. How to Choose the Right VIVOSUN Grow Tent
When choosing a VIVOSUN grow tent, there are a few factors to consider:
- Size: The size of the tent you choose will depend on the number of plants you want to grow and the available space in your home.
- Features: Consider the features that are important to you, such as ventilation ports, reflective Mylar lining, and easy-access doors.
- Applications: Think about what type of plants you want to grow. Some tents are specifically designed for growing certain types of plants.
- Budget: VIVOSUN grow tents come in a variety of price ranges. Set a budget for yourself and then choose a tent that fits within your budget.
VI. Setting Up Your VIVOSUN Grow Tent
Setting up your VIVOSUN grow tent is easy. Here are the basic steps:
- Choose a location for your tent: Find a location in your home that is free from drafts and has access to electricity and water.
- Assemble the tent frame: Follow the instructions that come with your tent to assemble the frame.
- Attach the tent cover: Once the frame is assembled attach the tent cover to the frame. Make sure all the zippers and closures are securely fastened. 4. Install the ventilation system: Most VIVOSUN tents come with ventilation ports. You can install an inline fan and carbon filter system to exhaust stale air and odors from the tent. 5. Set up your lighting system: Grow lights are essential for indoor plant growth. Choose the right type of grow lights for the plants you are growing and install them according to the manufacturer’s instructions.
VII. Growing Plants in Your VIVOSUN Grow Tent
Now that your VIVOSUN grow tent is set up, you’re ready to start growing plants! Here are the basic steps:
- Select the right growing medium: Popular choices include soil, coco coir, and hydroponic systems. Choose the medium that is best suited for the type of plants you want to grow.
- Plant your seeds or seedlings: Follow the planting instructions for the specific plants you are growing.
- Water and fertilize your plants regularly: The amount of water and fertilizer your plants will need will vary depending on the type of plant, the stage of growth, and the growing medium. Be sure to research the specific needs of your plants.
- Provide adequate lighting: The amount of light your plants will need will vary depending on the type of plant. Most plants need between 12 and 18 hours of light per day during the vegetative stage.
- Monitor the temperature and humidity: The ideal temperature and humidity levels for your plants will vary depending on the type of plant. Most plants thrive in temperatures between 68°F and 78°F (20°C and 26°C) and humidity levels between 40% and 60%.
- Control pests and diseases: Regularly inspect your plants for signs of pests and diseases. There are a number of organic and non-organic methods for controlling pests and diseases in your grow tent.

VIII. Harvesting Your Plants
When your plants are mature, it’s time to harvest! Here are some things to keep in mind:
- Signs that your plants are ready to harvest: The specific signs that your plants are ready to harvest will vary depending on the type of plant. However, some general signs include the formation of flowers or fruits, the changing color of leaves, and the trichomes (tiny hairs) on cannabis plants turning cloudy or amber.
- Harvesting techniques: The harvesting techniques you use will also vary depending on the type of plant. Some plants can be harvested whole, while others need to be trimmed or cut. Be sure to research the proper harvesting techniques for the specific plants you are growing.
- Curing and drying your harvest: Once you have harvested your plants, you will need to cure and dry them properly. This process helps to preserve the flavor and potency of your harvest.
IX. Troubleshooting Common Problems
Even with the best care, you may encounter some problems when growing plants in your VIVOSUN grow tent. Here are a few common problems and how to troubleshoot them:
- Pests and diseases: Regularly inspect your plants for signs of pests and diseases. There are a number of organic and non-organic methods for controlling pests and diseases in your grow tent.
- Nutrient deficiencies: If your plants are not getting the nutrients they need, they will show signs of nutrient deficiency. These signs can vary depending on the specific nutrient deficiency, but some common signs include yellowing leaves, stunted growth, and poor yields. To correct a nutrient deficiency, you will need to adjust your fertilizer regimen.
- Lighting problems: If your plants are not getting enough light, they will become leggy and stretched. If they are getting too much light, the leaves may bleach or burn. Adjust your lighting system as needed to provide the correct amount of light for your plants.
- Temperature and humidity problems: The ideal temperature and humidity levels for your plants will vary depending on the type of plant. Monitor the temperature and humidity levels in your grow tent and adjust them as needed.

X. Cleaning and Maintaining Your VIVOSUN Grow Tent
Proper cleaning and maintenance will help to extend the life of your VIVOSUN grow tent and prevent the growth of pests and diseases. Here are some tips:
- Regular cleaning: Clean the inside of your grow tent regularly with a disinfectant solution. Be sure to remove all plant debris and allow the tent to dry completely before using it again.
- Inspect for damage and repairs as needed: Regularly inspect your grow tent for damage, such as rips or tears. Repair any damage promptly to prevent further problems.
- Store the tent properly when not in use: When you are not using your grow tent, store it in a cool, dry place out of direct sunlight.

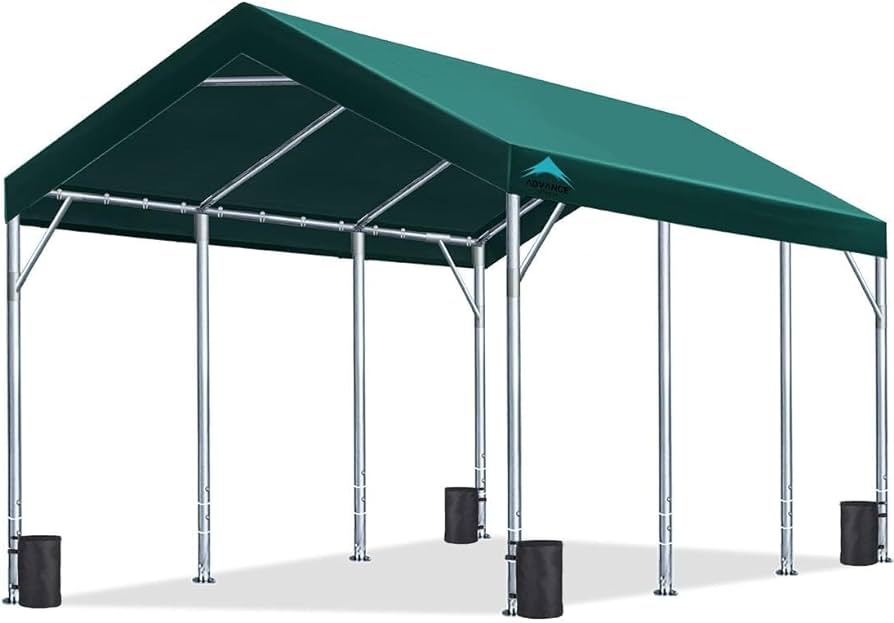
Exploring the Benefits of a Heavy Duty Carport Canopy for Vehicle Protection
Introduction
- A. Introduce the growing popularity of carport canopies as a practical and affordable solution for protecting vehicles and outdoor spaces
- B. Highlight the key features and benefits of heavy-duty carport canopies, emphasizing their durability, versatility, and weather resistance
- C. Briefly discuss the target audience for this product and its potential applications in both residential and commercial settings
Understanding the Need for Vehicle Protection
- A. Factors Contributing to Vehicle Damage: Explain the various factors that can damage vehicles parked outdoors, such as harsh weather conditions, falling debris, and bird droppings
- B. Consequences of Unprotected Vehicles: Discuss the negative consequences of leaving vehicles unprotected, including paint fading, rust formation, and interior damage
- C. The Value of Vehicle Protection: Emphasize the importance of protecting vehicles from the elements, highlighting the financial and aesthetic benefits of doing so

Heavy Duty Carport Canopies: A Superior Solution
- A. Durability and Strength: Explain how heavy-duty carport canopies are designed to withstand heavy snow loads, strong winds, and other extreme weather conditions
- B. Versatility and Customization Options: Discuss the wide range of size, style, and material options available for heavy-duty carport canopies, allowing for customization to suit individual needs
- C. Weather Resistance and Protection: Highlight the weather-resistant materials used in heavy-duty carport canopies, providing protection against UV rays, rain, snow, and dust

Versatile Applications for Carport Canopies
- A. Residential Vehicle Protection: Explain the primary use of heavy-duty carport canopies in residential settings, providing shelter for cars, trucks, motorcycles, and other vehicles
- B. Commercial and Industrial Applications: Discuss the commercial applications of heavy-duty carport canopies, such as protecting outdoor workspaces, storage areas, and recreational vehicles
- C. Temporary Shelters and Event Spaces: Highlight the versatility of carport canopies as temporary shelters for outdoor events, parties, and gatherings
Choosing the Right Heavy Duty Carport Canopy
- A. Size Considerations: Explain the importance of considering the size of the vehicles and the available space when selecting a carport canopy
- B. Material Selection: Discuss the different materials used for carport canopies, including PVC-coated polyester, galvanized steel, and aluminum, and their respective advantages
- C. Permanent vs. Temporary Installations: Consider the intended use and desired portability when deciding between a permanent carport canopy installation or a temporary setup
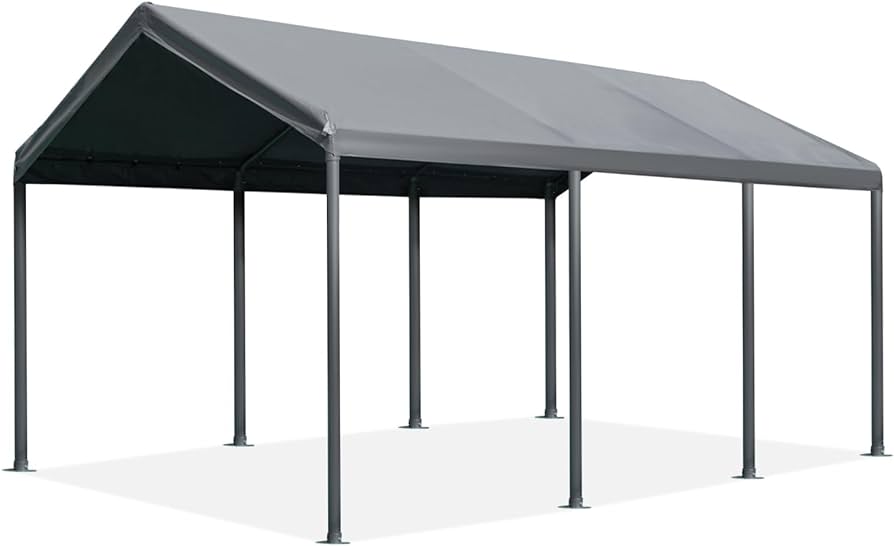
Installation and Assembly
- A. Permanent Installation: Provide an overview of the steps involved in the permanent installation of a heavy-duty carport canopy, including anchoring, framing, and canopy attachment
- B. Temporary Assembly: Explain the process of assembling a temporary carport canopy, emphasizing the importance of following the manufacturer’s instructions and ensuring proper stability
- C. Professional Installation Options: Discuss the benefits of seeking professional installation services for permanent carport canopies, ensuring proper safety and compliance with local regulations
Maintenance and Care
- A. Regular Cleaning and Inspection: Explain the importance of regular cleaning and inspection of the carport canopy to maintain its appearance and functionality
- B. Addressing Damage and Repairs: Discuss the steps to address minor damage or repairs, such as patching tears or tightening loose connections
- C. Professional Maintenance Services: Consider hiring professional maintenance services for more complex repairs or routine inspections, especially for permanent installations

Safety Considerations
- A. Proper Installation and Anchoring: Emphasize the importance of proper installation and anchoring to ensure the carport canopy can withstand strong winds and heavy snow loads
- B. Regular Inspections and Maintenance: Reiterate the importance of regular inspections and maintenance to identify potential safety hazards and address them promptly
- C. Snow and Ice Removal: Explain the safe removal of snow and ice from the carport canopy to prevent excessive weight and structural damage
Conclusion
- A. Reaffirm the Benefits of Heavy Duty Carport Canopies: Summarize the key benefits of heavy-duty carport canopies, highlighting their durability, versatility, and weather protection
- B. Recommend Carport Canopies for Vehicle Protection: Recommend heavy-duty carport canopies as a valuable investment for protecting vehicles and outdoor spaces
- C. Encourage Further Research and Exploration: Encourage further research and exploration of different carport canopy options and installation services to find the best solution for individual needs
Additional Considerations for Heavy Duty Carport Canopies
Beyond the core aspects, here are some additional factors to consider when exploring heavy-duty carport canopies:
- Local Permits and Regulations: In some areas, local building codes or homeowner association regulations may govern the installation of permanent carport canopies. It’s crucial to research and obtain any necessary permits before proceeding with installation.
- Aesthetics and Design: Heavy-duty carport canopies are available in a variety of styles and colors. Consider the aesthetics of your home or property and choose a design that complements the overall look.
- Privacy Needs: If privacy is a concern, consider adding side panels or privacy screens to your carport canopy for a more enclosed space. This can be particularly beneficial for commercial applications or when storing valuable equipment.
- Lighting Options: For nighttime use or added security, consider incorporating lighting fixtures into your carport canopy design. This can improve visibility and provide a sense of safety around parked vehicles or work areas.
- Budgetary Considerations: Heavy-duty carport canopies range in price depending on size, material, and complexity of design. Determine your budget beforehand and compare prices from various vendors to find the best value for your needs.
A Shelter for Your Vehicles and More
Heavy-duty carport canopies offer a practical and versatile solution for protecting your vehicles and outdoor spaces from the elements. Their durability, weather resistance, and range of customization options make them a valuable asset for both residential and commercial applications.
By considering the factors outlined in this guide, you can make an informed decision when choosing a heavy-duty carport canopy that perfectly suits your needs. From safeguarding your prized car to creating a functional workspace, a well-chosen carport canopy can provide a reliable shelter for years to come. So, invest in peace of mind and protection, and enjoy the many benefits that heavy-duty carport canopies offer.
-
VI. Installation and Assembly: A Step-by-Step Approach
Installing a heavy-duty carport canopy can be a rewarding DIY project, but it requires careful planning and execution. Here’s a breakdown of the general steps involved, categorized by permanent and temporary installations:
A. Permanent Installation:
- Planning and Permitting: Before diving into construction, ensure you have the necessary permits and understand any local regulations regarding carport canopy installations. Gather all the required tools and materials based on your chosen canopy model.
- Site Preparation: It is crucial to choose a level and stable location for your carport canopy. Once a suitable location is identified, clear the area of any debris or obstructions. Moreover, ensure proper drainage to prevent water pooling around the base of the structure.
Foundation and Post Installation: Depending on your chosen model, the foundation might involve concrete footings or anchor posts driven into the ground. To ensure secure anchoring, it is essential to follow the manufacturer’s instructions meticulously.
Frame Assembly: To assemble the frame of the carport canopy, use the provided hardware. This typically involves connecting pre-cut metal or wooden beams according to the manufacturer’s diagrams.
Canopy Attachment: After assembling the frame, secure the canopy fabric to it using straps, hooks, or other fastening methods specified in the instructions. It’s important to ensure proper tension and alignment for a taut and secure canopy.
- Final Touches: Once the main structure is complete, address any finishing touches like gutters, drainage systems, or side panels (if included) as per your design preferences.
B. Temporary Assembly:
- Preparation and Location: Choose a flat, stable location with ample space for the temporary carport canopy. Ensure the ground is clear and free of any obstacles.
- Frame Assembly: Follow the manufacturer’s instructions to assemble the frame of the temporary carport canopy. This typically involves connecting collapsible poles or pre-fabricated sections.
- Canopy Attachment: Secure the canopy fabric to the assembled frame using the provided hooks, clips, or fastening mechanisms. Ensure proper tension for stability.
- Guying and Anchoring: For temporary installations, it’s crucial to utilize guylines and ground anchors to provide additional stability, especially in windy conditions. Secure the guylines to designated points on the frame and stake the anchors firmly into the ground.
- Disassembly and Storage: When not in use, disassemble the temporary carport canopy for easy storage. Follow the manufacturer’s instructions for proper disassembly and storage to protect the components from damage.